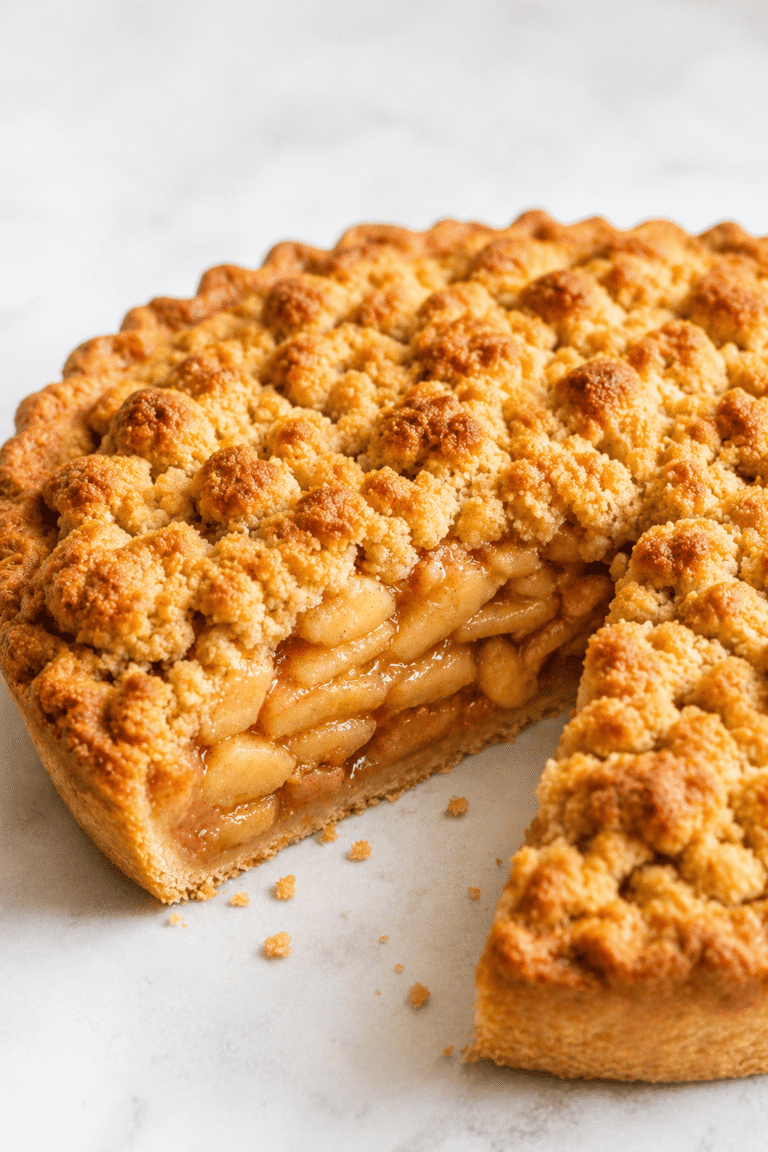
Pecan Pie Bars with Buttery Shortbread
🎁 FREE E-BOOK: 12 Sweet Favorites — reader-loved desserts in one beautiful recipe book.
Pecan pie bars bring together a tender, buttery shortbread base and a glossy brown sugar filling packed with chopped pecans. The nuts give each bite a little crunch, while the filling stays sticky and soft enough to yield beneath your fork. A chilled square has two distinct layers and a neatly cut edge.

There is something welcoming about a small tray of pecan pie bars beside the coffee cups. They carry the familiar richness of pecan pie in portions that are easy to share, whether dessert follows a holiday meal or an ordinary weekend lunch. A simple plate is all that rich amber filling needs.
Keep this pecan pie bars recipe for occasions when you want dessert prepared before the table fills up. The separate baking and chilling cues help you plan ahead and recognize when the slab is ready to slice, so the last job is cutting portions rather than watching the oven.
Pecan Pie Bars at a Glance
This recipe makes 24 pecan pie bars in one 9 x 13-inch metal pan. Allow about 4 hours 15 minutes from preparation to slicing, including an initial cool and at least 2 hours in the refrigerator; a center that is still warm needs longer.
| Detail | What to plan for |
|---|---|
| Yield | 24 bars, cut in a 4-by-6 grid |
| Pan | 9 x 13 x 2-inch light-colored metal pan, lined with parchment |
| Oven | 350°F (175°C), conventional oven, center rack |
| Preparation | About 20 minutes; mix the filling while the base bakes |
| Baking | 20–25 minutes for the base, then 30–35 minutes with the filling; about 55 minutes combined |
| Cooling and chilling | About 1 hour on a rack, then at least 2 hours refrigerated until fully cold |
| Total time | About 4 hours 15 minutes, with additional chilling if needed |
| Serving | Chilled for a firmer bite or briefly tempered for a softer filling |
For the same dessert family in a round pastry shell, try our classic pecan pie recipe. Choose pecan pie bars when small, evenly sized portions suit the table better.
Why This Shortbread and Pecan Filling Work Together
In pecan pie bars, the substantial shortbread layer gives the soft filling a base that can be lifted and cut once cold. Prebaking that base establishes its surface before the wet mixture goes on, while a continuous pressed layer helps keep the filling where it belongs.
Chopped pecans distribute through the filling, giving smaller portions plenty of nut texture without needing a carefully arranged top. The small flour addition supports the egg-set layer, so the finished bar can feel soft in the mouth while still holding a defined cut face.
Why You’ll Love These Pecan Pie Bars
These pecan pie bars suit a home baker who wants pie-style richness without rolling pastry or crimping a shell. The mixing is done in bowls, and the rectangular pan makes portioning straightforward.
- A pressed base: Spread and press the shortbread directly into the lined pan; no rolling pin is needed.
- Simple mixing tools: A spatula and whisk handle the two components without a food processor or stand mixer.
- Small portions for sharing: A 4-by-6 cutting grid gives 24 rich bars for a dessert tray.
- A modest finish: The chopped pecans and glossy filling provide the decoration on their own.
The Science of Tender Shortbread and Soft-Set Filling
The two layers of pecan pie bars become sliceable in different ways. Butter helps create a tender shortbread texture, heat gives the egg-filled layer its structure, and cooling firms both layers enough for a clean cut.
How Butter Keeps the Shortbread Tender
Butter coats some of the flour particles and limits how much gluten structure develops as the dough comes together. That gives the base of these pecan pie bars its short, tender bite. Once the dry pockets have disappeared and the mixture holds when pressed, extended kneading adds work without improving that texture.
How Eggs and Flour Support the Filling
As the filling heats, egg proteins form a network and the flour starch absorbs moisture and thickens. Together they help turn a pourable mixture into a cohesive layer. This is why the center needs to reach the right baked state: refrigeration can firm a cooked filling, but it cannot finish cooking a liquid one.
Why Warm and Cold Bars Feel Different
Warm butter and warm sugary filling are softer than they are after refrigeration. As pecan pie bars cool, the filling becomes less fluid and the butter-rich base firms. The practical consequence is to judge oven doneness while baking and slicing readiness after chilling, instead of expecting both textures at the same temperature.
Ingredients for the Shortbread Base and Pecan Filling
For these pecan pie bars, the shortbread and filling use separate amounts of flour, butter and salt. Measure each component into its own group before mixing so the larger crust allocation does not end up in the filling.

Ingredient List
Have both ingredient groups ready before the crust goes into the oven. Weigh the pecans after chopping, or measure the chopped pieces into the cup, and keep the two portions of melted butter separate.
For the Shortbread Crust
- 2 1/2 cups (300 g) all-purpose flour, spooned and leveled
- 1/2 cup (100 g) granulated sugar
- 1/2 teaspoon (3 g) fine table salt
- 1 cup (227 g) unsalted butter, melted and cooled until warm
For the Pecan Filling
- 1 cup (213 g) packed light brown sugar
- 3 tablespoons (23 g) all-purpose flour
- 3 large eggs (about 150 g without shells)
- 1 cup (312 g) light corn syrup
- 2 teaspoons (10 ml) pure vanilla extract
- 1/2 teaspoon (3 g) fine table salt
- 1/4 cup (57 g) unsalted butter, melted and cooled until warm
- 2 1/2 cups (285 g) chopped raw pecans, measured after chopping
Choose and Measure the Pecans
For pecan pie bars with distinct nut pieces in every bite, use raw pecan pieces or chop raw halves before measuring. The 285 g weight is the clearest guide because a cup of large halves holds a different amount from a cup of chopped nuts. Aim for a mix of small and medium pieces rather than fine nut meal; pieces provide the contrast to the soft filling.
There is no separate toasting step for the nuts in this recipe. They receive heat during the filled bake, so keep an eye on their color near the end rather than giving them another full round of browning first.
Keep the Syrup and Sugar Roles Clear
Use light corn syrup for the filling in these pecan pie bars. Maple syrup, honey and simple syrup differ in water content, thickness and sugar composition, so they should not be treated as equal replacements here. Corn syrup is a syrup, not cornstarch, and a spoonful of starch cannot stand in for its volume.
Packed light brown sugar supplies the molasses note without changing the syrup allocation. Keep the full amounts of both sweeteners: reducing one changes more than the sweetness and can affect the filling’s consistency.
Divide the Butter and Flour before Mixing
The crust for these pecan pie bars uses 1 cup (227 g) butter and 2 1/2 cups (300 g) flour; the filling uses 1/4 cup (57 g) butter and 3 tablespoons (23 g) flour. If you melt the butter together, weigh out those two portions before mixing. The butter should remain liquid but feel warm rather than be steaming hot when it meets the other ingredients.

Tools for Baking and Cutting Pecan Pie Bars
A light-colored metal pan gives the two baking stages a consistent starting point, and a parchment sling lets you lift the cold slab for cutting. Check refrigerator space before you begin, because pecan pie bars chill in their pan.
- Baking Pan and Parchment: One light-colored metal 9 x 13 x 2-inch (23 x 33 x 5 cm) pan and parchment for a lifting sling; foil for an optional loose shield if nuts brown too quickly.
- Mixing and Measuring: Two bowls, a whisk, flexible spatula, digital scale or measuring cups, and measuring spoons.
- Oven and Cooling Space: Conventional oven with center rack, a cooling rack, and refrigerator space for the pan at 40°F (4°C) or below.
- Cutting and Storing: Sharp knife, cutting board, airtight container and wrapping for finished portions.
- Optional Temperature Check: A thin-tip food thermometer can cross-check the egg-dish safety minimum; it does not replace the texture cues.
Before You Start the Shortbread and Filling
The main preparation risk with pecan pie bars is reaching the end of baking without enough time or space to chill them. Check the serving plan first, then keep the crust and filling ingredients clearly separated.
- Allow the full baking, cooling and chilling window before dessert, or bake the day before.
- Clear space for the pan in a refrigerator at 40°F (4°C) or below.
- Keep the separate flour and melted-butter allocations beside their own mixing bowls.
- Confirm that the pecans are raw and measured after chopping, and that the syrup is light corn syrup.
What to Expect from the Two Pecan Pie Bar Layers
Expect a compact, tender shortbread base beneath a sticky but cohesive pecan filling. These pecan pie bars have an egg-set filling, rather than a separately boiled caramel topping, and the base has the bite of shortbread rather than flaky rolled pastry.
- The chopped pecans make the surface naturally uneven, with glossy amber filling visible between the pieces.
- The filling feels richer and softer than the base, while the two layers remain distinct.
- A cold portion holds a neat edge; after a brief temper, the filling feels softer but still keeps its shape.
How to Make Pecan Pie Bars
Bake the shortbread first, add the filling while that base is hot, then bake again until the center is softly set. The final cooling and refrigeration stages are part of making pecan pie bars that can be lifted and cut, so leave the pan intact until the center is cold.
1. Prepare the Pan and Oven
Heat a conventional oven to 350°F (175°C) with a rack in the center. Line a light-colored metal 9 x 13 x 2-inch pan with parchment, covering the bottom and sides and leaving enough overhang to lift the cold slab. Press the paper into the corners without leaving a thick fold under the base.
Melt the butter and divide it into 227 g for the crust and 57 g for the filling. Let both portions cool until warm while remaining liquid. If you use clips to hold the parchment during pressing, remove them before the pan enters the oven.
What you should see: The paper sits close to the pan, and the butter is fluid without visible steam.
2. Mix and Press the Shortbread
In a bowl, stir together 2 1/2 cups (300 g) flour, 1/2 cup (100 g) granulated sugar and 1/2 teaspoon (3 g) fine salt. Add the 1 cup (227 g) melted butter and mix with a spatula until the dry pockets disappear.
For an even base under your pecan pie bars, distribute the mixture across the lined pan, then press it into one level layer, including the corners. Keep the base flat rather than building a tall rim. A broad, flat surface on the bottom of a measuring cup can help even out small ridges without prolonged kneading.
What you should see: A moist, cohesive pressed layer, with no open cracks exposing the paper and no loose flour around the edges.

3. Prebake the Shortbread Base
Prebake the shortbread for your pecan pie bars for 20–25 minutes, beginning visual checks at 20 minutes. While it bakes, mix the filling so it is ready when the base comes out. Leave the oven on for the second bake.
What you should see: The crust surface looks matte and set, with lightly golden edges. A shiny, raw-looking surface needs more time; deep-brown edges mean the base is already getting too dark for its second bake.

4. Whisk the Filling and Fold in Pecans
In the second bowl, work any lumps out of 1 cup (213 g) packed light brown sugar with 3 tablespoons (23 g) flour. Whisk in 3 large eggs, 1 cup (312 g) light corn syrup, 2 teaspoons (10 ml) vanilla and 1/2 teaspoon (3 g) fine salt until evenly combined.
Stir in the 1/4 cup (57 g) warm melted butter, then fold in 2 1/2 cups (285 g) chopped raw pecans. The filling for pecan pie bars needs steady, moderate strokes rather than whipping into a foam.
What you should see: A thick but pourable mixture with evenly coated nuts, no dry flour lumps and no visible streaks of egg.

5. Spread the Filling over the Hot Base
As soon as the prebaked base comes out, pour the filling over the hot crust. Spread it gently to the corners with a spatula and distribute the pecans evenly. Return the pan promptly to the oven instead of leaving the base to cool completely.
What you should see: An even layer of filling, without a mound of nuts in the center or bare patches at the sides.

6. Bake until the Center Is Softly Set
Bake the pecan pie bars for approximately 30–35 minutes, making the first check at 25 minutes. Look at the edges and gently nudge the pan to assess the center. If the middle still moves like liquid, continue in 3–5-minute intervals and check again.
If the nuts are darkening before the center sets, cover the top loosely with foil. Avoid pressing the foil onto the sticky surface. A browned top alone does not tell you whether the filling beneath it is ready.
What you should see: Firm edges, a lightly puffed surface and only a small, cohesive tremble in the center. The filling should not ripple or slosh like liquid; a glossy coating on the nuts is normal.

7. Cool, Then Refrigerate
Set the pan on a cooling rack for about 1 hour, until it is no longer steaming or hot. Move the slab, still in its metal pan, into the refrigerator, initially loosely covered. Chill for at least 2 hours and until the center is fully cold and firm; cover securely once cold.
In a warm kitchen, begin refrigerating the pecan pie bars sooner. Do not leave the pan out beyond 2 hours after baking, or 1 hour above 90°F (32°C), just to wait for room temperature. The clock is a guide to cooling, while a cold, stable center determines whether the slab can be lifted.
What you should see: A stable surface and a center firm enough to lift without the slab bending. If the middle is still warm, keep chilling before attempting to remove it.
8. Lift and Cut 24 Bars
Lift the fully cold slab onto a cutting board using the parchment overhang. With a sharp knife, cut 4 rows by 6 columns for 24 bars, wiping the blade between cuts. Keep the bars cold until needed, or let only the portions being served stand for about 15–20 minutes if you prefer a softer bite.
What you should see: Distinct layers and a cohesive cut face. A little sticky filling on the blade is normal; a puddle or a collapsing center is not.
I once cut into a pan of pecan pie bars before the center had fully chilled. The filling clung to the knife, and that first piece came out with rather untidy edges. It was a small lesson in patience: let the whole slab become cold and firm before slicing, then wipe the blade between cuts.

How to Judge the Filling from Oven to First Bite
Pecan pie bars are ready to leave the oven when the edges are set and the middle moves with a small, cohesive tremble. They are ready to cut later, when the entire slab is cold and firm. Those are separate decisions, and a soft warm center should not be judged as though it were a chilled serving.
| Stage | Normal texture | Concern | What to do |
|---|---|---|---|
| Leaving the oven | Firm perimeter and a small cohesive center tremble | Liquid waves or a freely moving middle | Continue baking and reassess in short intervals; shield darkening nuts loosely. |
| Fully chilled for slicing | The slab lifts intact and the filling keeps a cut edge | A warm middle or filling that smears heavily | If the center is still warm, chill longer. If fully cold filling still flows, review baking and ingredient changes rather than relying on refrigeration to cook it. |
| Briefly tempered for serving | A softer, yielding bite that retains its portion shape | Free-running filling or a collapsed center | Do not treat flowing liquid as the intended sticky texture. |

A thin-tip thermometer can provide a cross-check against the 160°F egg-dish safety minimum, with the tip in the filling and away from the pan or crust. That minimum does not prove the right texture for pecan pie bars, so it must be used alongside the set-edge and center-movement cues.
Small Details for Neater Pecan Pie Bars
Even nut distribution and gentle mixing give pecan pie bars a more consistent filling from one portion to the next. These details matter most before the filled pan goes back into the oven and when the nut color starts changing near the end.
- Spread the nuts before baking: Move an obvious mound toward the corners with the spatula so edge pieces receive pecans as well as filling. Once the layer starts setting, redistributing it would disturb its surface.
- Break up sugar lumps while dry: Work them into the flour before adding the eggs and syrup. This is easier than chasing firm brown-sugar pockets through a sticky liquid mixture.
- Shield only when needed: A loose foil cover protects nuts that are browning ahead of the center. Keep checking the filling underneath instead of using the foil as a reason to extend baking indefinitely.
Fixing Runny Filling, Soggy Bases, and Ragged Cuts
When pecan pie bars have runny filling, a softened base or ragged cuts, those problems do not necessarily have the same cause. First consider whether the center was properly baked, whether ingredients were changed and whether the slab was fully cold when cut.
| Problem | Likely cause | What to do now | Next time |
|---|---|---|---|
| Filling flows after refrigeration | Insufficient baking or a change to the syrup, eggs or other structural ingredients | Do not serve a liquid, potentially undercooked center as finished. Extra chilling does not complete baking. | Check for set edges and cohesive movement, and retain the specified ingredients. |
| Filling seeps under the base | A gap in the pressed crust, an insufficient prebake or uneven assembly may contribute | A fully baked, properly chilled slab may still be portioned, but the layers cannot be rebuilt. Check the center before serving. | Press a continuous base, prebake to a matte set surface and fill it while hot. |
| Nuts darken before the center sets | The top is browning faster than the filling is setting | Shield loosely with foil and continue short, cue-led checks. | Use the center rack, the specified light metal pan and a fully preheated oven. |
| The knife drags and cuts look ragged | The slab is still warm, or filling is accumulating on the blade | If still warm, refrigerate longer before cutting the remaining slab. Wipe the knife between cuts. | Chill the center fully and lift the slab onto a firm cutting board. |
Beautiful Ways to Serve Pecan Pie Bars
The amber pecan layer and pale-golden base give pecan pie bars plenty of contrast without added decoration. Serve small portions, keeping the remaining bars refrigerated while you plate or arrange what is needed.
Simple Bars with Their Layers on Show
Place a bar on a small white plate with its cut face visible. Serve it cold for a firmer filling or briefly tempered for a softer bite. Serving pecan pie bars plain keeps the nuts and buttery base at the center of the dessert.

A Small Scoop of Vanilla Ice Cream
Add a small scoop of homemade vanilla ice cream just before serving. Vanilla ice cream gives pecan pie bars a cool, creamy contrast to the nuts and shortbread; a modest scoop is enough alongside the rich filling. Set it beside the bar so both layers remain visible.

A Small Platter for Sharing
Arrange a few pecan pie bars in a single layer on a small platter, leaving room to pick them up without pressing neighboring pieces together. Bring out fresh portions from the refrigerator as needed instead of putting the whole batch on a warm table at once.

Pair a Bar with Unsweetened Coffee
Unsweetened coffee offers a pleasantly bitter contrast to the brown sugar filling in pecan pie bars. Serve a small cup alongside one bar, with the drink separate so steam and spills do not soften the shortbread. There is no need to sweeten the pairing further unless that is how you enjoy your coffee.

How to Store, Make Ahead, and Freeze Pecan Pie Bars
Keep pecan pie bars covered in the refrigerator after their initial cooling stage. Their egg-filled center needs cold storage, and individual portions can be taken out shortly before serving.
Refrigerate the Finished Bars
Store pecan pie bars in an airtight container at 40°F (4°C) or below and use them within 3–4 days of baking. For the best texture, aim to enjoy them in the first day or two, before moisture has more time to soften the base.
The FDA guidance for cooked egg dishes supports a 3–4-day refrigerated window and a limit of 2 hours outside refrigeration, reduced to 1 hour above 90°F (32°C). Apply those handling limits to these egg-filled bars, including time spent arranging, transporting and serving them.
Make Them a Day Ahead
Bake pecan pie bars the day before you need them, then refrigerate after the initial cooling stage and leave the slab covered once cold. Cut it while chilled on the day of serving. You can make it up to 2 days ahead, but those days still count within the same 3–4-day storage window.
Reheating is not needed. Briefly temper only the portions you are about to serve if you want a softer filling, keeping the rest cold.
Freeze and Thaw Individual Portions
Wrap fully cold pecan pie bars individually, then place them in an airtight container at 0°F (-18°C). Use them within 1 month for best quality, and thaw them wrapped overnight in the refrigerator.
Unwrap after thawing and keep the bars refrigerated until serving. The base may be a little softer after freezing and thawing, so this is a useful way to save extra portions when a slightly less crisp bottom is acceptable.

A Deeper Brown Sugar Flavor for Pecan Pie Bars
For pecan pie bars with a stronger molasses note, replace the 1 cup (213 g) packed light brown sugar in the filling with the same weight of dark brown sugar. Keep the remaining ingredients and method the same.
This changes the depth of flavor rather than adding another component. Bourbon, chocolate chips and a separate caramel layer would change the balance or structure of the filling; leave them out of this batch instead of guessing at amounts. Keep the specified pan size as well.
Pecan Pie Bars Questions, Answered
Keep light corn syrup in this batch and plan to refrigerate the bars before cutting or holding them overnight. Those two choices resolve several of the practical questions that come up when preparing pecan pie bars ahead of time.
Can I replace the corn syrup in these bars?
These pecan pie bars need the light corn syrup specified here. Maple syrup, honey and simple syrup are not interchangeable with it in this recipe. If you want to bake without corn syrup, choose a recipe developed around a different sweetener instead of making a one-for-one swap.
Why is the filling still runny after chilling?
If your pecan pie bars are still warm in the middle, they may simply need more chilling. If the filling is fully cold but still flows, it may have been underbaked or affected by changed ingredients. Chilling firms a cooked filling; it does not cook an unset one.
Do I need to refrigerate the bars overnight?
Yes. Refrigerate pecan pie bars after the initial cooling stage, even when you plan to serve them the next day. Keep them covered at 40°F (4°C) or below and count that overnight hold within the 3–4-day storage window.
How should I freeze and thaw these bars?
Wrap fully chilled pecan pie bars, freeze in an airtight container and use within 1 month for best quality. Thaw them wrapped in the refrigerator overnight. Expect the shortbread to soften slightly compared with a freshly chilled bar.
How far ahead can I make them for a gathering?
Making pecan pie bars the day before is convenient because the slab will be cold when you need to portion it. Up to 2 days ahead also fits the plan, provided the bars stay refrigerated and those days count toward the total storage window.
How can I cut neat portions without smearing the filling?
For neatly sliced pecan pie bars, wait until the center is fully cold, then use the parchment to lift the slab onto a board. Use a sharp knife and wipe it between cuts. Four rows by six columns gives the intended 24 portions.
Why did filling seep beneath the shortbread?
A break in the pressed base or an insufficient prebake can allow the layers to separate, but the exact cause depends on the batch. Press the next base without open cracks, bake until its surface is set, and spread the filling over it while hot.
Continue Your Baking Journey beyond Pecan Pie Bars
For the next bake, you can keep the pecan flavor, choose another tray dessert or add a different format to a holiday table. These recipes offer distinct textures and flavors alongside the shortbread and soft filling of pecan pie bars.
More Ways to Bake with Pecans
Pecans work just as well in a creamy dessert or a small cookie as they do in these bars. Choose the next recipe by the texture you would like to explore.
- Chocolate Pecan Pie: Explore chocolate with pecans in a whole pie.
- Pecan Pie Cheesecake: Try a creamy cheesecake with pecan topping.
- Pecan Pie Cookies: Choose a smaller cookie format with pecan filling.
- Butter Pecan Cookies: Bake a buttery pecan cookie without a pie filling.
More Bars for Sharing
A tray of bars is an easy format for offering contrasting flavors. Lemon brings brightness, chocolate adds depth, and pumpkin gives a softly spiced option.
- Blondie Recipe: Switch to chewy brown-sugar bars with chocolate chips.
- Lemon Bars: Add a bright citrus option to a bar tray.
- Pumpkin Cheesecake Bars: Plan a chilled pumpkin-and-cheesecake dessert.
- Cream Cheese Brownies: Offer chocolate bars with a cream-cheese contrast.
Build a Holiday Dessert Table
A holiday dessert table can use more than one shape and texture. Pair the bar format with a whole pie, a fruit-filled cookie or a creamy centerpiece.
- Chess Pie Recipe: Add a custard-style whole pie.
- Apple Pie Cookies: Include a pastry-and-fruit cookie option.
- Crustless Pumpkin Pie: Choose pumpkin custard without a pastry shell.
- Turtle Cheesecake: Make a separate caramel, chocolate and pecan centerpiece.
Why These Pecan Pie Bars Belong in Your Recipe Box
Keep this recipe within reach for the small decisions that make pecan pie bars easier to plan, portion and save.
- A Portioning Reference: Keep the 24-bar cutting plan handy when planning portions for a future dessert tray.
- A Texture Checkpoint: Return to the readiness guide when a warm filling makes its final texture difficult to judge.
- A Shopping Baseline: Use the complete component list to buy and divide ingredients without borrowing quantities from another pan size.
- A Freezer Plan: Keep the individual wrapping and thawing instructions beside the recipe for the portions you save.
- A Flavor Starting Point: Use the same-weight brown sugar option when you want a deeper molasses note without redesigning the filling.
A Sweet Finish with Shortbread and Pecans
Pecan pie bars give a generous dessert a smaller shape: buttery shortbread below, soft brown sugar filling above, and pieces of pecan throughout. The pleasure comes from that contrast, with each layer easy to taste.
It is the sort of dessert that fits both a holiday platter and a single plate beside coffee. Having a few portions ready makes it easy to offer something sweet without turning every serving into another baking project.
The uneven pecan top is part of its charm. A simple square, with its two layers on show, can feel just as welcoming as a carefully decorated slice.

Pecan Pie Bars
Buttery shortbread supports a soft-set brown sugar filling packed with chopped pecans. Bake the filling over the hot crust, then chill the slab fully before cutting it into 24 neat bars.
Ingredients
For the Shortbread Crust
- 2 1/2 cups (300 g) all-purpose flour, spooned and leveled
- 1/2 cup (100 g) granulated sugar
- 1/2 teaspoon (3 g) fine table salt
- 1 cup (227 g) unsalted butter, melted and cooled until warm
For the Pecan Filling
- 1 cup (213 g) packed light brown sugar
- 3 tablespoons (23 g) all-purpose flour
- 3 large eggs (about 150 g without shells)
- 1 cup (312 g) light corn syrup
- 2 teaspoons (10 ml) pure vanilla extract
- 1/2 teaspoon (3 g) fine table salt
- 1/4 cup (57 g) unsalted butter, melted and cooled until warm
- 2 1/2 cups (285 g) chopped raw pecans, measured after chopping
Instructions
- Prepare the Pan and Oven: Heat a conventional oven to 350°F (175°C) with a rack in the center. Line one light-colored metal 9 x 13 x 2-inch pan with parchment, leaving a sling for lifting. Melt the butter and keep the 1 cup (227 g) for the crust separate from the 1/4 cup (57 g) for the filling. Let both cool until warm and still liquid, with no steam. Fit the paper into the corners without thick folds.
- Mix and Press the Shortbread: Whisk the crust flour, granulated sugar and salt together. Stir in the 1 cup (227 g) warm melted butter until no dry flour remains. Press into an even, continuous layer across the bottom of the pan and into the corners, closing any cracks that expose the paper.
- Prebake the Shortbread Base: Bake for 20–25 minutes, checking from 20 minutes, until the surface looks matte and set and the edges are lightly golden. Avoid deep browning. Keep the oven on and prepare the filling during this bake so it is ready for the hot crust.
- Whisk the Filling and Fold in Pecans: In the second bowl, whisk the light brown sugar with the filling flour, breaking up lumps. Whisk in the eggs, light corn syrup, vanilla and filling salt until smooth. Stir in the 1/4 cup (57 g) warm melted butter, then fold in the chopped raw pecans. Mix without whipping in foam. The filling should be thick but pourable, with evenly coated nuts and no flour lumps or egg streaks.
- Spread the Filling over the Hot Base: Pour the filling over the just-baked hot shortbread. Spread it evenly, moving the pecans into the corners so they do not form a mound in the middle. Return the pan promptly to the oven.
- Bake until the Center Is Softly Set: Bake for 30–35 minutes, first checking at 25 minutes. Look for firm edges, a lightly puffed top and a small, cohesive tremble in the center when the pan is nudged gently. The filling should not move in liquid waves. If needed, continue in 3–5-minute intervals. If the nuts darken before the center sets, loosely cover with foil without pressing it onto the filling.
- Cool, Then Refrigerate: Set the pan on a cooling rack for about 1 hour, until it is no longer steaming or hot. Refrigerate in the metal pan, initially loosely covered, for at least 2 hours and until the center is fully cold and firm; cover securely once cold. Refrigerate sooner in a warm kitchen. Do not wait longer than 2 hours after baking, or 1 hour above 90°F (32°C), merely to reach room temperature. A cold, firm slab should hold its shape when lifted; chill longer if the center is still warm or soft.
- Lift and Cut 24 Bars: Lift the fully chilled slab onto a cutting board using the parchment. Cut into 4 rows by 6 columns with a sharp knife, wiping the blade between cuts. The cut face should hold together with distinct layers; slight stickiness is normal, but a puddle or collapsing center is not. For a softer bite, let only the portions being served stand for about 15–20 minutes, within the room-temperature limits below.
Notes
Equipment
- Baking Pan and Parchment: One light-colored metal 9 x 13 x 2-inch (23 x 33 x 5 cm) pan and parchment for a lifting sling; foil for an optional loose shield if nuts brown too quickly.
- Mixing and Measuring: Two bowls, a whisk, flexible spatula, digital scale or measuring cups, and measuring spoons.
- Oven and Cooling Space: Conventional oven with center rack, a cooling rack, and refrigerator space for the pan at 40°F (4°C) or below.
- Cutting and Storing: Sharp knife, cutting board, airtight container and wrapping for finished portions.
- Optional Temperature Check: A thin-tip food thermometer can cross-check the egg-dish safety minimum; it does not replace the texture cues.
- Pan and timing: Use the specified light-colored metal pan. Prep time is 20 minutes, nominal baking time is 55 minutes, and cooling plus chilling takes about 3 hours. Total time is about 4 hours 15 minutes; use the doneness and cold-center cues if more time is needed. Filling preparation overlaps the shortbread bake.
- Sugar and syrup: For a deeper molasses flavor, replace the light brown sugar with the same 1 cup (213 g) packed dark brown sugar. Keep the light corn syrup; maple syrup, honey and other syrups are not direct replacements in this recipe.
- Refrigeration and serving: Store airtight at 40°F (4°C) or below for 3–4 days from baking; texture is best in the first 1–2 days. Limit cumulative room-temperature handling, transport and serving to 2 hours, or 1 hour above 90°F (32°C). Return portions to the refrigerator promptly.
- Make ahead and freeze: Bake the day before serving, or up to 2 days ahead within the total refrigerated storage period. Freeze cold, well-wrapped bars at 0°F (−18°C) for up to 1 month for best quality. Thaw wrapped overnight in the refrigerator; the crust may soften slightly.
- Temperature check: A thermometer reading of 160°F (71°C) is a safety minimum for egg dishes, not a reliable texture endpoint for these bars. Judge the set perimeter and small cohesive center tremble as well.
- Portions and allergens: One pan makes 24 bars. Nutrition excludes ice cream and other accompaniments. Contains wheat, milk, eggs and pecans (tree nuts).
- Estimated nutrition per bar; brands and portion sizes affect the values.
Nutrition Information:
Yield: 24 Serving Size: 1 bar (1/24 of the pan)Amount Per Serving: Calories: 320Total Fat: 19gSaturated Fat: 7gCholesterol: 50mgSodium: 120mgCarbohydrates: 35gSugar: 17gProtein: 4g
Nutrition information is provided as an estimate only and may vary based on specific ingredients, brands, and portion sizes used. This information should not be considered medical or nutritional advice.
12 Sweet Favorites — Yours, Free 🍰
Tiramisù, no-bake cheesecake, the perfect chocolate chip cookie & 9 more reader-loved desserts — gathered into one beautiful free recipe book. From my kitchen to yours.
No spam, just sweet things. Unsubscribe anytime.