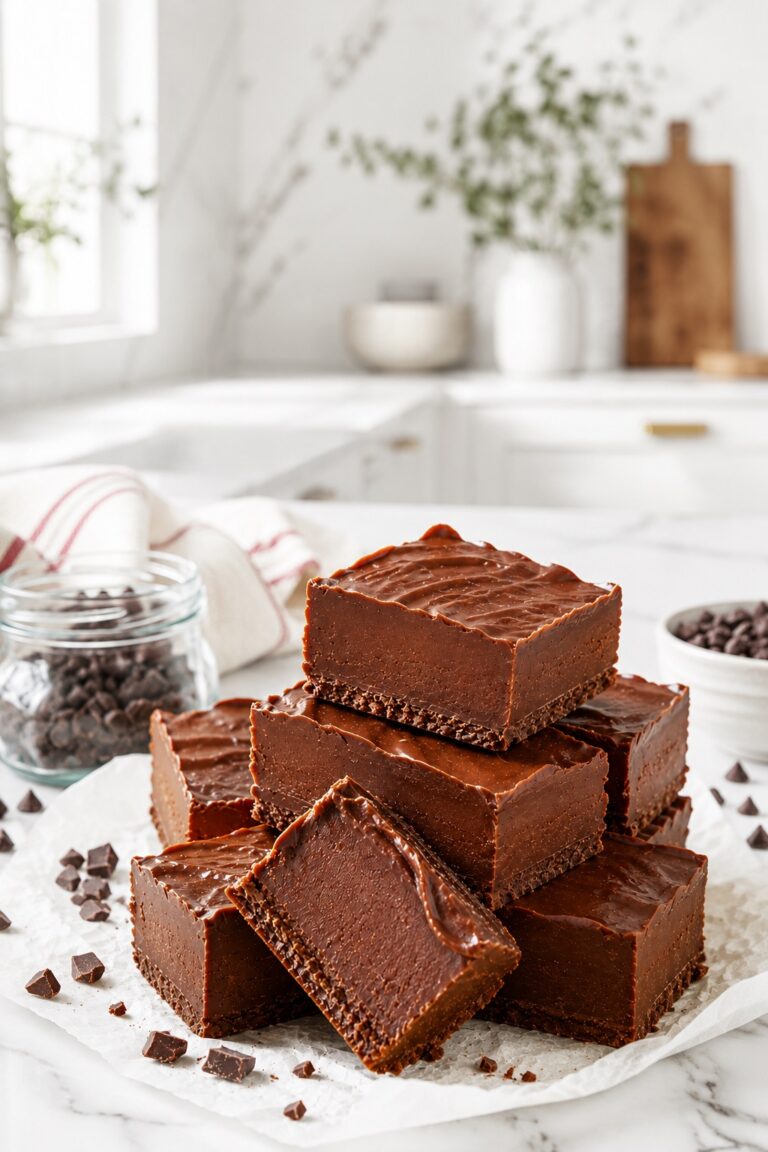
Fantasy Fudge Recipe (Easy, Creamy, Classic)
🎁 FREE E-BOOK: 12 Sweet Favorites — reader-loved desserts in one beautiful recipe book.
There’s something deeply nostalgic about a classic fantasy fudge recipe. That first bite — soft, creamy, and rich with chocolate — melts slowly and feels like something straight out of a holiday kitchen.
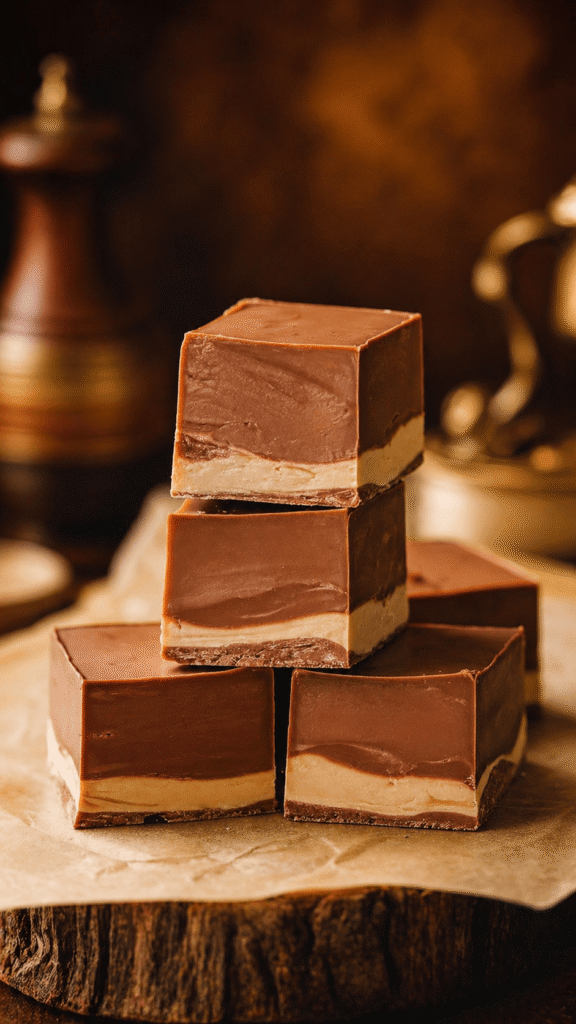
This is the kind of dessert that doesn’t try too hard. It’s simple, reliable, and always delivers that perfect balance between sweetness and texture. Smooth but not overly dense, rich but not overwhelming — exactly how homemade fudge should feel.
What makes this fantasy fudge recipe special is the texture. Thanks to the marshmallow creme, it turns out incredibly creamy with a soft, almost melt-in-your-mouth consistency that’s hard to replicate with traditional fudge methods.
It’s also one of those recipes people come back to every year. Easy to make, easy to customize, and perfect for gifting, sharing, or saving for those moments when you just want something indulgent without effort.
What Is Fantasy Fudge?
Fantasy fudge is a classic American-style chocolate fudge made with sugar, butter, evaporated milk, chocolate, and marshmallow creme.
Unlike traditional fudge, which relies heavily on precise temperature control and crystallization, this version is more forgiving and consistently smooth thanks to the added marshmallow base.
It’s known for its:
- Creamy, soft texture
- Rich chocolate flavor
- Foolproof preparation method
In short: a beginner-friendly fudge that tastes like it came from a candy shop.
Why You’ll Love This Fantasy Fudge Recipe
This fantasy fudge recipe is the kind of dessert that feels effortless but delivers every single time. It’s rich, creamy, and perfectly smooth — the kind of fudge you make once and then keep coming back to.
- Incredibly creamy texture — thanks to the marshmallow creme, it turns out smooth and melt-in-your-mouth every time
- Foolproof and beginner-friendly — no complicated candy techniques or stress about sugar crystals
- Quick to make — just a few simple steps and minimal prep time
- Perfect for gifting — cuts cleanly into beautiful squares that look as good as they taste
- Easy to customize — add nuts, swirls, or flavor twists depending on what you love
- Consistently reliable — no guesswork, no surprises, just perfect fudge
In short: this is one of those easy dessert recipes that feels nostalgic, comforting, and just a little bit special — without requiring any extra effort.
Why This Fudge Works
This recipe works because it removes the most difficult part of traditional fudge: sugar crystallization control.
- Marshmallow creme stabilizes the structure → prevents grainy texture
- Evaporated milk adds richness without excess water
- Proper boiling time ensures the fudge sets correctly
- Chocolate melts into a smooth, cohesive base
The result is a perfectly creamy fudge every time, even if you’re not experienced.
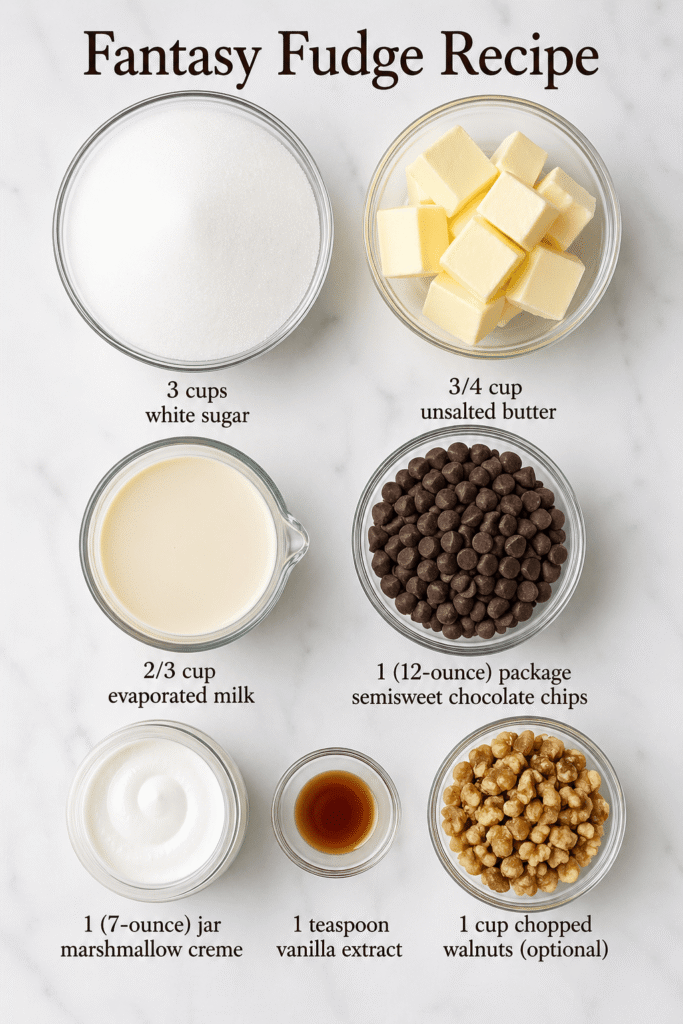
Ingredients
- 3 cups white sugar
- ¾ cup unsalted butter
- ⅔ cup evaporated milk
- 1 (12-ounce) package semisweet chocolate chips
- 1 (7-ounce) jar marshmallow creme
- 1 teaspoon vanilla extract
- 1 cup chopped walnuts (optional)
Ingredient Notes
- Evaporated milk: richer than regular milk, helps create body
- Chocolate chips: provide structure + flavor base
- Marshmallow creme: ensures smooth, creamy consistency
- Butter: adds richness and softness
Insight: Using higher-quality chocolate noticeably improves flavor depth.
Kitchen Tools You’ll Need
- Medium saucepan
- Wooden spoon or spatula
- Candy thermometer (optional but helpful)
- 9×13-inch pan
- Parchment paper
How To Make Fantasy Fudge
- Line a 9×13-inch pan with foil. Lightly grease the foil.
- In a large saucepan, combine sugar, butter, and evaporated milk.
- Bring the mixture to a rolling boil over medium heat. Stir constantly.
- Boil for 4 to 5 minutes. Keep stirring to avoid burning the bottom.
- Remove from heat. Add chocolate chips. Stir until melted.
- Add marshmallow creme and vanilla extract. Stir until smooth.
- Fold in walnuts if using.
- Pour into the prepared pan. Spread evenly.
- Let it cool at room temperature for about 4 hours or until firm.
- Lift the foil out and cut the fudge into small squares.
Visual Doneness Cues
- Glossy surface turns slightly matte
- Firm edges when touched
- Clean slices when cut
- Holds shape without sticking
Texture / Behavior Guide
| Stage | What You See | What It Means |
|---|---|---|
| Boiling | Thick bubbling | Sugar dissolving |
| Mixed | Smooth glossy | Proper emulsion |
| Set | Firm but soft | Perfect texture |
Expert Tips
- Respect the 4–5 minute boil — this is non-negotiable
This step builds the structure. Too short → won’t set. Too long → dry fudge. Aim for a steady, controlled boil, not aggressive bubbling. - Use medium heat, not high
High heat can scorch the sugar and butter, creating a slightly bitter taste and uneven texture. Slow and steady gives you control. - Stir constantly, but not aggressively
You want to keep everything moving without incorporating air. Overmixing can affect the final texture slightly. - Add chocolate immediately off heat
The residual heat melts it perfectly. Waiting too long can cause uneven melting or graininess. - Work fast after adding marshmallow creme
The mixture thickens quickly. Have your pan ready and pour immediately for a smooth, even surface. - Line your pan properly (with overhang)
This isn’t just convenience — it prevents sticking and allows clean, professional-looking cuts. - Use high-quality chocolate if you want a richer result
This is one of the few ingredients that directly impacts flavor depth. - Let it set undisturbed
Moving the pan or refrigerating too early can affect how the structure stabilizes.
Common Mistakes (Cause → Effect → Fix)
Undercooking the sugar mixture
→ Fudge stays soft, sticky, doesn’t fully set
✔ Fix: Make sure you reach a full rolling boil and hold it for 4–5 minutes
Overcooking the mixture
→ Dry, crumbly, slightly brittle texture
✔ Fix: Remove from heat right on time — don’t “just leave it a bit longer”
Using high heat to speed things up
→ Scorched flavor or uneven texture
✔ Fix: Always cook on medium heat for control
Not stirring enough while boiling
→ Sugar can crystallize unevenly → grainy texture
✔ Fix: Stir consistently, especially along the bottom and edges
Waiting too long to mix after removing from heat
→ Chocolate doesn’t melt smoothly → lumpy fudge
✔ Fix: Add chocolate immediately while mixture is hot
Overmixing after adding marshmallow creme
→ Slightly dense or less creamy texture
✔ Fix: Mix just until smooth and combined
Cutting too early
→ Messy edges, soft center
✔ Fix: Let it fully set before slicing (ideally chilled)
Comparison Guide
| Type | Texture | Difficulty | Method |
|---|---|---|---|
| Fantasy Fudge | Creamy, smooth | Easy | Marshmallow |
| Traditional Fudge | Dense, firm | Hard | Sugar crystals |
| Condensed Milk Fudge | Very soft | Very easy | No boiling |
How to Serve Fantasy Fudge
Serve the fudge at room temperature for that perfect creamy bite — soft, smooth, and just slightly firm when you press into it.
For a clean, bakery-style presentation:
- cut into small, even squares using a sharp knife
- wipe the knife between cuts for perfect edges
- arrange on a simple white plate or layered dessert tray
For a more indulgent moment:
- pair with hot coffee, espresso, or hot chocolate to balance the sweetness
- add a light sprinkle of flaky sea salt to enhance the chocolate flavor
- serve slightly chilled if you prefer a firmer, candy-like texture
For gifting or holidays:
- stack pieces in parchment-lined boxes
- mix with other treats for a homemade dessert platter
- wrap individually for a clean, premium feel
Save this for: holiday dessert boards, edible gifts, cozy winter nights, or quick sweet cravings that need zero effort.
Storage & Make Ahead
This fudge stores exceptionally well, which makes it perfect for planning ahead.
Room Temperature (Best for texture)
- Store in an airtight container
- Keeps fresh for up to 1 week
- Maintain layers with parchment paper to prevent sticking
Refrigerator (Longer storage)
- Keeps for up to 2 weeks
- Texture becomes slightly firmer
Freezer (Best for batches & gifting prep)
- Freeze up to 3 months
- Wrap tightly (plastic wrap + container) to avoid freezer burn
How to thaw properly:
- Let it sit at room temperature for 1–2 hours
- Avoid microwaving → affects texture
Make Ahead Tip:
This is an ideal make-ahead dessert — prepare it 1–2 days in advance for best flavor and structure.
Variations
Once you master the base, this recipe becomes incredibly versatile.
Chocolate Walnut Fudge
Add 1 cup chopped walnuts for crunch and contrast.
Peanut Butter Swirl Fudge
Swirl melted peanut butter into the mixture before setting for a marbled effect.
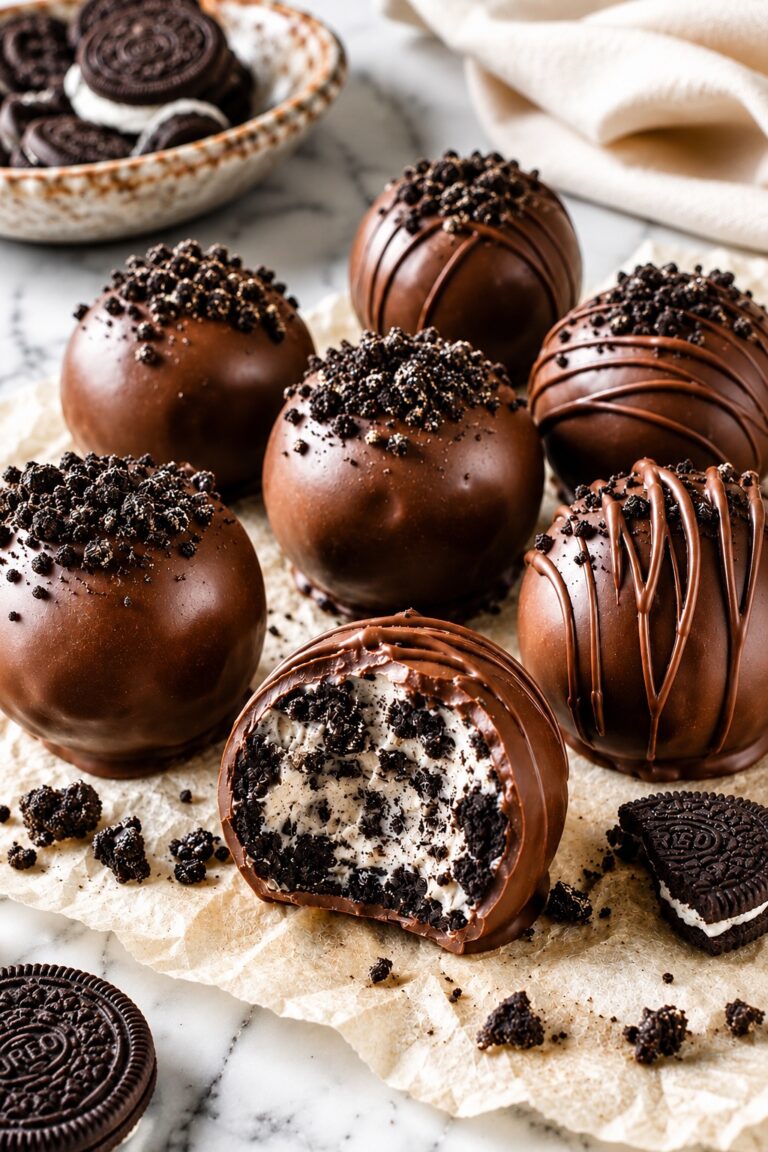
Cookies & Cream Fudge
Fold in crushed sandwich cookies for a creamy, crunchy twist.
White Chocolate Fantasy Fudge
Replace semi-sweet chocolate with white chocolate for a sweeter, vanilla-forward version.
Salted Caramel Fudge
Drizzle caramel into the mixture and finish with flaky sea salt for a sweet-salty balance.
Holiday Sprinkle Fudge
Top with festive sprinkles before setting — perfect for gifting and seasonal boards.
Espresso Chocolate Fudge
Add 1 tsp instant espresso powder to deepen the chocolate flavor.
FAQ
Why is my fudge not setting?
It likely wasn’t boiled long enough.
Can I skip marshmallow creme?
Not for this version — it’s essential for texture.
Can I use milk chocolate?
Yes, but it will be sweeter.
Do I need a thermometer?
No, but it helps ensure accuracy.
Can I double the recipe?
Yes, but use a larger pan.
Final Thoughts
This is one of those recipes that quietly becomes a tradition.
Not because it’s complicated — but because it works. Every time. The texture, the flavor, the simplicity… it all comes together in a way that feels effortless but still special.
And once you make it once, it’s the kind of recipe you don’t forget.

Fantasy Fudge
Fantasy Fudge, creamy, buttery, and luxuriously smooth with rich chocolate flavor. Pure, melt-in-your-mouth indulgence in every bite. 🍫✨
Ingredients
- 3 cups white sugar
- ¾ cup unsalted butter
- ⅔ cup evaporated milk
- 1 (12-ounce) package semisweet chocolate chips
- 1 (7-ounce) jar marshmallow creme
- 1 teaspoon vanilla extract
- 1 cup chopped walnuts (optional)
Instructions
- Prep Pan: Line a 9x13-inch pan with foil and lightly grease.
- Cook Mixture: In a large saucepan, combine sugar, butter, and evaporated milk. Bring to a rolling boil over medium heat, stirring constantly. Boil 4–5 minutes.
- Melt Chocolate: Remove from heat. Stir in chocolate chips until melted.
- Mix In: Add marshmallow creme and vanilla; stir until smooth. Fold in walnuts (if using).
- Set & Cut: Pour into pan, spread evenly, and cool at room temp for 4 hours. Lift foil, then cut into squares.
Enjoy! 😊
Notes
Nutrition Information:
Yield: 36 squares Serving Size: 1 squareAmount Per Serving: Calories: 130Total Fat: 6gCarbohydrates: 19gFiber: 1gSugar: 17gProtein: 1g
Nutrition information is estimated and may vary based on ingredients and portion sizes.
12 Sweet Favourites — Yours, Free 🍰
Tiramisù, no-bake cheesecake, the perfect chocolate chip cookie & 9 more reader-loved desserts — gathered into one beautiful free recipe book. From my kitchen to yours.
No spam, just sweet things. Unsubscribe anytime.