Fudge Recipe – Rich, Creamy Homemade Fudge
🎁 FREE E-BOOK: 12 Sweet Favorites — reader-loved desserts in one beautiful recipe book.
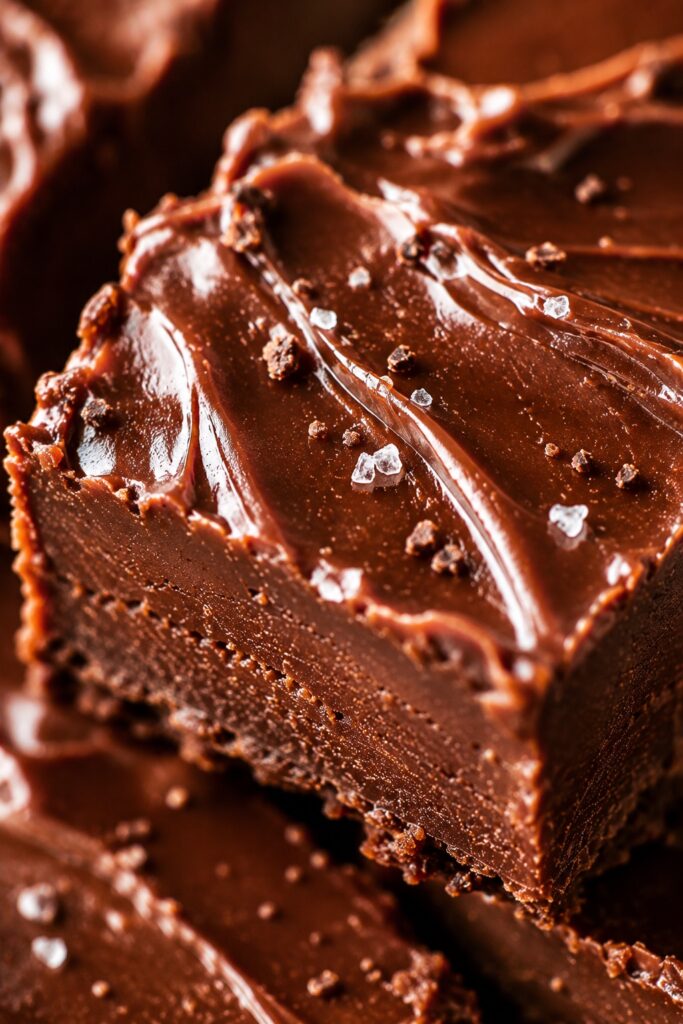
There’s something timeless about homemade fudge. The glossy surface, the dense creamy bite, the way each square slowly melts instead of crumbling apart — it feels nostalgic, cozy, and a little indulgent in the best possible way. A good fudge recipe doesn’t need complicated techniques or fancy equipment. It just needs the right balance of chocolate, sugar, fat, and patience.
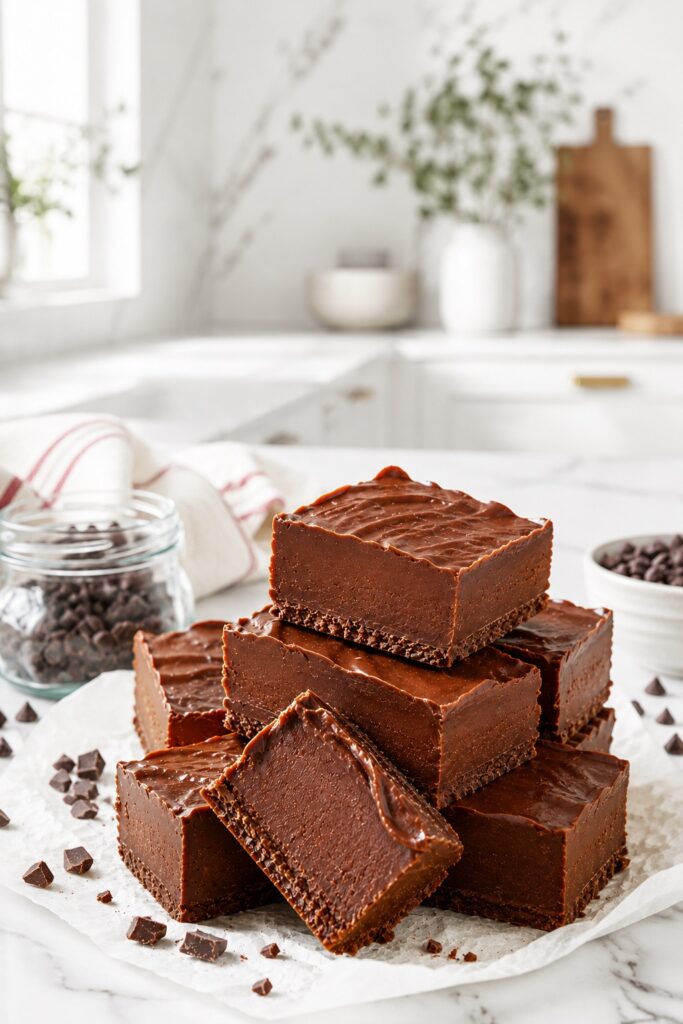
This classic fudge recipe creates rich, velvety squares with deep chocolate flavor and a soft melt-in-your-mouth texture that feels like something from an old-fashioned candy shop. The center stays creamy instead of dry, while the edges hold clean slices that make every piece look beautiful on a dessert tray.
People love saving this recipe because it works for almost everything: holiday platters, homemade gifts, cozy weekends, late-night chocolate cravings, and make-ahead desserts that stay delicious for days. It also feels surprisingly luxurious for how simple the process actually is.
If you’ve ever had fudge turn grainy, too soft, or oddly crumbly, this version focuses on the small details that make a huge difference — temperature, stirring, chocolate choice, and visual texture cues that help you know exactly when it’s right.
What Is Fudge?
Fudge is a rich chocolate confection made by combining sugar, chocolate, butter, and milk or cream into a smooth mixture that sets into dense, creamy squares. Unlike brownies or cake, fudge has almost no crumb structure. Its signature texture comes from controlled sugar crystallization and the balance between fat and moisture.
Traditional fudge is cooked on the stovetop, while easier modern versions often rely on sweetened condensed milk for stability and creaminess. This recipe follows the simpler homemade style while still creating that classic candy-shop texture people expect from real fudge.
Fudge at a Glance
| Detail | Description |
|---|---|
| Texture | Smooth, creamy, dense, melt-in-your-mouth |
| Flavor | Rich chocolate with deep cocoa notes |
| Difficulty | Easy |
| Time | About 15 minutes + chilling |
| Servings | 36 small squares |
| Method | Stovetop + chill |
| Best For | Holidays, dessert trays, gifting, chocolate cravings |
In short: This homemade fudge recipe creates ultra-creamy chocolate fudge with a glossy finish, rich flavor, and soft bite using simple pantry ingredients and minimal effort.
Why This Fudge Recipe Works So Well
Fudge depends heavily on balance. Too much heat creates dryness or graininess, while too much moisture prevents proper setting. This recipe works because the ingredients stabilize each other naturally.
The sweetened condensed milk adds concentrated milk solids and sugar at the same time, which helps create a smoother texture without needing candy thermometers or complicated sugar stages.
Butter softens the crystal structure and keeps the fudge creamy instead of chalky. Chocolate provides structure as it cools, while the fat content controls how firm or soft the final squares feel.
One small but important detail is removing the mixture from heat before overcooking the chocolate. Residual heat continues melting everything together even after the burner is off. That tiny adjustment helps prevent oily separation later.
Another real-life observation: fudge often looks too soft before chilling. That’s normal. The texture changes dramatically once the chocolate fully sets in the refrigerator.
Why You’ll Love This Homemade Fudge
- Rich chocolate flavor without tasting overly sweet
- Smooth creamy texture that slices beautifully
- Easy enough for beginner candy makers
- Perfect make-ahead dessert for holidays and parties
- Stores incredibly well
- Great for gifting and dessert trays
- Easy to customize with nuts, caramel, peanut butter, or sea salt
Save this recipe for Christmas cookie trays, cozy winter weekends, edible gifts, and last-minute chocolate desserts that still feel impressive.
The Simple Science Behind Creamy Fudge
Even though fudge feels simple, a lot happens underneath the surface.
Chocolate contains cocoa butter, which firms up as it cools. That’s what gives fudge its clean slices and dense structure after chilling.
Sugar plays a second major role. Large sugar crystals create grainy fudge, while smaller crystals create a smooth creamy texture. Using condensed milk helps control this because the sugar is already dissolved evenly.
Butter acts almost like a texture insurance policy. Its fat coats some of the sugar particles and reduces the chance of rough texture forming during cooling.
One interesting detail many people miss: over-stirring while the mixture cools can sometimes encourage graininess. Once the chocolate is smooth, it’s best to spread it into the pan without excessive mixing.
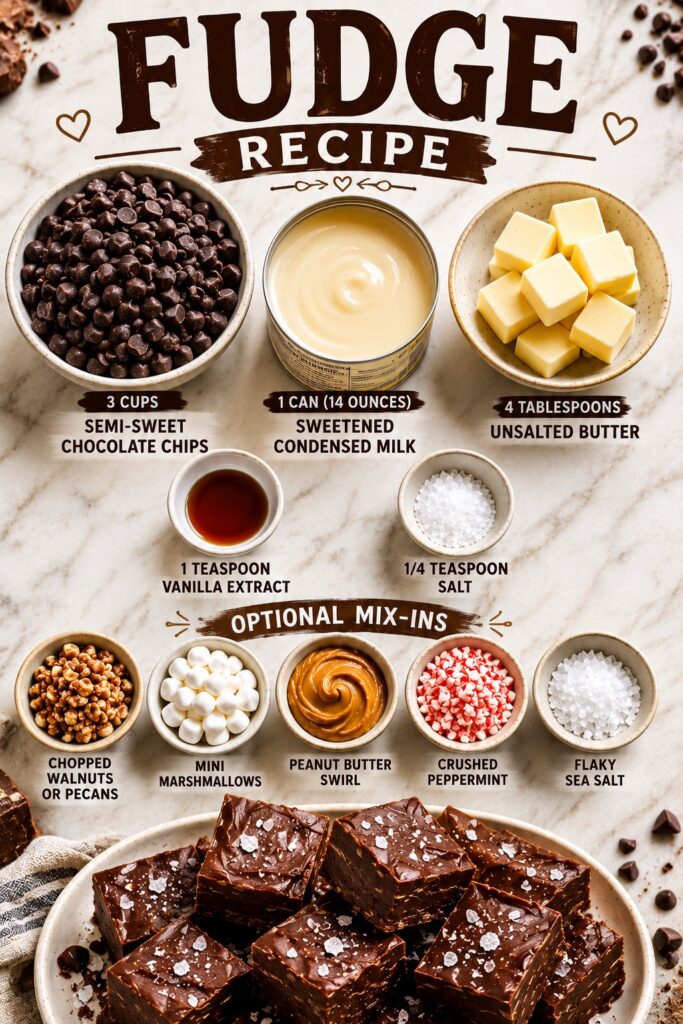
Ingredients You’ll Need
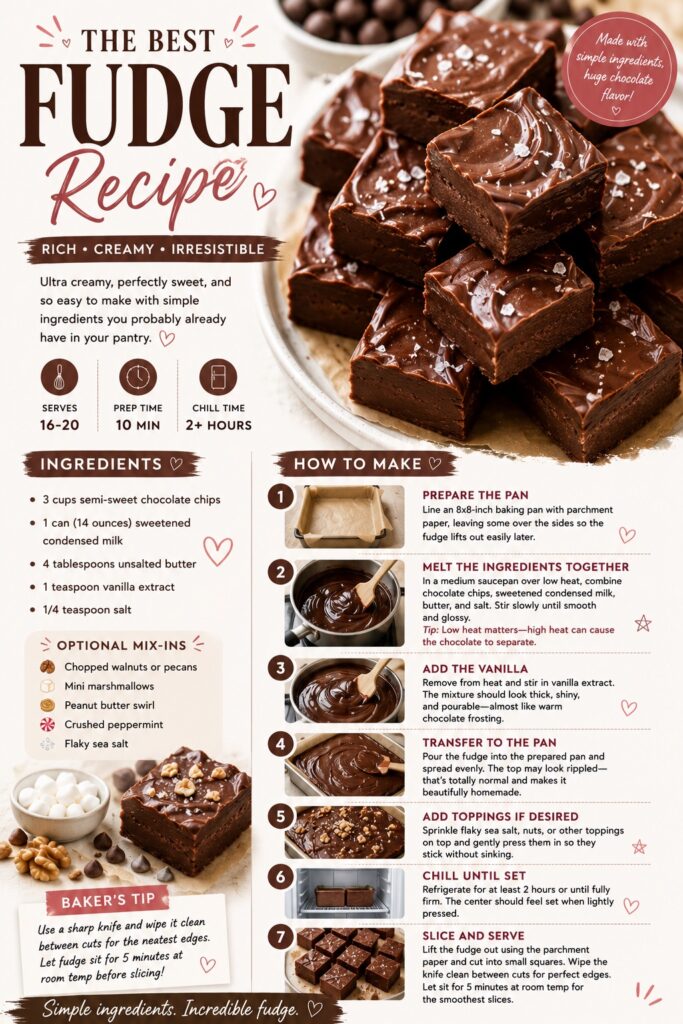
- 3 cups semi-sweet chocolate chips
- 1 can (14 ounces) sweetened condensed milk
- 4 tablespoons unsalted butter
- 1 teaspoon vanilla extract
- 1/4 teaspoon salt
Optional mix-ins:
- Chopped walnuts or pecans
- Mini marshmallows
- Peanut butter swirl
- Crushed peppermint
- Flaky sea salt
Ingredient Notes for Smooth, Creamy Fudge
Semi-Sweet Chocolate Chips
Semi-sweet chocolate creates the best balance between sweetness and deep cocoa flavor. Milk chocolate can make the fudge softer and sweeter, while dark chocolate creates firmer, richer squares.
Sweetened Condensed Milk
This ingredient is doing a lot of work. It provides sugar, milk solids, moisture, and creaminess all at once. It also makes the recipe far more forgiving than old-school cooked fudge.
Butter
Butter softens the final texture and helps create that smooth melt instead of a dry bite. If the fudge ever feels too firm straight from the fridge, slightly more butter usually fixes it.
Salt
A small amount of salt dramatically sharpens chocolate flavor. The fudge won’t taste salty — it just tastes more chocolatey.
Chocolate chips from different brands can melt differently because of stabilizers. If your mixture looks slightly thicker than expected, that’s usually the reason rather than a mistake in the recipe.
The Best Chocolate for Homemade Fudge
The type of chocolate you use can completely change the texture, sweetness, and overall feel of homemade fudge. Some chocolates melt silky and smooth, while others create a firmer or slightly thicker texture because of stabilizers and cocoa butter levels.
For the most balanced homemade fudge, semi-sweet chocolate is usually the best choice. It gives enough sweetness for that classic candy-shop flavor while still keeping a rich deep chocolate taste that doesn’t feel overpowering.
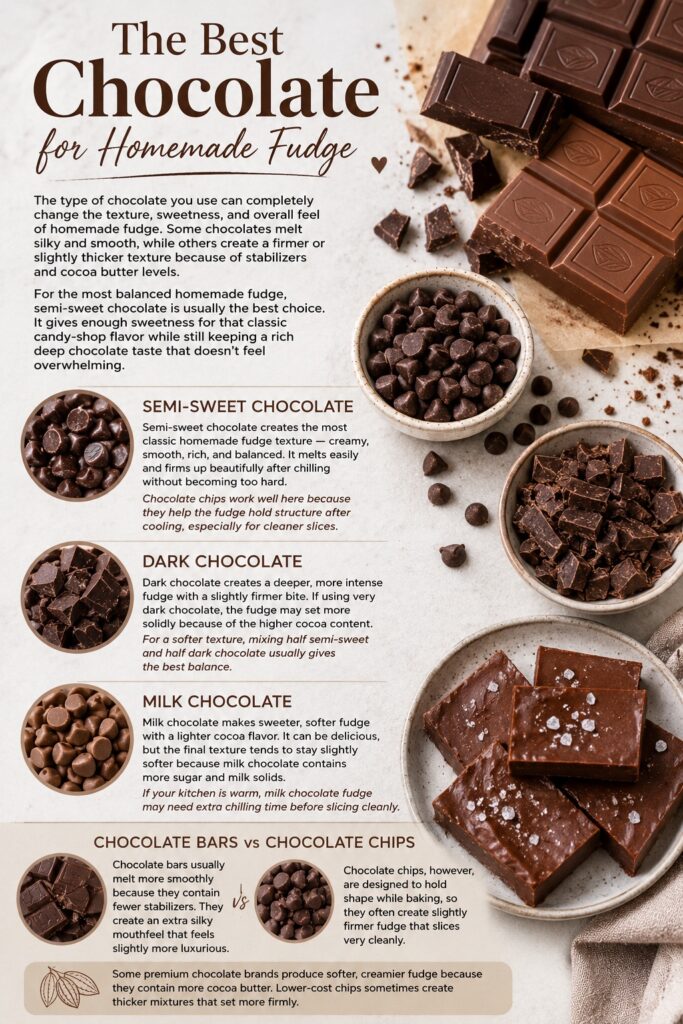
Semi-Sweet Chocolate
Semi-sweet chocolate creates the most classic homemade fudge texture — creamy, smooth, rich, and balanced. It melts easily and firms up beautifully after chilling without becoming too hard.
Chocolate chips work well here because they help the fudge hold structure after cooling, especially for cleaner slices.
Dark Chocolate
Dark chocolate creates a deeper, more intense fudge with a slightly firmer bite. If using very dark chocolate, the fudge may set more solidly because of the higher cocoa content.
For a softer texture, mixing half semi-sweet and half dark chocolate usually gives the best balance.
Milk Chocolate
Milk chocolate makes sweeter, softer fudge with a lighter cocoa flavor. It can be delicious, but the final texture tends to stay slightly softer because milk chocolate contains more sugar and milk solids.
If your kitchen is warm, milk chocolate fudge may need extra chilling time before slicing cleanly.
Chocolate Bars vs Chocolate Chips
Chocolate bars usually melt more smoothly because they contain fewer stabilizers. They create an extra silky mouthfeel that feels slightly more luxurious.
Chocolate chips, however, are designed to hold shape while baking, so they often create slightly firmer fudge that slices very cleanly.
Some premium chocolate brands produce softer, creamier fudge because they contain more cocoa butter. Lower-cost chips sometimes create thicker mixtures that set more firmly.
Helpful Tip
If you want truly rich bakery-style fudge, avoid chocolate labeled “candy coating” or “chocolate-flavored.” Real chocolate with cocoa butter creates a much smoother melt and more authentic homemade flavor.
Kitchen Tools You’ll Need
- Medium saucepan
- Silicone spatula or wooden spoon
- 8×8-inch baking pan
- Parchment paper
- Sharp knife for slicing
A parchment-lined pan makes removal much easier later. Leaving a little overhang on the sides helps lift the entire slab cleanly before cutting.
How to Make Fudge Step by Step
1. Prepare the Pan
Line an 8×8-inch baking pan with parchment paper.
Leave some parchment hanging over the sides so the fudge can lift out easily later. This small step saves a lot of frustration during slicing.
2. Melt the Ingredients Together
In a medium saucepan over low heat, combine the chocolate chips, sweetened condensed milk, butter, and salt.
Stir slowly until the mixture becomes completely smooth and glossy. The chocolate should look silky with no visible streaks remaining.
Tip: Low heat matters here. High heat can cause the chocolate to separate and become oily.
3. Add the Vanilla
Remove the pan from the heat and stir in the vanilla extract.
At this point, the fudge mixture should look thick, shiny, and pourable — almost like warm chocolate frosting.
If it seems slightly too thick, don’t panic. Some chocolate brands naturally create a denser mixture.
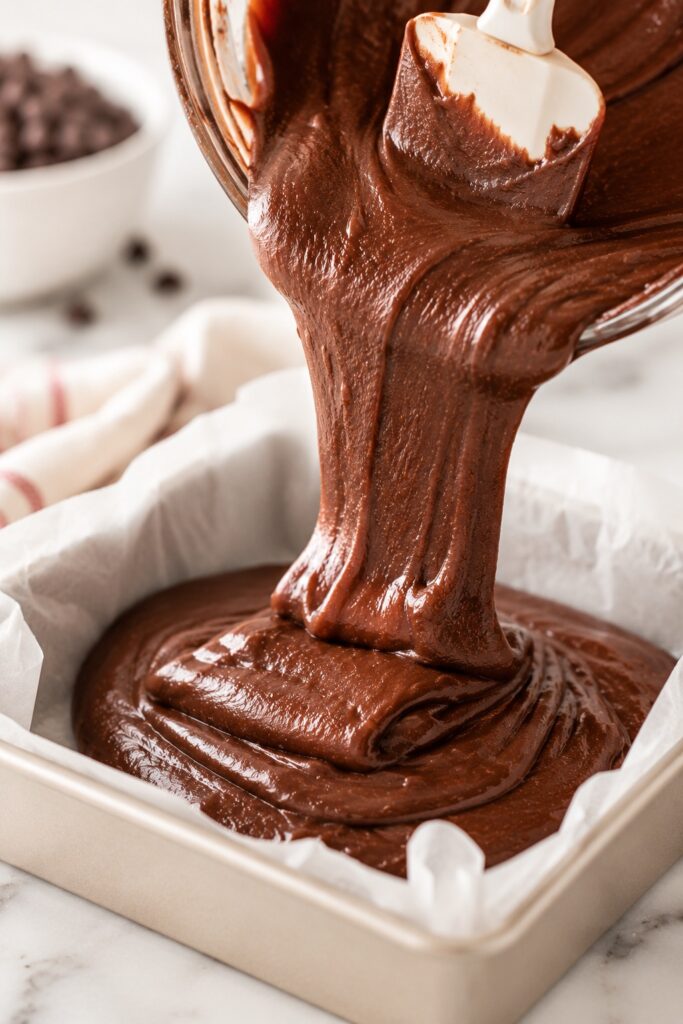
4. Transfer to the Pan
Pour the fudge into the prepared baking pan.
Use a spatula to spread it evenly into the corners. The surface should smooth out fairly easily while still holding gentle swirls.
Sometimes the top looks imperfect or slightly rippled. That actually makes homemade fudge look more inviting and real.
5. Add Toppings if Desired
Sprinkle flaky sea salt, nuts, or other toppings over the top before chilling.
Lightly press them into the surface so they stick without sinking completely.
6. Chill Until Set
Refrigerate the fudge for at least 2 hours or until fully firm.
The center should feel dense and set when lightly pressed. The edges will look slightly darker and cleaner once fully chilled.
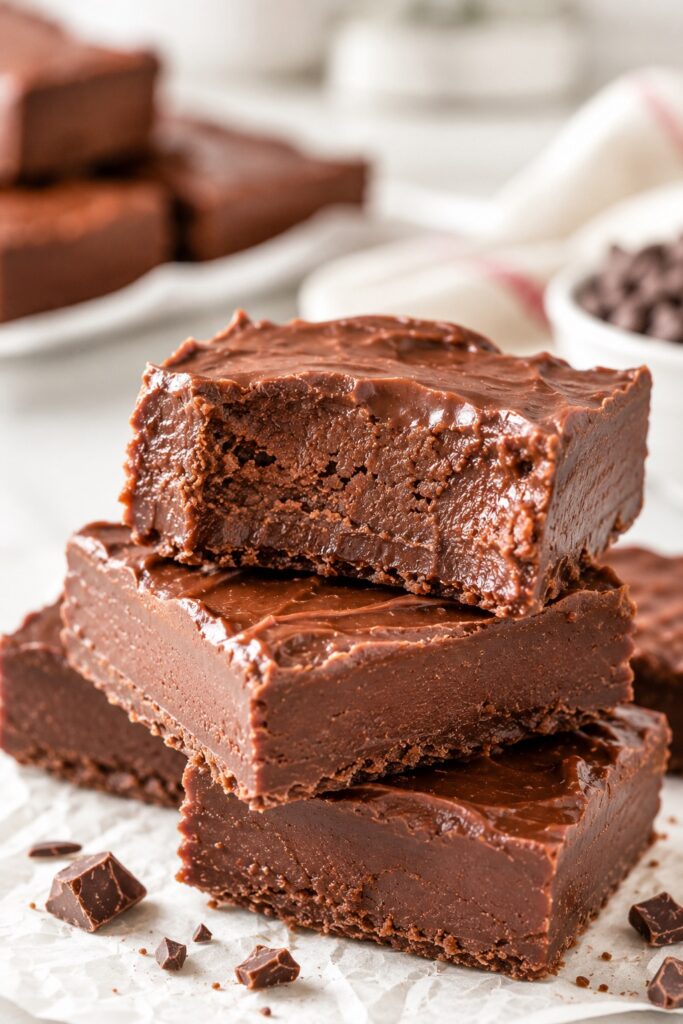
7. Slice and Serve
Lift the fudge from the pan using the parchment paper.
Cut into small squares using a sharp knife. Wiping the knife clean between cuts creates cleaner edges.
For the smoothest slices, let the fudge sit at room temperature for about 5 minutes before cutting.
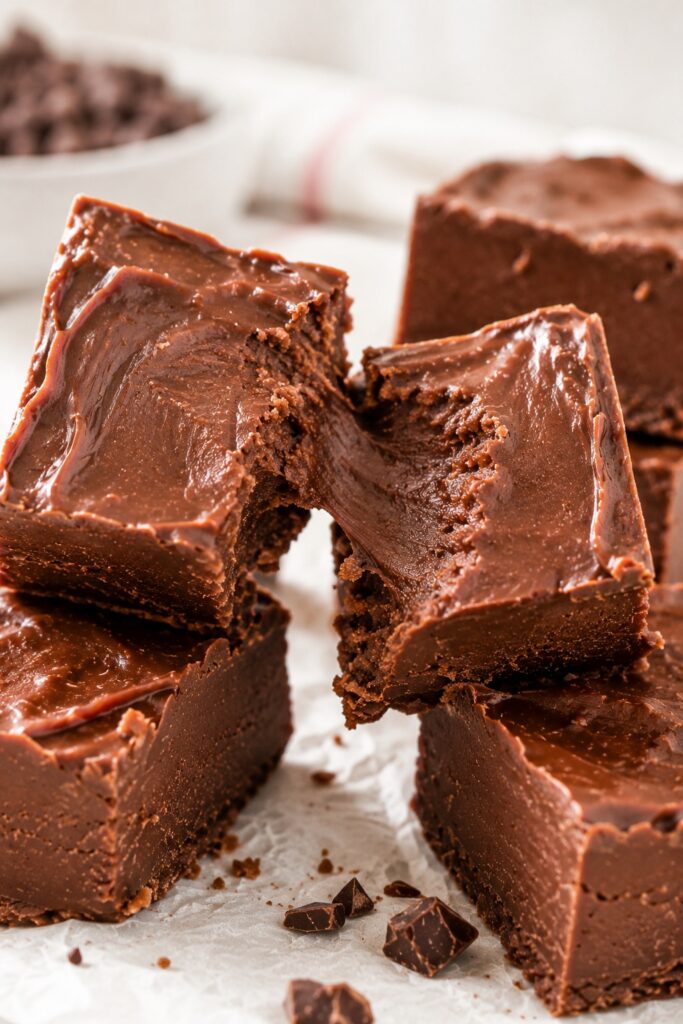
How to Know When Your Fudge Is Just Right
- Surface looks glossy rather than greasy
- Chocolate mixture becomes smooth and uniform
- Fudge holds shape when spread into the pan
- Center feels firm after chilling
- Slices cut cleanly without collapsing
- Edges look dense and slightly darker
- Texture appears creamy instead of crumbly
Fudge Texture Guide
| Stage | What You Should See |
|---|---|
| Melting | Smooth glossy chocolate with no lumps |
| Finished Mixture | Thick but spreadable consistency |
| Before Chilling | Soft shiny surface |
| Fully Chilled | Dense clean-cut structure |
| Final Texture | Creamy, rich, smooth melt |
Expert Tips for Perfect Fudge
- Use good-quality chocolate for smoother texture and deeper flavor.
- Melt everything slowly over low heat.
- Avoid overheating the chocolate mixture.
- Let the fudge chill fully before slicing.
- Slightly warm the knife for ultra-clean cuts.
- Add flaky sea salt on top for stronger chocolate flavor contrast.
- For softer fudge, let it sit at room temperature 10 minutes before serving.
One deeper insight: fudge tastes even better the next day because the chocolate flavor settles and rounds out after chilling overnight.
Common Fudge Mistakes and How to Fix Them
| Mistake | Result |
|---|---|
| Overheating chocolate | Oily or separated texture |
| Using high heat | Grainy or dry fudge |
| Cutting before fully chilled | Messy uneven squares |
| Too much stirring during cooling | Slightly grainy texture |
| Cheap chocolate with waxy stabilizers | Less creamy mouthfeel |
If your fudge ever turns too soft, additional chilling usually fixes it surprisingly well.
Fudge Variations and Flavor Ideas
| Version | Texture | Flavor | Best For |
|---|---|---|---|
| Classic Chocolate Fudge | Creamy and dense | Rich cocoa flavor | Everyday dessert trays |
| Dark Chocolate Fudge | Firmer and deeper | Intense chocolate | Coffee lovers |
| Peanut Butter Swirl Fudge | Softer and extra creamy | Sweet-salty balance | Holiday platters |
| Nutty Fudge | Slight crunch | Toasted flavor depth | Homemade gifts |
How to Serve Fudge Beautifully
Serve fudge slightly chilled or at cool room temperature for the smoothest texture and richest flavor.
For holidays, stack small squares on dessert platters beside cookies and brownies for a beautiful homemade candy-shop look.

For cozy evenings, pair it with coffee, hot chocolate, or cold milk. The dense chocolate texture feels especially luxurious with warm drinks.
Save this recipe for:
- Christmas dessert trays
- Homemade edible gifts
- Movie nights
- Cozy winter baking weekends
- Last-minute chocolate cravings
A small square often feels more satisfying than a large slice of cake because the texture is so rich and concentrated.
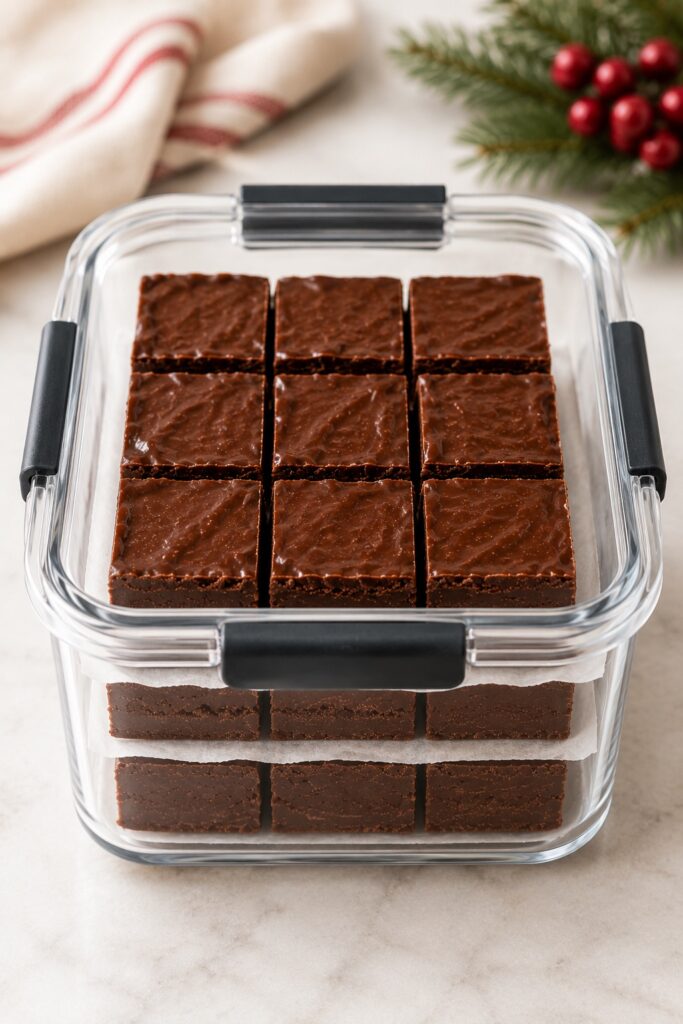
How to Store and Make Fudge Ahead
One of the best things about homemade fudge is how beautifully it stores. The texture stays rich and creamy for days, which makes this recipe perfect for holiday prep, dessert trays, edible gifts, and make-ahead entertaining.
Unlike cakes or cookies that can dry out quickly, fudge actually becomes even more flavorful after resting overnight. The chocolate settles, the texture firms up slightly, and the slices become cleaner and smoother.
How to Store Homemade Fudge
Store fudge in an airtight container in the refrigerator for up to 2 weeks.
For the best texture, place parchment paper between layers to prevent sticking and keep the glossy surface looking smooth and clean.
If serving for guests, let the fudge sit at room temperature for about 10–15 minutes before serving. This softens the texture slightly and gives the chocolate a creamier melt.
Helpful tip: Warm kitchens can soften fudge faster than expected, especially versions made with milk chocolate or peanut butter swirls.
Can You Freeze Fudge?
Yes — fudge freezes extremely well.
Wrap the entire slab or individual squares tightly in plastic wrap, then place them in a freezer-safe container or zip-top bag. Freeze for up to 3 months.
To thaw, transfer the fudge to the refrigerator overnight. Avoid thawing uncovered at room temperature because condensation can create moisture on the surface.
Once thawed, the texture should still feel dense, creamy, and smooth with very little change in flavor.
Best Make-Ahead Tips
- Make fudge 1–2 days ahead for even better flavor and cleaner slices.
- Slice after chilling fully for the neatest candy-shop appearance.
- Store small squares in parchment-lined containers for easy serving.
- Freeze full batches before busy holidays or parties.
- Keep toppings like flaky sea salt or crushed peppermint visible for the prettiest presentation.
Freshly made fudge often feels slightly softer on day one, but after an overnight chill the texture becomes noticeably richer, smoother, and more structured.
Save this recipe for holiday dessert trays, Christmas candy boxes, homemade gifts, and cozy weekends when you want a chocolate dessert already waiting in the fridge.
Homemade Fudge Gift Ideas
Homemade fudge is one of those desserts that instantly feels thoughtful, cozy, and special. Because it stores so well and slices beautifully, it’s perfect for edible gifts, holiday dessert boxes, cookie trays, and make-ahead party platters.
For a simple bakery-style presentation, stack fudge squares in parchment-lined tins or small kraft boxes tied with ribbon. The glossy chocolate finish and clean-cut edges make even basic packaging feel elegant and homemade in the best way.

During the holidays, fudge works especially well because it can be made several days ahead without losing texture or flavor. In fact, many people think the flavor tastes even richer the next day once the chocolate fully settles.
Easy Ways to Gift Homemade Fudge
- Layer squares inside holiday cookie tins with parchment paper between layers.
- Wrap small stacks in parchment and baker’s twine for cozy homemade gifting.
- Add fudge to dessert charcuterie boards and holiday candy trays.
- Pair chocolate fudge with peppermint bark, cookies, or brownies in gift boxes.
- Freeze batches ahead of busy holiday weekends and thaw overnight before serving.
Save this idea for: Christmas dessert boxes, homemade hostess gifts, cookie exchanges, Valentine’s Day treats, bake sales, and cozy winter gatherings.
One small detail that makes homemade fudge feel extra premium: cutting smaller perfectly clean squares instead of oversized pieces. Tiny candy-shop-style bites always look more elegant and inviting on dessert trays.
Easy Fudge Variations
Peanut Butter Fudge
Swirl warmed peanut butter into the top before chilling.
Rocky Road Fudge
Add mini marshmallows and chopped walnuts.
Peppermint Fudge
Mix crushed candy canes into the top layer for holiday flavor.
Espresso Chocolate Fudge
Add 1 teaspoon instant espresso powder for deeper chocolate notes.
Sea Salt Caramel Fudge
Drizzle caramel over the surface and finish with flaky sea salt.
Fudge Recipe FAQs
Why is my fudge grainy?
Usually from overheating or sugar crystallization. Low gentle heat helps keep the texture smooth.
Can I use milk chocolate?
Yes, but the fudge will be softer and noticeably sweeter.
Does fudge need refrigeration?
Yes. It keeps the texture firmer and extends freshness.
Can I freeze homemade fudge?
Absolutely. Wrap it tightly and freeze for up to 3 months.
Why didn’t my fudge set?
Most likely too much moisture or insufficient chilling time.
Can I add nuts or candies?
Yes. Stir them in after removing the mixture from heat.
How do I cut clean fudge squares?
Use a sharp knife and wipe it clean between slices.
More Cozy Chocolate Desserts You’ll Love
If this creamy homemade fudge is your kind of dessert, these rich chocolate treats are perfect to explore next. They keep the same cozy, indulgent feeling while giving you different textures — gooey cakes, fudgy brownies, creamy pies, and candy-style bites.
- Chocolate Fudge Recipe — a deeper chocolate-focused version for true fudge lovers.
- Peanut Butter Fudge Recipe — creamy, sweet-salty, and perfect for holiday candy trays.
- Fantasy Fudge Recipe — a nostalgic classic with that old-fashioned homemade candy texture.
- Chocolate Cobbler Recipe — warm, gooey, spoonable chocolate comfort with a rich saucy center.
- Buckeye Brownie Recipe — fudgy brownies layered with creamy peanut butter and chocolate.
- Chocolate Poke Cake Recipe — soft, moist, and soaked with chocolatey richness in every bite.
For a dessert board or holiday spread, pair this fudge with one creamy chocolate dessert, one brownie-style treat, and one soft cake-style recipe so every bite feels different but still beautifully chocolate-forward.
Homemade Fudge Recipe Summary
This homemade fudge recipe creates rich, creamy chocolate fudge with a smooth melt-in-your-mouth texture and deep cocoa flavor using simple pantry ingredients. With minimal prep and reliable results, it’s an easy dessert that works beautifully for holidays, gifting, dessert platters, and everyday chocolate cravings.
Final Thoughts on This Creamy Chocolate Fudge
Good fudge has a way of feeling both nostalgic and comforting at the same time. It’s simple, rich, familiar, and quietly impressive without needing complicated techniques or hours in the kitchen.
What makes this recipe special long-term is its consistency. Once you understand the texture cues and gentle heat balance, it becomes one of those dependable homemade desserts you can return to again and again — for holidays, cozy weekends, or the kind of chocolate craving only real homemade fudge can satisfy.

Fudge Recipe
Rich, creamy, and perfectly smooth homemade chocolate fudge with deep chocolate flavor and a melt-in-your-mouth texture. This easy fudge recipe is perfect for holidays, gifting, dessert trays, and cozy chocolate cravings.
Ingredients
- 3 cups semi-sweet chocolate chips
- 1 can (14 ounces) sweetened condensed milk
- 4 tablespoons unsalted butter
- 1 teaspoon vanilla extract
- 1/4 teaspoon salt
Optional Mix-Ins & Toppings
- Chopped walnuts or pecans
- Mini marshmallows
- Peanut butter swirl
- Crushed peppermint
- Flaky sea salt
Instructions
- Prepare the Pan
Line an 8x8-inch baking pan with parchment paper, leaving extra parchment hanging over the sides for easy removal later. - Melt the Ingredients
In a medium saucepan over low heat, combine the chocolate chips, sweetened condensed milk, butter, and salt. Stir slowly until the mixture becomes completely smooth, glossy, and silky. - Add the Vanilla
Remove the saucepan from the heat and stir in the vanilla extract. The fudge mixture should look thick, creamy, and shiny. - Transfer to the Pan
Pour the fudge into the prepared pan and spread evenly using a spatula. Smooth the top gently while keeping some natural swirls for a homemade look. - Add Toppings
Sprinkle flaky sea salt, nuts, crushed peppermint, or other toppings over the surface if desired. - Chill Until Firm
Refrigerate for at least 2 hours or until fully set. The center should feel dense and firm when lightly pressed. - Slice and Serve
Lift the fudge from the pan using the parchment paper. Slice into small squares using a sharp knife, wiping the blade clean between cuts for neat edges.
Notes
- Use low heat to prevent the chocolate from separating or becoming grainy.
- Semi-sweet chocolate creates the best balance of sweetness and rich chocolate flavor.
- For cleaner slices, let the fudge sit at room temperature for 5–10 minutes before cutting.
- Store in an airtight container in the refrigerator for up to 2 weeks.
- Freeze for up to 3 months for easy make-ahead desserts and holiday prep.
Nutrition Information:
Yield: 36 squares Serving Size: 1 squareAmount Per Serving: Calories: 145Total Fat: 8gSaturated Fat: 5gUnsaturated Fat: 2gCholesterol: 10mgSodium: 45mgCarbohydrates: 18gFiber: 1gSugar: 15gProtein: 2g
Nutrition information is estimated and may vary based on ingredients and portion sizes.
12 Sweet Favourites — Yours, Free 🍰
Tiramisù, no-bake cheesecake, the perfect chocolate chip cookie & 9 more reader-loved desserts — gathered into one beautiful free recipe book. From my kitchen to yours.
No spam, just sweet things. Unsubscribe anytime.