Buckeye Brownies Recipe
🎁 FREE E-BOOK:12 Sweet Favorites — reader-loved desserts in one beautiful recipe book.
There’s something almost irresistible about the combination of chocolate and peanut butter — but when you turn that into Buckeye Brownies, it becomes something deeper, richer, and genuinely unforgettable.
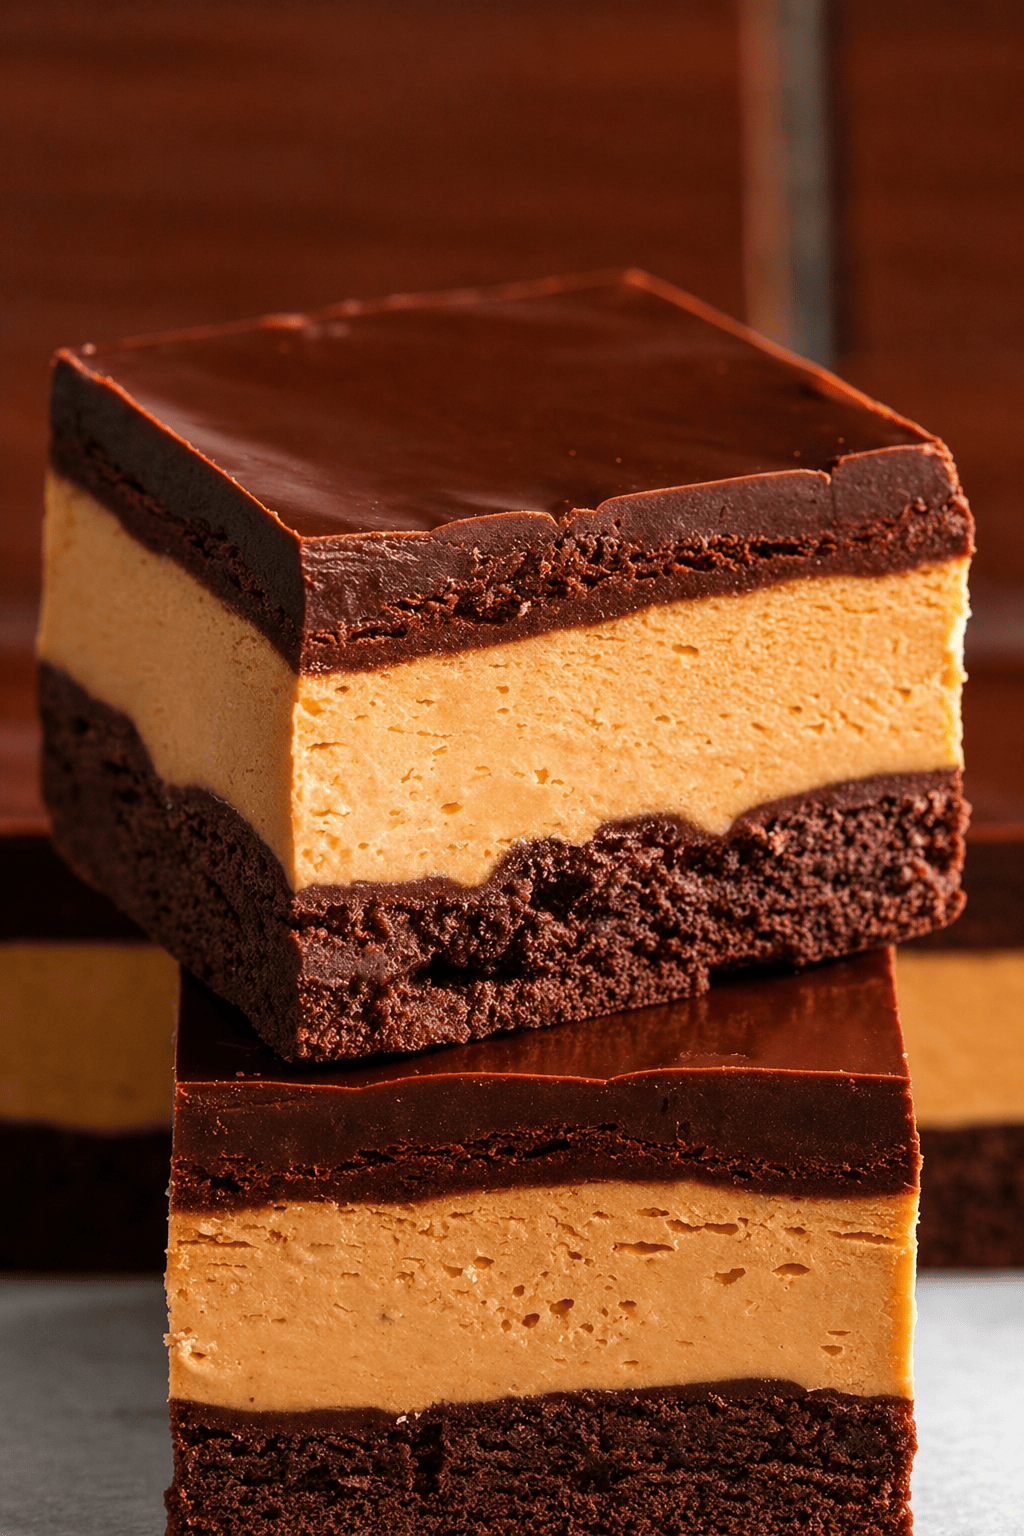
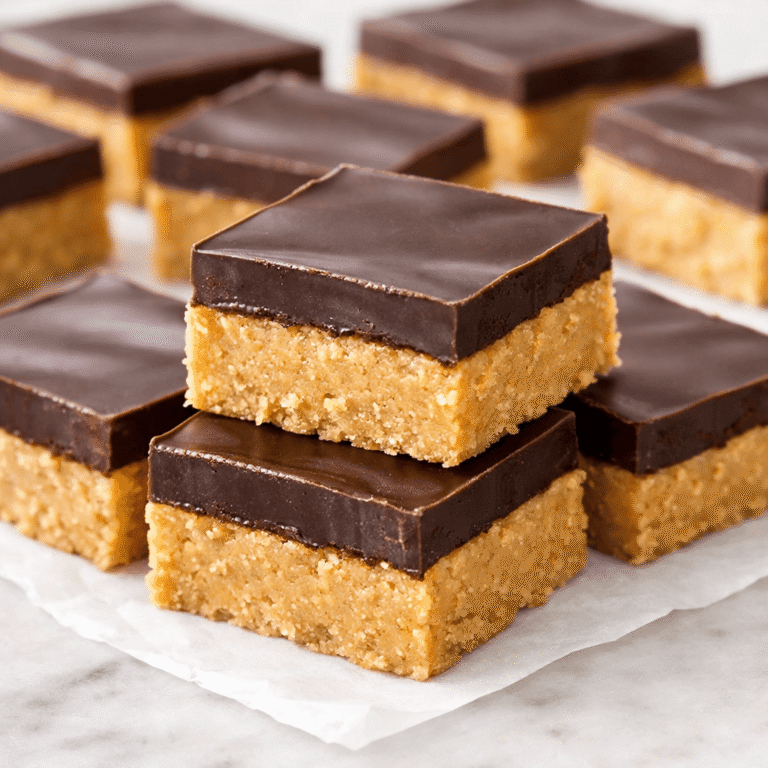
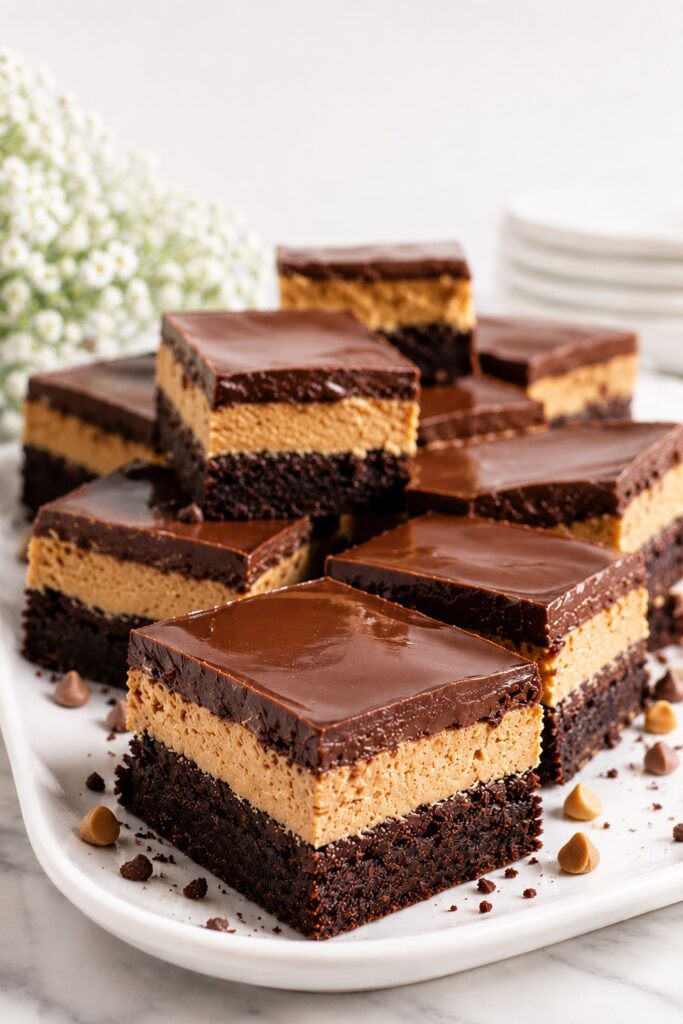
Imagine this: a dense, fudgy brownie base, topped with a thick, creamy peanut butter layer that melts softly on your tongue, all finished with a smooth, glossy chocolate topping that sets into a delicate shell. Every bite gives you contrast — soft, rich, creamy, and just slightly firm on top.
These buckeye brownies are inspired by the classic buckeye candy, but transformed into a layered dessert that feels both indulgent and bakery-level impressive — without actually being complicated.
This is the kind of dessert people save, share, and ask for again.
What Are Buckeye Brownies?
Buckeye brownies are a layered dessert made of:
- A fudgy chocolate brownie base
- A creamy peanut butter filling
- A smooth chocolate topping
They’re inspired by buckeye candy — a classic peanut butter and chocolate treat — but turned into sliceable bars with a rich brownie foundation.
In short:
A brownie + peanut butter fudge layer + chocolate ganache-like topping.
Why You’ll Love This Buckeye Brownies Recipe
- That perfect chocolate + peanut butter combo
It’s the classic buckeye flavor, but layered into a rich, sliceable brownie that feels even more indulgent. - Ultra-fudgy, creamy, and smooth in every bite
You get three textures at once — dense brownie, soft peanut butter, and a silky chocolate top. - Bakery-style look with minimal effort
Clean layers, glossy finish, and sharp slices — they look impressive without being complicated. - No complicated techniques required
Simple mixing, layering, and chilling. No special skills, just good ingredients. - Perfect make-ahead dessert
They actually taste better the next day once the layers fully set and the flavors deepen. - Easy to slice and serve for any occasion
Great for parties, holidays, or just cutting into squares for a quick treat. - Highly customizable once you know the base
You can go darker, saltier, crunchier, or even turn them into bite-sized versions.
In short:
They deliver maximum indulgence with minimal effort — and that’s exactly why people keep coming back to them.
Why This Buckeye Brownies Recipe Works
These brownies are all about balance and structure:
- The brownie base is intentionally dense and fudgy, so it can support the layers
- The peanut butter layer is soft but stable, like a quick fudge
- The chocolate topping sets into a clean-cut shell, giving that bakery-style finish
The result is a dessert that slices beautifully but still melts in your mouth.
Baking Science behind Perfect Buckeye Brownies
- High fat (butter + peanut butter) = soft, creamy layers
- Low flour brownie base = fudgy, not cakey
- Powdered sugar in PB layer = smooth, stable texture
- Chocolate topping cooling = creates a firm but sliceable top
Ingredients
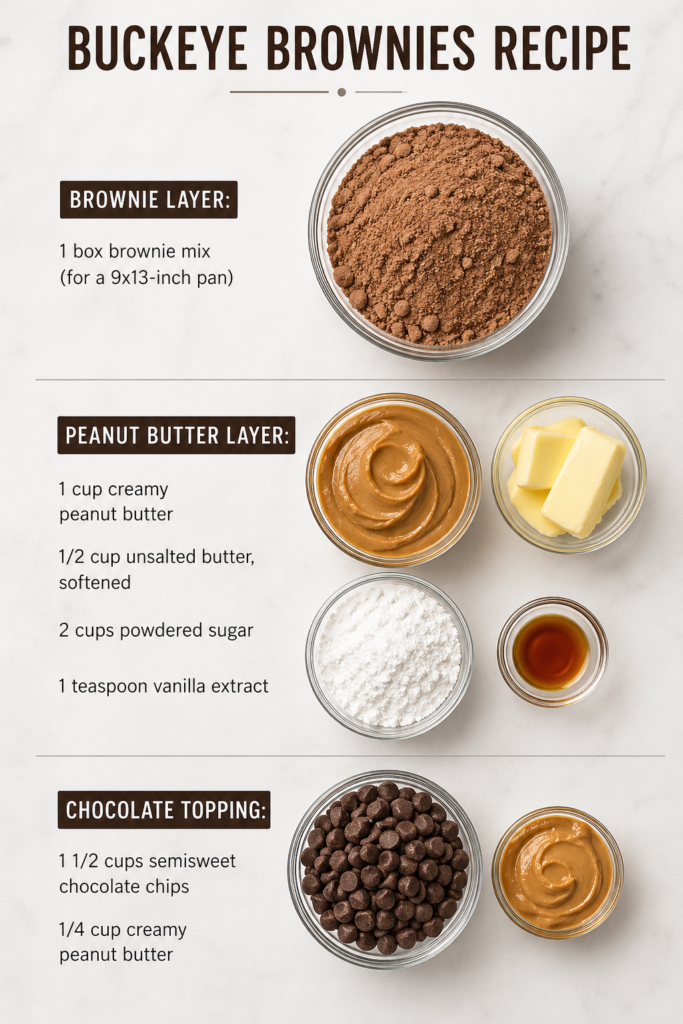
Brownie layer
1 box brownie mix (for a 9×13-inch pan)
Ingredients listed on the box (usually eggs, oil, and water)
Peanut butter layer
1 cup creamy peanut butter
1/2 cup unsalted butter, softened
2 cups powdered sugar
1 teaspoon vanilla extract
Chocolate topping
1 1/2 cups semisweet chocolate chips
1/4 cup creamy peanut butter
Ingredient Notes
- Peanut butter: Use creamy, not natural → better structure
- Powdered sugar: Creates that classic “buckeye” texture
- Chocolate chips: Melt smoothly and set cleanly
Kitchen Tools You’ll Need
- 8×8-inch baking pan
- Mixing bowls
- Spatula
- Hand mixer (optional but helpful)
- Parchment paper
Instructions
- Preheat oven to 350°F (175°C).
- Prepare the brownie mix according to the box directions.
- Bake in a 9×13-inch pan. Let the brownies cool completely.
- In a large bowl, mix peanut butter, butter, powdered sugar, and vanilla until smooth.
- Spread the peanut butter mixture over the cooled brownies. Press gently to smooth the surface.
- Melt chocolate chips and peanut butter together in a microwave-safe bowl. Stir every 30 seconds until smooth.
- Pour the chocolate over the peanut butter layer. Spread evenly.
- Chill in the fridge for at least 1 hour before slicing.
Texture & Behavior Guide
| Layer | Texture | What to Expect |
|---|---|---|
| Brownie | Dense, fudgy | Rich and slightly chewy |
| Peanut Butter | Creamy, soft | Melts slightly when eaten |
| Chocolate Top | Smooth, firm | Clean snap when sliced |
Expert Tips (Bakery-Level Results)
- Slightly underbake the brownie base
The center should look just set with a soft core. This keeps the base fudgy even after chilling. - Cool completely before layering
If the brownies are even slightly warm, the peanut butter layer will soften too much and lose structure. - Whip the peanut butter layer until silky
Don’t just mix — beat it for 1–2 minutes. It becomes lighter, smoother, and spreads effortlessly. - Adjust the peanut butter layer if needed
If it feels too soft → add a bit more powdered sugar
If too thick → a tiny splash of milk or softened butter fixes it instantly - Melt chocolate gently, not aggressively
Use low heat or short microwave bursts. Overheated chocolate turns thick and dull instead of glossy. - Tap the pan after pouring the chocolate
This removes air bubbles and creates that smooth, bakery-style finish. - Chill for structure, not just temperature
This isn’t just about cooling — it’s what allows clean, sharp layers when slicing. - Use a warm knife for clean cuts
Dip in hot water, wipe, then slice. Repeat between cuts for perfect edges. - Let them sit 5–10 minutes before serving
Straight from the fridge = firmer bite
Slightly softened = creamier, more melt-in-your-mouth texture
Common Mistakes (And How to Fix Them)
- Overbaking the brownies → dry base
→ Pull them out when the center is just set, not fully firm - Adding peanut butter layer on warm brownies → melting + sliding layers
→ Always cool completely first - Using natural peanut butter → oily separation
→ Stick to creamy, stabilized peanut butter for structure - Chocolate topping too thick or hard → hard to slice
→ Add butter to the chocolate for a softer, sliceable finish - Cutting too early → messy, uneven layers
→ Chill fully before slicing — patience = clean results - Peanut butter layer too soft → collapsing layers
→ Add powdered sugar gradually until it holds shape - Uneven layers → messy visual finish
→ Spread each layer evenly and take a few extra seconds to level
Comparison Guide
| Dessert | Difference |
|---|---|
| Classic Brownies | No peanut butter layer |
| Peanut Butter Brownies | Mixed, not layered |
| Buckeye Candy | No brownie base |
| These Buckeye Brownies | Full layered experience |
How to Serve Buckeye Brownies
These brownies shine when served in a way that highlights their layers and richness.
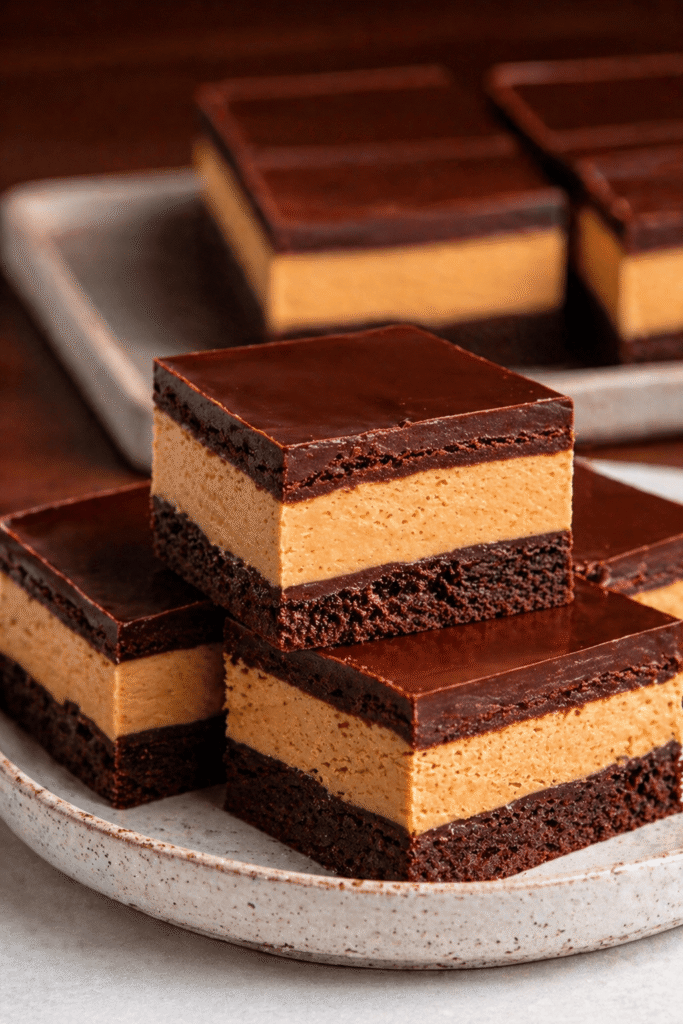
- Cut into clean, sharp squares for that bakery-style look
- Serve on a simple white plate to let the layers stand out
- Pair with a cold glass of milk or coffee for balance
- Slice into smaller pieces for dessert platters — they’re rich
For a slightly elevated feel:
- Let them sit 5–10 minutes out of the fridge
- Add a tiny pinch of flaky salt on top
- Serve with a scoop of vanilla ice cream for contrast
Make this when:
You want a dessert that looks impressive, tastes rich, and disappears fast at the table.
Save this for:
Holiday trays, potlucks, or those moments when only chocolate + peanut butter will do.
Storage & Make Ahead (Keep Them Perfect)
These Buckeye Brownies store beautifully — and actually improve in texture after resting.
Room Temperature (Short Term)
- Store covered for up to 1 day
- Keep in a cool spot (not warm kitchens)
- Texture: softer peanut butter layer, slightly softer chocolate top
Best for: same-day serving when you want a softer bite
Refrigerator (Best Option)
- Store in an airtight container for up to 5 days
- Keeps layers clean, firm, and sliceable
Texture after chilling:
- Brownie → dense & fudgy
- Peanut butter → firm but creamy
- Chocolate top → clean, slightly snappy
Pro tip:
Let sit 5–10 minutes at room temp before serving for the best texture balance.
Freezer (Long-Term Storage)
- Freeze up to 2 months
- Wrap tightly (plastic wrap + airtight container)
How to freeze properly:
- Slice first → easier portioning later
- Place parchment between layers to prevent sticking
To thaw:
- Overnight in fridge OR
- 30–45 minutes at room temperature
Make Ahead Strategy (Highly Recommended)
These brownies are even better the next day.
- Make 1 day in advance → flavors deepen, layers fully set
- Perfect for:
- Holidays
- Parties
- Meal prep desserts
If making ahead:
- Chill overnight
- Slice right before serving for clean edges
Serving After Storage (Important Detail)
- From fridge → let sit briefly for creamier texture
- From freezer → thaw fully before serving
- Avoid microwaving → melts layers unevenly
Quick Storage Summary
- Room temp: 1 day
- Fridge: 5 days (best)
- Freezer: 2 months
Right after chilling, the chocolate layer can feel slightly firm — but after a few minutes at room temperature, everything softens just enough to create that perfect melt-in-your-mouth bite.
Variations
Once you master the base, this recipe becomes incredibly versatile.
No-Bake Shortcut Version
Use a no-bake brownie base or cookie crust for a faster assembly.
Dark Chocolate Buckeye Brownies
Use dark chocolate for the topping to balance the sweetness and add depth.
Salted Buckeye Brownies
Finish with flaky sea salt → enhances both chocolate and peanut butter flavors instantly.
Crunchy Peanut Butter Version
Swap creamy for crunchy peanut butter for added texture contrast.
Espresso Chocolate Buckeye Brownies
Add 1/2 teaspoon espresso powder to the chocolate layer → intensifies chocolate flavor.
Reese’s-Inspired Version
Mix chopped peanut butter cups into the brownie base for an extra indulgent twist.
Swirled Buckeye Brownies
Lightly swirl some peanut butter into the brownie batter before baking for a marbled effect.
Mini Buckeye Brownie Bites
Bake in a mini muffin pan → perfect for parties and portion control.
FAQ
Can I use boxed brownie mix?
Yes — works perfectly for a quicker version.
Why is my peanut butter layer too soft?
Add more powdered sugar.
Can I skip chilling?
You can, but slicing will be messy.
Do these need to be refrigerated?
Yes, for best structure and freshness.
Can I make them gluten-free?
Yes — use a GF flour blend for the brownies.
You Might Also Love
If you’re drawn to rich, layered, deeply satisfying desserts like these Buckeye Brownies, here are a few more recipes that deliver that same indulgent, cozy energy — each with its own texture and flavor twist:
- Chocolate Mousse
Light, airy, and silky smooth — a spoonable chocolate dessert that melts instantly and feels effortlessly elegant. - Peanut Butter Cookies
Soft, buttery, and packed with that warm peanut butter flavor — simple, nostalgic, and always comforting. - Chocolate Fudge
Dense, creamy, and intensely chocolatey — closer to candy than cake, with that melt-in-your-mouth richness. - Oreo Pie
Cool, creamy, and no-bake — with a cookies-and-cream texture that feels both playful and indulgent.
Each of these brings a different kind of chocolate or peanut butter experience — from light and airy to dense and decadent — but they all share that same rich, comforting dessert feeling that’s easy to crave and even easier to love.
Final Thoughts
These are the kind of brownies that don’t just taste good — they feel satisfying.
There’s something about the clean layers, the contrast of textures, and that classic chocolate + peanut butter combination that makes them timeless.
Simple to make. Hard to forget.

Buckeye Brownies
Rich, fudgy Buckeye Brownies layered with a creamy peanut butter filling and a smooth chocolate topping. This chocolate peanut butter dessert is indulgent, easy to make, and perfect for slicing into clean, bakery-style bars.
Ingredients
Brownie layer
- 1 box brownie mix (for a 9x13-inch pan)
- Ingredients listed on the box (usually eggs, oil, and water)
Peanut butter layer
- 1 cup creamy peanut butter
- 1/2 cup unsalted butter, softened
- 2 cups powdered sugar
- 1 teaspoon vanilla extract
Chocolate topping
- 1 1/2 cups semisweet chocolate chips
- 1/4 cup creamy peanut butter
Instructions
- Bake brownies as directed on the box in a 9x13" pan. Cool completely.
- Mix peanut butter, butter, powdered sugar, and vanilla until smooth. Spread over brownies.
- Melt chocolate chips + peanut butter (microwave in 30-sec bursts). Pour over top.
- Chill 1 hour, then slice & enjoy!
Notes
1. Let brownies cool completely before adding peanut butter.
2. Slice chilled chocolate topping with a hot knife (wipe between cuts for clean edges).
3. Store in a sealed container in the fridge for up to 5 days.
Nutrition Information:
Yield: 24 brownies Serving Size: 1 brownieAmount Per Serving: Calories: 290Total Fat: 17gCarbohydrates: 32gSugar: 24gProtein: 4g
Nutrition information is estimated and may vary based on ingredients and portion sizes.
12 Sweet Favourites — Yours, Free 🍰
Tiramisù, no-bake cheesecake, the perfect chocolate chip cookie & 9 more reader-loved desserts — gathered into one beautiful free recipe book. From my kitchen to yours.
No spam, just sweet things. Unsubscribe anytime.