Peppermint Bark
🎁 FREE E-BOOK: 12 Sweet Favorites — reader-loved desserts in one beautiful recipe book.
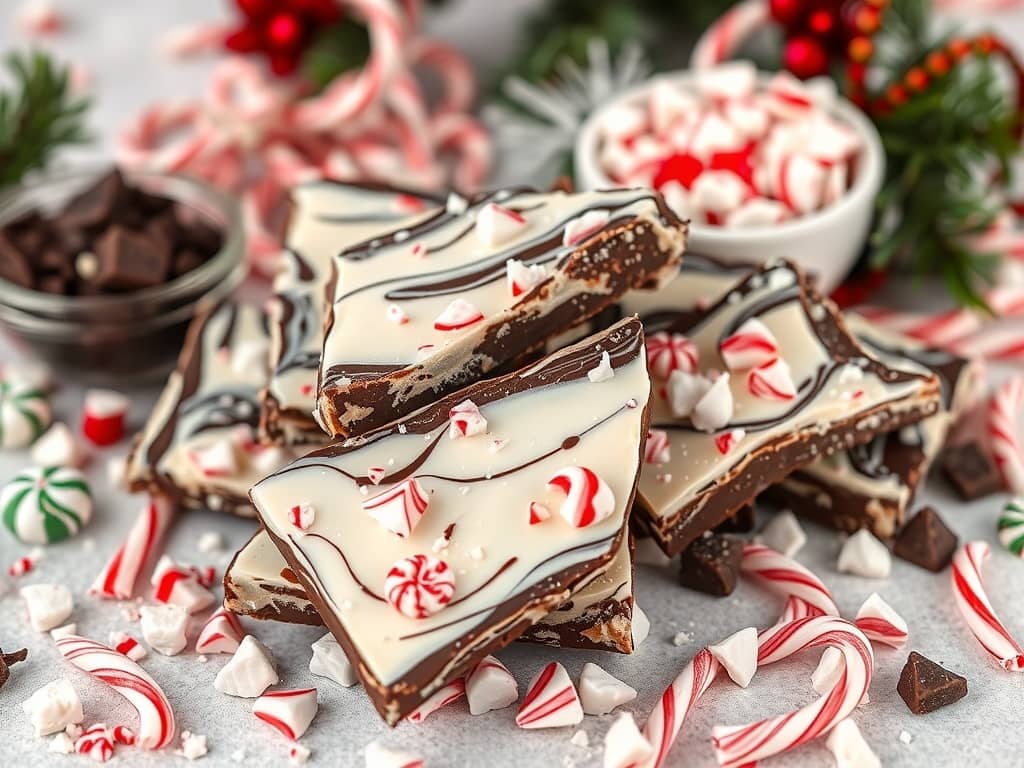
Let’s be real. Peppermint bark isn’t just another holiday candy. It’s that magical combination of chocolate and peppermint that makes you feel festive in about two bites. I still remember the first time I made it at home—FYI, my kitchen looked like a chocolate war zone—but the end result? Totally worth it. Seriously, if you’ve ever wondered how to make peppermint bark that’s both pretty and delicious, you’re in the right place.
What Makes Peppermint Bark So Irresistible
The Perfect Chocolate-Peppermint Combo
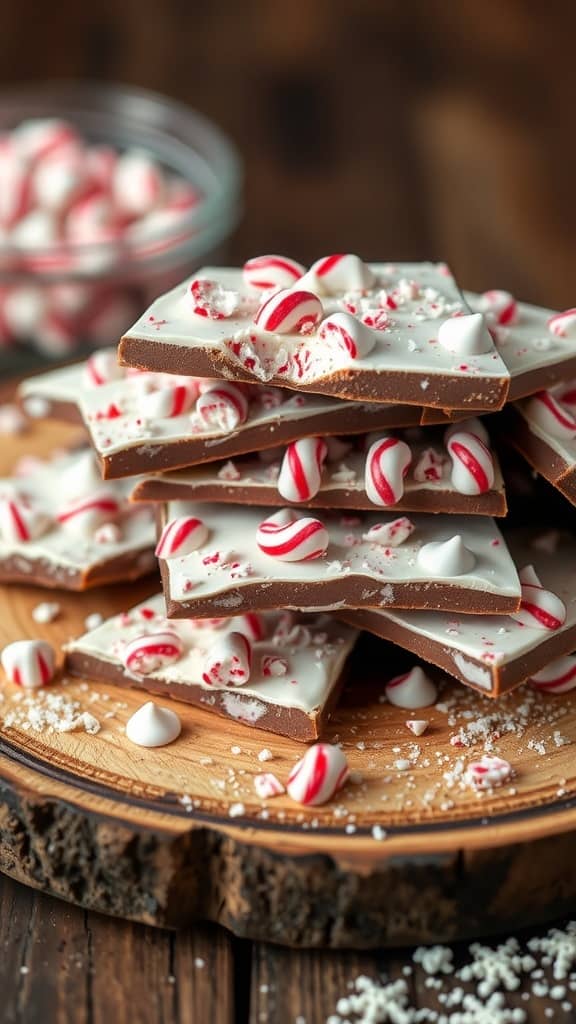
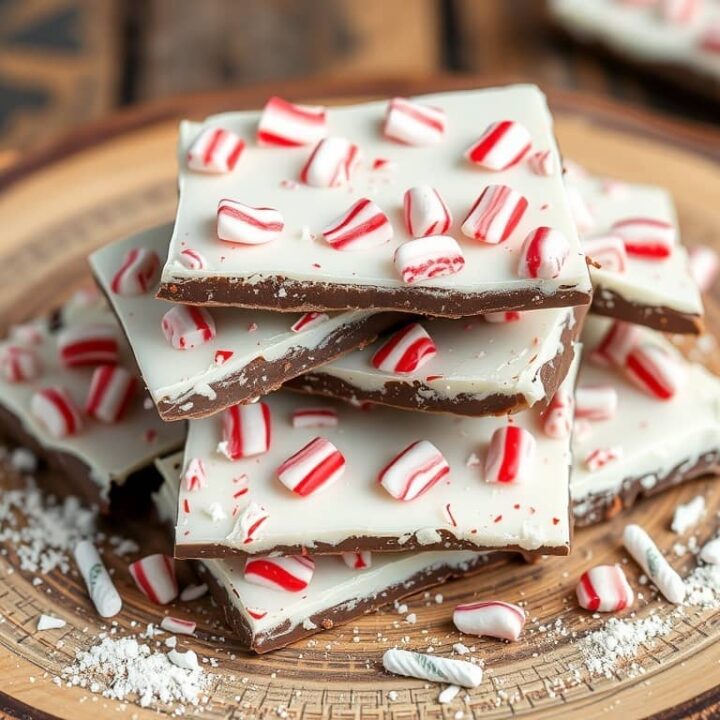
There’s a reason peppermint bark flies off the shelves every December. It’s sweet, minty, and crunchy, all in one bite. The contrast between creamy chocolate and crunchy candy cane pieces hits all the right taste notes. Honestly, you can’t help but smile when you take that first bite.
A Festive Treat for Everyone
Whether you’re gifting it, adding it to a cookie plate, or just eating it straight from the tray (don’t pretend you won’t), peppermint bark screams holiday cheer. Plus, it’s super simple to customize. Want dark chocolate on top instead of white? Go for it. Love extra peppermint crunch? Throw in more candy canes.

Prep Time: 15 minutes
Chill Time: 30–45 minutes
Servings: About 12-15 pieces
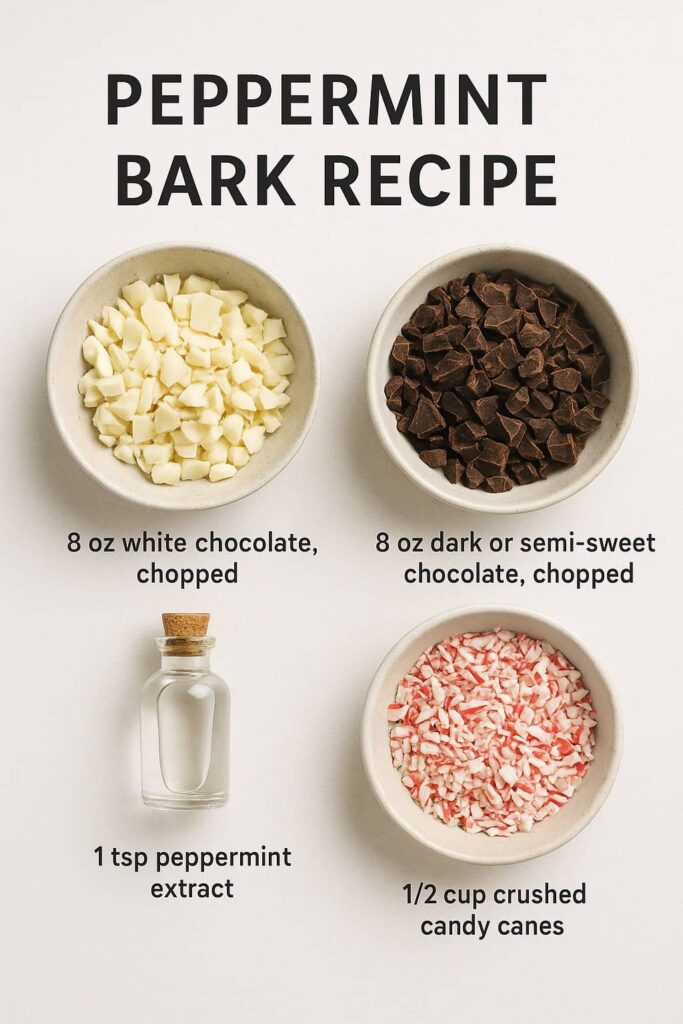
Ingredients You’ll Need
For a standard batch, you’ll need:
- 8 oz white chocolate, chopped
- 8 oz dark or semi-sweet chocolate, chopped
- 1 tsp peppermint extract
- 1/2 cup crushed candy canes (or more, if you’re feeling bold)
Kitchen tools:
- Baking sheet
- Parchment paper
- Heatproof bowls
- Microwave or double boiler
- Spatula
How to Make Peppermint Bark
Okay, let’s cut the fluff. Making peppermint bark at home is easier than you think. You don’t need fancy equipment or secret ingredients. Here’s the lowdown.
Step-By-Step Instructions
- Prep Your Pan: Line a baking sheet with parchment paper. This makes cleanup a breeze.
- Melt the Dark Chocolate: Use a microwave in 30-second bursts or a double boiler. Stir frequently to avoid burning. Spread it evenly on the prepared baking sheet.
- Melt the White Chocolate: Melt using the same method. Add peppermint extract once smooth. Carefully pour it over the dark chocolate layer. You can swirl it slightly with a spatula for a marbled effect.
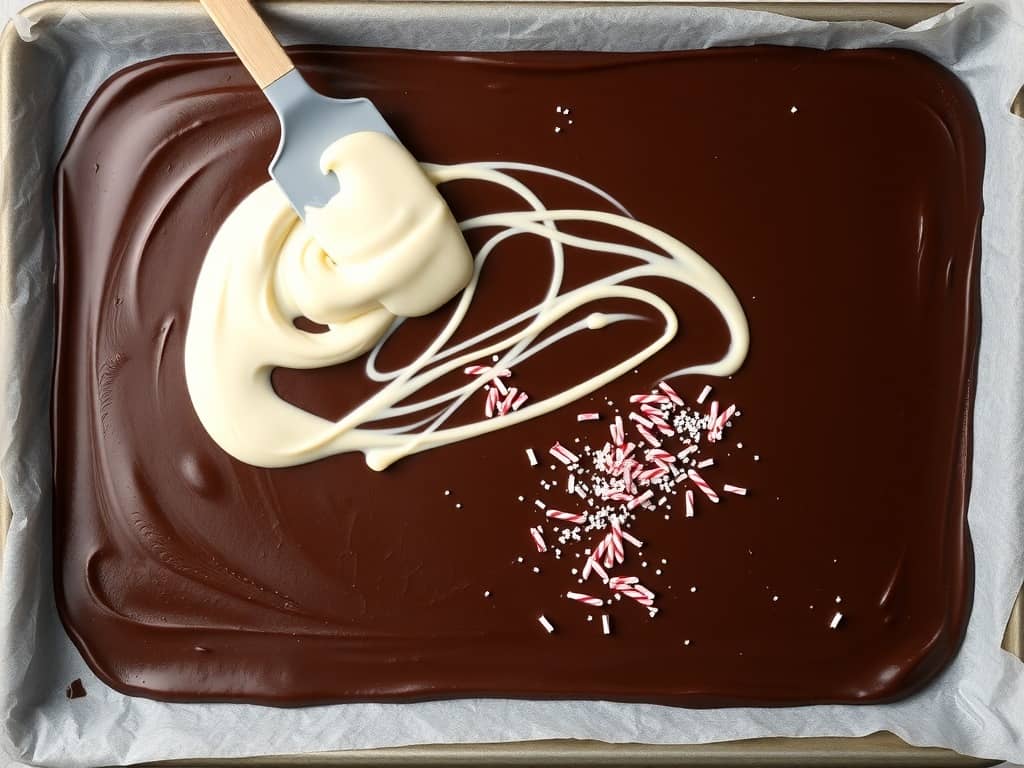
- Add Candy Canes: Sprinkle crushed candy canes evenly over the top while the chocolate is still soft. Press lightly so they stick.
- Chill: Refrigerate for about 30-45 minutes until firm.
- Break into Pieces: Once set, break into irregular pieces and enjoy!
Quick Tips to Make It Extra Perfect
- Use high-quality chocolate. Trust me, it makes a huge difference.
- Don’t skip chilling. Otherwise, you’ll have a chocolate mess instead of crisp bark.
- Crush candy canes by hand. Avoid a blender unless you want peppermint dust everywhere—been there, done that :/
Variations on Classic Peppermint Bark
Why stick to the original when you can get creative? Here are a few of my favorites:
- Dark Chocolate Lover’s Bark: Swap the white chocolate top for dark chocolate for a richer flavor.
- Nutty Peppermint Bark: Sprinkle chopped almonds or pistachios on top for added crunch.
- Mini Peppermint Bark Cups: Use muffin tins lined with paper for single-serving bark treats.
Can You Freeze Peppermint Bark?
Absolutely. Wrap the pieces in parchment, then in an airtight container or freezer bag. It keeps for up to 3 months, which is perfect if you like to prep holiday treats ahead of time.
Fun Facts About Peppermint Bark
Ever wondered why peppermint bark became a holiday classic? Here’s the scoop:
- It was popularized in the 1960s by a big chocolate company, but home cooks like us made it a DIY tradition.
- The crunchy candy cane topping isn’t just for looks. It gives a satisfying texture and a pop of festive color.
- Peppermint extract is your friend. A tiny bit goes a long way in making the chocolate taste holiday-ready.
Nutritional Info & Serving Size
Yes, I said it—you can actually know what you’re eating. Here’s a rough breakdown per serving (about 2 pieces, 1 oz total):
- Calories: 150
- Fat: 9 g
- Sugar: 16 g
- Protein: 1 g
Not bad for a festive treat, right? Perfect for holiday baking or sneaky midnight snacks.
Why Homemade Peppermint Bark Beats Store-Bought
Honestly, nothing tastes like homemade. Here’s why I ditch the store versions:
- Control your ingredients: No mystery oils or artificial flavoring.
- Customizable sweetness: Love extra peppermint or less sugar? Done.
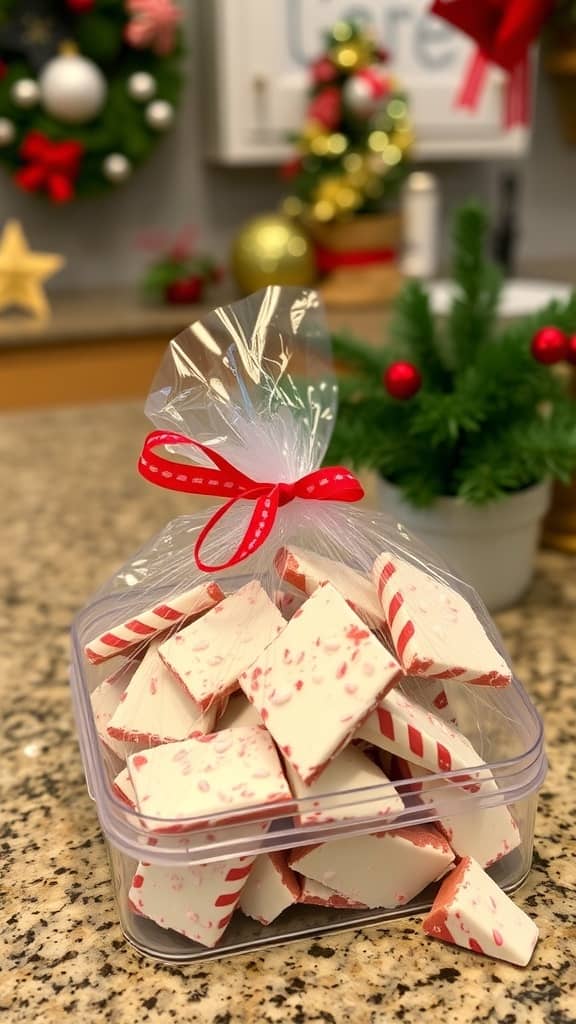
- Makes an awesome gift: Homemade bark wrapped in cellophane or a cute tin? Total crowd-pleaser.
Plus, there’s the pride factor. You made this. You are basically a holiday hero.
Final Thoughts
Making peppermint bark is easier than most people think. A little chocolate, some candy canes, and a touch of peppermint extract go a long way. It’s festive, delicious, and fun to make, whether for yourself or as a gift.
So, next time you’re in the mood for a holiday baking adventure, skip the store-bought stuff. Grab some chocolate, crush those candy canes, and make your kitchen smell like Christmas heaven.
And hey, once you try it, drop a comment below. Did you swirl it like a pro or go full chaos mode like me? I wanna hear all about your peppermint bark experience 🙂
Peppermint Bark
Crispy, creamy, and oh-so-minty, this peppermint bark delivers layers of smooth chocolate and crunchy candy cane that melt in your mouth and vanish way too fast.
Ingredients
- 8 oz white chocolate, chopped
- 8 oz dark or semi-sweet chocolate, chopped
- 1 tsp peppermint extract
- 1/2 cup crushed candy canes (or more, if you’re feeling bold)
Instructions
- Line a baking sheet with parchment paper.
- Melt dark chocolate and spread evenly on the sheet.
- Melt white chocolate, stir in peppermint extract, and pour over dark chocolate. Swirl gently.
- Sprinkle crushed candy canes on top and press lightly.
- Chill for 30–45 minutes until firm.
- Break into pieces and enjoy!
Nutrition Information:
Yield: 7 Serving Size: 2Amount Per Serving: Calories: 150Total Fat: 9gSugar: 16gProtein: 1g
12 Sweet Favourites — Yours, Free 🍰
Tiramisù, no-bake cheesecake, the perfect chocolate chip cookie & 9 more reader-loved desserts — gathered into one beautiful free recipe book. From my kitchen to yours.
No spam, just sweet things. Unsubscribe anytime.