Pumpkin Bread Recipe (Easy, Spiced & Moist Every Time)
🎁 FREE E-BOOK: 12 Sweet Favorites — reader-loved desserts in one beautiful recipe book.
This pumpkin bread recipe makes a tender, warmly spiced loaf with a moist orange-brown crumb and a gently split top. Cinnamon, nutmeg and a little clove bring depth to the pumpkin, while a plain, golden-brown crust keeps each slice simple.

A slice of pumpkin bread suits the quiet part of a morning: a small plate, something warm to drink and a few minutes before the day gathers speed. It is equally at home cut into generous slices for sharing, with no frosting to spread or layers to assemble.
Keep this pumpkin bread recipe for the days when you want one straightforward loaf and clear cues along the way. Measure the pumpkin carefully, check the deepest part of the center and leave time for the loaf to cool before cutting those first neat slices.
Pumpkin Bread at a Glance
This pumpkin bread recipe makes one plain, oil-based quick bread, baked in a 9 x 5-inch metal loaf pan and cut into 10 slices. The hands-on preparation is short, but the cooling time matters when planning when to serve it.
| Detail | What to plan for |
|---|---|
| Method | Hand-mixed pumpkin quick bread; baked in one loaf pan, with no kneading or rising time |
| Active preparation | About 10 minutes |
| Baking | About 55–65 minutes; begin checking at 50 minutes |
| Cooling | About 2 hours total: 10 minutes in the pan, then about 1 hour 50 minutes on a rack; longer if the center is still warm |
| Total time | About 3 hours 10 minutes, using a 60-minute bake and including cooling |
| Yield | 1 loaf, 10 slices |
| Pan | Light-colored metal, 9 x 5 x 2 1/2 inches (about 23 x 13 x 6 cm) |
| Oven | 350°F (175°C), conventional oven, center rack |
| Difficulty | Straightforward hand mixing; careful measuring and checking the deep center are the key skills |
| Flavor and texture | Sweet pumpkin with cinnamon, nutmeg and cloves; a moist, tender, sliceable crumb and softly browned crust |
| Make-ahead and chilling | Bake one day ahead, cool fully and wrap airtight; no chilling required and no overnight batter rest |
Why This Pumpkin Bread Stays Tender
The aim of this pumpkin bread recipe is a loaf that feels tender when you bite into it and still holds together when you lift a slice. That balance comes from keeping the pumpkin, fat and supporting ingredients in proportion, then treating the center and cooling time as part of the finished result.
- Pumpkin moisture stays in proportion. This pumpkin bread recipe pairs 1 cup (227 g) of puree with 180 g flour and two eggs. Emptying the rest of a can into the bowl would add moisture without the same support. Keeping the specified amount gives the crumb a clearer path to a moist, sliceable finish.
- Oil supports a soft, plain crumb. The neutral oil brings tenderness without introducing a buttery flavor that competes with the pumpkin and spices. Brief folding after the dry ingredients go in protects that soft texture from unnecessary mixing.
- The spice blend has a clear lead. Cinnamon leads the spice blend in this pumpkin bread recipe, followed by nutmeg and a smaller amount of cloves. This gives the loaf warm, layered flavor while keeping the strongest spice in a supporting role; increasing the cloves would change that balance quickly.
- The center decides when baking is complete. A browned crust can arrive before the deepest crumb is ready. The center checks in this pumpkin bread recipe, together with a foil tent when needed, help the middle finish baking without letting the crust become too dark.
- Cooling preserves the slice. A loaf that has baked through is still delicate while warm. Waiting until the center is at room temperature lets you cut with less compression, so the tender crumb can hold the shape you worked to create.
Why You’ll Love This Pumpkin Loaf
Choose this pumpkin bread recipe when you want a small baking project that you can mix by hand and serve without decorating. Most of the elapsed time belongs to baking and cooling, so it suits a morning bake for later in the day or a loaf made the day before you need it.
- A short hands-on session. This pumpkin bread recipe needs about 10 minutes of hands-on preparation to organize and mix the batter. There is no butter-softening wait, mixer setup or kneading, making it approachable when you are comfortable measuring ingredients but want a simple mixing method.
- One loaf to share or portion. With a yield of ten slices, this pumpkin bread recipe fits a small gathering or several separate servings. You can keep the loaf together for the table or freeze cooled slices when you will not use it all within the short room-temperature quality window.
- Ready for an ordinary plate. The pumpkin and spices carry the flavor without a frosting, filling or glaze. Serve a room-temperature slice with breakfast or a warm drink, without leaving yourself a decorating task before guests arrive.
- A useful day-ahead bake. Baking the previous day takes the long cooling wait out of your serving day. Once the loaf is fully cool and wrapped, you can leave the slicing until it is needed, with refrigeration or freezing preferable if the kitchen is warm or humid.
- Small portions for later. Individually wrapped freezer slices let you thaw only what you want. That makes this pumpkin bread recipe useful for both a shared loaf now and an occasional slice later, rather than requiring you to finish the entire batch at once.
The Science Behind a Tender Pumpkin Crumb
Pumpkin quantity, mixing and cooling each have a distinct role in this pumpkin bread recipe. Understanding those differences helps you keep the loaf tender without mistaking uncooked batter for moisture.
Moisture needs structure. Pumpkin puree contains both water and pumpkin solids, while oil contributes tenderness. Adding extra puree changes that balance without adding more flour or eggs to support it. For this pumpkin bread recipe, keep the puree at 1 cup (227 g), even if there is some left in the can. More puree is a formula change, not simply a way to intensify the pumpkin flavor; the wetter middle may need attention after the surface already looks baked.
Mixing changes the flour. Once flour is moistened, continued mixing develops more gluten and can make quick bread tougher, as explained in Utah State University’s quick-bread guidance. The brief folding stage in this pumpkin bread recipe ends when the dry flour disappears; a few small lumps are preferable to stirring for a perfectly smooth batter. Those small lumps are different from dry flour pockets: sweep the bottom of the bowl so the flour is incorporated without continuing to beat the whole mixture.
Cooling makes slicing gentler on the crumb. A warm loaf is more easily compressed by the knife. Letting it cool completely helps the slices hold their shape. Move it to a rack after the initial pan rest and loosen the paper so the sides can cool as well as the top. Cooling is part of this pumpkin bread recipe because it protects the baked crumb; it does not turn raw batter into cooked bread.
Ingredients for a Classic Pumpkin Loaf
This pumpkin bread recipe uses plain canned pumpkin, neutral oil and familiar baking staples. Measure the flour and pumpkin carefully, and use level spoonfuls for the baking soda, salt and spices.

Ingredient List
The quantities for this pumpkin bread recipe fill one 9 x 5-inch loaf pan. Use canned 100% pure pumpkin puree, and keep all 11 ingredients at the amounts below for the intended flavor and texture.
- 1 1/2 cups (180 g) all-purpose flour, spooned and leveled if not weighed
- 1 teaspoon (6 g) baking soda
- 1/2 teaspoon (3 g) fine table salt
- 1 teaspoon (about 2.5 g) ground cinnamon
- 1/2 teaspoon (about 1 g) ground nutmeg
- 1/4 teaspoon (about 0.5 g) ground cloves
- 1 cup (227 g) canned 100% pure pumpkin puree
- 1/2 cup (120 ml) neutral vegetable oil
- 2 large eggs (about 100 g without shells)
- 1 cup (200 g) granulated sugar
- 1 teaspoon (5 ml) pure vanilla extract
Choosing and Measuring the Pumpkin
Look for plain pumpkin puree rather than pumpkin pie filling, which may already contain sugar and spices. Measure 1 cup (227 g) for this pumpkin bread recipe instead of emptying the whole can into the bowl. Adding more pumpkin can leave the batter wetter and make the center harder to judge.
Homemade puree can vary considerably in thickness. Canned puree gives you the clearest starting point for this pumpkin bread recipe. Do not add water to loosen it or squeeze it dry before measuring. Spoon the puree into the measure and level it, or weigh it directly into the wet-ingredient bowl. Save any remainder separately instead of adjusting the batter to use it up.
Flour, Oil and Spice Notes
For this pumpkin bread recipe, weigh the flour at 180 g when possible. If using cups, spoon it into the measure and level the top rather than packing flour down. Extra flour can make the loaf firmer and drier than intended.
Use 120 ml of a neutral vegetable oil; the same volume of neutral canola oil also works here. Butter behaves differently and is not a straight swap in this pumpkin bread recipe. Measure the cloves lightly and accurately, since their flavor can quickly dominate the other spices.
This pumpkin bread recipe uses granulated sugar at the stated amount. Reducing it or replacing it with a liquid sweetener changes more than sweetness, so keep this first loaf to the listed formula. The two large eggs are about 100 g without their shells; their size matters when the rest of the recipe is measured for one pan.
The leavener in this pumpkin bread recipe is baking soda, not baking powder; measure a level teaspoon. Whisk out any soda lumps with the flour, salt and spices before they meet the wet mixture. Use fine table salt for the stated measure; coarse salt will not fill the spoon in the same way.
For a fruit loaf built around ripe bananas, try our Banana Bread Recipe. It gives you a separate starting point for banana flavor without changing the pumpkin mixture here.

The Pan and Tools for Pumpkin Bread
For this pumpkin bread recipe, the light-colored metal pan helps keep the baking instructions consistent, and the simple mixing tools make it easy to stop folding as soon as the flour disappears. Have the skewer and cooling rack ready before the loaf comes out of the oven.
- Loaf pan and lining: A light-colored metal 9 x 5 x 2 1/2-inch pan, parchment paper for the base and all sides, and foil if the top needs protection during baking. The parchment lining in this pumpkin bread recipe provides a way to lift the delicate loaf without turning it out.
- Mixing tools: A medium bowl for the dry ingredients, a large bowl for the wet ingredients, a whisk and a flexible spatula. The whisk distributes the dry ingredients; the spatula reaches the bottom during the final brief fold.
- Measuring tools: A kitchen scale, liquid measure and measuring spoons keep the flour, pumpkin, oil and small quantities in this pumpkin bread recipe accurate.
- Oven and center check: A conventional oven with a center rack, plus a thin skewer that can reach the deepest part of the loaf. A short toothpick that only samples the upper crumb is less useful for checking the center.
- Cooling, slicing and storage: A wire cooling rack, serrated knife, wrap and freezer bags; a microwave-safe plate and microwave are optional for gently reheating a slice.
Before You Mix the Pumpkin Batter
Before mixing this pumpkin bread recipe, make sure the oven, pan and cooling space are ready. The batter goes into the oven promptly after folding, so label checks and equipment changes are easier to handle now.
- Confirm the pumpkin and measures. Choose plain canned puree, set aside exactly 227 g, and weigh 180 g flour or spoon and level it. Have the small measures ready too, particularly the baking soda and cloves, where a heaped spoon can noticeably change the loaf.
- Check and line the pan. Use the stated light-colored metal pan and cover the base and all sides with parchment, leaving enough overhang to lift the loaf. A smaller, glass or ceramic pan may need a different baking schedule; the timing in this pumpkin bread recipe is for the specified pan.
- Get the oven and checking tools ready. Preheat to 350°F (175°C) with the rack in the center. Set out a thin skewer and foil so you can check the middle and protect the top without searching for them while the oven is open.
- Plan for the cooling space. Have a rack ready and allow about two hours after baking before serving, with longer if the center remains warm. If that does not fit your day, make this pumpkin bread recipe the day before rather than planning to cut the loaf straight from the oven.
What to Expect from This Pumpkin Loaf
In this pumpkin bread recipe, look for thick batter, a gently domed loaf and a moist crumb that supports a slice once cool. The appearance changes at each stage, so a smooth batter or a dramatic high crown is not the goal.
| Stage | Expected appearance and feel | How to interpret it |
|---|---|---|
| After folding | Thick orange batter that can be scraped and spread into the pan; a few small lumps may remain. | Stop once there is no dry flour, including at the bottom of the bowl. Keep the fill below two-thirds of the pan height. |
| After baking | A browned top, modest dome and natural split; the center is set. | The split is a normal visual feature, but its appearance alone cannot confirm doneness. Use the deep-center checks below. |
| After complete cooling | An orange-brown crumb with small pores, a tender bite and slices that hold together. | Moist crumbs are expected. A glossy paste-like middle or wet batter is not the intended texture, and warmth can make even a baked slice easier to compress. |
How to Make Pumpkin Bread
To make this pumpkin bread recipe, whisk the dry and wet ingredients separately, then bring them together with a brief fold. Once the pan is filled, bake promptly and use the center checks to decide when the loaf is ready. Finish with a full cooling period before slicing.
1. Prepare the oven and pan
Preheat a conventional oven to 350°F (175°C), with a rack in the center. Use one light-colored metal 9 x 5 x 2 1/2-inch loaf pan (about 23 x 13 x 6 cm). Line the base and long sides with a parchment sling, then line the short ends with separate pieces so no extra pan-greasing ingredient is needed. Keep paper away from heating elements.
What you should see: The empty pan is fully lined and the oven has finished preheating.

2. Whisk the dry ingredients
Whisk the flour, baking soda, salt, cinnamon, nutmeg and cloves in a medium bowl. Break up any visible soda or spice lumps.
What you should see: An even blend with no concentrated white soda pockets.

3. Combine the wet ingredients
In a large bowl, whisk the pumpkin, oil, eggs, sugar and vanilla until uniform. Scrape the sides and bottom. The sugar need not fully dissolve.
What you should see: A cohesive orange mixture with no egg-white strands or separate oil pools.

4. Fold and fill
Add the dry mixture to the wet mixture. Fold with a flexible spatula, scraping the bottom, just until no dry flour remains. Scrape all the batter into the prepared pan and level it gently. Bake promptly; do not rest the mixed batter.

What you should see: Thick, cohesive batter; a few small lumps are acceptable. It should sit well below the rim. If it exceeds two-thirds of the pan depth, check the pan dimensions and quantities before baking.

5. Bake and check the center
Bake for about 55-65 minutes, beginning checks at 50 minutes. If the top is sufficiently brown while the center is still wet, loosely tent with foil. Check the deepest center in two nearby places using a thin skewer. It should emerge clean or with a few moist crumbs, without glossy wet batter. Also check just beneath the central split. If wet batter remains, return to the oven and check in 5-minute increments.
What you should see: A set, gently domed top with a natural split, stable center and no liquid batter on the skewer. Brown crust alone is not proof of doneness.

6. Cool and slice
Cool in the pan on a rack for 10 minutes. Lift out carefully using the parchment sling, loosen the paper from the sides, and finish cooling on the rack until room temperature and no longer warm at the center. Allow about 2 hours total cooling including the pan stage; room conditions may extend it. Cut into 10 slices with a serrated knife.
What you should see: The loaf supports a clean cut without compressing into a gummy line. Do not wrap while it is still warm.

How to Tell When Pumpkin Bread Is Done
For this pumpkin bread recipe, the deepest center tells you more than the color of the crust. A loaf can look browned on top while wet batter remains beneath the split, so check more than one spot before taking it out.
- Check deep enough: Guide a thin skewer into the deepest center, then test a nearby position and just beneath the central split.
- Look at what comes out: A clean skewer or a few moist crumbs is the endpoint for this pumpkin bread recipe; shiny, wet batter means the loaf needs more time.
- Protect the top if needed: If it is already brown enough, loosely tent with foil while the center finishes baking.
- Use short follow-up checks: When wet batter remains, return the loaf to the oven and check again in 5-minute increments.
When judging this pumpkin bread recipe, do not rely on a single dry-looking crack or a dark edge. The middle should be set and stable as well. Leave the loaf to cool only after the center checks show no wet batter.
Moist Crumb, Wet Center or Gummy Band?
A moist slice, a wet center and a compressed lower band mean different things when evaluating this pumpkin bread recipe. Look at the cooled cut surface before deciding what needs attention, and avoid assuming that every dense patch has the same cause.
I used to rush the first slice of a quick bread while the middle was still warm. Letting the loaf cool completely became part of the recipe for me, not just time spent waiting.
| What you notice | What it tells you | What to do |
|---|---|---|
| Soft crumb with small pores that holds a slice | This is the moist, sliceable texture to aim for once the loaf has cooled. | Cut with a gentle sawing motion and wrap only when fully cool. |
| Glossy paste or wet batter in the center | The center has not baked through; this is different from a few moist crumbs on a skewer. | During baking, continue in short intervals and protect a browned top with foil. Cooling is not a remedy for raw batter. |
| A dense or compressed band near the base | Appearance alone cannot distinguish every measuring, mixing, baking or slicing problem. | Before repeating this pumpkin bread recipe, check the flour and pumpkin amounts; fold briefly, verify the baked center and cool fully before cutting. |

Small Details for Better Pumpkin Bread
A few handling choices help you get an even batter and intact slices from this pumpkin bread recipe. Focus on where the spatula and knife travel, rather than adding extra mixing or pressing the loaf into shape.
- Sweep the bottom of the bowl. When folding this pumpkin bread recipe, dry flour can sit beneath the wet mixture even when the surface looks blended. Turn the spatula through the bottom and up the side so you can find those pockets without stirring the whole bowl longer than needed.
- Level with a light touch. Once the batter is in the pan, gently smooth the surface. Repeatedly stirring it in the pan adds handling after the mixing is already complete.
- Choose the first cut for the occasion. When making this pumpkin bread recipe to share, leave most of the loaf whole and cut only the first few servings. For freezer portions, slice the fully cooled loaf before wrapping so each serving can thaw separately.
- Let the knife do the cutting. On the cooled loaf, use a serrated knife with a gentle sawing motion. Pressing straight down can compact the soft crumb even when it is baked through.
Pumpkin Bread Problems and Practical Fixes
If this pumpkin bread recipe does not turn out as expected, work back through the ingredient amounts, mixing and center checks. Several problems can look similar, so treat these as things to investigate rather than a diagnosis from appearance alone.
| Symptom | Possible cause | Prevention | What to do now |
|---|---|---|---|
| Top is dark while the center is wet | The surface has browned before heat has finished baking the middle. | Follow this pumpkin bread recipe with the stated light-metal pan and judge the center separately from the crust. | Tent loosely with foil and continue baking in 5-minute increments until no wet batter remains. |
| Dense band or compressed slices | Excess pumpkin, extra mixing, incomplete baking or cutting while warm may contribute. | Weigh the main ingredients, fold briefly and allow complete cooling. | If the loaf is fully baked but still warm, let it cool before cutting more. Cooling will not repair a raw center. |
| Loaf sinks as it cools | The center may not have set fully; changed quantities can also affect structure. | Keep the amounts in this pumpkin bread recipe and check the deep center in more than one place. | Inspect the center rather than hiding the dip. Do not treat raw batter as moist bread or assume a collapsed loaf can be restored. |
| Crumb is dry or firm | Packed flour or baking beyond the center’s doneness can reduce tenderness. | For this pumpkin bread recipe, use 180 g flour and begin checking at 50 minutes. | Wrap the completely cooled loaf airtight; prolonged reheating will not restore lost moisture. |
| Strong spice or uneven flavor | Heaped spice measures or lumps of soda may leave concentrated patches. | Use level spoons and whisk the dry mixture evenly. | The mixed-in quantities cannot be removed from the baked loaf; correct measuring and dry mixing next time. |
Beautiful Ways to Serve Pumpkin Bread
This plain pumpkin bread recipe needs very little finishing to look inviting. Choose a simple slice for a quiet break, a board when sharing or a gently warmed portion when you want a softer, fragrant bite.
A Simple Slice on a Small Plate
Serve one room-temperature slice on a small plate with the cut crumb facing outward. The plain surface lets the pumpkin color and fine pores show, and the spices carry the bite without a topping.
A small plate is the simplest way to serve this pumpkin bread recipe with coffee or tea and no extra preparation. Cut only the portion you need, then wrap the remaining cooled loaf again. Keeping the presentation plain also makes the pumpkin color and the contrast between crust and crumb easy to appreciate.

A Loaf Board for Sharing
Set the loaf on a board with a few slices cut and slightly separated at one end. Leave the rest together until more portions are wanted, and use the serrated knife to keep the slices neat. This arrangement makes it easy to see both the naturally split top and the tender center.
Make this pumpkin bread recipe for a relaxed breakfast or small gathering, then use the board for easy self-service. Bring the loaf to the table after it has cooled fully, and leave room beside the sliced end for the knife. Slice more as needed rather than separating the entire loaf in advance.

If individual portions suit your plans better, use our Pumpkin Muffins recipe. It gives you a muffin method and baking time without guessing how to convert this pumpkin bread recipe.
A Gently Warmed Slice
For a softer bite, gently rewarm a slice after the loaf has first baked and cooled completely. Serve it plain while just warm, following the short reheating intervals below so the edges do not become dry.
If you made this pumpkin bread recipe ahead and froze individual portions, gentle warming makes a thawed slice especially fragrant. Warm only the slice you intend to eat, then move it to a small plate. Aim for just warm throughout rather than steaming hot, which makes the tender crumb more fragile to handle.

How to Store, Freeze and Reheat Pumpkin Bread
For this pumpkin bread recipe, cooling the loaf completely, including the center, comes before wrapping. Wrapping while it is warm traps moisture against the bread; once wrapped, expect the crust to soften rather than stay exactly as it was just after baking.
Cooling and Wrapping the Loaf
After the initial 10 minutes in the pan, lift the loaf onto a wire rack and loosen the parchment from the sides. Wait until it reaches room temperature and no warmth remains at the center before wrapping it airtight. If you made this pumpkin bread recipe to share, keep the loaf mostly whole; otherwise, wrap individual cooled slices for easier portions.
Keeping Pumpkin Bread at Room Temperature
For this pumpkin bread recipe, the room-temperature quality target is two days in a cool, dry room with the loaf wrapped airtight. If your kitchen is warm or humid, refrigerate instead of leaving it on the counter, or freeze it promptly. Discard moldy or spoiled bread rather than trimming away the affected part.
Freezing and Thawing Pumpkin Bread
Wrap the fully cooled loaf or individual slices, then put them in a freezer bag and press out excess air. Label the bag and aim to use the bread within one month for best quality. Freezing this pumpkin bread recipe in individual slices lets you thaw only the portion you need.

Thaw slices while still wrapped at room temperature until soft throughout, generally around an hour depending on thickness. A whole loaf takes longer. Let the center thaw before deciding whether a slice needs a little warming.
Reheating a Slice and Baking Ahead
To reheat a thawed slice, place it on a microwave-safe plate and warm at about 50% power in 10-second intervals until just warm. Stop before the edges become hot and dry. This is for serving baked bread, not for rescuing an uncooked center.
For make-ahead serving, bake this pumpkin bread recipe one day before you need it, cool the loaf fully and wrap it airtight. Mix the batter shortly before baking rather than holding the mixed batter overnight.
Pumpkin Bread Questions, Answered
For this pumpkin bread recipe, use plain pumpkin, judge the deep center and plan to cool the loaf before slicing. Those three choices help with the texture questions below; storage depends on whether the bread will stay in a cool room or be saved for later.
Why is my pumpkin bread gummy at the bottom?
A gummy lower band can follow extra moisture, too much mixing, incomplete baking or compression from cutting while warm. In this pumpkin bread recipe, the band alone does not identify the cause. Use 227 g pumpkin and 180 g flour, fold only until combined, check the deep center and let the loaf cool fully before slicing.
Why did my pumpkin bread sink as it cooled?
An insufficiently set center is one possible reason, but changed ingredient amounts can also affect the loaf’s structure. For this pumpkin bread recipe, a browned top does not confirm that the middle is ready. Check two deep-center spots and beneath the split, and keep baking if the skewer carries wet batter.
How can I tell whether the center is baked?
Insert a thin skewer into the deepest center and a nearby spot, including just beneath the split. The skewer check for this pumpkin bread recipe should leave a few moist crumbs or come out clean, without shiny batter. If the top is already brown enough, cover it loosely with foil while the center finishes.
Can I use pumpkin pie filling instead of pumpkin puree?
Use plain canned pumpkin puree for this pumpkin bread recipe. Pumpkin pie filling already contains other ingredients, often including sweetener and spices, so it would change the loaf’s balance. Measure 1 cup (227 g) of plain puree rather than using an entire can.
Can I freeze pumpkin bread?
Yes. Once completely cool, wrap the loaf or individual slices and place them in a freezer bag. Aim to use them within one month for best quality, then thaw while wrapped. Freezing this pumpkin bread recipe in separate slices lets you take out only what you need.
Does pumpkin bread need refrigeration, and how long does it keep?
In a cool, dry room, keep the fully cooled loaf airtight and aim to eat it within two days for best quality. In a warm or humid kitchen, refrigerate or freeze it promptly. The two-day guide for this pumpkin bread recipe is a quality target, not a guarantee of safety regardless of conditions.
Your Next Bake After Pumpkin Bread
After this pumpkin bread recipe, stay with pumpkin in a different form, move toward another fruit-and-spice cake or choose individual breakfast portions. Each option gives you its own ingredient amounts and method.
More Ways to Bake with Pumpkin
Explore pumpkin in soft cookies, oat cookies, a rolled cake and cheesecake bars.
- Soft Pumpkin Cookies with Vanilla Cream Cheese Frosting: For soft pumpkin cookies finished with vanilla cream cheese frosting.
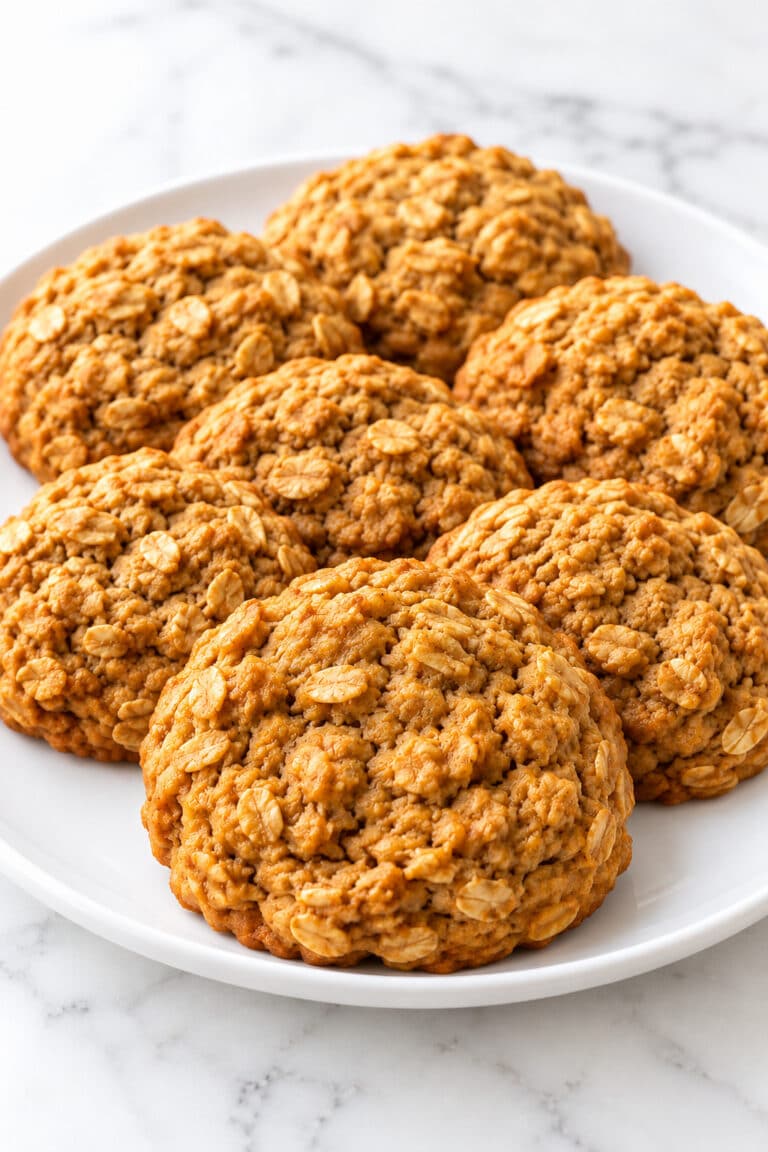
- Pumpkin Oatmeal Cookies: For an oatmeal cookie version of pumpkin baking.
- Pumpkin Roll Recipe: For a filled pumpkin cake rolled into a spiral.
- Pumpkin Cheesecake Bars: For pumpkin cheesecake in a sliceable bar format.
Keep Baking with Fruit and Spice
Choose another fruit bread or a warmly spiced cake for your next baking day.
- Chocolate Chip Banana Bread Recipe: For banana bread with chocolate chips.
- Healthy Chocolate Banana Bread: For a chocolate-forward banana loaf.
- Gingerbread Cake: For a gingerbread cake when warm spice is the main attraction.
- Apple Cake Recipe: For an apple cake as another fruit-based bake.
Plan Your Next Breakfast Bake
Move from sliced loaf to muffins or a more involved batch of pumpkin rolls.
- Cranberry Orange Muffins: For muffins pairing tart cranberries with orange.
- Pumpkin Chocolate Chip Muffins: For individual pumpkin bakes with chocolate chips.
- Pumpkin Cinnamon Rolls: For a pumpkin cinnamon roll project.
- Apple Muffins: For apple muffins in individual portions.
Why This Pumpkin Bread Belongs in Your Recipe Box
This pumpkin bread recipe is useful again when the next can of pumpkin is waiting in the cupboard. This one keeps the batch, cooling plan and portion choices straightforward enough to return to without turning an everyday bake into a large project.
- One-Loaf Scale: The single-pan batch makes this pumpkin bread recipe useful when you want a few slices rather than two full loaves.
- No Mixer Needed: The bowl-and-whisk method makes this a practical recipe to return to without setting up an appliance.
- Clear Center Checks: The center-check guide gives you a reference when your own oven needs a few more minutes.
- A Cooling Plan Included: This pumpkin bread recipe includes cooling in the total time so you can plan when the loaf will be ready to slice.
- Simple Make-Ahead Slices: Baking the loaf a day ahead leaves only slicing for the day you want to serve it.
- Freezer-Friendly Portions: Wrapping slices separately lets you save part of the loaf for another day.
A Pumpkin Loaf Worth Slowing Down For
This pumpkin bread recipe brings together the familiar warmth of cinnamon, nutmeg and cloves in a plain slice that needs little fuss at the table. Its appeal is the bread itself: a softly browned edge, a tender middle and enough structure to lift a slice without it falling apart.
It is an easy shape of baking to come back to when you want something to share or a few portions to put away for another day. A whole loaf on a board and a wrapped slice waiting in the freezer serve different moments equally well.
The smell may tempt you to cut into it straight away, but a little patience belongs with this kind of baking. Let the loaf settle, bring out a small plate and enjoy the first slice when the crumb is ready for it.

Pumpkin Bread
A tender pumpkin loaf with a moist, sliceable crumb and the warmth of cinnamon, nutmeg and cloves. Mixed by hand with canned pumpkin and neutral oil, it makes one plain loaf to enjoy at room temperature or gently warmed.
Ingredients
- 1 1/2 cups (180 g) all-purpose flour, spooned and leveled if not weighed
- 1 teaspoon (6 g) baking soda
- 1/2 teaspoon (3 g) fine table salt
- 1 teaspoon (about 2.5 g) ground cinnamon
- 1/2 teaspoon (about 1 g) ground nutmeg
- 1/4 teaspoon (about 0.5 g) ground cloves
- 1 cup (227 g) canned 100% pure pumpkin puree
- 1/2 cup (120 ml) neutral vegetable oil
- 2 large eggs (about 100 g without shells)
- 1 cup (200 g) granulated sugar
- 1 teaspoon (5 ml) pure vanilla extract
Instructions
Prepare the oven and pan. Preheat a conventional oven to 350°F (175°C), with a rack in the center. Use one light-colored metal 9 x 5 x 2 1/2-inch loaf pan (about 23 x 13 x 6 cm). Line the base and long sides with a parchment sling, then line the short ends with separate pieces so no extra pan-greasing ingredient is needed. Keep paper away from heating elements.
What you should see: The empty pan is fully lined and the oven has finished preheating.
Whisk the dry ingredients. Whisk the flour, baking soda, salt, cinnamon, nutmeg and cloves in a medium bowl. Break up any visible soda or spice lumps.
What you should see: An even blend with no concentrated white soda pockets.
Combine the wet ingredients. In a large bowl, whisk the pumpkin, oil, eggs, sugar and vanilla until uniform. Scrape the sides and bottom. The sugar need not fully dissolve.
What you should see: A cohesive orange mixture with no egg-white strands or separate oil pools.
Fold and fill. Add the dry mixture to the wet mixture. Fold with a flexible spatula, scraping the bottom, just until no dry flour remains. Scrape all the batter into the prepared pan and level it gently. Bake promptly; do not rest the mixed batter.
What you should see: Thick, cohesive batter; a few small lumps are acceptable. It should sit well below the rim. If it exceeds two-thirds of the pan depth, check the pan dimensions and quantities before baking.
Bake and check the center. Bake for about 55-65 minutes, beginning checks at 50 minutes. If the top is sufficiently brown while the center is still wet, loosely tent with foil. Check the deepest center in two nearby places using a thin skewer. It should emerge clean or with a few moist crumbs, without glossy wet batter. Also check just beneath the central split. If wet batter remains, return to the oven and check in 5-minute increments.
What you should see: A set, gently domed top with a natural split, stable center and no liquid batter on the skewer. Brown crust alone is not proof of doneness.
Cool and slice. Cool in the pan on a rack for 10 minutes. Lift out carefully using the parchment sling, loosen the paper from the sides, and finish cooling on the rack until room temperature and no longer warm at the center. Allow about 2 hours total cooling including the pan stage; room conditions may extend it. Cut into 10 slices with a serrated knife.
What you should see: The loaf supports a clean cut without compressing into a gummy line. Do not wrap while it is still warm.
Notes
- Pumpkin: Use 1 cup (227 g) plain canned pumpkin puree, not pumpkin pie filling. Do not empty a larger can into the batter.
- Flour and oil: Weigh the flour at 180 g or spoon and level the cup measure. Use 1/2 cup (120 ml) neutral vegetable oil; the same volume of neutral canola oil is suitable. Butter is not a direct replacement in this method.
- Pan and timing: Use the stated light-colored metal pan. The 60-minute cook time is a planning estimate; bake about 55-65 minutes and begin checking at 50 minutes. Keep the pan fill below two-thirds of its depth. Pan size, oven temperature and baking time do not change in proportion to ingredient quantities.
- Cooling: The 2-hour cooling time includes 10 minutes in the pan. Allow longer if the center remains warm, and cool completely before slicing or wrapping.
- Storage: Wrap the completely cooled loaf airtight. In a cool, dry room, aim to enjoy it within 2 days for best quality. In a warm or humid kitchen, refrigerate or freeze promptly. Discard moldy or spoiled bread rather than trimming it.
- Freezing: Wrap the fully cooled loaf or individual slices, place in a freezer bag and press out excess air. Use within 1 month for best quality. Thaw slices while wrapped until soft throughout, generally about 1 hour depending on thickness; a whole loaf takes longer.
- Reheating: Warm a thawed slice on a microwave-safe plate at about 50% power in 10-second intervals until just warm. This is for baked bread, not for rescuing an uncooked center.
- Make ahead: Bake 1 day before serving, cool fully and wrap airtight. Bake promptly after mixing; do not hold the mixed batter overnight.
- Nutrition values are approximate and vary with the ingredients and slice size.
Nutrition Information:
Yield: 10 Serving Size: 1 slice (1/10 of the loaf)Amount Per Serving: Calories: 266Total Fat: 12.4gSaturated Fat: 1.2gCholesterol: 37mgSodium: 297mgCarbohydrates: 36gFiber: 1.3gSugar: 20.9gProtein: 3.4g
Nutrition information is provided as an estimate only and may vary based on specific ingredients, brands, and portion sizes used. This information should not be considered medical or nutritional advice.
12 Sweet Favorites — Yours, Free 🍰
Tiramisù, no-bake cheesecake, the perfect chocolate chip cookie & 9 more reader-loved desserts — gathered into one beautiful free recipe book. From my kitchen to yours.
No spam, just sweet things. Unsubscribe anytime.