Red Velvet Brownies
🎁 FREE E-BOOK:12 Sweet Favorites — reader-loved desserts in one beautiful recipe book.
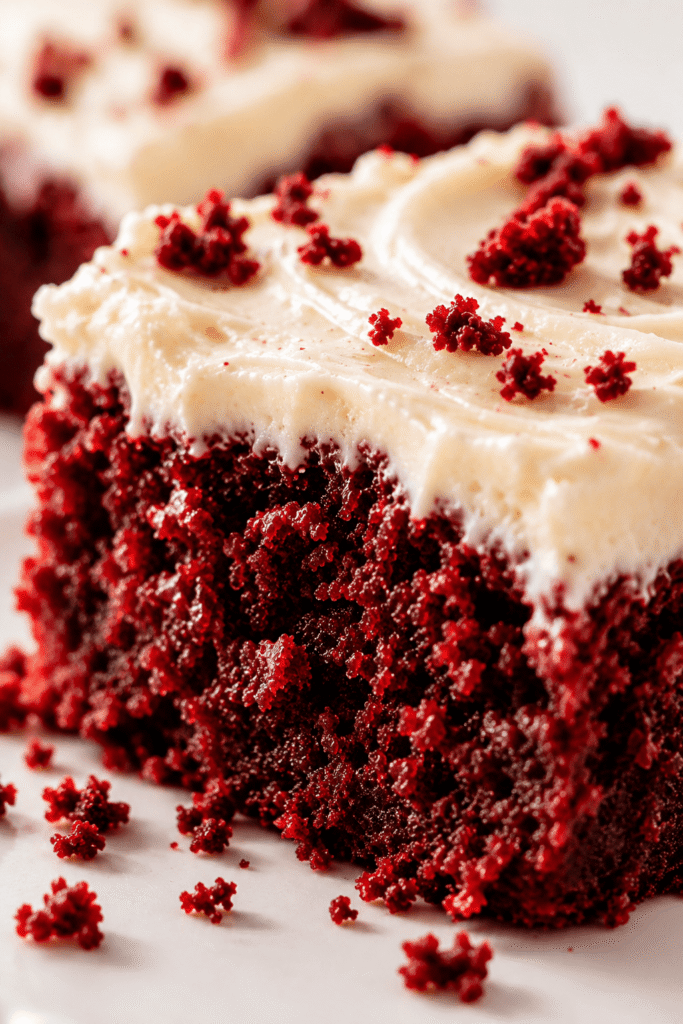
Red Velvet Brownies are a brownie-style dessert inspired by the flavor and color profile of classic red velvet cake. They usually combine butter, sugar, eggs, a small amount of cocoa powder, vanilla, and red food coloring to create bars that are soft, rich, and slightly fudgy with a signature deep red hue. Compared to traditional brownies, they usually have a lighter cocoa profile and a more buttery, vanilla-forward finish, while still delivering that dense, chewy bite people expect from a brownie.

There is something about red velvet desserts that always feels a little more special than everyday chocolate baking. The deep red color, the subtle cocoa flavor, and that soft, vellty crumb create a dessert that feels nostalgic, romantic, and just a little dramatic in the best way. These Red Velvet Brownies bring all of that into one rich, fudgy bar that feels both familiar and striking.
Unlike a classic cakier red velvet cake, this version leans fully into brownie territory. The centers stay dense and soft, the tops develop that beautiful shiny finish, and every bite feels rich without being too heavy. You still get the signature red velvet character, but with the chew, depth, and ease that make brownies so easy to love.
This is exactly the kind of dessert people save because it looks impressive, slices beautifully, and feels perfect for holidays, gatherings, gifting, or simple weekend baking. It has that bold bakery-style appearance, but the process is straightforward and approachable.
If you love easy homemade desserts that feel a little elevated without becoming complicated, this Red Velvet Brownies recipe is one to keep close. It is rich, vibrant, buttery, and deeply satisfying, with the kind of texture that makes you reach for a second square before you even realize it.
Why This Recipe Works
These brownies work because the ingredient balance is designed to create a dense, moist interior without tipping into a cake-like texture. The butter adds richness and softness, while the eggs provide structure and help create that glossy brownie-style surface. The flour is kept moderate so the bars hold together cleanly but still stay tender.
The cocoa powder is intentionally used in a smaller amount than in traditional brownies. That keeps the flavor aligned with classic red velvet, where chocolate is present but not dominant. Instead, vanilla and butter round out the flavor and give the brownies that signature smooth finish.
Another reason this recipe works so well is the baking window. Pulling the brownies once the center is just set gives them time to finish settling as they cool. That is what preserves the fudgy texture and prevents the edges from drying out before the center is ready.
A few practical details make a big difference here:
- Whisking the sugar well into the melted butter helps create a smoother, shinier top.
- Using just enough flour keeps the brownies structured without making them cakey.
- Cooling fully before slicing gives you cleaner squares and a better final texture.
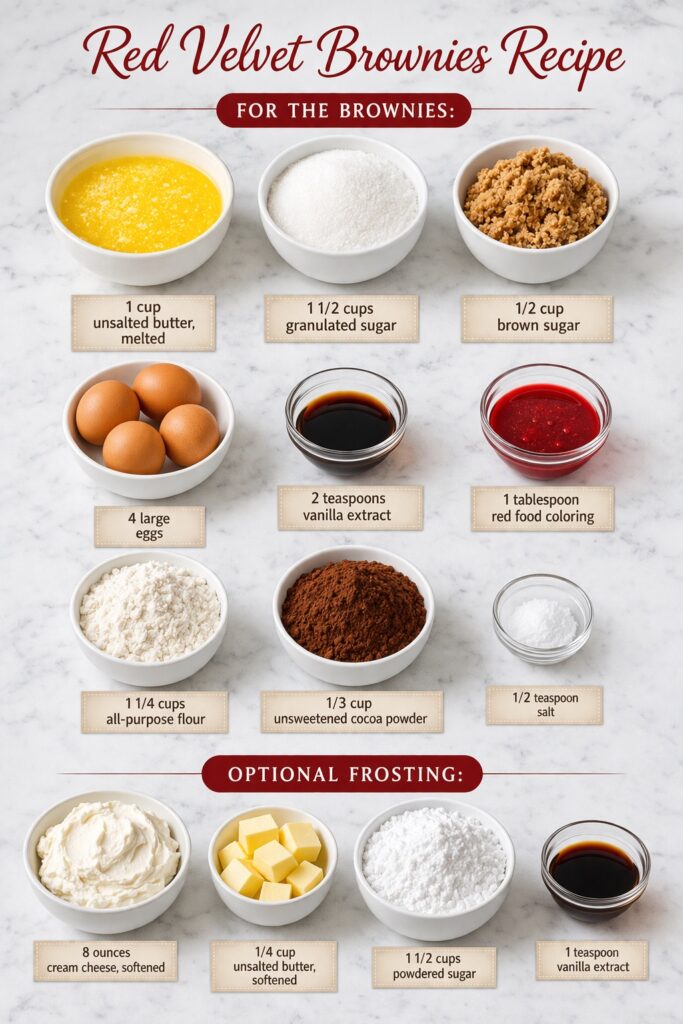
Ingredients
1 cup unsalted butter, melted
1 1/2 cups granulated sugar
1/2 cup brown sugar
2 teaspoons vanilla extract
1 tablespoon red food coloring
4 large eggs
1 1/4 cups all-purpose flour
1/3 cup unsweetened cocoa powder
1/2 teaspoon salt
Optional Frosting
8 ounces cream cheese, softened
1/4 cup unsalted butter, softened
1 1/2 cups powdered sugar
1 teaspoon vanilla extract
Instructions
- Preheat oven to 350°F (175°C). Grease a 9×13-inch pan.
- In a large bowl, mix melted butter, granulated sugar, brown sugar, and vanilla.
- Add red food coloring. Stir until the mix turns red.
- Add eggs one at a time. Mix after each one.
- In another bowl, whisk flour, cocoa powder, and salt.
- Add dry mix to wet mix. Stir until smooth.
- Pour batter into the pan. Spread evenly.
- Bake for 28 to 32 minutes. A toothpick should come out with a few moist crumbs.
- Let cool before frosting.
Frosting Instructions
- Beat cream cheese and butter until smooth.
- Add powdered sugar and vanilla. Mix until fluffy.
- Spread frosting over cooled brownies.
Visual Doneness Cues
Knowing what to look for matters more than baking by the clock alone. Red Velvet Brownies are ready when:
- The edges look set and slightly pulled from the sides of the pan.
- The top looks glossy and no longer wet.
- The center has a slight softness but does not jiggle like raw batter.
- A toothpick inserted in the middle comes out with moist crumbs, not liquid batter.
Texture and Behavior Guide
| If You Want… | Do This |
|---|---|
| Fudgier brownies | Bake at the lower end of the time range and cool completely before slicing |
| Cleaner slices | Chill the brownies briefly after cooling, then cut with a sharp knife |
| More intense red color | Use gel food coloring or a high-quality red coloring |
| Softer edges | Check early and avoid overbaking |
| Sharper red velvet flavor | Do not increase the cocoa too much; let vanilla stay prominent |
Expert Tips for the Best Red Velvet Brownies
- Use room temperature eggs for a smoother batter.
- Sift the cocoa and flour to avoid lumps and keep the batter even.
- Fold the dry ingredients in gently to avoid developing too much structure.
- Do not bake until fully dry in the center if you want that classic fudgy bite.
- Let the brownies cool completely before cutting for the best texture and neatest squares.
- For especially pretty slices, wipe the knife clean between cuts.
Common Mistakes and How to Avoid Them
| Mistake | What Happens | How to Fix It |
|---|---|---|
| Overmixing the batter | The brownies become tougher and less tender | Fold just until the flour disappears |
| Adding too much flour | The texture turns cakey or dry | Measure carefully and level the flour |
| Overbaking | The center loses its fudgy softness | Pull them when moist crumbs remain |
| Cutting while warm | The brownies fall apart or smear | Cool fully before slicing |
| Using too much cocoa | The flavor drifts away from classic red velvet | Keep the cocoa subtle and balanced |
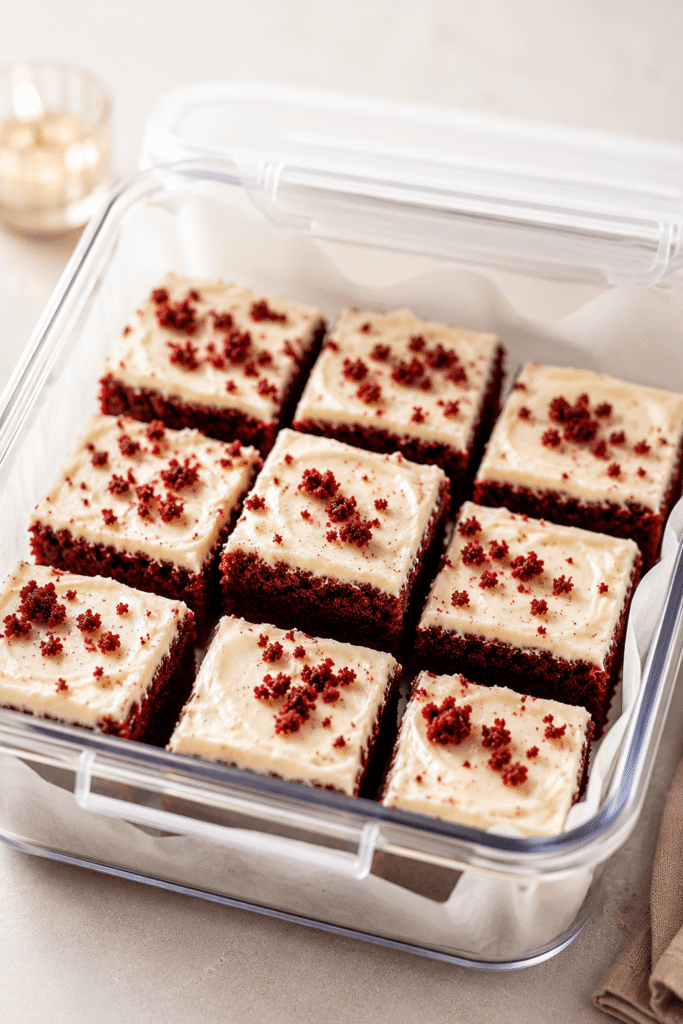
Storage and Make-Ahead Tips
Store the brownies in an airtight container at room temperature for up to 3 days. For slightly longer storage, refrigerate them for up to 1 week.
If refrigerating, let them sit at room temperature for a bit before serving so the texture softens again.
To freeze, wrap individual squares tightly and store in a freezer-safe container for up to 2 months. Thaw at room temperature before serving.
These are also a great make-ahead dessert because the texture stays satisfying even a day after baking.
How to Serve Red Velvet Brownies
Serve these red velvet brownies chilled or at room temperature, depending on the texture you prefer. Chilled brownies will feel firmer and fudgier, while room-temperature brownies will have a softer bite and creamier frosting.
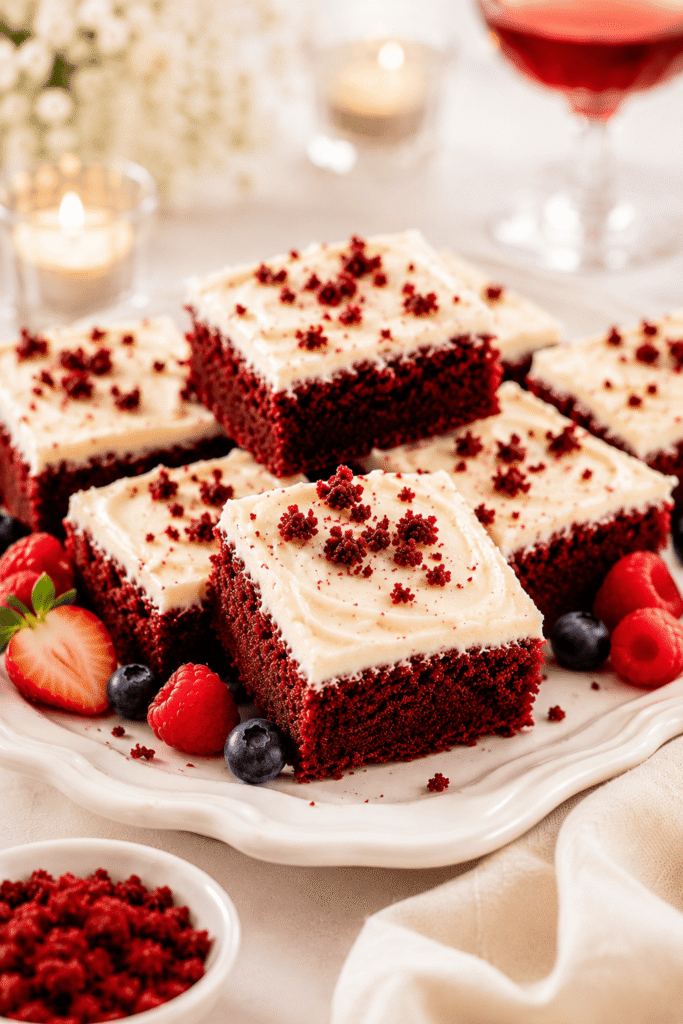
- For parties: Arrange the brownies on a white serving platter for a clean, elegant dessert table look.
- For holidays: Add a light sprinkle of red velvet crumbs on top right before serving for a bakery-style finish.
- For a richer dessert: Serve with fresh berries, vanilla ice cream, or a drizzle of melted white chocolate.
- For neat slices: Chill the brownies before cutting, then let them sit at room temperature for 10–15 minutes before serving.
Variations
- Cream Cheese Swirl Red Velvet Brownies: Add a simple cream cheese swirl on top before baking for a cheesecake-style finish.
- White Chocolate Red Velvet Brownies: Fold white chocolate chips into the batter for extra sweetness and contrast.
- Holiday Red Velvet Brownies: Top with festive sprinkles after baking for a more seasonal look.
- Red Velvet Brownie Bites: Bake in a lined muffin tin for smaller individual portions.
Frequently Asked Questions
Do Red Velvet Brownies taste like chocolate brownies?
Not exactly. They have a lighter cocoa flavor than traditional brownies and taste more buttery, vanilla-forward, and balanced.
Are Red Velvet Brownies fudgy or cakey?
This version is designed to be fudgy, soft, and slightly chewy rather than cakey.
Can I add cream cheese frosting?
Yes. A thin layer of cream cheese frosting or drizzle pairs beautifully with red velvet flavor.
What kind of food coloring works best?
Both liquid and gel red food coloring work, but gel usually creates a stronger red color with less added liquid.
How do I know when the brownies are done?
Look for set edges, a glossy top, and moist crumbs on a toothpick inserted near the center.
Can I make these ahead of time?
Yes. They hold well and can actually taste even better after resting because the texture settles nicely.
Can I double the recipe?
Yes. Double it and bake in a 9×13-inch pan, adjusting the baking time as needed.
More Easy Dessert Bar Recipes You’ll Love
If you love these red velvet brownies, try these rich, party-friendly desserts next. They are perfect for dessert tables, holidays, potlucks, and easy make-ahead treats.
- Cream Cheese Brownies
- Buckeye Brownies
- Brownie Bites
- Magic Cookie Bars
- Peanut Butter Bars
- Blueberry Cream Cheese Bars
- Pumpkin Cheesecake Bars
- Red Velvet Cookies
Final Thought
Some recipes feel practical, and some feel a little magical. These Red Velvet Brownies belong somewhere in the middle. They are easy enough for a relaxed afternoon bake, but they look and taste like something far more special. That is part of their charm.
They bring together comfort, color, softness, and richness in a way that feels both familiar and elevated. And sometimes that is exactly the kind of dessert worth making: one that is simple to pull together, but still feels like it means something when you set it on the table.

Red Velvet Brownies
Each bite is a little adventure, soft in the center, slightly crisp at the edges, and packed with delicious contrast. It’s not just dessert… it’s a moment. 🍫❤️
Ingredients
- 1 cup unsalted butter, melted
- 1 1/2 cups granulated sugar
- 1/2 cup brown sugar
- 2 teaspoons vanilla extract
- 1 tablespoon red food coloring
- 4 large eggs
- 1 1/4 cups all-purpose flour
- 1/3 cup unsweetened cocoa powder
- 1/2 teaspoon salt
- Optional Frosting
- 8 ounces cream cheese, softened
- 1/4 cup unsalted butter, softened
- 1 1/2 cups powdered sugar
- 1 teaspoon vanilla extract
Instructions
- Prep: Heat oven to 350°F (175°C). Grease a 9x13-inch pan.
- Wet Mix: Whisk melted butter, both sugars, and vanilla. Stir in red food coloring until vibrant.
- Eggs: Add eggs one at a time, mixing after each.
- Dry Mix: In a separate bowl, combine flour, cocoa powder, and salt. Fold into wet mix until smooth.
- Bake: Spread batter evenly in pan. Bake 28–32 min, toothpick should have a few moist crumbs.
- Cool & Frost: Let cool completely before adding cream cheese frosting.
- Enjoy your rich, fudgy, and oh-so-red brownies! 😍🍫
Notes
Creamy Dreamy Frosting
- Whip It Good – Beat cream cheese and butter until silky smooth.
- Sweeten Up – Mix in powdered sugar and vanilla until light & fluffy.
- Slather & Enjoy – Spread over cooled brownies and dive in!
- Pro tip: For extra swirls, use the back of a spoon to make pretty peaks! 😋🍰
Nutrition Information:
Yield: 24 brownies Serving Size: 1 brownieAmount Per Serving: Calories: 190Total Fat: 10gCarbohydrates: 24gSugar: 15gProtein: 2g
Nutrition information is estimated and may vary based on ingredients and portion sizes.
12 Sweet Favourites — Yours, Free 🍰
Tiramisù, no-bake cheesecake, the perfect chocolate chip cookie & 9 more reader-loved desserts — gathered into one beautiful free recipe book. From my kitchen to yours.
No spam, just sweet things. Unsubscribe anytime.