Strawberry Cheesecake (Baked, No-Bake & Flavor Variations)
🎁 FREE E-BOOK: 12 Sweet Favorites — reader-loved desserts in one beautiful recipe book.
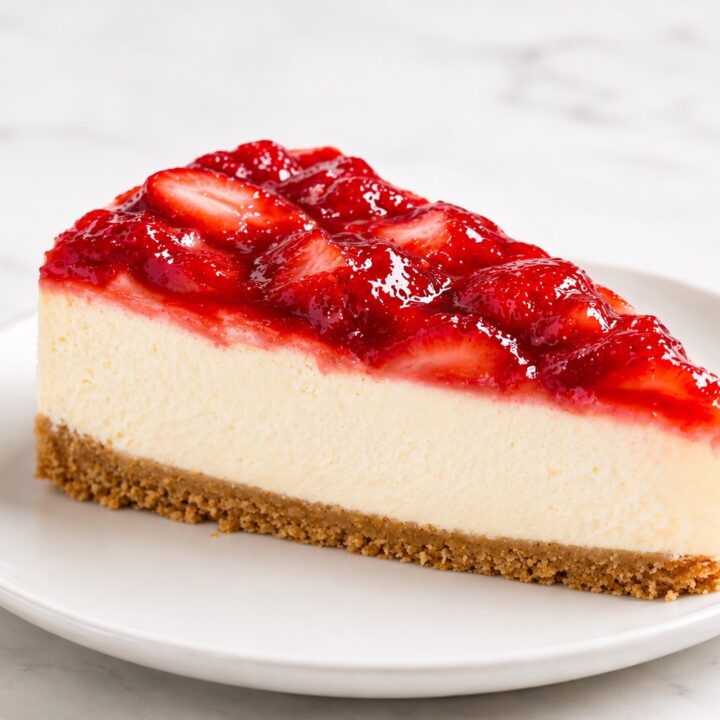
There’s something undeniably special about a homemade strawberry cheesecake. It has that perfect balance of creamy richness and bright fruitiness that makes it feel both comforting and elegant at the same time. The smooth, velvety filling paired with a buttery graham cracker crust and glossy strawberry topping creates a dessert that feels classic, beautiful, and always worth the effort.

This strawberry cheesecake recipe is the kind of dessert that instantly looks impressive on the table, but underneath that beautiful finish is a simple structure: a crisp cookie crust, a rich baked cheesecake filling, and a fresh strawberry layer that brings sweetness, color, and just enough brightness to keep every bite balanced. And once you understand that base, it becomes surprisingly easy to adapt — whether you prefer a classic baked version, a lighter no-bake cheesecake, or small flavor variations that shift the entire feel of the dessert.
What makes this cheesecake so lovable is the contrast in textures. The crust stays buttery and slightly crisp, the cheesecake bakes into a dense yet creamy center, and the strawberry topping adds a soft, juicy finish. It feels luxurious, but it still has that homemade warmth that makes people go back for another slice — no matter which version you choose.
If you’re looking for a dessert that works for holidays, birthdays, spring gatherings, summer celebrations, or whenever you want something that feels both beautiful and reliable, this strawberry cheesecake delivers that perfect mix of classic comfort and bakery-style elegance, with enough flexibility to make it your own.
What Is Strawberry Cheesecake?
Strawberry cheesecake is a baked or chilled dessert made with a crust, a creamy cheesecake filling typically based on cream cheese, sugar, and eggs, and a strawberry topping or strawberry flavor layer. In the classic baked version, the filling is rich, dense, and silky, while the strawberries add freshness and a naturally sweet, slightly tangy contrast.
In short: it’s a creamy baked dessert with a buttery crust and a fresh strawberry finish that makes it feel both indulgent and bright.
Quick Recipe Overview
| Texture | Rich, creamy, dense yet silky, with a crisp buttery crust |
|---|---|
| Flavor | Sweet, tangy, creamy, buttery, and fresh with real strawberry flavor |
| Difficulty | Intermediate |
| Prep Time | 30 minutes |
| Bake Time | 55–65 minutes |
| Chill Time | At least 6 hours |
| Total Time | About 7 hours 30 minutes |
| Servings | 12 slices |
| Method | Baked cheesecake |
| Best For | Holidays, birthdays, spring desserts, summer gatherings, make-ahead desserts |
In short: This strawberry cheesecake recipe gives you a creamy baked cheesecake with a buttery graham cracker crust and a glossy strawberry topping that feels elegant, fresh, and completely homemade.
Why You’ll Love This Strawberry Cheesecake
- Classic baked cheesecake texture that is rich, creamy, and perfectly smooth in every slice
- Fresh strawberry topping adds brightness, natural sweetness, and a beautiful glossy finish
- Buttery graham cracker crust creates the perfect crisp contrast to the creamy filling
- Includes both baked and no-bake options, so you can choose the texture and method you prefer
- Easy to customize with simple variations like lemon, chocolate, or strawberry swirl
- Elegant enough for celebrations, but approachable enough for everyday baking at home
- Great make-ahead dessert that tastes even better after chilling overnight
Why This Recipe Works
This recipe works because the structure is built around balance. The graham cracker crust gives the cheesecake a firm base and a buttery contrast to the creamy filling. The filling itself uses cream cheese, eggs, sugar, and sour cream for the right balance of richness, stability, and softness.
A few practical things make a big difference here:
- Room temperature ingredients help the filling blend smoothly, which prevents lumps and keeps the texture silky.
- Gentle mixing reduces excess air, which helps prevent the cheesecake from puffing too much or cracking.
- Gradual cooling allows the cheesecake to settle slowly, improving texture and reducing dramatic surface cracks.
- The strawberry topping is added after chilling so the berries stay vibrant and fresh instead of sinking into the batter or losing their brightness in the oven.
The result is a cheesecake that feels rich without being heavy, with a clean creamy slice and a fresh strawberry finish that keeps it from tasting overly dense.
Baking Science
Cheesecake texture depends heavily on fat, moisture, and controlled baking.
- Cream cheese provides the body and richness.
- Eggs set the filling as it bakes, giving the cheesecake its sliceable structure.
- Sour cream softens the texture and adds a slight tang that keeps the filling from tasting flat.
- Low, steady heat helps the center set gently instead of curdling or drying out.
A properly baked cheesecake should not look fully firm in the center when it comes out of the oven. A slight jiggle in the middle is exactly what leads to that creamy final texture after cooling and chilling.
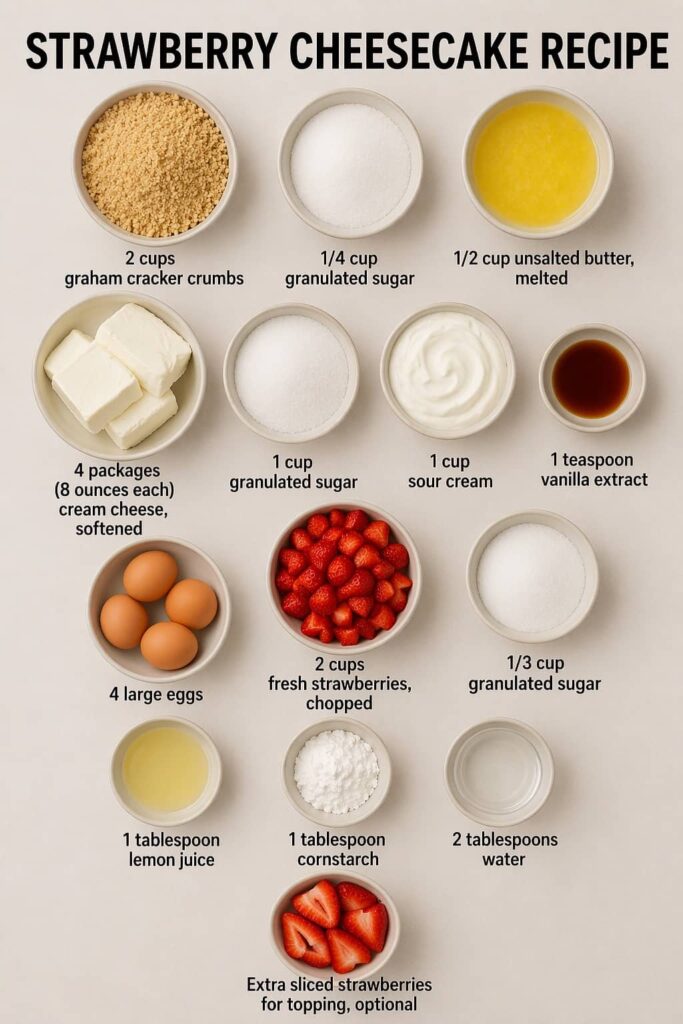
Ingredients
For the Crust
- 2 cups graham cracker crumbs
- 1/4 cup granulated sugar
- 1/2 cup unsalted butter, melted
For the Cheesecake Filling
- 4 packages (8 ounces each) cream cheese, softened
- 1 cup granulated sugar
- 1 cup sour cream, room temperature
- 1 teaspoon vanilla extract
- 4 large eggs, room temperature
For the Strawberry Topping
- 2 cups fresh strawberries, chopped
- 1/3 cup granulated sugar
- 1 tablespoon lemon juice
- 1 tablespoon cornstarch
- 2 tablespoons water
- Extra sliced strawberries for topping, optional
Ingredient Notes
- Cream cheese: Full-fat cream cheese gives the best classic cheesecake texture. Lower-fat versions usually create a softer, less rich filling.
- Sour cream: Adds tang and smoothness. It helps soften the dense richness of the cream cheese and gives the filling a more balanced flavor.
- Eggs: They should be added one at a time and mixed just until incorporated. Overmixing eggs adds too much air, which can increase the risk of cracking.
- Strawberries: Fresh strawberries give the cleanest flavor and brightest finish. If using frozen, cook them a bit longer so the topping thickens properly.
- Lemon juice: This does not make the topping taste lemony. It simply sharpens and brightens the strawberry flavor.
Substitution Notes
- Graham crackers can be replaced with digestive biscuits or vanilla wafer crumbs.
- Sour cream can be replaced with full-fat Greek yogurt for a slightly tangier finish.
- You can use a ready-made strawberry topping, but homemade gives a fresher, less overly sweet result.
Kitchen Tools Needed
- 9-inch springform pan
- Large mixing bowl
- Hand mixer or stand mixer
- Rubber spatula
- Small saucepan
- Fine-mesh strainer, optional
- Roasting pan or large pan for water bath, optional
Practical note: A springform pan is the easiest way to get clean cheesecake edges and release the dessert without damaging the crust.
How to Make Strawberry Cheesecake
1. Prepare the crust
Preheat the oven to 325°F (163°C). In a bowl, mix the graham cracker crumbs, sugar, and melted butter until the texture resembles wet sand.
Press the mixture firmly into the bottom of a 9-inch springform pan and slightly up the sides if desired. Bake for 8 to 10 minutes, then let it cool slightly.
Visual cue: The crust should look set and lightly golden, not dark.
2. Make the cheesecake filling
In a large mixing bowl, beat the softened cream cheese until smooth and creamy. Add the sugar and mix until combined. Add the sour cream and vanilla extract and mix until smooth.
Add the eggs one at a time, mixing on low speed just until each egg is incorporated. Scrape down the bowl as needed.
Tip: Do not whip the batter. A smooth, gently mixed filling bakes more evenly and stays creamier.
3. Fill the pan
Pour the cheesecake filling over the cooled crust and smooth the top.
If you like, place the springform pan into a larger pan and use a water bath for gentler baking. If not using a water bath, the cheesecake will still work beautifully. Just be careful not to overbake it.
4. Bake
Bake for 55 to 65 minutes, or until the edges look set and the center still has a slight wobble.
Turn off the oven, crack the oven door slightly, and let the cheesecake sit inside for 1 hour.
Human moment: This part always feels like the hardest because it smells done long before it is fully ready, but that slow cooling really helps the texture.
5. Cool and chill
Remove the cheesecake from the oven and let it cool completely at room temperature. Then refrigerate for at least 6 hours, preferably overnight.
Visual cue: After chilling, the center should feel fully set and slice cleanly.
6. Make the Strawberry Topping for Cheesecake
This homemade strawberry topping for cheesecake is soft, glossy, and full of real strawberry flavor. It’s the perfect finishing layer that adds freshness, natural sweetness, and a beautiful vibrant color to any cheesecake — whether baked or no-bake.
Unlike store-bought versions, this topping stays bright, slightly juicy, and perfectly thickened, so it sits beautifully on top without running off the slices.
How to Make Strawberry Topping for Cheesecake
- In a saucepan, combine the chopped strawberries, sugar, and lemon juice.
- Cook over medium heat until the strawberries begin to soften and release their juices.
- In a small bowl, mix the cornstarch and water to create a smooth slurry.
- Stir the slurry into the strawberry mixture and continue cooking until the sauce thickens and becomes glossy.
- Remove from heat and let it cool completely before using.
Visual Cues
- Strawberries should look soft and juicy, not mushy
- Sauce should be glossy and slightly thick, not watery
- When spooned, it should slowly settle, not run instantly
Pro Tips
- Cut strawberries in small, even pieces for a smoother topping
- Don’t overcook — it should stay fresh, not jam-like
- Add a splash of lemon juice to enhance flavor, not make it sour
- Cool completely before using (altfel înmoaie cheesecake-ul)
Variations
- Chunky topping: leave larger strawberry pieces
- Smooth sauce: blend lightly after cooking
- Extra glossy: add 1 teaspoon strawberry jam at the end
- Low sugar version: reduce sugar slightly, but keep cornstarch ratio
7. Finish the cheesecake
Spoon the cooled strawberry topping over the chilled cheesecake. Add extra sliced fresh strawberries on top if desired. Slice and serve chilled.
Visual Doneness Cues
| Stage | What You Should See |
|---|---|
| Crust mixed | Moist, sandy texture that holds together when pressed |
| Crust baked | Lightly golden and set, not greasy or overly dark |
| Filling mixed | Smooth, thick, creamy batter with no visible lumps |
| Cheesecake baked | Edges set, center slightly jiggly but not liquid |
| Cheesecake chilled | Firm, sliceable, creamy interior |
| Strawberry topping | Glossy, spoonable, thick enough to sit on top without running off |
Texture and Behavior Guide
| If You Want… | Do This |
|---|---|
| Extra creamy cheesecake | Avoid overbaking and chill overnight |
| A cleaner top surface | Mix gently and cool gradually in the oven |
| More strawberry flavor | Add both cooked topping and fresh sliced strawberries on top |
| Firmer slices | Chill longer before slicing and wipe the knife between cuts |
| A softer crust | Press it less firmly and avoid baking it too dark |
Expert Tips
- Use full-fat cream cheese for the best rich, classic cheesecake texture.
- Make sure all filling ingredients are at room temperature before mixing.
- Mix on low speed once the eggs go in.
- Do not rush the chill time. Cheesecake truly finishes setting in the refrigerator.
- For especially clean slices, chill overnight and use a warm knife.
- Let the strawberry topping cool fully before spooning it over the cheesecake.
Common Mistakes
| Mistake | What Happens | How to Fix It |
|---|---|---|
| Using cold cream cheese | Lumpy filling | Let it soften fully before mixing |
| Overmixing the batter | Too much air, more cracking | Mix gently, especially after adding eggs |
| Overbaking | Dry, dense texture | Remove when the center still has a slight wobble |
| Skipping chill time | Loose slices, less flavor development | Chill at least 6 hours, ideally overnight |
| Adding warm topping | Softens the surface and affects structure | Cool the topping completely first |
Comparison Guide
| Style | Texture | Flavor | Best For |
|---|---|---|---|
| Baked Strawberry Cheesecake | Dense, creamy, silky | Rich and balanced | Classic dessert tables, celebrations |
| No-Bake Strawberry Cheesecake | Lighter, mousse-like | Cooler and slightly less rich | Warm weather, easy prep desserts |
| Strawberry Cheesecake Bars | Firm, portable | Sweet and snackable | Parties, picnics, smaller portions |
How to Serve
This strawberry cheesecake is beautiful served straight from the fridge with a generous spoonful of glossy strawberry topping and a few fresh sliced berries on top. It feels especially lovely for spring and summer tables, brunch gatherings, birthdays, baby showers, or holiday dessert spreads where you want something elegant but still familiar.
A few favorite ways to serve it:
- With extra fresh strawberries for a fresher, lighter finish
- With whipped cream for a softer, more bakery-style presentation
- With a drizzle of strawberry sauce for a more dramatic dessert plate
- With coffee after dinner when you want something rich but not chocolate-heavy
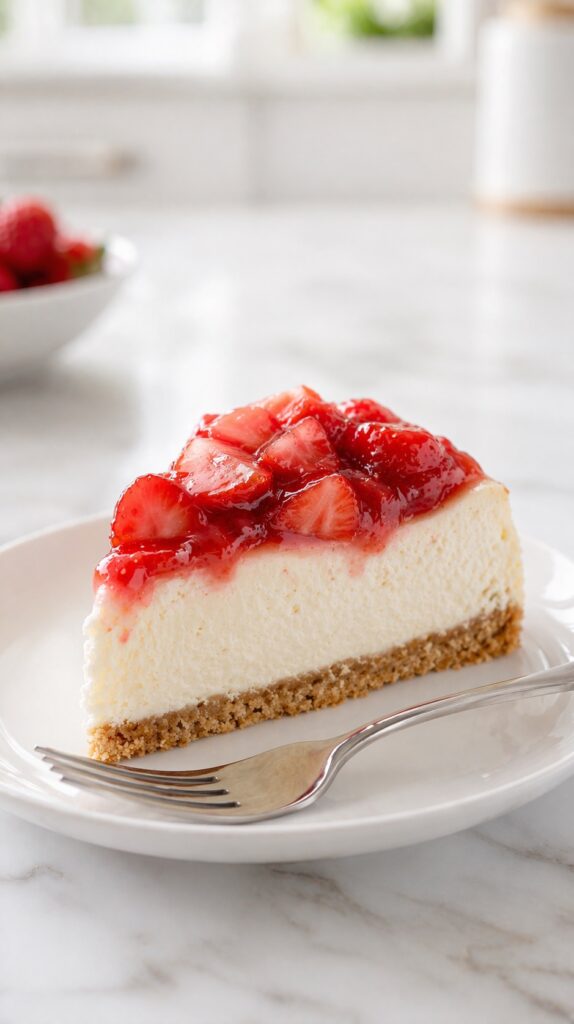
Save this for spring gatherings, Mother’s Day dessert tables, summer birthdays, or any moment when you want a dessert that looks stunning but still feels warm and homemade.
Storage and Make-Ahead
- Refrigerator: Store covered for up to 4 days.
- Make-ahead: The cheesecake can be baked 1 day in advance and topped before serving.
- Freezer: Freeze the plain cheesecake, without topping, for up to 2 months. Thaw overnight in the refrigerator.
Best tip: If you plan to make it ahead, keep the strawberry topping separate until serving day for the freshest finish.
Variations (Make It Your Own)
Once you master the base, this strawberry cheesecake becomes incredibly versatile. You can easily adapt the flavor, texture, or presentation depending on the occasion — from elegant dinner desserts to casual, crowd-friendly treats.
Strawberry Swirl Cheesecake
Swirl a few spoonfuls of strawberry sauce directly into the cheesecake batter before baking. Use a toothpick or knife to create soft ribbons across the surface. This adds visual contrast and a subtle layered strawberry flavor throughout the slice.
Chocolate Strawberry Cheesecake
Add a thin layer of chocolate ganache over the crust before pouring in the filling, or drizzle melted chocolate over the finished cheesecake. The rich chocolate deepens the flavor and pairs beautifully with the fresh strawberry topping.
Lemon Strawberry Cheesecake
Add 1–2 teaspoons of fresh lemon zest to the filling for a brighter, fresher flavor profile. This version feels lighter and works especially well for spring and summer desserts.
No-Bake Strawberry Cheesecake (Soft & Creamy, No Oven)
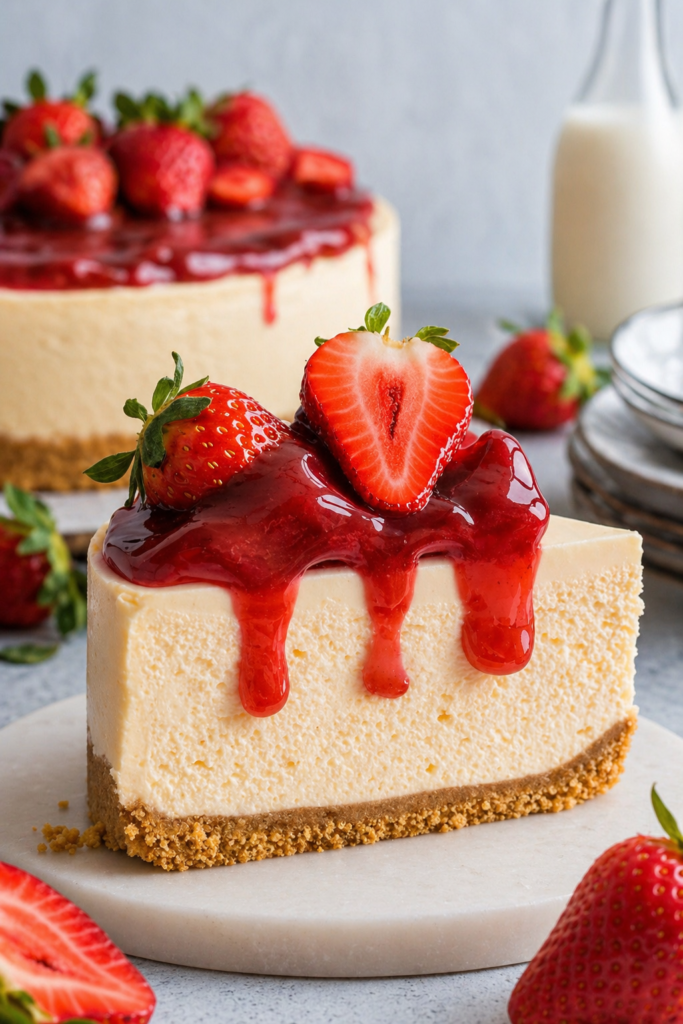
This no-bake strawberry cheesecake is a lighter, fresher version of the classic, with a smooth, airy texture and a cool, creamy finish. Instead of baking, the filling is gently set in the refrigerator, creating a dessert that feels soft, silky, and perfect for warm days.
What Changes in This Version
- No eggs and no baking
- Texture becomes lighter and more mousse-like
- Faster to prepare, but still needs chilling time
- Flavor feels slightly fresher and less dense
Adjusted Ingredients
For the Crust (same as base recipe):
- 2 cups graham cracker crumbs
- 1/4 cup sugar
- 1/2 cup melted butter
For the No-Bake Filling:
- 16 oz (450g) cream cheese, softened
- 3/4 cup powdered sugar (not granulated)
- 1 teaspoon vanilla extract
- 1 1/2 cups heavy whipping cream (cold)
Optional Stabilization (recommended for clean slices):
- 1 teaspoon gelatin + 2 tablespoons cold water
Strawberry Topping:
Same as original recipe (fully cooled before using)
How to Make No-Bake Strawberry Cheesecake
1. Prepare the crust
Mix graham crumbs, sugar, and melted butter until it resembles wet sand. Press firmly into a springform pan. Chill in the fridge for at least 30 minutes instead of baking.
2. Whip the cream
In a cold bowl, whip the heavy cream until soft peaks form. Set aside.
3. Make the cream cheese base
In another bowl, beat the cream cheese until smooth. Add powdered sugar and vanilla extract, mixing until creamy and lump-free.
4. (Optional) Add gelatin for stability
Bloom gelatin in cold water for 5 minutes, then gently warm until dissolved (not hot). Slowly mix it into the cream cheese mixture.
5. Fold everything together
Gently fold the whipped cream into the cream cheese mixture using a spatula. Mix slowly to keep the texture light and airy.
6. Assemble
Spread the filling over the chilled crust and smooth the top.
7. Chill
Refrigerate for at least 6 hours, preferably overnight, until fully set.
8. Add topping
Spoon the cooled strawberry topping over the cheesecake before serving.
Texture & Result
- Soft, creamy, and airy interior
- Light mousse-like structure
- Clean slices (firmer if gelatin is used)
- Cool and refreshing, not heavy
Pro Tips
- Use powdered sugar, not granulated — it dissolves smoothly
- Whip cream to soft peaks, not stiff (keeps texture silky)
- Fold gently — this is what creates the light texture
- Chill overnight for best slice structure
- Always add topping after chilling, not before
Common Mistakes
- Adding topping too early → softens the surface
- Overmixing after adding whipped cream → dense filling
- Skipping chill time → soft, unstable slices
- Using warm gelatin → can create lumps
Mini Strawberry Cheesecakes
Divide the crust and filling into muffin tins lined with paper liners. Reduce the baking time to about 18–22 minutes. These are perfect for parties, portion control, or easy serving.
Strawberry Cheesecake Bars
Bake the cheesecake in a square pan and slice into clean bars after chilling. This variation is ideal for gatherings, picnics, and dessert platters where easy serving matters.
Extra Strawberry Layer Cheesecake
Add a thin layer of strawberry compote between the crust and the filling before baking. This creates a hidden fruity layer that intensifies the strawberry flavor in every bite.
The easiest way to transform this recipe isn’t by changing everything — it’s by layering flavors. Even a small addition (like lemon zest or a chocolate layer) can shift the entire feel of the dessert from classic to elevated.
How to Decorate Strawberry Cheesecake for Halloween
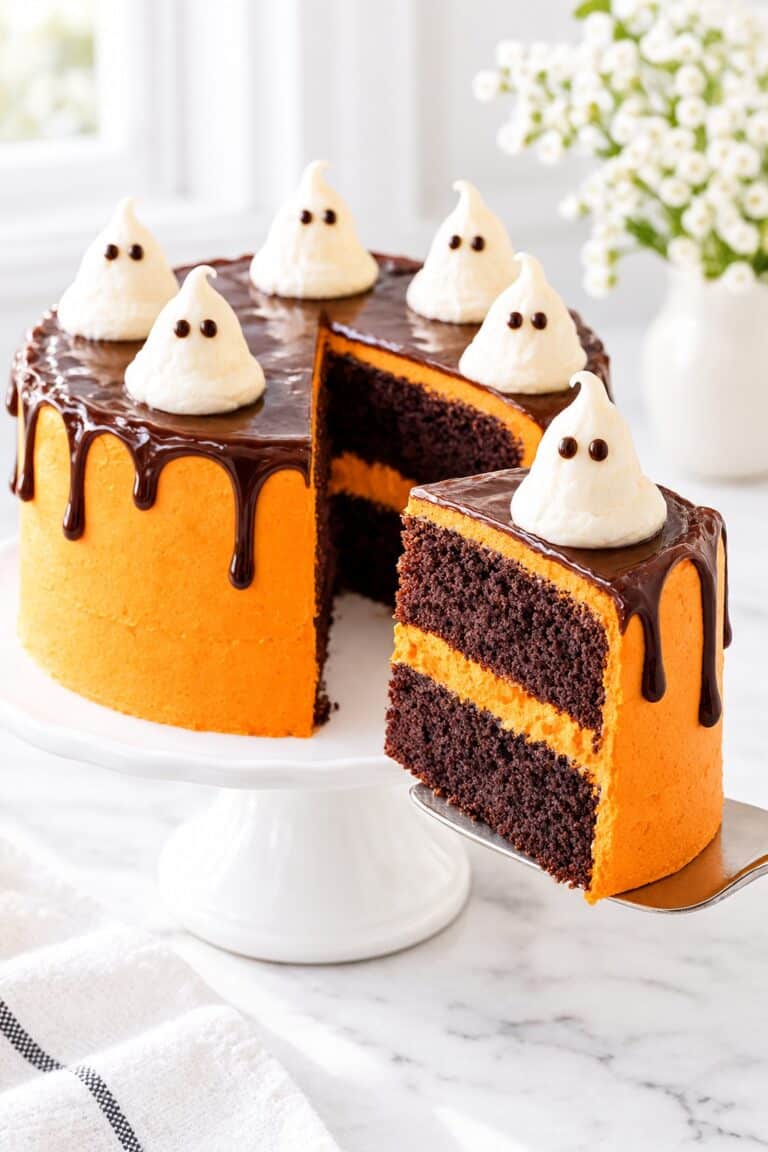
A glossy red strawberry topping, flowing drips, and three little white ghosts turn this strawberry cheesecake into a striking Halloween centerpiece. Orange pumpkins, black spiders, and delicate bat wings complete the scene while leaving the creamy cheesecake sides visible.
For this version, use the baked 9-inch cheesecake from the main recipe and chill it overnight. The finish comes from smooth strawberry glaze and shaped sugar decorations, so no buttercream coating is needed.

Ingredients and Decorating Tools
For the smooth strawberry drip topping:
Use these quantities instead of the original strawberry topping, not in addition to it.
- 3 cups (450 g) fresh strawberries, hulled and chopped
- 1/2 cup (100 g) granulated sugar
- 1 1/2 tablespoons (22 ml) lemon juice
- 1 tablespoon plus 1 1/2 teaspoons (12 g) cornstarch
- 3 tablespoons (45 ml) cold water
- 1 tablespoon (20 g) light corn syrup, optional, for extra shine
- Red gel food coloring, optional, added sparingly
For the decorations:
- Approximately 250 g white fondant
- Approximately 150 g orange fondant
- Approximately 15 g dark green fondant
- Approximately 150 g ready-to-use black gum paste
- Approximately 40 g yellow fondant, optional, for miniature sugar candles
- 50 g white candy melts or white chocolate
- 8–10 small fresh strawberries, washed and thoroughly dried
- A little powdered sugar for rolling
- Edible glue or a small amount of water for attaching sugar details
These amounts allow extra material for rolling, trimming, and practicing.
Useful tools:
- Small rolling pin
- Fine-mesh strainer
- Blender or immersion blender
- Small offset spatula
- Piping bag or squeeze bottle
- Toothpicks and a small food-safe brush
- Small bat cutter or a paper template
- Two food-safe paper lollipop sticks for elevated bats
Make the Glossy Red Strawberry Topping
- Cook the fruit. Combine the strawberries, sugar, and lemon juice in a saucepan. Cook over medium-low heat, stirring occasionally, until the berries soften and release their juices, approximately 6–8 minutes.
- Blend and strain. Carefully blend until smooth, then press through a fine-mesh strainer. Return the strained strawberry mixture to the saucepan. Removing the larger fruit pieces creates a cleaner surface and more even drips.
- Thicken gently. Mix the cornstarch with the cold water until completely smooth. Stir the slurry into the strawberry mixture. Bring to a gentle bubbling simmer and cook for approximately 1 minute, stirring continuously, until glossy and thickened.
- Adjust the color if desired. Stir in the optional corn syrup. If the berries produce a pale topping, add a tiny amount of red gel coloring. The goal is a rich strawberry red.
- Cool before decorating. Transfer to a shallow bowl and cover the surface. Let cool until no warmth remains. The glaze should fall from a spoon in a thick ribbon and slowly level out.
Consistency check: Test a spoonful on the back of a chilled plate held upright. It should travel slowly rather than run straight off. If too thick, stir in water 1 teaspoon at a time. If too thin, cook it briefly to reduce, then cool and test again.
Shape the Ghosts, Pumpkins, and Black Decorations
Make the sugar decorations 1–2 days ahead so they have time to firm up. Keep unused fondant and gum paste tightly wrapped while working.
Three draped white ghosts
- Shape three pieces of white fondant, approximately 20 g each, into rounded cones about 1 3/4–2 inches (4.5–5 cm) tall. Give each cone a broad, flat base and a softly rounded head.
- Roll additional white fondant approximately 1/16 inch (1.5–2 mm) thick. Cut three circles about 4–4 1/2 inches (10–11 cm) across.
- Brush each cone very lightly with water and drape a circle over it. Smooth the head gently, then arrange the lower edges into loose folds. Trim any excess so the ghosts stand flat.
- Flatten tiny pieces of black gum paste into two oval eyes and one larger, elongated mouth for each ghost. Attach with a barely damp brush.
- Press shallow indentations around the features with a rounded modeling tool to give the faces a softly hollowed appearance.
Let the ghosts firm up on parchment. Vary the folds and tilt one head slightly for a more natural arrangement.
Orange pumpkins and jack-o’-lanterns
- Roll orange fondant into three balls of different sizes, approximately 25–45 g each.
- Flatten the tops and bottoms slightly. Use the side of a toothpick to press 7–9 curved grooves from the top indentation to the base.
- Shape short, tapered stems from dark green fondant and attach them at the top.
- Leave one pumpkin plain. For the jack-o’-lanterns, attach thin black triangular eyes, a small triangular nose, and a curved mouth with uneven teeth.
- For the hollow-looking front pumpkin, press shallow recesses into the orange fondant before fitting the thin black facial pieces inside.
Keep the pumpkins approximately 1–1 1/2 inches (2.5–4 cm) wide so they fit comfortably beside the ghosts.
Black spiders
Shape two spiders from black gum paste. For each one, make an oval abdomen and a smaller rounded head. Roll eight slender legs, bend them at the joints, and attach four to each side with edible glue.
Assemble on parchment and support the bent legs with small pieces of folded parchment while drying. Make the legs slightly thicker than they appear in the photograph so they can be handled without breaking.
Bat silhouettes and dramatic wings
Roll black gum paste approximately 1–1.5 mm thick. Cut two small bat silhouettes, about 1 1/2–2 inches (4–5 cm) wide.
For the larger wings behind the ghosts, cut two pointed wing shapes about 2 1/2–3 inches (6–7.5 cm) long. Add scalloped lower edges and gently score branching veins with a toothpick. Let dry over loosely folded parchment to create a slight curve.
Attach the small bats to food-safe lollipop sticks using a little freshly softened gum paste on the back. Allow the attachments and wings to dry thoroughly, usually 24–48 hours.
Optional miniature yellow candles
Shape yellow fondant into short cylinders, approximately 1 inch (2.5 cm) tall. Pinch the top edges into irregular melted-wax shapes and add tiny black fondant wicks. These are decorative sugar candles and should remain unlit.
Assemble the Halloween Cheesecake
- Prepare the chilled cheesecake. Unmold the fully chilled cheesecake and place it on its final serving plate. Use a plate wider than the cheesecake to catch the red drips.
- Create the drips first. Put some cooled strawberry glaze into a piping bag or squeeze bottle. Test one drip at the back. Add small amounts around the rim, varying the quantity to create different lengths. Space the longest drips apart so some pale cheesecake remains visible.
- Cover the top. Spoon more glaze into the center and gently spread it toward the edge with an offset spatula. Connect it to the drips without repeatedly pushing extra glaze over the sides. Reserve any remaining topping for serving.
- Set the glaze. Refrigerate for 30–60 minutes, until the topping has thickened and the drips have stopped moving.
- Protect the sugar decorations. Melt the white candy melts or white chocolate and brush a thin layer over the undersides of the ghosts and pumpkins. Let set completely. This provides a small moisture barrier between the sugar decorations and the strawberry topping.
- Position the ghosts. Shortly before serving, place the three ghosts across the back half of the cheesecake: one on the left, one near the center, and one on the right. Leave the front half open so the red glaze remains visible.
- Build the pumpkin cluster. Arrange the pumpkins together on the left side, with the smallest jack-o’-lantern toward the front. Place one spider beside this cluster and the other between the left and center ghosts.
- Add the strawberries. Hull the dried strawberries and stand them on their flat cut ends, pointed tips upward. Arrange several around the ghosts and three across the front. Avoid piling fruit against the sugar figures.
- Finish with wings and bats. Position the large wings behind the ghosts, pressing only their lower edges gently into the firm cheesecake. Insert the bat picks at the back at different heights. Add the optional yellow sugar candles in the remaining spaces.
What you should see: A smooth red surface, irregular glossy drips, three clearly visible white ghosts, and a concentrated orange-and-black cluster on the left. Leaving open red space between the decorations helps the individual shapes stand out.
Make-Ahead, Serving, and Storage
Bake the cheesecake and prepare the strawberry glaze the day before serving. Store both refrigerated, keeping the glaze separate until decorating day.
Make the fondant figures and gum paste pieces 1–2 days ahead. Once firm, keep them in a dry container at cool room temperature, away from moisture and direct sunlight.
Apply the strawberry glaze several hours before serving if needed, but add the sugar figures, fresh strawberries, and delicate wings shortly before presentation. Moisture from the glaze and refrigerator can gradually soften sugar decorations.
Keep the cheesecake refrigerated until needed. Remove the bat picks and large decorative pieces before slicing. Refrigerate leftovers promptly and enjoy within the original recipe’s 4-day storage window, counting from when the cheesecake was made.
FAQ
Can I use frozen strawberries?
Yes. Frozen strawberries work well for the topping, but they usually release more liquid, so you may need to cook the topping a little longer.
How do I know when cheesecake is done baking?
The edges should look set, while the center should still have a slight wobble. It should not look liquid, but it should not look fully firm either.
Why did my cheesecake crack?
Cracks usually happen from overmixing, overbaking, or cooling too quickly. The good news is that the strawberry topping covers the surface beautifully.
Can I make strawberry cheesecake the day before?
Yes, and it is actually better that way. Cheesecake tastes best after a full chill because the texture becomes firmer and the flavor settles.
Can I skip the water bath?
Yes. A water bath helps with gentler baking and fewer cracks, but this recipe can still work well without one if you avoid overbaking.
What crust works best for strawberry cheesecake?
A graham cracker crust is the classic choice, but vanilla wafer or digestive biscuit crusts also work beautifully.
Can I use strawberry jam instead of homemade topping?
Yes, but the flavor will usually be sweeter and less fresh than homemade strawberry topping.
More Fruit Based Desserts You’ll Love
Strawberry cheesecake fits especially well with other fruity, creamy, and celebration-style desserts. It pairs beautifully with recipes like No Bake Cheesecake, Strawberry Cupcakes, Strawberry Pie, Fruit Pizza, and Lemon Bars for readers looking for fresh, bright dessert ideas.
Recipe Summary
This strawberry cheesecake recipe is a creamy baked cheesecake made with a buttery graham cracker crust, a smooth vanilla cheesecake filling, and a glossy homemade strawberry topping. It is rich, silky, fresh, and perfect for holidays, birthdays, spring desserts, and elegant homemade dessert tables.
Final Thoughts
Some desserts feel comforting, and some feel beautiful. Strawberry cheesecake somehow manages to be both. It has that rich, creamy depth people expect from a classic cheesecake, but the strawberries bring in a softness and brightness that make the whole dessert feel lighter, fresher, and a little more special.
It’s the kind of recipe that looks stunning when sliced, feels generous on a dessert table, and always seems to disappear faster than expected. If you love desserts that feel classic, polished, and deeply homemade, this strawberry cheesecake is one worth making again and again.
Love this? There are twenty more like it.
128 pages, five chapters, 15 kitchen guides and 16 printable planning pages — in US Letter and A4.
Strawberry Cheesecake
This strawberry cheesecake is rich, creamy, and smooth with a buttery graham cracker crust and a glossy homemade strawberry topping. A beautiful baked cheesecake recipe for holidays, birthdays, and spring or summer dessert tables.
Ingredients
For the Crust
- 2 cups graham cracker crumbs
- 1/4 cup granulated sugar
- 1/2 cup unsalted butter, melted
For the Cheesecake Filling
- 4 packages (8 oz each) cream cheese, softened
- 1 cup granulated sugar
- 1 cup sour cream, room temperature
- 1 teaspoon vanilla extract
- 4 large eggs, room temperature
For the Strawberry Topping
- 2 cups fresh strawberries, chopped
- 1/3 cup granulated sugar
- 1 tablespoon lemon juice
- 1 tablespoon cornstarch
- 2 tablespoons water
- extra sliced strawberries for topping, optional
Instructions
- Preheat the oven to 325°F (163°C). Mix the graham cracker crumbs, sugar, and melted butter until the texture resembles wet sand. Press firmly into the bottom of a 9-inch springform pan and slightly up the sides if desired. Bake for 8 to 10 minutes, then let it cool slightly. (The crust should look set and lightly golden, not dark.)
- Beat the softened cream cheese until smooth and creamy. Add the sugar and mix until combined. Add the sour cream and vanilla extract and mix until smooth. Add the eggs one at a time, mixing on low speed just until incorporated. (Do not whip the batter.)
- Pour the cheesecake filling over the cooled crust and smooth the top. Optional: place the pan into a larger pan and use a water bath for gentler baking.
- Bake for 55 to 65 minutes, until the edges are set and the center still has a slight wobble. Turn off the oven, crack the door slightly, and let the cheesecake sit inside for 1 hour.
- Remove the cheesecake and let it cool completely at room temperature, then refrigerate for at least 6 hours or overnight. (The center should be fully set and slice cleanly.)
- Cook the chopped strawberries, sugar, and lemon juice over medium heat until the berries release their juices. Stir in the cornstarch mixed with water and cook until thickened and glossy. Let cool completely.
- Spoon the cooled strawberry topping over the chilled cheesecake. Add extra sliced strawberries if desired, then slice and serve chilled.
Notes
- Use full-fat cream cheese for the best texture.
- Room temperature ingredients help create a smooth filling.
- Do not overmix once the eggs are added.
- The cheesecake is done when the center still has a slight wobble.
- Chill thoroughly before slicing for the cleanest texture.
Nutrition Information:
Yield: 12 slices Serving Size: 1 sliceAmount Per Serving: Calories: 420Total Fat: 29gSaturated Fat: 17gCarbohydrates: 34gFiber: 1gSugar: 25gProtein: 6g
Nutrition information is automatically calculated and should be considered an estimate only. Exact values may vary depending on the specific ingredients and brands used.
12 Sweet Favorites — Yours, Free 🍰
Tiramisù, no-bake cheesecake, the perfect chocolate chip cookie & 9 more reader-loved desserts — gathered into one beautiful free recipe book. From my kitchen to yours.
No spam, just sweet things. Unsubscribe anytime.


One Comment
Comments are closed.