Jello Poke Cake with Strawberry Gelatin & Whipped Topping
🎁 FREE E-BOOK: 12 Sweet Favorites — reader-loved desserts in one beautiful recipe book.
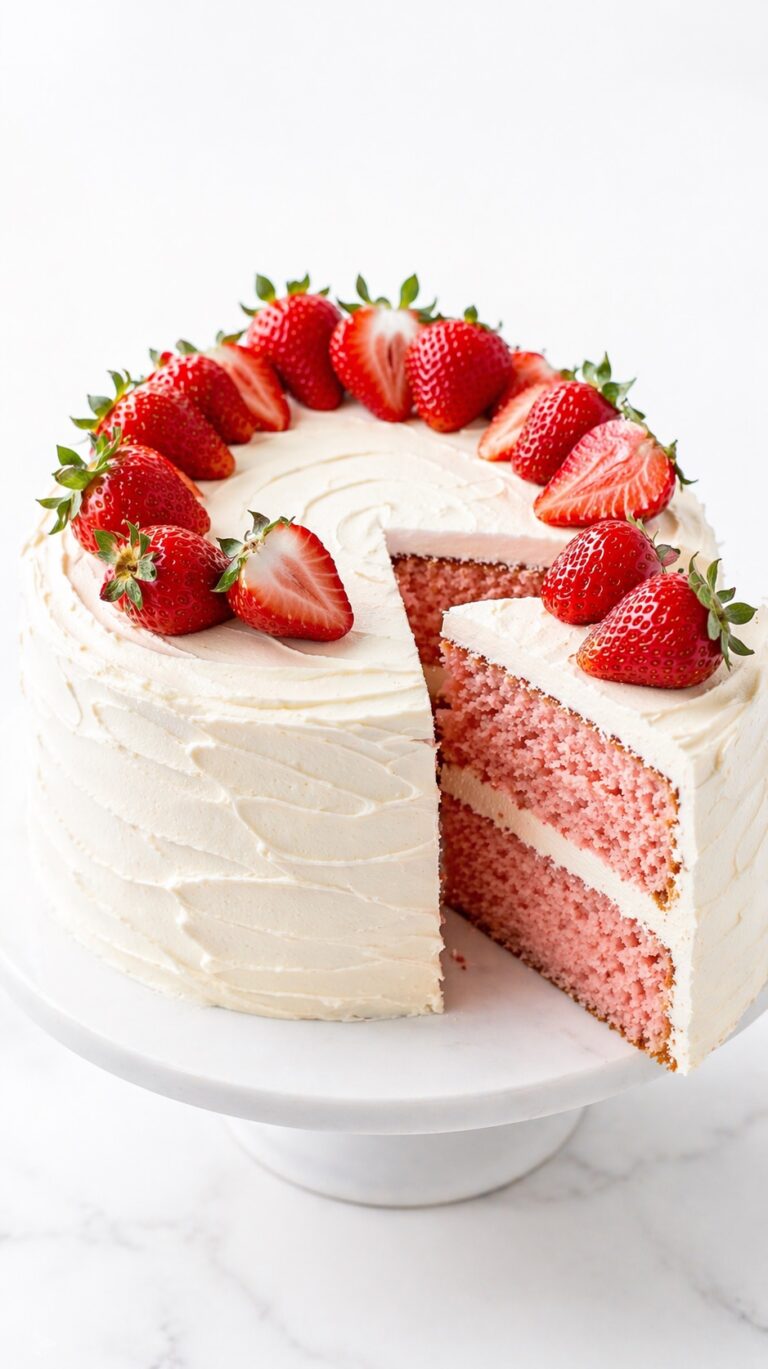
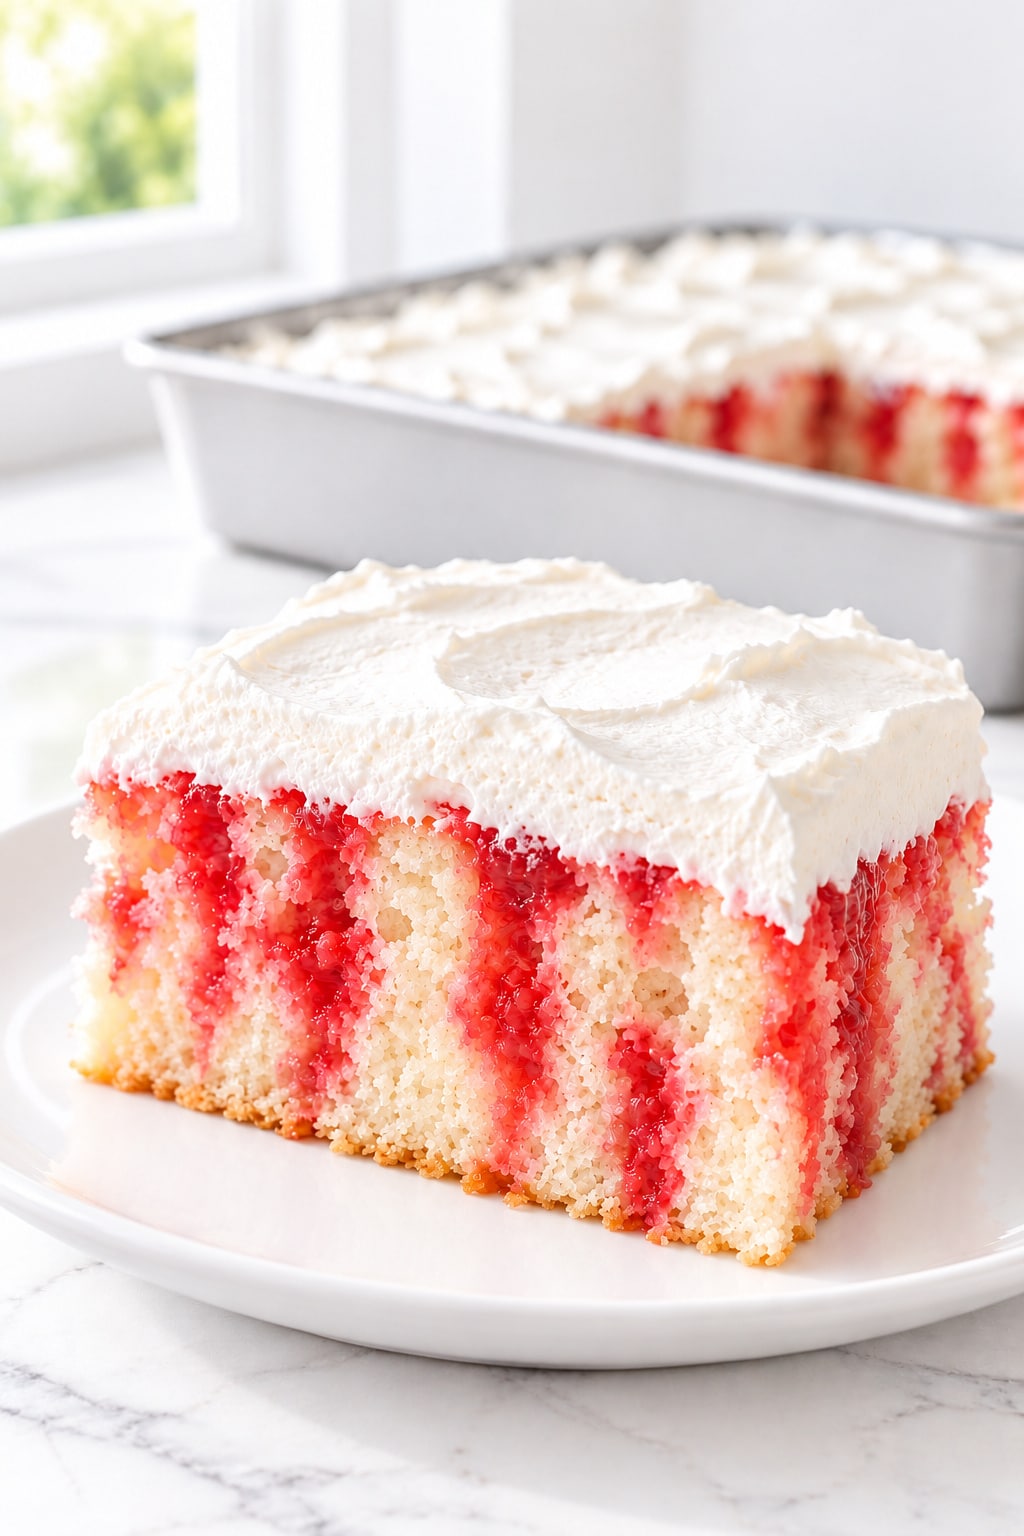
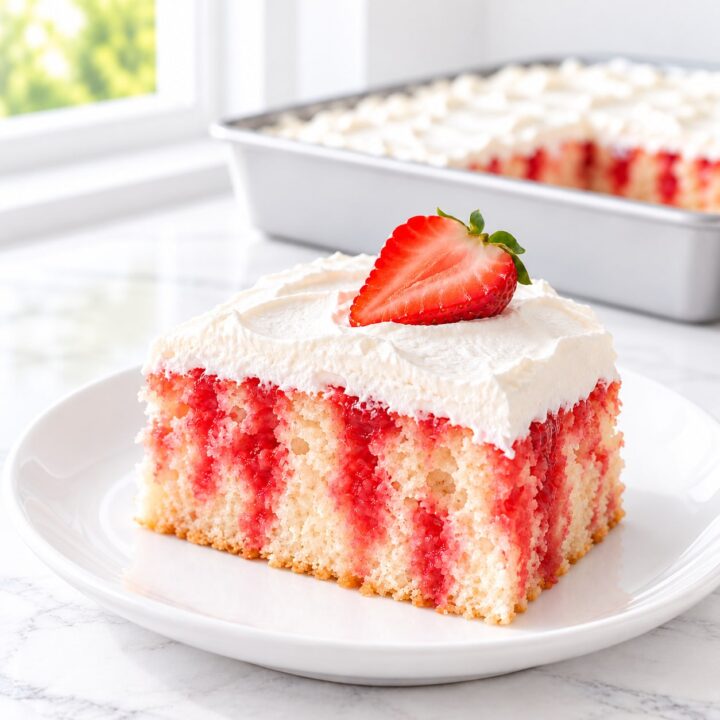
Jello Poke Cake brings tender white cake, bright strawberry streaks, and a soft cloud of whipped topping together in one cool, creamy slice. The pale crumb stays visible between the pink-red channels, giving each square a fruity sweetness without turning the whole cake into jelly.

There is an easy familiarity to a chilled cake carried to the table in its baking pan. It suits a potluck, a family lunch, or a relaxed gathering where dessert should be cheerful to share and simple to portion, with no layers to stack or frosting to pipe.
This Jello Poke Cake recipe keeps the important details clear: the water for the batter is separate from the water for the strawberry soak, the topping goes onto a completely cold cake, and the full chilling time is included in the plan. Those details make this a useful version to keep for the next time a colorful, make-ahead dessert is on the menu.
Jello Poke Cake at a Glance
This Jello Poke Cake is a chilled, single-layer white cake made with cake mix, strawberry gelatin, and prepared whipped topping. It bakes and serves from one rectangular pan and is cut into 16 portions.
- Flavor: Vanilla white cake, sweet strawberry, and a creamy white finish.
- Texture: Tender pale crumb, moist strawberry channels, and soft, airy topping.
- Method: Bake, poke, soak, and refrigerate; serve cold.
- Difficulty: Easy, with cooling and chilling that need to be planned ahead.
- Pan: Light-colored metal, 9 × 13 × 2 inches (23 × 33 × 5 cm).
- Yield: 16 portions, cut in a 4 × 4 grid.
- Active preparation: About 20 minutes with the ingredients ready.
- Bake time: 26–31 minutes, with 30 minutes used for planning.
- Cooling and chilling: 15 minutes after baking, at least 3 hours before topping, and at least 1 hour afterward.
- Total time: About 5 hours 5 minutes; allow longer if the cake is not fully cold or set.
- Advance preparation: Thaw the topping in the refrigerator before it is needed. The cake can be assembled the day before serving.
- Best for: Potlucks, family gatherings, and a chilled dessert table.
The cake-mix base and prepared topping make this the simpler preparation route. For a homemade white cake finished with stabilized real whipped cream, choose the from-scratch strawberry poke cake instead. That recipe has its own batter, topping, and portioning instructions.
Why This Jello Poke Cake Works: Tender Crumb and Clean Slices
The strength of this Jello Poke Cake is the balance between a tender cake that can accept the soak and enough intact crumb to support a chilled slice. Each component has a specific job, including the light topping.
- A pale base shows the strawberry tracks. White cake mix prepared with egg whites keeps the contrast clear, so the finished slice has distinct fruit-colored channels rather than an evenly pink crumb.
- The soak is measured for the cake. One regular 3-ounce gelatin packet is dissolved with less cold water than a bowl of gelatin would use. That keeps the liquid allocation tied to this dessert.
- Narrow holes leave cake between the channels. A dinner fork opens paths for the liquid without removing large plugs of crumb that would otherwise help the square hold together.
- Even pouring avoids one saturated edge. Spreading the soak across the pan gives the center and corners a chance to absorb it, rather than repeatedly flooding the easiest opening.
- Cold cake protects the white finish. Waiting until the soaked cake is completely cold gives the topping a cool surface and helps keep the two layers visually separate.
- The topping stays soft and modest. A single tub adds a creamy finish without introducing a dense pudding or cream cheese layer that would change the character of the cake.
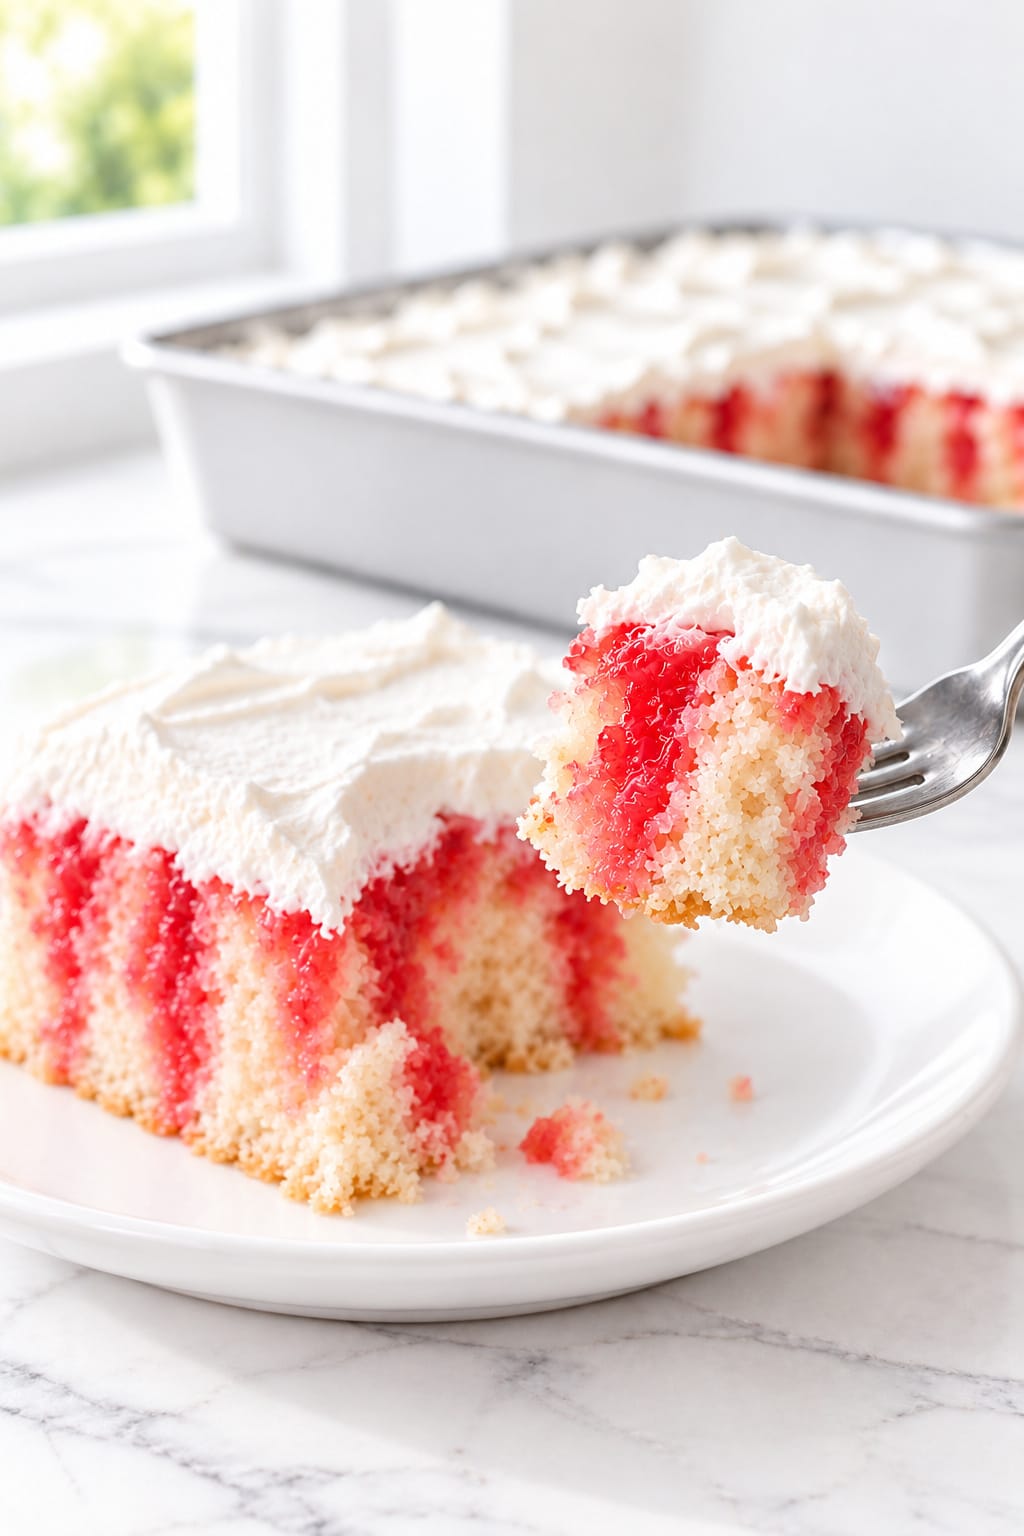
Why You’ll Love Making This Easy Jello Poke Cake
Jello Poke Cake is a practical choice when you can give dessert refrigerator time but would like to keep the hands-on work short. The preparation uses familiar ingredients and leaves the decoration pleasantly simple.
- The active work is manageable. About 20 minutes covers mixing, preparing the soak, and topping the cake. The total is much longer because the cake needs both refrigerator stages.
- One pan does several jobs. Bake, soak, chill, and portion in the same pan, so there is no delicate transfer onto a serving stand.
- The portions are easy to plan. A four-by-four cutting pattern gives 16 squares for a shared dessert, without estimating uneven wedges.
- There is no separate frosting to make. Prepared whipped topping saves another mixing task and spreads into soft swoops with an offset spatula.
- The day-before option is useful. Complete the cake and its chilling ahead, then keep it covered until the gathering rather than assembling dessert during the meal.
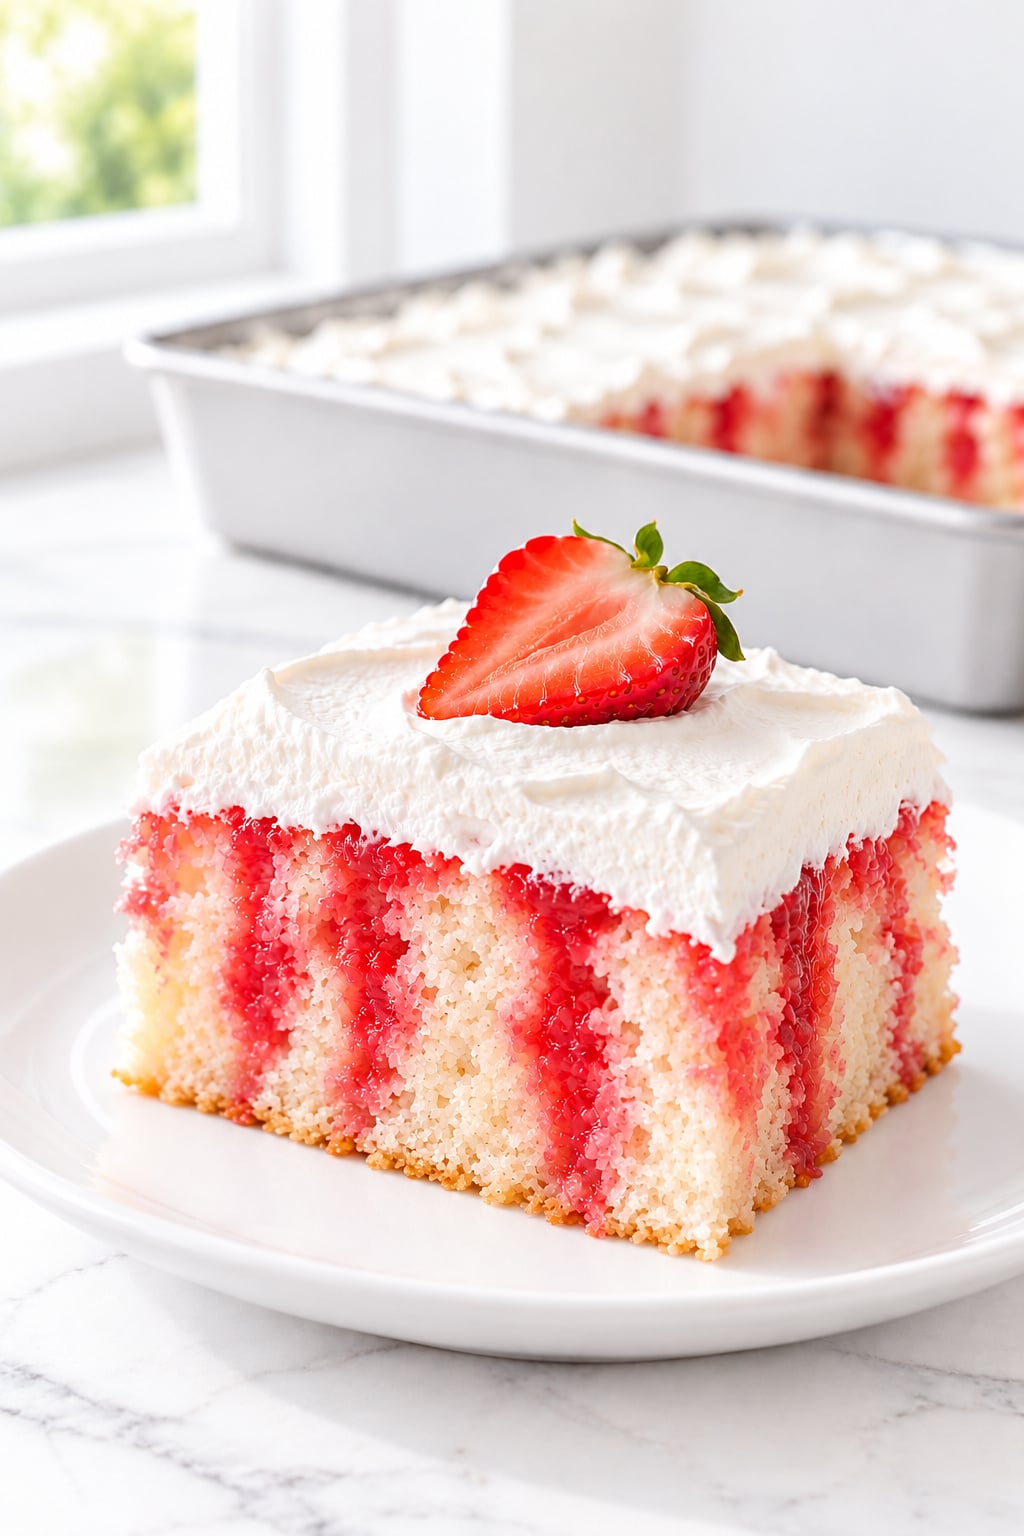
- A small garnish is enough. One dry strawberry half on each square adds fresh color, while an ungarnished slice still shows the strawberry streaks inside.
The Science of Jello Poke Cake: Moist Channels and a Soft White Topping
Three processes shape Jello Poke Cake: liquid moves through the crumb, dissolved gelatin sets as it cools, and an airy topping needs gentle, cold handling. Understanding those processes helps explain why extra water or rushed cooling changes the result.
Cake structure and liquid distribution. The baked base of Jello Poke Cake contains small spaces that can take up liquid. Narrow fork openings provide additional routes into the crumb while leaving supporting cake around them. The practical consequence is to make clean punctures and distribute the soak across the surface, rather than tearing wide cavities or pouring repeatedly into one spot.
Dissolution comes before setting. The hot water dissolves the gelatin mixture so it can flow into the cake. As the mixture cools, the gelatin forms a network within the moistened channels. Undissolved grains cannot distribute evenly, and separately chilled, thickening gelatin will not flow like a fresh liquid soak. Stir until clear, pour while fluid, and judge the slice after refrigeration.
Airy toppings need a cold surface. Whipped topping contains an aerated structure that can soften with heat or lose volume when roughly handled. Fully thawed does not mean warm: keep it refrigerated and spread it gently over completely cold cake. A few soft swirls are preferable to repeatedly working it back and forth.
Ingredients for Jello Poke Cake and Its Strawberry Soak
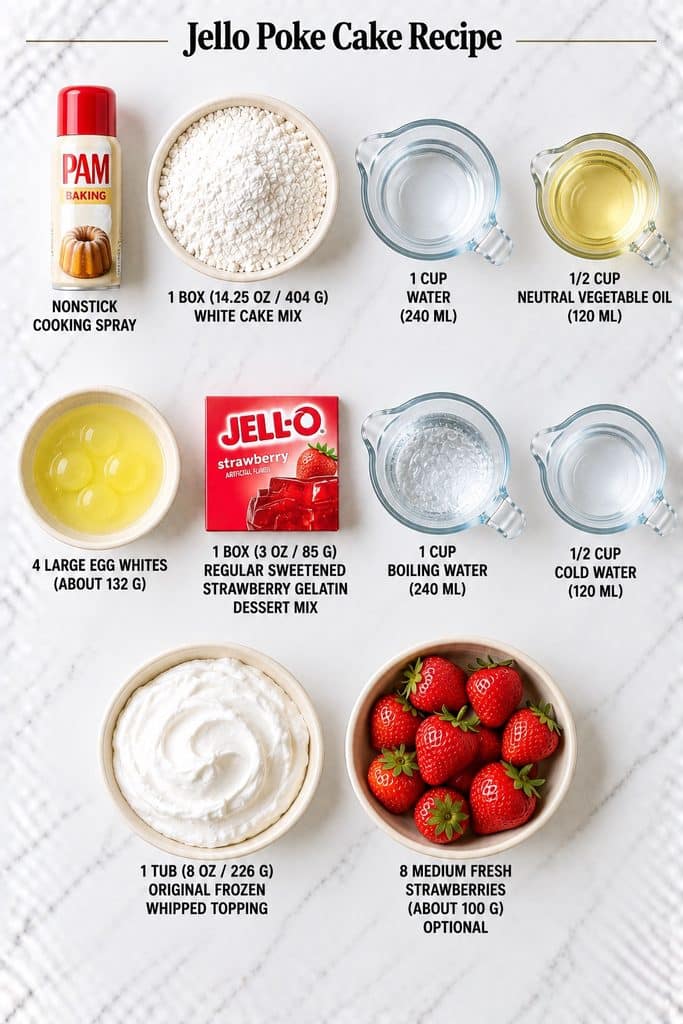
The ingredients for Jello Poke Cake are grouped into pan preparation, white cake, strawberry soak, topping, and optional fruit. Keep the three water measurements separate so the batter and soak each receive the correct amount.
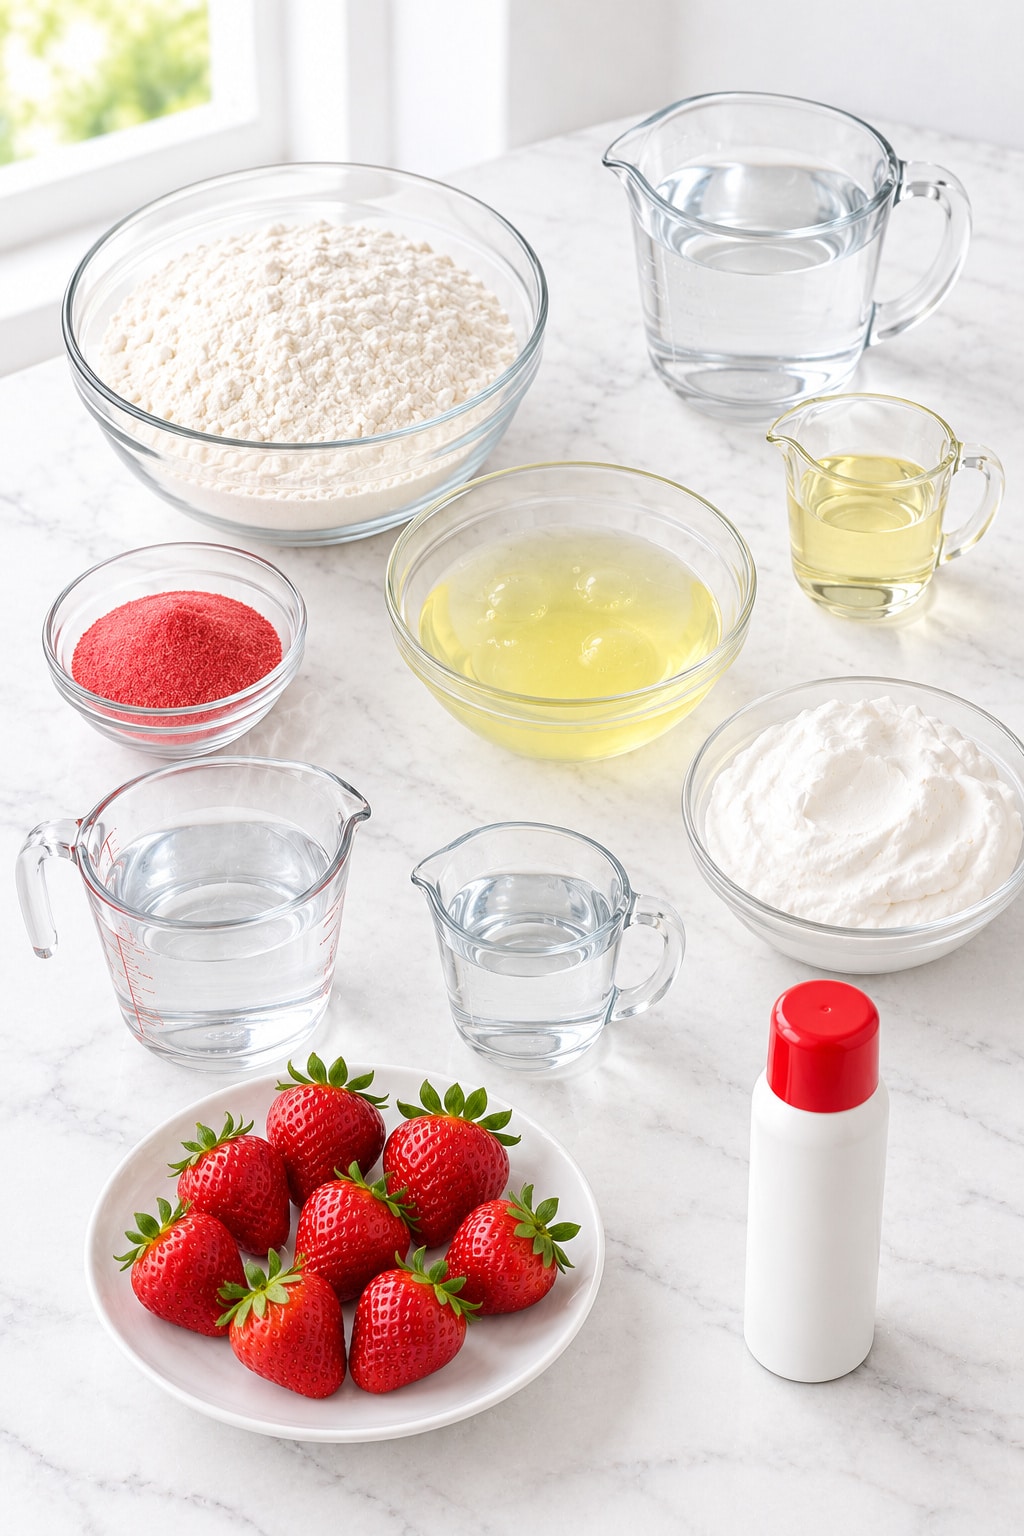
Ingredient List
Use the specified white cake mix for the fixed batter quantities here, regular sweetened strawberry gelatin for the soak, and cold, fully thawed topping for the finish. The strawberries are optional and are added only when serving.
Pan preparation
- Nonstick cooking spray, as needed for the bottom of the pan
White cake
- 1 box (14.25 oz / 404 g) white cake mix, reference product Betty Crocker Favorites Super Moist White
- 1 cup (240 ml) water, for the cake batter
- 1/2 cup (120 ml) neutral vegetable oil
- 4 large egg whites (about 132 g), unwhipped
Strawberry gelatin soak
- 1 box (3 oz / 85 g) regular sweetened strawberry gelatin dessert mix, such as Jell-O
- 1 cup (240 ml) boiling water, for dissolving the gelatin
- 1/2 cup (120 ml) cold water, for the gelatin
Topping
- 1 tub (8 oz / 226 g) original frozen whipped topping, thawed in the refrigerator
Optional garnish
- 8 medium fresh strawberries (about 100 g), hulled, patted dry and halved (optional)
Ingredient Notes for the Cake Mix, Strawberry Gelatin and Topping
For Jello Poke Cake, the package details matter more than the number of boxes. This Jello Poke Cake uses a 14.25-ounce white mix with its own water, oil, and egg-white additions; the gelatin and topping are different products with different jobs.
White cake mix and egg whites: The fixed cake quantities for Jello Poke Cake are based on Betty Crocker Favorites Super Moist White Cake Mix, 14.25 ounces (404 g). Its preparation uses 1 cup water, 1/2 cup oil, and 4 large egg whites. Keep the whites unwhipped. If another package gives different additions or baking directions, use its instructions for the cake rather than forcing these additions onto it; the timing and nutrition will change.
The water has three separate uses: 1 cup (240 ml) goes into the cake batter, a second cup (240 ml) is boiled to dissolve the gelatin, and 1/2 cup (120 ml) cold water finishes the soak. The cake does not receive all three measurements as a pour-over. Once the powder is dissolved, the soak also contains that powder, so its finished volume is not simply the measured water volume.
Regular strawberry gelatin: Use the 3-ounce (85 g) sweetened gelatin dessert powder, not instant pudding, unflavored gelatin, or a sugar-free packet. The full cold-water amount printed for preparing a bowl of gelatin is not the amount used for Jello Poke Cake. A larger packet is not a reason to pour a larger batch onto this pan.
Oil, topping, and fruit: A neutral liquid vegetable oil keeps its flavor in the background; use the same 1/2 cup if choosing another neutral oil. Thaw the original frozen whipped topping in the refrigerator and keep it cold. Wash and dry the optional strawberries thoroughly so their surface moisture does not streak the topping.
Kitchen Tools for Baking, Soaking and Chilling Jello Poke Cake
A rectangular metal pan, a narrow perforating tool, and enough refrigerator space matter most for Jello Poke Cake. The remaining tools make measuring, gentle spreading, and lifting the cold portions easier.
- Measure and mix: Kitchen scale, US measuring cups, large mixing bowl, electric hand mixer with standard beaters, and flexible spatula.
- Bake and cool: Conventional oven with a center rack, light-colored metal 9 × 13 × 2-inch pan (23 × 33 × 5 cm), and wire cooling rack.
- Perforate and pour: Large dinner fork, heatproof measuring jug or bowl, stirring spoon, and kettle or another heat source for boiling water.
- Chill and finish: Refrigerator at or below 40°F (4°C), appliance thermometer, pan lid or tented cover, offset spatula, and heat-safe support suitable for the refrigerator shelf.
- Garnish and portion: Thin knife, broad cake server, and small cutting board for the optional strawberries.
Before You Begin: Make Room for a Fully Chilled Jello Poke Cake
Before mixing Jello Poke Cake, make sure the topping will be thawed when the cold cake needs it. A clear refrigerator shelf also prevents having a warm, soaked pan waiting on the counter while you rearrange food.
- Check the cake-mix package against the ingredient quantities, and measure the batter water separately from both soak waters.
- Place the unopened topping tub in the refrigerator at least 4 hours before it is needed, or the night before. Keep it refrigerated after thawing; do not stir it to hurry the process.
- Fully preheat a conventional oven to 350°F (175°C) with the rack centered. The baking range here is for the specified light-colored metal pan.
- Clear a refrigerator shelf with space around the pan for cold air to circulate, and have a suitable heat-safe support ready.
- Keep Jello Poke Cake in its baking pan throughout soaking and chilling. Moving the whole soaked cake onto a stand would make it harder to support.
What to Expect from the Crumb, Strawberry Tracks and Chilled Finish
Jello Poke Cake looks quite different before and after chilling. Damp red patches around the holes are normal after pouring; the finished cake should be cold and cohesive, with pale crumb still supporting the strawberry channels.
- The baked white cake has a lightly golden surface rather than a dark crust. Paleness alone does not prove that the center is baked.
- The fresh soak is a clear red liquid. It should run into the channels, not sit on the cake as thick jelly or undissolved powder.
- During refrigeration, the damp crumb and gelatin settle together. Expect moist fruit-flavored tracks rather than a separate, free-standing gelatin slab.
- The topping is a soft, continuous white layer with shallow swoops. It is not a tall buttercream border or a separate cheesecake filling.
How to Make Jello Poke Cake, Step by Step
Make Jello Poke Cake in the same pan from baking through serving. The sequence matters: a baked, briefly rested cake receives the fluid soak, then becomes completely cold before the topping is added.
1. Prepare the pan and oven
Heat a conventional oven to 350°F (175°C) with a rack in the center. Lightly spray the bottom of a light-colored metal 9 × 13 × 2-inch pan (23 × 33 × 5 cm). Keep Jello Poke Cake in this pan for the remaining stages.
What you should see: The bottom has a thin, even film of spray, and the oven is fully preheated before the batter goes in.
2. Mix the white cake batter
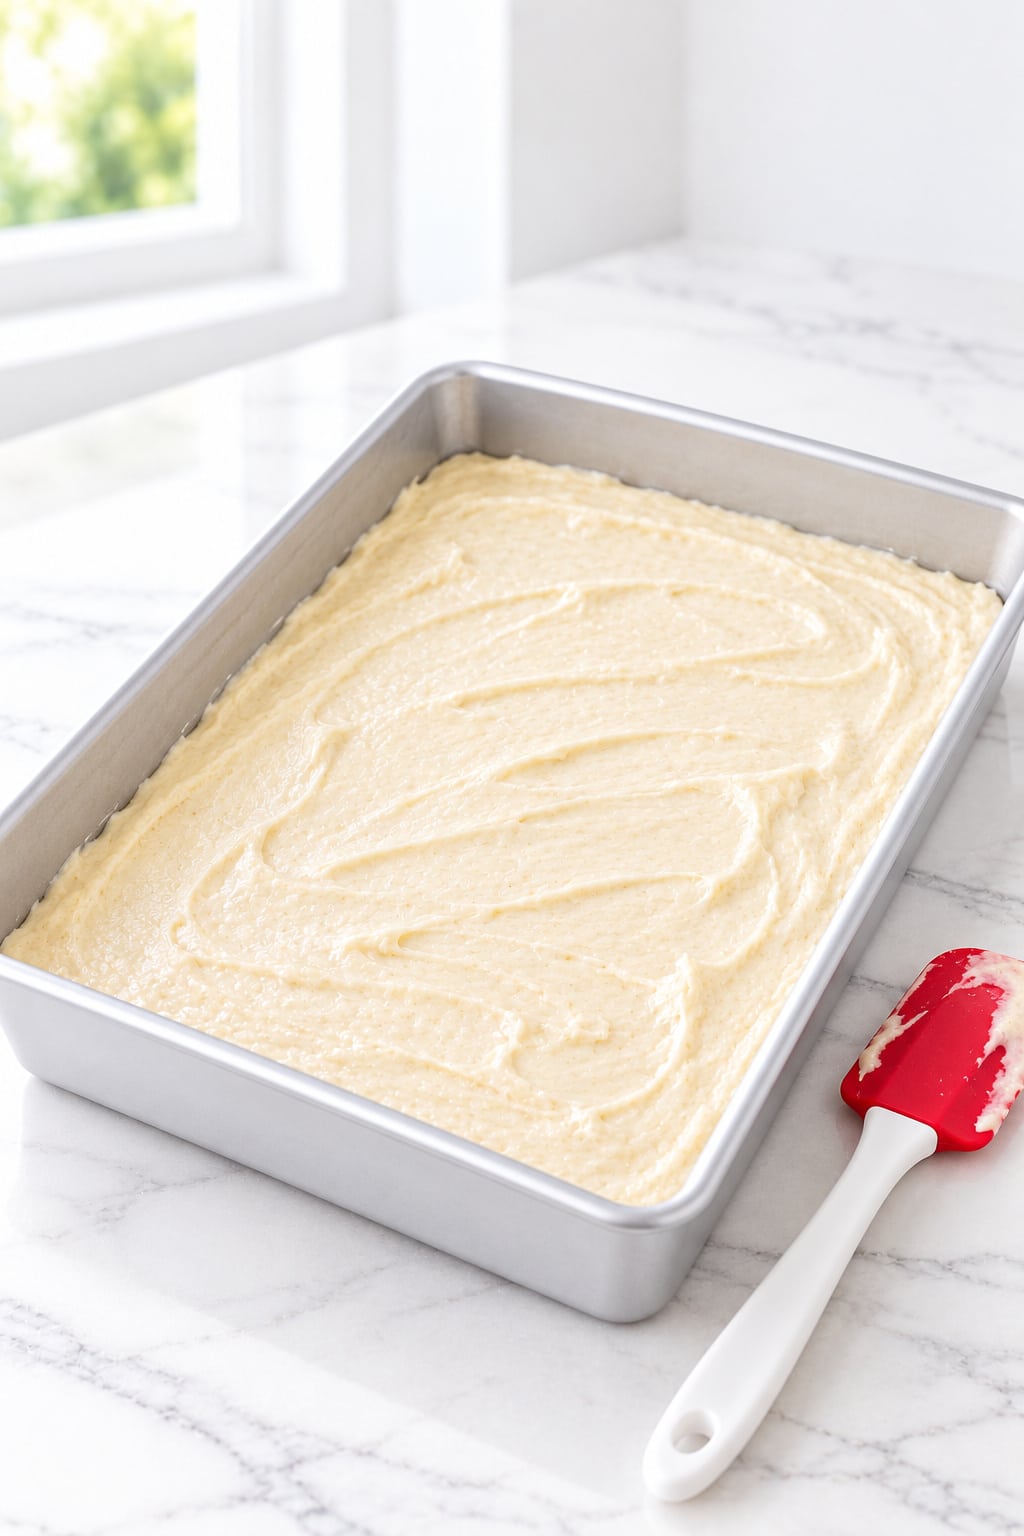
Put the entire 404 g white cake mix in a large bowl with 1 cup (240 ml) batter water, 1/2 cup (120 ml) neutral oil, and 4 large unwhipped egg whites. Beat with an electric mixer on medium for 2 minutes, scraping the bowl as needed. Spread the batter evenly into the pan.
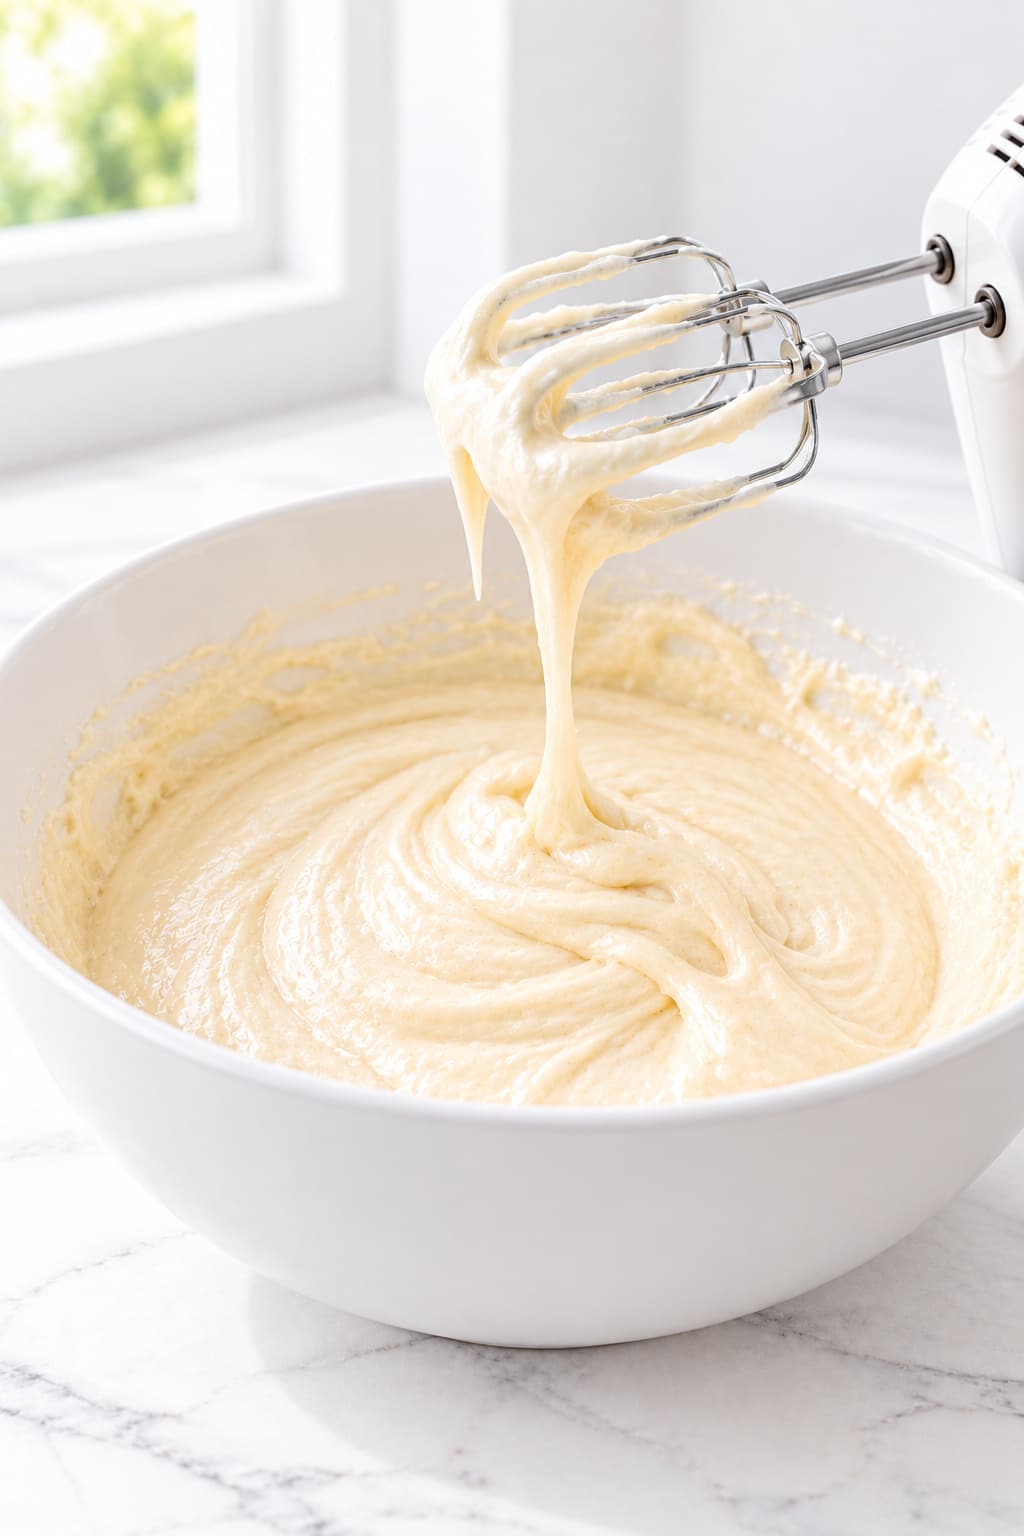
What you should see: The batter is evenly hydrated and pale, with no dry pockets around the bottom of the bowl. The egg whites are mixed into the batter, not beaten separately.
3. Bake until the center is set
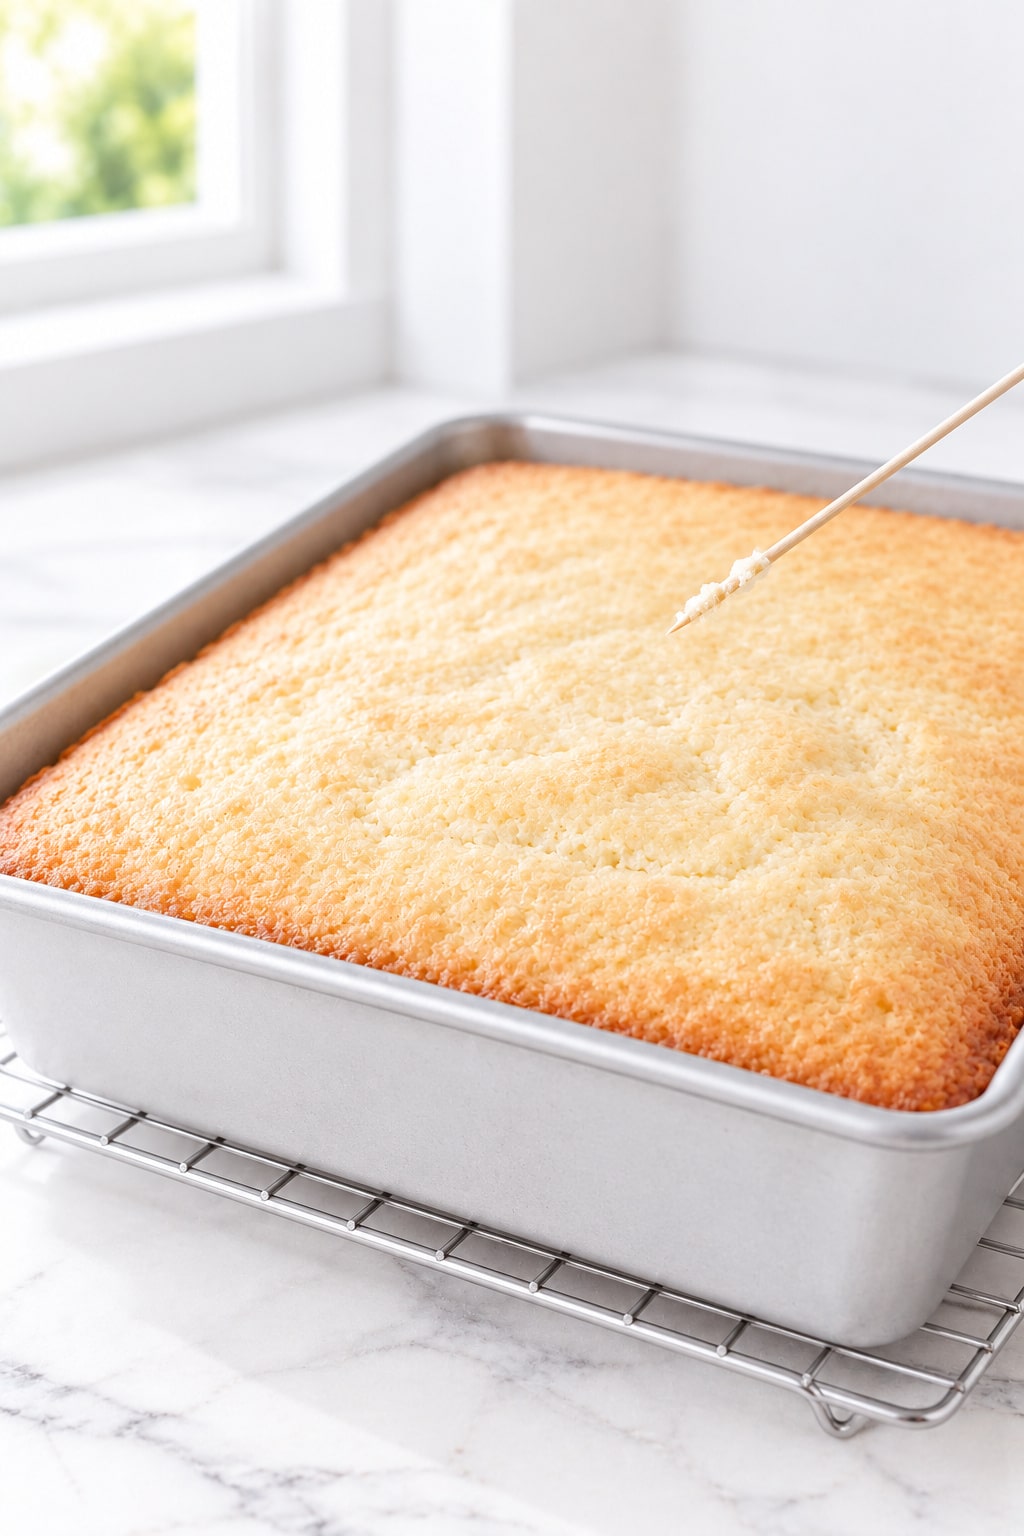
Bake the Jello Poke Cake base for 26–31 minutes, beginning the first check at 26 minutes. Lightly touch the center and insert a toothpick there. Continue baking if it carries wet batter; do not remove an unset cake in an attempt to keep it moist.
What you should see: The center is set and springs back lightly. The toothpick comes out clean or with a few dry crumbs, without wet paste.
4. Rest and perforate the cake
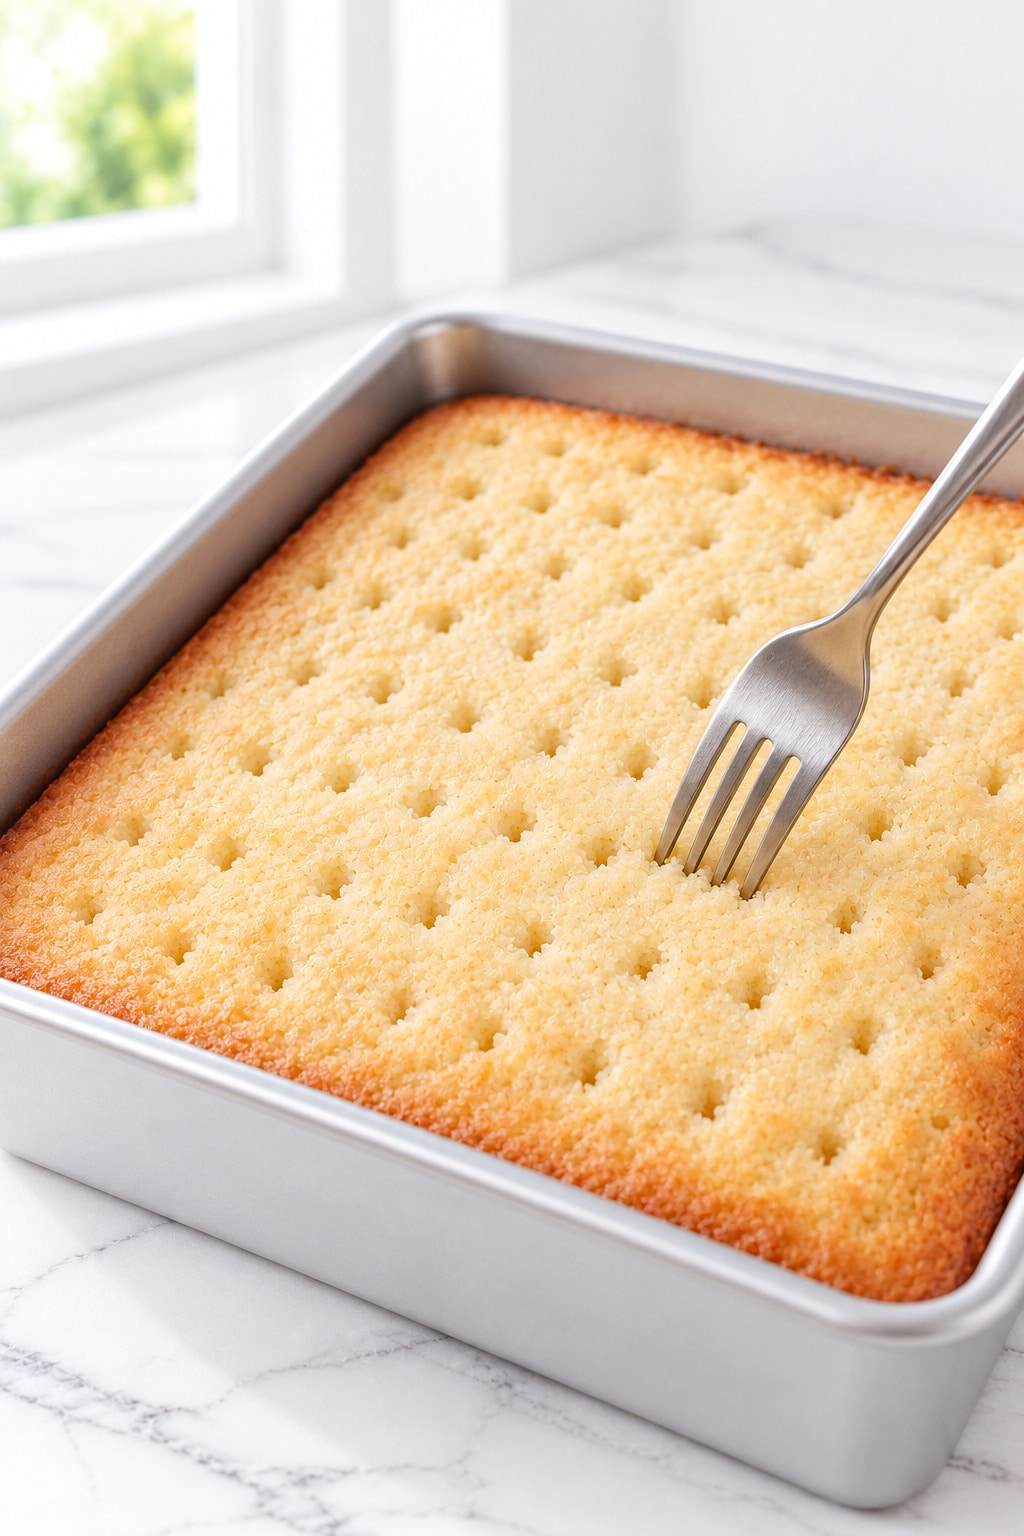
Rest the pan on a wire cooling rack for 15 minutes. Use a large dinner fork to pierce the warm cake evenly, moving about 1/2 inch (1.3 cm) between placements. Aim through roughly half to two-thirds of the crumb, stopping above the pan bottom. Lift the fork straight out and wipe sticky tines as needed.
What you should see: Many narrow openings remain in intact cake. The top is not torn into craters, and the fork does not scrape the pan base.
5. Dissolve the strawberry gelatin
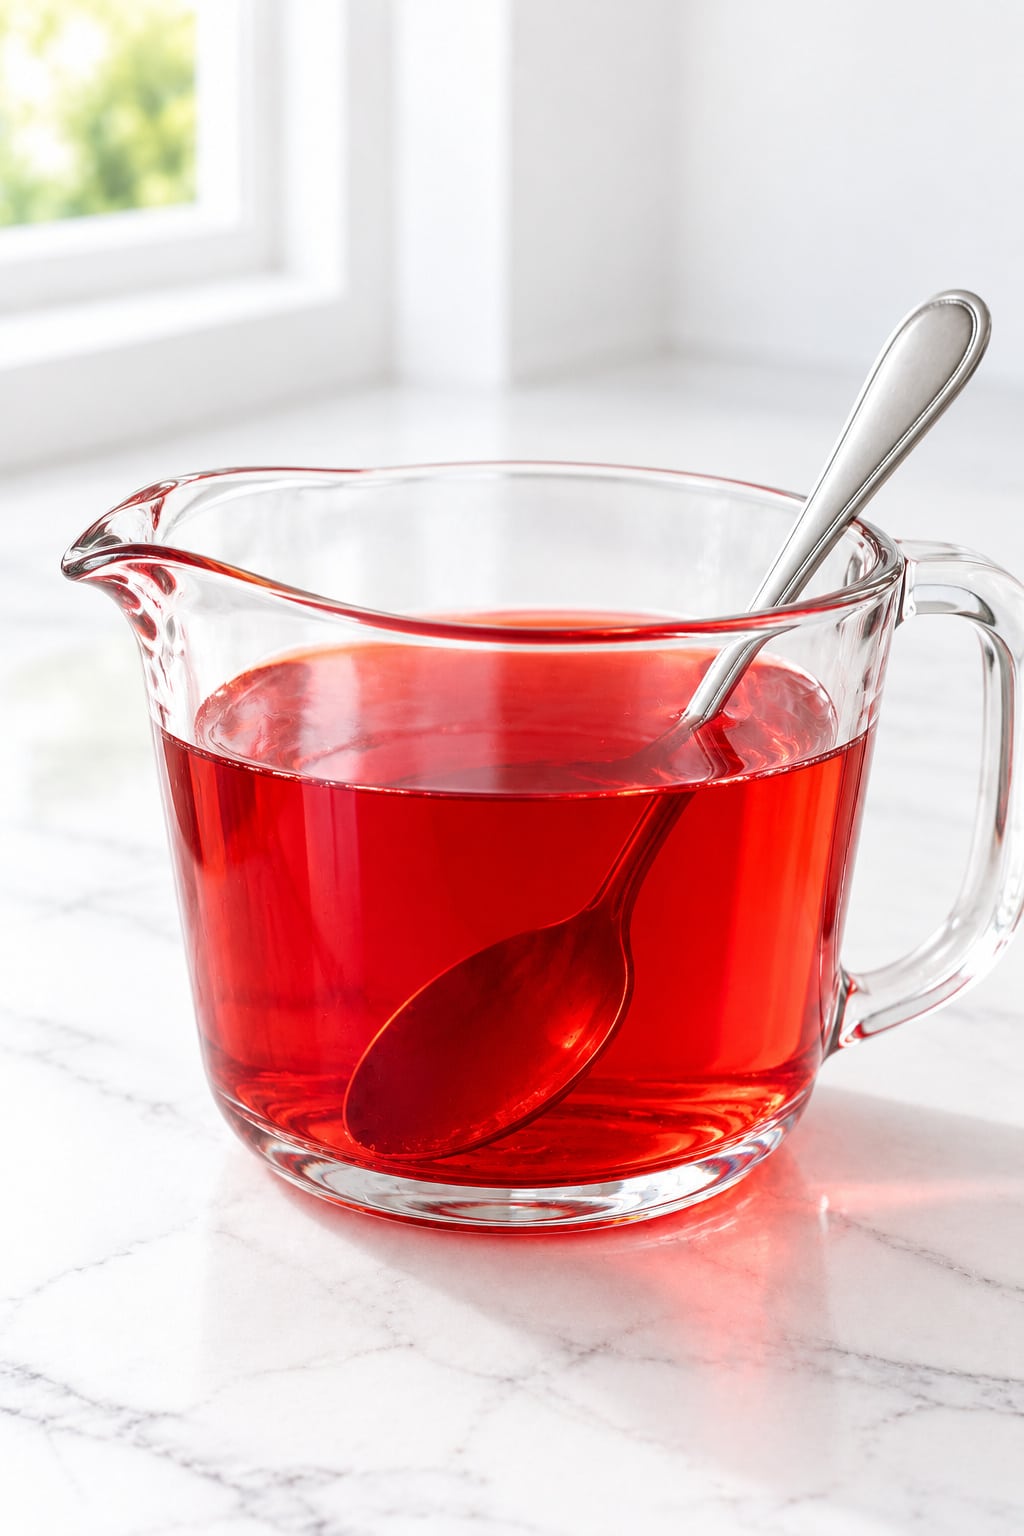
Put all 3 ounces (85 g) regular strawberry gelatin powder in a heatproof bowl or jug. Add 1 cup (240 ml) freshly boiling water and stir for 2 minutes, until the grains dissolve. Stir in 1/2 cup (120 ml) cold water and use the mixture promptly. Do not refrigerate it separately before pouring.
What you should see: The soak is clear red and fluid, without gritty powder or gelled lumps.
6. Distribute the soak evenly
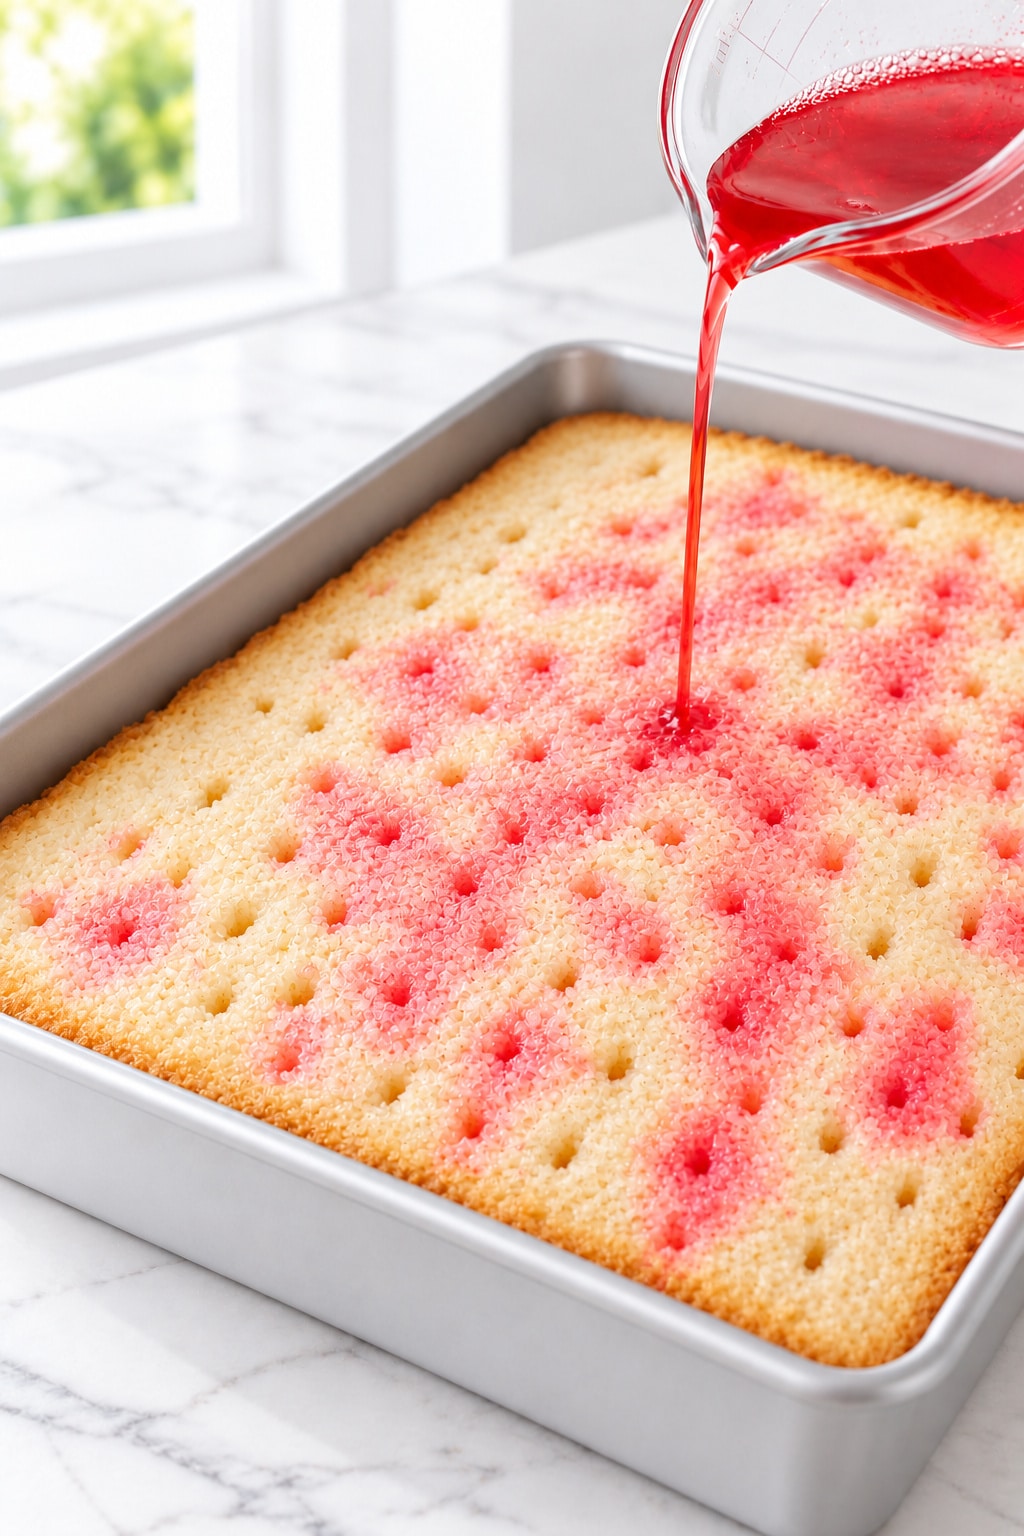
Pour the freshly mixed gelatin slowly over the perforated Jello Poke Cake, making several passes across the pan and using all of the soak. If one area begins collecting liquid, pause there and let it absorb before continuing across a drier area. Do not add extra water.
What you should see: The red liquid enters the channels and creates damp halos around them. It is not repeatedly flooding the same corner.
7. Chill the soaked cake
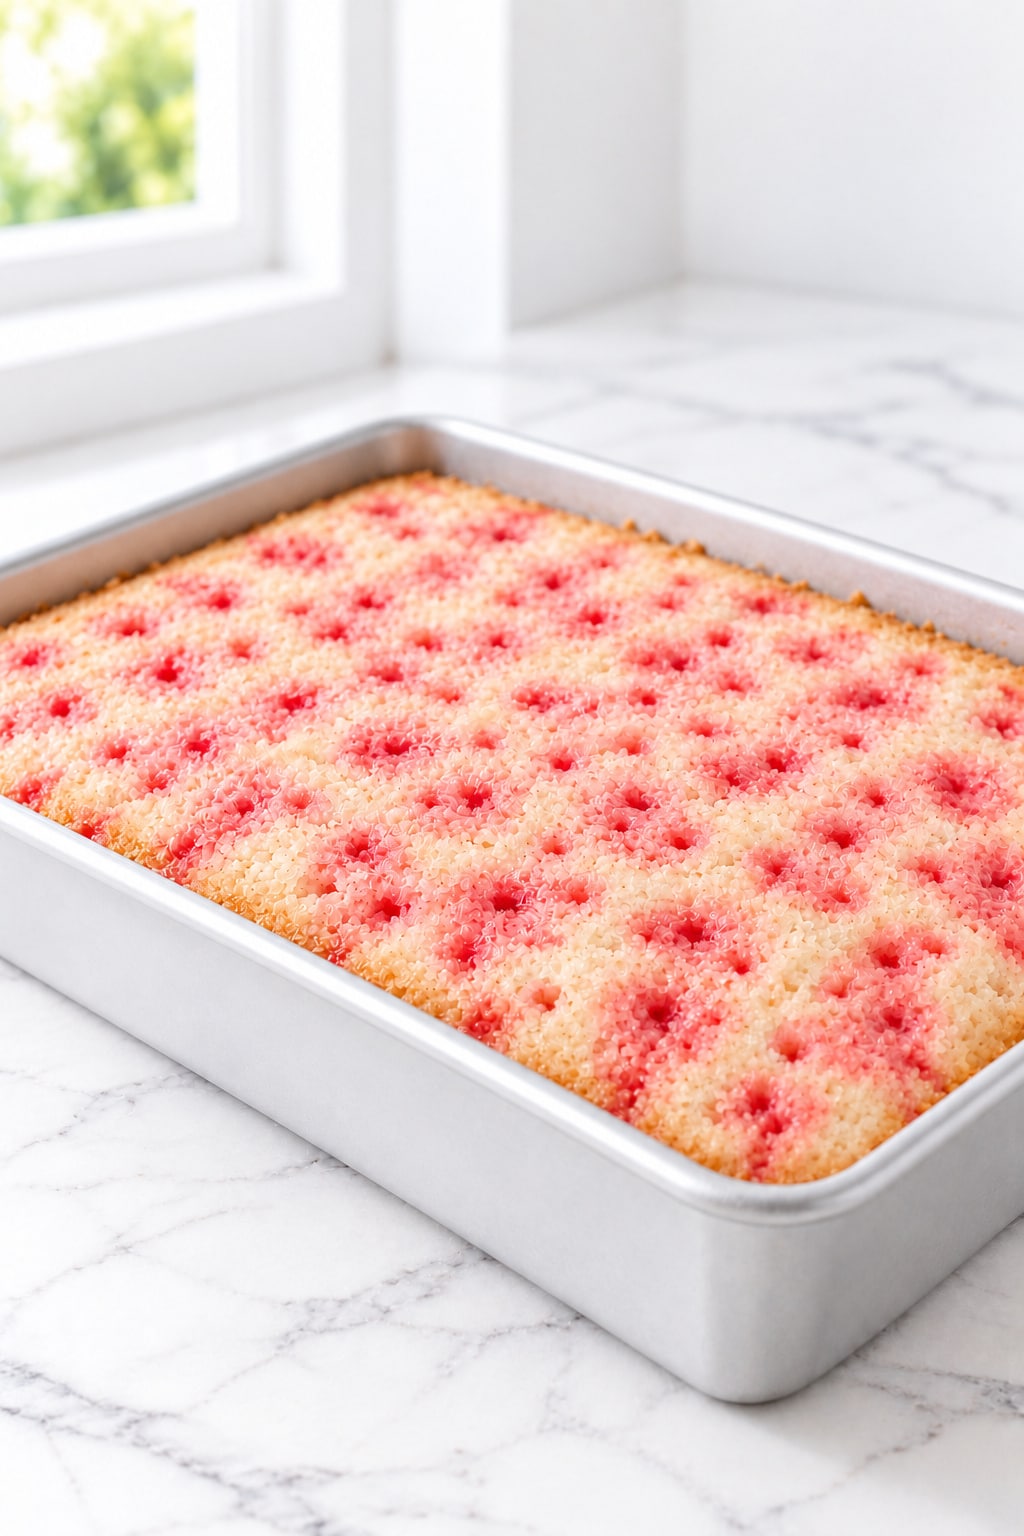
Transfer the pan promptly to a refrigerator at 40°F (4°C) or below, using a heat-safe support appropriate for the shelf. Leave room for air to circulate. Loosely tent during initial cooling, then cover once cold. Refrigerate for at least 3 hours, and longer if the center is still warm.
What you should see: The cake is cold throughout, with no liquid layer left on its surface. A warm center means it needs more refrigerator time before topping.
8. Add the whipped topping and chill again
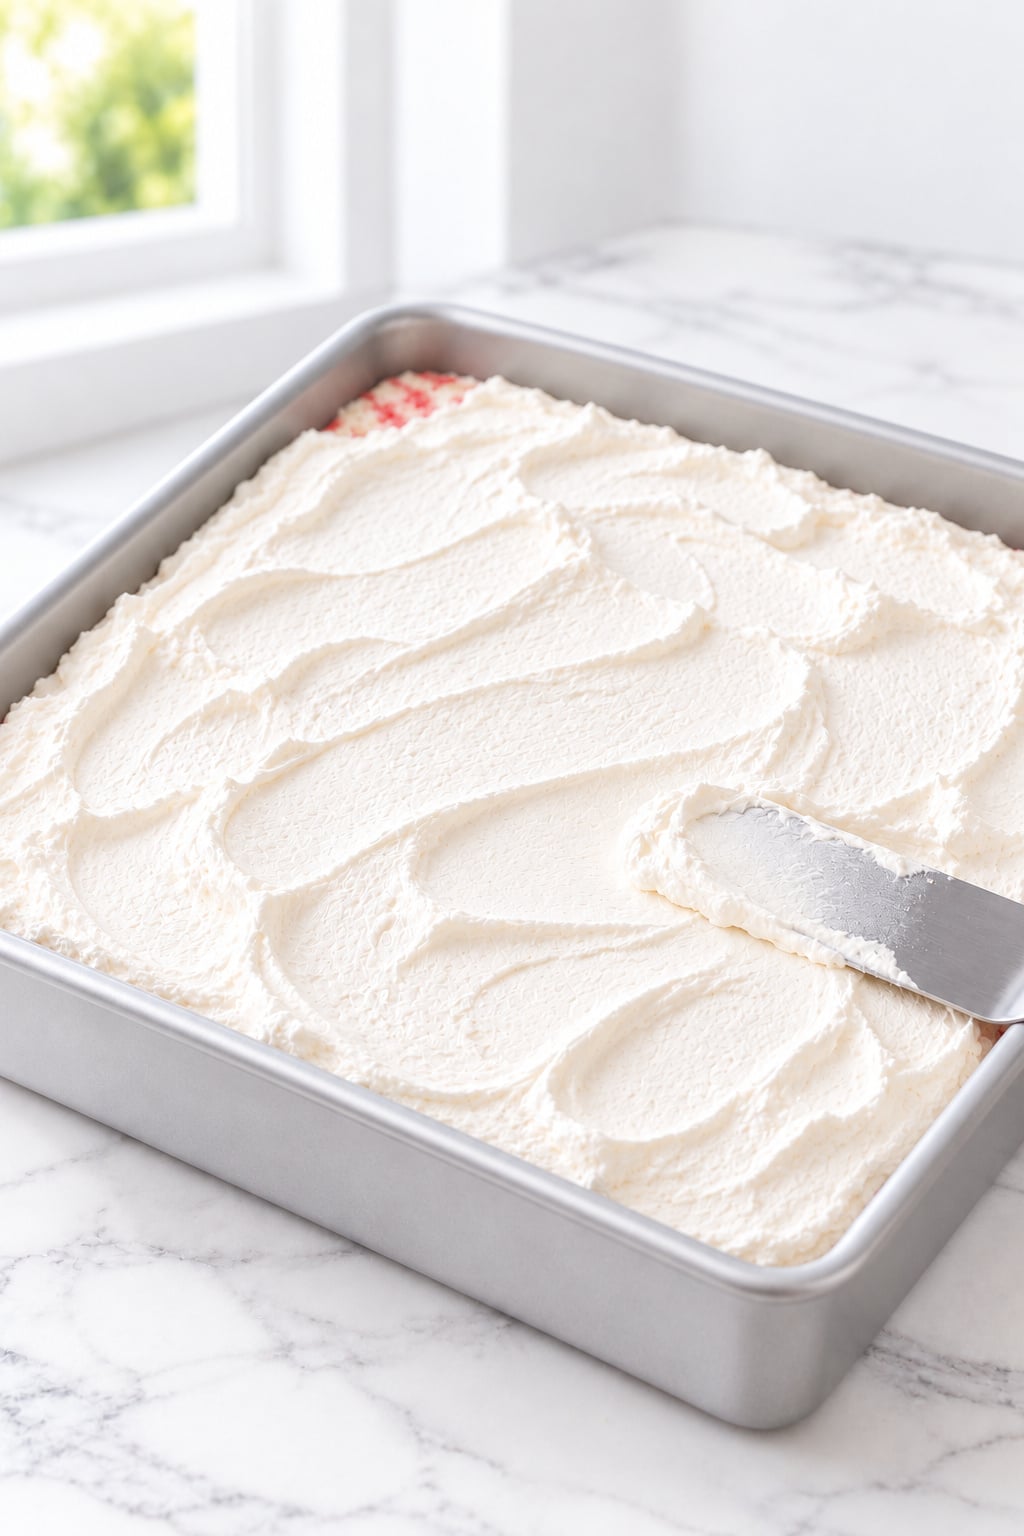
Dollop all 8 ounces (226 g) cold, fully thawed whipped topping across the cold cake. Spread gently with an offset spatula into an even layer and shallow swoops. Avoid vigorous stirring or repeated back-and-forth working. Cover without touching the topping and refrigerate for at least 1 more hour.
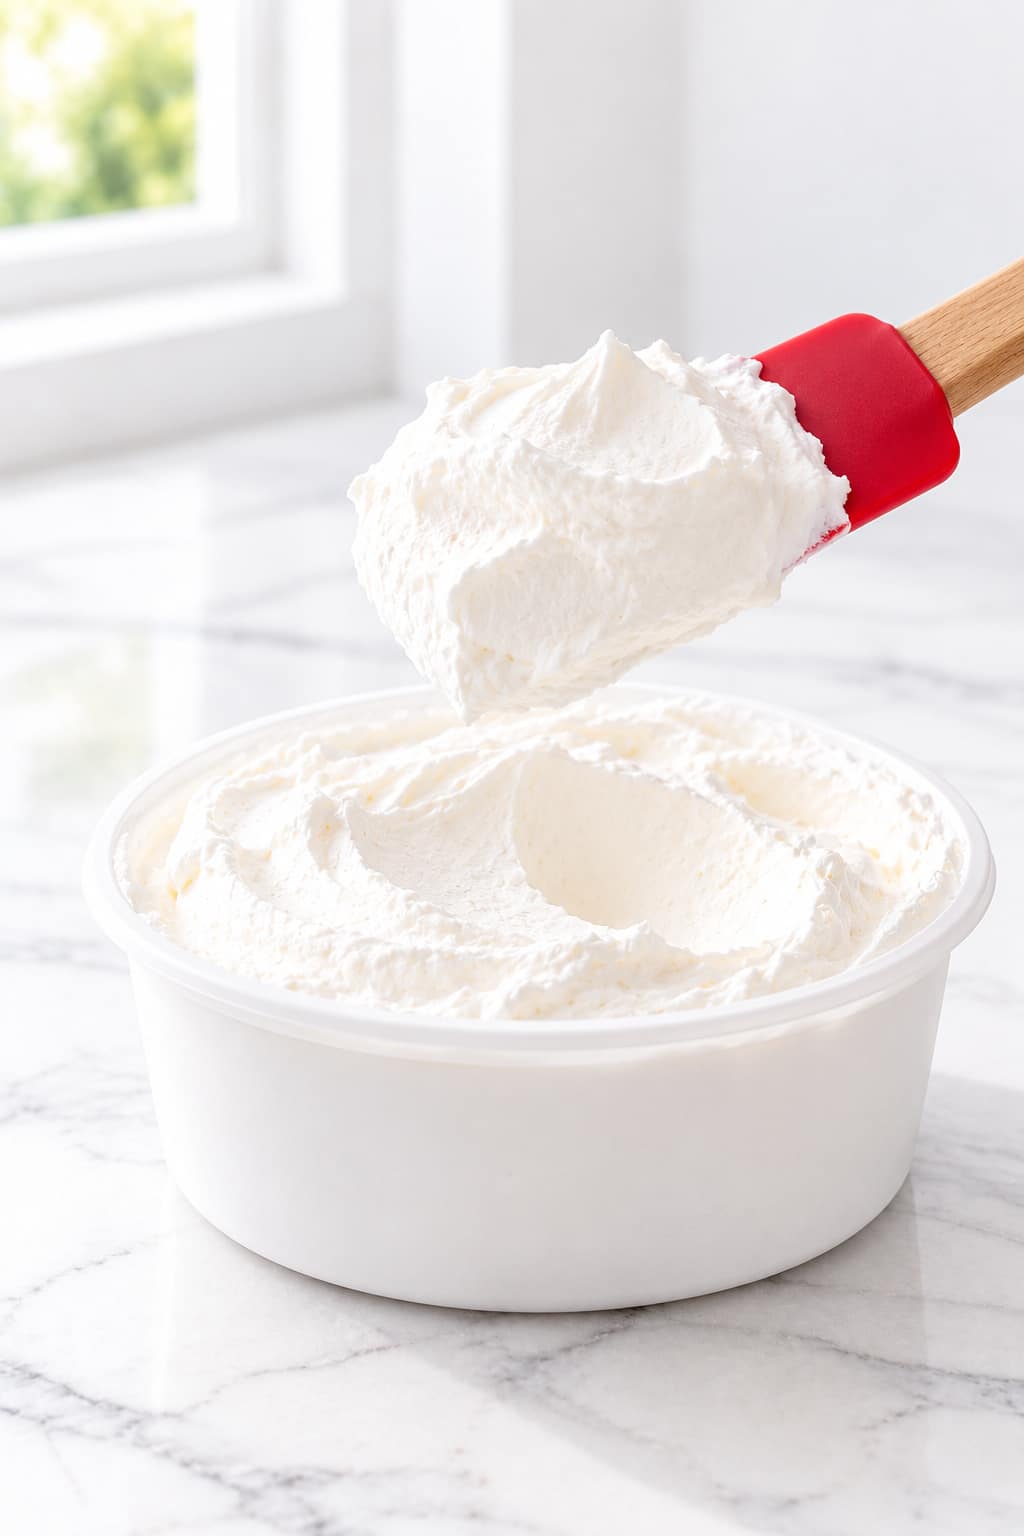
What you should see: The finish stays soft, white, and continuous, without melted edges or red liquid mixing through it.
9. Cut and serve cold
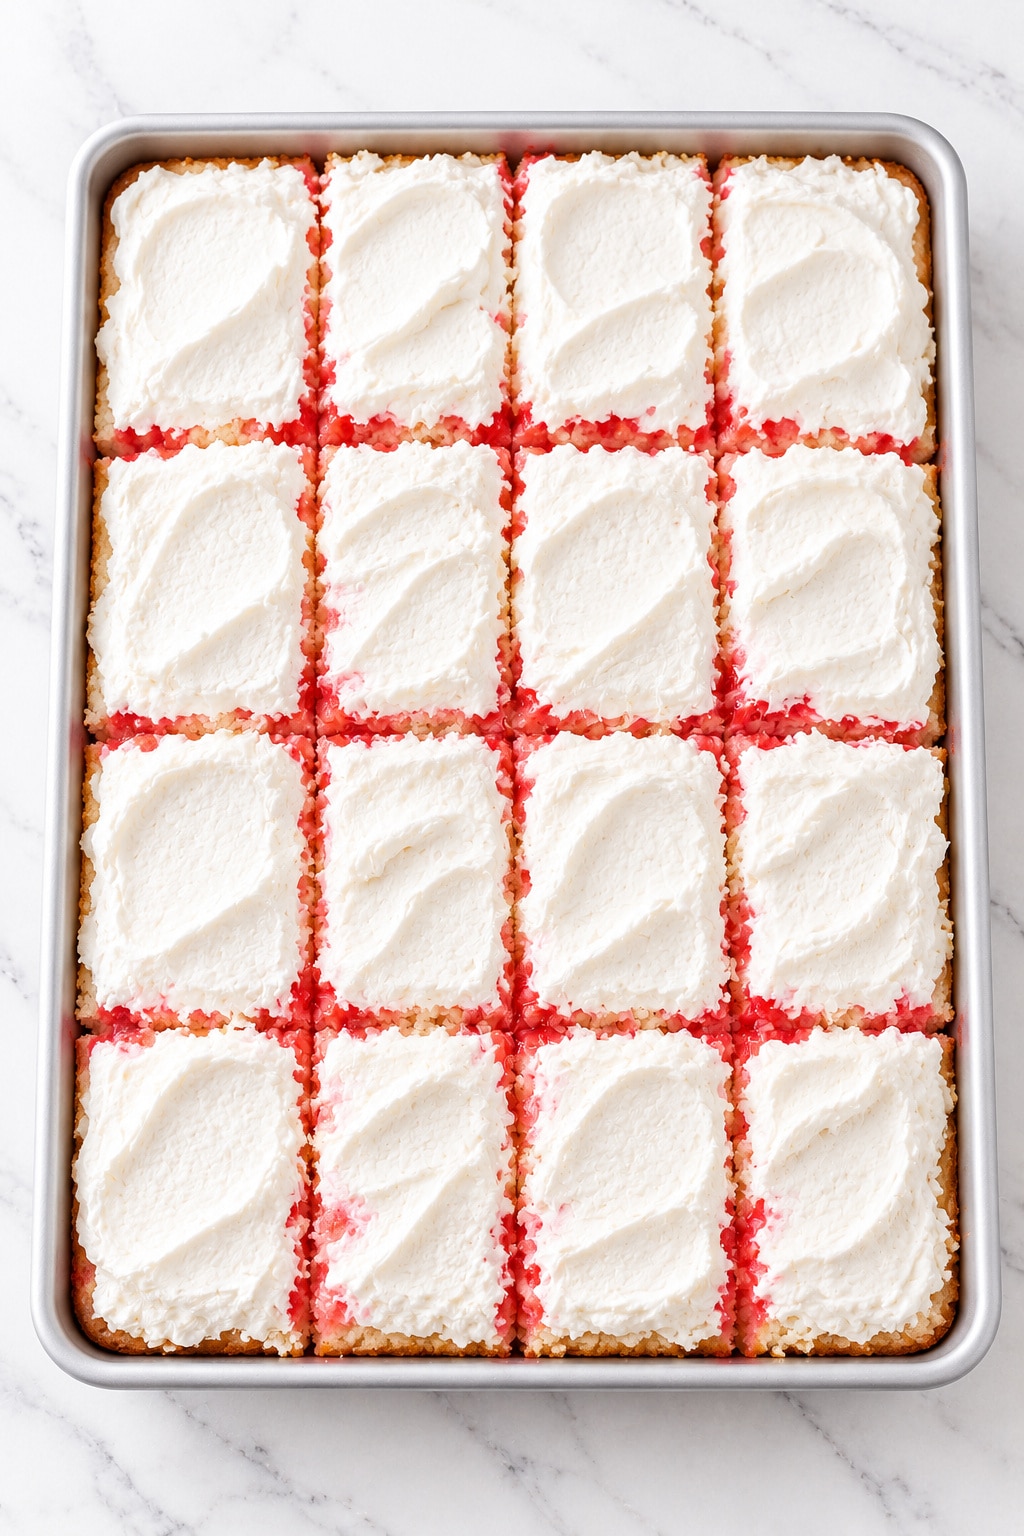
Cut Jello Poke Cake into four rows by four columns. Wipe the thin knife between cuts and slide a broad cake server beneath each square. If using the optional garnish, add one dry strawberry half per piece just before serving. Return the remaining cake to the refrigerator.
What you should see: Each cold square holds together on the server but yields easily to a fork, with moist strawberry tracks and pale crumb between them.
Jello Poke Cake Doneness: When the Cake, Soak and Topping Are Ready
Readiness for Jello Poke Cake has three separate checkpoints: baked crumb, a cold absorbed soak, and a topping that has completed its final chill. A good result at one stage does not remove the need for the next.
The White Cake Is Fully Baked
Check the center of Jello Poke Cake before adding any gelatin. A lightly springy surface and a toothpick without wet batter show that the crumb has set; a shiny, liquid center needs more baking. The soak adds moisture after baking, so an underbaked center is not a shortcut to a softer cake.
The Soaked Cake Is Cold and Set
After at least 3 hours in the refrigerator, Jello Poke Cake must feel completely cold, including the center, and show no free liquid on top. The aim is moistened cake that supports its channels. A pool sitting above the crumb or a warm center means the cake is not ready for its white topping.
The Topping and Slice Are Ready
The topping should remain softly defined after spreading and its final hour of refrigeration. When a square is lifted, the sides should stay together and the bottom should not release liquid onto the plate. Use cold portions for this check, since warm cake gives a misleading impression of the finished structure.
One lesson I have learned with chilled, cream-topped cakes is that the final layer rewards patience: if the cake is even slightly warm, the cream can soften and slide. Letting the cake become fully cold gives the topping a clean surface and makes the finished slices much easier to serve.
| Element | Normal appearance | A sign to investigate |
|---|---|---|
| Baked center | Set and lightly springy | Wet batter on the tester |
| Absorbed soak | Moist colored tracks within cake | Standing liquid or a compressed gummy base |
| White topping | Soft, even layer | Melting, sliding, or red liquid mixing through it |
| Cold portion | Tender square that lifts together | Crumb collapsing into paste or liquid leaking below |
Tips for Even Strawberry Tracks and Neat Jello Poke Cake Slices
The most useful refinements for Jello Poke Cake are the ones that help you notice a problem before adding the next component. Work with the appearance of the cake and soak, not the clock alone.
- Look across the whole surface before the next pour. The soak in Jello Poke Cake tends to find existing wet paths. Redirecting toward a drier area is more useful than repeatedly filling a saturated opening.
- Check the fork tines while you work. A sticky coating can pull and compress the warm crumb. Wiping the tool keeps the next punctures cleaner without widening them.
- Allow the topping to soften by thawing, not stirring. A cold thaw gives it spreadability while preserving its airiness. Rough mixing is not a substitute for enough time in the refrigerator.
- Leave clearance above the white layer. A lid or tented cover protects the cake without pressing away the shallow swirls or pulling off topping when uncovered.
- Support the first portion from underneath. A broad server lifts the soaked base more evenly than balancing it on a narrow knife. Once one square is out, the remaining cuts are easier to reach.
Jello Poke Cake Mistakes: Soggy Bases, Gummy Crumb and Watery Topping
When Jello Poke Cake is too wet or loses its shape, look first at the liquid amount, the baked crumb, and the temperature at topping time. Some issues can be prevented more easily than repaired after soaking.
| Problem | Likely cause | Prevention | Correction or limit |
|---|---|---|---|
| Wet or gummy base | Too much soak, torn crumb, or an underbaked center | Use the stated packet and waters, bake fully, and stop holes above the pan | Do not add more liquid. Chill fully before judging; chilling cannot cook raw batter or reverse a large excess of water. |
| Gritty red liquid | Powder not fully dissolved | Stir the powder in freshly boiling water before adding cold water | Finish dissolving while the mixture is still hot; do not pour gritty soak onto the cake. |
| One flooded edge | Pouring repeatedly into the same area | Use slow passes across the whole surface | Pause at the wet area and redirect toward drier cake. Do not keep adding liquid to force absorption. |
| Dry pale patches | Uneven fork coverage or uneven pouring | Perforate evenly and observe the surface between passes | Distribute the remaining measured soak toward drier areas; do not make an extra batch. |
| Soft or slipping topping | Cake still warm, topping warm, or topping overworked | Use fully cold cake and gently handled refrigerated topping | Chill before cutting. If the cake was warm, additional cold time may firm it, but the original smooth finish may not return. |
| Watery pink garnish marks | Wet fruit or fruit added too early | Pat the halves dry and garnish close to serving | Keep unused fruit separate and add fresh dry halves to the next portions. |
Beautiful Ways to Serve Jello Poke Cake
Serve Jello Poke Cake cold so the white topping stays soft and the strawberry tracks remain clear at the cut edges. Simple plating suits its cheerful color better than adding several extra toppings.
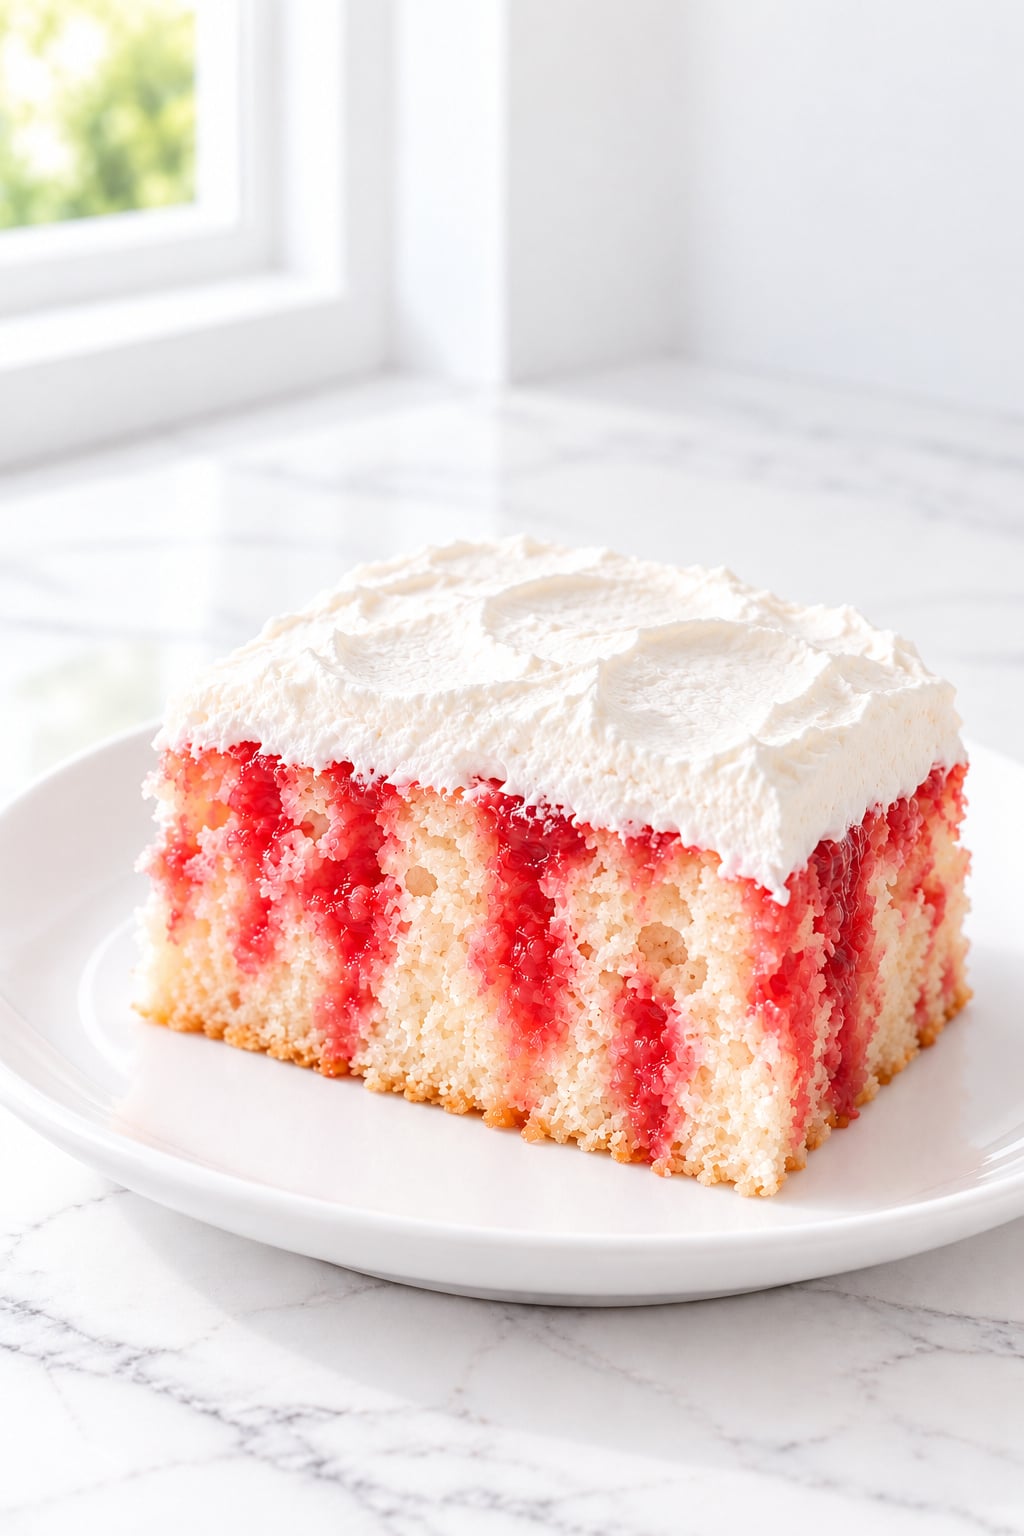
A Simple Chilled Square
Set one chilled square of Jello Poke Cake on a plain white plate and keep the cut face toward the guest. Without garnish, the contrast between pale cake, pink-red channels, and a soft white top becomes the main decoration. This is an easy choice when you want to portion the cake straight from the pan.
A Fresh Strawberry Finish
Place one thoroughly dried strawberry half on each square just before serving. The small fresh garnish echoes the fruit flavor without hiding the white topping, and keeping it separate until the end avoids a watery pink patch during overnight storage.
A Platter for Sharing
Arrange a few cold Jello Poke Cake squares on a white platter with enough space to lift them individually. Bring out a small group at a time and replenish from the refrigerator, especially during a longer gathering. Keep the soft topping upright rather than stacking pieces on one another.
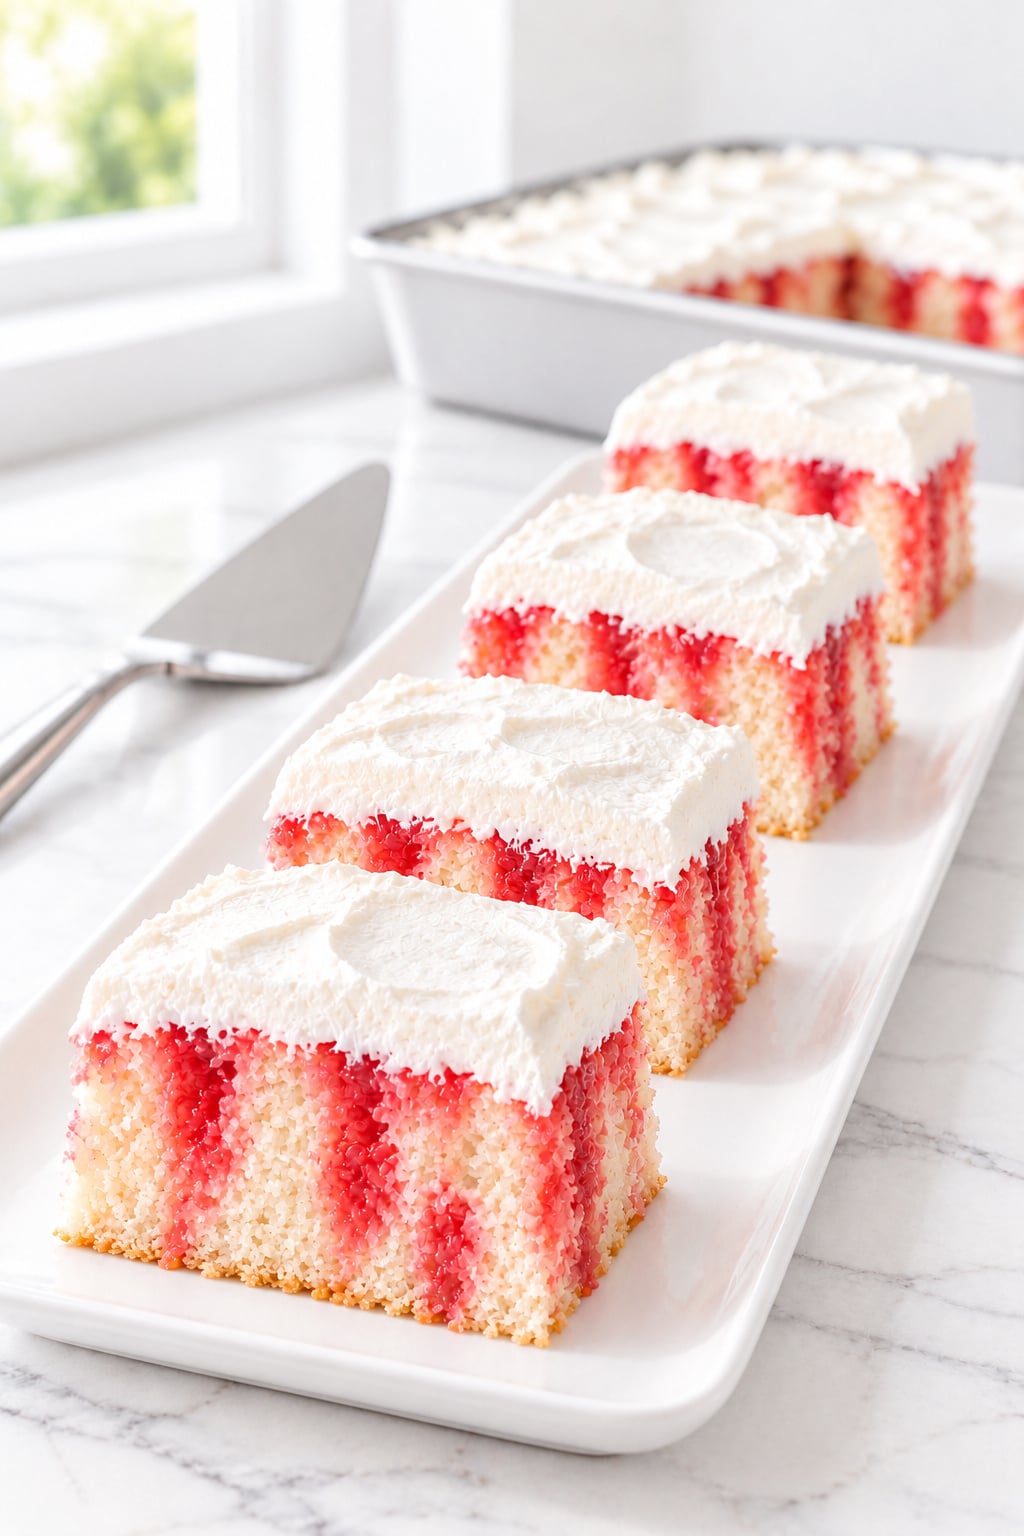
What to Pair with Jello Poke Cake
Offer unsweetened coffee or tea beside Jello Poke Cake for a simple finish to the meal. For a second dessert on the table, Oreo Fluff adds a spoonable cookies-and-cream option; serve it separately rather than adding it to the cake.
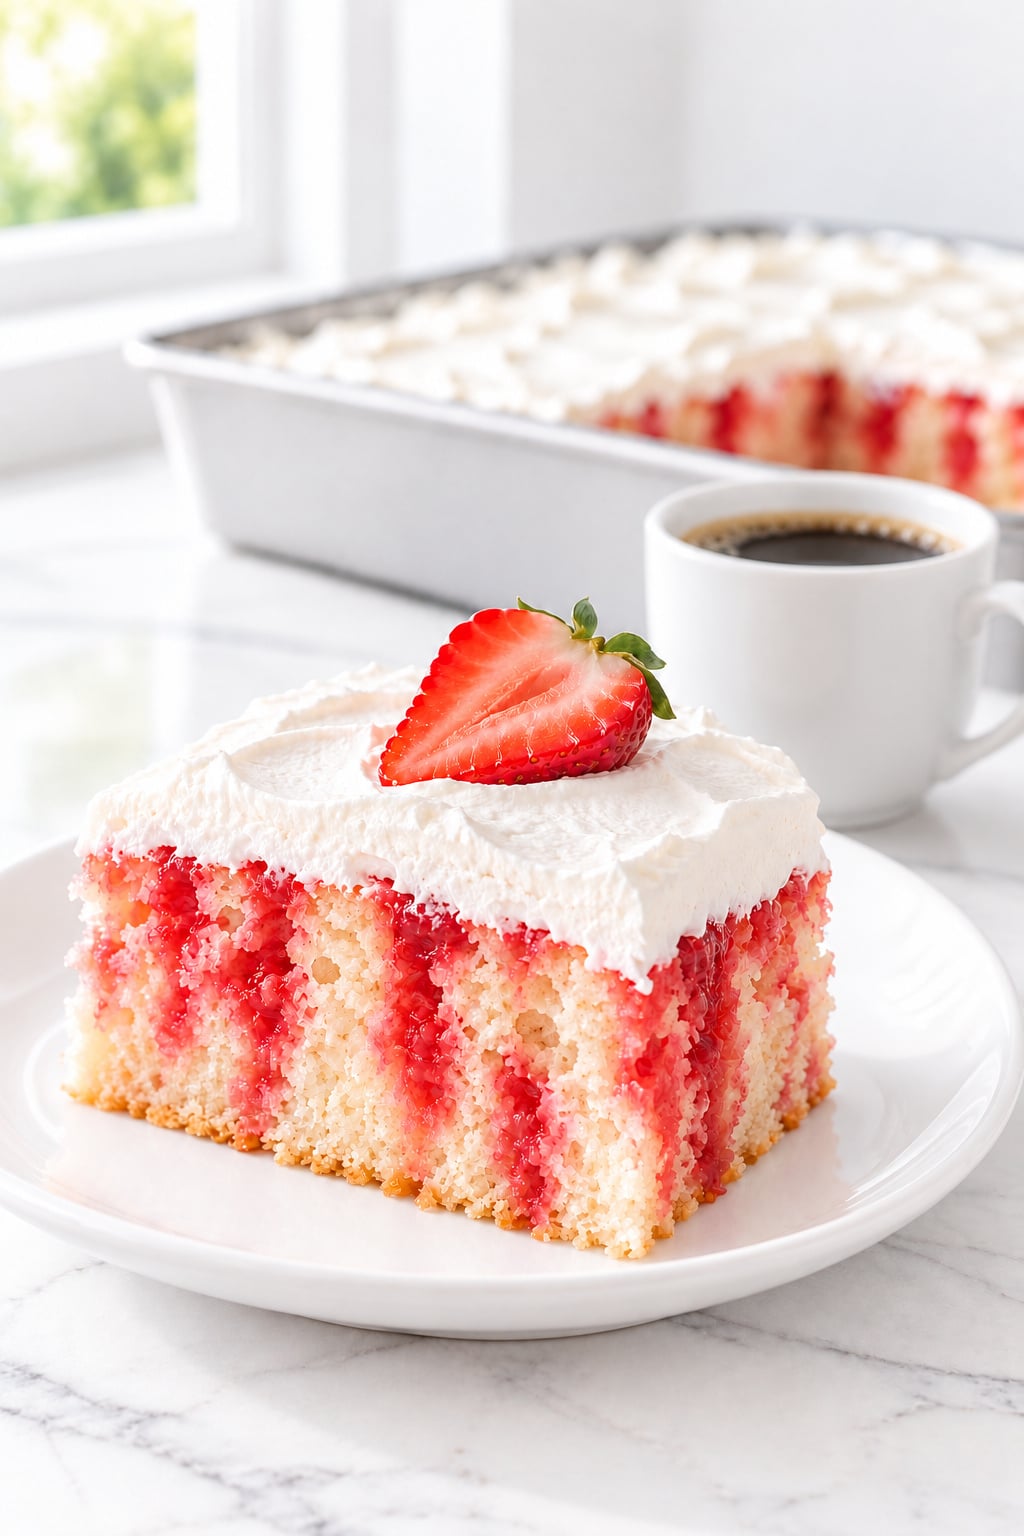
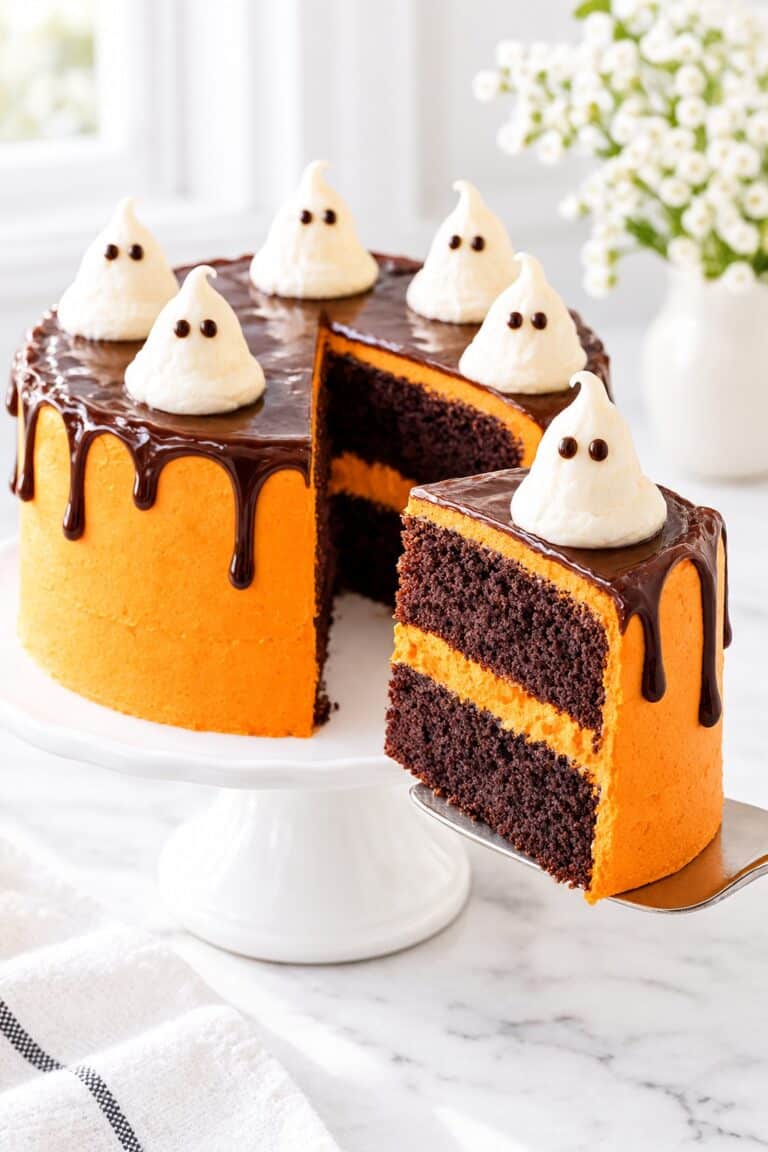
How to Make an Orange Jello Halloween Cake
Want the orange jelly-covered cake with little ghosts, a witch’s hat, and black bats? This decorating project recreates those visible details on an approximately 8-inch round cake. Allow three days for baking, setting, and decorating, with most of that time spent waiting for components to cool or firm up.
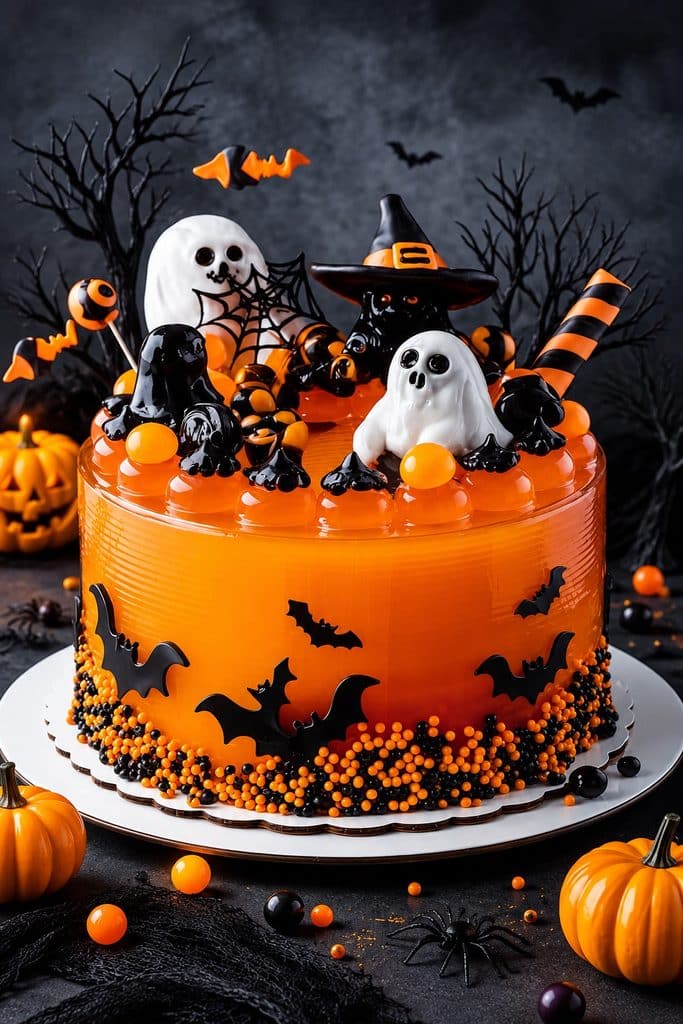
This is a separate layer-cake variation. The gelatin-soaked, whipped-topping Jello Poke Cake in the recipe card stays in its 9 × 13-inch pan. For the tall, freestanding shape shown here, use the unsoaked layers and buttercream below, seal the cake with a thin white chocolate ganache barrier, then encase it in orange Jell-O. Do not pour the original strawberry gelatin mixture into these layers. The recipe card’s servings, nutrition, and timing do not apply to this version.
The visible orange exterior is a molded layer of orange Jell-O. Its smooth, glossy surface comes from setting against a clean mold liner. The ganache underneath protects the cake from the liquid gelatin; it is not the visible orange finish. Make the figures and candies ahead, then add them shortly before serving.
Ingredients and Equipment
Use a digital scale for the chocolate and cream. This plan makes an 8-inch cake core with four cake layers inside an approximately 9-inch orange jelly shell, about 5–5½ inches tall before the toppers. Actual height depends on the baked layers. It should provide about 24–32 small party portions, depending on how you cut it.
For the white cake layers
- Two 14.25-ounce (404 g) boxes Betty Crocker Favorites Super Moist White Cake Mix
- 2 cups (480 ml) water, divided
- 1 cup (240 ml) neutral vegetable oil, divided
- 8 large egg whites, unwhipped, divided
- A little butter or baking spray for the pans, plus parchment paper
These liquid quantities are for that particular mix. If your boxes have a different weight or preparation method, follow their directions for two batches of white cake instead.
For the vanilla buttercream
- 300 g unsalted butter, softened but still cool
- 600 g powdered sugar, sifted
- 3 tablespoons (45 ml) heavy cream
- 2 teaspoons vanilla extract
- ¼ teaspoon fine salt
For the protective white chocolate barrier
- 750 g real white chocolate containing cocoa butter, finely chopped
- 250 g heavy cream, approximately 35% fat
For the orange Jell-O shell and rim domes
- Eight 3-ounce (85 g) boxes regular orange Jell-O gelatin dessert mix, 680 g total
- 5 cups (1.2 liters) boiling water
Use regular, sweetened orange gelatin dessert mix, not pudding or ready-to-eat gelatin cups. This is a concentrated, firm JIGGLERS-style mixture, with a chewier texture than ordinary bowl-set Jell-O. Do not add the cold water listed in the standard package directions. The generous batch allows for the shell, approximately 16 small domes, a setting sample, and some excess. Chill any unused mixture separately to serve in small cups.
For the Halloween decorations
- About 200 g ready-made rice cereal treats, for lightweight figure centers
- 250 g white fondant, 350 g black fondant, and 150 g orange fondant
- 350 g black candy melts, 100 g orange candy melts, and 100 g white candy melts, melted separately according to their packages
- 1 small wafer ice cream cone, approximately 3 inches tall, for the witch’s hat
- 1 sturdy wafer roll, approximately 5–6 inches long
- 12–16 small orange and black candy balls
- 150–180 g mixed orange and black sugar pearls or crisp sprinkles
- 1–2 tablespoons food-grade clear piping gel, optional, for a light sheen on the fondant figures
- A little powdered sugar for rolling the fondant
These decorating quantities include handling allowance. Choose fondant and candy colors labeled edible. Black candy melts give the bats a deep black color without adding liquid coloring to melted chocolate.
Tools and supports
Have four 8 × 2-inch round pans, a turntable, offset spatulas, a tall scraper, a thermometer, piping bags, parchment, and a silicone half-sphere mold with approximately 1-inch cavities. For the jelly shell, use a rigid cake ring with an approximately 9-inch internal diameter after lining, at least 7 inches tall, and a food-safe acetate collar of the same height. A smooth collar gives smooth sides. To reproduce the photograph’s fine horizontal lines, use a food-safe silicone texture liner with fine horizontal ribs instead. You also need a waterproof, food-safe 10–12-inch cake drum, two 8-inch food-safe cake cards, four food-safe cake dowels, food-safe lollipop sticks, and 6–8 food-safe cocktail picks for the side bats. For tall toppers, use purpose-made closed-bottom cake pick holders that keep the topper stems separated from the cake. Do not insert bare craft wire into food.
Bake and Cool the Layers
Heat the oven to 350°F (175°C). Grease the round pans and line their bases. Mix one box with 1 cup water, ½ cup oil, and 4 egg whites for 2 minutes. Divide between two pans; bake approximately 26–31 minutes, until the centers spring back and a tester comes out clean. Cool in the pans for 10 minutes, then turn out to cool completely. Repeat with the second box and remaining liquids. Make each batch just before baking rather than leaving mixed batter waiting through another oven cycle.
Trim any domed tops once cold, keeping the layers level and similar in height. Wrap and chill them before assembly. Keep the layers unsoaked for this construction.
Fill and Support the Tall Cake
- Make the buttercream. Beat the butter until smooth and lighter in color. Add the powdered sugar gradually on low speed, then the cream, vanilla, and salt. Beat until spreadable, finishing on low speed to reduce air bubbles. The filling should hold a ridge, not slump from the spatula.
- Build two short units. Put one cake layer on each 8-inch cake card, using a dab of buttercream underneath. Spread approximately 250 g buttercream over each layer, stopping just short of the edges. Top each with another cake layer. You now have two filled, two-layer units. Use some remaining buttercream for very thin crumb coats. Chill until firm.
- Support the upper unit. Fix the lower unit to the cake drum. Insert four cake dowels in a square within the central 4-inch area, away from the outer edge. Measure and cut every dowel level with the top of the lower unit, with no jagged ends. Place a thin smear of buttercream on top, then lower the upper unit, on its own cake card, onto the dowels. Its card must rest evenly on the supports.
- Check the shape. Align the sides into one straight cylinder. Fill small gaps with the remaining buttercream and chill again. The internal card and dowels carry the upper half; the buttercream is not its structural support.
Seal the Cake Before Adding the Jello
Heat the cream until steaming. Pour it over the chopped white chocolate, wait about 5 minutes, then stir gently until smooth. Let the ganache thicken until spreadable. Coat the assembled cake evenly, approximately ⅛ inch thick, closing every gap around the layers, internal card, and lower cake card. Seal the lower card to the waterproof drum so liquid cannot reach exposed cake or cardboard.
Smooth the coating into a straight cylinder with a level top and refrigerate until firm. Measure it: the coated cake should be approximately 8¼–8½ inches across. Center the lined 9-inch ring around it, leaving approximately ¼–⅜ inch of space on every side. The ring and cake must sit on the same completely level drum.
Close the collar seam securely from the outside. Seal the ring’s exterior bottom edge to the drum with tape, keeping adhesive away from the food. Pipe a very small ganache fillet along the inside bottom edge of the collar to close the liquid’s escape route. Chill again until the seals are firm. The small fillet will be hidden by the sprinkle border.
Use a textured mold liner to make horizontal lines in the jelly itself. Combing the ganache underneath will not reproduce that outer texture. Do not scrape or comb set gelatin, which will tear. Keep the chilled cake in its ring; there is no freezing or rack-pouring step for this finish.
Mix, Mold, and Set the Orange Jello
- Dissolve the mix. Put the eight boxes of orange Jell-O powder in a large heatproof bowl. Add the 5 cups boiling water and stir gently for at least 3 minutes, until no grains remain. Avoid whipping in air.
- Cool before pouring. Let the mixture cool to approximately 82–86°F (28–30°C), checking frequently. It must still flow freely and must not feel hot. Skim away surface foam. Keep the cake and its ganache barrier cold. Do not pour hot gelatin against the coating.
- Fill the small molds. Reserve approximately 100 ml for about 16 half-sphere cavities, approximately 1 inch wide, and fill each cavity level. Set a spoonful separately in a small cup as a firmness sample. Refrigerate the domes and sample; do not freeze.
- Check the seal. With the cake still centered in the ring on a tray, pour a little jelly into the gap around the bottom, making a layer only ⅛ inch deep. Refrigerate until this starter layer sets. If liquid escapes, stop, repair the seal, chill, and repeat the test before adding more. Keep the remaining mixture liquid in a bowl over lukewarm water while waiting.
- Fill the shell. Slowly fill the space between the cake and collar, pouring close to the surface to avoid bubbles. Continue until the gelatin covers the top ganache by approximately ⅛–¼ inch. Do not fill the entire empty height of the ring. Remove visible bubbles with the tip of a clean food-safe pick.
- Chill thoroughly. Refrigerate on a level shelf for at least 8 hours, preferably overnight. The sample and domes should be firmly set, and the top of the shell should feel resilient rather than liquid beneath the surface. Leave the cake in the ring until ready to decorate.
The exact amount needed depends on the measured cake diameter and height. Fill to the specified depth, not until the entire bowl is empty. Any excess goes into separate molds or cups. If the reserved mixture begins to gel while you work, gently warm it just until liquid again, then cool it back to the pouring temperature.
Unmold the Jelly Shell Carefully
Remove the exterior tape and open or lift away the rigid ring while leaving the liner in place. Support the drum, then peel the liner slowly back against itself, a small section at a time. Do not pull the jelly outward. If a silicone liner resists, release it progressively without stretching the shell. Keep the cake upright on its original drum; do not invert it or lift it by the jelly sides.
Ease the orange domes out by gently flexing their silicone mold. Keep them refrigerated. A clean mold gives the jelly its shine, so there is no need to brush oil or syrup over the cake. If droplets form, keep the cake cold and let the surface settle; do not rub or wipe away its finish.
Shape the Ghosts, Witch, and Black Ghouls
The two white ghosts: Compress rice cereal treats into one rounded upright core about 2½–3 inches tall and a second about 1½–2 inches tall, both with flat bases. Roll white fondant approximately ⅛ inch thick. Cut a roughly 6-inch circle for the larger ghost and a 4½-inch circle for the smaller one. Drape each over its core, ease it into loose folds, and trim the skirt so it rests flat. Add tiny black fondant eyes and mouths with a dot of piping gel. Let them dry standing up on parchment. Make two thin white candy-coating disks slightly larger than their bases and, once set, fix each ghost to a disk with a little coating. These disks separate the fondant and cereal centers from the wet jelly.
The little black ghouls: Make three smaller rounded cereal-treat cores, approximately 1–2 inches tall. Cover with thin black fondant and shape the lower edges into little folds or feet. Add tiny eyes or leave some as simple black silhouettes. Mount each on a thin, set black candy-coating disk. A very thin brush of piping gel shortly before serving can give the fondant a shine. Keep fondant off the jelly itself, which can soften it and make dark colors bleed.
The witch in the center: Cover another small, rounded cereal-treat core with black fondant. Add two tiny orange eyes just below where the hat brim will sit. Spread melted black candy coating into a flat, approximately 4-inch circle on parchment, about ⅛ inch thick. Coat the wafer cone in black candy coating. Once both pieces have set, attach the cone to the center of the brim with more coating.
Wrap a narrow orange fondant band around the cone just above the brim. Add an orange rectangular buckle with a black center and a thin orange crossbar. Let the hat harden before placing it on the witch’s core. Mount the witch on a set black candy-coating disk, as for the other figures. Keep this figure lightweight and support its stem in a closed cake pick holder if it will not stand securely on its own. Use only food-safe components and follow the holder manufacturer’s directions.
Make the Bats, Spiderweb, and Striped Candies
- Flat side bats: Draw or print 6–8 bat outlines, approximately 1¼–2½ inches wide, and place under parchment. Pipe black candy coating within the outlines, about ⅛ inch thick, joining the wings firmly to each body. Let them set flat. Peel the parchment away rather than pulling fragile wings upward. On the back of each bat’s thicker central body, attach a food-safe cocktail pick with a mound of black coating, leaving approximately 1¼ inches projecting backward, perpendicular to the bat. Hold it in position until firm. These picks will anchor the bats in the cake core rather than relying on glue against wet jelly.
- The spiderweb: Use a roughly 3-inch web outline beneath parchment. Pipe black candy coating along the outer frame, spokes, and curved cross-lines. Make every junction connected, with a little extra coating at weak points. Set completely and peel off carefully. Let its bottom edge rest on a narrow black candy-coating strip, and fix one side to a figure’s chocolate base with a little coating. Keep it supported at two points; do not balance it freely above the jelly.
- Swirl pops: Pipe two approximately 1¼-inch candy disks on parchment, alternating orange and black coating in curved bands. Embed food-safe lollipop sticks in the backs, cover the sticks with a little more coating, and let set. For the two flying bat pops, pipe orange wing shapes and add a small black central body, reinforcing the stick attachment on the back.
- The striped rod: Coat the wafer roll in black candy coating and let set. Roll orange fondant into a thin strip about ⅜ inch wide and wind it around the roll in a spiral, leaving black gaps. The rod will lean at the back-right. If it needs extra support, attach it to a food-safe stick and place that stick in a suitable cake pick holder.
Arrange Everything to Match the Photo
Decorate the fully set, cold jelly cake shortly before serving. Keep the figures dry until assembly and place them on their candy-coating bases. The gelatin shell cannot carry heavy toppers by itself: tall stems must pass through suitable cake pick holders into the cake core, with their weight resting on broad bases or purpose-made supports.
- Build the bottom border first. Gently press orange and black pearls around the bottom ¾–1 inch of the sides, working over a tray. Test a small patch first and apply the rest immediately before serving. The moist surface helps small sprinkles adhere, but their colors can bleed if left there for hours. Do not press hard enough to dent the jelly.
- Attach the side bats. Place the larger bats low on the front and sides, with the smaller ones higher up. Gently insert each bat’s cocktail pick through the jelly into the cake core, stopping when the bat sits close to the surface without squeezing it. Do not rely on buttercream or melted chocolate as glue on the wet gelatin. Keep track of every side pick so it can be removed before slicing.
- Place the orange domes. Arrange approximately 16 orange Jell-O half-spheres around the top rim, flat sides down. Leave small gaps for a few rounded black accents made from set black candy coating. Do not use black fondant directly on the jelly.
- Set the main figures. Put the large white ghost at the back-left, the witch near the back-center, and the smaller white ghost at the front-right. Place one taller black ghoul at the front-left and the other two near the front-center and right edge. For the tiny witch’s hat at the very front, shape a small black fondant cone, fix it to a 1-inch fondant disk, and mount it on a matching candy-coating base. Use pick holders for any upright piece that needs support.
- Add height at the back. Position the swirl pops and bat pops behind the figures, with the striped wafer rod leaning out at the back-right. Fix each stick in a closed cake pick holder. Keep the sticks from crossing the internal cake board or striking the dowels.
- Finish the details. Secure the spiderweb between the tall white ghost and the witch, supported on its candy-coating strip and fixed to a figure’s base. Add the orange and black candy balls between the figures shortly before serving, placing any sugar-sensitive pieces on tiny candy-coating disks. Keep the front white ghost and witch’s eyes visible.
The black trees, wall bats, table pumpkins, and spiders in the photograph are background styling. Set those props around or behind the cake, keeping non-food-safe items off its edible surfaces.
Make-Ahead Plan and Serving
- Two days before: Bake and cool the layers. Make the fondant figures, hat, bats, web, candy pops, and their candy-coating bases. Let them set, then protect from dust and humidity in a cool, dry place. Keep the delicate web flat until assembly.
- One day before: Make the buttercream, build the supported cake, and seal it with ganache. Chill, fit and seal the lined ring, mix the orange Jell-O, then mold the shell and domes. Refrigerate overnight until fully set.
- Serving day: Unmold the fully set cake, then add the sprinkle border, bats, rim domes, figures, and tall toppers shortly before serving. Keep refrigerated until serving. Add the delicate spiderweb last.
Keep the finished cake refrigerated, with a tall cover that does not touch the jelly or toppers. For the cleanest appearance, finish the visible decorations shortly before serving. Do not freeze the gelatin shell or domes; freezing and thawing can damage their texture. Remove remaining fondant figures before refrigerating leftovers.
Before cutting, remove every topper, side-bat cocktail pick, lollipop stick, pick holder, and other non-edible support. Lift off the upper two-layer unit on its cake card, remove the dowels from the lower unit, and cut each unit separately. Count the supports as you remove them. Use a warm knife wiped clean between cuts to keep the orange jelly shell and white layers neat.
How to Store Jello Poke Cake and Make It Ahead
Keep Jello Poke Cake covered and refrigerated between servings. Its soft topping and moistened crumb are best handled as a chilled dessert, with fruit added near serving rather than left to release juice over the cake.
Storage
Store Jello Poke Cake under a pan lid or a tented cover that does not touch the topping, or use covered containers for individual portions. Aim to use the cake within 3 days of making it, with the freshest appearance and texture generally in the first 24–48 hours. The crumb may soften further during storage.
Keep the refrigerator at 40°F (4°C) or below. Follow FDA guidance on refrigerating perishable foods: limit unrefrigerated time to 2 hours, or 1 hour above 90°F (32°C). These are general food-holding rules; keep Jello Poke Cake cold and handle it carefully throughout storage.
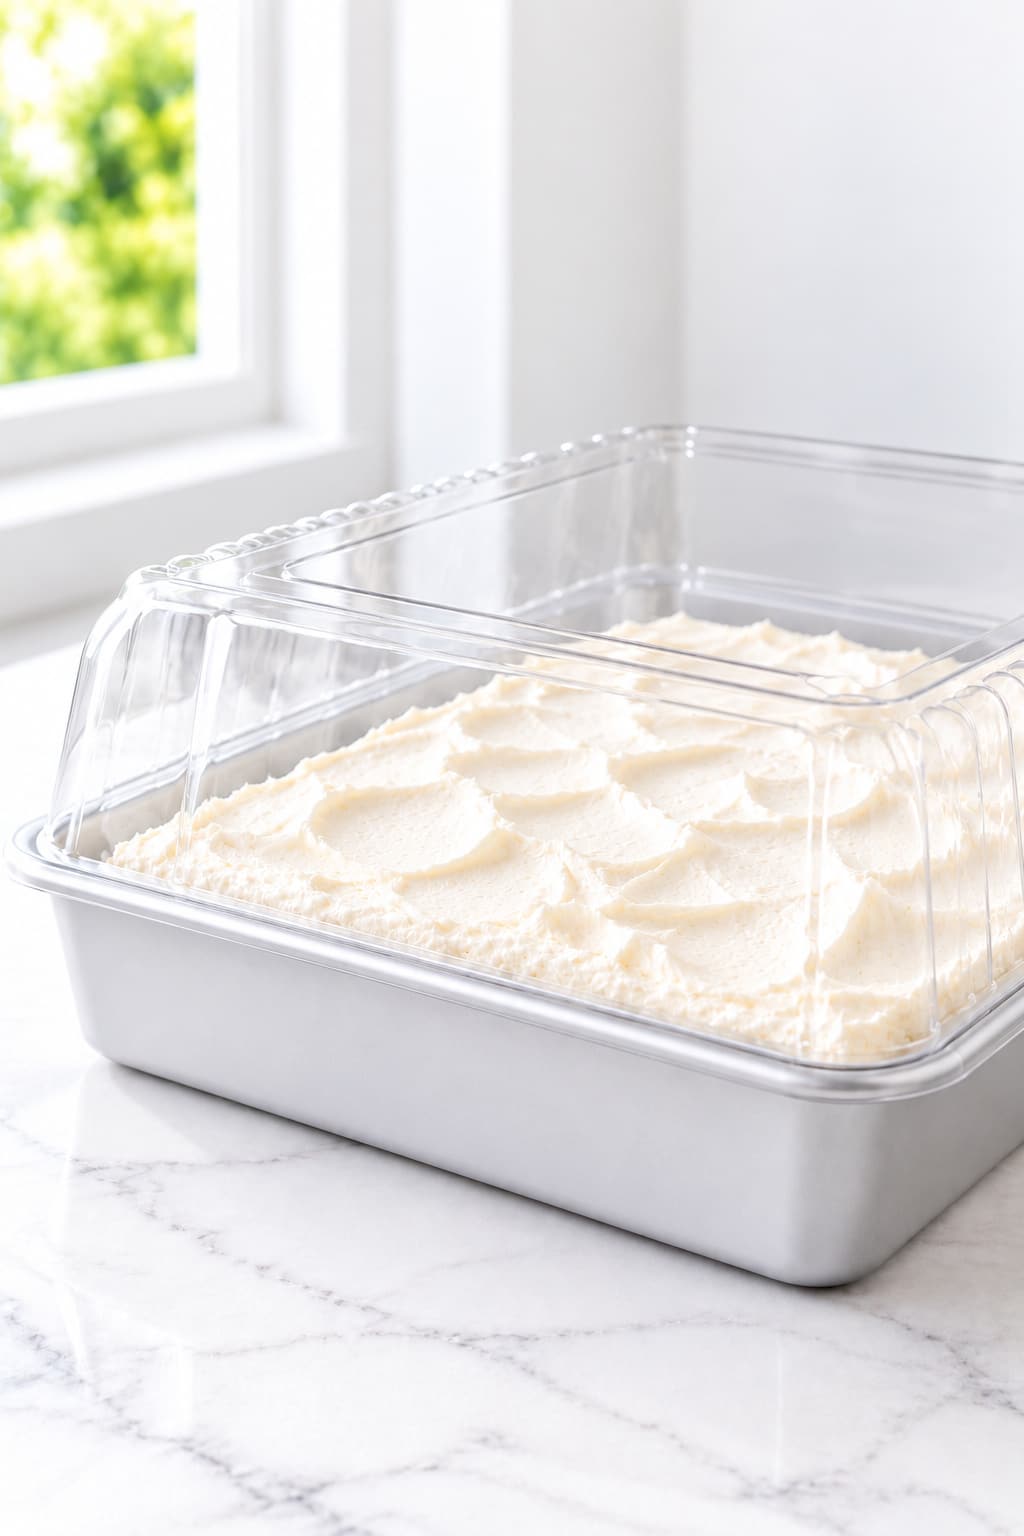
Make It Ahead for the Next Day
Make Jello Poke Cake up to one day before serving. Complete the first chill, add the topping, and allow its final refrigerator hour before covering with clearance above the surface. Keep the optional strawberry halves separate and add them just before the portions go to the table.
Thawing the topping is an advance task, not something to begin when the soaked cake is ready to finish. Moving the unopened tub to the refrigerator the night before keeps the day-of sequence straightforward.
Freezing and Reheating
For the intended texture, choose refrigerated make-ahead rather than freezing the assembled Jello Poke Cake. Serve it cold without warming it: reheating would soften the topping and change the chilled finish. If a long storage interval is needed, plan a fresh cake closer to serving day.
Jello Poke Cake Questions, Answered
Small changes in water, hole size, or cooling can make Jello Poke Cake behave differently. The quantities and sequence in these answers apply to this strawberry-gelatin sheet cake, including its prepared whipped topping.
How much water do I add to Jell-O for poke cake?
For Jello Poke Cake with one regular 3-ounce (85 g) packet, use 1 cup (240 ml) boiling water plus 1/2 cup (120 ml) cold water. The cake batter has its own separate cup of water. Do not use the larger cold-water allocation for a bowl of gelatin.
Why is my Jello poke cake soggy?
Too much or unevenly distributed liquid, damaged crumb, or an underbaked center can leave it soggy. Bake until the center is set, use only the stated soak, and pour evenly into narrow holes. Refrigerate fully before judging; extra cold time will not repair raw batter or a large excess of liquid.
Does Jello poke cake have a jelly-like texture?
The intended result is tender cake with moist strawberry channels, not a separate jelly layer. Wide cavities can leave denser gelatin pockets, so keep the fork openings narrow and preserve cake between them.
Should the cake be warm or cold when I pour the Jell-O?
Use the cake after its 15-minute rest, while it is still warm and settled. Add freshly dissolved, fluid gelatin at that stage. The cake then needs to become completely cold before the whipped topping goes on.
What is the best tool for poking the holes?
Use a large dinner fork for this version, moving about 1/2 inch (1.3 cm) between placements. Pierce roughly halfway to two-thirds through the crumb without touching the pan. Avoid widening or twisting the openings.
Can I make Jello poke cake the night before?
Yes. Finish the soak, the minimum 3-hour chill, the topping, and its final hour of refrigeration. Cover without pressing the white layer and keep Jello Poke Cake cold. Add the optional dry strawberry halves just before serving.
I have a 6-ounce Jell-O packet. Should I pour a double batch over the cake?
No. This pan uses 3 ounces (85 g) regular gelatin powder with the stated water measurements. Do not pour a doubled batch over it. A larger packet does not change how much soak this cake needs.
Can I stack this into a layer cake?
Keep this Jello Poke Cake in its 9 × 13-inch pan. The soaked crumb and soft topping are designed for cold sheet-cake squares, not stacked layers. Choose a layer-cake recipe when that presentation is important.
Keep the Dessert Table Going After Jello Poke Cake
If the soft cake, cool cream, or familiar cake-mix preparation is what appeals to you, there are several good directions for your next dessert. Choose another creamy cake, a chilled spoonable classic, or a warm cake-mix bake with a different finish.
More Cakes with a Soft, Creamy Finish
These recipes keep cake and a creamy finish together, while changing the filling, berry flavor, or serving format. Choose the one that matches how much baking and assembly you want to do next.
- Chocolate Poke Cake Recipe: Choose a chocolate pudding-filled sheet cake when you want the poke-cake format with a richer chocolate finish.
- Strawberry Angel Food Cake Dessert: Try a spoonable bowl of airy cake cubes, berries and cream when you want a chilled berry dessert without baking a sheet cake.
- Strawberry Sheet Cake: Bake strawberry flavor directly into a scratch-made pink cake and finish it with strawberry cream cheese frosting.
- Strawberry Shortcake Recipe: Make buttery biscuit-style shortcakes with fresh berries and cream for individual desserts assembled just before serving.
Chilled Classics for the Dessert Table
For a dessert table with more than one cold option, these puddings and fruit desserts bring familiar flavors in a spoonable form. They offer a different way to share a creamy dessert without another tray of cake squares.
- Strawberry Cheesecake Banana Pudding: Keep the strawberry-and-cream craving but move to a layered, spoonable pudding dessert.
- Banana Pudding Recipe: Choose a comforting chilled banana-and-vanilla dessert with softened cookie layers.
- Watergate Salad Recipe: Bring a retro pistachio dessert with a fluffy, spoonable texture to the same potluck table.
- Ambrosia Salad: Serve a creamy fruit-and-marshmallow classic when you want another nostalgic chilled dessert.
More Cakes That Start with a Mix
Cake mix can also become a warm, scoopable dessert with fruit beneath a buttery topping. These recipes use a different layering method, giving you a useful next project when a chilled cake is not what you are craving.
- Cherry Dump Cake Recipe: Use cake mix for a warm cherry dessert with a buttery topping instead of a chilled gelatin soak.
- Peach Dump Cake: Try warm peaches under a golden cake-mix topping for a scoopable dessert to share.
- Lemon Cream Cheese Dump Cake with Buttery Crumb Topping: Move to bright lemon filling and cream cheese beneath a buttery cake-mix crumble.
- Strawberry Cheesecake Dump Cake: Keep strawberries and a cake-mix shortcut while changing the finish to warm fruit, cream cheese pockets and a golden topping.
Why Jello Poke Cake Belongs in Your Recipe Box
Keep Jello Poke Cake as a familiar dessert with a few useful lessons that carry beyond one occasion.
- A Familiar Format: It preserves the character of the classic chilled sheet cake while giving the preparation a clear point of reference.
- A Visual Lesson: The colored channels make it easier to connect what happens during pouring with the structure seen in a finished slice.
- A Clear Reference: Keeping batter water and soak water separately named is a useful habit to carry into other pour-over cakes.
- A Useful Contrast: Keeping the convenience version distinct from a scratch-made cake gives both approaches an honest place in a home baker’s collection.
- A Calm Routine: Moving from warm cake to cold finishing gives you a useful way to organize other desserts that combine baking and refrigeration.
- An Accessible Tradition: Straightforward mixing and visible color changes give you a manageable cake to explain to someone learning to bake.
A Final Note on This Classic Jello Poke Cake
Jello Poke Cake gives a familiar convenience dessert the attention it deserves: a clear strawberry flavor, a tender cold slice, and a soft finish that lets the cake remain the center of the plate.
It is a recipe to return to when the occasion calls for something cheerful and recognizable, and when a simple pan of dessert feels more fitting than a tall cake made for display.
That white-and-strawberry cross-section is part of the pleasure: a cake can look festive while still belonging to an ordinary baking pan, ready to be passed around the table.
Jello Poke Cake
Tender white cake with bright strawberry gelatin tracks and a soft whipped topping. This easy chilled sheet cake starts with a cake mix and makes 16 cool, creamy slices.
Ingredients
Pan preparation
- Nonstick cooking spray, as needed for the bottom of the pan
White cake
- 1 box (14.25 oz / 404 g) white cake mix, reference product Betty Crocker Favorites Super Moist White
- 1 cup (240 ml) water, for the cake batter
- 1/2 cup (120 ml) neutral vegetable oil
- 4 large egg whites (about 132 g), unwhipped
Strawberry gelatin soak
- 1 box (3 oz / 85 g) regular sweetened strawberry gelatin dessert mix, such as Jell-O
- 1 cup (240 ml) boiling water, for dissolving the gelatin
- 1/2 cup (120 ml) cold water, for the gelatin
Topping
- 1 tub (8 oz / 226 g) original frozen whipped topping, thawed in the refrigerator
Optional garnish
- 8 medium fresh strawberries (about 100 g), hulled, patted dry and halved
Instructions
- Prepare the oven and pan. Heat a conventional oven to 350°F (175°C) with a rack in the center. Lightly spray the bottom of a light-colored metal 9 × 13 × 2-inch (23 × 33 × 5 cm) pan. Keep the cake in this pan for soaking, chilling and serving. Clear refrigerator space before baking. What you should see: The pan bottom has a thin coating and the oven is fully preheated.
- Mix the white cake batter. Combine the entire 14.25-ounce (404 g) white cake mix, 1 cup (240 ml) batter water, 1/2 cup (120 ml) oil and 4 large unwhipped egg whites (about 132 g). Beat with an electric mixer on medium for 2 minutes, scraping as needed, then spread evenly in the pan. What you should see: The batter is evenly mixed with no dry pockets. Do not whip the whites separately.
- Bake until the center is set. Bake for 26–31 minutes, checking at 26 minutes. The center should spring back lightly and a toothpick inserted in the center should come out clean or with a few dry crumbs. What you should see: There is no wet batter or gummy paste on the toothpick.
- Rest and poke the cake. Rest the pan on a wire rack for 15 minutes. Pierce the cake evenly with a large dinner fork, moving about 1/2 inch (1.3 cm) between placements. Aim through roughly half to two-thirds of the crumb without scraping the pan bottom. Wipe sticky tines as needed. What you should see: Narrow holes reach into intact crumb without tearing large craters.
- Dissolve the strawberry gelatin. In a heatproof jug or bowl, stir the entire 3-ounce (85 g) regular strawberry gelatin packet into 1 cup (240 ml) freshly boiling water for 2 minutes, until dissolved. Stir in 1/2 cup (120 ml) cold water. Use promptly while fluid. Do not chill the soak separately or add more water. What you should see: The red liquid has no undissolved grains or gelled lumps.
- Pour the soak evenly. Slowly pour all the freshly mixed gelatin across the perforated cake in several passes. If liquid collects in one spot, pause briefly to let it sink in before continuing. What you should see: The liquid enters the holes without persistent flooding in one area.
- Chill the soaked cake. Transfer promptly to the refrigerator at 40°F (4°C) or below, using a heat-safe support appropriate for the shelf. Leave air space around the pan. Loosely tent during initial cooling, then cover when cold. Chill at least 3 hours and longer if needed. What you should see: The cake is completely cold throughout, with no liquid layer on top, before adding topping.
- Top and chill again. Dollop all 8 ounces (226 g) of cold, fully thawed whipped topping over the cold cake. Gently spread into an even layer. Do not vigorously stir, whip or warm it. Cover without touching the topping and refrigerate for at least 1 more hour. What you should see: The soft white layer holds its shape without melted edges or red liquid streaks.
- Slice and serve cold. Cut into 4 rows by 4 columns for 16 portions. Wipe a thin knife between cuts and lift with a broad cake server. If using the strawberries, add one dry half to each slice immediately before serving. Return the remaining cake promptly to refrigeration. What you should see: Tender slices hold together, with pale crumb visible between the strawberry-colored tracks.
Notes
- Cake mix and separate waters: These cake quantities and the 26–31-minute baking range are for Betty Crocker Favorites Super Moist White Cake Mix, 14.25 ounces (404 g). A different mix may need different cake additions and baking directions. Keep the 1 cup batter water separate from the 1 cup boiling water and 1/2 cup cold water for the soak.
- Choose regular gelatin: Use a 3-ounce (85 g) packet of regular sweetened strawberry gelatin dessert mix. Pudding, unflavored gelatin and sugar-free packets are not direct substitutes. Do not use the full cold-water amount printed for a standalone gelatin dessert or pour a doubled gelatin batch over this pan.
- Thaw the topping first: Thaw the unopened topping in the refrigerator for at least 4 hours, or overnight, before using. Keep it cold and do not stir it in the tub. The thawing time is a prerequisite; the recipe timing starts with topping already thawed.
- Allow the full chill time: Additional time is 4 hours 15 minutes: a 15-minute rest, at least 3 hours of chilling after soaking, and at least 1 more hour after topping. Total time is about 5 hours 5 minutes, based on a 30-minute bake. If the cake is still warm after the first chill, wait longer before topping.
- Pan and portion size: Use one 9 × 13 × 2-inch pan and cut it into 16 equal portions. Changing pan depth, batch size or the number of pans requires separate baking and chilling decisions; do not shorten the cold stages.
- Storage and make ahead: Keep covered at 40°F (4°C) or below and use within 3 days, with the best appearance and texture in the first 24–48 hours. Make up to one day ahead, completing both chill stages; add optional strawberries just before serving. Serve cold. Refrigerated make-ahead is preferred to freezing.
- Serving time: Limit cumulative time out of refrigeration to 2 hours, or 1 hour above 90°F (32°C). Put out small portions and replenish from the refrigerator.
Nutrition Information:
Yield: 16 Serving Size: 1 sliceAmount Per Serving: Calories: 219Total Fat: 10.2gSaturated Fat: 3.1gCholesterol: 0mgSodium: 212mgCarbohydrates: 30.3gSugar: 18.1gProtein: 2.5g
Nutrition information is provided as an estimate only and may vary based on specific ingredients, brands, and portion sizes used. This information should not be considered medical or nutritional advice.
12 Sweet Favorites — Yours, Free 🍰
Tiramisù, no-bake cheesecake, the perfect chocolate chip cookie & 9 more reader-loved desserts — gathered into one beautiful free recipe book. From my kitchen to yours.
No spam, just sweet things. Unsubscribe anytime.