How to Make Sourdough Starter (Easy Step-by-Step for Beginners)
🎁 FREE E-BOOK:12 Sweet Favorites — reader-loved desserts in one beautiful recipe book.
A sourdough starter is a natural yeast made from flour and water that ferments over several days. To make a sourdough starter, you only need flour, water, and about 5–7 days of simple daily feeding. This beginner-friendly method shows you exactly how to create an active starter from scratch at home.
So, you want to make your own sourdough starter?
Nice. Welcome to the unofficial club of people who willingly grow wild yeast in their kitchens like it’s 1897.
Don’t worry, it’s not as scary as it sounds. Honestly, it’s like owning a very low-maintenance pet. You just need flour, water, a jar, and a bit of patience. That’s it. No secret handshake, no expensive gadgets.
Let’s walk through it. I’ll keep it real, and I’ll tell you what worked for me (and what definitely didn’t).

- Large Enough Size: Its 50 oz capacity enable you to produce up to six mouthwatering loaves. You’ll appreciate the jar’s …
- Wide Mouth Design: You’ll love its large opening which means the jar is cleaning effortless and so much easier for feedi…
- Two Fermentation Rates: With Bamboo Lid, there is slight sealing and a little slower fermentation rate. With cloth cover…
What Is a Sourdough Starter?
A sourdough starter is a simple mixture of flour and water that captures wild yeast and beneficial bacteria from the environment.
Over time, this mixture ferments and becomes a natural leavening agent for sourdough bread, no commercial yeast needed.
It might sound fancy, but it’s actually very simple. You’re just letting flour and water sit at room temperature while nature does its thing.
Why This Sourdough Starter Method Works
A sourdough starter is basically a tiny fermentation project you keep in a jar. When you mix flour and water and leave it at room temperature, you’re creating the perfect environment for wild yeast and lactic acid bacteria (already present on flour and in the air) to multiply. This natural fermentation process is what gives sourdough bread its flavor, texture, and rise.
Here’s the simple science behind it:
- Flour feeds the microbes. It contains natural sugars and nutrients that yeast and bacteria love.
- Water activates fermentation. Once hydrated, the flour starts breaking down and becomes easy “food.”
- Daily feedings build strength. Discarding and feeding keeps the starter from getting too acidic and helps the good microbes take over.
- Time + warmth = activity. Most starters become reliably active in 5–7 days, depending on room temperature and flour type.
By the end, you’ll have a bubbly, tangy starter that can leaven bread naturally, no commercial yeast needed.
Why Make a Sourdough Starter From Scratch?
You might be wondering why anyone would bother making a sourdough starter instead of using store-bought yeast. The short answer? Better flavor, more control, and a more rewarding baking experience.

- Vacuum Packed
- Vacuum packed
- 100% ordinary and extremely concentrated natural rose extract
Here’s why making your own starter is worth it:
- Better flavor: Homemade sourdough develops a deeper, tangier, more complex taste than bread made with commercial yeast.
- No commercial yeast needed: A starter relies on wild yeast and natural fermentation, no packets required.
- Long-lasting: With regular feeding, a sourdough starter can last for years.
- More control: You control the ingredients, fermentation time, and flavor development.
- Pure satisfaction: There’s something incredibly rewarding about baking bread completely from scratch, even the yeast.
This natural fermentation process is well documented and studied, including by resources like King Arthur Baking, which explains how wild yeast and bacteria work together in sourdough.
What You’ll Need (It’s Not Much)
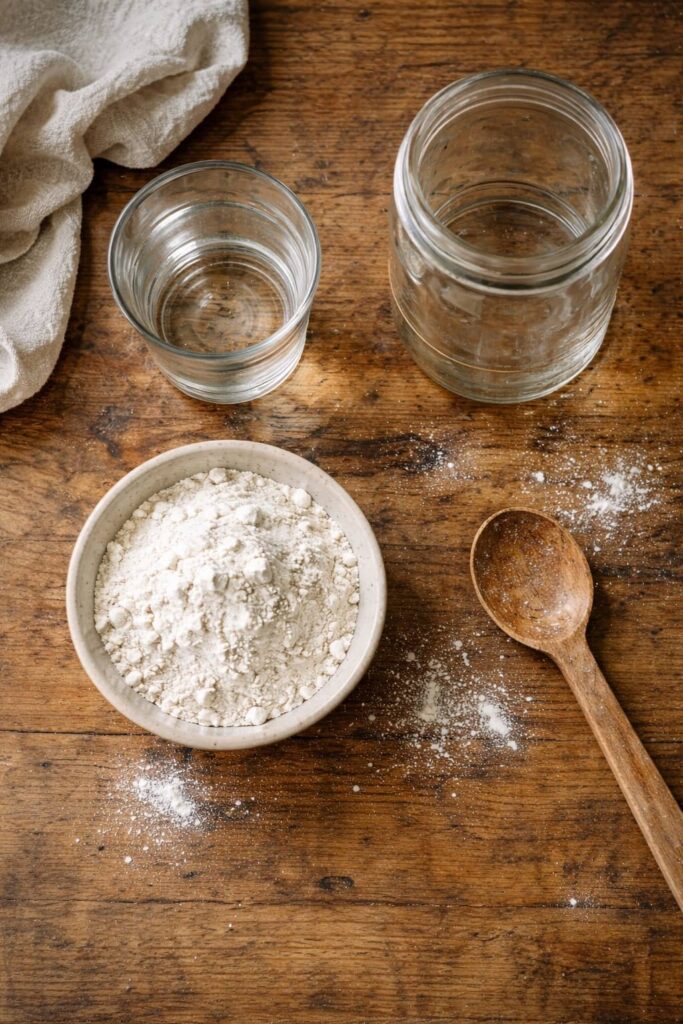
You probably already have everything you need to make a sourdough starter. No special tools, no fancy ingredients.
Here’s what you’ll need:
- Unbleached all-purpose flour (or whole wheat flour to help jump-start fermentation)
- Filtered or dechlorinated water, at room temperature
- A clean glass jar or container (a 16 oz mason jar works perfectly)
- A spoon or small spatula (this one will do the job) for mixing
- A digital scale (Optional, but helpful) for more consistent results
That’s it. You don’t need pineapple juice, rye flour, or anything fancy, just flour, water, and a little patience.
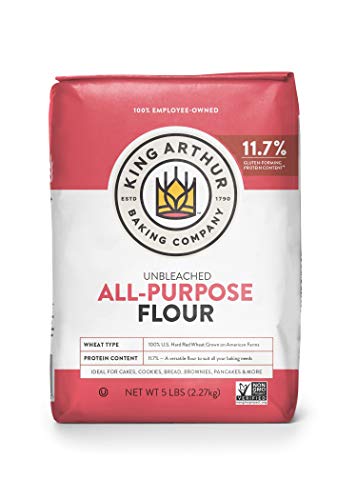
- Versatile Baking: Premium all purpose flour ideal for bread, cakes, pastries, and more. Perfect for all your baking need…
- High-Quality Ingredients: Milled from American red winter wheat, this unbromated and unbleached all purpose flour boasts…
- Trusted Quality: Non-GMO Project Verified and Certified Kosher, King Arthur all purpose flour meets the strictest indust…
Ingredients
- 1/2 cup all-purpose flour (or whole wheat flour)
- 1/4 cup filtered water, room temperature
For Daily Feedings
- 1 cup flour
- 1/2 cup filtered water
Optional
- Whole wheat flour or rye flour for stronger fermentation activity during the first few days
Step-by-Step: How to Make a Sourdough Starter
Making a sourdough starter takes about 5 to 7 days, sometimes a little longer if your kitchen is cold. That’s completely normal. Go slow and trust the process.
Day 1: The Beginning
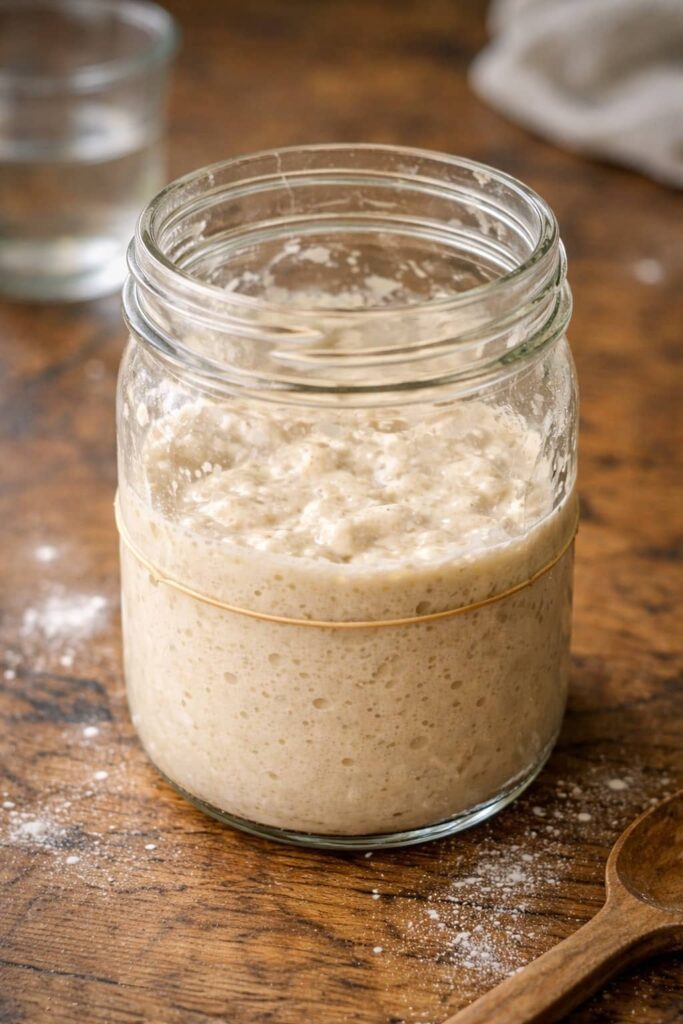
- Mix 60 g (½ cup) flour with 60 g (¼ cup) water in a clean jar.
- Stir until it looks like thick pancake batter.
- Scrape down the sides, loosely cover the jar (with a lid or clean towel), and leave it at room temperature.
Tip: Using whole wheat or rye flour on day one can help jump-start fermentation. You can switch to all-purpose flour later.
Day 2: The Waiting Game
- Open the jar and give it a sniff. It may smell lightly floury or slightly sweet.
- Stir the mixture once.
- Do not feed it yet.
Don’t panic: No bubbles at this stage is completely normal. Your starter is still waking up.
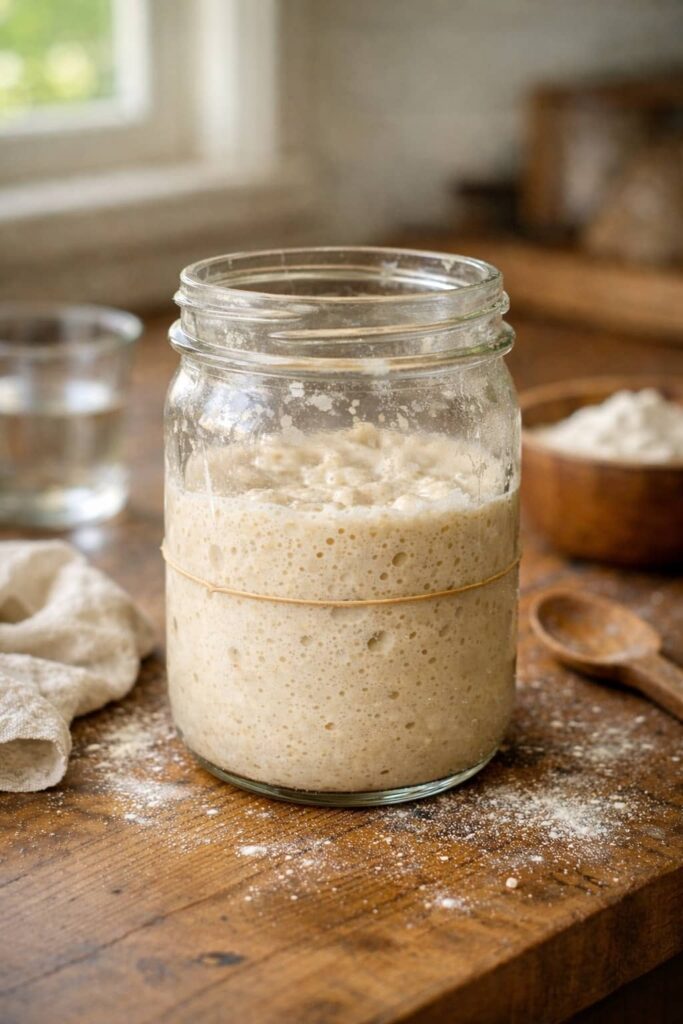
Day 3: First Signs of Life
- You may start to see small bubbles on the surface or sides of the jar.
- Discard half of the starter.
- Feed it with 60g (½ cup) flour + 60 g (¼ cup) water and stir well.
This is your first official feeding, welcome to your new routine.
Note: Funky smells (slightly sour or cheesy) are normal. If you see mold or smell something truly rotten, discard and start over.
Day 4: The Ugly Phase
- Discard half of the starter again.
- Feed with 60 g flour + 60 g water.
Your starter may rise, fall, separate, or smell strange. This phase is very common, just keep going.
Day 5: We’re Getting Somewhere
- Repeat the feeding process: discard half, then add flour and water.
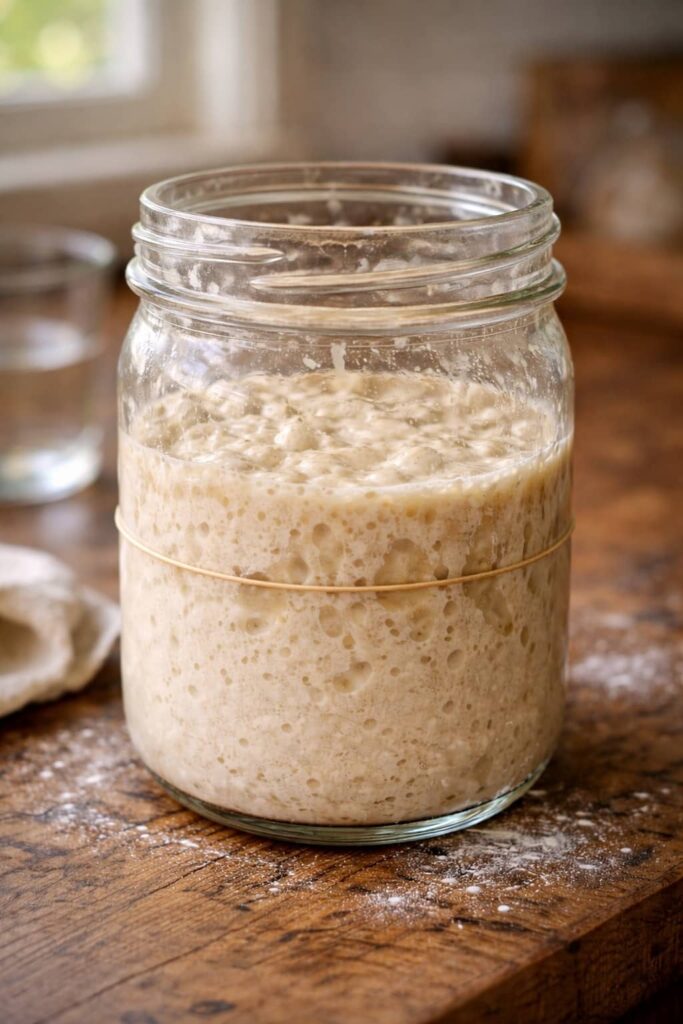
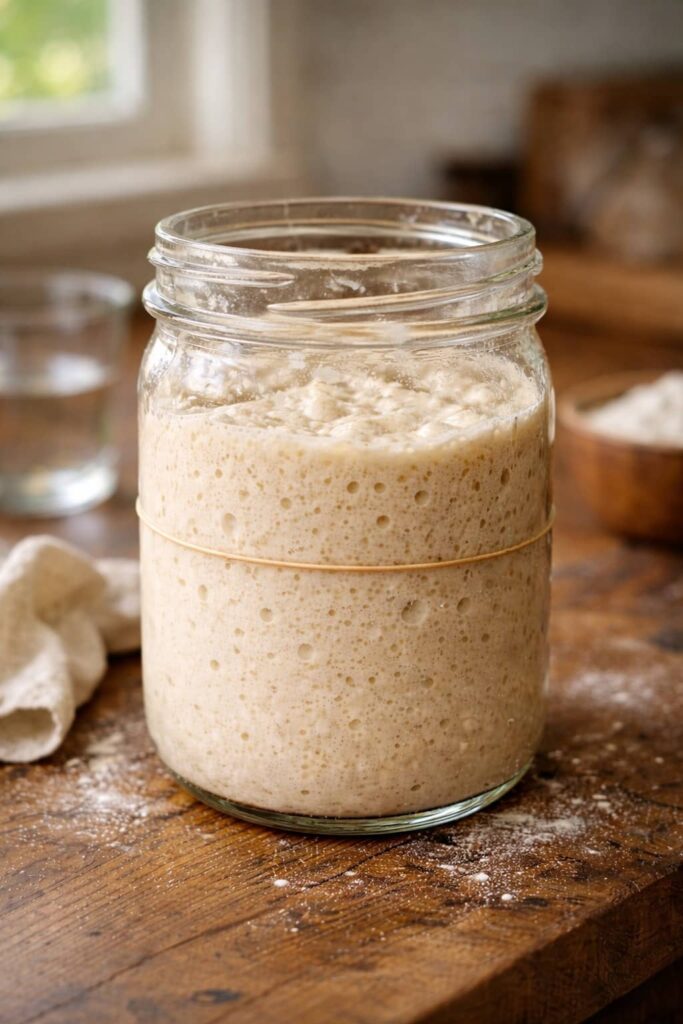
- You should start seeing more consistent bubbles and some rise.
You can try the float test: drop a small spoonful of starter into water. If it floats, it’s active enough to bake.
If it sinks, keep feeding daily, many starters need a full week or longer.
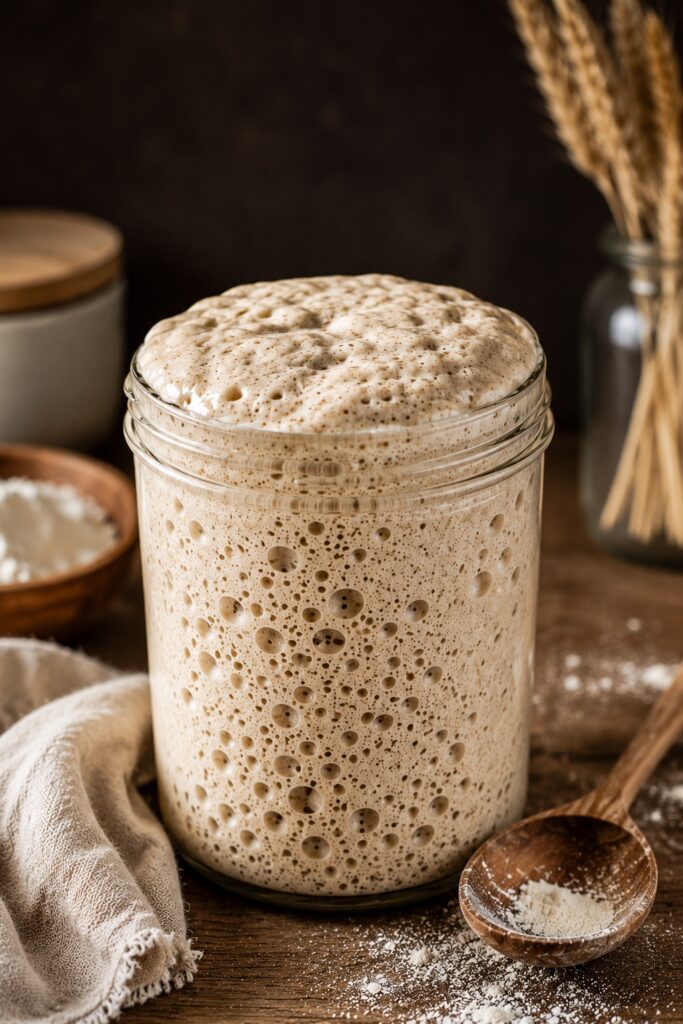
Day 6–7: Ready to Bake
- Continue feeding once a day (or twice if your starter is very active).
- Look for these signs:
- Lots of bubbles
- A pleasant, tangy smell
- Doubling in size within 4–6 hours after feeding
If your starter checks all these boxes, congratulations, you’ve made a healthy, active sourdough starter.
How to Feed a Sourdough Starter
Once your sourdough starter is active, feeding it regularly keeps it healthy, bubbly, and ready to bake. How often you feed it depends on how frequently you bake.
If You Bake Often (3+ Times Per Week)
- Keep your starter at room temperature.
- Feed it once a day.
- Each feeding:
- Discard about half of the starter.
- Add fresh flour and water in equal amounts.
- Stir well and loosely cover.
This schedule keeps your starter strong and ready to use at any time.
If You Bake Occasionally (Once a Week or Less)
- Store your starter in the refrigerator.
- Feed it once a week.
Before baking:
- Take the starter out of the fridge 1–2 days ahead.
- Feed it once or twice at room temperature until it becomes bubbly and active again.
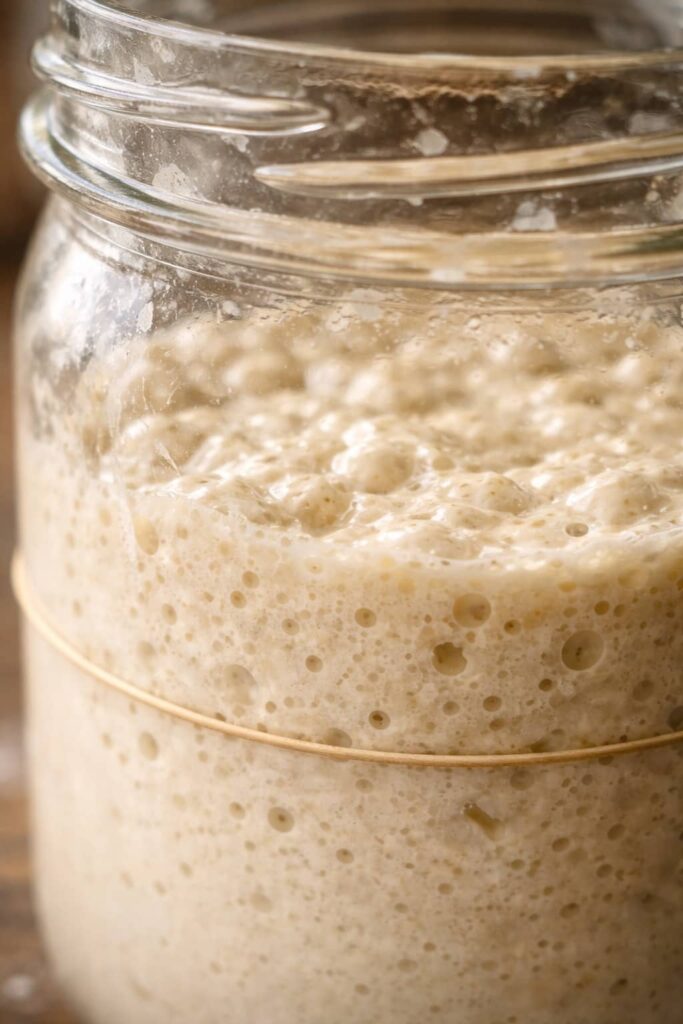
How to Tell If Your Sourdough Starter Is Ready
Your sourdough starter is ready to bake when it shows consistent strength and activity, not just a single good rise.
Look for these clear signs:
- It doubles in size reliably within 4–6 hours after feeding
- The surface is bubbly and slightly domed, not flat or sunken
- The texture is airy and web-like when you scoop it with a spoon
- The smell is pleasantly tangy, mildly yeasty, not sharp or sour
If your starter meets all these points, it’s strong enough to leaven bread properly.
💡 Tip: A starter that floats in water can be ready, but this test isn’t always reliable. Visual activity and consistency matter more than floating.
Common Sourdough Starter Problems (And Easy Fixes)
Even healthy starters can go through strange phases. Most issues are normal and easy to fix.
My Starter Has No Bubbles
This is very common in the first few days.
What to do:
- Keep feeding it daily
- Make sure it’s kept at room temperature
- Be patient, some starters take longer to activate
My Starter Smells Bad
A sour or cheesy smell is normal during fermentation.
A truly rotten or moldy smell is not.
What to do:
- Sour, funky smells → keep going
- Mold (fuzzy growth, pink or green spots) → discard and restart
There’s Liquid on Top (Hooch)
That dark or grayish liquid is called hooch. It means your starter is hungry.
What to do:
- Pour it off or stir it in
- Feed your starter more regularly
My Starter Rose and Then Stopped
This often happens around days 3–4 and is completely normal.
What to do:
- Continue regular feedings
- Ignore the temporary slowdown, your starter is stabilizing
My Starter Isn’t Ready After 7 Days
Not all starters follow the same timeline.
What to do:
- Keep feeding daily
- Give it more time, especially in cooler kitchens
- Consistency matters more than speed
Common Sourdough Starter Mistakes (And How to Avoid Them)
Making a sourdough starter isn’t difficult, but a few small mistakes can slow things down. Here are the most common ones, and how to fix them:
- Using chlorinated tap water: Chlorine can inhibit yeast activity. Use filtered water or let tap water sit out overnight to dechlorinate.
- Keeping the starter too cold: Yeast prefers warmth. Aim for a room temperature of about 70–75°F (21–24°C).
- Skipping discard before feeding: Discarding keeps acidity balanced and helps the starter stay strong and active.
- Panicking over normal smells: Tangy, sour, or slightly funky smells are normal. Only discard if you see mold or smell something truly rotten.
- Giving up too soon: Many starters fail simply because they’re abandoned too early. Consistency and patience matter more than speed.
How to Name Your Sourdough Starter (Yes, Really)
Naming your sourdough starter is completely optional, but surprisingly helpful. Giving it a name makes the process more fun and helps you stay consistent with feedings.
Some starters I’ve had were named:
- Geraldine
- Crumbelina
- Yeast Mode
It’s simple psychology: you’re less likely to forget feeding “Carl” than “that random jar in the corner.” And anything that helps you stay consistent is a win when it comes to sourdough.
How to Store and Maintain a Sourdough Starter Long Term
Once your sourdough starter is established, proper storage and maintenance will keep it healthy for years. How you store it depends on how often you bake.
Storing Your Starter at Room Temperature
This option works best if you bake several times a week.
- Keep the starter at room temperature.
- Feed it once a day (discard half, then add equal parts flour and water).
- Store it loosely covered to allow airflow.
This keeps your starter active and ready to use at any time.
Storing Your Starter in the Refrigerator
If you bake once a week or less, refrigeration is the easiest option.
- Feed the starter, then place it in the refrigerator.
- Feed it once a week to keep it healthy.
Before baking:
- Remove the starter from the fridge 1–2 days ahead.
- Feed it once or twice at room temperature until bubbly and active.
How to Revive a Weak or Neglected Starter
If your starter seems sluggish or hasn’t been fed in a while, it can usually be revived.
- Discard most of the starter, keeping a small amount.
- Feed with fresh flour and water.
- Keep it at room temperature.
- Repeat daily feedings until it becomes bubbly and active again.
Most starters are very resilient and bounce back with consistent care.
How Long Does a Sourdough Starter Last?
With regular feeding and proper storage, a sourdough starter can last for years. Some bakers keep the same starter alive for decades.
Frequently Asked Questions About Sourdough Starter
How long does it take to make a sourdough starter?
Most sourdough starters become active in 5–7 days, but some can take longer depending on room temperature, flour type, and feeding consistency.
Can I use all-purpose flour for sourdough starter?
Yes. Unbleached all-purpose flour works perfectly for maintaining a starter. Whole wheat or rye flour can help jump-start fermentation in the first few days.


Why is my sourdough starter not bubbling?
Lack of bubbles is usually caused by cold temperatures, inconsistent feedings, or a young starter. Keep feeding daily and make sure it’s stored in a warm spot.
Can I bake with sourdough starter before day 7?
Sometimes, but it’s better to wait until your starter consistently doubles in size within 4–6 hours after feeding. An immature starter may not leaven bread properly.
How do I know if my sourdough starter is bad?
If you see mold (fuzzy spots in green, pink, or black) or smell something truly rotten, discard the starter and start over. Sour, tangy smells are normal.
Do I have to discard sourdough starter every time?
Yes. Discarding keeps acidity balanced and helps maintain a healthy yeast population. You can save discard for pancakes, crackers, or other recipes.
What to Do With Sourdough Discard
Every time you feed your sourdough starter, you’ll discard a portion of it. Don’t throw it away, sourdough discard is incredibly versatile and perfect for easy baking recipes.
Here are some popular ways to use sourdough discard:
- Pancakes
- Waffles
- Crackers
- Banana bread
- Biscuits
If you’re looking for an easy way to use it, these sourdough discard pancakes are a great place to start.
You can use sourdough discard in many recipes that call for flour and liquid. It adds a subtle tang and helps reduce food waste, making it both practical and delicious.
Final Thoughts: You’ve Got This
Making a sourdough starter might sound intimidating, until you actually do it.
It’s not hard. It just takes time, patience, and a little trust in nature (and in yourself).
Once your starter is active, the possibilities are endless. Try making homemade sourdough English muffins for an easy and delicious next step. Bread, of course, but also pizza crust, cinnamon rolls, soft pretzels, and so much more. You can also use your starter to make sourdough chocolate chip cookies when you want something sweet.
So go ahead, mix that flour and water, give your starter a name, and feed it consistently. Before you know it, you’ll be baking bread that truly tastes amazing and proudly telling everyone you made it from scratch.
Now tell me, what are you naming yours? 😊
12 Sweet Favourites — Yours, Free 🍰
Tiramisù, no-bake cheesecake, the perfect chocolate chip cookie & 9 more reader-loved desserts — gathered into one beautiful free recipe book. From my kitchen to yours.
No spam, just sweet things. Unsubscribe anytime.