Lemon Bars
🎁 FREE E-BOOK: 12 Sweet Favorites — reader-loved desserts in one beautiful recipe book.
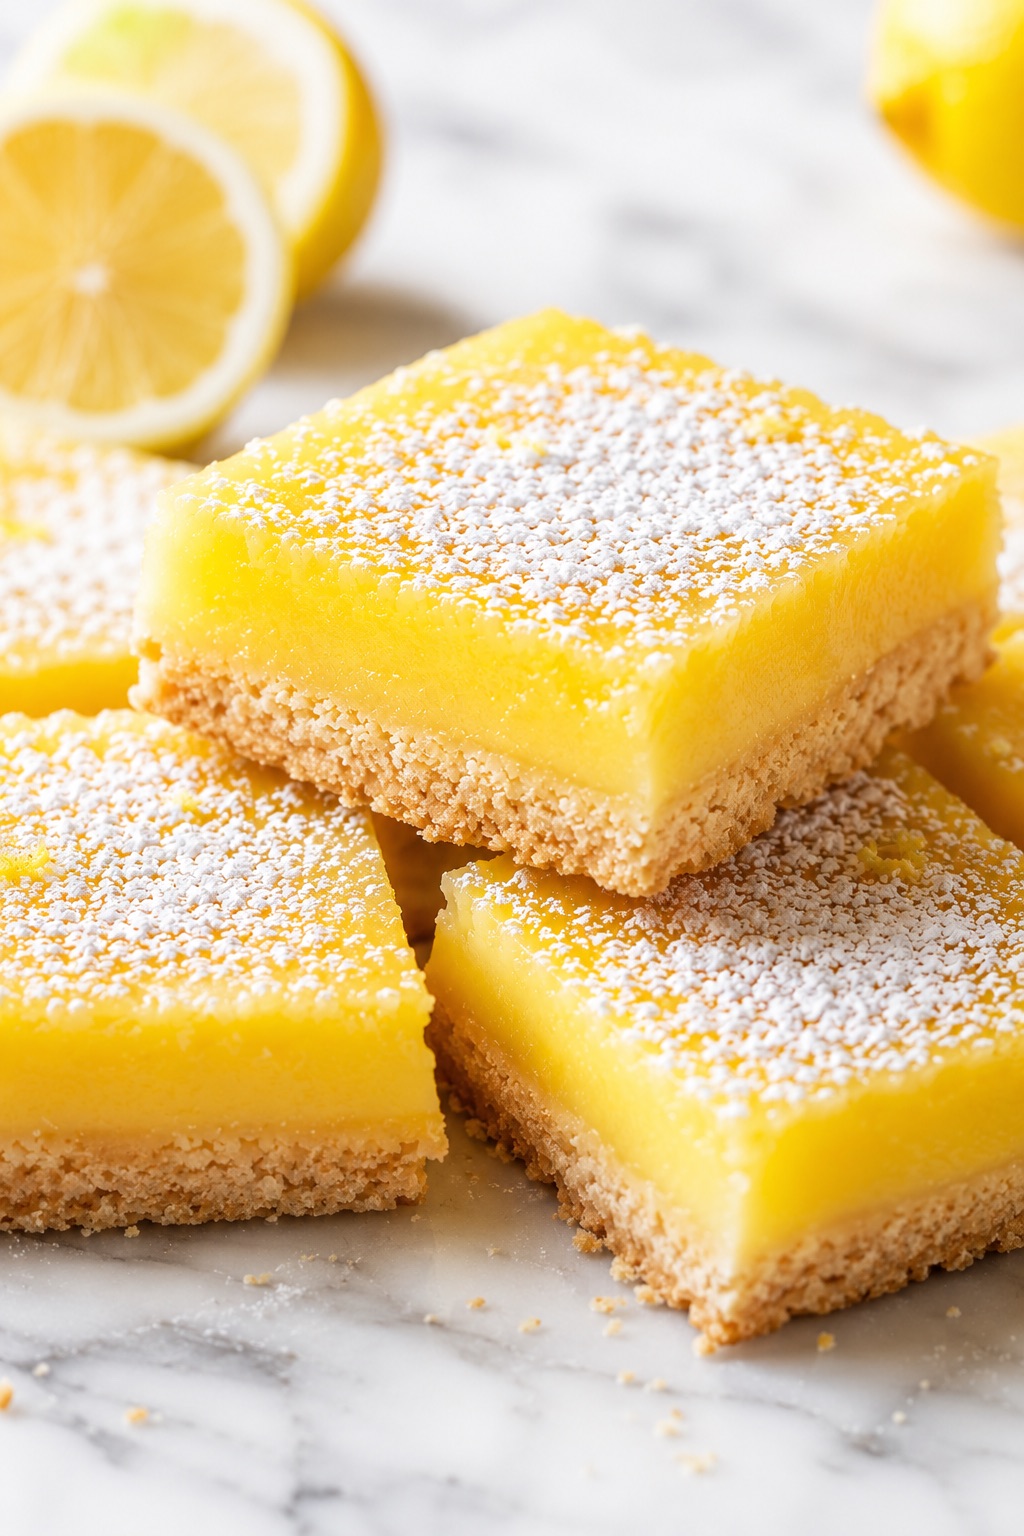
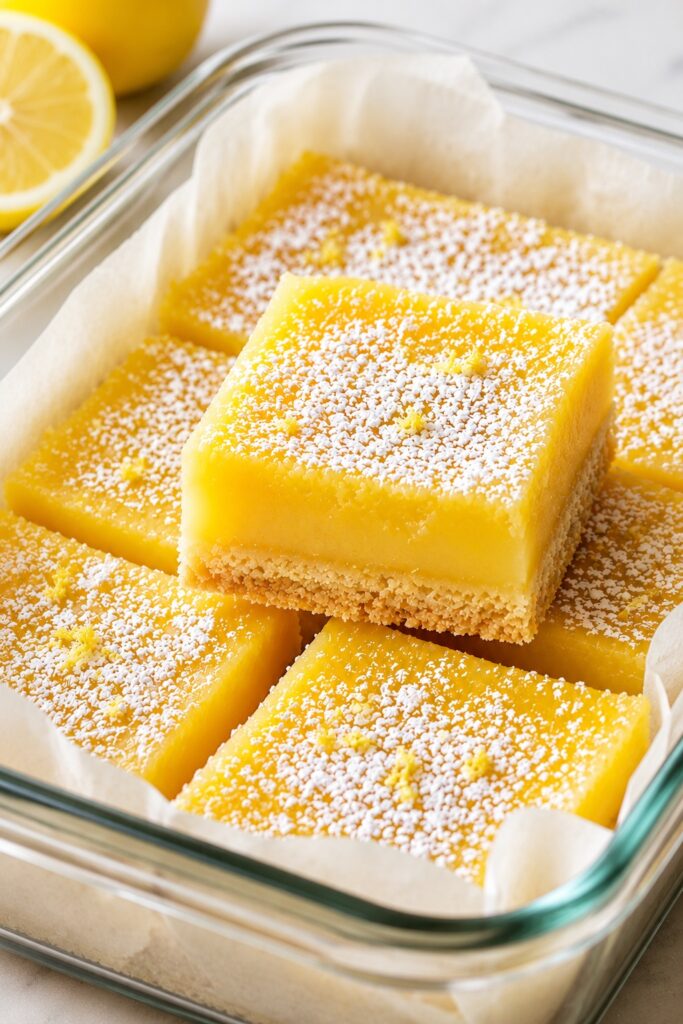
This lemon bars recipe combines a buttery shortbread crust with a smooth, bright lemon filling for a classic homemade dessert that feels fresh, sweet, and perfectly balanced. These easy lemon bars are ideal for spring baking, Easter dessert trays, brunch tables, and any time you want a simple citrus dessert that slices beautifully and tastes like sunshine.
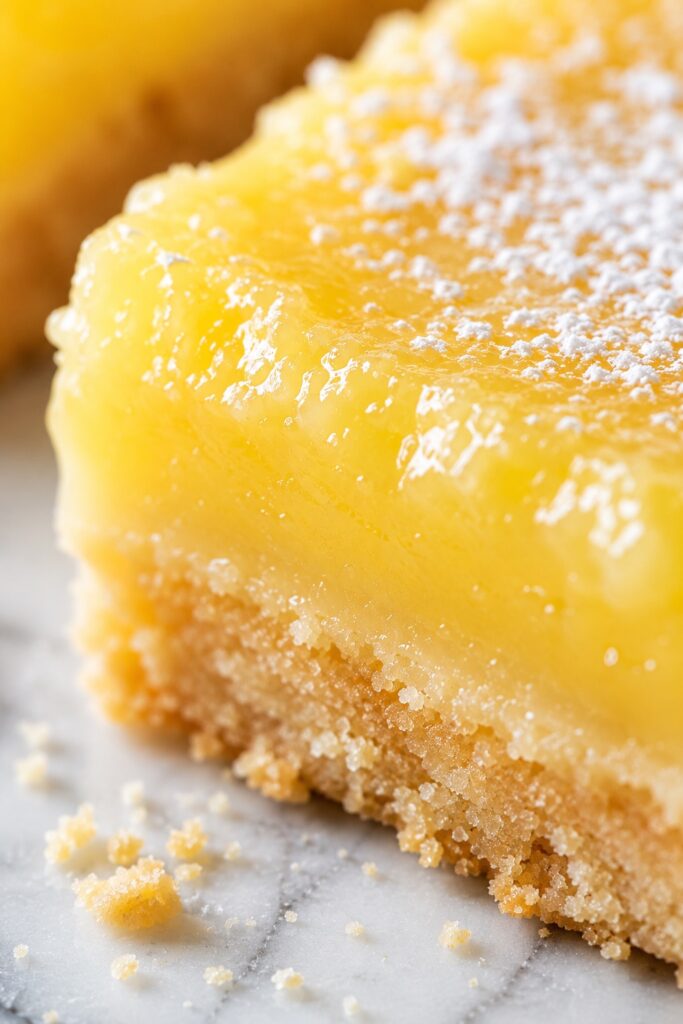
There’s something about lemon bars that feels instantly bright and comforting at the same time. The moment you bite through that soft layer of powdered sugar, into the silky lemon filling and buttery shortbread crust underneath, they taste like sunshine in dessert form.
This lemon bars recipe gives you that classic balance people love most: a crisp, buttery base with a smooth, vibrant lemon layer that’s tangy, sweet, and rich without feeling heavy. They’re simple to make, slice beautifully, and always feel a little special whether you’re baking for spring, Easter, brunch, or just because you want something fresh and homemade.
What makes lemon bars so memorable is their contrast. The crust is tender and buttery, the filling is soft and creamy with real lemon flavor, and the powdered sugar on top adds that delicate finish that makes them feel both rustic and elegant.
If you love easy desserts that look beautiful, cut neatly, and bring a fresh citrus flavor to the table, these homemade lemon bars are the kind of recipe you’ll come back to again and again.
What Are Lemon Bars?
Lemon bars are a classic dessert made with two main layers: a buttery shortbread crust and a soft lemon custard-style topping baked directly over it. Once cooled, they’re chilled, sliced into squares or rectangles, and usually finished with a light dusting of powdered sugar.
The best lemon bars have a crust that stays tender yet structured, paired with a filling that tastes bright and lemony without becoming harsh or overly sharp. Their texture should feel smooth and set, not rubbery, watery, or overly firm.
Quick Recipe Overview
| Texture | Buttery shortbread base with a smooth, soft, creamy lemon layer |
|---|---|
| Flavor | Bright, tangy, sweet, buttery, fresh, citrusy |
| Difficulty | Easy |
| Time | About 1 hour 10 minutes plus chilling |
| Servings | 16 bars |
| Method | Baked dessert bars |
| Best For | Spring desserts, Easter baking, brunch, showers, afternoon treats, make-ahead desserts |
In short: these lemon bars are buttery, bright, and beautifully balanced, with a crisp shortbread crust and a silky lemon filling that slices cleanly and tastes fresh in every bite.
Why This Recipe Works
- The shortbread crust gives the bars structure: It bakes first, so it stays tender but stable enough to support the lemon layer without turning soggy.
- Real lemon juice and zest bring layered flavor: Juice gives the filling its tartness, while zest adds fragrant citrus oils that make the flavor taste fuller and fresher.
- The filling bakes gently over the crust: This helps it set into that classic soft lemon bar texture instead of becoming dense or dry.
- A chill after baking improves everything: The bars slice more neatly, the lemon layer firms up properly, and the flavor tastes even more balanced once fully cooled.
One of the small details that makes a big difference here is using both lemon juice and zest rather than relying on juice alone. It gives the bars that true homemade lemon flavor instead of just plain acidity.
Baking Science
Lemon bar filling sets because the eggs coagulate as the bars bake, creating a smooth custard-like texture. The flour in the filling helps stabilize it slightly, while the sugar balances the tartness and keeps the texture tender rather than firm or rubbery.
The crust works like a classic shortbread: butter adds richness, flour provides structure, and sugar keeps it tender. Pre-baking the crust helps evaporate moisture early, which protects it once the lemon layer is poured on top.
Ingredients You’ll Need
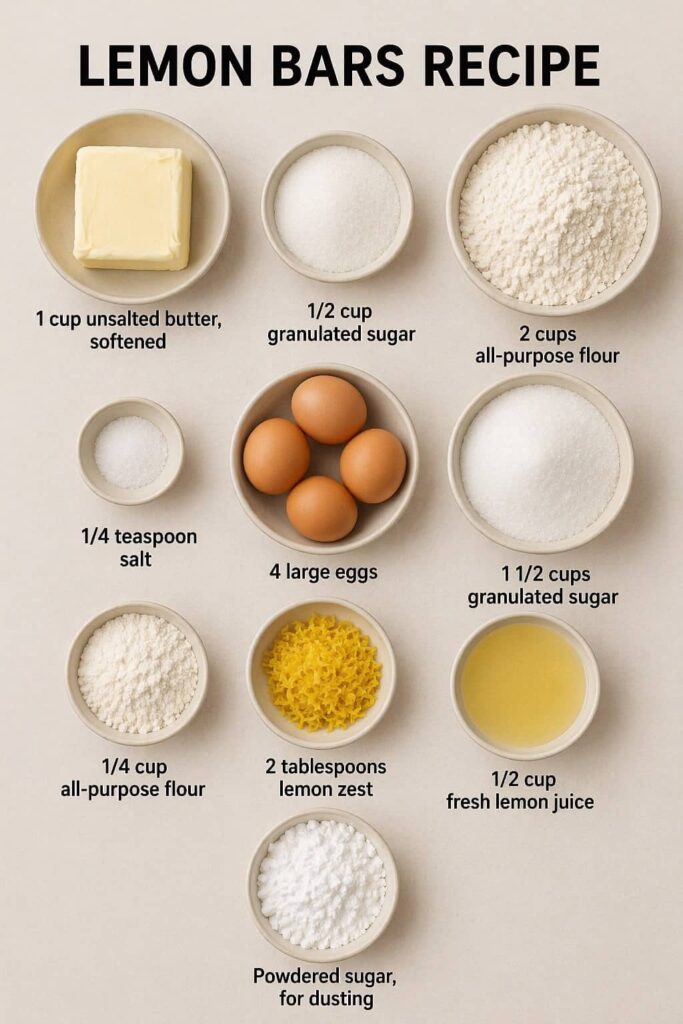
For the Shortbread Crust
- 1 cup unsalted butter, softened
- 1/2 cup granulated sugar
- 2 cups all-purpose flour
- 1/4 teaspoon salt
For the Lemon Filling
- 4 large eggs
- 1 1/2 cups granulated sugar
- 1/4 cup all-purpose flour
- 2 tablespoons lemon zest
- 1/2 cup fresh lemon juice
- Powdered sugar, for dusting
Ingredient Notes
- Butter: Use real unsalted butter for the crust. It gives the shortbread its rich, classic flavor and tender crumb.
- Fresh lemon juice: Freshly squeezed juice gives the cleanest, brightest lemon flavor. Bottled juice can taste flatter and slightly harsh.
- Lemon zest: This is where a big part of the citrus aroma comes from. It makes the filling taste more vibrant and natural.
- Eggs: These help the lemon layer set. Room temperature eggs mix more smoothly into the filling.
- Flour in the filling: A small amount helps stabilize the lemon layer so it slices cleanly without losing its soft texture.
Small authority note: If you want that classic bakery-style lemon bar flavor, do not skip the zest. The juice brings tartness, but the zest brings lemon personality.
Kitchen Tools Needed
- 8×8-inch or 9×9-inch baking pan
- Mixing bowls
- Whisk
- Hand mixer or sturdy spoon for the crust
- Microplane or zester
- Citrus juicer
- Parchment paper
- Fine mesh sieve for powdered sugar
Lining the pan with parchment paper makes removal much easier and helps the lemon bars lift out cleanly for neat slicing.
How to Make Lemon Bars
1. Prepare the pan and oven
Preheat your oven to 350°F. Line your baking pan with parchment paper, leaving a little overhang on the sides so you can lift the bars out later.
2. Make the shortbread crust
In a mixing bowl, cream the softened butter and granulated sugar until smooth. Add the flour and salt, then mix until a soft dough forms. It will look thick and slightly crumbly at first, but it should press together easily.
Press the crust evenly into the prepared pan. Use your hands or the bottom of a measuring cup to smooth the surface and push it gently into the corners.
3. Pre-bake the crust
Bake the crust for 18 to 22 minutes, or until it looks lightly golden around the edges and just set in the center.
This is one of those moments where visual cues matter more than guessing. You want the crust baked enough to hold the filling, but not so dark that it tastes overly toasted underneath the lemon layer.
4. Make the lemon filling
While the crust bakes, whisk together the eggs and sugar until smooth. Add the flour, lemon zest, and lemon juice, then whisk again until fully combined.
The filling should look fluid, glossy, and pale yellow, with no visible flour pockets.
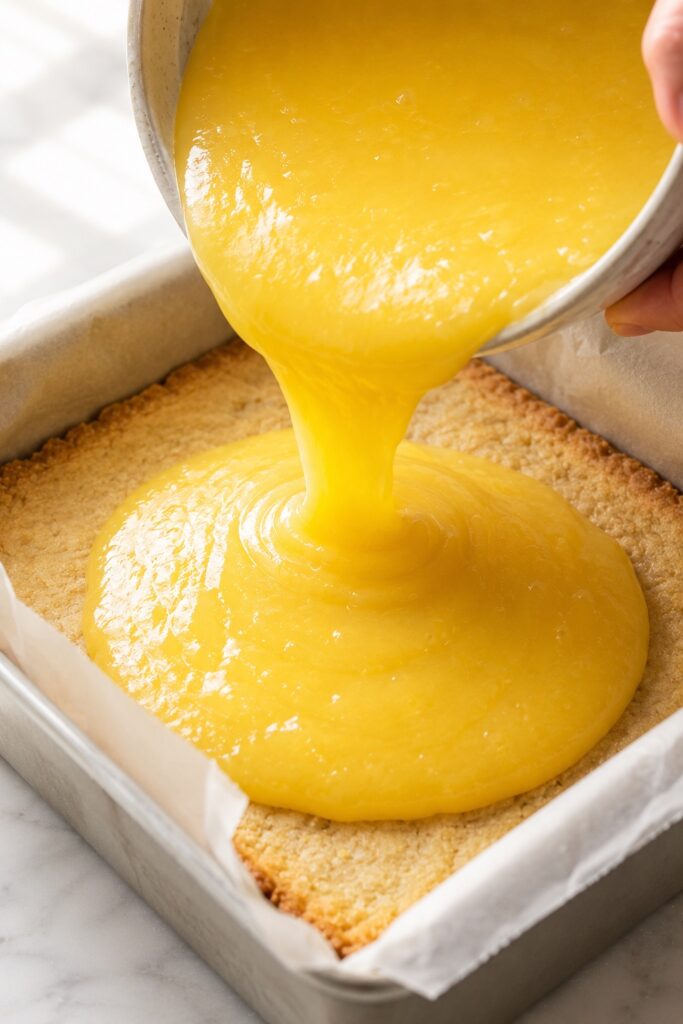
5. Pour over the hot crust
Once the crust comes out of the oven, pour the lemon filling directly over the warm crust. Return the pan to the oven immediately.
6. Bake until just set
Bake for 20 to 25 minutes, or until the center looks set and no longer appears liquid. A very slight wobble in the middle is fine, but it should not look wet.
Do not overbake. Overbaked lemon bars can lose that soft, creamy texture and become firmer than they should be.
7. Cool completely
Let the bars cool at room temperature, then chill them in the refrigerator for at least 2 hours before slicing. This helps the filling firm up and gives you much cleaner edges.
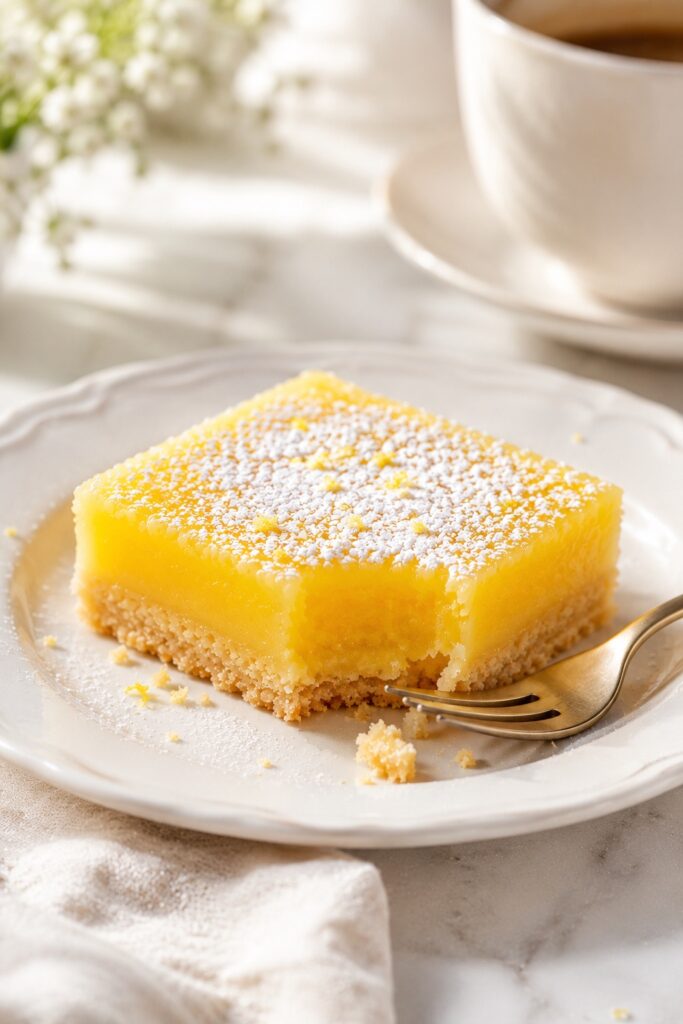
8. Dust and slice
Once chilled, lift the bars from the pan, dust lightly with powdered sugar, and cut into squares or rectangles.
For the cleanest slices, wipe the knife between cuts.
Visual Doneness Cues
- The crust should look lightly golden at the edges and dry on the surface
- The lemon filling should look set, smooth, and softly matte rather than wet or shiny
- The center can have the slightest movement, but should not slosh
- After chilling, the bars should slice cleanly and hold their shape
Texture and Behavior Guide
| If You See This | What It Means |
|---|---|
| Crust is pale and very soft | It likely needed a few more minutes of pre-baking |
| Filling looks watery in the center | The bars need more baking time |
| Filling feels firm and dense | They may have been overbaked |
| Bars fall apart when sliced | They likely needed more cooling and chilling time |
| Flavor tastes flat | They may need more zest or fresher lemon juice next time |
Expert Tips
- Use fresh lemons for the brightest flavor.
- Zest the lemons before juicing them.
- Pour the filling onto a warm crust, not a cooled one.
- Do not overbake the lemon layer.
- Chill fully before slicing for the neatest bars.
- Dust with powdered sugar just before serving for the prettiest finish.
Common Mistakes
| Mistake | What Happens | How to Fix It |
|---|---|---|
| Underbaking the crust | The base can soften too much under the filling | Pre-bake until lightly golden and set |
| Using bottled lemon juice | The flavor can taste dull or slightly artificial | Use fresh lemon juice and zest |
| Overbaking the bars | The filling becomes dense or rubbery | Remove when the center is just set |
| Slicing too early | The bars can look messy and soft | Cool completely and chill before cutting |
| Adding powdered sugar too early | It can dissolve into the surface | Dust right before serving |
Comparison Guide
| Style | Texture | Flavor | Best For |
|---|---|---|---|
| Classic Lemon Bars | Buttery crust + smooth lemon layer | Bright, sweet-tart, balanced | Everyday baking, spring, brunch, parties |
| Lemon Curd Bars | Richer and softer | More intense lemon flavor | Elegant desserts |
| Cheesecake Lemon Bars | Creamier and denser | Tangy, rich, less sharp | Dessert trays and special occasions |
How to Serve Lemon Bars
Lemon bars are one of those desserts that feel effortless but always stand out on the table. Serve them chilled or lightly cool, with a fresh dusting of powdered sugar just before bringing them out.
They fit beautifully on spring dessert boards, Easter tables, baby showers, brunch spreads, afternoon coffee breaks, and warm-weather gatherings where you want something fresh instead of overly rich.
They’re especially lovely when you want a dessert that feels bright, clean, and homemade — the kind of recipe people reach for after heavier cakes or chocolate desserts.
Save this for: Easter dessert trays, spring baking weekends, brunch with family, or any time you want an easy homemade dessert that tastes sunny and elegant at the same time.
Storage and Make-Ahead
- Refrigerator: Store in an airtight container for up to 5 days.
- Make-ahead: These are excellent made a day in advance since the texture improves after chilling.
- Freezer: Freeze without powdered sugar for up to 2 months. Thaw in the refrigerator, then dust before serving.
Variations
- Meyer lemon bars: Use Meyer lemons for a slightly sweeter, softer citrus flavor.
- Lemon lavender bars: Add a very small amount of culinary lavender for a floral twist.
- Extra tangy lemon bars: Increase the zest slightly for a bolder lemon finish.
- Orange-lemon bars: Replace part of the lemon juice with orange juice for a softer citrus blend.
- Berry lemon bars: Serve with fresh raspberries or strawberries for a spring-ready dessert plate.
Frequently Asked Questions
Why are my lemon bars runny?
They were likely underbaked or not chilled long enough. The center should look set before coming out of the oven, and the bars need time to firm up fully after cooling.
Can I use bottled lemon juice?
You can, but fresh lemon juice gives a much brighter and cleaner flavor. For the best homemade lemon bars, fresh is strongly recommended.
Do lemon bars need to be refrigerated?
Yes. Because of the egg-based filling, lemon bars should be stored in the refrigerator.
How do I get clean slices?
Chill the bars completely, use a sharp knife, and wipe the blade clean between cuts.
Can I double this recipe?
Yes. Double it and bake in a 9×13-inch pan, adjusting the baking time as needed.
Why did my powdered sugar disappear?
If the bars are still slightly warm or moist on top, the powdered sugar can dissolve. Dust them just before serving for the best appearance.
Can I make lemon bars ahead for a party?
Yes. They’re one of the best make-ahead desserts because the texture sets beautifully after chilling.
More Recipes You’ll Love
If you enjoy bright, fresh desserts like these lemon bars, you might also love other citrus and spring favorites such as Lemon Cake, Key Lime Pie, Lemon Meringue Pie, or Fruit Pizza. They all bring that same cheerful, homemade dessert energy in slightly different ways.
Recipe Summary
This lemon bars recipe is everything a classic citrus dessert should be: buttery, bright, smooth, and beautifully balanced. With a tender shortbread crust and a soft lemon filling made with fresh juice and zest, these homemade lemon bars are easy to make, easy to slice, and perfect for spring gatherings, Easter desserts, brunch tables, or simple weekend baking.
Final Thoughts
Lemon bars have a way of making dessert feel lighter, brighter, and a little more joyful. They don’t need layers or elaborate decoration to stand out. That contrast of buttery crust, silky lemon filling, and soft powdered sugar is already enough to make them memorable.
If you’re looking for a dessert that feels fresh, classic, and genuinely homemade, these lemon bars are one of those recipes that deliver every single time. Simple ingredients, beautiful texture, and that unmistakable lemon glow — sometimes that’s exactly what makes a recipe so easy to love.

Lemon Bars
These classic lemon bars have a buttery shortbread crust and a silky lemon filling with the perfect balance of bright citrus flavor and sweetness. They’re easy to make, slice beautifully, and feel fresh and comforting at the same time.
Ingredients
Crust
- 2 cups all-purpose flour (or almond flour for gluten-free lemon bars)
- 1/2 cup granulated sugar (or erythritol for keto lemon bars)
- 1 cup unsalted butter, softened (or coconut oil for vegan lemon bars)
- 1/4 tsp salt
Filling
- 4 large eggs (or flax eggs for vegan version)
- 1 1/2 cups granulated sugar (adjust for dietary needs)
- 1/4 cup all-purpose flour (or cornstarch for GF)
- 1/2 cup fresh lemon juice
- 2 tablespoons lemon zest
Finishing
- Powdered sugar, for dusting
Instructions
- Preheat the oven to 350°F and line an 8x8-inch or 9x9-inch baking pan with parchment paper.
- In a mixing bowl, cream the softened butter and sugar until smooth. Add the flour and salt and mix until a soft dough forms.
- Press the dough evenly into the prepared pan.
- Bake the crust for 18 to 22 minutes, or until lightly golden around the edges and set in the center.
- While the crust bakes, whisk together the eggs and sugar until smooth. Add the flour, lemon zest, and lemon juice, then whisk until fully combined.
- Pour the lemon filling over the hot crust as soon as it comes out of the oven.
- Return the pan to the oven and bake for 20 to 25 minutes, or until the filling is set and no longer looks wet in the center.
- Let the bars cool completely at room temperature.
- Refrigerate for at least 2 hours before slicing.
- Dust with powdered sugar just before serving and cut into 16 bars.
Notes
- Use fresh lemon juice for the brightest flavor.
- Do not skip the lemon zest, because it adds deeper citrus aroma and flavor.
- Bake just until the filling is set to keep the texture smooth and soft.
- Chill fully before slicing for the cleanest bars.
- Dust with powdered sugar right before serving so it stays visible on top.
Nutrition Information:
Yield: 16 bars Serving Size: 1 barAmount Per Serving: Calories: 210Total Fat: 10gSaturated Fat: 6gCarbohydrates: 2gSugar: 18gProtein: 3g
12 Sweet Favourites — Yours, Free 🍰
Tiramisù, no-bake cheesecake, the perfect chocolate chip cookie & 9 more reader-loved desserts — gathered into one beautiful free recipe book. From my kitchen to yours.
No spam, just sweet things. Unsubscribe anytime.