No Bake Cheesecake
🎁 FREE E-BOOK: 12 Sweet Favorites — reader-loved desserts in one beautiful recipe book.
What Is No Bake Cheesecake?
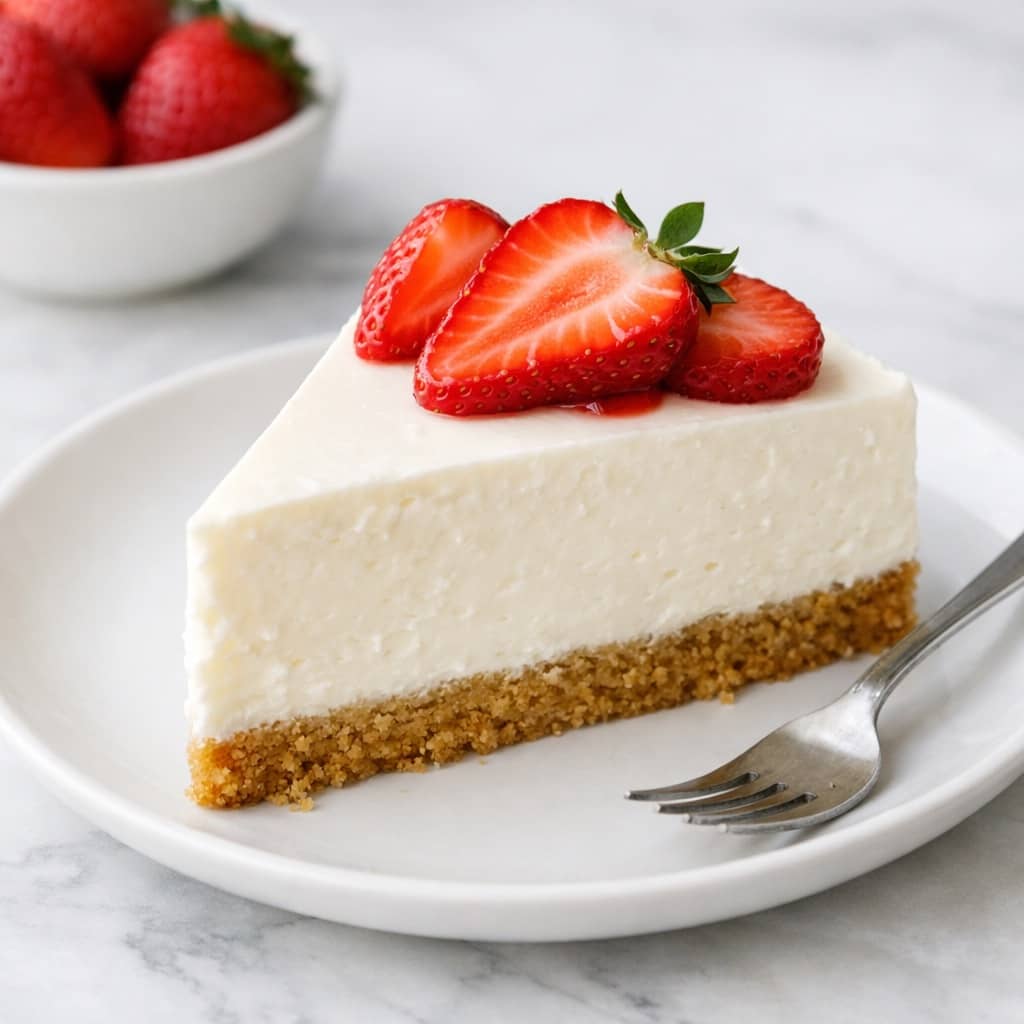
No bake cheesecake is a creamy dessert made with a graham cracker crust and a smooth cream cheese filling that sets in the refrigerator instead of the oven. This easy no bake cheesecake recipe comes together in about 20 minutes of prep time, then chills until firm and sliceable. The result is a light, silky cheesecake with no water bath and no baking required.
Whether you make it with heavy cream or Cool Whip, this Philadelphia-style no bake cheesecake sets beautifully and slices clean every time.
There’s something irresistible about a cool, creamy slice of no bake cheesecake – smooth, lightly sweet, and perfectly set without ever turning on the oven. It’s the kind of dessert that feels elegant but secretly couldn’t be easier.
No Bake Cheesecake at a Glance
- No baking required
- Sets in the refrigerator in at least 4 hours
- Light, mousse-like texture
- Made with cream cheese and whipped cream
- Easy to customize with fruit or chocolate toppings
- Beginner-friendly dessert
What Makes No Bake Cheesecake Different?
Unlike traditional baked cheesecake, no bake cheesecake sets in the refrigerator instead of the oven. There’s no water bath, no cracking, and no long baking time. The texture is lighter — more mousse-like than dense New York-style cheesecake — making it perfect for warm weather or make-ahead entertaining.
What Is the Difference Between Baked and No Bake Cheesecake?
The main difference between baked and no bake cheesecake is how they set. Baked cheesecake firms up in the oven and has a dense texture, while no bake cheesecake sets in the refrigerator and has a lighter, creamier consistency.
Baked Cheesecake
- Dense and rich
- Requires oven + water bath
- Risk of cracks
- Longer prep time
No Bake Cheesecake
- Light and airy
- Sets in the fridge
- Beginner-friendly
- Ideal for summer or busy days
Why You’ll Love This No Bake Cheesecake
- No oven required – perfect for summer or busy days
- Make-ahead friendly (sets overnight beautifully)
- Easy flavor swaps: strawberry, lemon, Oreo, chocolate
- Beginner-proof and party-ready
Prep Time
15 minutes (plus 4 hours chilling)
Servings
8 slices
Nutrition Info (per slice)
Calories: 320 | Fat: 22g | Carbs: 26g | Protein: 5g | Sugar: 18g
Ingredients
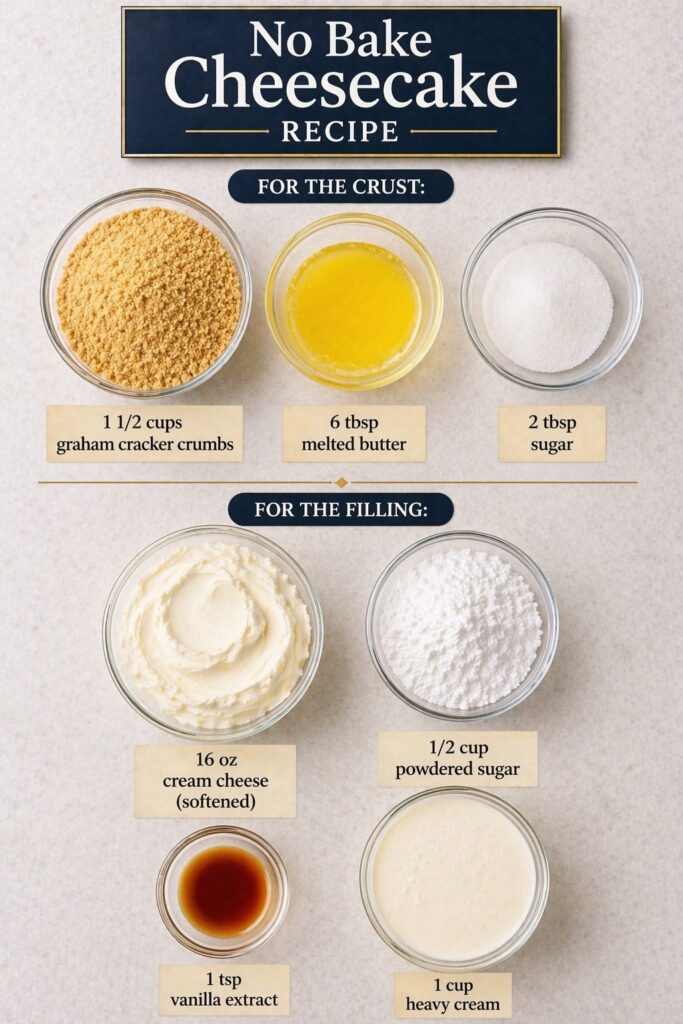
You only need a handful of simple ingredients to make this creamy no bake cheesecake. Each one plays an important role in creating the perfect texture and structure.

For the Crust
- 1 ½ cups graham cracker crumbs (or Oreo crumbs for a no bake Oreo cheesecake)
- 6 tbsp melted butter
- 2 tbsp sugar
For the Filling
- 16 oz cream cheese (softened, Philadelphia brand for Philadelphia no bake cheesecake)
- ½ cup powdered sugar
- 1 tsp vanilla extract
- 1 cup heavy cream (or Cool Whip for no bake cheesecake with Cool Whip)
- Use full-fat cream cheese for best structure.
- Make sure cream cheese is fully softened before mixing.
- Whip heavy cream to stiff peaks before folding.
These ingredients work together to create structure without baking. The whipped cream provides lift, while the cream cheese gives stability and richness.
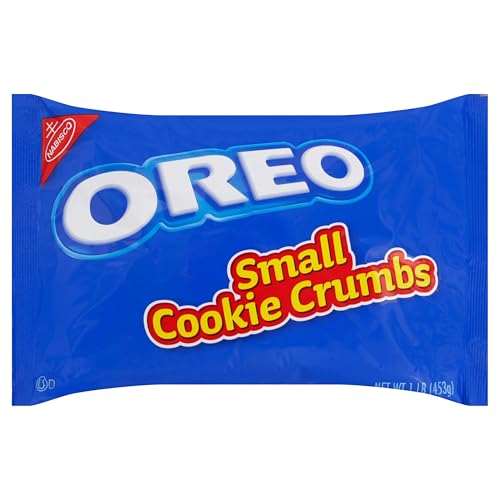
- Perfect addition to ice cream, milkshakes, cheesecakes, dessert bars, and pies
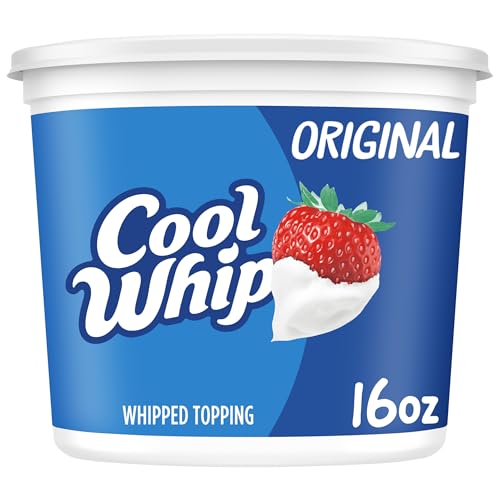
- One 16 oz tub of Cool Whip Original Whipped Topping
- Cool Whip Original Whipped Topping is a one-of-a-kind dessert topping
- 2 grams of sugar, 1 gram of saturated fat and 1.5 grams of total fat per serving
Why No Bake Cheesecake Sets Without Baking
- Cold temperature firms the filling, allowing the cream cheese and whipped mixture to stabilize as it chills.
- Properly softened cream cheese creates a smooth base, preventing lumps and helping the cheesecake set evenly.
- Whipped cream adds structure and lightness, replacing the need for eggs or baking.
- Enough chilling time is essential, as the texture fully develops after several hours in the refrigerator.
Kitchen Tools Needed:
- 9-inch Pie Dish or Springform Pan
- Large Mixing Bowls (at least two)
- Electric Hand Mixer or Stand Mixer
- Measuring Cups and Spoons
- Spatula (for scraping the bowl clean)
- Whisk (for mixing the crust)
Helpful Extras:
- Glass or Cup (to press the crust down firmly and evenly)
- Fine Grater (if making a lemon version for zest)
How to Make No Bake Cheesecake
1. Make the Crust
Mix graham cracker crumbs, melted butter, and sugar. Press firmly into a 9-inch pie pan using the bottom of a glass. Chill while preparing the filling.
2. Beat the Cream Cheese
Beat softened cream cheese until completely smooth before adding sugar. This prevents lumps and ensures a silky filling.
Make sure the cream cheese is softened but not warm, as overly soft cream cheese can prevent the cheesecake from setting properly.
3. Add Sugar and Vanilla
Mix until light and creamy.
4. Whip the Cream
Whip heavy cream to stiff peaks before folding gently into the cream cheese mixture. If using Cool Whip, fold it in carefully to keep the filling airy.

5. Assemble and Chill
Spread filling evenly over crust. Chill at least 4 hours, preferably overnight, until fully set.
How Long Does No Bake Cheesecake Need to Set?
No bake cheesecake needs at least 4 hours in the refrigerator to set properly. For the cleanest slices and best texture, chilling overnight is recommended.
Troubleshooting No Bake Cheesecake
Why is my no bake cheesecake runny?
Cause: Cream wasn’t whipped to stiff peaks.
Fix: Whip until firm peaks form before folding.
No bake cheesecake can turn runny if the whipped cream was not beaten to stiff peaks, the filling was overmixed, or the dessert was not chilled long enough to fully set.
- Cream wasn’t whipped to stiff peaks
- Not enough chill time (minimum 4 hours)
- Cream cheese was overmixed after adding whipped cream
Why is it grainy?
- Cream cheese wasn’t fully softened
- Powdered sugar wasn’t fully incorporated
Crust falling apart?
- Not pressed firmly
- Not chilled before filling
Common Mistakes First-Time Bakers Make
Even though this is an easy no bake cheesecake, a few small mistakes can affect the final texture. Here’s what to watch for:
1. Using Cold Cream Cheese
Cold cream cheese doesn’t blend smoothly and creates a lumpy filling. Let it sit at room temperature until fully softened before mixing.
2. Not Whipping the Cream Enough
Heavy cream must be whipped to stiff peaks. If it’s too soft, the cheesecake won’t set properly and may turn runny.
3. Overmixing After Folding
Once the whipped cream is added, fold gently. Overmixing deflates the air that gives no bake cheesecake its light texture.
4. Not Pressing the Crust Firmly
A loose crust leads to crumbling slices. Press the crust firmly using the flat bottom of a glass.
5. Rushing the Chill Time
This dessert needs time. While it may look set after 2-3 hours, the cleanest slices come after at least 4 hours – ideally overnight.
Pro Tips for the Perfect No Bake Cheesecake Texture
If you want that smooth, bakery-style slice that holds its shape beautifully, these small details make a big difference:
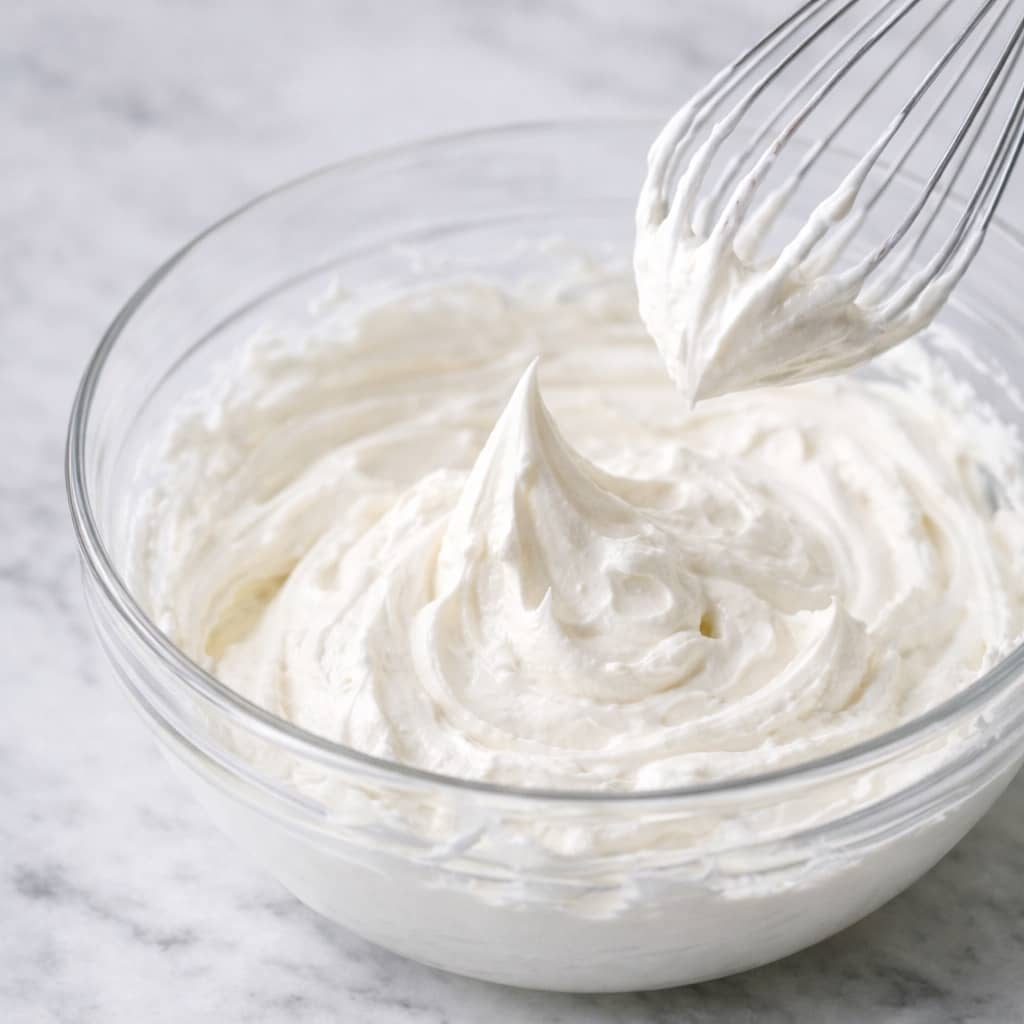
1. Use Full-Fat Cream Cheese
Full-fat cream cheese creates structure and stability. Reduced-fat versions contain more moisture and can make the filling softer.
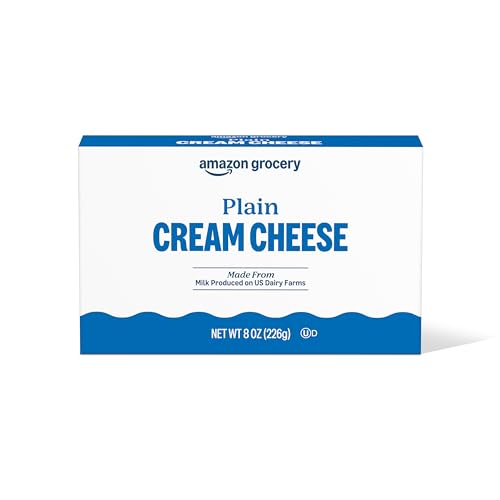
- One 8 ounce tub of Plain Cream Cheese
- No chemical preservatives
- Made with milk produced on US dairy farms
2. Beat Cream Cheese First – Alone
Before adding sugar, beat the cream cheese until completely smooth. This eliminates lumps and ensures a silky base.
3. Sift the Powdered Sugar
Sifting prevents tiny clumps and keeps the filling ultra-smooth.
4. Fold, Don’t Stir
Once the whipped cream is added, gently fold it in using a spatula. Stirring aggressively will deflate the air and make the cheesecake dense.
5. Chill in the Coldest Part of the Fridge
Place the cheesecake toward the back of the refrigerator, where temperature is most stable. This helps it set evenly.
6. For Extra Stability (Optional Trick)
If you need a firmer slice for warm-weather events, chill the cheesecake for 30–45 minutes in the freezer before serving.
How to Get Clean Cheesecake Slices (Step-by-Step)
If you want those smooth, bakery-style slices that look picture-perfect, follow these simple steps:
1. Chill Overnight
The firmer the cheesecake, the cleaner the cut. Overnight chilling gives the best results.
2. Use a Long, Sharp Knife
A thin, sharp knife works best. Avoid serrated knives.
3. Warm the Blade
Run the knife under hot water, then wipe it dry before slicing. The warmth helps glide through the filling smoothly.
4. Wipe Between Each Cut
After every slice, wipe the blade clean. This prevents smearing and keeps edges sharp.
5. Slice in One Smooth Motion
Cut straight down in a single motion instead of sawing back and forth.
Can You Make No Bake Cheesecake Without Cool Whip?
Yes. Heavy cream whipped to stiff peaks creates a light and stable filling. Cool Whip offers convenience and extra stability, but both options work beautifully.
Can You Freeze No Bake Cheesecake?
Yes. Wrap slices tightly and freeze up to 1 month. Thaw overnight in the refrigerator before serving.
Toppings & Flavor Variations
One of the best things about no bake cheesecake is how easy it is to customize. From fresh berries to chocolate or caramel, simple toppings can completely transform the flavor and presentation.
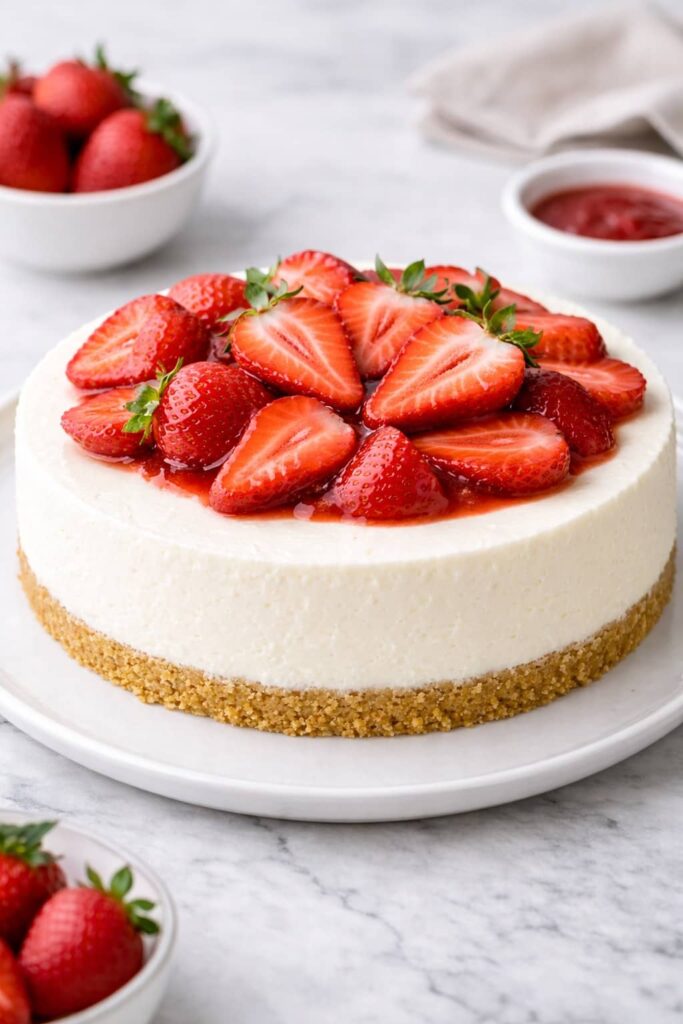
- Fresh strawberries or mixed berries
- Lemon curd for a bright twist
- Chocolate ganache drizzle
- Crushed Oreos for a cookies-and-cream version
- Caramel sauce + sea salt
If you love easy no-bake desserts, you might also enjoy our No Bake Pumpkin Pie or browse more Cheesecake Recipes for seasonal variations.
Flavor Variations (Pick Your Favorite!)
- No bake strawberry cheesecake: Add ½ cup strawberry puree
- No bake lemon cheesecake: Add 2 tbsp lemon juice + zest
- No bake peanut butter cheesecake: Mix in ½ cup peanut butter
- No bake cherry cheesecake: Top with cherry pie filling
- No bake blueberry cheesecake: Swirl in blueberry compote
- Jello no bake cheesecake: Use flavored Jello in the filling
- 3 ingredient no bake cheesecake: Just cream cheese, sweetened condensed milk, and lemon juice
How to Decorate No Bake Cheesecake for Halloween
A smooth ivory cheesecake makes a beautiful backdrop for a white ghost, an orange jack-o’-lantern, chocolate decorations, and one oversized black spider. This Halloween version keeps the cheesecake uncovered, with its creamy sides and golden crumb crust clearly visible.
The decorations are made separately and added once the cheesecake is thoroughly chilled. No frosting or fruit topping is needed.

Prepare the Cheesecake for This Presentation
For the freestanding shape shown here, use a 9-inch springform pan, rather than a pie dish. Line the bottom with parchment and the sides with a food-safe acetate collar for an especially smooth finish.
The original filling makes a shallower cheesecake. For a taller presentation closer to the photograph, keep the original crust quantities and double the filling:
- 32 ounces (907 g) full-fat block cream cheese, softened
- 1 cup (120 g) powdered sugar, sifted
- 2 teaspoons (10 ml) vanilla extract
- 2 cups (480 ml) cold heavy whipping cream, preferably 36% fat
Prepare the filling using the main recipe’s method, whipping the cream to stiff peaks before folding it into the cream cheese mixture. Spread over the chilled crust and smooth the top while the filling is still soft.
Refrigerate for at least 12 hours, until firm throughout. Doubling the filling increases the height, but the final height will also depend on how much volume the whipped cream retains.
Halloween Decorating Ingredients and Tools
For the decorations:
- 200 g orange Candy Melts or orange confectionery coating
- 100 g white Candy Melts or white confectionery coating
- 100 g dark cocoa Candy Melts or dark confectionery coating
- 50 g yellow or golden-orange Candy Melts
- Approximately 75 g black gum paste
- 1 small dark chocolate truffle, optional
- A little edible glue
These quantities include extra coating for lining molds, piping, and attaching pieces.
Useful tools:
- A two-part pumpkin chocolate mold, approximately 2–2½ inches (5–6 cm) wide
- Parchment paper and a small baking sheet
- Small piping bags
- A small food-safe brush
- A toothpick or modeling tool
- Three food-safe paper lollipop sticks
- A small offset spatula
Use precolored confectionery coating for the orange and yellow pieces. If coloring white coating yourself, use coloring specifically labeled for chocolate.
Make the Halloween Decorations
1. Create the standing white ghost.
Draw a ghost approximately 3 inches (7.5 cm) tall on paper, with a rounded head, two raised arms, and a broad, slightly wavy base. Place the drawing beneath parchment on a flat tray.
Melt the white coating according to its package directions. Pipe the outline, then fill it to approximately ¼ inch (5–6 mm) thick. Gently tap the tray to settle the coating and use a toothpick to fill small gaps.
Let set completely before peeling away the parchment. The side that touched the parchment will become the smooth front.
Pipe two dark oval eyes and an open mouth onto the front. Once set, turn the ghost over and attach a lollipop stick with additional melted white coating, leaving approximately 1½–2 inches (4–5 cm) extending below the decoration. Let the attachment harden fully.
2. Make the hollow orange jack-o’-lantern.
Brush melted orange coating inside both halves of the pumpkin mold. Let the first coat begin to set, then add another coat, building a shell approximately 2–3 mm thick. Pay particular attention to the rim and stem area.
Let harden completely, then carefully unmold both halves. Join them with a narrow line of melted orange coating around the edges. Hold together gently until secure.
Pipe triangular eyes and a smiling, jagged mouth with dark coating. Add a small dark stem at the top. For recessed-looking features, choose a jack-o’-lantern mold with facial indentations and fill those details with dark coating.
Keeping the pumpkin hollow reduces its weight on the soft cheesecake.
3. Pipe the two orange pinwheel discs.
Pipe two orange circles approximately 1½ inches (4 cm) across onto parchment, making each approximately 3–4 mm thick. Let set.
With a fine piping bag, add six curved dark lines to each disc. Begin each line near the center and curve it toward the outer edge, keeping every curve turning in the same direction.
Once firm, attach a small triangular piece of set coating to the back of each disc with melted coating. This creates a concealed support so the discs can stand at a slight backward angle.
4. Make the golden jack-o’-lantern plaque.
On parchment, pipe a golden-yellow plaque approximately 2½ inches (6 cm) tall. Give it a rounded lower edge and two pointed corners at the top to recreate the silhouette in the photograph.
Fill to approximately 4 mm thick and let set. Add dark triangular eyes, a small nose, and an uneven jack-o’-lantern smile.
Attach a food-safe lollipop stick to the back with melted coating, allowing the attachment to harden before handling.
5. Make the dark triangular plaque.
Spread dark coating onto parchment to approximately 3 mm thick. When it begins to firm but is still cuttable, cut out a triangle approximately 2½ inches (6 cm) tall.
Allow it to harden, then pipe a narrow orange line along two edges. Attach a lollipop stick to the back with melted coating and let set.
6. Shape the oversized black spider.
Use black gum paste to make a rounded abdomen approximately 1 inch (2.5 cm) across and a smaller head. Flatten the undersides slightly so the body sits securely.
Roll eight legs approximately 1½–2 inches (4–5 cm) long. Keep them about 3–4 mm thick at the body, tapering toward the tips. Bend each leg at two points to create the raised, angular shape.
Attach four legs to each side with edible glue. Assemble the spider on parchment, supporting the bent legs with small folded pieces of parchment while they dry.
Allow 24–48 hours, or until the legs are firm enough to lift without bending. Handle the finished spider by its body.
Assemble the Cheesecake to Match the Photograph
- Unmold while cold. Remove the springform ring and carefully peel away the acetate. Transfer the cheesecake to its serving board before adding decorations.
- Keep the ivory surface exposed. Leave the top plain. If needed, soften small surface marks with one gentle pass of a slightly warm, dry offset spatula.
- Place the ghost at the back center. Insert its attached stick gently into the cheesecake, leaving the ghost’s base just touching the surface. Do not force the stick through the crust.
- Position the two plaques. Place the golden jack-o’-lantern plaque behind the orange discs on the left. Position the dark triangle at the back right, slightly angled inward.
- Add the orange pumpkin. Set the hollow jack-o’-lantern on the right half of the cheesecake, in front of the triangular plaque. Keep it a little away from the edge.
- Arrange the pinwheel discs. Stand the two orange discs together to the left of the ghost, with one slightly overlapping the other. Press their small supports only gently into the surface.
- Add the dark accent. If using a chocolate truffle, place it between the pinwheel discs and the pumpkin, near the ghost’s base.
- Finish with the spider. Set the spider on the front-left area, leaving most of the front-right surface clear. Support its body as you lower it and avoid pressing on the dried legs.
What you should see: A taller arrangement across the back, a bright orange pumpkin on the right, and a large black spider toward the front. The open ivory space around the decorations is part of the design.
Make-Ahead and Serving Tips
Prepare the cheesecake the day before serving. Make the spider 1–2 days ahead, and make the coating decorations at least several hours ahead so every attachment can harden.
Store the finished decorations separately in a cool, dry container. Add them shortly before serving, once the cheesecake is on its final plate. This limits moisture exposure and keeps the delicate pieces easier to handle.
Keep the cheesecake refrigerated until presentation. Remove the three supported plaques and their sticks before cutting, and lift off the large decorations so the cheesecake can be sliced cleanly.
Refrigerate leftovers promptly and enjoy within 3–4 days of making the cheesecake, following the storage guidance for the main recipe.
Storage & Food Safety
Store covered in the refrigerator and serve chilled. For best texture, enjoy within 3–4 days.
Because this dessert contains dairy, avoid leaving it at room temperature for extended periods, following general food safety guidelines for refrigerated desserts.
Frequently Asked Questions
How Do You Know When No Bake Cheesecake Is Set?
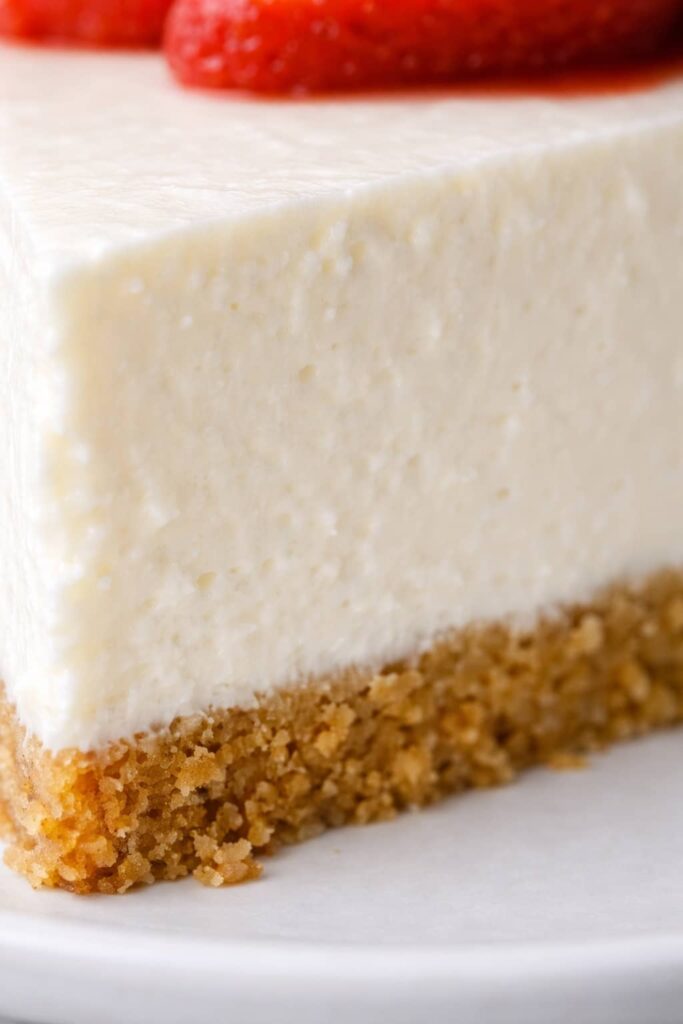
No bake cheesecake is set when the center feels firm and does not jiggle excessively when gently shaken. The edges should be solid, and a knife should cut cleanly through the filling.
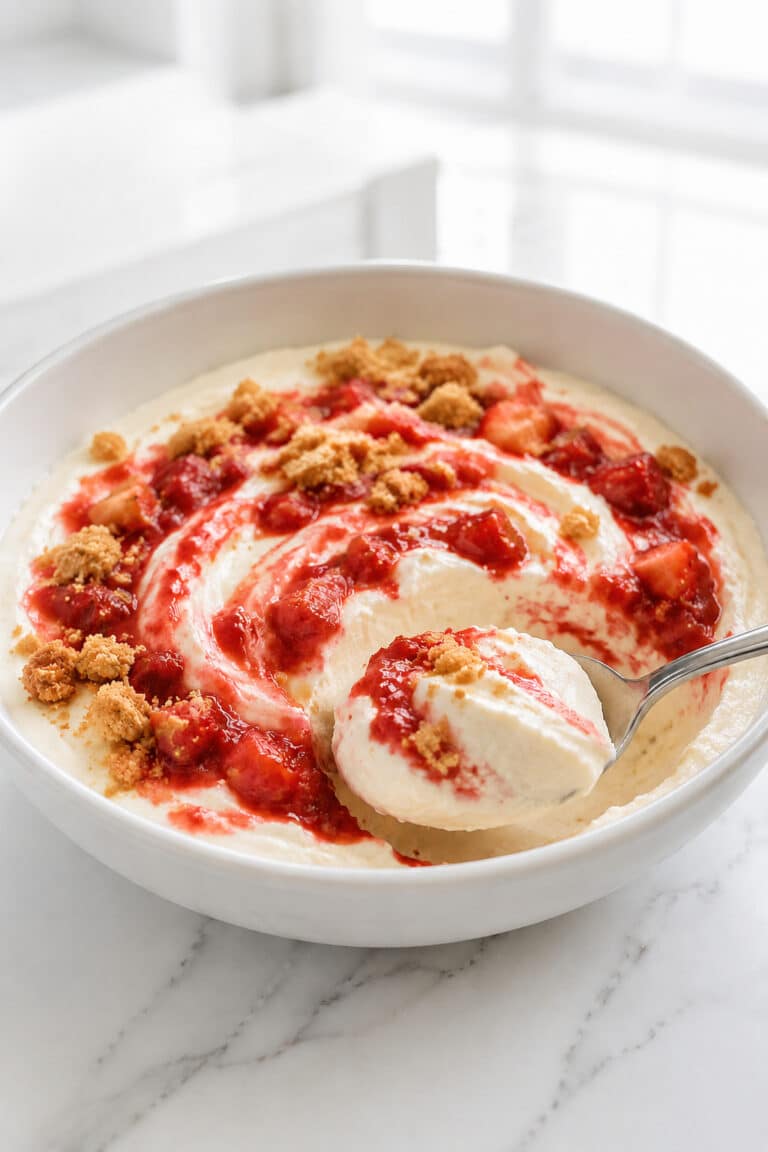
Let’s look at a closer view of the texture once fully set.
Why Didn’t My No Bake Cheesecake Set?
No bake cheesecake may not set if the cream was not whipped to stiff peaks, the filling was overmixed, or it wasn’t chilled long enough. A minimum of 4 hours is required, but overnight is best.
Do I need gelatin for no bake cheesecake?
This recipe does not require gelatin because the whipped cream and chilling time provide structure.
Does No Bake Cheesecake Contain Gelatin?
Traditional no bake cheesecake does not require gelatin. It sets naturally through chilled whipped cream and cream cheese. However, some variations include gelatin for extra stability, especially in very warm climates.
Can You Make No Bake Cheesecake Ahead of Time?
Yes, no bake cheesecake is ideal for making ahead. It can be prepared one day in advance and stored covered in the refrigerator until ready to serve.
Can You Freeze No Bake Cheesecake?
Yes, no bake cheesecake freezes well. Wrap slices tightly and freeze for up to one month. Thaw overnight in the refrigerator before serving for best texture.
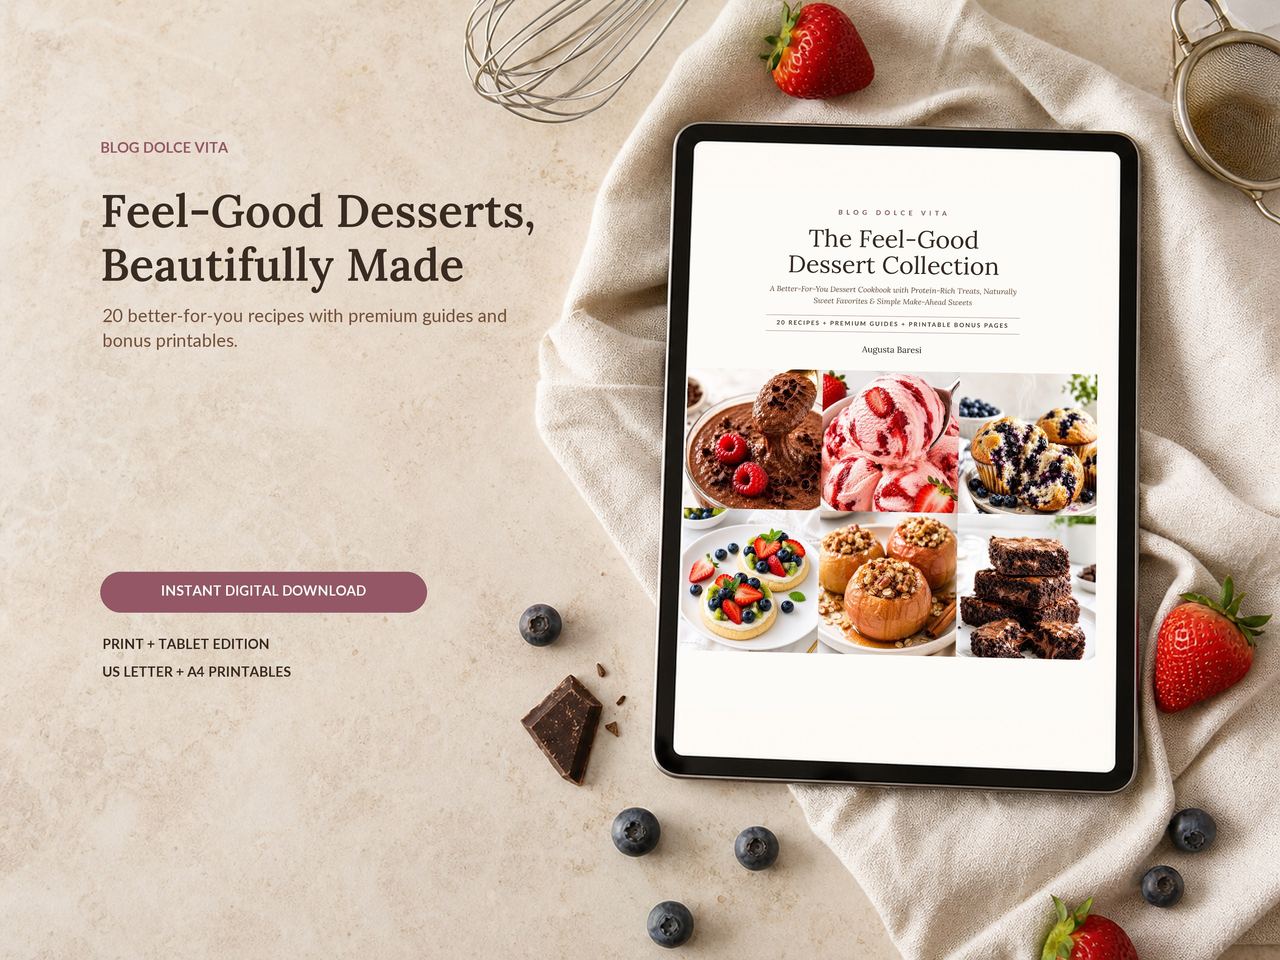
Love this? There are twenty more like it.
128 pages, five chapters, 15 kitchen guides and 16 printable planning pages — in US Letter and A4.
No Bake Cheesecake
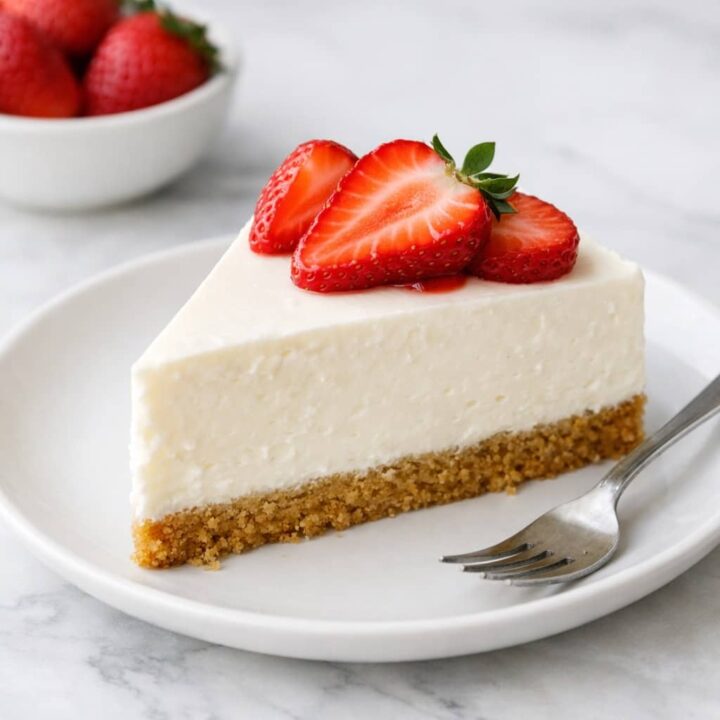
Creamy, smooth no bake cheesecake with a buttery graham cracker crust and light whipped filling. This easy dessert sets beautifully without using the oven.
Ingredients
For the Crust
- 1 ½ cups graham cracker crumbs (or Oreo crumbs for a no bake Oreo cheesecake)
- 6 tbsp melted butter
- 2 tbsp sugar
For the Filling
- 16 oz cream cheese (softened, Philadelphia brand for Philadelphia no bake cheesecake)
- ½ cup powdered sugar
- 1 tsp vanilla extract
- 1 cup heavy cream (or Cool Whip for no bake cheesecake with Cool Whip)
Instructions
1. Prepare the Crust
In a bowl, mix the graham cracker crumbs, melted butter, and sugar until evenly combined. Press firmly into the bottom of a 9-inch pie pan using the flat bottom of a glass. Refrigerate while preparing the filling.
2. Beat the Cream Cheese
In a large mixing bowl, beat the softened cream cheese until completely smooth and creamy.
3. Add Sugar and Vanilla
Mix in the powdered sugar and vanilla extract until fully incorporated and light.
4. Whip the Cream
In a separate bowl, whip the heavy cream to stiff peaks. (If using Cool Whip, skip whipping and measure directly.)
5. Fold the Filling
Gently fold the whipped cream (or Cool Whip) into the cream cheese mixture until smooth and airy. Do not overmix.
6. Assemble
Spread the filling evenly over the chilled crust and smooth the top with a spatula.
7. Chill
Refrigerate for at least 4 hours, preferably overnight, until fully set before slicing.
Notes
- Use full-fat cream cheese for the best structure and creamy texture.
- Make sure the cream cheese is fully softened before mixing to avoid lumps.
- Whip heavy cream to stiff peaks for a stable, mousse-like filling.
- Chill overnight for the cleanest slices and firmest texture.
- For extra stability in warm weather, chill the cheesecake in the freezer for 30–45 minutes before serving.
Recommended Products
As an Amazon Associate and member of other affiliate programs, I earn from qualifying purchases.


Nutrition Information:
Yield: 8 slices Serving Size: 1 sliceAmount Per Serving: Calories: 320Total Fat: 22gCarbohydrates: 26gSugar: 18gProtein: 5g
The nutrition information provided is an estimate and will vary based on the specific ingredients and brands used. It is calculated automatically and should not be considered a guarantee.
More Cheesecake Recipes You’ll Love
If you enjoyed this classic no bake cheesecake, here are more creamy, crowd-pleasing cheesecake recipes to try next:
- Classic Cheesecake Recipes – rich, baked, and timeless
- No Bake Pumpkin Pie – easy fall-inspired dessert
- Strawberry Cheesecake Desserts – fresh and fruity
- Oreo Cheesecake Variations – cookies-and-cream lovers’ favorite
- Blueberry Cheesecake – bright and fruity
Final Thought
No bake cheesecake is one of those timeless desserts that proves simplicity can still feel special. With its smooth, creamy texture and effortless preparation, it’s a recipe you’ll return to again and again – for summer gatherings, holiday tables, or quiet evenings when you want something sweet without the fuss. Sometimes the easiest desserts are the ones everyone remembers.
This no-bake cheesecake keeps things simple while delivering a smooth, classic texture that feels both nostalgic and elegant.
12 Sweet Favorites — Yours, Free 🍰
Tiramisù, no-bake cheesecake, the perfect chocolate chip cookie & 9 more reader-loved desserts — gathered into one beautiful free recipe book. From my kitchen to yours.
No spam, just sweet things. Unsubscribe anytime.


One Comment
Comments are closed.