Oreo Cheesecake Recipe – Baked, Creamy & Loaded with Oreos
🎁 FREE E-BOOK: 12 Sweet Favorites — reader-loved desserts in one beautiful recipe book.
This Oreo cheesecake recipe cuts into tall, cold wedges with a near-black cookie crust, a smooth ivory center, and distinct Oreo pieces tucked through every creamy slice.
It has all the familiar comfort of cookies and cream, but the finish feels celebration-worthy: a crisp crust that climbs the sides, a dense-creamy baked filling, and just enough whipped cream and Oreo on top to make the whole cheesecake look polished.

The method is built around the details that matter most with a tall cheesecake—a protected water bath, a three-signal doneness check, and gradual cooling—so you know what to look for before the center becomes overbaked.
Plan to bake it the day before you want to serve it. Most of the timeline is hands-off, and the full overnight chill is what transforms the delicate warm custard into clean, creamy slices.
Oreo Cheesecake at a Glance
This is a tall, baked cookies-and-cream cheesecake made in a 9-inch springform pan, gently baked in a water bath, cooled in stages, and served fully chilled.
- Yield: 12 tall wedges
- Active bake: approximately 85–100 minutes at 300°F (150°C)
- Cooling: 60 minutes in the switched-off oven, then 60 minutes on a rack
- Chilling: at least 8 hours; overnight is preferred
- Texture: dense-creamy and smooth, with distinct cookie pieces and a crisp side-wall crust
- Best plan: bake one day ahead and decorate after the cheesecake is fully cold
This recipe is intentionally an egg-set, oven-baked cheesecake with a substantial chilled slice. If you want a lighter, refrigerator-set texture with no baking, this no-bake cheesecake follows that different path.
Why This Oreo Cheesecake Works
Every part of the formula supports the same goal: a tall Oreo cheesecake that tastes balanced, holds a clean slice, and still feels creamy rather than heavy or cakey.
- A defined Oreo crust: Twenty-six whole cookies create enough crumb for the base and a 1½- to 2-inch side wall, while 5 tablespoons of butter bind the crumbs without making the crust greasy.
- A balanced 32-ounce filling: Full-fat block cream cheese gives the cheesecake its height and body, while sour cream adds tang and keeps the sweetness from feeling flat.
- Restrained structure: Four eggs set the filling, and 1 tablespoon of cornstarch adds a small moisture buffer without turning the cheesecake floury.
- Visible Oreo pieces: Roughly chopped cookies are folded in by hand, keeping recognizable dark pockets instead of tinting the complete filling gray.
- A controlled finish: Lightly sweetened whipped cream and 12 Oreo halves make the cheesecake look finished without hiding the baked surface under a heavy topping.

Why You’ll Love This Baked Oreo Cheesecake
This cheesecake earns its place on a celebration menu because the impressive part happens before guests arrive: bake it ahead, let it chill overnight, and finish it shortly before serving.
- It turns a familiar cookies-and-cream flavor into an elegant full-size dessert.
- Twelve tall wedges make it generous enough for birthdays, holidays, and dinner parties.
- The long chill creates neat slices that are easy to plate.
- The topping is restrained, so cream cheese tang and Oreo flavor both stay clear.
- The complete cheesecake can be prepared ahead without a last-minute bake.
For another make-ahead baked cheesecake with a warm spiced-cookie profile, try this creamy Biscoff cheesecake.
The Science of a Creamy Oreo Cheesecake
A smooth cheesecake depends on controlling air, heat, protein setting, and cold structure rather than simply leaving the pan in the oven for a fixed number of minutes.
Low-Speed Mixing Controls Air
Fast mixing traps bubbles that expand during baking and collapse as the cheesecake cools. Smoothing the cream cheese first, then using low speed—especially after the eggs are added—protects the level, dense-creamy structure.
The Water Bath Moderates Heat
Hot water surrounds the pan with gentler, more even heat, slowing the perimeter while the center catches up. In controlled cheesecake water-bath trials, King Arthur Baking found the water bath to be the strongest tested method for reducing cracks; it improves the odds but is not a guarantee.
Eggs, Cornstarch, and Carryover Heat Build the Set
Egg proteins form the custard network as the filling warms, while a small amount of cornstarch helps manage moisture around the sour cream and cookie pieces. The center continues setting during the 60-minute oven rest, which is why it should still move softly when the active bake ends.
Refrigeration Creates the Final Slice
Chilling firms the dairy fat and the completed protein network. That cold structure turns a fragile warm custard into the clean-slicing texture expected from Oreo cheesecake, just as chilling is essential to the final body of a classic New York cheesecake.
Ingredients for a Tall Oreo Cheesecake
The ingredient list is divided into crust, filling, and finish so every Oreo and dairy ingredient goes into the correct component.
Oreo Crust
Use the cookies with their filling included to build a cohesive base and a crisp 1½- to 2-inch wall around the cheesecake.
- 26 original Oreo sandwich cookies with filling included (about 10½ ounces / 295 g), finely crushed
- 5 tablespoons unsalted butter (70 g), melted
Creamy Oreo Cheesecake Filling
Bring the cream cheese, sour cream, and eggs only to cool room temperature so the batter becomes smooth without needing prolonged mixing.
- 4 packages full-fat block cream cheese, 8 ounces each (32 ounces / 907 g total), softened to cool room temperature
- 1 cup granulated sugar (200 g)
- 1 tablespoon cornstarch (8 g)
- ¼ teaspoon fine sea salt (1.5 g)
- 1 cup full-fat sour cream (240 g), at cool room temperature
- 2 teaspoons pure vanilla extract (10 ml)
- 4 large eggs (about 200 g without shells), at cool room temperature
- 14 original Oreo sandwich cookies with filling included (about 5½ ounces / 160 g), roughly chopped into distinct pieces
Whipped Cream and Oreo Finish
Keep the cream cold and add this light finish only after the cheesecake has chilled completely.
- ¾ cup cold heavy whipping cream (180 ml)
- 2 tablespoons powdered sugar (15 g)
- ½ teaspoon pure vanilla extract (2.5 ml)
- 6 original Oreo sandwich cookies, halved into 12 garnishes

Ingredient Notes for a Smooth Cookies-and-Cream Filling
These product and temperature details protect the texture and sweetness balance of the tested formula.
- Full-fat block cream cheese: Use wrapped 8-ounce blocks, not whipped or tub-style spread. The higher moisture and different stabilizers in spreadable products can weaken the set.
- Original Oreos: Leave the filling inside every cookie. The butter and sugar levels are calibrated for original cookies used whole. The official baked Oreo cheesecake method also supports the familiar 9-inch format, crust up the sides, sour cream, four eggs, low-speed egg additions, and chopped cookies in the filling.
- Cool-room-temperature dairy and eggs: They should feel cool rather than warm. This reduces lumps without encouraging excess air or unsafe extended holding.
- Distinct Oreo pieces: Roughly chop the 14 filling cookies. Fine crumbs will tint the batter gray and erase the clean cookies-and-cream contrast.
- Cold heavy cream: Keep it refrigerated until decorating so it whips into defined rosettes rather than soft puddles.

Kitchen Tools for a Leak-Protected Oreo Cheesecake
The right pan depth and water-bath setup matter more here than specialty tools; prepare these five functional groups before mixing.
- Pan and leak protection: A 9-inch springform pan, ideally 3 inches deep; a parchment round; two large unbroken sheets of heavy-duty foil; and, when available, a slightly larger solid cake pan to hold the springform.
- Water-bath setup: A large roasting pan plus a kettle or heat-safe pitcher for very hot water.
- Crushing and mixing: A food processor or sealed bag and rolling pin; a stand mixer with paddle or electric hand mixer; a large mixing bowl, medium bowl, whisk, and flexible spatula.
- Baking and cooling: A conventional oven with a centered rack, a clean thin-probe instant-read thermometer, and a wire cooling rack.
- Finishing and slicing: A piping bag with a large star tip or a spoon, a thin sharp knife, hot water in a tall vessel or clean sink, and clean towels.
Before You Begin: Set Up the Pan, Ingredients, and Water Bath
Complete these checks before the filling is mixed, because a waiting cheesecake batter gains air and loses the smooth workflow this method depends on.
- Confirm that the 9-inch springform pan is deep enough to hold a tall filling; 3 inches is ideal.
- Fit the parchment round and test the preferred solid-pan barrier, or prepare two unbroken heavy-duty foil sheets with all seams above the future water line.
- Bring the cream cheese, sour cream, and eggs to cool room temperature; keep the finishing cream cold.
- Move the oven rack to the center and allow the oven to preheat fully.
- Choose a roasting pan with safe clearance around the protected springform, and have very hot water ready.
- Clear level refrigerator space for the complete pan and protect an uninterrupted minimum 8-hour chill.
Plan Your Oreo Cheesecake: The Overnight Workback
Work backward about 13 hours from serving, or bake the cheesecake the day before and treat the overnight chill as part of the recipe rather than waiting time to shorten.
| When | What happens | Readiness dependency |
|---|---|---|
| About T−13 hours | Prepare the pan, crust, filling, and water bath. | The crust must be pre-baked before the filling enters the pan. |
| About T−12 hours | Begin the 85–100-minute bake. | Stop by the three-signal readiness check, not by time alone. |
| About T−10½ hours | Switch off the oven and crack the door 1–2 inches. | Leave the cheesecake inside for 60 minutes so the center sets gradually. |
| About T−9½ hours | Remove the water bath and foil; cool on a rack for 60 minutes. | The pan and surface must cool before refrigeration. |
| About T−8½ hours | Refrigerate loosely covered, then cover once fully cold. | Chill for at least 8 hours to establish clean slicing. |
| T−60 to T−30 minutes | Whip the cream and add the Oreo finish. | The cheesecake must be completely cold before decorating. |
| T−10 minutes to serving | Mark 12 wedges and slice with a clean warm knife. | Keep the cheesecake cold for the cleanest edges. |
What to Expect From This Oreo Cheesecake
The unbaked filling should be pale ivory with distinct dark cookie pieces—not uniformly gray—and it should fall thickly from the spatula rather than pour like cream. At the end of baking, the center will still move softly while the outer ring looks set. A small surface mark can be normal; after the overnight chill, the filling should hold a clean edge while remaining dense-creamy rather than fluffy or mousse-like.
How to Make Oreo Cheesecake, Step by Step
Follow the stages in order and keep the mixer slow once the filling begins; the visual checkpoint after each step tells you when it is safe to continue.
1. Prepare the Pan and Preheat the Oven
Place a rack in the center of the oven and preheat to 325°F (165°C). Lightly grease the base of a 9-inch springform pan, fit a parchment round inside, and close the ring securely. Prepare the solid-pan leak barrier or two unbroken heavy-duty foil sheets, but leave the exterior accessible until the crust has been baked.
What you should see: The parchment lies flat without climbing the wall, the springform latch closes firmly, and the pan sits level without visible gaps at the base.
2. Make and Pre-Bake the Oreo Crust
Process the 26 whole Oreos into fine, even crumbs. Stir in the 5 tablespoons (70 g) melted butter until every crumb looks moistened. Press the mixture firmly across the base and 1½–2 inches up the sides, keeping the wall even rather than thick at the corner. Bake for 10 minutes, set the pan on a rack, and reduce the oven to 300°F (150°C).

What you should see: Before butter, the crumbs look fine and loose with no large cookie pieces; in the pan, the base is compact and level, the side wall is continuous, and the baked crust looks slightly set rather than wet.

3. Smooth the Cream Cheese
Beat the cool-room-temperature cream cheese with the paddle attachment on low to medium-low speed for 60–90 seconds. Stop, scrape the bowl, paddle, and bottom seam thoroughly, then mix only until no firm pellets remain.
What you should see: The cream cheese is completely smooth, thick, and satiny, with no cold lumps and very few visible air bubbles.

4. Add the Sugar, Cornstarch, and Salt
Whisk the granulated sugar, cornstarch, and fine sea salt together in a small bowl so the cornstarch cannot enter in one clump. Add the mixture to the cream cheese and mix on low for about 30 seconds. Scrape once, then stop as soon as the batter is uniform.
What you should see: The mixture remains thick and smooth, with no dry streaks at the bottom or cornstarch pockets along the side of the bowl.
5. Finish the Filling and Fold In the Oreos
Mix in the sour cream and vanilla on low just until smooth. Add the eggs one at a time, mixing on low only until each egg disappears before adding the next. Scrape the bowl and finish with two or three folds by hand. Add the 14 roughly chopped Oreos and fold only until the pieces are evenly dispersed.

What you should see: Before the cookies, the filling is pale ivory, glossy, thick, and low in visible foam; afterward, distinct Oreo pieces remain suspended throughout without turning the complete batter gray.

6. Fill and Protect the Springform Pan
Pour the filling into the warm—not hot—crust and smooth the top gently. Place the springform inside the slightly larger solid cake pan when available. Otherwise, wrap the exterior in two large unbroken layers of heavy-duty foil, keeping every seam well above the intended water line.
What you should see: The filling sits level below the rim, the Oreo wall remains visible above it, and the protection forms a continuous barrier with no low seam, puncture, or trapped flap that could channel water inward.

7. Set Up the Water Bath
Set the protected springform in the roasting pan and place the roasting pan on the extended oven rack. Carefully pour very hot water into the roasting pan until it reaches about halfway up the protected springform, then slide the rack in slowly so water does not splash over the barrier.
What you should see: The pan is stable and level, hot water surrounds it evenly to about half its height, and the water line remains below every foil seam or solid-pan rim.

8. Bake to the Correct Center Set
Bake at 300°F (150°C) for approximately 85–100 minutes. Begin checking near 80 minutes without repeatedly opening the oven. End the active bake when the outer 2–3 inches are set and slightly puffed, the center 2–3 inches move slowly as one soft unit rather than rippling, and a clean thin probe placed in the center reads approximately 150–155°F (66–68°C).
What you should see: The surface is mostly level and matte at the perimeter, the center retains a gentle unified movement, and no liquid wave travels from the middle toward the edge.

9. Cool the Cheesecake in Three Stages
Turn off the oven, crack the door 1–2 inches, and leave the cheesecake inside for 60 minutes. Remove it from the water bath and protection, run a thin knife around any point attached above the crust, and cool on a rack for 60 minutes. Refrigerate loosely covered until fully cold, then cover and chill for at least 8 hours; overnight is preferred.
What you should see: After the oven rest, the center movement is smaller; after rack cooling, the surface has settled without a liquid center; after chilling, the filling feels firm at the edge and no longer trembles when the pan is moved.

10. Whip the Cream and Decorate
Release the ring from the fully chilled cheesecake and transfer it to a serving plate. Whip the cold cream, powdered sugar, and vanilla on medium speed to medium-stiff peaks. Pipe or spoon 12 restrained rosettes around the perimeter and place one Oreo half into each.

What you should see: The whipped cream holds a defined curl with a tip that bends slightly, and the 12 garnishes sit evenly without covering the center or weighing down the surface.

11. Slice Cleanly and Serve
Mark the top into 12 equal wedges. Dip a thin sharp knife into hot water, wipe it completely dry, and make one straight downward cut. Clean, warm, and dry the blade before every cut. Serve the cheesecake cold, allowing an individual plated wedge to stand for 10–15 minutes only if you prefer a slightly softer mouthfeel.
What you should see: Each wedge has a sharp ivory edge, distinct Oreo pockets, and a cohesive dark crust that stays attached instead of dragging through the filling.

Oreo Cheesecake Doneness: How to Know When It Is Done
Use all three readiness signals together; bake time is a planning range, and movement alone cannot tell you enough about the complete cheesecake.

- Set outer ring: The outer 2–3 inches look set and slightly puffed rather than glossy or liquid.
- Unified center movement: A 2- to 3-inch circle in the center moves slowly as one soft unit. A ripple that travels outward means it needs more time.
- Supporting temperature: A clean thin probe in the center reads approximately 150–155°F (66–68°C) at the end of active baking.
When the center still ripples, continue baking in 5-minute intervals. When the center looks completely firm before the oven rest, the cheesecake is likely overbaked. The thermometer reading is culinary endpoint guidance, not a replacement for careful handling, staged cooling, and prompt refrigeration.
Expert Tips for a Smooth, Clean-Slicing Oreo Cheesecake
These small controls prevent the most common problems without adding unnecessary work to the recipe.
- Scrape before adding eggs: Cold cream cheese collects at the bottom seam and around the paddle. Finding it early prevents pale lumps without forcing you to overmix the finished batter.
- Let each egg disappear on low: The eggs need uniform distribution, not volume. Stop the mixer as soon as the final streak vanishes and finish with a spatula.
- Keep the filling cookies chunky: Pieces about ½–¾ inch create clean dark pockets. Tiny crumbs disperse into the filling and make the color muddy.
- Keep every barrier seam high: Water follows the lowest opening. A solid cake pan around the springform removes the most vulnerable foil seam when the pans fit safely.
- Add water with the roasting pan on the rack: This reduces the distance you must carry a heavy pan of hot water and helps prevent splashing into the cheesecake.
- Release only attached areas after the oven rest: The cheesecake contracts as it cools; freeing a stuck spot reduces pulling without disturbing a crust that is already separate.
- Slice cold and dry the blade: Heat helps the knife pass through dairy fat, but water left on the blade smears the cut and softens the Oreo crust.
One cheesecake lesson I keep coming back to: waiting for the center to look completely firm usually means it has baked too far. A softly moving center finishes setting during the gradual oven rest and refrigerator chill.
Common Oreo Cheesecake Mistakes and How to Fix Them
Use the symptom to find the cause, decide what can still be corrected, and prevent the same problem on the next bake.

| Mistake | What happens | Why | Prevent or fix |
|---|---|---|---|
| Water reaches the springform | The crust becomes wet or pasty. | A foil puncture or low seam lets bath water enter. | Use a solid outer cake pan when possible, or two unbroken foil layers with seams above the water line. A soaked finished crust cannot be made crisp by chilling. |
| Cold cream cheese is mixed with the other ingredients | Pale lumps remain in the filling. | Firm cream cheese cannot disperse before the batter must stop mixing. | Soften it to cool room temperature and smooth it alone first. Do not keep whipping the egg-filled batter to chase small lumps. |
| The batter is mixed fast after the eggs | The cheesecake puffs, sinks, or develops surface bubbles. | Trapped air expands in the oven and collapses during cooling. | Mix each egg on low only until it disappears, then finish by hand. |
| The filling cookies are crushed too finely | The batter turns gray and loses distinct cookie pockets. | Fine dark crumbs disperse through the complete filling. | Fold in ½- to ¾-inch pieces with only a few strokes. The flavor remains usable, but the clean visual contrast cannot be restored. |
| The cheesecake is baked until the center is firm | The filling becomes dry, grainy, or deeply cracked. | The center continues setting during the oven rest and chill. | Stop at the three-signal check. Cover a cosmetic crack with restrained rosettes only after chilling; moisture lost to overbaking cannot be added back. |
| The center still ripples at the endpoint check | The cheesecake may remain loose after chilling. | The custard has not built enough structure. | While it is still in the active bake, continue in 5-minute intervals. Chilling alone cannot repair a truly underbaked liquid center. |
| The pan moves directly from hot oven to refrigerator | The surface can crack and condensation can collect. | The temperature change is too abrupt and steam becomes trapped. | Use the full oven rest and rack-cooling stages before refrigeration. |
| A warm or dirty knife is dragged through several wedges | The filling smears and the crust trails across the cut. | Soft filling and cookie residue accumulate on the blade. | Slice the fully chilled cheesecake and clean, warm, and dry the knife before every cut. |
Beautiful Ways to Serve Oreo Cheesecake
Serve the cheesecake chilled and keep the plate simple enough for the ivory filling, dark Oreo pockets, and crisp side crust to remain the focus.
Classic Chilled Wedges
Plate one clean wedge with a few fine Oreo crumbs beside—not over—the slice, then let it stand for 10 minutes for a slightly softer, creamier bite.

A Restrained Celebration Finish
Keep the 12 whipped-cream rosettes and cookie halves evenly spaced so each guest receives one garnish and the top remains elegant enough for a birthday or holiday table.
Café-Style Coffee Pairing
Pair a cold wedge with unsweetened coffee, espresso, or cold milk; the slight bitterness or clean dairy note balances the sweet cookie crust.
A Cookies-and-Cream Dessert Table
Use the cheesecake as the centerpiece and add Oreo cupcakes when you want easy individual portions for a larger group.
A Bite-Size No-Bake Companion
For a mixed-format dessert board, add a small tray of creamy Oreo balls and keep fruit or strongly flavored sauces off the cheesecake itself.
How to Store, Freeze, and Thaw Oreo Cheesecake
Keep Oreo cheesecake cold, protect the cut surface from drying, and freeze it without the whipped-cream finish whenever possible.
- Refrigerate: Cover the complete cheesecake or press an airtight barrier against exposed cut sides without crushing the decoration. Enjoy within 4 days for the best texture.
- Freeze: Chill completely, leave off the whipped cream and cookie garnish, then freeze whole or in individual slices until firm. Wrap airtight and freeze for up to 2 months for best quality.
- Thaw: Keep the wrapping on and thaw overnight in the refrigerator. Add whipped cream and Oreo halves only after the surface is fully thawed and dry.
- Transport: Move the cheesecake in a level, covered carrier while fully cold, using ice packs for a longer trip, and refrigerate again promptly.
- Room-temperature limit: Refrigerate this egg-and-dairy dessert within 2 hours, or within 1 hour when the temperature is above 90°F (32°C), following the FDA’s egg safety guidance.
Do not reheat the cheesecake; its canonical texture and clean structure are designed for chilled service.
Oreo Cheesecake Questions, Answered
These answers cover format and ingredient changes that sit outside the tested 9-inch baked-cheesecake method.
Can I Make This Oreo Cheesecake Without a Water Bath?
A cheesecake can be formulated for low, dry baking, but skipping the bath changes the heating profile and timing of this recipe. It is not a one-step equivalent, so use the protected water bath for the canonical result.
Can I Use Double Stuf or Flavored Oreos?
Original Oreos are the controlled ingredient. Extra filling, flavored wafers, and coated varieties change sweetness, fat, moisture, and color, so they are not guaranteed one-to-one substitutes.
Can I Use Tub-Style or Reduced-Fat Cream Cheese?
Use full-fat block cream cheese. Spreadable and reduced-fat products have different moisture and stabilizer systems that can produce a softer set or less creamy texture.
Can I Bake This in an 8-Inch or 10-Inch Pan?
The formula is calibrated for a deep 9-inch springform. Changing the diameter changes capacity, batter depth, bake time, and overflow risk, so an alternate size needs its own validated quantities and timing.
Can I Turn This Recipe Into Mini Cheesecakes or Bars?
Not by dividing the batter and keeping the same method. Smaller formats need different crust allocation, fill depth, water-bath decisions, and endpoint timing.
Can I Decorate the Cheesecake the Night Before?
You can add the whipped cream after the cheesecake is fully cold and refrigerate it overnight. For the crispest appearance, insert the Oreo halves closer to serving because exposed cookies gradually soften in the refrigerator.
More Cheesecake and Oreo Desserts to Bake Next
Choose your next recipe by following the part you enjoyed most: the baked cheesecake method, the Oreo flavor, or the creamy make-ahead format.
More Baked Cheesecakes
These recipes keep the satisfying baked-cheesecake structure while changing the flavor, finish, or serving style.
- New York Cheesecake — the cleanest next step when you want a classic vanilla-forward slice without cookie inclusions.
- Biscoff Cheesecake — a creamy alternative built around caramelized spiced-cookie flavor.
- Pumpkin Cheesecake — a warmly spiced seasonal cheesecake with a softer autumn profile.
- Sopapilla Cheesecake — an easier bar-style bake with cream cheese, flaky dough, and cinnamon sugar.
More Oreo Desserts
Stay with the cookies-and-cream craving while moving into cupcakes, bite-size treats, a quick mug dessert, or chilled pie.
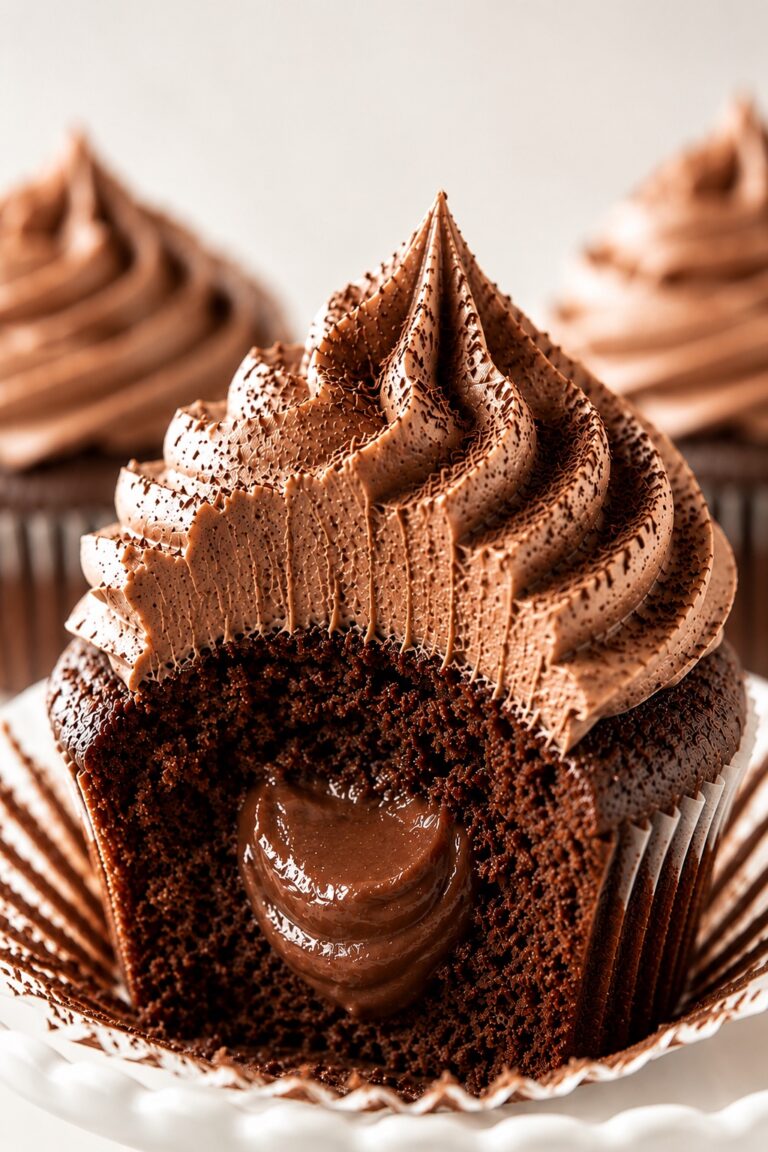
- Oreo Cupcakes — individual chocolate-and-cream portions that work especially well for parties.
- Oreo Balls — rich no-bake bites with a creamy cookie center.
- Oreo Mug Cake — a fast single-serving option for an immediate Oreo dessert.
- Oreo Pie — a chilled sliceable dessert when you want Oreo flavor without a baked cheesecake.
More Creamy Make-Ahead Desserts
These are natural choices when your priority is a dessert that can be prepared before the gathering and served cold.
- No-Bake Cheesecake — a lighter refrigerator-set cheesecake with no oven or water bath.
- Banana Cream Pie — a cool, custardy pie layered with fresh banana.
- Strawberry Cheesecake Banana Pudding — a fruit-forward layered dessert with cream cheese richness.
- Strawberry Poke Cake — a soft, juicy chilled cake made for easy make-ahead serving.
Why This Oreo Cheesecake Belongs in Your Recipe Box
Keep this recipe for the occasions when a familiar flavor needs the structure, polish, and planning clarity of a centerpiece dessert.
A Defined Doneness System
The outer-ring, center-movement, and temperature signals give you a repeatable decision instead of asking you to trust bake time alone.
A Leak-Protection Plan
The solid-pan option and high-seam foil method address the most vulnerable part of a springform water bath before baking begins.
A Clear Overnight Rhythm
The workback schedule makes the long passive chill easy to fit around a birthday, holiday, or dinner deadline.
A Balanced Cookies-and-Cream Slice
The sour cream, salt, and restrained topping keep the Oreo flavor clear without letting sweetness flatten the cream cheese tang.
A Finish You Can Scale by Portion
Twelve rosettes and 12 Oreo halves make it easy to mark equal wedges before the first cut.
A Storage Plan That Protects Texture
Separate guidance for chilling, freezing, thawing, decorating, and transport helps the cheesecake reach the table in its intended state.
A Final Note on a Cheesecake Worth Planning Ahead For
This Oreo cheesecake is made for the moment when cookies-and-cream comfort should feel tall, polished, and worthy of the center of the table.
You will come back to it for the same reason the slices look so composed: the recipe gives every important transition—from smooth batter to softly set center to fully chilled structure—a clear checkpoint.
With cheesecake, the most beautiful result rarely comes from rushing toward firmness; it comes from gentle heat, a little movement left in the center, and the patience to let cold finish what the oven began.

Oreo Cheesecake Recipe
This baked Oreo cheesecake has a crisp cookie crust that climbs the sides, a dense-creamy filling with distinct Oreo pieces, and a light whipped-cream finish. A protected water bath, three-signal doneness check, and overnight chill help create tall, clean slices.
Ingredients
Oreo Crust
- 26 original Oreo sandwich cookies with filling included (about 10 1/2 ounces / 295 g), finely crushed
- 5 tablespoons unsalted butter (70 g), melted
Creamy Oreo Cheesecake Filling
- 4 packages full-fat block cream cheese, 8 ounces each (32 ounces / 907 g total), softened to cool room temperature
- 1 cup granulated sugar (200 g)
- 1 tablespoon cornstarch (8 g)
- 1/4 teaspoon fine sea salt (1.5 g)
- 1 cup full-fat sour cream (240 g), at cool room temperature
- 2 teaspoons pure vanilla extract (10 ml)
- 4 large eggs (about 200 g without shells), at cool room temperature
- 14 original Oreo sandwich cookies with filling included (about 5 1/2 ounces / 160 g), roughly chopped into distinct pieces
Whipped Cream and Oreo Finish
- 3/4 cup cold heavy whipping cream (180 ml)
- 2 tablespoons powdered sugar (15 g)
- 1/2 teaspoon pure vanilla extract (2.5 ml)
- 6 original Oreo sandwich cookies, halved into 12 garnishes
Instructions
1. Prepare the Pan and Preheat the Oven
Place a rack in the center of the oven and preheat to 325°F (165°C). Lightly grease the base of a 9-inch springform pan, fit a parchment round inside, and close the ring securely. Prepare a slightly larger solid cake pan as the preferred leak barrier, or have two large unbroken heavy-duty foil sheets ready. What you should see: The parchment lies flat, the latch closes firmly, and the pan sits level without visible gaps at the base.
2. Make and Pre-Bake the Oreo Crust
Process the 26 whole Oreos into fine crumbs. Stir in the melted butter until evenly moistened. Press firmly across the base and 1 1/2–2 inches up the sides, keeping the corner even rather than thick. Bake for 10 minutes, set the pan on a wire rack, and reduce the oven to 300°F (150°C). What you should see: The base is compact and level, the side wall is continuous, and the baked crust looks set rather than wet.
3. Smooth the Cream Cheese
Beat the cool-room-temperature cream cheese with a paddle attachment or hand mixer on low to medium-low speed for 60–90 seconds. Scrape the bowl, paddle or beaters, and bottom seam thoroughly, then mix only until smooth. What you should see: The cream cheese is thick and satiny, with no cold lumps and very few visible air bubbles.
4. Add the Sugar, Cornstarch, and Salt
Whisk the granulated sugar, cornstarch, and salt together in a medium bowl. Add the mixture to the cream cheese and mix on low for about 30 seconds. Scrape once and stop as soon as the batter is uniform. What you should see: The mixture remains thick and smooth, with no dry streaks or cornstarch pockets.
5. Finish the Filling and Fold In the Oreos
Mix in the sour cream and vanilla on low just until smooth. Add the eggs one at a time, mixing on low only until each disappears. Scrape the bowl and finish with two or three folds by hand. Fold in the 14 chopped Oreos only until evenly dispersed. What you should see: The filling is pale ivory, glossy, thick, and low in foam, with distinct Oreo pieces rather than an overall gray color.
6. Fill and Protect the Springform Pan
Pour the filling into the warm—not hot—crust and smooth the top. Place the springform inside the slightly larger solid cake pan when available. Otherwise, wrap the exterior in two unbroken layers of heavy-duty foil, keeping every seam above the intended water line. What you should see: The filling is level below the rim, and the protection has no low seam, puncture, or trapped flap that could channel water inward.
7. Set Up the Water Bath
Set the protected springform in a large roasting pan and place it on the extended oven rack. Use a kettle or heat-safe pitcher to add very hot water until it reaches about halfway up the protected pan. Slide the rack in slowly. What you should see: The cheesecake pan is stable and level, and the water line remains below every foil seam or solid-pan rim.
8. Bake to the Correct Center Set
Bake at 300°F (150°C) for approximately 85–100 minutes; begin checking near 80 minutes without repeatedly opening the oven. End the active bake when the outer 2–3 inches are set and slightly puffed, the center 2–3 inches move slowly as one soft unit rather than rippling, and a clean thin instant-read probe in the center reads approximately 150–155°F (66–68°C). If the center still ripples, continue in 5-minute intervals. What you should see: The perimeter is mostly matte and set, while the center retains gentle unified movement without a liquid wave.
9. Cool the Cheesecake in Three Stages
Turn off the oven, crack the door 1–2 inches, and leave the cheesecake inside for 60 minutes. Remove it from the water bath and protection, loosen only any point attached above the crust, and cool on a wire rack for 60 minutes. Refrigerate loosely covered until fully cold, then cover and chill for at least 8 hours; overnight is preferred. What you should see: The center movement becomes smaller during the oven rest, the surface settles during rack cooling, and the fully chilled filling no longer trembles when the pan is moved.
10. Whip the Cream and Decorate
Release the ring from the fully chilled cheesecake and transfer it to a serving plate. Whip the cold cream, powdered sugar, and vanilla on medium speed to medium-stiff peaks. Pipe with a large star tip or spoon 12 restrained rosettes around the perimeter and place one Oreo half into each. What you should see: The cream holds a defined curl with a slightly bent tip, and the 12 garnishes sit evenly without covering the center.
11. Slice Cleanly and Serve
Mark the top into 12 equal wedges. Dip a thin sharp knife in hot water, wipe it completely dry, and cut straight down. Clean, warm, and dry the blade before every cut. Serve cold; an individual wedge may stand for 10–15 minutes for a slightly softer mouthfeel. What you should see: Each wedge has a clean ivory edge, distinct Oreo pockets, and a cohesive dark crust that stays attached.
Notes
- Equipment: Use a 9-inch springform pan, ideally 3 inches deep; parchment; a solid outer cake pan or two unbroken heavy-duty foil sheets; a large roasting pan; kettle or heat-safe pitcher; food processor or sealed bag and rolling pin; stand mixer with paddle or electric hand mixer; large and medium bowls; whisk; flexible spatula; conventional oven; thin-probe instant-read thermometer; wire rack; piping bag with large star tip or spoon; thin sharp knife; hot water; and clean towels.
- Use the canonical ingredients: Original Oreos with their filling, full-fat block cream cheese, and full-fat sour cream are part of the controlled formula. Double Stuf, flavored Oreos, tub-style cream cheese, and reduced-fat cream cheese are not guaranteed one-to-one substitutes.
- Pan size: The formula is calibrated for a deep 9-inch springform. An 8-inch, 10-inch, mini, or bar format needs separately validated quantities and timing.
- Water bath: Skipping the protected water bath changes the heating profile and timing and is not a one-step equivalent for this formula.
- Doneness: Use all three endpoint signals together. Time and visual wobble alone are not sufficient controls.
- Storage: Refrigerate covered and enjoy within 4 days for best texture. Do not leave this egg-and-dairy dessert at room temperature longer than 2 hours, or longer than 1 hour above 90°F (32°C).
- Freezing: Freeze the fully chilled cheesecake without whipped cream or Oreo garnish whenever possible. Wrap airtight and freeze whole or in slices for up to 2 months. Thaw wrapped overnight in the refrigerator, then decorate.
- Serving: Do not reheat. This cheesecake is designed to be sliced and served chilled.
Nutrition Information:
Yield: 12 Serving Size: 1 sliceAmount Per Serving: Calories: 710Total Fat: 51gSaturated Fat: 28gCholesterol: 186mgSodium: 560mgCarbohydrates: 57gFiber: 1gSugar: 39gProtein: 10g
Nutrition information is provided as an estimate only and may vary based on specific ingredients, brands, and portion sizes used. This information should not be considered medical or nutritional advice.
12 Sweet Favorites — Yours, Free 🍰
Tiramisù, no-bake cheesecake, the perfect chocolate chip cookie & 9 more reader-loved desserts — gathered into one beautiful free recipe book. From my kitchen to yours.
No spam, just sweet things. Unsubscribe anytime.