Matilda Cake (Ultra-Moist, Rich & Bakery-Style)
🎁 FREE E-BOOK: 12 Sweet Favorites — reader-loved desserts in one beautiful recipe book.
Everyone watches the first slice.
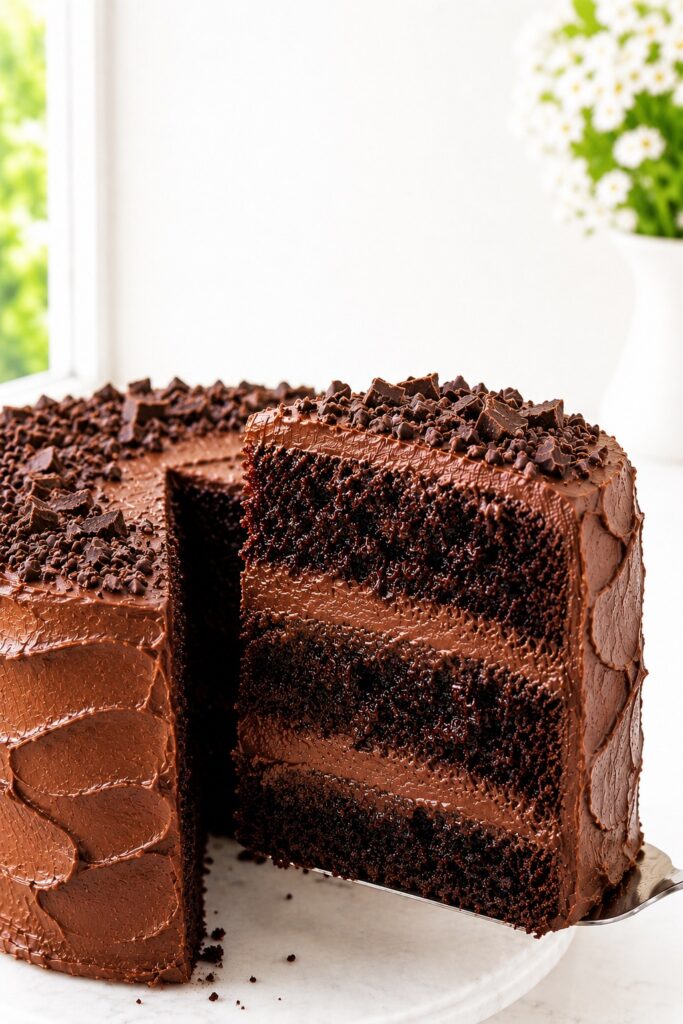
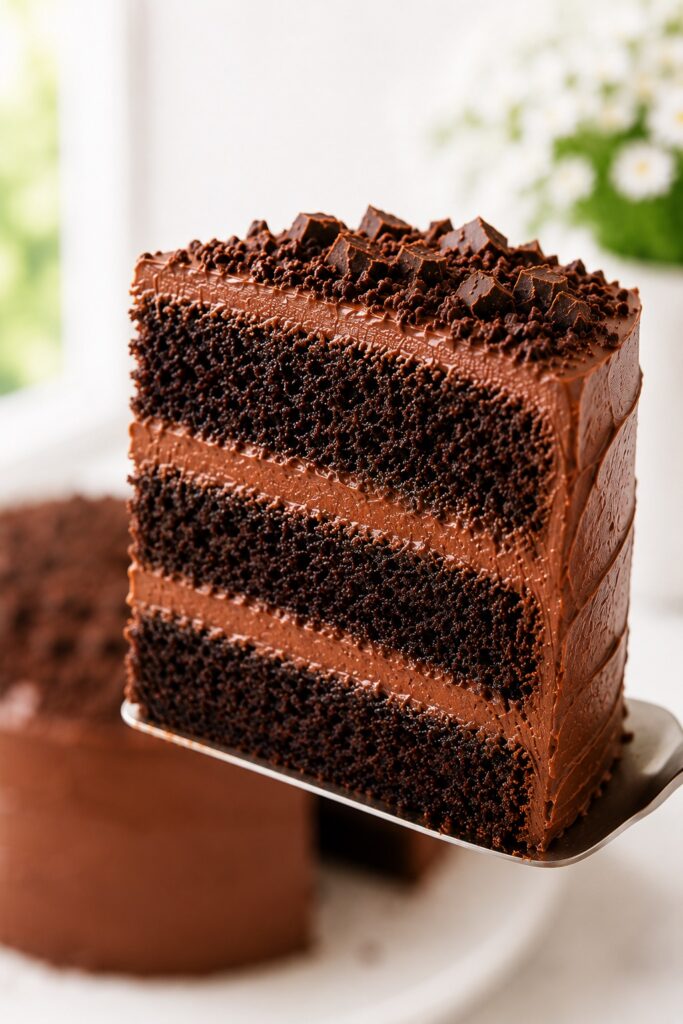
A truly great Matilda Cake has that effect. Conversations pause for a moment as the knife slips through thick chocolate frosting and three dark cake layers separate cleanly beneath it. The crumb looks impossibly soft, the frosting slowly settles into generous chocolate ribbons, and a few delicate crumbs scatter across the plate before the slice is even lifted. Long before anyone takes a bite, the cake has already made its impression.
The first forkful explains why. The chocolate flavor is deep but smooth, the crumb feels plush and exceptionally moist, and the frosting melts gently against every layer instead of overwhelming it. It is rich enough to satisfy serious chocolate lovers, yet balanced enough that finishing the slice somehow feels easier than expected.
This Matilda Cake recipe was developed to recreate that unforgettable experience using dependable techniques and everyday ingredients. The three layers bake evenly with a soft, bakery-style crumb, the chocolate frosting spreads into generous, silky layers, and every slice delivers the dramatic look people hope for without requiring professional decorating skills.
Some cakes are remembered because they look beautiful. Others because they taste incredible. The very best ones do both. That is exactly why this recipe has become one people return to whenever the occasion deserves more than an ordinary chocolate cake.
What Is Matilda Cake? (And Why Has It Become a Modern Baking Icon?)
Matilda Cake is a tall, richly frosted chocolate layer cake celebrated for its ultra-moist crumb, dramatic height, and generous chocolate frosting between every layer. Unlike traditional chocolate cakes built around a single classic formula, Matilda Cake has become a modern baking icon—less because of one original recipe and more because of the unforgettable chocolate cake experience it represents.
Why Is It Called Matilda Cake?
Its popularity traces back to the famous chocolate cake scene in Matilda, where an oversized chocolate cake became one of the most memorable desserts in popular culture. Over time, home bakers, bakeries, and recipe developers created their own interpretations, but the cake’s defining characteristics remained remarkably consistent.
Is There an Authentic Matilda Cake Recipe?
Not exactly. Unlike many classic cakes with a well-defined traditional formula, Matilda Cake has evolved into a style of chocolate cake rather than a single recipe. What matters most isn’t following one historic version—it’s capturing the qualities people expect: exceptional moisture, generous frosting, dramatic presentation, and a truly unforgettable chocolate experience.
This recipe stays true to everything people love about Matilda Cake while using reliable techniques designed for home bakers. The three layers bake evenly, the buttercream spreads into thick, silky ribbons, and every slice delivers the rich chocolate flavor and plush texture that have made this cake one of today’s most beloved celebration desserts.
In short: Matilda Cake is a bakery-style three-layer chocolate cake known for its exceptionally moist crumb, generous chocolate frosting, and dramatic presentation. More than a single recipe, it has become the modern benchmark for what an unforgettable homemade chocolate cake should be.
What Makes a Cake Taste Like Matilda Cake?
Not every chocolate layer cake delivers the unmistakable experience people associate with Matilda Cake. While recipes vary from one baker to another, the cakes that truly capture its iconic look and flavor all share the same defining characteristics. Together, these elements create the rich, dramatic chocolate cake that has become a modern baking favorite.
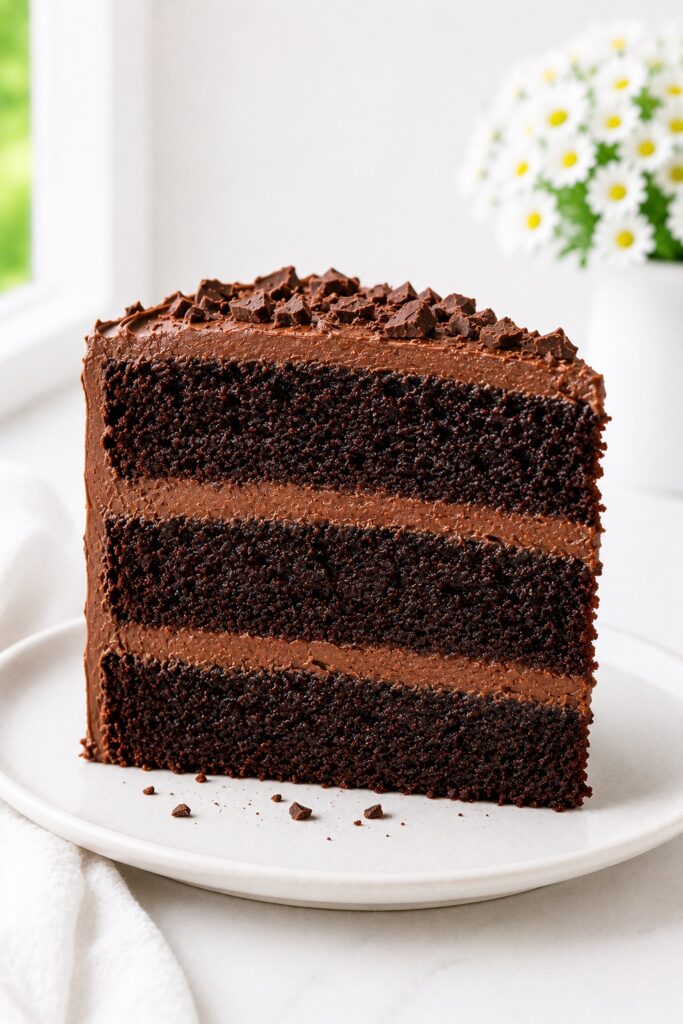
- Three tall, evenly baked chocolate layers — The height is part of the experience. Three layers create a beautiful balance of cake and frosting while giving every slice its dramatic bakery-style appearance.
- An exceptionally moist, plush crumb — The cake should feel soft enough to melt on the fork without becoming fragile or gummy. Every bite should stay tender from edge to center.
- Deep chocolate flavor instead of overwhelming sweetness — Great Matilda Cake tastes intensely chocolatey, with rich cocoa notes supported by coffee and dark chocolate rather than excessive sugar.
- Generous chocolate frosting between every layer — Thick ribbons of silky frosting are just as important as the cake itself. They create the luxurious texture and dramatic slices that have become part of Matilda Cake’s signature look.
- A rustic bakery-style finish — Unlike perfectly polished celebration cakes, Matilda Cake looks best with relaxed spatula marks, soft swirls, and handcrafted texture that makes it feel homemade and inviting.
- A cake that tastes even better the next day — As the layers and frosting rest together, the chocolate flavor becomes rounder, the crumb feels even softer, and every slice becomes more cohesive. That’s one of the reasons so many bakers prepare Matilda Cake a day before serving.
In short: Matilda Cake isn’t defined by a single recipe—it’s defined by an experience. Tall layers, a plush chocolate crumb, generous frosting, and a dramatic homemade presentation come together to create the unforgettable cake that inspired its modern reputation.
Matilda Cake Recipe at a Glance
| Texture | Ultra-moist, plush, soft, with silky chocolate frosting between every layer. |
| Flavor | Deep cocoa, balanced sweetness, buttery chocolate frosting, rich without feeling heavy. |
| Difficulty | Intermediate, with beginner-friendly visual cues throughout. |
| Active Time | About 45 minutes. |
| Total Time | About 2 hours, including cooling. |
| Yield | One tall 8-inch, 3-layer cake (12 generous slices). |
| Perfect For | Birthdays, celebrations, holidays, chocolate lovers, and special occasions. |
| Make-Ahead | Excellent. Bake the layers one day ahead for even easier assembly. |
In short: This recipe is for anyone who wants a chocolate cake that looks bakery-worthy, stays exceptionally moist, slices beautifully, and tastes every bit as impressive as it looks.
Is This the Right Chocolate Cake Recipe for You?
- ✔ You want a celebration cake that genuinely looks impressive without complicated decorating.
- ✔ You love rich chocolate flavor but still want a cake that feels soft and balanced rather than overly dense.
- ✔ You enjoy recipes that explain what to look for at every stage instead of simply telling you what to do.
- ✔ You want a dependable recipe you’ll feel confident making again for birthdays, holidays, and family celebrations.
Before You Preheat the Oven
- If you’ve baked vanilla cakes before, don’t be surprised by this batter. After the hot coffee is added, it becomes much thinner than most cake batters. Resist the temptation to add extra flour—that extra hydration is exactly what creates the signature plush chocolate crumb.
- Don’t rush the cooling time. Completely cooled layers are easier to stack, easier to frost, and much less likely to shift while you’re assembling the cake.
- Plan on generous frosting. Thick chocolate layers are not simply decoration here—they’re part of the texture that makes Matilda Cake instantly recognizable.
- The cake gets even better overnight. As the crumb and frosting rest together, the chocolate flavor becomes rounder and the texture even softer, making day-two slices every bit as irresistible as the first.
Why This 3-Layer Matilda Cake Works Every Time
Truly unforgettable chocolate cake is never about a single ingredient. It is the result of dozens of small decisions that work together to create one perfect slice. Moisture has to support structure, chocolate flavor has to stay balanced instead of becoming bitter, and the frosting has to complement the cake rather than overpower it.
This recipe was developed around four core baking principles. Every ingredient, every mixing step, and every baking decision supports at least one of them, giving you a cake that looks impressive, slices beautifully, and stays exceptionally soft from the first slice to the last.
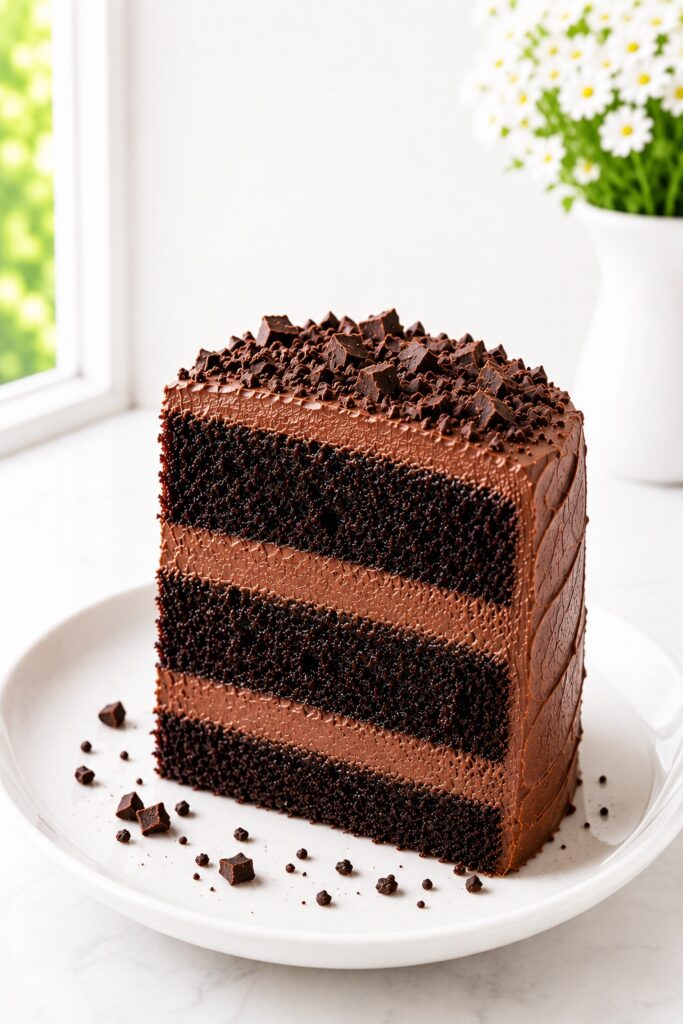
Moisture That Lasts Beyond the First Day
Chocolate cakes naturally need more hydration than many vanilla cakes because cocoa powder absorbs a surprising amount of liquid as it bakes. Here, buttermilk, oil, and hot coffee work together instead of competing with one another. The result is a crumb that stays plush, tender, and moist long after the cake has cooled, rather than drying out overnight.
Structure Strong Enough to Stack, Soft Enough to Melt
A three-layer cake has to support its own weight without becoming dense. Carefully balanced flour, eggs, and leavening create layers that remain sturdy while baking, yet feel remarkably light once you take a bite. The knife cuts cleanly through each layer, but the fork meets almost no resistance.
Chocolate Flavor With Real Depth
Great chocolate cake should taste intensely chocolatey, not simply sweet. Blooming the cocoa with hot coffee unlocks deeper cocoa notes, while dark chocolate in the frosting builds richness without relying on extra sugar. The finished cake tastes fuller, smoother, and more balanced from the first bite to the last.
Three Layers Designed to Work Together
The three-layer design does far more than create dramatic height. Slightly thinner layers bake more evenly, cool faster, and stay consistently moist throughout. They also create the ideal frosting-to-cake ratio, so every forkful delivers soft chocolate cake, silky frosting, and balanced texture instead of long stretches of plain sponge.
The result? A chocolate cake that feels every bit as indulgent as it looks—rich without being heavy, exceptionally moist without becoming fragile, and impressive enough for special occasions while remaining completely achievable in a home kitchen.
Why You’ll Love This Recipe
- Bakery-worthy without bakery-level skills — The simple step-by-step method makes an impressive three-layer chocolate cake completely achievable at home.
- Exceptionally moist from the first slice to the last — Hot coffee, buttermilk, and oil work together to create a rich, tender crumb that stays soft for days.
- Rich chocolate flavor in every bite — Deep cocoa notes and creamy chocolate buttercream make this the kind of cake serious chocolate lovers dream about.
- Beautiful slices that hold their shape — The sturdy layers and smooth buttercream create clean, picture-perfect slices that look as good as they taste.
- Perfect for life’s biggest celebrations — Whether it’s a birthday, holiday, dinner party, or special occasion, this cake always feels worthy of the moment.
- A recipe you’ll come back to again and again — Once you’ve made it, you’ll have a dependable homemade chocolate cake that’s just as impressive for family gatherings as it is for milestone celebrations.
This is the kind of chocolate cake people remember. It is rich without being heavy, impressive without being complicated, and dependable enough to become the recipe everyone asks you to bake again.
The Baking Secrets Behind an Exceptionally Moist Matilda Cake
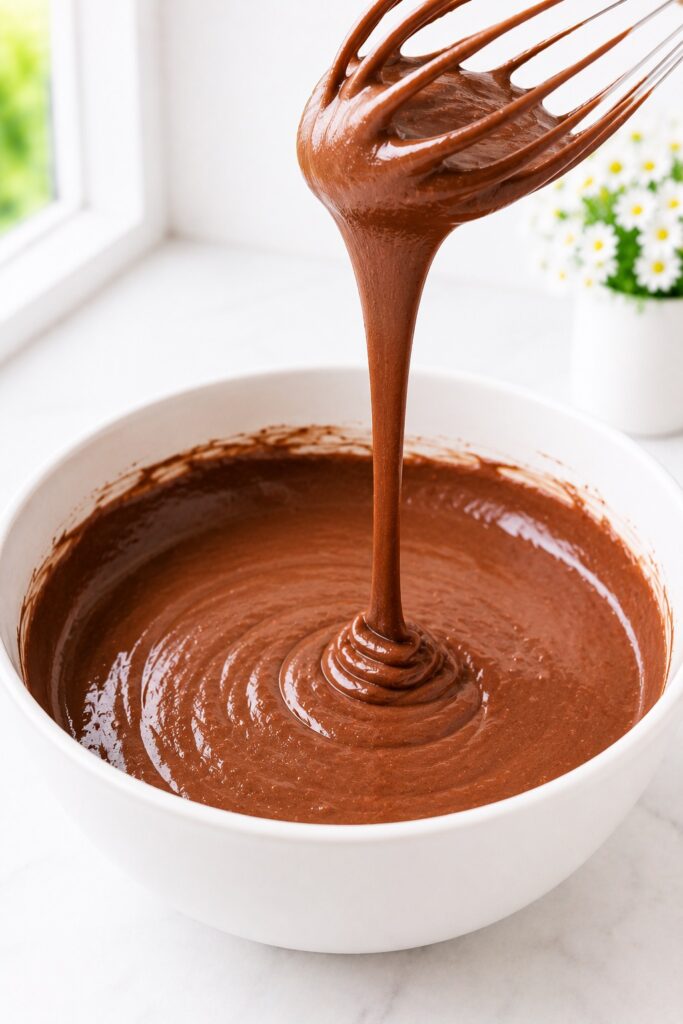
Perhaps the biggest surprise for first-time bakers is the batter. After the hot coffee is added, it becomes much thinner than a typical vanilla cake batter—almost pourable. If your instinct tells you to add more flour, don’t. That looser consistency is intentional and one of the biggest reasons this cake bakes into an incredibly soft, plush crumb instead of a dry, tight one.
Exceptional chocolate cake isn’t created by one magical ingredient. It happens when moisture, fat, heat, and cocoa stay in balance from the moment the batter is mixed until the cake has completely cooled. Every major ingredient in this recipe supports that balance, allowing the layers to stay exceptionally moist while remaining sturdy enough to stack into a tall celebration cake.
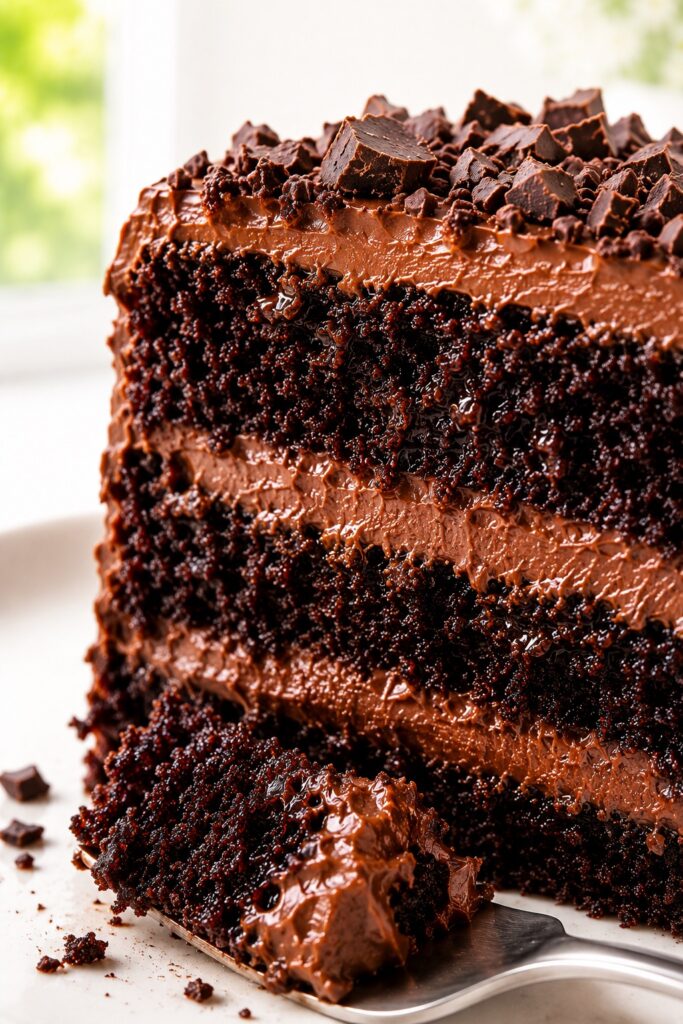
Why Chocolate Cake Needs More Liquid Than You Might Expect
Cocoa powder behaves differently from flour. As it hydrates and bakes, it absorbs a surprising amount of moisture, which is why chocolate cake recipes often look much wetter than vanilla cake recipes. Without enough liquid, the cocoa pulls moisture away from the crumb, leaving the finished cake drier than it should be.
You’ll notice that the batter looks smooth, glossy, and almost silky before it goes into the pans. That’s exactly what you want. A well-hydrated batter gives the cocoa room to develop its full flavor while creating the soft, velvety texture that defines a great Matilda Cake.
Why Hot Coffee Makes Chocolate Taste Richer
Many people worry that adding coffee will make the cake taste like coffee. In reality, most people would never guess it’s there. Its job is to help bloom the cocoa powder, bringing forward deeper chocolate notes before the cake even enters the oven.
One small detail you’ll notice while mixing is that the batter becomes darker and noticeably glossier after the hot coffee is incorporated. That visual change is a good sign that the cocoa has hydrated well. If you prefer not to use coffee, hot water still works beautifully—it simply produces a slightly milder chocolate flavor.
Why Oil Keeps the Cake Soft Even After Chilling
Butter brings wonderful flavor, but oil contributes something equally important: lasting tenderness. Because oil stays liquid at room temperature, the crumb remains soft long after baking instead of becoming firm as it cools.
That difference becomes even more noticeable the next day. After resting overnight, the moisture has time to distribute evenly throughout the layers, creating an even softer texture while the chocolate flavor becomes rounder and more pronounced. It’s one of the rare cakes that many bakers genuinely prefer on day two.
Why Three Layers Create a Better Chocolate Cake
Three thinner cake layers don’t just look dramatic—they bake more evenly than one very tall cake. Heat reaches the center faster, so the edges don’t have to overbake while waiting for the middle to finish. The result is a consistently moist crumb from edge to center.
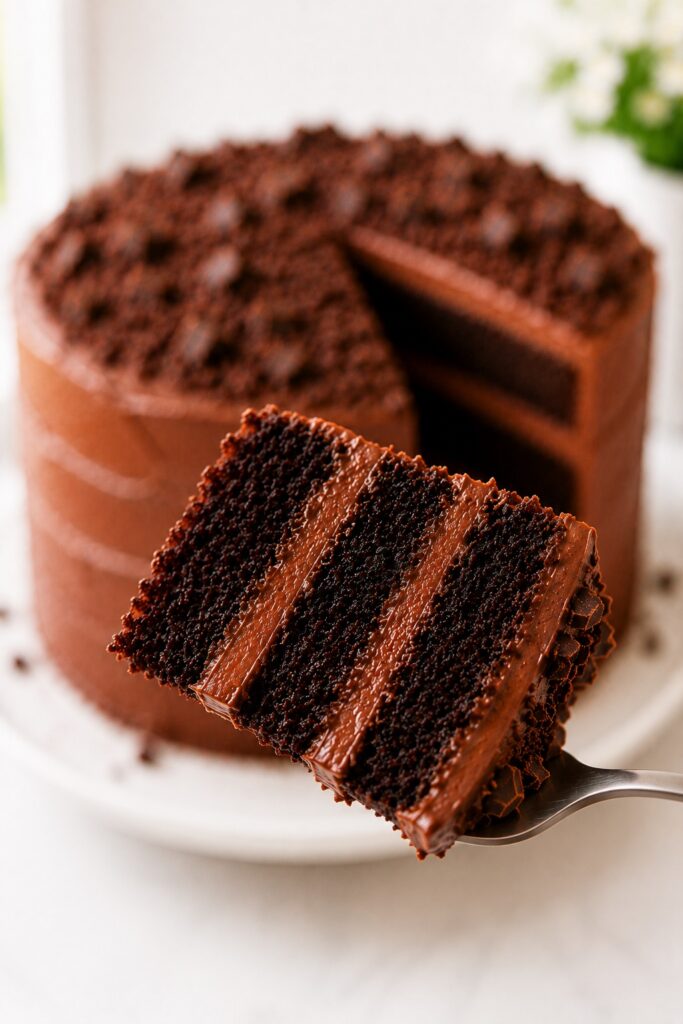
You’ll appreciate the difference most when serving the cake. As the knife passes through the layers, each slice keeps its shape while the frosting forms thick chocolate ribbons between them instead of squeezing out the sides. Every forkful delivers nearly the same balance of soft cake and silky frosting, which is exactly what makes Matilda Cake feel so satisfying to eat.
The takeaway: The secret to an unforgettable Matilda Cake isn’t a hidden ingredient or a complicated technique. It’s a series of small baking decisions that work together—from a properly hydrated batter to evenly baked layers and generous frosting—so every slice is as soft, rich, and memorable as the first.
Everything You Need to Bake Matilda Cake Successfully
Before you turn on the mixer, spend five quiet minutes getting everything ready. Measure the ingredients, line the cake pans, and let the refrigerated ingredients come to room temperature. It may seem like a small step, but it’s one of the easiest ways to make the entire baking process feel calmer—and the finished cake noticeably better.
The ingredient list looks generous, but you’ll probably recognize almost everything. There are no specialty products or difficult techniques hiding here. Instead, each ingredient has a very specific job, working together to create the signature combination of deep chocolate flavor, a plush, bakery-soft crumb, and silky frosting that defines a great Matilda Cake.
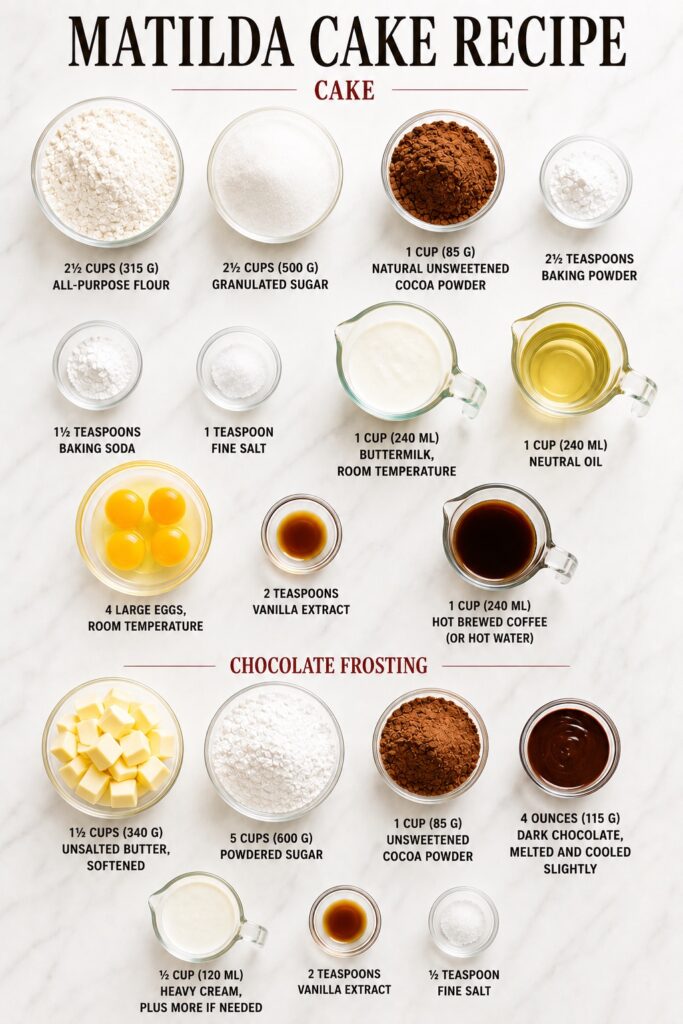
For the Chocolate Cake Layers
These ingredients create the foundation of the cake. Together they produce layers that are soft enough to melt beneath the fork, yet sturdy enough to support generous layers of chocolate frosting without collapsing.
- 2½ cups (315 g) all-purpose flour
- 2½ cups (500 g) granulated sugar
- 1 cup (85 g) natural unsweetened cocoa powder
- 2½ teaspoons baking powder
- 1½ teaspoons baking soda
- 1 teaspoon fine salt
- 1 cup (240 ml) buttermilk, room temperature
- 1 cup (240 ml) neutral oil
- 4 large eggs, room temperature
- 2 teaspoons vanilla extract
- 1 cup (240 ml) hot brewed coffee (or hot water)
For the Chocolate Frosting
The frosting isn’t simply there to cover the cake. It creates the thick chocolate ribbons between the layers, balances the soft crumb, and gives Matilda Cake its unmistakable bakery-style look. Don’t be tempted to make a smaller batch—you’ll want every bit of it.
- 1½ cups (340 g) unsalted butter, softened
- 5 cups (600 g) powdered sugar
- 1 cup (85 g) unsweetened cocoa powder
- 4 ounces (115 g) dark chocolate, melted and cooled slightly
- ½ cup (120 ml) heavy cream, plus more if needed
- 2 teaspoons vanilla extract
- ½ teaspoon fine salt
Note: If you have a digital kitchen scale, this is the perfect recipe to use it. Measuring the flour and cocoa by weight takes only a few extra seconds and helps produce consistently soft, even cake layers every single time.
What Each Ingredient Actually Does
One of the reasons this recipe is so dependable is that every major ingredient has a clear purpose. Nothing is included simply because “most chocolate cakes use it.” Instead, the ingredients work in small teams, each responsible for a different part of what makes Matilda Cake so memorable: its sturdy height, exceptionally moist crumb, and deep chocolate flavor.
The Team That Builds the Cake
Flour, eggs, baking powder, baking soda, and salt form the framework that allows this cake to stand three layers tall without becoming heavy. None of them could do the job alone. The flour provides structure, the eggs strengthen and bind the crumb, while the baking powder and baking soda create the lift that keeps each layer light instead of dense.
You’ll notice the difference when slicing the finished cake. The layers hold their shape beautifully, yet the fork glides through them with very little resistance. That’s exactly the balance these ingredients are designed to create.
The Team That Creates the Signature Chocolate Flavor
The chocolate flavor doesn’t come from a single ingredient. It comes from the way natural cocoa powder, hot coffee, vanilla, and dark chocolate build on one another throughout the recipe. Cocoa creates the foundation, hot coffee helps unlock deeper chocolate notes, vanilla rounds out the flavor, and the melted dark chocolate gives the frosting extra richness and body.
If you’ve ever tasted a chocolate cake that seemed sweet but somehow lacked real chocolate character, it was often missing this kind of layering. Here, every chocolate element has a different role, which creates a fuller, more balanced flavor from the first bite to the last.
If you prefer not to bake with coffee, hot water is an easy substitute. The cake will still be delicious, although the chocolate flavor will be a little lighter and less complex.
If you upgrade one ingredient, make it the cocoa powder. Since cocoa flavors every bite of the cake, using a good-quality unsweetened cocoa has a bigger impact than almost any other single upgrade.
The Team That Keeps Every Slice Exceptionally Soft
Oil and buttermilk quietly do some of the most important work in the entire recipe. They don’t make the cake taller or darker, but they create the texture people remember. Oil keeps the crumb tender even after chilling, while buttermilk adds moisture and gently tenderizes the cake so it stays soft without becoming fragile.
One of the nicest surprises comes the day after baking. As the layers rest, moisture redistributes throughout the crumb, making each slice feel even softer and more cohesive. That’s why many bakers think Matilda Cake is at its absolute best on day two.
If buttermilk isn’t available, you can make a reliable substitute by stirring 1 tablespoon of white vinegar or lemon juice into 1 cup of whole milk and letting it stand for about 5 minutes. The result won’t be identical, but it will still produce a beautifully tender cake.
Choosing the Best Cocoa Powder and Chocolate for Matilda Cake
Chocolate is the heart of this recipe, so the cocoa powder and chocolate you choose have a bigger impact than most people expect. They influence the cake’s flavor, color, texture, and even how moist each slice feels. Fortunately, you don’t need luxury ingredients to bake an unforgettable Matilda Cake—you simply need the right type of cocoa and chocolate.
Understanding what to buy is often more valuable than chasing the most expensive brand. Here’s what actually matters.
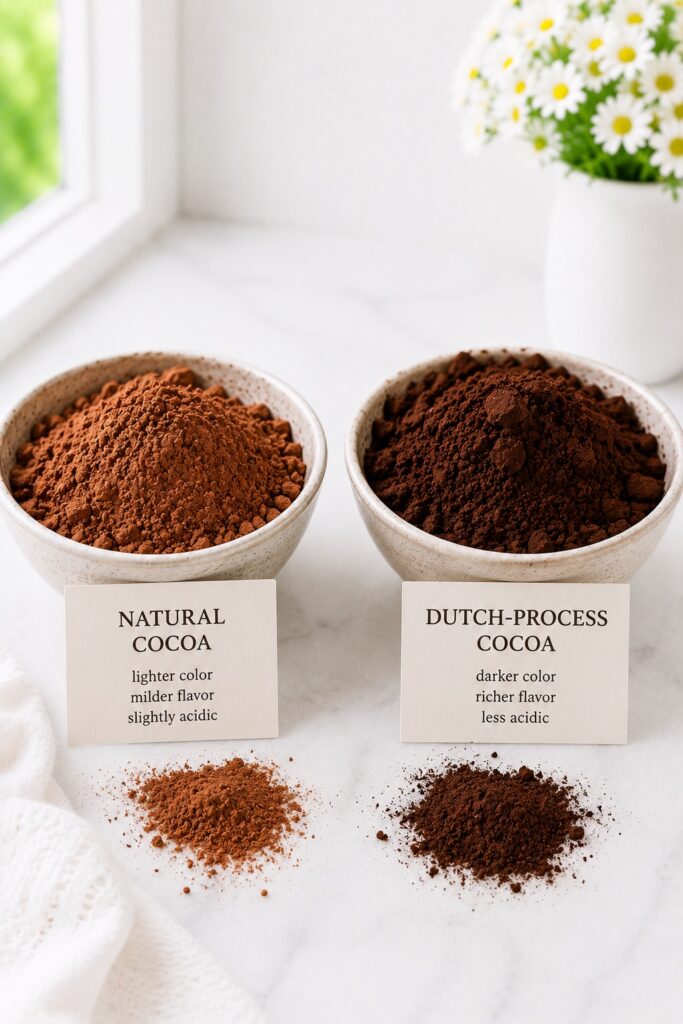
Natural Cocoa vs. Dutch-Process Cocoa
This recipe is developed specifically for natural unsweetened cocoa powder. Natural cocoa is slightly acidic, allowing it to react properly with the baking soda while producing the bold, classic chocolate flavor that defines this cake.
Dutch-process cocoa has been alkalized to reduce its acidity. It produces a darker color and a smoother, more mellow chocolate flavor, but because its chemistry is different, it doesn’t always behave the same way in recipes written for natural cocoa. Unless you’re also adjusting the leavening, it’s best to follow the recipe as written.
Tip: If you’re making this recipe for the first time, stick with natural unsweetened cocoa powder. It delivers the flavor, rise, and texture this recipe was designed to achieve.
How to Choose a Good Cocoa Powder
- Choose unsweetened cocoa powder. Sweetened drinking cocoa isn’t suitable for baking.
- Look for a rich chocolate aroma. Fresh cocoa should smell deeply chocolatey as soon as you open the container.
- Avoid stale or dusty-smelling cocoa. Older cocoa gradually loses both aroma and depth of flavor.
- Store it in a cool, dry place. Proper storage helps preserve its quality between bakes.
Choosing the Right Chocolate for the Frosting
The melted chocolate in the buttercream contributes far more than flavor. It also creates a smoother texture, richer mouthfeel, and a deeper chocolate finish. For the best balance, choose a good-quality dark chocolate containing about 60–70% cocoa.
Milk chocolate creates a noticeably sweeter frosting, while very dark chocolate above 75% cocoa can make the buttercream taste more bitter unless the sweetness is adjusted. Whenever possible, use real chocolate bars instead of compound chocolate or candy melts, which don’t melt or taste quite the same.
Quick Buying Guide
| If you want… | Choose… | Why |
|---|---|---|
| Classic Matilda Cake flavor | Natural unsweetened cocoa | Matches the recipe’s leavening and delivers a bold chocolate flavor. |
| A darker, smoother chocolate profile | Dutch-process cocoa | Excellent for recipes designed for it, but not a direct substitute here. |
| The richest buttercream | 60–70% dark chocolate | Creates balanced flavor and a silky texture. |
| A sweeter, milder frosting | Milk chocolate | Produces a lighter chocolate flavor that’s especially kid-friendly. |
Popular baking cocoa brands include Ghirardelli, Guittard, Droste, Valrhona, and Hershey’s Natural Cocoa. Rather than focusing on a specific brand, prioritize fresh, unsweetened cocoa with a rich chocolate aroma and good-quality dark chocolate for the frosting.
The takeaway: Great Matilda Cake isn’t about buying the most expensive ingredients—it’s about choosing ingredients that work together. A fresh natural cocoa powder and a good-quality dark chocolate will contribute far more to the finished cake than any expensive decorating technique ever could.
The Tools That Make This Cake Easier
You don’t need a cabinet full of baking equipment to make an impressive Matilda Cake. In fact, most of the tools are probably already in your kitchen. A few extras simply make the process smoother and help you achieve cleaner layers and a more polished finish.
The Essentials
- Three 8-inch round cake pans for evenly baked layers.
- Mixing bowls, whisk, and an electric mixer to bring the batter and frosting together smoothly.
- Parchment paper rounds for easy cake release and clean layers.
- A cooling rack so the layers cool evenly before frosting.
Helpful Upgrades (But Completely Optional)
- An offset spatula makes frosting the layers easier and creates those relaxed bakery-style swoops.
- A digital kitchen scale helps produce consistent results, especially when measuring flour and cocoa powder.
- A cake turntable makes decorating more comfortable, but it isn’t necessary for a beautiful homemade finish.
Tip: If I could recommend only one optional tool for this recipe, it would be an offset spatula. It costs very little, but it instantly makes frosting feel easier, cleaner, and much more controlled.
The good news? Beautiful Matilda Cake isn’t about owning professional equipment. It’s about understanding the recipe, taking your time, and enjoying the process. The tools simply make that journey a little easier.
How to Make the Best Homemade Matilda Cake
1. Prepare the Cake Pans
Start by preheating the oven to 350°F (175°C). Grease three 8-inch round cake pans, line the bottoms with parchment paper, then lightly grease the parchment as well. If you prefer, dust the pans with a little cocoa powder instead of flour to help keep the outside of the cake beautifully dark.
Note: The pans should be evenly coated without pools of grease, and the parchment should lie completely flat so the baked layers release cleanly.
Tip: Taking an extra minute to line the pans is one of the easiest ways to prevent broken cake layers. A tall three-layer cake is much easier to assemble when each layer comes out perfectly intact.
2. Mix the Dry Ingredients
In a large mixing bowl, whisk together the flour, granulated sugar, cocoa powder, baking powder, baking soda, and salt until everything is evenly combined. If your cocoa powder has small lumps, break them up with the whisk before moving on so they don’t end up in the finished cake.
Visual Cue: The mixture should have an even chocolate-brown color with no visible streaks of flour or pockets of cocoa powder.
Tip: Whisk for about 30 seconds longer than you think you need. Evenly distributing the leavening agents now helps all three cake layers rise at the same rate and bake with a more uniform crumb.
3. Whisk the Wet Ingredients
In a separate large bowl, whisk together the buttermilk, oil, eggs, and vanilla extract until completely smooth. The eggs should be fully incorporated and the mixture should look creamy and evenly blended before you combine it with the dry ingredients.
The mixture should be smooth, glossy, and uniform in color, with no visible streaks of egg yolk or egg white.
4. Build the Batter
Pour the wet ingredients into the bowl of dry ingredients and whisk just until no dry pockets remain. Slowly stream in the hot coffee while whisking continuously until the batter is smooth and fully combined. Avoid overmixing once everything comes together, as that can make the finished cake less tender.
Visual Cue: The batter should be smooth, glossy, and quite thin—closer to heavy cream than traditional cake batter. That consistency is exactly what helps create an exceptionally moist chocolate cake.
Note: Don’t be tempted to add extra flour, even if the batter seems too thin. Chocolate cake batters with a higher liquid content almost always bake into softer, more tender layers than thick batters.
5. Divide the Batter and Bake
Divide the batter evenly between the prepared cake pans and gently tap each pan on the counter once or twice to release any large air bubbles. Bake for 24 to 28 minutes at 350°F (175°C) rotating the pans halfway through if your oven bakes unevenly.
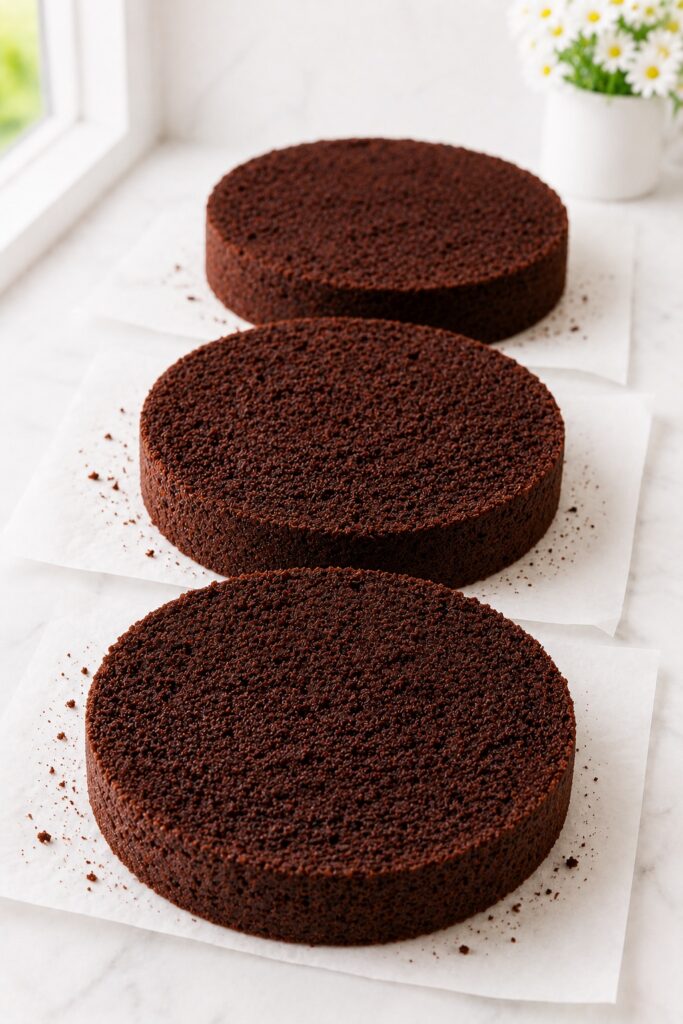
Doneness Cues: The tops should look set with a soft matte finish, the centers should spring back lightly when touched, and a toothpick inserted into the middle should come out with a few moist crumbs rather than wet batter. The edges may also begin to pull away from the sides of the pans.
Tip: Start checking the cakes at the lower end of the baking time. Even two or three extra minutes in the oven can make the difference between an ultra-moist crumb and one that’s slightly dry.
6. Cool the Cake Layers
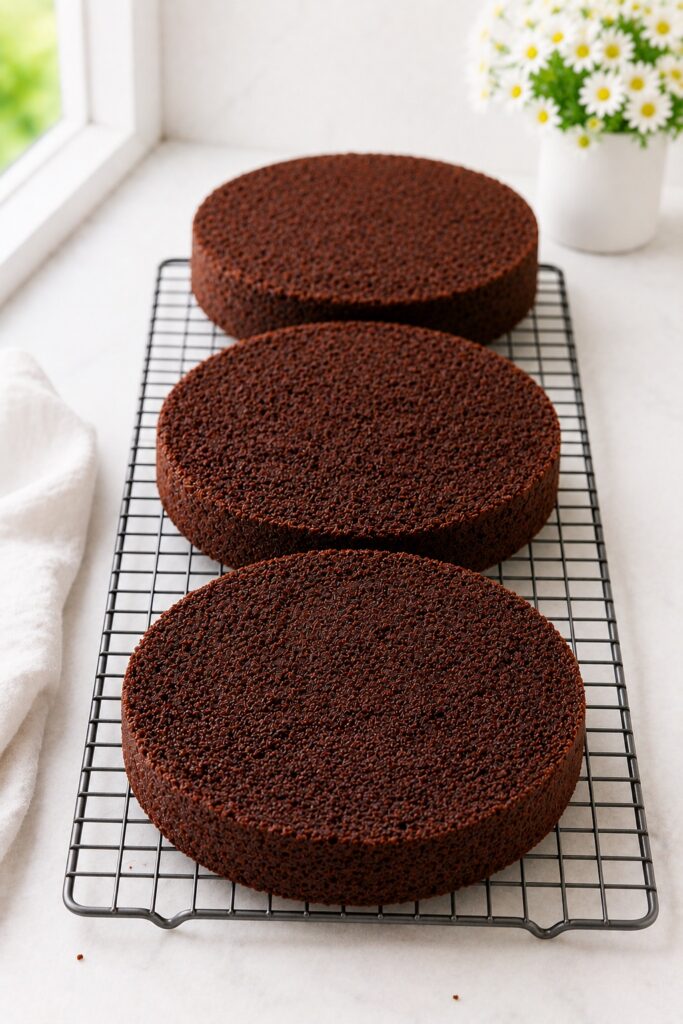
Let the cakes cool in their pans for about 15 minutes before running a thin knife around the edges and carefully turning them out onto a wire rack. Peel away the parchment paper while the layers are still slightly warm, then allow them to cool completely before frosting.
The cake layers should feel completely cool to the touch with no warmth in the center. The tops will be soft and springy, while the sides should release cleanly from the parchment.
Note: Resist the temptation to frost the cake too soon. Even slightly warm layers can cause the buttercream to soften, slide, or melt, making the finished cake much harder to assemble neatly.
7. Make the Chocolate Buttercream
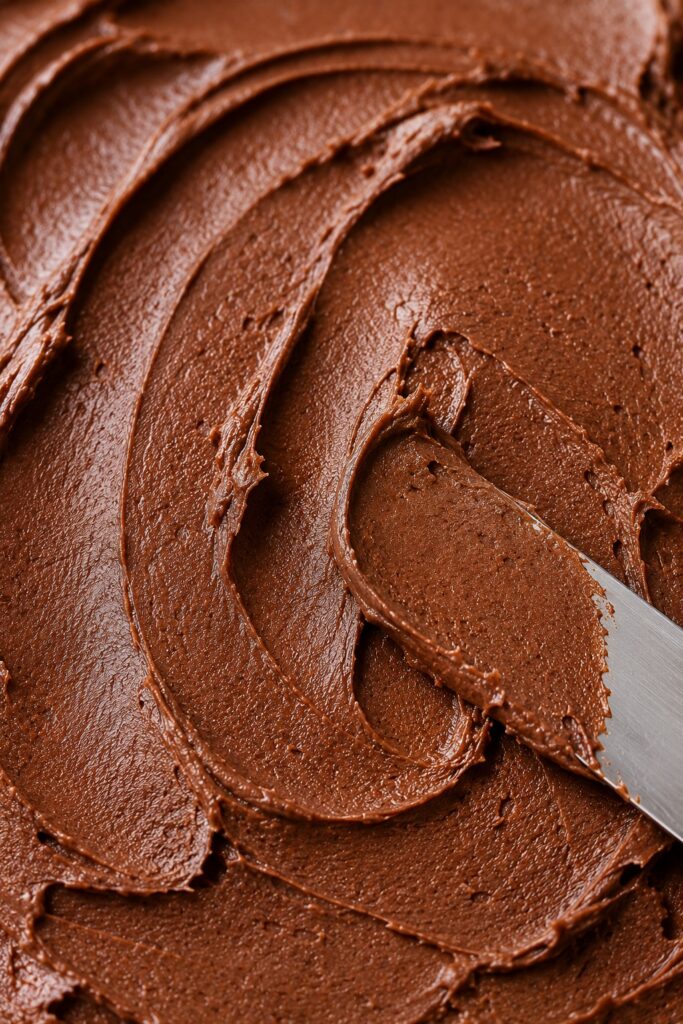
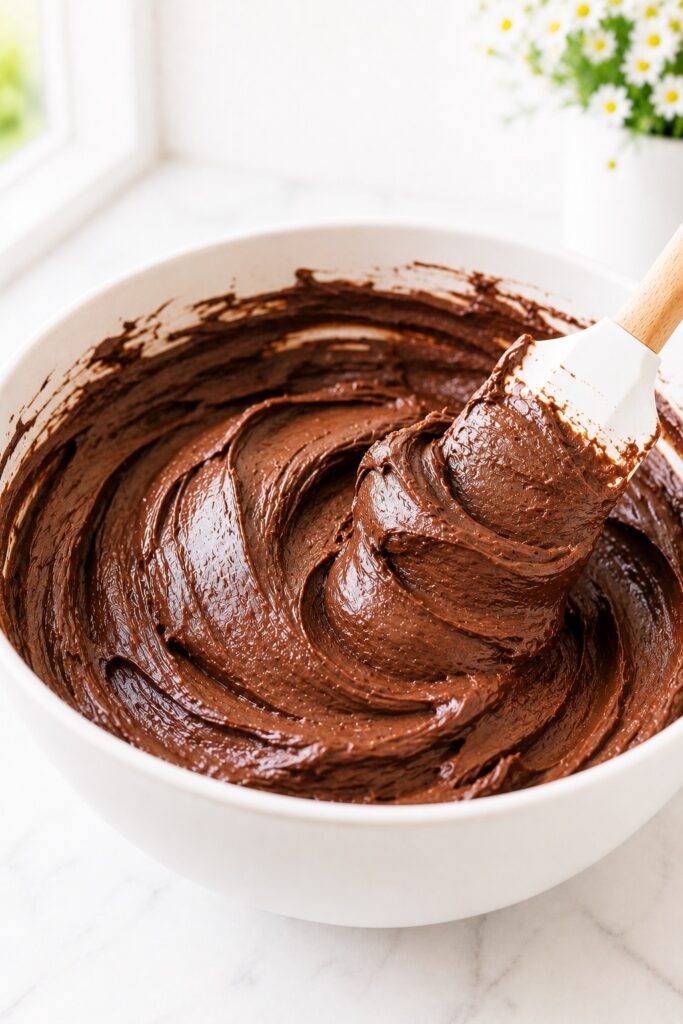
Beat the softened butter until it becomes noticeably lighter in color and fluffy, then gradually mix in the powdered sugar, cocoa powder, heavy cream, vanilla extract, and salt. Add the melted dark chocolate once it has cooled slightly, then continue beating for another 2 to 3 minutes until the buttercream is smooth, creamy, and easy to spread.
What to look for: The buttercream should be silky, light, and hold soft peaks when you lift the mixer. It should spread easily without feeling runny, stiff, or grainy.
Note: Make sure the melted chocolate is no longer hot before adding it to the buttercream. Warm chocolate can soften the butter too much, while cooled chocolate blends in smoothly and gives the frosting a deeper, richer chocolate flavor.
How to Assemble and Decorate Matilda Cake Like a Professional Bakery
Baking beautiful cake layers is only half the process. The way you assemble, frost, and finish the cake has just as much impact on the final result. This step-by-step guide walks you through exactly how to build stable layers, apply the buttercream, and create the rustic bakery-style finish that makes Matilda Cake so unforgettable.
1. Build Stable, Even Cake Layers
Place the first cake layer on a cake board or serving plate and spread about 1 cup (approximately 230–250 g) of chocolate buttercream evenly over the surface. Aim for a filling layer about ¼ to ⅜ inch (6–10 mm) thick, leaving a ¼-inch (6 mm) border around the edge. As you place the next cake layer on top, the buttercream will naturally spread toward the edges without squeezing out the sides.
Repeat with the second layer, then place the final cake layer upside down so the perfectly flat bottom becomes the top of the finished cake. This simple bakery technique creates straighter sides, a flatter top, and a cleaner final finish.
Tip: Divide the buttercream before you begin assembling the cake—about 1 cup for each filling layer, a thin portion for the crumb coat, and the remaining buttercream for the final coat. This simple step keeps the layers even and ensures you have enough frosting to finish the cake beautifully.
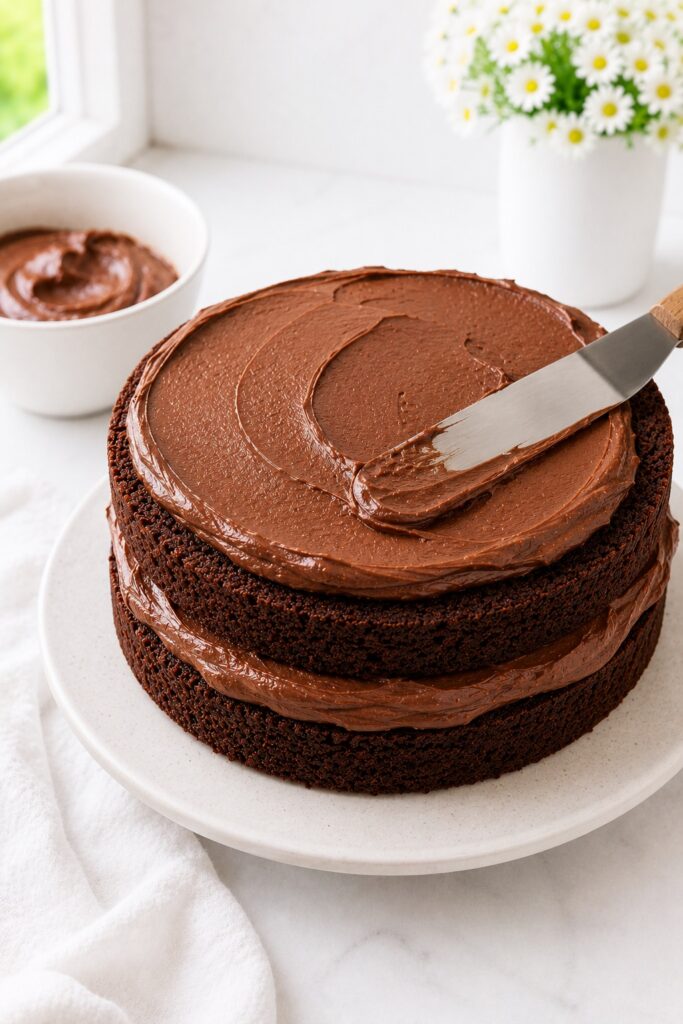
2. Apply a Thin Crumb Coat
Spread a very thin layer of buttercream over the entire cake, covering both the top and the sides. Don’t worry if crumbs show through at this stage—the purpose of the crumb coat is simply to trap loose crumbs and create a clean base for the final layer of frosting.
Refrigerate the cake for 15 to 20 minutes, or until the buttercream feels firm to the touch before continuing.
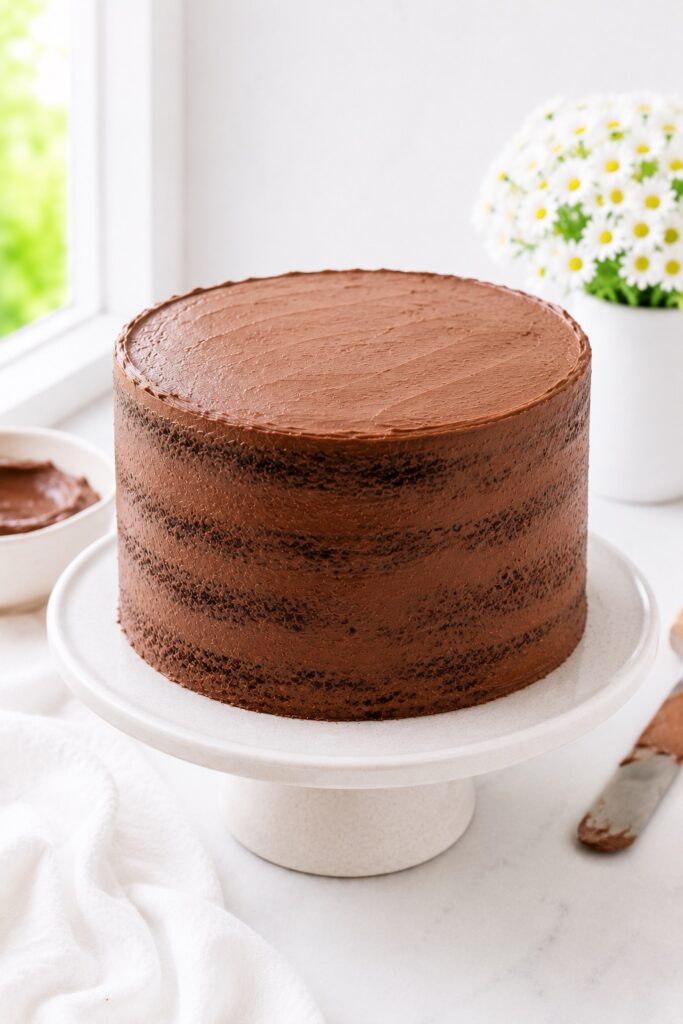
3. Apply the Final Coat of Buttercream
Spread the remaining buttercream generously over the top of the cake first, then work your way down the sides. An offset spatula makes it easy to apply the frosting, while a bench scraper helps smooth the sides with long, gentle passes. Rotate the cake as you work instead of moving the spatula excessively for a more even finish.
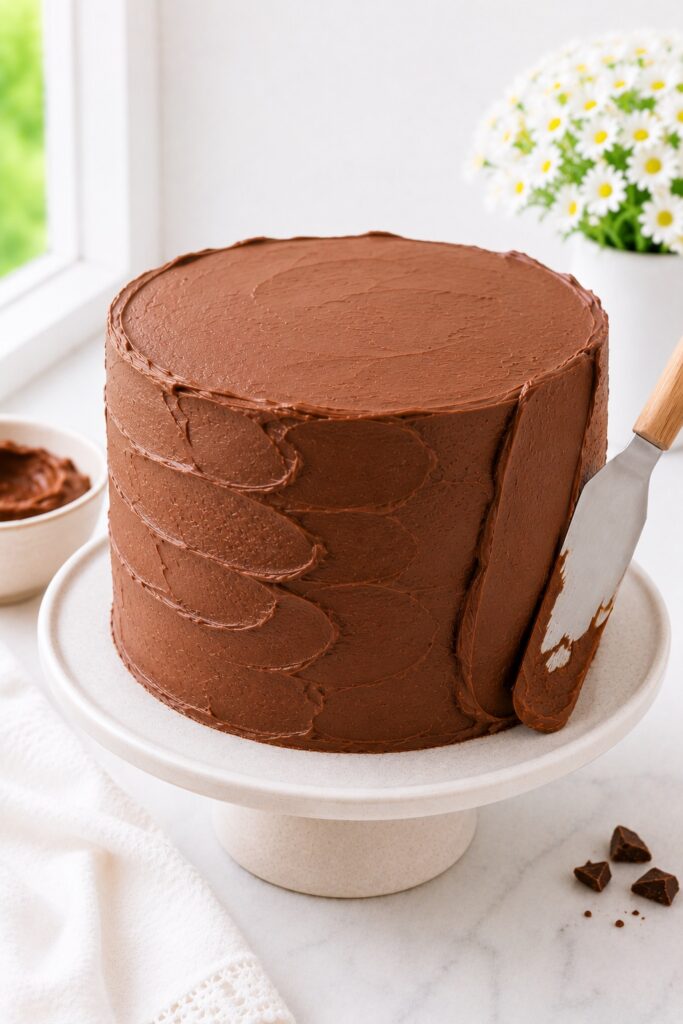
4. Create the Signature Matilda Cake Finish
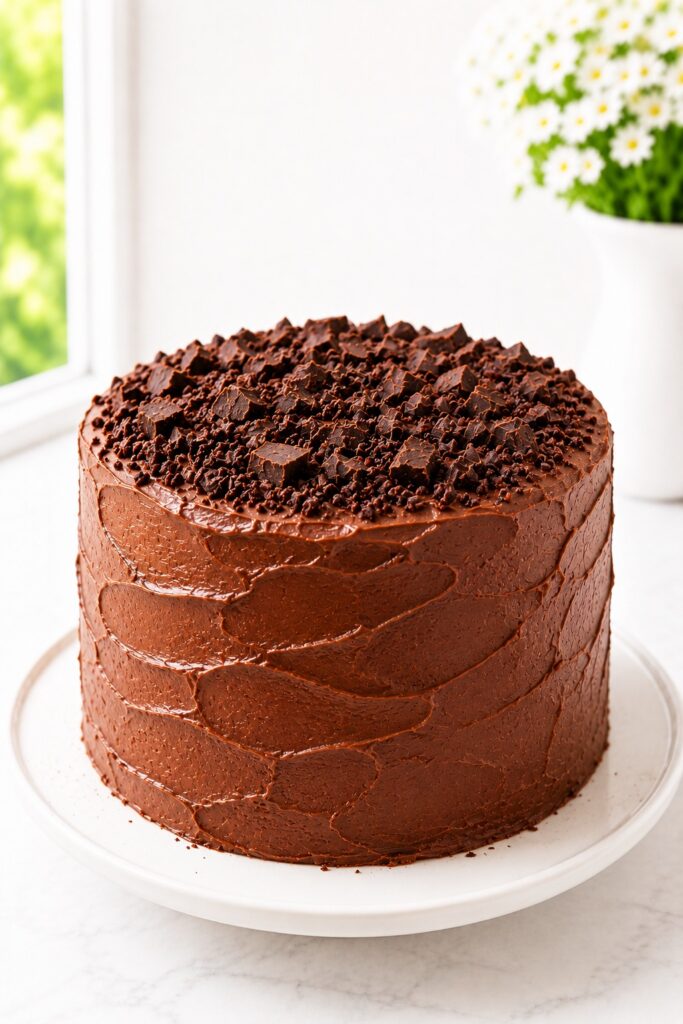
Unlike perfectly polished celebration cakes, Matilda Cake is known for its generous, handcrafted appearance. Leave soft offset spatula marks, gentle swirls, and natural texture in the buttercream instead of trying to make it perfectly smooth. Those relaxed imperfections are part of what gives the cake its unmistakable bakery-style character.
If desired, finish the cake with chocolate curls, shaved dark chocolate, finely chopped chocolate, chocolate flakes, or a light dusting of cocoa powder. Keep the decorations simple so the dramatic layers remain the star of every slice.
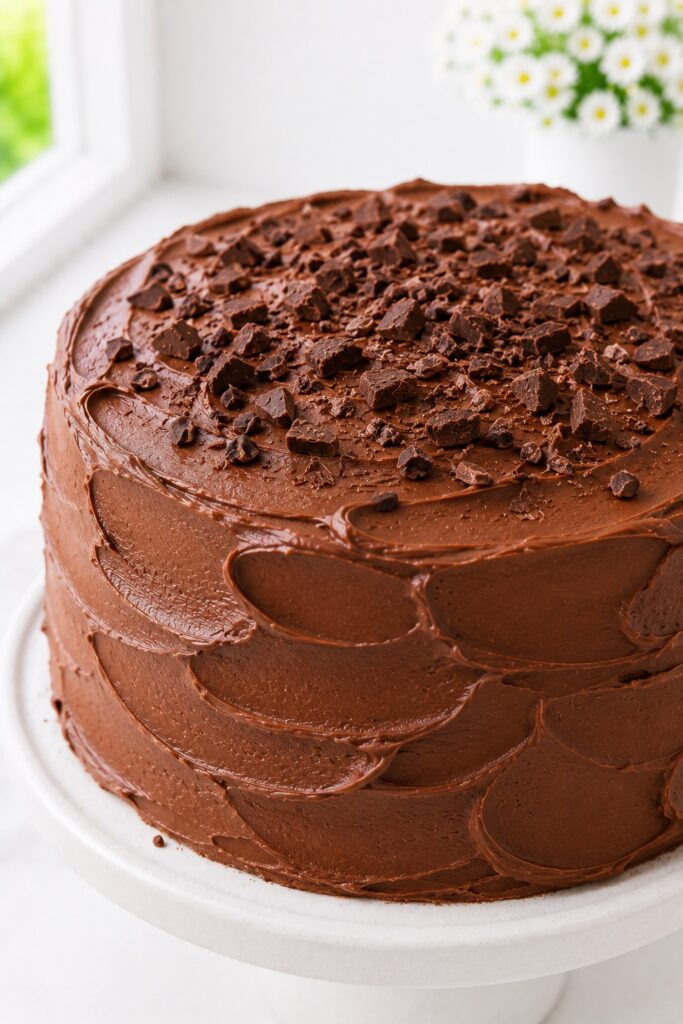
5. Chill, Slice, and Serve
For the cleanest bakery-style slices, refrigerate the finished cake for 20 to 30 minutes before cutting. Dip a long, sharp knife into hot water, wipe it dry, and clean the blade between every slice. For the best flavor and texture, let each slice sit at room temperature for about 10 to 15 minutes before serving so the buttercream softens and the chocolate flavor fully develops.
Note: The most beautiful Matilda Cakes are never perfectly smooth. Thick chocolate filling, confident spatula strokes, and a relaxed handcrafted finish create the rich, inviting look that makes this cake instantly recognizable.
How to Tell When Your Matilda Cake Is Perfectly Baked
One of the easiest ways to dry out a chocolate cake is to trust the timer more than the cake itself. Oven temperatures vary, cake pans conduct heat differently, and even the position of the rack can change the baking time by a few minutes. Instead of relying on the clock alone, learn to read the cake. Once you know what to look for, you’ll feel far more confident every time you bake.
As the baking time comes to an end, check for these signs together rather than one at a time. A perfectly baked Matilda Cake doesn’t pass just one test—it quietly passes all of them.
Signs Your Cake Is Ready
- The surface looks soft and matte. The glossy shine of raw batter disappears, leaving an even chocolate finish that looks set but never dry.
- The center springs back gently. A light press with your fingertip should leave little or no indentation. If the center still feels loose or sinks noticeably, give it another minute or two.
- The edges have just started to release. A very small gap between the cake and the pan is a good sign. Large gaps usually mean the cake has baked slightly longer than necessary.
- A toothpick comes out with a few moist crumbs. Think fudgy crumbs, not wet batter. A perfectly clean toothpick often means you’ve already lost a little of the moisture that makes this cake so soft.
- The chocolate aroma becomes deeper and warmer. During the last few minutes of baking, you’ll notice the kitchen filling with a richer cocoa scent as the cake finishes setting.
- The pan feels more stable when gently moved. The center should no longer wobble, even though the cake still looks beautifully moist.
If It Needs a Little Longer…
- The center still looks glossy or slightly wet.
- The middle jiggles noticeably when the pan is moved.
- The toothpick comes out coated with raw batter.
- A gentle press leaves a deep fingerprint that doesn’t spring back.
Note: If you’re debating whether to leave the cake in for another three minutes, bake it for just one. Chocolate cakes continue cooking from their own residual heat after they leave the oven, but there’s no way to put moisture back once it’s baked away.
Common Matilda Cake Problems (and How to Fix Them)
Even experienced bakers occasionally run into small setbacks, especially with tall layer cakes. The good news is that most problems have a simple explanation—and many can be prevented or even fixed. If something doesn’t look quite right, don’t panic. Here’s what may have happened and what to do next.
| If This Happens… | It’s Usually Because… | What To Do |
|---|---|---|
| The cake seems dry. | It baked a little too long or too much flour was added. | Brush the layers lightly with simple syrup before frosting, then check the cake a few minutes earlier next time. |
| The center sinks after baking. | The cake was underbaked or the oven door was opened too early. | If the center is fully baked, simply level the top before frosting. Next time, wait until the cake has almost finished baking before opening the oven. |
| The frosting slides between the layers. | The cake layers were still slightly warm or the frosting became too soft. | Refrigerate the cake for 15–20 minutes, then continue frosting once everything has firmed up. |
| The cake sticks to the pan. | The pans weren’t lined with parchment or the cake cooled too long in the pan. | Always line the pans and remove the cakes after about 10–15 minutes of cooling. |
| The cake feels dense instead of light. | The batter was overmixed or the flour measurement wasn’t accurate. | Mix only until the ingredients are combined and measure the flour carefully. |
| The frosting feels too stiff or too soft. | Room temperature and ingredient temperature affect buttercream more than most people expect. | Add a splash of cream if it’s too thick or a little powdered sugar if it’s too soft, adjusting gradually. |
Remember: Matilda Cake doesn’t have to look bakery-perfect to taste incredible. Even if a layer cracks or the frosting isn’t perfectly smooth, the rich chocolate flavor and soft crumb will still shine through.
Which Chocolate Cake Is Right for You?
Chocolate cakes may share many of the same ingredients, but they deliver very different baking experiences. Some are light and airy, others are intensely fudgy, while some are designed for casual family desserts rather than milestone celebrations. If you’re deciding which chocolate cake to bake next, this quick guide makes the choice easier.
| If You’re Looking For… | Choose… | Why It Stands Out |
|---|---|---|
| A tall, show-stopping celebration cake | Matilda Cake | Three ultra-moist layers, generous chocolate frosting, and dramatic bakery-style presentation that’s perfect for birthdays and special occasions. |
| An easy everyday chocolate cake | Classic Chocolate Cake | Simple to prepare, versatile, and ideal for casual family desserts without elaborate decorating. |
| A lighter chocolate cake with bold cocoa flavor | Devil’s Food Cake | A softer, airier crumb with a deep cocoa profile that feels lighter than many rich chocolate cakes. |
| An intensely rich, almost brownie-like dessert | Chocolate Fudge Cake | Dense, deeply chocolatey, and perfect for anyone who loves an extra-fudgy texture. |
| A chocolate cake for feeding a crowd | Texas Sheet Cake | Bakes in one pan, serves many people easily, and requires minimal decorating. |
Our take: If you want the kind of chocolate cake people remember long after the celebration is over, Matilda Cake strikes a beautiful balance between height, moisture, rich chocolate flavor, and bakery-style presentation. It delivers the drama of a special-occasion cake without requiring advanced decorating skills or complicated techniques.
From the BDV Test Kitchen: We reach for Matilda Cake when the cake itself is meant to be part of the celebration—not just the dessert served at the end of it. Those tall layers and generous ribbons of chocolate frosting turn every slice into the centerpiece of the table.
The Best Ways to Serve Matilda Cake
Matilda Cake is one of those desserts that naturally becomes the centerpiece of the table. It doesn’t need elaborate decorations or complicated plating to make an impression. Serve it at the right temperature, let the rich chocolate flavor speak for itself, and every slice feels like a celebration.
If the cake has been refrigerated, let it stand at room temperature for about 30 minutes before serving. As the buttercream softens, the chocolate becomes more aromatic, the frosting turns silky, and the crumb regains the plush texture that makes this cake so memorable.
For Birthdays and Special Celebrations
Place the whole cake on a simple white cake stand and let its height become the focal point. Finish it with a handful of chocolate curls, finely shaved dark chocolate, or a light dusting of cocoa powder just before serving. The beauty of Matilda Cake comes from its generous layers, so understated decoration often creates the biggest impact.
For the Ultimate Chocolate Lover
Serve a generous slice with a cold glass of milk, freshly brewed coffee, or a shot of espresso. If you’re looking for an even more indulgent dessert, add a small scoop of vanilla ice cream alongside the cake. The contrast between the cold ice cream and the soft chocolate frosting makes every bite feel rich without becoming overwhelming.
For a Beautiful Dessert Presentation
Serve each slice on a white dessert plate with a few fresh raspberries or strawberries for a touch of color. Their natural brightness balances the deep chocolate flavor without competing with it, while the contrast creates an elegant presentation that’s perfect for dinner parties and holiday tables.
The Slice Everyone Remembers
Cut the first slice while the cake is still whole and let the three chocolate layers reveal themselves naturally. Those thick ribbons of frosting and the ultra-moist crumb are part of the experience, turning a simple slice into the moment everyone at the table notices first. It’s one of the reasons Matilda Cake feels so special for birthdays and celebrations.
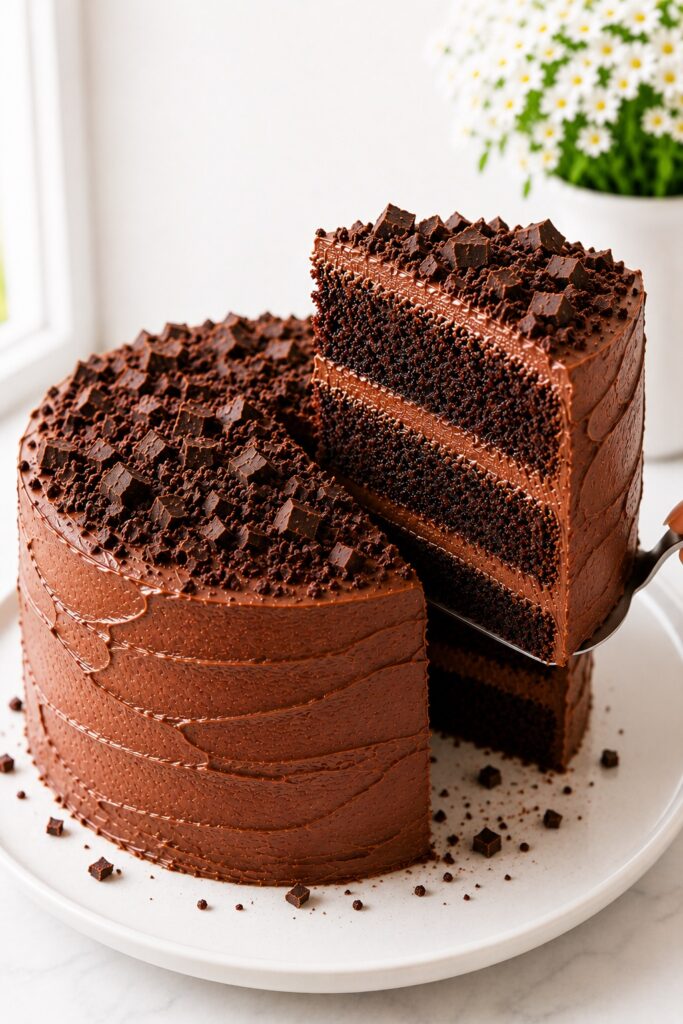
Save this recipe for birthdays, celebrations, holidays, or anytime you want a dessert that truly feels like an occasion. Matilda Cake isn’t simply served—it creates the kind of chocolate moment people remember long after the plates have been cleared.
Storage, Freezing & Make-Ahead Guide
Matilda Cake has another advantage: it keeps exceptionally well. In fact, many bakers prefer it on the second day, when the chocolate flavor has deepened and the crumb has had time to settle into an even softer, more cohesive texture. Whether you’re baking ahead for a celebration or saving leftovers, here’s the best way to keep every slice tasting fresh.
At Room Temperature
If your kitchen is cool (below about 70°F / 21°C), you can store the fully frosted cake covered at room temperature for up to 24 hours. A cake dome or airtight cake container helps prevent the frosting from drying out while keeping the crumb soft.
In the Refrigerator
For longer storage, refrigerate the cake in an airtight container or cover it well to protect it from absorbing refrigerator odors. It will keep beautifully for up to 5 days. Before serving, let the cake stand at room temperature for about 30 minutes so the buttercream softens and the chocolate flavor becomes more pronounced.
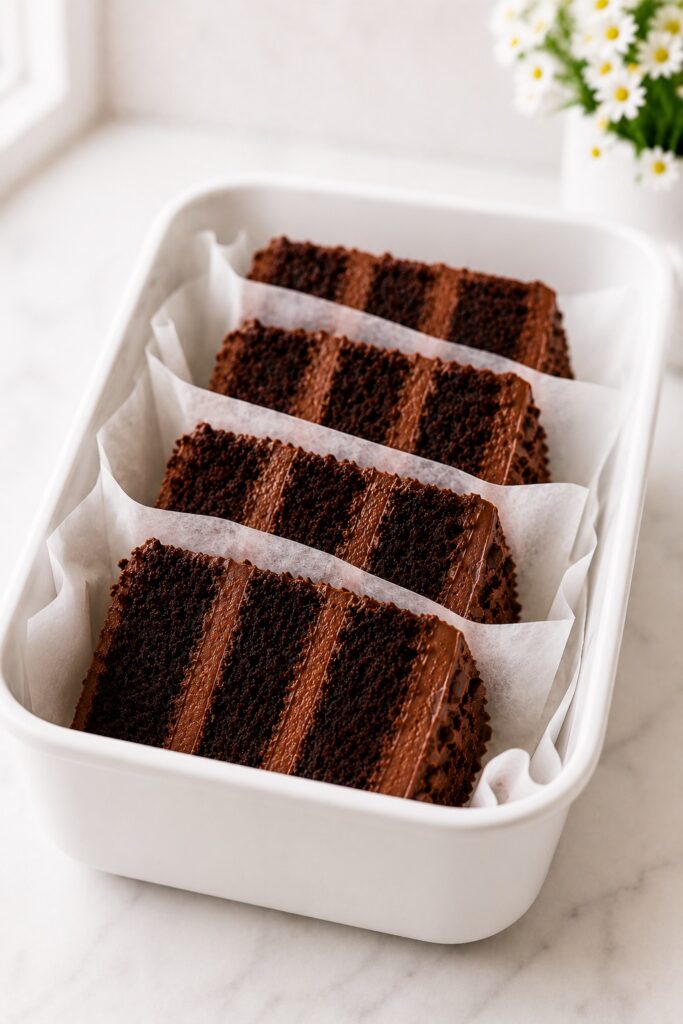
Freezing the Cake
The unfrosted cake layers freeze exceptionally well for up to 2 months. Wrap each layer tightly in plastic wrap followed by aluminum foil, then thaw overnight in the refrigerator before assembling the cake.
You can also freeze individual frosted slices. Wrap each slice well and store in a freezer-safe container. Thaw overnight in the refrigerator, then let it sit at room temperature for 20–30 minutes before serving.
Making It Ahead
Matilda Cake is an excellent make-ahead dessert. Bake the layers one day in advance, wrap them once completely cool, and frost the cake the following day. If you need to work even further ahead, freeze the unfrosted layers and assemble the cake closer to your event.
Tip: If you’re baking this cake for a birthday or special celebration, we actually recommend making it the day before. The extra resting time allows the crumb and frosting to settle together, creating an even richer chocolate flavor and cleaner slices.
Quick Storage Guide
| Storage Method | How Long | Best Practice |
|---|---|---|
| Room temperature | Up to 1 day | Keep covered in a cool kitchen. |
| Refrigerator | Up to 5 days | Bring to room temperature before serving. |
| Freezer (whole layers) | Up to 2 months | Freeze unfrosted and well wrapped. |
| Freezer (individual slices) | Up to 2 months | Wrap individually for quick desserts. |
Easy Ways to Make This Matilda Cake Your Own
One of the best things about this recipe is how easily it can be adapted without losing what makes Matilda Cake so special. The rich chocolate layers and silky frosting provide a dependable foundation for different flavor combinations, whether you’re baking for a birthday, a holiday gathering, or simply trying something new.
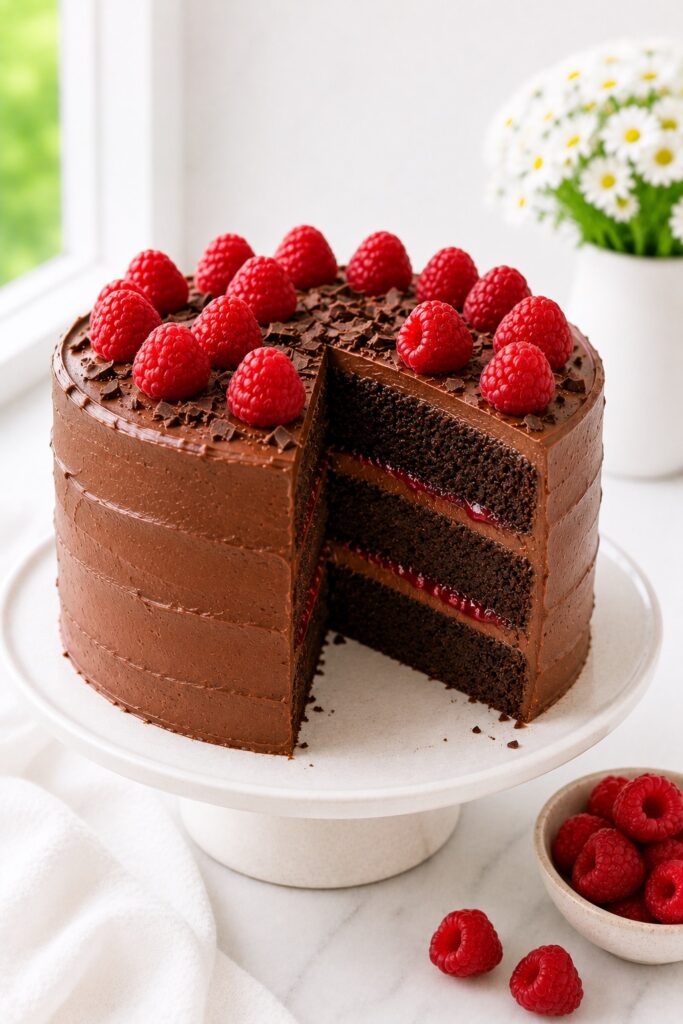
Raspberry Matilda Cake – Beautiful Celebration Cake
Spread a thin layer of raspberry preserves beneath each layer of frosting and decorate the finished cake with fresh raspberries. The bright fruit balances the rich chocolate beautifully, making this an elegant choice for birthdays, Valentine’s Day, or holiday celebrations.
Dark Chocolate Lover’s Version
Swap the natural cocoa powder for Dutch-process cocoa and use bittersweet chocolate in the frosting for a deeper, more intense chocolate flavor. This variation is slightly less sweet and perfect for anyone who enjoys rich European-style chocolate desserts.
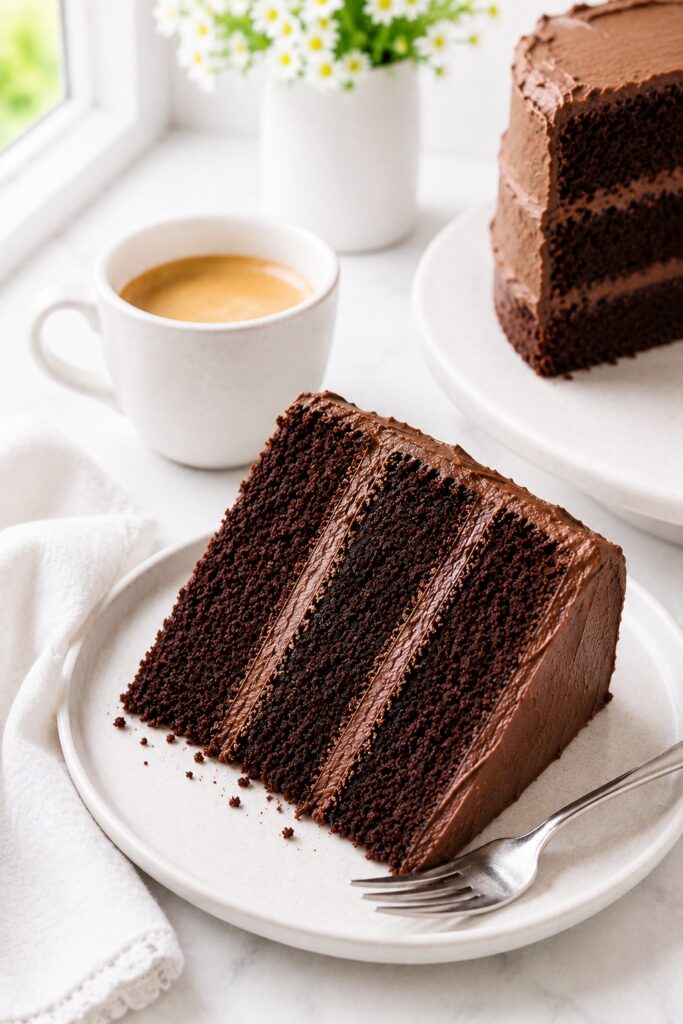
Mocha Matilda Cake
Brew strong coffee for the batter and stir 1 to 2 teaspoons of espresso powder into the frosting. The coffee doesn’t make the cake taste like coffee—it simply adds depth and makes the chocolate flavor feel even richer and more complex.
Salted Caramel Matilda Cake
Add a thin layer of salted caramel between the cake layers or drizzle a little over each slice just before serving. The sweet-salty contrast enhances the chocolate without overpowering it, creating a dessert that feels both comforting and sophisticated.
Tip: If I could recommend just one variation, it would be the Chocolate Raspberry version. Chocolate and raspberries naturally complement one another, creating a dessert that feels more refined while staying true to the rich, indulgent character of Matilda Cake.
No matter which variation you choose, keep the three generous cake layers and thick chocolate frosting. That dramatic height, ultra-moist crumb, and unmistakable chocolate-on-chocolate experience are what make Matilda Cake instantly recognizable and so memorable with every slice.
Can You Make Matilda Cake in Different Pan Sizes?
Absolutely. While this recipe is written for three 8-inch round cake pans, it’s flexible enough to work in several other pans with small adjustments. The batter quantity stays the same—you’ll simply need to adjust the baking time and keep an eye on the visual doneness cues rather than relying only on the clock.
| Pan | What to Expect | Approximate Bake Time* |
|---|---|---|
| Three 8-inch round pans | The original recipe with tall bakery-style layers. | 24–28 minutes |
| Two 9-inch round pans | Slightly wider, thicker layers with the same rich flavor. | 30–35 minutes |
| 9×13-inch pan | A classic sheet cake that’s easier to transport and serve. | 35–40 minutes |
| 24 cupcakes | Perfect for birthdays, parties, and lunchboxes. | 18–22 minutes |
| 10–12 cup Bundt pan | A beautiful everyday cake with less decorating. | 50–60 minutes |
*Baking times are approximate. Always check for doneness using the visual cues in this guide, as ovens and pans can vary.
Do I Need to Change the Frosting?
No. The full batch of frosting is ideal for the original three-layer cake. If you’re making a 9×13-inch sheet cake or cupcakes, you’ll likely have a little frosting left over—which is never a bad thing. For a two-layer cake, the same amount creates extra-generous filling and coverage, or you can reduce the frosting by about one-quarter if you prefer a thinner finish.
Note: No matter which pan you choose, avoid filling it more than about two-thirds full. That gives the cake enough room to rise evenly without overflowing.
The takeaway: You don’t need special pans to enjoy this recipe. Whether you bake it as a towering layer cake, an easy sheet cake, cupcakes, or a Bundt cake, the same rich chocolate flavor and ultra-moist texture shine through.
Frequently Asked Questions
Why is my Matilda Cake batter so thin?
That’s exactly how this batter should look. The combination of buttermilk and hot coffee creates a smooth, pourable batter that fully hydrates the cocoa powder. Although it may seem thinner than a traditional cake batter, that extra moisture is one of the reasons the finished cake bakes up so soft, tender, and beautifully moist. Resist the temptation to add more flour.
Will the cake taste like coffee?
No. Coffee simply enhances the chocolate flavor without making the cake taste like coffee. Think of it as a flavor booster rather than a noticeable ingredient. If you prefer not to use coffee, hot water works perfectly well, although the chocolate flavor will be slightly less intense.
Can I make this as a two-layer cake?
Yes. Divide the batter evenly between two 9-inch round cake pans instead of three 8-inch pans. Because the layers will be thicker, they’ll usually need a few extra minutes in the oven. Start checking for doneness a little earlier than you think you’ll need to and rely on the visual cues rather than the timer alone.
Can I make Matilda Cake ahead of time?
Absolutely. In fact, it’s one of the best cakes to prepare in advance. The chocolate flavor becomes deeper and the crumb even more cohesive after resting overnight. You can bake the layers one day ahead or assemble the entire cake the day before serving for beautifully clean slices and even better flavor.
How do I get clean bakery-style slices?
Refrigerate the frosted cake for about 20 minutes before slicing. Use a long, sharp knife dipped in hot water and wiped dry between every cut. For the best texture, let each slice sit at room temperature for 10 to 15 minutes before serving so the buttercream softens and the chocolate flavor fully opens up.
Can I freeze leftover Matilda Cake?
Yes. Individual slices freeze especially well for up to 2 months. Wrap each slice tightly in plastic wrap and place it in a freezer-safe container. Thaw overnight in the refrigerator, then let it come to room temperature before serving for the softest crumb and creamiest frosting.
Does Matilda Cake taste better the next day?
Many bakers think so. As the cake rests, moisture redistributes throughout the layers and the chocolate flavor becomes more rounded and cohesive. If you’re baking for a celebration, making the cake the day before is one of the easiest ways to achieve an even better result.
Still have a question? Leave it in the comments below. If it helps other readers bake an even better Matilda Cake, we’ll happily answer it and continue improving this guide.
More Cakes Worth Baking
If this Matilda Cake reminded you how rewarding homemade baking can be, you are already building the skills behind beautiful celebration cakes. Here are a few recipes that continue that same journey with new flavors, textures, and baking styles.
Not Sure What to Bake Next?
- Love celebration cakes? Start with Strawberry Cake.
- Craving more chocolate? Try German Chocolate Cake.
- Want something easier? Make Blueberry Cream Cheese Bars.
More Bakery-Style Layer Cakes
- Lemon Cake — Bright citrus layers with a soft, buttery crumb that feel fresh, elegant, and perfect for spring or summer celebrations.
- Strawberry Cake — Tender cake filled with fresh strawberry flavor and creamy frosting for a colorful celebration centerpiece.
- Carrot Cake — Wonderfully moist spice cake finished with rich cream cheese frosting and plenty of homemade comfort.
- Italian Cream Cake — A Southern favorite layered with toasted pecans, coconut, and silky cream cheese frosting.
If Chocolate Is Always the Right Answer
- German Chocolate Cake — Rich chocolate layers paired with a signature coconut-pecan filling for an unforgettable celebration cake.
- Chocolate Cupcakes — Everything you love about chocolate layer cake in an easy, individually portioned dessert.
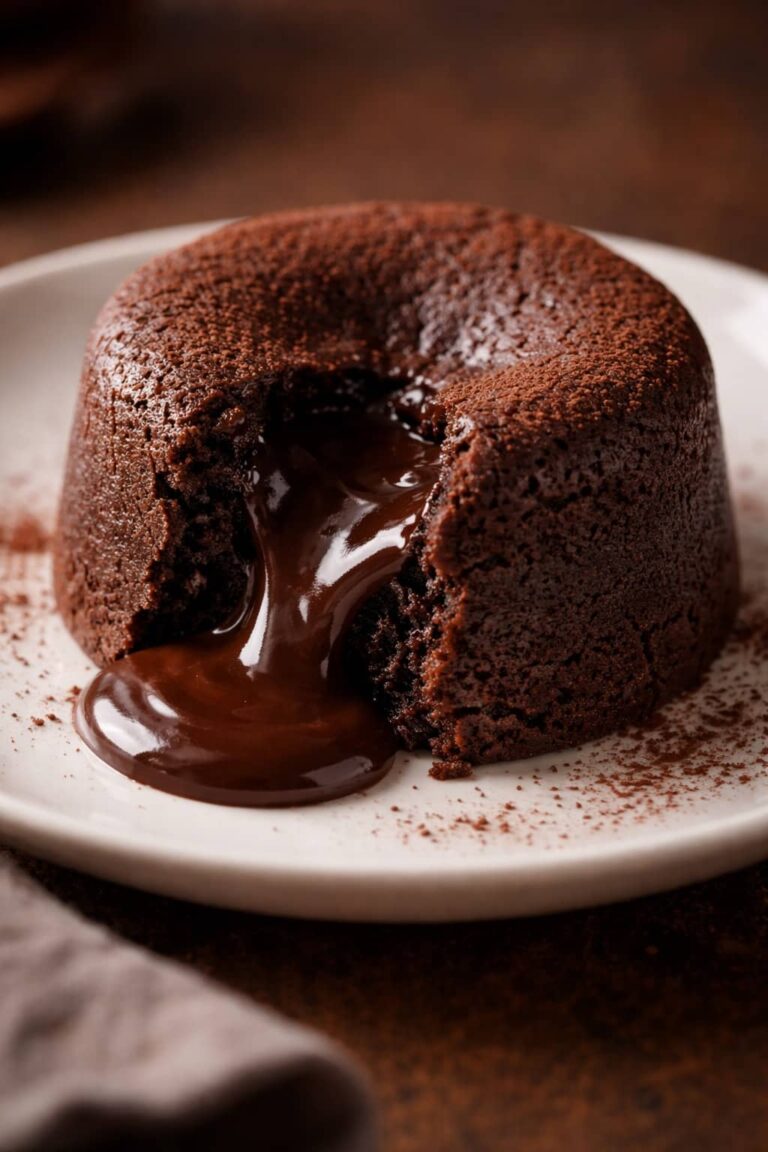
- Chocolate Lava Cake — A restaurant-worthy dessert with a warm molten chocolate center.
- Flourless Chocolate Cake — Intensely rich, naturally gluten-free, and wonderfully fudgy.
Planning Another Special Occasion?
- Red Velvet Cake — Velvety cocoa cake paired with tangy cream cheese frosting for a timeless classic.
- Boston Cream Pie — Soft sponge cake layered with silky pastry cream and finished with glossy chocolate ganache.
- Hummingbird Cake — A moist Southern cake filled with bananas, pineapple, pecans, and warm spices.
Looking for Something Simpler?
- Blueberry Cream Cheese Bars — Creamy cheesecake-style bars topped with juicy blueberries.
- Peach Cobbler — Warm baked peaches beneath a buttery golden topping that tastes like pure comfort.
- Brownie Cookies — Crackly on the outside, fudgy in the center, and perfect when you cannot choose between brownies and cookies.
BDV Editor’s Pick: If you loved the dramatic layers and rich chocolate flavor of this Matilda Cake, make German Chocolate Cake next. You will learn a completely different filling technique while creating another unforgettable celebration cake.
Every recipe teaches a new skill. The techniques you practiced here—building stable layers, recognizing visual baking cues, and working confidently with frosting—will make every cake above feel a little easier. That is one of the most rewarding parts of baking from scratch.
Why This Recipe Is Worth Saving
- Bakery-style results at home — Three tall chocolate layers with a soft, ultra-moist crumb and generous chocolate frosting.
- Easy techniques with dependable results — Every step is designed to help home bakers create a beautiful layer cake with confidence.
- Perfect for every celebration — A wonderful choice for birthdays, holidays, dinner parties, or anytime only a great chocolate cake will do.
- Even better the next day — The chocolate flavor deepens as the cake rests, making leftovers every bit as delicious.
- A recipe you’ll use for years — Once you’ve mastered this cake, many other homemade layer cakes will feel much easier to bake.
Some cakes are made once and forgotten. Others become the recipe friends request, the one family members hope you’ll bring to every celebration, and the one you know will never disappoint. This Matilda Cake has everything it takes to become one of those recipes.
Final Thoughts
Some desserts are simply delicious. Others become part of birthdays, family traditions, holiday tables, and the moments people remember long after the last slice is gone. That’s exactly the kind of cake this Matilda Cake was meant to be.
If you bake this recipe, I’d genuinely love to hear how it turned out. Did you make it for a special celebration, or simply because you were craving an unforgettable chocolate cake? Leave a comment below and share your experience—it might even help inspire the next baker who stops by.
Wishing you plenty of happy moments in the kitchen and many homemade cakes worth celebrating.
Before You Jump to the Recipe
If this is your first time baking a tall chocolate layer cake, take one last look at the visual doneness cues before you begin. The biggest secret to an exceptionally moist Matilda Cake isn’t baking it longer—it’s pulling it from the oven while a toothpick still comes out with a few moist crumbs. Trust the cake more than the timer, and you’ll be rewarded with soft, bakery-style layers every time.

Matilda Cake
This Matilda Cake recipe features three ultra-moist chocolate cake layers filled and frosted with rich, silky chocolate buttercream. Made with buttermilk, oil, cocoa powder, and hot coffee for exceptional moisture and deep chocolate flavor, it’s the perfect bakery-style chocolate cake for birthdays, holidays, and special celebrations.
Ingredients
For the Chocolate Cake
- 2½ cups (315 g) all-purpose flour
- 2½ cups (500 g) granulated sugar
- 1 cup (85 g) natural unsweetened cocoa powder
- 2½ teaspoons baking powder
- 1½ teaspoons baking soda
- 1 teaspoon fine salt
- 1 cup (240 ml) buttermilk, room temperature
- 1 cup (240 ml) neutral oil (such as vegetable or canola)
- 4 large eggs, room temperature
- 2 teaspoons vanilla extract
- 1 cup (240 ml) hot brewed coffee (or hot water)
For the Chocolate Buttercream
- 1½ cups (340 g) unsalted butter, softened
- 5 cups (600 g) powdered sugar
- 1 cup (85 g) unsweetened cocoa powder
- 4 ounces (115 g) dark chocolate (60–70% cocoa), melted and cooled slightly
- ½ cup (120 ml) heavy cream, plus more if needed
- 2 teaspoons vanilla extract
- ½ teaspoon fine salt
Instructions
- Prepare the pans and oven.
Preheat the oven to 350°F (175°C). Grease three 8-inch round cake pans, line the bottoms with parchment paper, then lightly grease the parchment. - Mix the dry ingredients.
Whisk together the flour, sugar, cocoa powder, baking powder, baking soda, and salt until evenly combined. - Mix the wet ingredients.
In a separate bowl, whisk together the buttermilk, oil, eggs, and vanilla until smooth. Add to the dry ingredients and mix just until combined. Slowly whisk in the hot coffee until the batter is smooth and pourable. Do not overmix. - Bake the cake layers.
Divide the batter evenly between the prepared pans. Bake for 24–28 minutes, or until a toothpick inserted into the center comes out with a few moist crumbs. Cool in the pans for 15 minutes, then transfer to a wire rack and cool completely. - Make the chocolate buttercream.
Beat the butter until light and fluffy. Gradually beat in the powdered sugar, cocoa powder, heavy cream, vanilla, and salt. Mix in the cooled melted chocolate and beat for another 2–3 minutes until smooth and spreadable. - Assemble the cake.
Place one cake layer on a serving plate and spread about 1 cup of buttercream over the top. Repeat with the second layer. Place the final layer upside down for a flat top. - Crumb coat the cake.
Spread a thin layer of buttercream over the top and sides to trap loose crumbs. Refrigerate for 15–20 minutes until firm. - Frost and decorate.
Cover the cake with the remaining buttercream, creating soft spatula swirls for a rustic bakery-style finish. Decorate with chocolate curls, shaved chocolate, chopped chocolate, or a light dusting of cocoa powder if desired. - Chill and serve.
For the cleanest slices, refrigerate the cake for 20–30 minutes before cutting. Slice with a hot knife, wiping it clean between cuts. Let the cake stand at room temperature for 10–15 minutes before serving for the best flavor and texture.
Notes
- Measure accurately: For the most consistent results, weigh the flour and cocoa powder with a digital kitchen scale whenever possible.
- Use room-temperature ingredients: Buttermilk, eggs, and butter blend more smoothly, creating a lighter, more even cake crumb.
- Don’t worry about the thin batter: After adding the hot coffee, the batter will look much thinner than typical cake batter. This is normal and helps create the signature ultra-moist texture.
- Don’t overbake: Start checking the cakes at 24 minutes. A toothpick should come out with a few moist crumbs, not completely clean.
- Cool completely before frosting: Even slightly warm cake layers can cause the buttercream to soften and slide.
- Divide the buttercream before assembling: Reserve about 1 cup for each filling layer, a thin amount for the crumb coat, and the remaining buttercream for the final coat.
- For the best flavor, make it a day ahead: The chocolate flavor deepens and the crumb becomes even softer after resting overnight.
- Storage: Store covered at room temperature for up to 1 day or refrigerate for up to 5 days. Bring to room temperature before serving. Unfrosted layers or individual slices can be frozen for up to 2 months.
Nutrition Information:
Yield: 12 slices Serving Size: 1 sliceAmount Per Serving: Calories: 780Total Fat: 42gSaturated Fat: 19gCarbohydrates: 97gFiber: 5gSugar: 73gProtein: 8g
Nutrition information is provided as an estimate only and may vary based on specific ingredients, brands, and portion sizes used. This information should not be considered medical or nutritional advice.
12 Sweet Favorites — Yours, Free 🍰
Tiramisù, no-bake cheesecake, the perfect chocolate chip cookie & 9 more reader-loved desserts — gathered into one beautiful free recipe book. From my kitchen to yours.
No spam, just sweet things. Unsubscribe anytime.