Pumpkin Pie Recipe with Creamy Spiced Filling and Butter Crust
This pumpkin pie recipe bakes a smooth, warmly spiced pumpkin custard inside a golden butter pastry shell. Heavy cream and an extra egg yolk give the filling its rich character, while the chilled slice stays tender enough to yield easily to a fork.

There is something welcoming about a plain pumpkin pie on an autumn table: a crimped edge, the scent of cinnamon, and a pale spoonful of cream beside that warm orange filling. It fits the slower end of a holiday meal, when dessert can be brought out without another pan going into the oven.
12 Sweet Favorites — Yours, Free 🍰
Tiramisù, no-bake cheesecake, the perfect chocolate chip cookie & 9 more reader-loved desserts — gathered into one beautiful free recipe book. From my kitchen to yours.
No spam, just sweet things. Unsubscribe anytime.Keep this pumpkin pie recipe for the separate crust, custard and chilling cues. A dry pastry base, a gently set center and a fully cold pie each tell you something different. Planning those stages the day before leaves the serving day for cutting neat wedges and whipping a little vanilla cream.
Pumpkin Pie Recipe at a Glance
This pumpkin pie recipe makes one single-crust pie with a baked pumpkin custard filling. The pastry holds a soft, chilled center; it has a different structure from a cream-cheese cheesecake or a crustless pumpkin dessert. Allow a full day-before baking window when possible, because the rests and final chill are part of the recipe.
| Recipe detail | What to plan |
|---|---|
| Course and cuisine | American dessert |
| Method | Homemade butter pastry, partial blind bake, unheated pumpkin custard mixture baked in the shell, full refrigeration |
| Texture | Tender butter pastry and a creamy, sliceable cold custard |
| Flavor | Pumpkin, mixed brown and white sugars, vanilla, cinnamon, ginger, nutmeg and clove |
| Difficulty | Moderate: pastry shaping, blind baking and custard-doneness judgment |
| Active preparation | About 35 minutes |
| Dough rests | 60 minutes as a disk plus 30 minutes in the pan |
| Oven time | About 75-100 minutes combined: 25-33 minutes shell plus 50-65 minutes filling |
| Initial cooling | Plan 90 minutes; refrigerate no later than 2 hours after baking |
| Final refrigeration | At least 4 hours and until fully cold; overnight preferred |
| Total time | About 8 hours 50 minutes to 9 hours 15 minutes; brief dough warm-up, oven adjustment or longer chill can extend this |
| Yield and serving | One 9-inch pie, 8 chilled wedges |
| Pan | 9-inch metal pie pan, about 1 1/2 inches deep; preferably 4 1/2-5 cups empty-rim capacity |
| Oven | Conventional/static, lower-third rack; 375 F / 190 C shell, then 350 F / 175 C filling |
| Best for | A planned fall or Thanksgiving dessert with day-before baking and refrigerator space |
| Make-ahead and finishing | Bake the day before; add optional vanilla whipped cream at serving |
| Allergens | Wheat, milk and eggs |
Why This Pumpkin Pie Recipe Works
The crust and filling in this pumpkin pie recipe need different kinds of attention. Giving the shell its own short bake creates a dry starting surface, while a gentler second bake lets the custard set without waiting for the pastry to cook from raw.
- A separate start for the pastry. The weighted prebake supports the sides, and the brief unweighted bake dries the base before it meets the liquid filling. That gives you a clear crust checkpoint before the custard is involved.
- Richness without a starch-thickened filling. Heavy cream, two eggs and an extra yolk make a creamy pumpkin custard. There is no flour or cornstarch in the filling, so the texture depends on careful baking and a complete cold rest.
- Spice with a clear pumpkin center. Cinnamon leads, with smaller amounts of ginger, nutmeg and clove. Brown sugar contributes molasses flavor, while the white sugar supplies part of the sweetness without adding more of that darker note.
- A modest finish. The optional vanilla cream for this pumpkin pie recipe is added by the dollop, leaving the pumpkin and pastry visible and keeping the filling itself unchanged.
Why You’ll Love This Make-Ahead Pumpkin Pie Recipe
Choose this pumpkin pie recipe when you want a traditional pastry dessert and can give it time to chill. The filling is mixed by hand, but making and prebaking the crust calls for more attention than a quick stir-and-bake dessert.
- For a dessert made before the gathering. Bake and refrigerate the pie the day before, then finish it shortly before serving. That keeps the filled-pie bake out of the busiest part of the meal.
- For people who enjoy a cold, creamy slice. The intended serving texture is chilled custard with a tender pastry edge. It suits a planned dessert course more readily than a last-minute warm pudding.
- For a small, clear serving plan. One pie makes eight wedges, and the optional cream makes eight modest dollops. You can serve the slices plain or let each person choose a little cream.
- For a kitchen with time and cold space. You will need room for a dough disk, a fitted shell and the finished pie at different stages. The long waits in this pumpkin pie recipe are mostly hands-off, but they still belong in the schedule.
If you want the pumpkin custard without rolling or supporting a pastry shell, crustless pumpkin pie is a useful alternative. It has its own ingredients and baking method, so follow that recipe rather than removing the crust from this pumpkin pie recipe and keeping the same oven schedule.
The Science of Pumpkin Custard and Butter Pastry
Three changes govern the texture of this pumpkin pie recipe: butter behaves differently as it warms, eggs form a custard as they heat, and moisture moves between the filling and pastry. Understanding those changes helps you decide when to pause, when to keep baking and when to stop.
Cold Butter and Tender Pastry
The pastry in this pumpkin pie recipe starts with small pieces of cold butter, which keep the mixture uneven rather than turning it into a smooth paste. During baking, those pockets contribute separation in the dough, while restrained mixing limits the toughness that comes from working hydrated flour too much.
For this pumpkin pie recipe, add water only until the dough holds when squeezed. More water may make the dough seem easier to gather at first, but it also gives the flour more moisture to absorb. The useful stopping point is cohesion with visible butter pieces, followed by the refrigerator rest.
Egg Proteins and a Gentle Custard Set
As the filling for this pumpkin pie recipe heats, egg proteins form a network that holds water and pumpkin solids together. Continued heating tightens that network; pushing a custard toward a rigid hot center can produce a firmer texture, cracking or moisture release.
The extra yolk and cream bring richness, but they do not make the custard immune to overbaking. Use the center cues in this pumpkin pie recipe together, then let cooling and refrigeration finish the change from a warm, delicate filling to a cold slice.
Moisture at the Pastry and Custard Boundary
Liquid pumpkin filling supplies moisture while it bakes, so a raw pastry base and an egg-rich custard do not necessarily finish at the same moment. The partial shell bake in this pumpkin pie recipe gives the pastry a chance to hold its shape and lose surface moisture first.
For this pumpkin pie recipe, covering the pie while warm can also work against the pastry: steam condenses inside the wrapping and settles back onto the surface. Let steam escape, transfer the pie to the refrigerator within the stated time, and cover it once cold. The crust may still soften during storage; a longer custard bake is not a remedy for that.
The Ingredients Behind This Spiced Pumpkin Pie Recipe
Measure the crust, pumpkin filling and optional vanilla cream separately for this pumpkin pie recipe. Salt, sugar, vanilla and cream appear in different components, so keeping those small bowls distinct helps prevent an extra amount from finding its way into the wrong mixture.

Ingredient List
The butter crust and spiced filling are the two main components of this pumpkin pie recipe. Prepare the vanilla whipped cream only if you want a topping, and keep its cream, sugar and vanilla separate until serving day.
Crust
- 1 1/4 cups (150 g) all-purpose flour, plus a little for rolling
- 1/2 cup (113 g) unsalted butter, cold and cut into cubes
- 1 teaspoon (4 g) granulated sugar
- 1/2 teaspoon fine table salt
- 3-5 tablespoons (45-75 ml) ice water, added only as needed
Filling
- 1 can (15 ounces / 425 g) pure pumpkin puree, not sweetened pumpkin pie filling
- 3/4 cup (160 g) packed light brown sugar
- 1/4 cup (50 g) granulated sugar
- 2 large eggs, approximately 100 g without shells
- 1 large egg yolk, approximately 18 g
- 1 1/4 cups (300 ml, rounded US conversion) heavy whipping cream, about 36% fat
- 1 teaspoon (5 ml) pure vanilla extract
- 1 1/2 teaspoons ground cinnamon
- 1/2 teaspoon ground ginger
- 1/4 teaspoon ground nutmeg
- 1/8 teaspoon ground cloves
- 1/2 teaspoon fine table salt
Optional vanilla whipped cream
- 1/2 cup (120 ml) cold heavy whipping cream
- 1 tablespoon (8 g) confectioners’ sugar
- 1/2 teaspoon (2.5 ml) pure vanilla extract
Choose Puree, Cream and Spices Carefully
Use plain canned pumpkin puree for this pumpkin pie recipe. A can labeled pumpkin pie filling or pumpkin pie mix already contains sweeteners and seasonings, so it will not give you the same starting mixture.
Choose heavy whipping cream around 36% fat. The cream in this pumpkin pie recipe is measured by volume: 1 1/4 cups, or a rounded 300 ml. Evaporated milk, condensed milk and half-and-half have different compositions and should not replace it by the cup.
Use large eggs and a separate yolk. This pumpkin pie recipe uses two whole eggs and one yolk intentionally; a third whole egg adds white as well as yolk. The approximate shell-free weights are there for orientation, while the egg size and count remain the practical measures.
Weigh flour and pack the brown sugar. A lightly filled flour cup and a tightly packed one can hold very different amounts. For the rich pastry in this pumpkin pie recipe, the 150 g flour weight is especially useful; the brown sugar, unlike flour, is measured packed. Measure the four spices individually instead of assuming any pumpkin spice blend has the same balance.

Essential Tools for This Pumpkin Pie Recipe
Start with a metal pie pan that has enough depth for this pumpkin pie recipe. A 9-inch label alone does not tell you how much filling it holds, especially when comparing a full-size pan with a shallow disposable shell.
- Pan and oven. 9-inch metal pan about 1 1/2 inches deep, preferably 4 1/2-5 cups empty-rim capacity; conventional/static oven, lower-third rack; rimmed baking sheet.
- Measure and mix. Scale or cups and spoons, mixing bowl, pastry cutter or fingertips, whisk and spatula; optional hand mixer for cream.
- Roll and rest. Rolling pin, lightly floured work surface, wrap, refrigerator and space for the fitted pan.
- Support and check. Parchment and enough pie weights or dried beans to support base and sides; foil or pie shield; instant-read thermometer.
- Cool, cover and serve. Wire rack, cold-storage cover or wrap, knife and serving utensil; bowl and spoon for optional cream.
For this pumpkin pie recipe, check empty-pan capacity before lining it, then dry the pan completely. Once the pastry is in place, leave about 1/4 inch below the rim when filling. If the custard will not fit, do not pour it over the edge or assume a smaller pan can use the same baking time.
Check Your Pumpkin Pie Setup Before Mixing
Before starting this pumpkin pie recipe, check the things that are awkward to correct with soft dough or a warm shell in front of you. Pan fit, cold storage and enough pie weights matter more than having a perfectly styled work surface.
- Confirm the pan. Use the specified 9-inch metal pan, about 1 1/2 inches deep, with preferably 4 1/2-5 cups of empty-rim capacity.
- Clear a level refrigerator shelf. The fitted shell and baked pie both need room without tilting.
- Check the ingredients. Keep the butter cold and confirm plain puree, large eggs and heavy whipping cream before measuring.
- Gather parchment and weights. You need enough weights or dried beans to support the sides as well as the base.
- Plan the oven position. Use a conventional oven and lower-third rack, with room for the pie on a rimmed baking sheet.
- Choose the baking day. Include both dough rests and at least four hours of final refrigeration; allow longer if the pie is not fully cold.
Plan This Pumpkin Pie Recipe Around Serving Day
Start this pumpkin pie recipe the day before you intend to serve it whenever possible. For a same-day bake, allow roughly nine hours from mixing to a cold pie, with extra time if the dough needs to soften for rolling or the pie needs a longer chill.
| When | What happens | What must be ready |
|---|---|---|
| Day before, first work period | Mix the pastry and refrigerate the disk for 60 minutes. | The dough holds together, with small pieces of butter still visible. |
| After the first rest | Roll, fit and crimp; refrigerate the shell for 30 minutes. | The dough is rollable without cracking, then firm again in the pan. |
| Oven period | Prebake the shell, mix the filling and bake the filled pie. | Allow 25-33 minutes for the shell and 50-65 minutes for the filled pie; use the cues rather than the clock alone. |
| After baking | Plan about 90 minutes on the rack, then refrigerate. | Move it to the refrigerator no later than two hours after baking, even if slightly warm. |
| Overnight | Finish chilling, then keep covered once cold. | At least four hours of refrigeration and a fully cold, set pie. |
| Serving day | Whip the optional cream and cut eight wedges. | Keep the pie cold until close to serving; add cream to the portions being served. |

What to Expect from the Dough, Filling and Chilled Pie
The filling in this pumpkin pie recipe starts as a pourable mixture and becomes firmer in stages. A raw filling that flows, small butter flecks in the dough and a warm pie that feels delicate are all compatible with the intended result.
- Uneven pastry is normal. The mixed dough should contain small butter pieces, rather than looking perfectly smooth.
- The raw filling is fluid. It should pour into the shell; it is not supposed to hold a spoon upright before baking.
- Warm custard is softer than cold custard. Do not expect the pie to cut into stable wedges as soon as it leaves the oven.
- Chilling changes the slice. The fully cold filling should hold a cut face while remaining tender under a fork.
How to Make Pumpkin Pie from Crust to Chilled Slice
Make this pumpkin pie recipe in stages, keeping the pastry cold before its first bake and the custard gently mixed before its second. Have the filling ready near the end of prebaking so it can go into the warm shell without a long wait.
Make and Chill the Butter Pastry
Begin the crust for this pumpkin pie recipe by mixing the flour, crust sugar and salt in a bowl. Cut or rub in the cold cubed butter with a pastry cutter or your fingertips, leaving pea-size pieces and smaller flakes. Add 3 tablespoons of ice water and fold the mixture together; add more by teaspoons only until a squeezed handful holds.

Gather the dough into a disk without kneading it smooth, wrap it and refrigerate for 60 minutes. The dough for this pumpkin pie recipe can look crumbly before it is gathered; press a small handful first before adding more water to the whole bowl.

What you should see: An uneven dough with visible butter pieces that stays together when squeezed, without feeling like a smooth elastic ball.

Roll, Fit and Chill the Pie Shell
If the disk is too firm to roll without cracking, let it stand only until pliable, about 5-10 minutes as needed. For the single crust in this pumpkin pie recipe, roll on a lightly floured surface to a 12-13-inch round, approximately 1/8 inch thick. Lift it into the pie pan and ease it against the bottom and sides without stretching.

Trim, fold and crimp the edge at the rim. Refrigerate the fitted shell for 30 minutes. A shell that has become soft during shaping needs this rest before it meets the oven.
What you should see: Pastry lying comfortably against the pan, with a supported crimp and a firm, chilled surface before baking.

Prebake the Shell Until the Base Looks Dry
The crust bake for this pumpkin pie recipe begins at 375°F (190°C), with a rack in the lower third of a conventional oven. Set the chilled shell on a rimmed baking sheet. Line it with parchment and add enough pie weights or dried beans to support both the base and the sides.
Bake for 20-25 minutes, until the sides hold their shape. Carefully lift out the parchment and weights, then bake for another 5-8 minutes, until the base looks dry and lightly colored. If a bubble rises, gently flatten it with the back of a spoon rather than poking a hole that could leak filling.

What you should see: A pale golden, dry-looking base and sides that stay upright; the shell should not be deeply browned at this stage of the pumpkin pie recipe.

Whisk a Smooth Pumpkin Filling
For the filling in this pumpkin pie recipe, whisk the brown sugar, granulated sugar, filling salt and all four spices together, breaking up lumps. Mix in the pumpkin puree, eggs and yolk until smooth, then gently incorporate the cream and vanilla. Scrape around the bowl so no darker spice or pumpkin streaks remain.
Mix to combine rather than whipping air into the custard. If the filling for this pumpkin pie recipe is ready well before the shell, cover and refrigerate it instead of leaving the raw egg mixture out through the pastry rests.
What you should see: A uniformly colored filling that pours easily, with little foam across its surface.

Fill the Warm Shell and Bake Gently
For the filled bake in this pumpkin pie recipe, reduce the oven to 350°F (175°C). With the warm prebaked shell still on its baking sheet, pour in the filling, leaving about 1/4 inch of headroom. Shield the pastry rim with foil or a pie shield as it colors.

Bake for approximately 50-65 minutes, beginning your checks at 40-45 minutes. The outer filling should be set, while a central area about 3-4 inches across moves with a soft, cohesive wobble when the pan is gently nudged. A liquid wave moving across the filling means it needs more baking.
For this pumpkin pie recipe, check the center with a fine instant-read probe, keeping its tip away from the pan. Look for approximately 165-170°F (74-77°C) together with the visual cues. Do not extend the bake simply to make the whole surface rigid; the center will continue to firm as it cools.

What you should see: Set outer custard, possibly slightly raised, and a gently moving center that behaves as one soft area rather than sloshing liquid.

Cool on a Rack, Then Refrigerate
Place the pie on a wire rack and plan about 90 minutes of initial cooling. Refrigerate it no later than two hours after it leaves the oven, even if it still feels slightly warm; shorten that limit to one hour if the surroundings are above 90°F (32°C). Leave it uncovered or loosely tented at first so steam can escape, then cover it once cold.
Chill for at least four hours and until fully cold throughout, preferably overnight. The final refrigeration is part of this pumpkin pie recipe, not an optional pause before serving. Never leave the pie on the counter overnight.
What you should see: Steam no longer becoming trapped under a tight cover, followed by a completely cold pie with a filling that has settled; use the clock and refrigerator temperature as well as appearance.

Whip the Optional Vanilla Cream
To finish this pumpkin pie recipe with cream, wait until near serving time and whip the optional cold cream with its confectioners’ sugar and vanilla until it forms soft-medium peaks that hold a dollop. A hand mixer is convenient, but a whisk also works; stop before the cream becomes grainy.
What you should see: Smooth cream with a gently bending peak, enough to divide into eight modest spoonfuls.

Cut Eight Chilled Wedges
This pumpkin pie recipe makes eight wedges; cut the fully chilled pie, wiping the knife between cuts. Slide a serving utensil beneath each slice to support the pastry base, then add the optional cream just before serving.
What you should see: A clean orange cut face that holds as a wedge, with tender custard over a baked pastry base and no running filling.

Pumpkin Pie Doneness: Three Readiness Checks
The three useful stopping points in this pumpkin pie recipe answer different questions: is the shell ready to fill, is the custard ready to leave the oven, and is the pie ready to slice? A good result at one stage does not remove the need for the next.
| Stage | Evidence to use | What it tells you |
|---|---|---|
| Before filling | The pastry sides hold their shape and the base looks dry and pale golden. | The shell has had its own drying stage; dark browning is not the goal yet. |
| At the end of baking | Set outer custard; a cohesive 3-4-inch center wobble; center approximately 165-170°F (74-77°C). | The custard can leave the oven while still delicate. A liquid wave is different from this soft movement. |
| Before cutting | At least four hours in the refrigerator and fully cold throughout. | The pie has had time to develop the structure needed for wedges; chilling does not cook an underbaked liquid center. |
Insert a fine thermometer tip into the center without touching the metal underneath. A shallow or off-center reading can mislead you about the coolest part. A fine probe leaves only a small mark, a reasonable tradeoff for checking the center of this pumpkin pie recipe.


Expert Tips for This Pumpkin Pie Recipe
The most useful adjustments in this pumpkin pie recipe happen before a problem becomes permanent. Soft dough can be chilled, a dry patch can be assessed before adding more water, and a coloring rim can be shielded while the center finishes.
I used to wait for the center of a custard pie to look completely firm before taking it out of the oven. That extra reassurance often meant a firmer filling than I wanted. Learning to recognize a gentle, cohesive wobble helped me stop baking sooner and give the pie the chilling time it needed.
- Assess the crumbs, not just the bowl. The butter-rich dough in this pumpkin pie recipe can look loose even when a pressed handful holds. Testing that handful before adding water keeps you from treating every dry-looking crumb as a reason to wet the entire batch.
- Ease the pastry into the corners. Pulling it tightly over the pan makes the fit look neat for a moment, but it leaves the dough under tension. Lift and settle it instead, especially where the base meets the sides.
- Protect the rim independently. In this pumpkin pie recipe, the crust edge is exposed to heat while the custard center is still warming. Shield the part that is already colored rather than using rim color as the reason to stop baking the filling.
- Keep the wobble check gentle. A small nudge is enough to distinguish a cohesive center from a liquid wave. Repeatedly shaking the pan makes a delicate hot custard harder to judge and risks spilling it.
- Prepare for the cold hold before baking. Clear the refrigerator shelf while the oven is occupied. A warm pie should not sit out beyond its cooling window because there is nowhere level to put it.
Pumpkin Pie Mistakes and How to Respond
A crack in this pumpkin pie recipe is usually a texture or appearance problem, while a liquid center or excessive time at room temperature needs a different response. Use the symptom to decide what can still be adjusted; one photograph or surface mark cannot establish the cause with certainty.
| What you notice | Likely cause | Prevention | What to do now |
|---|---|---|---|
| Pastry sides shrink badly | Stretched dough, insufficient resting or inadequate support during prebaking. | Fit without pulling, keep both rests and support the sides with weights. | If the shell has collapsed too far to hold the filling, remake it before adding custard. |
| Base is soft or damp | The shell was still wet-looking before filling, or moisture softened it in storage. | Use the dry-base cue and avoid tight warm wrapping. | Do not overbake a set custard to chase a darker base; stored pastry may remain softer. |
| Center sends a liquid wave across the pie | The filling has not reached its baking endpoint. | Use set edges, cohesive movement and the center temperature together. | If still in the baking stage, continue baking and check again; refrigeration cannot cook raw filling. |
| Cracks or a grainier filling | Excess heat or baking until the hot center is rigid. | Begin checking early and stop at the combined doneness cues. | A small cream dollop can soften the appearance of a crack, but it cannot reverse overcooking. |
| Wet surface beneath the cover | Steam condensed inside tight wrapping. | Let steam escape and cover once cold, while still meeting the refrigeration deadline. | Remove the tight cover while the pie finishes cooling in the refrigerator; do not extend counter cooling. |
| Pie has been left out too long | The cooling or serving window was missed. | Track unrefrigerated time and have cold storage ready. | Do not use smell or appearance to decide it is safe; discard pie that exceeded the stated room-temperature limit. |
Beautiful Ways to Serve a Chilled Pumpkin Pie
Serve this pumpkin pie recipe fully chilled, when the filling can hold a neat wedge. A plain plate, a modest cream finish or the whole pie brought to the table each offers a different presentation without changing the dessert.
A Plain Slice That Shows the Custard
For a plain serving of this pumpkin pie recipe, place a cold wedge on a small white plate with the cut face turned outward. The orange custard and golden pastry already provide contrast, so a plain slice is especially useful when you want the pumpkin and spice to be the focus.

A Modest Dollop of Vanilla Cream
For a cream-topped serving of this pumpkin pie recipe, add one soft spoonful of the optional vanilla cream near the wider end of the wedge, leaving most of the filling visible. The cool cream adds a gentle dairy contrast to the spice; dividing the batch into eight modest dollops keeps the topping in proportion to the pie.

A Whole Pie for the Shared Table
Bring the chilled pie out close to dessert time, cut consistent wedges and offer the cream in a small bowl. This pumpkin pie recipe can be served plain to some guests and with cream to others, without topping leftovers that will return to the refrigerator.
Keep Pumpkin Pie Cold from Cooling to Leftovers
This pumpkin pie recipe contains eggs and cream, so cold storage belongs to both the cooling plan and the leftover plan. Keep the refrigerator at or below 40°F (4°C), and count time spent cooling, transporting and serving rather than treating each as a fresh allowance.
Cool Without Missing the Refrigeration Window
Plan about 90 minutes on a rack, then refrigerate the pie no later than two hours after baking. The FDA guidance for refrigerating pumpkin pie includes pumpkin pie among foods that need prompt refrigeration and recommends a refrigerator temperature of 40°F or below.
If the pie is still slightly warm at that deadline, let it continue cooling uncovered or loosely tented in the refrigerator. Iowa State University Extension’s advice on cooling and wrapping custard pies explains this approach. Cover once cold to protect the pie without trapping the initial steam.
Refrigerate the Pie and Add Cream at Serving
Keep the cold pie covered and use it within 3-4 days. For this pumpkin pie recipe, baking one day ahead is the preferred plan: it allows the full chill without asking the pastry to hold its first-day texture through several days of storage.
Finish this pumpkin pie recipe with freshly whipped cream on the slices you are serving. Keep total unrefrigerated exposure within two hours, or one hour when the temperature is above 90°F (32°C). For transport, keep the pie cold and level, and add cream at the destination; an insulated carrier does not give an unlimited unrefrigerated window.

Freeze Plain and Thaw in the Refrigerator
If you make this pumpkin pie recipe to freeze, chill the pie completely first, leave it plain and wrap it well; allow up to one month for quality. Thaw it overnight in the refrigerator and add fresh cream after thawing. Some surface moisture or pastry softening is possible, so choose a freshly chilled pie when the neatest texture is the priority.
Do not thaw the frozen pie on the counter. Reheating is unnecessary for its intended chilled presentation and will not restore overcooked custard or make an improperly stored pie safe.
What You Can Change in This Pumpkin Pie Recipe
Keep changes to this pumpkin pie recipe modest when you want to preserve its custard texture and timing. A darker brown sugar changes flavor; replacing dairy, eggs or dry sugar can change how the filling sets.
| Change | How to approach it | What changes |
|---|---|---|
| Dark brown sugar | Use the same 160 g weight in place of light brown sugar. | A deeper molasses flavor; the amount of dry sugar stays the same. |
| Purchased pastry | Choose one that fits the stated pan and capacity, and confirm its manufacturer permits the prebake method. | Preparation time, pastry behavior and nutrition differ. |
| Fresh pumpkin puree | Use a recipe written for fresh puree unless its moisture has been brought to a suitable consistency. | Fresh puree varies in water content; this recipe uses canned puree as written. |
| Evaporated or condensed milk | Keep the specified heavy cream here. | Different water, fat and sugar content means these are not simple cup-for-cup swaps. |
| Maple syrup, less sugar or no eggs | Choose a recipe designed for that change. | Liquid balance and custard structure change along with sweetness. |
| Different pan or gluten-free pastry | Use instructions written for that size or pastry. | Depth, support and baking behavior may differ; this oven schedule should not be assumed to transfer. |
For a pumpkin dessert with cream-cheese tang and a graham cracker base, choose pumpkin cheesecake. Its filling is built around cream cheese, so it is a more useful route than stirring cream cheese into this pumpkin pie recipe and hoping the same custard cues will apply.
Pumpkin Pie Questions Worth Answering
When planning this pumpkin pie recipe, keep the crust method, center cues and refrigeration needs together. The answers below apply to this cream-based, pastry-crust version.
Should I prebake the crust for this pumpkin pie?
Yes. This pumpkin pie recipe uses a partial blind bake before the filling goes in. Bake the weighted shell at 375°F (190°C), then remove the weights for a brief bake until the base looks dry and lightly colored; it should not be fully dark brown.
How much should pumpkin pie jiggle when it is done?
For this pumpkin pie recipe, the outer filling should be set while a central area roughly 3-4 inches across moves together with a gentle wobble. A liquid wave is different. Pair that movement with a center temperature around 165-170°F (74-77°C), rather than waiting for a rigid hot center.
Why did my pumpkin pie crack?
Overbaking is a common cause of cracks in this pumpkin pie recipe, especially when the pie stays in the oven until the center stops moving entirely. Check early and use the combined cues. A small crack does not automatically mean the pie is inedible, but topping it cannot undo an overcooked texture.
Can I use fresh pumpkin instead of canned puree?
Plain canned puree is the starting ingredient for this pumpkin pie recipe. Fresh puree can contain more water, and variety and preparation affect its consistency. Use a fresh-pumpkin recipe rather than assuming an equal-weight substitution will bake and set identically.
Can I replace the heavy cream with evaporated milk?
Keep the heavy whipping cream in this pumpkin pie recipe. Evaporated milk has a different fat and water balance, and sweetened condensed milk also brings substantial sugar. For either milk, use a recipe written around that ingredient.
Can I make pumpkin pie the day before serving?
Yes. This pumpkin pie recipe suits day-before preparation: bake it, follow the rack-cooling period and refrigerate overnight. Add the optional cream when serving. This gives the custard time to become fully cold and keeps the filled-pie bake out of your serving-day schedule.
Does homemade pumpkin pie need refrigeration?
Yes. The eggs and cream in this pumpkin pie recipe require refrigeration; refrigerate the pie within two hours of baking, even if it is still slightly warm, and keep it at or below 40°F (4°C). Leave it uncovered or loosely covered until cold, then cover it; do not cool it on the counter overnight.
Can I freeze this pumpkin pie?
Yes. You can freeze this pumpkin pie recipe after the pie is fully cold, without cream and wrapped well, for up to one month for quality. Thaw overnight in the refrigerator, then add fresh cream. Some moisture or crust softening can occur, so freezing is a convenience option rather than a promise of identical texture.
Keep Baking for Your Fall Dessert Table
After this pumpkin pie recipe, your next bake might follow the pastry, the pumpkin flavor or the occasion. Choose another pie for a different filling, a smaller pumpkin format for a change of presentation, or a more involved centerpiece when you want a new baking project.
Bake Another Classic Holiday Pie
Stay with a pastry shell and let the filling change the experience. Sweet potato keeps the creamy, spiced direction, while nuts, apples and vanilla custard bring different textures to a fall dessert table.
- Sweet Potato Pie. Roasted sweet potatoes give this spiced custard a different body and flavor inside butter pastry. Choose it when you enjoy the structure of a pumpkin pie but want another root-vegetable filling to compare.
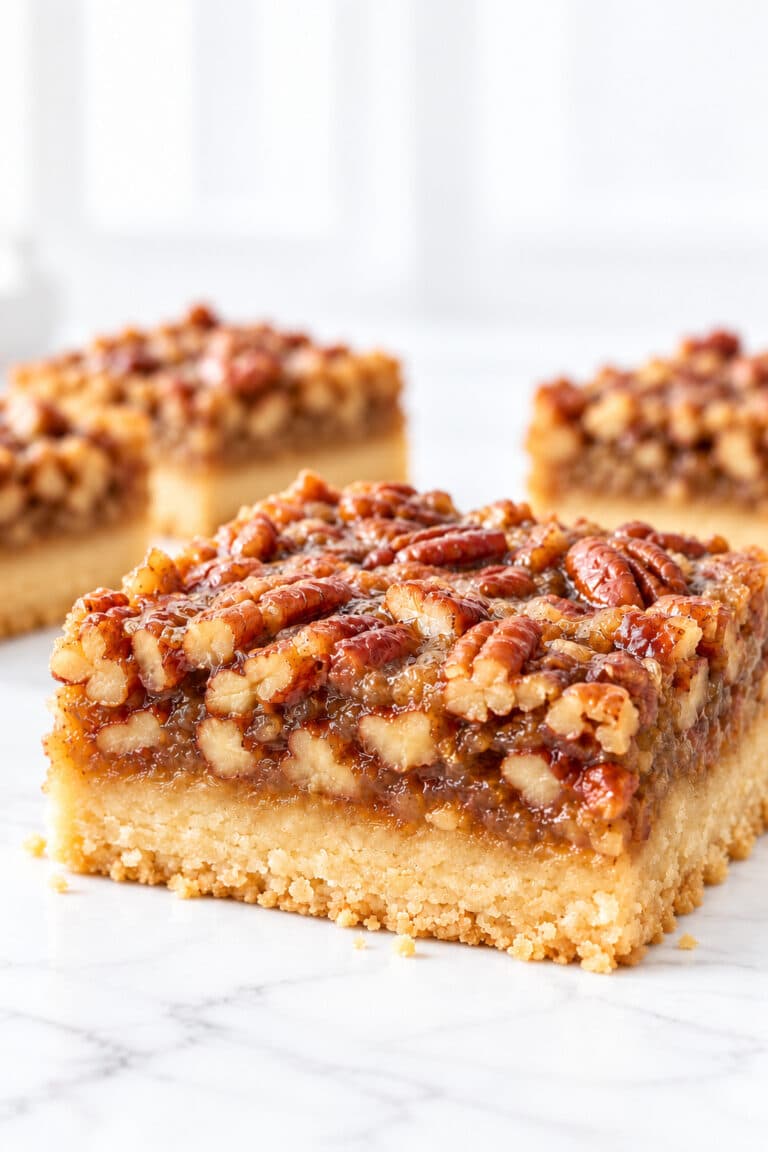
- Pecan Pie. Chopped pecans run through a sweet syrup filling, with pecan halves across the top. The toasted nuts add chew and crunch beside a smooth pumpkin custard, making it a contrasting second pie.
- Apple Crumble Pie. Recognizable cinnamon apple slices sit beneath buttery crumbs, with pastry underneath. It is a good next choice when you want fruit pieces and a crumb topping instead of another smooth filling.
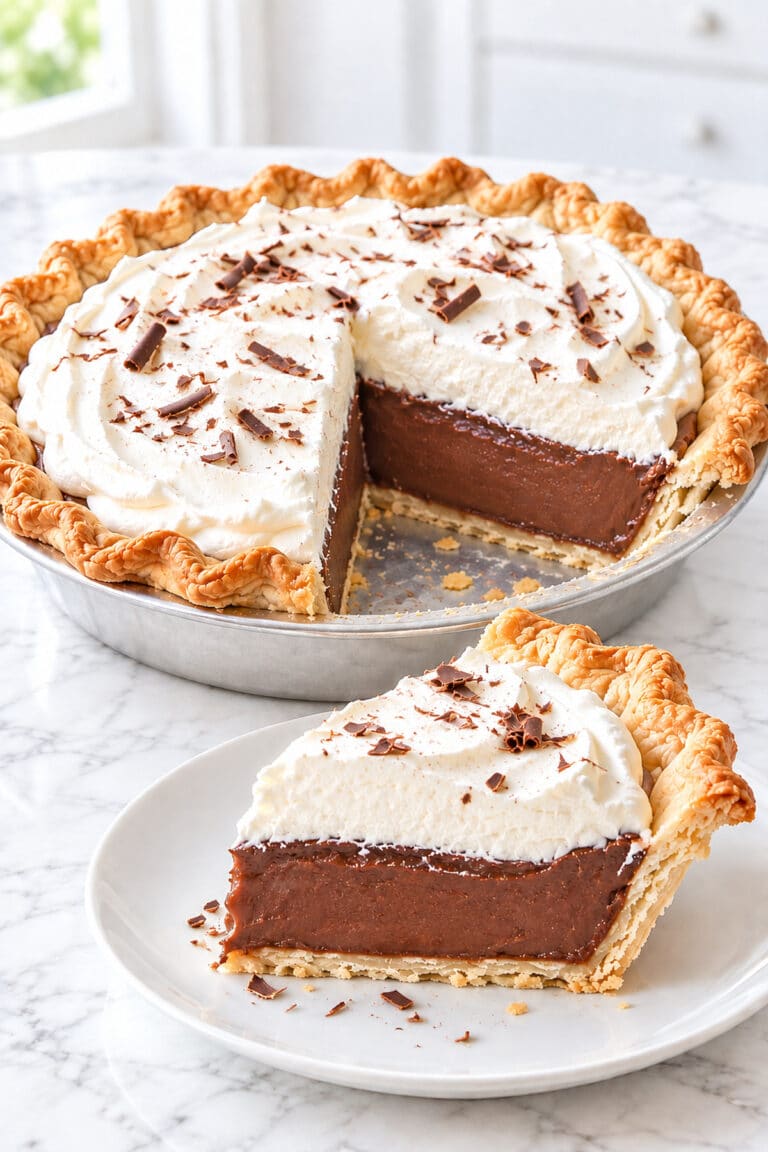
- Chess Pie. Vanilla, butter and fine cornmeal give this custard pie its own character beneath a thin golden top. Keep it in mind when the appeal is simple pastry and filling, with less emphasis on autumn spice.
Try Pumpkin in a Different Format
Keep pumpkin at the center and change what surrounds it. These recipes move through cream-cheese bars, shaped cookies, a baked-dish dessert and a streusel-topped cake, so the next choice can depend on how you want to mix, shape and serve.
- Pumpkin Cheesecake Bars. A graham cracker base supports one uniform pumpkin cream-cheese filling. Choose the bars for square portions and a tangier pumpkin dessert, with no rolled pastry shell to shape.
- Pumpkin Pie Cookies. A butter-cookie base holds a separately cooked pumpkin filling in individual pieces. The broad wells and exposed cookie rims make shaping the main change of pace from a full pie.
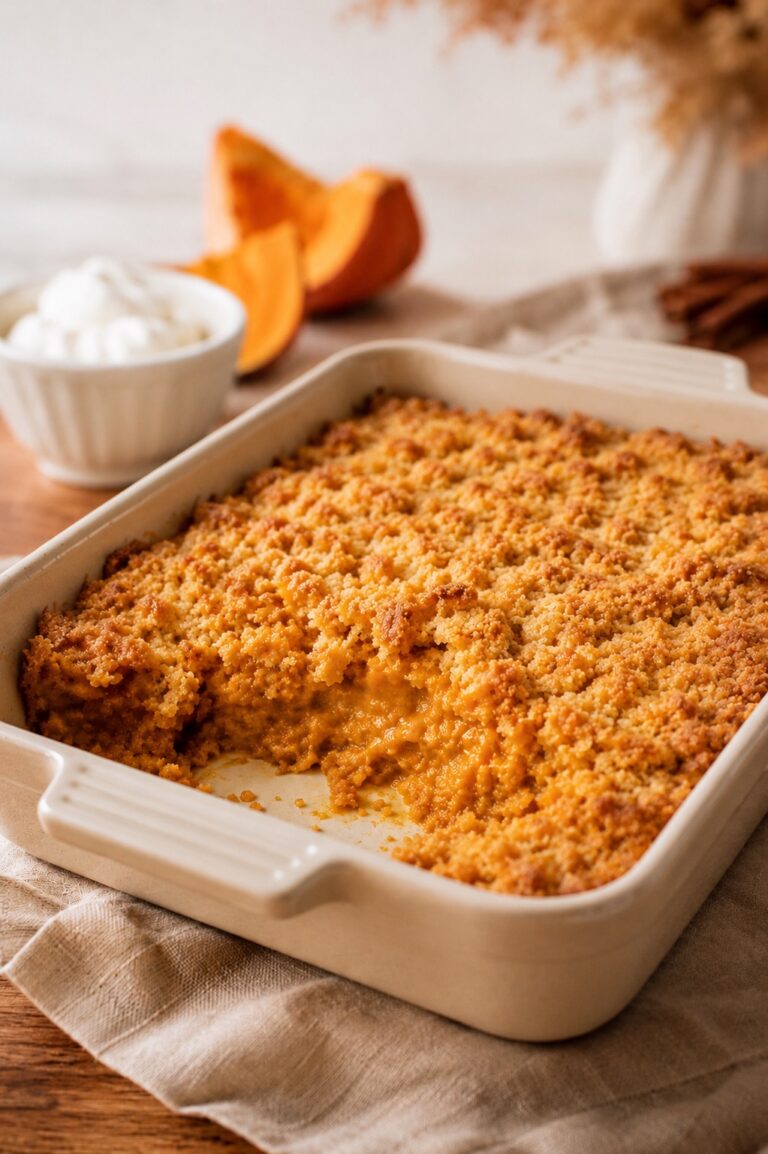
- Pumpkin Dump Cake. Pumpkin filling bakes beneath dry cake mix and butter, creating a different baked-dish dessert. Choose it when you want to assemble layers in a dish rather than roll and prebake pastry.
- Pumpkin Coffee Cake. Soft pumpkin cake sits under buttery cinnamon streusel. It moves the seasonal flavor into a cake-and-crumb texture that suits a morning coffee or an afternoon slice.
Plan Your Next Celebration Bake
Choose one of these when the making is part of the occasion. Rolling a sponge, working with yeast dough, frosting cake layers or adding a second pie gives you a different kind of project from the pumpkin pie recipe above.
- Pumpkin Roll. A thin pumpkin sponge wraps around vanilla cream-cheese filling to make a visible spiral. Choose this one when you want to practice a rolled presentation, with attention to the warm rolling stage.
- Pumpkin Cinnamon Rolls. Pumpkin yeast dough surrounds a cinnamon filling beneath cream-cheese glaze. It is a different pace of baking, with dough handling and proofing as the important judgments.
- Pumpkin Cake. Three pumpkin cake layers and vanilla cream-cheese frosting make a larger decorated centerpiece. Choose it when cooling, filling and finishing the layers are part of the celebration you have in mind.
- Chocolate Pecan Pie. Toasted pecans and semisweet chocolate pockets add texture to a sweet pastry-crust pie. It gives chocolate lovers a distinct companion to pumpkin without changing the pumpkin pie itself.
Why This Recipe Belongs in Your Recipe Box: Classic Pumpkin Pie
Keep this pumpkin pie recipe as a complete homemade version to return to each fall, with butter pastry, a cream-based filling and an optional vanilla finish in the same recipe.
- Homemade Pastry Included. The crust has its own ingredient amounts, shaping directions and partial blind bake. You can make the whole pie from flour and butter without finding a separate pastry recipe or guessing whether a purchased shell will fit.
- A Familiar Pumpkin-and-Spice Balance. One 15-ounce can of plain puree and individually measured cinnamon, ginger, nutmeg and cloves give this pumpkin pie recipe a consistent starting point when you bring it back to the table next autumn.
- Pan Details You Can Return To. The diameter, depth, capacity and filling headroom are specified together. Those details are useful when replacing an old pie pan or deciding whether the pan already in your cupboard can hold this filling.
- A Smooth Slice Beside Fruit or Nuts. Creamy pumpkin custard brings a softer texture to a dessert table that also has apple pie or pecan pie. The single pastry crust keeps it a classic pie rather than another cake or cheesecake.
- Two Finishes from One Bake. Keep the pie plain and offer vanilla cream separately. Guests can choose their finish, and the remaining wedges can go back into cold storage without a topping that needs to hold overnight.
A Final Note on Homemade Pumpkin Pie
A cold wedge brings the textures of this pumpkin pie recipe into focus: smooth orange custard that yields to a fork, a thin butter-pastry base and a golden crimp at the back. Cinnamon leads the spice, with ginger, nutmeg and clove underneath.
Serve a slice plain to taste the pumpkin and pastry together, or add a small spoonful of vanilla cream for a cool, soft contrast. The filling stays visible either way, and an uneven fold in the crust gives each wedge its own handmade edge.
With this pumpkin pie recipe baked and chilled the day before, dessert can be eight simple slices shared after the meal. Bring out the cream just before serving and let the warm spices be the last flavor of an autumn dinner.

Pumpkin Pie Recipe with Creamy Spiced Filling and Butter Crust
A creamy pumpkin pie recipe with warm spices and a homemade butter crust. Partial blind baking helps the pastry base, and a full chill gives the custard time to set before slicing.
Ingredients
Crust
- 1 1/4 cups (150 g) all-purpose flour, plus a little for rolling
- 1/2 cup (113 g) unsalted butter, cold and cut into cubes
- 1 teaspoon (4 g) granulated sugar
- 1/2 teaspoon fine table salt
- 3-5 tablespoons (45-75 ml) ice water, added only as needed
Filling
- 1 can (15 ounces / 425 g) pure pumpkin puree, not sweetened pumpkin pie filling
- 3/4 cup (160 g) packed light brown sugar
- 1/4 cup (50 g) granulated sugar
- 2 large eggs, approximately 100 g without shells
- 1 large egg yolk, approximately 18 g
- 1 1/4 cups (300 ml, rounded US conversion) heavy whipping cream, about 36% fat
- 1 teaspoon (5 ml) pure vanilla extract
- 1 1/2 teaspoons ground cinnamon
- 1/2 teaspoon ground ginger
- 1/4 teaspoon ground nutmeg
- 1/8 teaspoon ground cloves
- 1/2 teaspoon fine table salt
Optional vanilla whipped cream
- 1/2 cup (120 ml) cold heavy whipping cream
- 1 tablespoon (8 g) confectioners' sugar
- 1/2 teaspoon (2.5 ml) pure vanilla extract
Instructions
- Make and chill the dough. Whisk the flour, 1 teaspoon sugar and 1/2 teaspoon salt. Cut in the cold butter until pea-size pieces remain. Add 3 tablespoons ice water, then more by the teaspoon, using only enough of the 3-5 tablespoons for the dough to hold when squeezed. Gather without kneading, flatten into a disk, wrap and refrigerate for 60 minutes.
- Roll and fit the crust. If too firm to roll, let the disk stand for 5-10 minutes. Roll on a lightly floured surface to a 12-13-inch circle about 1/8 inch thick. Fit into a 9-inch metal pie pan about 1 1/2 inches deep without stretching. Trim and crimp the rim, then refrigerate the fitted shell for 30 minutes.
- Partially blind bake. Heat a conventional oven to 375°F (190°C), with a rack in the lower third. Line the chilled shell with parchment and fill with pie weights or dried beans supporting both base and sides. Set on a rimmed baking sheet. Bake for 20-25 minutes, lift out parchment and weights, then bake for another 5-8 minutes until the base looks dry and pale. Do not prick holes in the crust.
- Mix the filling gently. While the shell bakes, stir the brown sugar, 1/4 cup granulated sugar, spices and remaining 1/2 teaspoon salt together. Mix in the pumpkin, eggs and yolk until smooth, then gently stir in the 1 1/4 cups cream and 1 teaspoon vanilla. Avoid whipping air into the mixture. Refrigerate the filling if it must wait.
- Fill and bake. Reduce the oven to 350°F (175°C). Pour the filling into the warm crust, leaving about 1/4 inch of headroom; do not overfill. Protect the pastry rim with foil or a pie shield. Bake on the baking sheet for 50-65 minutes, beginning checks at 40-45 minutes. The outside should be set and the central 3-4 inches should wobble gently as one area, without a liquid wave. A thermometer in the center, without touching the pan, should read 165-170°F (74-77°C). Do not wait for a completely firm hot center.
- Cool, then refrigerate. Place the pan on a wire rack for about 90 minutes. Refrigerate within 2 hours of leaving the oven, even if still slightly warm; refrigerate within 1 hour if the room is above 90°F (32°C). Keep loosely covered or uncovered while cooling in the refrigerator, then cover once cold. Chill for at least 4 hours, preferably overnight, before slicing.
- Whip the optional cream. Near serving time, whip the cold 1/2 cup cream with the confectioners' sugar and 1/2 teaspoon vanilla to soft-medium peaks. Divide into eight modest dollops.
- Slice and serve. Cut the cold pie into 8 wedges with a clean sharp knife, wiping the blade between cuts. Add the optional cream to individual slices just before serving. Return the remaining pie to the refrigerator promptly.
Notes
- Pan and portions. Use a 9-inch metal pan about 1 1/2 inches deep, preferably holding 4 1/2-5 US cups to the empty rim. Keep 1/4 inch of headroom above the filling. This recipe makes one pie and eight slices. Changing the number of slices does not change the pan, oven settings or baking time. A larger batch or different pan needs separate baking guidance.
- Time to plan. Allow about 9 hours 5 minutes from starting the dough to a chilled pie: 35 minutes preparation, about 90 minutes baking, and 7 hours additional time. Additional time includes 90 minutes dough chilling, about 90 minutes on the rack and at least 4 hours refrigerated. Actual combined oven time is 75-100 minutes, giving about 8 hours 50 minutes to 9 hours 15 minutes overall. Dough softening, oven recovery and overnight chilling can extend this.
- Ingredient choices. Use plain pumpkin puree, not sweetened pie filling. Dark brown sugar may replace the light brown sugar at the same 160 g weight for a stronger molasses flavor. Do not substitute condensed milk, evaporated milk, half-and-half or plant milk for the cream without a separately developed formula. Fresh puree, liquid sweeteners, reduced sugar, egg-free and gluten-free changes need separate guidance.
- Purchased pastry. A purchased pastry shell must fit the specified pan and filling volume. Follow its manufacturer's directions for partial blind baking. Its timing and nutrition will differ from the homemade crust.
- Storage and make ahead. Make the pie a day ahead and refrigerate at 40°F (4°C) or colder. Keep covered and use within 3-4 days. For best quality, freeze the fully cooled plain pie, well wrapped, for up to 1 month; thaw overnight in the refrigerator. Add whipped cream near serving. Do not cool or thaw overnight on the counter. Keep total time out of refrigeration within 2 hours, or 1 hour above 90°F (32°C).
- Nutrition estimate. Per slice, one eighth of the pie, without whipped cream. Values are approximate and vary with brands and portions. One of eight optional cream dollops adds about 55 calories. Extra flour used for rolling is not included.
Nutrition Information:
Yield: 8 Serving Size: 1 sliceAmount Per Serving: Calories: 445Total Fat: 27gSaturated Fat: 16.4gCholesterol: 143mgSodium: 330mgCarbohydrates: 46.8gFiber: 2.3gSugar: 29.2gProtein: 5.7g
Nutrition information is provided as an estimate only and may vary based on specific ingredients, brands, and portion sizes used. This information should not be considered medical or nutritional advice.
12 Sweet Favorites — Yours, Free 🍰
Tiramisù, no-bake cheesecake, the perfect chocolate chip cookie & 9 more reader-loved desserts — gathered into one beautiful free recipe book. From my kitchen to yours.
No spam, just sweet things. Unsubscribe anytime.