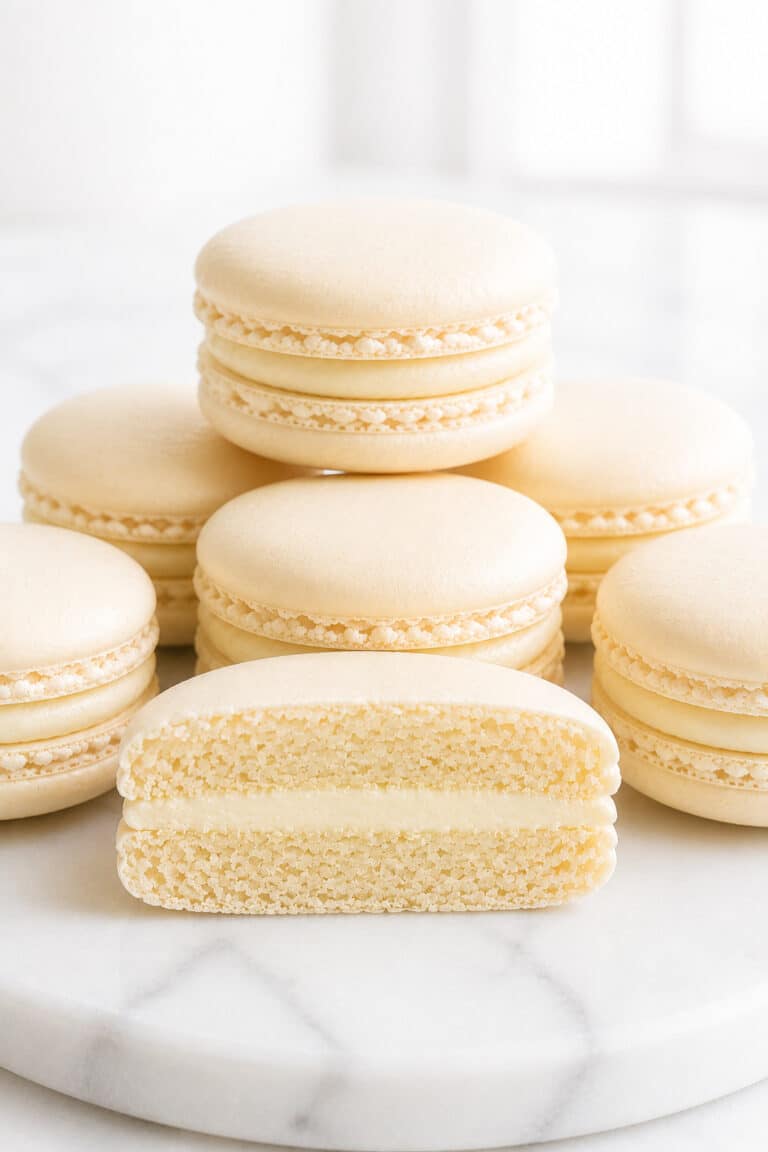
Spritz Cookies with Buttery Flavor and Delicate Shapes
🎁 FREE E-BOOK: 12 Sweet Favorites — reader-loved desserts in one beautiful recipe book.
Buttery, delicate spritz cookies have lightly crisp edges, a fine tender crumb, and little ridges that make a simple dough look beautifully finished. Vanilla keeps the flavor warm and familiar, with an optional touch of almond for a more fragrant batch.

A plate of homemade spritz cookies suits so many ordinary occasions: coffee with a friend, a little homemade gift, or something sweet to pass around after dinner. Their charm comes from the shapes and the butter flavor, so even a plain batch can feel thoughtfully made.
Keep this recipe close for the moments when the cookie press feels less cooperative than expected. Alongside the baking instructions, the dough guide helps you distinguish a cold, firm mixture from one that is too warm, so you can make a useful adjustment before adding flour or liquid.
In This Recipe
Spritz Cookies at a Glance
These spritz cookies are shaped directly onto bare metal with a cookie press and have a fine tender crumb once cool. Plan for the whole batch to pass through the oven in several rounds; the time for one tray is only part of the job.
| Detail | What to plan for |
|---|---|
| Texture | Delicately crisp edges, fine tender crumb after cooling |
| Flavor | Butter and vanilla; optional almond |
| Difficulty | Easy dough; cookie press technique needs attention |
| Prep Time | 25 minutes, including shaping |
| Bake Time per Tray | 6–10 minutes |
| Full-Batch Bake Time | Up to 30 minutes for 3 oven loads |
| Cooling Time | About 15 minutes for the final tray; 2 minutes on tray before rack |
| Total Time | About 1 hour 10 minutes with butter already softened |
| Yield | About 48 medium cookies; disk size changes the count |
| Serving Size | 1 cookie for recipe-card and nutrition calculations |
| Method | Cookie press; conventional oven baking |
| Equipment / Pan | Cookie press and two 13×18-inch light metal sheets |
| Oven | 375°F / 190°C; one sheet at a time, center rack |
| Chilling | No scheduled chill; brief corrective cooling only if dough is too warm |
| Make-Ahead | Bake ahead; store cooled cookies or freeze baked cookies |
| Best For | Cookie platters, small gifts, tea or coffee |
Why These Spritz Cookies Work
These spritz cookies balance a tender crumb with enough body to keep a pressed pattern. The dough and bake work together so the small shapes remain distinct while the finished bite stays delicate.
- Balanced proportions. Butter supplies tenderness, measured flour supports the shape, and the egg helps the dough hold together. Each ingredient has a clear role in a short, simple list.
- No added raising agents. Without baking powder or baking soda, the dough is not designed to puff into a thick cookie and blur the disc pattern.
- A workable consistency. A supple, cohesive dough can form small, recognizable shapes as it leaves the press. It does not need rolling, cutting, or another layer to define it.
- A pale bake. Light-golden edges and cooling preserve the fine finish. Deep browning is not needed to make these small cookies feel complete.

Why You’ll Love These Buttery Spritz Cookies
Spritz cookies suit bakers who enjoy a little shaping and want several attractive cookies from one dough. Once the press is dispensing evenly, a tray of repeated shapes comes together with a comfortable rhythm.
- Small portions for sharing. A few cookies fit beside coffee, while a handful can fill out a mixed plate without cutting larger desserts into portions.
- Several shapes, one bowl. Change the disc to give the batch a different look. A plain ring can be as appealing as a seasonal design.
- Less rolling and cutting. The dough goes into the press, so you do not need a floured rolling surface, a rolling pin, or a set of cutters.
- A simple finish. Leave the cookies plain or add light sprinkles before baking. There is no separate icing session to schedule afterward.
How Butter, Flour, and Egg Shape Spritz Cookies
The dough for spritz cookies needs to be flexible enough to move through a disc while keeping the outline it leaves behind. Three changes matter most: the condition of the butter, the balance of flour in the dough, and the way the cookies set during baking and cooling.
Butter needs to bend rather than flow. Cool, softened butter blends smoothly and gives the dough a workable consistency. Very cold butter makes the mixture resist the press; overly warm butter can leave it shiny and slack. A firm dough therefore needs a temperature check before a change to its ingredients.
Flour controls resistance as well as structure. The 270 g flour amount gives this dough its body. Extra flour can make pressing harder and the finished crumb drier. After adding it, stop mixing as soon as the dough is cohesive; prolonged mixing works against the tender texture you want.
The finished texture develops in two stages. In the oven, the egg and flour help the small shapes set. After baking, the butter-rich cookies firm as they cool. This is why a warm cookie can feel fragile even when its surface is set and its edges have reached a pale gold.
Ingredients for Tender, Well-Defined Spritz Cookies
For spritz cookies, use softened butter that still holds its shape, a room-temperature egg, and carefully measured flour. Those preparation details make the dough easier to judge than a broad instruction to use everything at room temperature.

Ingredient List
Gather the ingredients below before you begin mixing. The almond extract and sprinkles are optional; the butter, sugar, egg, vanilla, flour, and fine salt form the plain cookie dough.
- 1 cup (227 g) unsalted butter, softened but still cool
- 1/2 cup (100 g) granulated sugar
- 1 large egg (about 50 g without shell), at room temperature
- 1 teaspoon (5 ml) pure vanilla extract
- 1/4 teaspoon (1.25 ml) almond extract, optional
- 2 1/4 cups (270 g) all-purpose flour, spooned and leveled if measured by cups
- 1/4 teaspoon (about 1.5 g) fine salt
- 1 tablespoon (about 12 g) small oven-safe sprinkles, optional
Ingredient Notes
The butter should take a finger impression while keeping its shape, and its surface should look matte rather than oily. The egg should blend smoothly into the mixture, while pure vanilla provides the main aroma. Omit the almond extract if you prefer a straightforward vanilla cookie.
For flour, weighing 270 g is the clearest guide. If using cups, spoon the flour into the cup and level the surface rather than scooping and packing it. Use fine salt for the stated measure, and choose small oven-safe sprinkles that will sit lightly on the pressed shapes.
Spritz cookies call for a dough made specifically for the press. If you would rather roll out dough and use cutters, these classic sugar cookies offer that different approach without asking you to change the consistency of this dough.

Kitchen Tools for Shaping Spritz Cookies
For spritz cookies, a cookie press and two cool, unlined sheets are the important shaping setup. Keep the second sheet available while the first is in the oven, and leave room for a rack so the baked cookies can cool before you pack them.
- Accurate measuring: a kitchen scale, measuring cups, and measuring spoons for the flour, butter, sugar, and small flavoring amounts.
- Mixing: a large mixing bowl, a hand mixer or stand mixer with a paddle attachment, and a flexible spatula for scraping the bowl.
- Shaping: a cookie press with its matching discs, assembled according to the instructions for your model.
- Baking: two light-colored metal 13 × 18-inch baking sheets and a conventional oven. The sheets should be ungreased, unlined, dry, and cool; bake one sheet at a time on the center rack at 375°F (190°C).
- Cooling and transferring: a wire cooling rack and a thin cookie spatula for moving the delicate cookies after their brief tray rest.
Before You Press Your First Spritz Cookie
Before making spritz cookies, check the dough ingredients and pressing setup. A few small preparations make it easier to keep the batch moving without loading dough onto a warm or slippery sheet.
- The butter is softened but still cool, and the egg is at room temperature.
- Both baking sheets are clean, completely dry, cool to the touch, and free of grease or liners.
- The press is assembled with the correct disc and moving parts in place.
- The oven is preheated to 375°F (190°C), with room for one sheet on the center rack.
- A cooling rack and thin spatula are ready for the first baked tray.

Planning Three Trays of Spritz Cookies
For a batch of about 48 spritz cookies, allow three oven rounds of about 16 cookies each. Two sheets let you prepare the next round while the first bakes, but the sheet must cool completely before it receives more dough.
| Stage | Time or dependency | What needs to be ready |
|---|---|---|
| Mix and shape | About 25 minutes of preparation and shaping | Butter already softened; oven preheated before the first tray goes in. |
| Bake three rounds | 6–10 minutes per tray; allow up to 30 minutes for the full batch | One sheet in the oven at a time; the other remains available for shaping or cooling. |
| Reuse the first sheet | Only after the metal is cool to the touch | Do not press the final round onto a hot surface to save time. |
| Finish cooling | Allow about 15 minutes for the final tray, with 2 minutes on the sheet first | Every cookie must be completely cool before it goes into a closed container. |
Allow about 1 hour and 10 minutes for the complete batch with the butter already softened. Some shaping and cooling can overlap. Smaller discs produce more cookies and may require additional oven rounds, so the visible shape and the tray capacity matter more than a fixed count.
What to Expect from Spritz Cookie Dough
The dough for spritz cookies should be supple and cohesive rather than loose or pourable. The small baked cookies remain mostly pale, and their delicate texture becomes easier to judge after they have cooled.
- The dough holds together and keeps the outline left by the disc.
- The first few shapes may be uneven while the press begins dispensing consistently.
- Baked tops stay pale, with a little gold at the edges or underneath.
- Freshly baked cookies feel fragile; the cooled crumb is fine and tender.
How to Make Spritz Cookies
To make spritz cookies, work through mixing, the first few pressed shapes, and then baking in small rounds. Keep the dough supple and the sheets cool, using the cues below to decide when each stage is ready for the next.
1. Prepare the Oven, Trays, and Cookie Press
Preheat the conventional oven to 375°F (190°C) and place a rack in the center. Set out two ungreased, unlined, light-colored 13 × 18-inch metal sheets. Assemble the cookie press with a matching disc according to its instructions.
What you should see: The sheets are dry and cool to the touch, and the assembled press is ready to receive the dough.
2. Cream the Butter and Sugar
Beat 1 cup (227 g) softened butter with 1/2 cup (100 g) granulated sugar at medium speed for about 2 minutes, until evenly creamy and slightly lighter. Scrape the sides and bottom of the bowl. Stop before the mixture becomes very airy or greasy.
What you should see: A smooth, creamy mixture with enough body to hold soft ridges, rather than a shiny or slack paste.

3. Add the Egg and Extracts
Add 1 large egg, 1 teaspoon vanilla extract, and the optional 1/4 teaspoon almond extract. Mix until incorporated, then scrape the bowl again so no butter mixture remains hidden at the base.
What you should see: An evenly combined mixture without separate streaks of egg or unmixed butter.
4. Mix in the Flour and Salt
Combine 2 1/4 cups (270 g) all-purpose flour and 1/4 teaspoon fine salt, then add them at low speed. Stop when the last dry streaks disappear and the mixture forms a cohesive dough. Bring any flour at the bottom into the dough with the spatula.
What you should see: A supple dough that holds together without dry pockets, loose flour, or a greasy sheen.

5. Load the Press and Try the First Shapes
Fill the press with dough, avoiding large empty spaces in the barrel. Rest the base flat against the bare sheet, keep the press upright, and operate it as directed for your model. Lift straight up and try a few spritz cookies before filling the sheet. Medium shapes use around 13–14 g of dough each; a smaller disc will produce more cookies from the same batch.
What you should see: The dough comes through the disc, remains on the metal, and shows a recognizable outline. Uneven first shapes can be gathered back into the dough.

6. Check the Dough and Finish Pressing
If the dough is cold and difficult to move, let it soften gradually at room temperature. If it is visibly warm, shiny, and slack, cool it briefly, checking often until it is supple again. Replace a warm sheet with a cool one. Once the first shapes release cleanly, finish pressing, leaving about 1 inch between the edges.
What you should see: The press works with manageable pressure, and the deposited shapes hold their ridges on the sheet.
BDV Tip: A press that has not started dispensing evenly may produce a few incomplete shapes. Reuse those pieces rather than adding flour to the whole bowl because of the first attempt.

7. Decorate and Bake Until Lightly Golden
If desired, scatter the 1 tablespoon small oven-safe sprinkles lightly over the shaped cookies. Bake the spritz cookies one sheet at a time for 6–10 minutes, checking from 6 minutes. Remove the tray when the surfaces are set and the edges or bases first turn a pale gold.
What you should see: Mostly pale cookies with matte surfaces, visible pressed details, and light golden edges or undersides. The tops do not need to become brown.
8. Cool Before Serving or Storing
Leave the cookies on the sheet for 2 minutes, then use a thin spatula to transfer them to a wire rack. Let them cool completely before serving or packing, allowing about 15 minutes for the final tray. Cool each sheet fully before pressing another round onto it.
What you should see: The cookies can be lifted after the brief rest, then become firmer and easier to handle as they lose their warmth.
Pale Tops and Golden Edges: When Spritz Cookies Are Done
Spritz cookies are done when the surface looks set, the pattern remains distinct, and the edges or underside show the first light gold. Their pale tops are part of the intended appearance; deep, even browning can take the fine crumb past its delicate finish.
| Stage | Right cue | A reason to pause |
|---|---|---|
| In the oven | Matte, set tops and very lightly golden edges or bases | A shiny, visibly raw center needs more time; watch closely rather than relying on the clock alone. |
| After the 2-minute tray rest | A thin spatula can lift the cookie with support | A warm cookie is still fragile; lifting it roughly can break the edges. |
| Completely cool | Lightly crisp edges and a fine, tender crumb | A dark base or a dry, hard bite points toward too much browning; a noticeably floury crumb also warrants checking the flour measurement. |

Check one of the spritz cookies from the first tray after it has cooled. A small break should show a fine crumb rather than a moist, chewy center. Use that first round to judge how quickly your chosen disc shape reaches the light-golden stage in your oven.

How to Troubleshoot Spritz Cookie Press Problems
When spritz cookies will not press cleanly, first identify whether the dough stays inside the press or comes out but lifts away from the sheet. Those are different problems, and the useful first check is not always the flour.
With butter-rich cookie dough, I’ve learned to check the temperature before changing the ingredients. When the dough feels too firm, a little time at room temperature can be all it needs. That small pause helps preserve the balance of the recipe without adding unnecessary liquid.
| Check | What the problem looks like | What to do next |
|---|---|---|
| 1. The sheet | Dough comes out but will not stay on a lined, greasy, wet, or warm surface | Use bare, dry, ungreased metal that is cool to the touch; rest the press base flat against it. |
| 2. The dough temperature | Firm, cold dough resists the disc; warm dough looks greasy and loses definition | Let cold dough soften gradually. Briefly cool only dough that is too warm, stopping when it becomes supple. |
| 3. The press | The plunger does not advance properly or the first shapes are incomplete | Check assembly and disc fit against the instructions for your model; reuse a few uneven starting shapes. |
| 4. The flour measurement | Dough remains dry or crumbly at a workable temperature | Review how the 270 g flour was measured. Do not keep adding flour or liquid to solve a tray or mechanism problem. |

Stop rather than forcing a stubborn handle. If the dough remains unworkable after the sheet, temperature, assembly, and flour amount have been checked, the exact cause needs a closer look; repeated additions can move the whole batch farther from a usable consistency.
Expert Tips for Well-Defined Spritz Cookies
For well-defined spritz cookies, disc choice and the grouping of different shapes can make pressing and baking easier to control. These two decisions are especially helpful when a press includes several elaborate designs.
Begin with a simpler opening. A broad, uncomplicated disc gives the dough a less restricted path than a very fine design. If a supple dough struggles through an intricate disc, try a simpler shape before changing the mixture. This checks whether the shape itself is adding resistance.
Keep very different shapes in separate rounds. A cookie with narrow tips and one with a broader center may reach their best color at different moments. Grouping similar shapes on a tray makes it easier to judge the batch without overbrowning the smallest details while a larger shape finishes.
Mistakes That Blur Spritz Cookie Shapes
Small changes during measuring, mixing, or baking can affect both the pressed detail and the cooled bite of spritz cookies. The finished cookie often helps you identify which part of the preparation deserves attention next time.
| Mistake | What Happens | Why It Happens | How to Prevent or Fix It |
|---|---|---|---|
| Beating until the butter mixture is very airy or warm | The dough can become softer and the shapes less distinct | Excessive beating changes both aeration and the condition of the butter | Stop at creamy and slightly lighter, about 2 minutes; scrape the bowl instead of beating indefinitely. |
| Packing flour into the measuring cup | The dough resists pressing and the cooled cookie can taste dry | More flour enters the dough than the intended 270 g | Weigh the flour, or spoon it into the cup and level it; do not add more flour to a firm dough before checking temperature. |
| Continuing to mix after the flour disappears | The crumb can become firmer than intended | Extra mixing develops more structure in the dough | Use low speed and stop when the mixture is cohesive, finishing loose pockets with a spatula. |
| Waiting for the entire top to brown | The base can become dark and the delicate crumb dry | The small cookie continues browning while you wait for a color it does not need | Check from 6 minutes and use set tops with pale-gold edges or bases; an overbrowned cookie cannot be returned to a pale bake. |
Beautiful Ways to Serve Spritz Cookies
Let the shapes remain the focus when you serve spritz cookies. A little space around the cookies and a simple plate or box show their detail more clearly than a heavy covering of toppings.
A Mixed Cookie Platter
Arrange a loose group of plain or lightly sprinkled cookies beside jam-filled thumbprint cookies. The glossy centers add color while the different outlines make the platter feel varied. Keep the cookies in a shallow layer so the smallest edges are easy to lift without breaking.

A Gift Box with Protected Layers
Pack completely cooled spritz cookies in a rigid box, separating layers with food-safe paper. Leave enough room for their raised details instead of pressing down the lid. This makes a thoughtful hand-delivered gift, especially when you choose a few repeated shapes that nest comfortably together.

A Small Plate for Tea or Coffee
Serve a few spritz cookies on a plain saucer with coffee or tea. Their modest sweetness and butter-vanilla flavor suit an unhurried afternoon plate, and a simple arrangement leaves the pressed ridges visible. Keep the cookies away from splashes or steam while they wait to be served.
A Halloween Cookie Platter with Spritz Cookies
Little orange spritz flowers look lovely tucked between white ghosts, black bats, and cheerful jack-o’-lanterns. To recreate the platter pictured, use the spritz dough above for the small pressed flowers and a separate rolled sugar-cookie dough for the larger decorated shapes. The smooth icing and raised details come from royal icing applied in stages.

Plan ahead: Bake and flood the cookies one day, then add faces when the bases are completely dry. Allow up to 24 hours after the final details before bagging. This optional platter makes about 20–24 cut-out cookies, depending on cutter size, plus a small batch of spritz flowers. The recipe card below covers the plain spritz cookies; its timing, yield, and nutrition do not include these extras.
Ingredients and Tools for the Halloween Platter
For the orange spritz flowers: Set aside about 150 g prepared spritz dough from the recipe below, enough for roughly 10–12 small flowers depending on your press. You will also need concentrated orange gel food coloring. The remaining dough can be pressed and baked as usual.
For the ghost, bat, pumpkin, and star cut-outs: Use one batch of our rolled sugar cookie recipe, made with:
- 225 g (1 cup) unsalted butter, softened
- 200 g (1 cup) granulated sugar
- 1 large egg
- 1½ teaspoons vanilla extract
- 315 g (2½ cups) all-purpose flour, plus a little for rolling
- ½ teaspoon baking powder
- ½ teaspoon salt
For the royal icing:
- 454 g (about 4 cups) powdered sugar, sifted
- 3 level tablespoons Wilton meringue powder, or another meringue powder intended for royal icing; check its package ratios
- 75 ml (5 tablespoons) warm water to start, plus extra water for thinning
- Concentrated gel food coloring in orange, black, and bright green
- Optional: a little white icing color for a brighter white; a spoonful of brown icing for the large flower’s center
Use ghost, bat, pumpkin, six-pointed star, and optional scalloped-flower cutters, roughly 3 inches (7–8 cm) across. Have a rolling pin, parchment-lined baking sheets for the cut-outs, a bare ungreased sheet and flower disk for the spritz cookies, cooling racks, small bowls, piping bags, and a scribe or toothpick ready. Round tips #1 or #2 suit fine details; #3 or #4 suit filling. Tipless bags also work.
Bake the Two Cookie Bases
- Cut-outs: Cream the butter and sugar for 2–3 minutes. Beat in the egg and vanilla. Whisk the flour, baking powder, and salt separately, then mix them into the butter mixture just until combined. Cover and chill for at least 30 minutes.
- Roll the chilled sugar-cookie dough ¼ inch (6 mm) thick. Cut the Halloween shapes and transfer to parchment-lined sheets, about 1 inch apart. Rechill for 10–15 minutes if the silhouettes soften. Bake at 350°F / 175°C for about 8–10 minutes, checking for set, lightly golden edges. Larger cutters may need longer. Rest on the sheet for 5 minutes, then cool fully on a rack.
- Spritz flowers: Work a toothpick-sized dab of orange gel into the reserved spritz dough, mixing gently until even. Add color gradually, without liquid food coloring or extra flour. Press small flowers onto a cool, bare, ungreased metal sheet. Bake separately at 375°F / 190°C for 6–10 minutes, checking at 6 minutes. Rest 2 minutes on the sheet, then move to a rack. Leave these little flowers uniced so their pressed ridges stay visible.
Mix, Color, and Adjust the Royal Icing
With clean, grease-free equipment, beat the powdered sugar, meringue powder, and 75 ml water on low speed with a stand mixer’s paddle for about 7–10 minutes, until the icing holds peaks. If using a different powder, follow its mixing directions. Keep covered and rest 15–30 minutes, then stir gently to release bubbles.
Divide the icing approximately into 1 cup white, 1 cup orange, ¾ cup black, and ¼ cup green. Tint with gel a little at a time. Let the covered black icing rest for a few hours before deciding whether it needs more color; dark shades deepen. Reserve a few tablespoons of each color for outlines and details before thinning the remainder.
- Outlines and faces: Use icing that pipes a smooth line and keeps its shape, with a soft peak whose tip bends slightly. It should squeeze easily without spreading into a puddle.
- Smooth backgrounds: Add water a few drops at a time. A ribbon dropped from a spoon should blend into the bowl in about 15–20 seconds. This is your flood icing.
- Pumpkin ribs and star panels: Start near the thicker end of flood consistency, around a 20-second ribbon, so each section stays gently rounded. Keep green stems at piping consistency.
Test on a spare cookie first. If the icing runs over the edge, stir in sifted powdered sugar; if it leaves ridges that will not settle, add drops of water. Keep unused bowls covered and bag tips capped.
White Ghosts with Raised Black Faces
Outline each ghost in white, leaving about 1–2 mm of bare cookie visible around the edge. Let the outline set, then fill inside it with white flood icing. Guide icing into the arms and wavy hem with a scribe, pop bubbles, and gently tap the cookie level. Work on one cookie at a time so the filling joins smoothly.
Leave the white bases uncovered until hard and completely dry, preferably overnight. With black piping icing and a #1 or #2 tip, pipe two round eyes and an oval mouth. For a small smiling ghost, pipe a short curved mouth instead. Stop squeezing before lifting the bag; settle any tiny point with the scribe. For the playful ghost variant, add four orange buttons and a small orange asterisk once the white is dry.
Black Bats with Tiny White Eyes
Outline the bat silhouette in black, following the pointed wings and ears while preserving the same narrow cookie border. Fill with black flood icing and nudge it into the wing tips with a scribe. Keep the surface smooth rather than drawing wing lines. Once the black layer is fully dry, add two tiny dots of white piping icing between the ears. Small dots keep the delicate look of the platter.
Orange Pumpkins with Rounded Ribs
- Lightly mark five curved vertical sections on each pumpkin with a food-safe edible marker: one central section, two beside it, and two outer sections. Leave the stem area clear.
- Outline and fill the center and both outer sections in orange, leaving the two sections between them empty. Keep each filled panel gently domed, without piling icing into a thick mound.
- Wait until those sections have a firm, matte crust and no longer flow. Start checking after 30–60 minutes; thicker icing or humidity can require several hours. Then outline and fill the two empty sections. Filling all five while wet would erase the ribbed effect.
- Dry the orange base completely, preferably overnight. Pipe a small green stem, then add several short green strokes flaring outward at its base for the raised cap.
- Pipe two black triangle eyes and a smaller triangle nose. Outline a wide smile with a jagged upper and lower edge, then fill it with black icing at a thick flood consistency. Shape the teeth as orange notches in the black smile. Keep the face slightly raised, with modest amounts of icing.
Orange Stars and the Large Scalloped Flower
For the six-pointed star, mark six kite-shaped panels running from the center to each point. Outline and fill three alternating panels in orange. Let them crust firmly, then fill the remaining three, leaving fine seams between them. This creates the gently padded, faceted surface in the photo.
For the optional large flower, use the scalloped cut-out cookie and the same alternating-panel technique, shaping each orange petal from the outside edge toward the center. Once dry, finish with a small brown center and short stem. It is a decorated cut-out; the much smaller uniced orange flowers are the spritz cookies.
Let the Decorations Dry, Then Build the Platter
Dry the finished cookies flat, uncovered, in a clean, dry room. Allow up to 24 hours after the last icing details before stacking or bagging, and longer if any thick areas still dent. Check a spare decorated cookie rather than pressing a finished face. Avoid refrigerating the iced cookies, where condensation can spoil the surface.
Once completely dry, store in an airtight container at room temperature, separating layers with parchment. Keep the plain spritz flowers in their own container until serving to protect their delicate texture.
For the pictured arrangement, place two pumpkins near the center of a round, food-safe wooden board, add a star near the top, and alternate ghosts and bats around them. Tuck the little orange flowers into the gaps. Keep most faces visible and overlap edges only after the icing is fully hard. The contrast between smooth iced shapes and small ridged spritz cookies makes the platter feel generous and playful.
Keeping Spritz Cookies Fresh for Gifts and Gatherings
Store spritz cookies only after they have cooled completely. A dry container and protection from warm, humid conditions help preserve their delicate edges and keep the small shapes from sticking together.
Storage and Make-Ahead
Keep plain or dry-sprinkled spritz cookies in an airtight container in a cool, dry place for 3–4 days. For a gift, place them in their protective layers after cooling rather than closing the box while they are still warm. Baking the cookies ahead is the simplest preparation route for this recipe.
Keep raw flour and egg dough away from ready-to-eat cookies, and do not taste the unbaked mixture. Iowa State University Extension explains the relevant safe handling and storage of baked goods. The storage guidance here applies to these plain cookies or dry sprinkles, rather than cookies with perishable fillings or frosting.

Freezing and Thawing
To freeze spritz cookies, pack them completely cooled in a freezer-safe container with layers protected from crushing. Close it well and freeze for up to 2 months for best quality. Thaw the cookies in their packaging, then open it once they have returned to room temperature. Handle the fine edges gently when arranging them again.
Spritz Cookie Questions, Answered
Questions about spritz cookies often come down to the press, the sheet, and the feel of the dough. These quick answers give you a starting point, with the fuller troubleshooting guide above for a batch that needs more attention.
Why won’t my spritz cookies stick to the baking sheet?
Press spritz cookies onto a cool, dry, ungreased metal sheet without parchment or silicone. Rest the press base flat on it. If the dough still lifts away, check its temperature and the press assembly before adding flour.
Why is my spritz dough too hard to press?
Cold dough can be too firm for the disc. Let it soften gradually at room temperature and check that the press is assembled correctly. If the dough is also dry and crumbly, review the flour measurement; do not force the handle.
Should I chill spritz cookie dough?
This recipe has no scheduled chilling step. The dough should be supple for pressing. Brief cooling is useful only when it has become too warm, shiny, or slack; stop cooling once it feels workable again.
Can I use parchment paper or a silicone mat?
Use bare, ungreased metal for pressing these cookies. A liner can interfere with the dough staying on the sheet as you lift the press, even though liners are useful for many other cookies.
Can I make these spritz cookies without a cookie press?
A press is needed for the patterned shapes described here. A different shaping method changes their appearance and can change baking time. For a rolled-and-cut cookie, choose a recipe written for that method instead of diluting this dough.
Can I freeze baked spritz cookies?
Yes. Cool them completely, protect the layers in a well-closed freezer-safe container, and freeze for up to 2 months for best quality. Thaw in the packaging before opening and handling them.
Why do my spritz cookies spread?
Dough that is too warm and a baking sheet that has not cooled can soften the outline. Check those first, then review the butter-mixing stage and measurements. A little softening of the ridges is different from the shapes flattening into one another.
More Homemade Cookies for Your Baking Journey
A batch of spritz cookies can be the beginning of a varied cookie plate. These other recipes give you different shapes, flavors, or textures to bake alongside them or to try on another day.
Buttery Classics with a Different Shape
For another butter-forward cookie, choose a different way of shaping or finishing the dough. These recipes range from simple shortbread to a more detailed jam sandwich.
- Shortbread Cookie Recipe gives you a buttery, fine-crumbed cookie in a rolled-and-cut format.
- Butter Pecan Cookies add nutty flavor and a different bite to a butter-cookie assortment.
- Linzer Cookies turn two cut-out cookies and a jam center into a more detailed sandwich project.
- Italian Christmas Cookies bring a soft, glazed cookie to a festive plate.
Warm Spice and Cranberry Brightness
Warm spice or a bright fruit accent makes a useful contrast with a plain vanilla-butter cookie. Choose the flavor you want to bring to the next tray.
- Molasses Cookies offer deeper sweetness and a chewy, warmly spiced texture.
- Gingerbread Cookie Recipe gives you a spiced dough for rolling and cutting into seasonal shapes.
- Snickerdoodle Cookies pair a round, soft cookie with a cinnamon-sugar coating.
- White Chocolate Cranberry Cookies combine a fruit accent with sweet white chocolate.
Chocolate Cookies for Your Next Batch
A chocolate cookie adds another flavor to a mixed plate without changing the Spritz dough. These options offer different levels of shaping and finishing.
- Chocolate Crinkle Cookies give you a soft chocolate center under a crackled sugar coating.
- Hot Chocolate Cookies take the cocoa-and-marshmallow direction for a cozy cookie plate.
- Peanut Butter Blossom Cookies combine a peanut butter cookie with a distinct chocolate center.
- Almond Joy Cookies offer a coconut cluster with chocolate and almonds for a different texture.
Why These Spritz Cookies Belong in Your Recipe Box
These spritz cookies are worth keeping in mind when you enjoy small cookies whose character comes from careful shaping and a simple butter dough.
- A Pressing Reference: The dough guide gives you a practical place to return when the press behaves differently from one session to the next.
- A Familiar Starting Point: A plain butter-and-vanilla profile can remain useful as your tastes or choice of cookie shapes change.
- Details Worth Learning: Paying attention to the first few shapes builds a skill you can carry into future pressed-cookie batches.
- An Equipment Reminder: Keeping the recipe with your press makes the tray and temperature requirements easier to remember when the tool comes out again.
- A Measured Baseline: Clear ingredient amounts let you compare a later batch with the same starting point instead of guessing what changed.
- Room for Practice: Reusing a few uneven shapes makes the early learning stage feel manageable without needing every cookie to look identical.
A Final Thought on Homemade Spritz Cookies
Spritz cookies give a simple butter dough a recognizable little shape. Their pale color and fine crumb allow the flavor to stay clear, while the pressed details bring a quiet elegance to a small cookie.
This is the kind of baking project to return to when making a few different shapes is part of the pleasure. A tray of flowers, rings, or another favorite disc pattern can suit both an ordinary afternoon and a carefully packed gift.
A slightly uneven cookie still belongs on the plate. The care is visible in the batch as a whole, and a little variation keeps the result feeling homemade.

Spritz Cookies
Delicate spritz cookies with rich buttery flavor, clear pressed shapes, and a tender bite. Vanilla leads the flavor, with optional almond extract and a light scattering of sprinkles for cookie platters and homemade gifts.
Ingredients
- 1 cup (227 g) unsalted butter, softened but still cool
- 1/2 cup (100 g) granulated sugar
- 1 large egg (about 50 g without shell), at room temperature
- 1 teaspoon (5 ml) pure vanilla extract
- 1/4 teaspoon (1.25 ml) almond extract, optional
- 2 1/4 cups (270 g) all-purpose flour, spooned and leveled if measured by cups
- 1/4 teaspoon (about 1.5 g) fine salt
- 1 tablespoon (about 12 g) small oven-safe sprinkles, optional
Instructions
- Prepare the Oven, Trays, and Cookie Press. Preheat a conventional oven to 375°F (190°C) with a rack in the center. Set out two light-colored metal 13×18-inch baking sheets, a cookie press with its matching disc, a wire rack, and a thin cookie spatula. The sheets must be clean, dry, cool, bare, and ungreased. Assemble the press according to its instructions.
- Cream the Butter and Sugar. Beat the 1 cup (227 g) softened but still cool unsalted butter and 1/2 cup (100 g) granulated sugar on medium speed for about 2 minutes. Scrape the bowl. Stop when the mixture is creamy, uniform, and slightly lighter but still holds its shape; it should not look greasy or very airy.
- Add the Egg and Extracts. Beat in the 1 large room-temperature egg, 1 teaspoon (5 ml) vanilla extract, and 1/4 teaspoon (1.25 ml) almond extract, if using, until evenly combined. Scrape the sides and bottom of the bowl so no unmixed streaks remain.
- Mix in the Flour and Salt. Whisk together the 2 1/4 cups (270 g) all-purpose flour and 1/4 teaspoon (about 1.5 g) fine salt. Add to the butter mixture on low speed and mix only until the dry streaks disappear. Scrape and fold as needed. The dough should be cohesive, supple, and matte, without dry pockets or an oily sheen.
- Load the Press and Try the First Shapes. Fill the press without leaving large air gaps. Hold it upright with its base flat against a cool, bare sheet, operate it according to the model, then lift straight up. Try a few shapes first. The dough should stay on the metal and show a clear disc pattern; return misshapen test pieces to the dough.
- Check the Dough and Finish Pressing. If the dough is cold and difficult to press, let it soften gradually at room temperature. If it looks warm, shiny, or greasy, cool it briefly, checking often, until supple again. Check the sheet and press assembly before adding flour or liquid. Press the remaining cookies about 1 inch apart. Plan on about 16 medium cookies per sheet and three oven loads for the batch, depending on the disc. Keep waiting dough covered and reuse sheets only when cool.
- Decorate and Bake Until Lightly Golden. Add a light scattering of the optional small oven-safe sprinkles, using about 1 tablespoon (12 g) for the whole batch. Bake one sheet at a time on the center rack for 6–10 minutes, checking from 6 minutes. Stop when the tops are matte and set, the ridges remain visible, and the edges or bases show the first pale gold. Keep the tops pale rather than waiting for the whole cookie to brown.
- Cool Before Serving or Storing. Let each batch rest on its baking sheet for 2 minutes, then transfer carefully to the wire rack with a thin spatula. Allow the cookies to cool completely before serving or packing, with about 15 minutes allowed for the final batch. They will firm as they cool. Cool each sheet fully before pressing the next batch onto it.
Notes
- Yield and size. This batch makes about 48 medium cookies, roughly 1 1/2–2 inches across depending on the disc. The yield estimate allows about 13–14 g raw dough per cookie. Smaller shapes make more cookies and may require more oven loads.
- Timing. Allow 25 minutes for preparation and shaping, up to 30 minutes to bake three sheets, and 15 minutes for the final batch to cool, for about 1 hour 10 minutes total. Start with softened butter; extra softening time is separate. Each sheet bakes for 6–10 minutes, and some shaping and cooling can overlap.
- Flour and butter. Weigh the flour when possible. If using cups, spoon and level it. Use butter that yields to gentle pressure while staying matte and holding its shape. There is no required chilling step; use brief corrective cooling only if the dough becomes warm and greasy.
- Pressing surface. Use cool, dry, ungreased bare metal. Parchment, silicone mats, grease, and hot sheets can interfere with release. Check the surface, dough temperature, and press assembly before changing the ingredients.
- Optional flavor. Omit the almond extract if preferred; no replacement is needed. Use small oven-safe sprinkles lightly so the shapes remain visible.
- Storage. Cool plain or dry-sprinkle cookies completely, then store airtight in a cool, dry place for 3–4 days. For longer storage, protect the baked cookies in rigid, airtight freezer packaging with layers separated and freeze for up to 2 months for best quality. Thaw in the packaging, then open once they reach room temperature.
- Nutrition. Nutrition is an estimate per cookie, based on 48 plain cookies. Optional almond extract and sprinkles are excluded.
Nutrition Information:
Yield: 48 Serving Size: 1 cookieAmount Per Serving: Calories: 64Total Fat: 4gSaturated Fat: 2.4gCholesterol: 14mgSodium: 14mgCarbohydrates: 6.4gFiber: 0.2gSugar: 2.1gProtein: 0.8g
Nutrition information is provided as an estimate only and may vary based on specific ingredients, brands, and portion sizes used. This information should not be considered medical or nutritional advice.
12 Sweet Favorites — Yours, Free 🍰
Tiramisù, no-bake cheesecake, the perfect chocolate chip cookie & 9 more reader-loved desserts — gathered into one beautiful free recipe book. From my kitchen to yours.
No spam, just sweet things. Unsubscribe anytime.