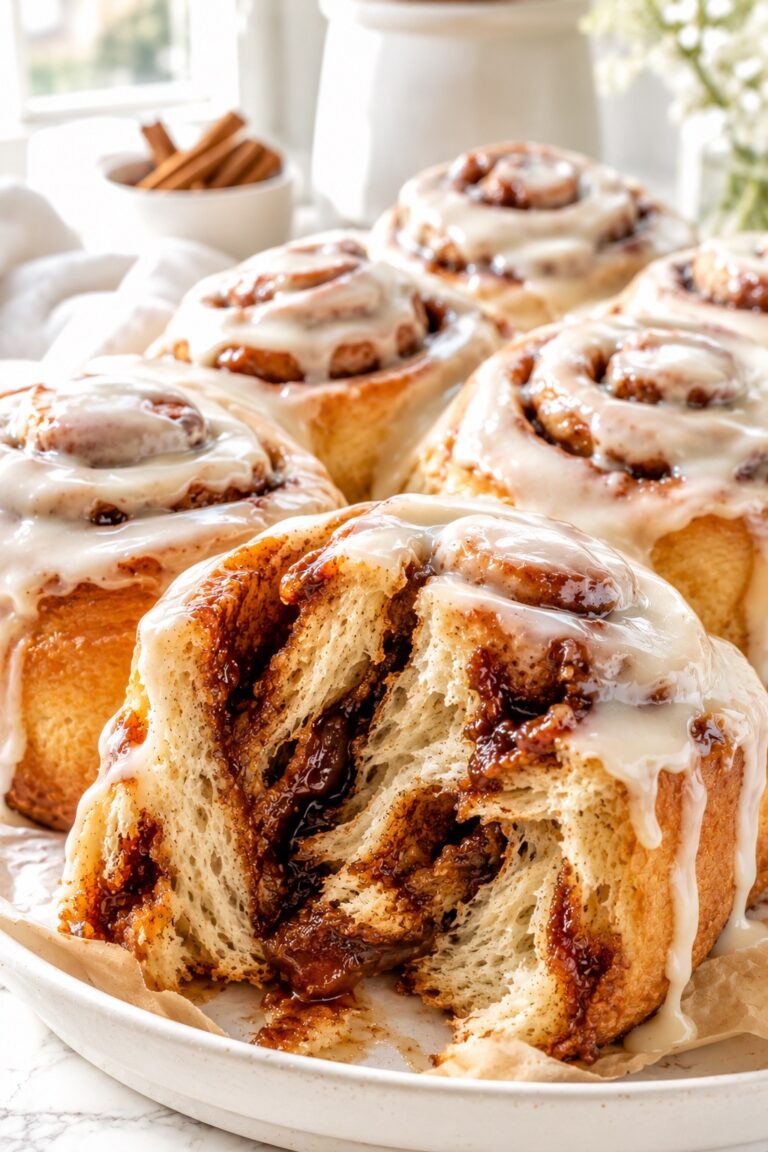
Soft Pumpkin Cinnamon Rolls with Cream Cheese Glaze
🎁 FREE E-BOOK: 12 Sweet Favorites — reader-loved desserts in one beautiful recipe book.
Soft pumpkin cinnamon rolls bring together tender pumpkin-gold bread, a dark cinnamon swirl, and vanilla cream cheese glaze that settles into the warm layers. The pumpkin is mixed into the dough, giving each spiral a gentle autumn flavor beneath the brown sugar filling.

A pan of cinnamon rolls suits the kind of breakfast that can linger: a weekend morning, a holiday table, or coffee shared while the kitchen still smells of cinnamon. Pumpkin gives that familiar bake a seasonal warmth without taking away the pleasure of pulling apart soft bread.
The most useful details to keep close are the ones that help you judge the dough: how much tackiness is normal, when the shaped rolls have risen enough, and how to check the middle before glazing. Those cues matter more than using every spoonful of flour or finishing on a fixed clock.
Pumpkin Cinnamon Rolls at a Glance
Expect soft pumpkin bread with a moist cinnamon spiral and a creamy vanilla finish. This is a moderately hands-on yeast bake for 12 medium rolls, with a same-day schedule or an overnight option.
| Detail | What to Expect |
|---|---|
| Texture | Soft, pull-apart pumpkin bread with moist cinnamon ribbons and a creamy glaze that settles into the warm layers. |
| Flavor | Gentle pumpkin, warm cinnamon and nutmeg, buttery brown sugar, and vanilla cream cheese tang. |
| Difficulty | Moderate: you will knead, roll, and portion the dough, then judge two rises by its appearance and feel. |
| Time | Allow about 4 hours. The same-day planning range is 3 hours 5 minutes to 4 hours 45 minutes, including 25–30 minutes of baking and 15–20 minutes of cooling; a cool room or extra shaping rest can extend it. |
| Servings | 12 medium rolls; 1 glazed roll per serving. |
| Method | Enriched instant-yeast dough, kneaded by hand or mixer, shaped after the first rise, proofed again, and oven-baked. |
| Best For | Fall weekend breakfasts, holiday brunch, or a morning gathering planned with an overnight head start. |
| Pan | A light-colored 9 × 13 × 2-inch metal pan, with the rolls in three rows of four. |
| Oven | 350°F / 175°C, conventional oven, center rack. |
| Make Ahead | Shape and refrigerate immediately for 8–12 hours, then finish proofing the next morning before baking. |
Why This Pumpkin Cinnamon Roll Recipe Works
The dough is designed to stay supple, the cinnamon filling spreads as a cohesive layer, and the bake is judged from the middle of the pan. Together, those choices support tender bread with a clear spiral and a soft glaze that leaves the layers visible.
- A soft dough without excess flour: The flour reserve lets you respond to the dough instead of forcing in the maximum amount. Keeping a little tackiness avoids the stiff, heavily floured dough that can produce firm rolls.
- A distinct cinnamon layer: Softened butter, brown sugar, and cinnamon form one spreadable paste. That consistency makes it easier to distribute the filling across the dough rather than leaving thick patches in some spirals and bare bread in others.
- Even portions with room to rise: Twelve similar-width slices fit the three-by-four pan arrangement. Keeping their size consistent helps the rolls expand together and reduces the difference between a small, fast-baking piece and an oversized center roll.
- A center check that goes beyond color: The middle roll must have set bread layers as well as an appropriate temperature reading. This avoids mistaking browned tops for a finished pan or treating raw dough as a desirable soft center.
- A glaze that follows the spirals: The milk is added gradually, so the cream cheese glaze remains thick enough to spread. Briefly cooling the rolls keeps the finish from immediately running away into the hot bread.

Why You’ll Love This Pumpkin Cinnamon Roll Recipe
These rolls suit a fall breakfast when you want pumpkin, cinnamon, and a little cream cheese tang, and have time to let the dough rise. The work can be spread across an evening and morning, and you can make the full batch without a stand mixer.
- A breakfast you can start the night before: Mixing and shaping can be done in the evening, leaving the final proof, bake, and glaze for the next morning. You still need that morning rise, but there is no fresh dough to knead before breakfast.
- A manageable pan for sharing: The batch makes 12 medium rolls, so you can plan portions for a brunch table or family breakfast. They finish together in one pan, with no need to decorate each roll separately.
- No stand mixer required: You can mix the dough in a bowl and knead it by hand, so the recipe works in a kitchen without a stand mixer. Use a dough hook if you prefer machine kneading.
- Useful breaks between hands-on stages: The first rise leaves time to prepare the filling, and the cooling period leaves time for the glaze. Most of the session is waiting for the dough rather than working continuously at the counter.
- A way to keep a few for later: Fully baked, unglazed rolls can be wrapped individually and frozen. That makes it possible to warm a smaller portion another day and add glaze close to serving.
The Science Behind Soft Pumpkin Cinnamon Rolls
Pumpkin changes the dough’s moisture balance, kneading gives the dough strength, and the filling and oven heat affect how clearly the finished layers separate.
Pumpkin Changes the Flour Balance
Pumpkin purée brings both moisture and soft plant solids into the dough. Its thickness can vary, so a slightly tacky surface does not, by itself, mean the dough needs more flour.
Extra flour changes the balance of the whole dough, making the bread firmer as it absorbs moisture. Measure the pumpkin, give the flour time to hydrate, and judge the dough’s ability to stretch before using the reserve.
Strong Dough Gives the Rise Something to Hold
Kneading develops the wheat proteins into an elastic network that can hold gas as the yeast works. Sugar and butter enrich the dough, but the dough still needs enough strength to expand without losing its shape.
A thin, stretchy piece of dough is a more useful checkpoint than a perfectly clean bowl. Pumpkin fibers and spice flecks can interrupt the surface, so look for an elastic membrane rather than the transparency of plain white bread dough.
Soft Butter Keeps the Cinnamon Layer Spreadable
Softened butter makes a paste that carries cinnamon and brown sugar across the dough in an even layer. Melted butter moves more freely and can carry the filling toward the edges before the log is shaped.
The butter should spread under light pressure while still holding its shape. A little cooked filling at the base of the pan is normal; keeping the paste cohesive helps limit large losses during shaping.
The Center Sets Later Than the Exposed Edges
The outside of the pan and the exposed tops heat more directly than the bread in the middle. Browning can therefore look finished while the central dough bands still need time to set.
Use the center roll to judge the bake. If the tops color early, a loose foil tent shields them while heat continues to reach the middle.
Ingredients for Pumpkin Cinnamon Rolls with Cream Cheese Glaze
Measure the pumpkin dough, cinnamon filling, and vanilla cream cheese glaze as separate components, especially the two portions of butter and the milk used for the glaze.

Ingredient List
Begin the dough with 3 cups (360 g) of flour and keep the remaining 1/2 cup (60 g) separate, including any flour used to dust the work surface.
Pumpkin Dough
- 3 to 3 1/2 cups (360–420 g) all-purpose flour, spooned and leveled if measured by volume; begin with 3 cups (360 g), reserve up to 1/2 cup (60 g).
- 1/2 cup (100 g) granulated sugar.
- 2 1/4 teaspoons (7 g) instant yeast, one standard packet, within date.
- 1 teaspoon (6 g) fine table salt.
- 1 teaspoon (about 2.6 g) ground cinnamon.
- 1/2 teaspoon (about 1.1 g) ground nutmeg.
- 1/2 cup (120 ml) whole milk.
- 1/2 cup (113 g) plain canned pumpkin purée, stirred and at room temperature.
- 1/4 cup (57 g) unsalted butter, melted with the milk and cooled as specified below.
- 1 large egg (about 50 g without shell), at room temperature.
Cinnamon Filling
- 1/2 cup (113 g) unsalted butter, softened and spreadable, not melted.
- 3/4 cup (160 g) packed light brown sugar.
- 2 tablespoons (about 16 g) ground cinnamon.
Vanilla Cream Cheese Glaze
- 4 ounces (113 g) full-fat brick-style cream cheese, softened.
- 1 cup (113 g) powdered sugar, measured before sifting; sift if lumpy.
- 1 teaspoon (5 ml) vanilla extract.
- 2–3 tablespoons (30–45 ml) whole milk; begin with 2 tablespoons and add the final tablespoon gradually only if needed.
Ingredient Notes for Pumpkin Dough and Cream Cheese Glaze
Plain pumpkin purée and brick-style cream cheese give you better control over moisture than sweetened pie filling or soft spreadable cheese.
- Pumpkin: Choose plain canned purée and stir it before measuring; pumpkin pie filling includes sweetener and seasonings.
- Flour and yeast: All-purpose flour and instant yeast are the starting point for this dough. Weighing flour makes the small additions easier to control.
- Brown sugar: Pack the light brown sugar into the cup if measuring by volume.
- Cream cheese: Use full-fat brick-style cream cheese and soften it enough to beat smooth.
- Glaze milk: Start with 2 tablespoons; the extra tablespoon is for adjusting a glaze that is still too thick.
For help smoothing cream cheese before adding sugar, the cream cheese frosting guide explains the handling technique. Keep the quantities here for a softer glaze that spreads over warm rolls.
Pumpkin, Flour, and Yeast Substitution Limits
This dough depends on wheat flour and instant yeast for its structure and rise, so changes to the flour, pumpkin, or leavening can also change the amount of liquid and the timing.
- Homemade pumpkin purée: A watery purée can make the dough much wetter; it may need a different moisture balance. Plain canned purée is the most straightforward choice here.
- Bread flour: It can change water absorption and chew, so it should not be treated as an identical swap.
- Active dry yeast: Product directions may require different handling. Use instant yeast for the method below.
- Gluten-free or vegan versions: A measure-for-measure flour swap or a flax egg with dairy replacements does not preserve this dough’s structure. Choose a recipe developed for those ingredients.
- Sourdough: Starter changes both the dough and its fermentation schedule; this is an instant-yeast recipe.
- Extra liquids: Keep extra pumpkin, cream, and other liquids out of the filling and baking pan.
If you want a plain cinnamon roll, use the complete homemade cinnamon rolls recipe rather than removing the pumpkin from this dough.

Kitchen Tools for Evenly Baked Pumpkin Cinnamon Rolls
A scale helps you manage small flour additions, and the specified metal pan leaves room for 12 rolls to expand and bake together.
- Digital scale, measuring cups/spoons and an instant-read thermometer.
- Large mixing/proofing bowl, small saucepan, sturdy spoon or spatula, and a fitted cover; optional mixer with dough hook.
- Rolling pin, ruler, bench scraper and unflavored dental floss or a sharp thin knife.
- Light-colored 9 × 13 × 2-inch metal baking pan, conventional oven center rack, foil for optional tenting and a wire cooling rack.
- Medium filling/glaze bowls, hand mixer or whisk for the glaze, and an offset spatula.
Before You Begin Your Pumpkin Cinnamon Rolls
Have the flour reserve, pan, and room-temperature egg and pumpkin ready before you warm the milk, so the dough can be mixed while the liquid is at the right temperature.
- Check that the pumpkin is plain purée, not pumpkin pie filling.
- Measure the initial flour and keep the 60 g reserve in a separate bowl.
- Check the date and condition of the instant yeast.
- Take the egg and measured pumpkin out of the refrigerator shortly before mixing.
- Use the 9 × 13 × 2-inch light-colored metal pan.
- Allow time for both rises, or clear a level refrigerator space for the covered pan if using the overnight option.
Plan Your Pumpkin Cinnamon Rolls: Same-Day or Overnight
Allow about 4 hours for same-day rolls, with shaping as the point where you can switch to an overnight schedule. The dough decides when each rise is complete.
| Stage | Planning time | What can happen alongside it |
|---|---|---|
| Mix, rest, and knead | About 25 minutes | Measure the filling ingredients while keeping perishable ingredients chilled until needed. |
| First rise | 60–120 minutes | Soften the filling butter as needed and mix the filling near the end. |
| Roll, fill, and cut | About 15 minutes | Add a covered 5–10-minute rest only if the dough keeps springing back. |
| Final proof | 45–75 minutes | Preheat the oven during the latter part of the rise. |
| Bake | 25–30 minutes | Begin checking at 20 minutes. |
| Cool before glazing | 15–20 minutes | Prepare the glaze while the rolls cool. |
Those stages total about 3 hours 5 minutes to 4 hours 45 minutes, before any extra shaping rest or slower rise. Filling and glaze preparation overlap the waiting stages rather than adding two more blocks of time.
For overnight rolls, replace the room-temperature final proof with an immediate 8–12-hour refrigerated hold after shaping. The following morning, allow roughly 60–120 minutes for the rolls to finish proofing, then allow time for baking and cooling; cold dough may take longer to become pillowy.
What to Expect from These Pumpkin Cinnamon Rolls
These are individual yeast-bread rolls with pumpkin in the dough and a cinnamon spiral through the center. The layers pull apart like soft bread; a cream-filled pumpkin sponge roll has a different texture and preparation.
- Muted pumpkin color: The crumb is pumpkin-gold, with a gently spiced flavor rather than a vivid orange appearance.
- A tacky dough: Some stickiness is normal while the dough remains cohesive and workable.
- A moist cinnamon ribbon: The brown sugar filling stays softer and darker than the bread around it.
- A glaze that settles: Warm rolls soften the ivory glaze, leaving the spiral visible beneath it.
How to Make Pumpkin Cinnamon Rolls
Mix and knead the pumpkin dough, let it rise, then shape 12 spirals for their second rise. Bake until the center is set and let the pan cool briefly before spreading on the glaze.
1. Measure the Ingredients and Prepare the Pan
Measure 3 cups (360 g) flour into the mixing bowl and keep up to 1/2 cup (60 g) separate. Bring the measured pumpkin and egg toward room temperature, then lightly grease the proofing bowl and 9 × 13 × 2-inch metal pan with neutral oil or nonstick spray.
Soften the filling butter during the first rise. Take the cream cheese out close to the time you will make the glaze, rather than leaving it out through both rises.
What you should see: Thick, stirred pumpkin without a watery pool, a separate flour reserve, and a lightly coated pan.
2. Warm the Milk and Butter
Gently warm 1/2 cup (120 ml) whole milk with 1/4 cup (57 g) butter in a small saucepan until the butter melts. Avoid boiling or reducing the milk, then let the mixture cool to 100–110°F / 38–43°C before adding it to the dough.
What you should see: Melted butter dispersed in warm milk, with a thermometer confirming that the liquid has cooled into the mixing range.
3. Mix the Pumpkin Dough
Whisk the initial flour with the granulated sugar, instant yeast, salt, cinnamon, and nutmeg. Add the warm milk mixture, pumpkin, and egg, then stir until no loose flour remains.
Cover the rough dough and let it rest for 5 minutes so the flour can absorb moisture before you judge its stickiness.
What you should see: A soft, rough dough that gathers together, rather than a pourable batter or a dry, crumbly mixture.

4. Knead Until Soft and Elastic
Knead by hand for an initial 8–12 minutes, or use a dough hook at your mixer’s recommended low kneading speed for an initial 6–10 minutes. Continue only as needed for the dough to become smooth and elastic and stretch into a thin membrane before tearing.
If the dough still smears wetly after kneading, add reserved flour about 1 tablespoon (7–8 g) at a time. Include any bench dusting in the 60 g reserve. Stop adding flour once the dough holds together and can be lifted with a scraper; a slightly tacky surface is expected.
Keep the finished dough near 75–80°F / 24–27°C. If mixing makes it markedly warmer, pause; if it resists stretching, cover and rest briefly before checking again.

What you should see: A supple, cohesive dough with a mild tack. A small piece stretches thin, though pumpkin fibers and spice flecks may keep the membrane from looking completely transparent.

5. Let the Dough Rise
Put the dough into the lightly greased bowl, cover it, and let it rise in a moderately warm place, around 75–78°F / 24–26°C. Allow about 60–120 minutes, or longer in a cool room, until it is close to doubled.
Mark the starting height if the bowl has straight sides. Avoid a hot oven that makes the dough race ahead while softening the butter excessively.
What you should see: A rounded, aerated dough with a substantial increase in volume, not a tight ball with only a stretched surface.

6. Mix the Cinnamon Filling
Near the end of the first rise, mix 1/2 cup (113 g) softened butter, 3/4 cup (160 g) packed light brown sugar, and 2 tablespoons (about 16 g) cinnamon into a uniform paste. If the butter is oily or liquid, cool the filling until it becomes softly spreadable again.
What you should see: A cohesive cinnamon paste that spreads under light pressure without running into puddles.

7. Roll, Fill, and Cut Twelve Spirals
Gently press out large gas pockets, then roll the dough into an even 15 × 10-inch rectangle, about 38 × 25 cm, with a long side facing you. If the dough repeatedly springs back, cover it and rest for 5–10 minutes before continuing.

Spread the filling evenly, leaving about 1/2 inch / 1.3 cm bare along the far 15-inch edge.

Starting at the long edge nearest you, roll a 15-inch log snugly without stretching it tight, then seal the seam.

Mark 12 equal pieces, each 1 1/4 inches / about 3.2 cm wide. Cut with unflavored dental floss or a sharp thin knife, keeping the end pieces as part of the batch. Arrange the rolls upright in three rows of four in the prepared pan.
What you should see: Twelve similar-sized spirals, intact outer seams, and room between the rolls for expansion.

8. Proof the Rolls and Preheat the Oven
Cover the pan and let the rolls rise for about 45–75 minutes, using their appearance to decide when to bake. They should become visibly expanded and pillowy as the small gaps begin to close.
Press a dough band lightly: the indentation should return slowly and partly. A quick rebound usually means more proofing is needed, but judge the overall expansion too. Fully preheat the conventional oven to 350°F / 175°C with a center rack during the latter part of the rise.
For the overnight route, refrigerate immediately after shaping instead of completing this warm rise, then finish proofing the next morning as described under make-ahead guidance.

What you should see: Soft, expanded rolls that remain supported, without collapse or a fragile, overinflated surface.

9. Bake Until the Center Is Set
Bake on the center rack for about 25–30 minutes, checking from 20 minutes. If the tops brown before the center is ready, tent loosely with foil and continue baking.
Check a middle roll: its dough bands should be set and its top should spring gently. Insert an instant-read thermometer into the bread, avoiding the cinnamon filling, and look for approximately 190°F / 88°C together with those structural cues.
What you should see: Light golden edges and fully baked, soft bread around a moist cinnamon ribbon. A wet, pasty stripe of raw dough needs more baking even if another part of the roll gives a suitable temperature reading.

10. Cool the Rolls and Mix the Glaze
Set the pan on a wire rack and cool for about 15–20 minutes, until the rolls are warm rather than steaming. Beat the softened cream cheese smooth, then beat in the powdered sugar and vanilla.
Mix in 2 tablespoons (30 ml) milk. Add the remaining tablespoon gradually only if the glaze needs loosening enough to fall in a thick ribbon and spread across the rolls.
What you should see: A smooth glaze without cream cheese lumps or watery separation.

11. Glaze and Serve Warm
Spread the glaze over the warm rolls, leaving the spiral ridges visible, and serve. The glaze softens as it meets the warm bread; it stays more visibly white when the rolls are cooler.

What you should see: Distinct cinnamon spirals under an ivory glaze, with soft pumpkin-gold bread between the layers.

Pumpkin Cinnamon Roll Doneness: Soft Layers, Fully Baked Centers
Judge the dough by its stage and the baked rolls by their bread layers. Stickiness while kneading, resistance before proofing, and a pasty center after baking need different responses.
Read the Dough from Mixing to Final Proof
A dough that stretches smoothly can be ready to rise while still feeling tacky. More flour is useful for persistent wet smearing, but it cannot replace kneading, proofing, or enough time in the oven.

| Stage | Normal sign | Sign to investigate | What to do next |
|---|---|---|---|
| After mixing | A rough, soft dough with no loose flour | Wetness judged before the flour has hydrated | Give it the covered 5-minute rest before deciding on extra flour. |
| During kneading | Mild tack with increasing stretch | Dough tears quickly or keeps smearing like paste | For tearing, rest briefly and continue kneading; for persistent wet smearing, use the flour reserve in small additions. |
| After the first rise | Near doubled, rounded, and aerated | Little expansion despite a smoother surface | Keep it covered and allow more time in moderate warmth; check the yeast and temperature if it remains inactive. |
| Before baking | Pillowy rolls and slow, partial spring-back | Tight rolls that rebound immediately | Give the covered rolls more time rather than relying on the clock. |
| After baking | Set bread layers with a moist cinnamon ribbon | Pale, shiny, pasty dough between the filling bands | Return unglazed rolls to the oven and protect the tops if needed. |
Check the Middle Roll Before Adding Glaze
The middle roll should contain soft bread that holds its structure, not a glossy paste. The filling can remain moist and dark while the surrounding bread is fully baked.

Aim for approximately 190°F / 88°C in the bread of the middle roll, checking that the probe has not landed in a cinnamon pocket. Combine the reading with a gently springing top and set dough bands; a browned corner roll cannot tell you whether the center of the pan is ready.
Expert Tips for Soft, Distinct Pumpkin Cinnamon Spirals
What I learned: I have added too much flour to enriched dough by trying to remove every trace of tackiness. A better cue is dough that feels smooth and elastic but remains slightly tacky and stretches into a thin windowpane.
- Let resistant dough relax: A covered rest during rolling lets the dough stretch with less force, helping you keep the rectangle even instead of leaving a thick middle and thin edges.
- Cut without flattening: Slide floss under the log and cross it over the top, or use a thin knife with light pressure; compressed spirals have less room to open evenly.
- Thin the glaze slowly: Cream cheese becomes smoother as it is beaten, so adding all the milk before smoothing it can leave a runnier finish than intended.
Pumpkin Cinnamon Roll Mistakes and How to Correct Them
A heavy roll can come from too much flour, too little rise, or too little baking. Match the symptom to the stage before deciding how to correct it.
| Symptom | Likely cause | What you can do now | For the next batch |
|---|---|---|---|
| Dough is stiff and barely stretches | Too much flour added while chasing a dry surface | Stop adding flour and allow a short covered rest; an already stiff dough may still bake up firm. | Weigh the initial flour and count bench dusting within the reserve. |
| Dough is warm and greasy during mixing | Mixing heat or an overly hot liquid mixture | Pause mixing and let the dough cool toward the working range. | Measure the milk mixture before adding it and keep mixer speed low. |
| Very little rise | Cool conditions or weak/inactive yeast | Allow more time in moderate warmth; dough with inactive yeast will not recover simply through a longer bake. | Check yeast freshness and judge expansion before shaping. |
| Filling runs while spreading | Butter is melted or too warm | Cool the filling back to a spreadable paste before rolling. | Use softened butter and keep the dough away from excessive heat. |
| Rolls collapse after a long second rise | Proofing continued past a supported, pillowy state | Handle gently and bake promptly; the lost structure may not fully recover. | Use volume and spring-back together and avoid an unattended extended warm proof. |
| Brown tops with a doughy middle | Exterior browned before the central bread set | Tent unglazed rolls loosely and continue baking, checking the center. | Use the specified pan and assess the middle rather than color alone. |
| Glaze disappears into the rolls | Bread is still steaming or glaze is very thin | Let the rolls cool further before adding any remaining glaze. | Wait for warm rather than steaming rolls and begin with 2 tablespoons of milk. |
Beautiful Ways to Serve Pumpkin Cinnamon Rolls
Serve the rolls warm enough for the bread to feel soft, with the glaze resting lightly over the spiral. Simple white serving pieces keep the pumpkin color and cinnamon layers visible.
A Warm Roll on a Simple White Plate
Place one roll in the center of a white plate with a small fork beside it. A little glaze following the edge of the spiral is enough; the warm bread and cinnamon provide the detail.

A Pull-Apart Platter for a Shared Brunch
Arrange several rolls close together on a small white platter, leaving their individual spirals visible. This keeps the pull-apart feel of the pan while making the rolls easy to pass around a brunch table.

Coffee or Tea Beside the Cinnamon Swirl
Pair a warm roll with coffee or unsweetened tea if you enjoy a less sweet sip alongside the glaze. Keep the cup beside the plate so the cinnamon swirl remains the focus.

How to Store, Freeze, and Make Pumpkin Cinnamon Rolls Ahead
Cream cheese glaze needs refrigeration, while baked rolls are easiest to freeze before glazing. Choose the overnight dough option when you want freshly baked rolls the next day.
Refrigerate Rolls with Cream Cheese Glaze
Refrigerate glazed rolls and prepared glaze promptly in covered containers at or below 40°F / 4°C. For the best texture within a short storage window, use them within 3 days.
The FDA guidance on refrigerated food storage limits foods requiring refrigeration to 2 hours out of the refrigerator, or 1 hour when the temperature is above 90°F / 32°C. Apply that limit to the cream cheese glaze and glazed rolls, including serving time, and chill leftovers in manageable portions instead of leaving the whole pan out for hours.
You can make the glaze the night before and refrigerate it covered. Stir or beat it smooth again before spreading; soften it only briefly as needed and keep its total time out of refrigeration within the same limit.
Shape Tonight and Finish Proofing Tomorrow
Refrigerate the covered pan immediately after shaping, before the second room-temperature rise. Hold it at or below 40°F / 4°C for 8–12 hours.
The next day, allow roughly 60–120 minutes at moderate room temperature for the rolls to become expanded and pillowy. They are ready when a light indentation returns slowly and partly, together with clear growth in volume; a fixed 30-minute warm-up is not enough to judge cold dough. Bake at 350°F / 175°C using the same middle-roll checks.
Freeze Baked Rolls Before Glazing
For freezing, let fully baked, unglazed rolls cool, wrap them individually, and seal them in a freezer container or bag. Use within 2 months for best quality.

Thaw overnight in the refrigerator, then warm the rolls gently and add fresh glaze close to serving. Freezing them unglazed makes it easier to warm the bread without melting the finish.
Warm Gently for a Softer Crumb
For thawed, unglazed rolls, cover loosely and warm in a 300°F / 150°C oven, checking after about 10–15 minutes, until warm through.
Short microwave bursts can soften a single roll, though an existing glaze may melt. Rewarming improves texture; it does not make improperly stored food safe again.
Pumpkin Cinnamon Roll Questions, Answered
Shaping the rolls ahead and judging the dough’s texture are often the decisions that matter most when planning a batch. Keep the overnight hold and flour additions within the limits for this pumpkin dough.
Can I make these pumpkin cinnamon rolls overnight?
Yes. Shape the rolls, cover the pan, and refrigerate immediately at or below 40°F / 4°C for 8–12 hours. The next morning, let them finish proofing until pillowy, allowing roughly 60–120 minutes before baking; cold rolls may need longer. Do not complete the warm second rise before refrigerating.
How sticky should pumpkin cinnamon roll dough be?
Slightly tacky is normal, but the kneaded dough should hold together and stretch. Start with 360 g flour, allow the 5-minute rest, and knead before adding more. If it still smears wetly, use the 60 g reserve in 7–8 g additions, including flour used on the counter.
Why is my pumpkin dough taking so long to rise?
A cool room or weak yeast can slow the rise. Keep the covered dough around 75–78°F / 24–26°C and wait for it to approach double its starting volume. If it remains inactive, check yeast freshness and whether the milk mixture was too hot; a longer bake cannot replace the rise.
Can I leave the shaped rolls out for a longer second rise?
Only while they still need to proof. The 45–75-minute range is a guide: expanded, pillowy rolls with slow partial spring-back are ready. Leaving them much longer can weaken their structure. For an overnight delay, refrigerate immediately after shaping instead of leaving the pan to rise unattended.
How can I tell if the middle rolls are fully baked?
Check the bread in a middle roll for set layers and a gently springing top, with a temperature near 190°F / 88°C away from the filling. Moist cinnamon filling is expected; pale, pasty dough is not. If the tops are already brown, tent loosely with foil and continue baking.
Can I prepare the cream cheese glaze the night before?
Yes. Refrigerate it covered at or below 40°F / 4°C, then stir or beat it smooth before using. Let it soften only briefly as needed. Keep its total time out of refrigeration under 2 hours, or under 1 hour above 90°F / 32°C, including time on the glazed rolls.
Can I replace the all-purpose flour with gluten-free flour?
A direct measure-for-measure swap is not a reliable match for this dough. Wheat gluten provides the stretch needed for kneading, rolling, and holding the rise. For gluten-free rolls, use a recipe built around a gluten-free flour blend rather than replacing the flour here.
Continue Your Cozy Pumpkin Baking Journey
Pumpkin, cinnamon, and warm fruit each offer a different next bake, whether you want another breakfast to share or a dessert for later in the day.
More Pumpkin Breakfast Favorites
For pumpkin breakfasts without two yeast rises, muffins, a loaf, and waffles offer different ways to use the same seasonal flavor.
- Pumpkin Muffins: Bake individually portioned pumpkin breakfasts without yeast proofing.
- Pumpkin Chocolate Chip Muffins: Bring chocolate into a soft pumpkin muffin.
- Pumpkin Bread Recipe: Choose a sliceable pumpkin loaf for breakfast or an afternoon break.
- Pumpkin Waffle Recipe: Move the pumpkin breakfast to the waffle iron.
Follow the Cinnamon Swirl
Cinnamon works just as well in a pancake swirl, small pull-apart pieces, or a creamy dessert as it does in a pan of rolls.
- Sourdough Discard Cinnamon Rolls: Use a separate dough designed to include sourdough discard.
- Cinnamon Roll Pancakes: Bring the cinnamon swirl to a pancake breakfast.
- Monkey Bread: Keep the sharing format with smaller pull-apart cinnamon pieces.
- Churro Cheesecake: Pair cinnamon sugar with a creamy cheesecake layer.
Keep Baking for Fall
For another fall dessert, choose warm apples, a snack cake, soft cookies, or a pumpkin sponge wrapped around cream filling.
- Baked Apples Recipe: Choose a warm dessert centered on fruit.
- Apple Cake Recipe: Bake an apple snack cake with a cinnamon-sugar finish.
- Pumpkin Sugar Cookies: Make soft pumpkin cookies with a simple sugar coating.
- Pumpkin Roll Recipe: Try pumpkin sponge cake with a cream filling.
Why This Pumpkin Cinnamon Roll Recipe Belongs in Your Recipe Box
Keep this recipe as a reference for the judgments that make pumpkin yeast dough easier to handle each autumn.
- Pumpkin Dough Confidence: The flour and stretch cues help you recognize workable pumpkin dough when its initial stickiness feels unfamiliar.
- Readable Rise Cues: Volume and touch give you something useful to compare when a later batch rises at a different pace.
- A Reliable Portion Map: The rectangle and slice measurements make it easier to return to the same medium roll size.
- A Center-First Check: Checking the middle builds a habit of judging the whole pan rather than trusting its browned edges.
- A Clear Glaze Finish: The thick-ribbon cue gives you a recognizable finishing point even when cream cheese consistency varies.
- A Useful Brunch Reference: The schedule helps you decide how much of a future breakfast can be prepared the evening before.
A Final Note on Pumpkin Cinnamon Rolls
Pumpkin earns its place in these rolls through the bread itself. It softens the color and rounds out the cinnamon, while the tang of cream cheese keeps the sweet finish lively.
This is a bake to return to when you want to spend part of a fall morning making something warm to share. Familiar dough cues make that time easier to settle into, even when the room is cooler or the rise takes a little longer.
There is a quiet satisfaction in a pan of rolls that has been given time to become bread. The spirals can be slightly uneven and the glaze can settle where it likes; a tender middle is what makes the last bite worth slowing down for.

Pumpkin Cinnamon Rolls
Soft pumpkin cinnamon rolls with tender pumpkin-gold layers, a rich brown sugar cinnamon swirl, and smooth vanilla cream cheese glaze. This homemade yeast dough bakes into 12 pull-apart rolls, with clear cues for kneading, proofing, and checking the centers. Shape them the night before for a warm pan at a relaxed fall breakfast or holiday brunch.
Ingredients
For the Pumpkin Dough
- 3 to 3 1/2 cups (360–420 g) all-purpose flour, spooned and leveled if measured by volume; begin with 3 cups (360 g), reserve up to 1/2 cup (60 g)
- 1/2 cup (100 g) granulated sugar
- 2 1/4 teaspoons (7 g) instant yeast, one standard packet, within date
- 1 teaspoon (6 g) fine table salt
- 1 teaspoon (about 2.6 g) ground cinnamon
- 1/2 teaspoon (about 1.1 g) ground nutmeg
- 1/2 cup (120 ml) whole milk
- 1/2 cup (113 g) plain canned pumpkin purée, stirred and at room temperature
- 1/4 cup (57 g) unsalted butter, melted with the milk and cooled as specified below
- 1 large egg (about 50 g without shell), at room temperature
For the Cinnamon Filling
- 1/2 cup (113 g) unsalted butter, softened and spreadable, not melted
- 3/4 cup (160 g) packed light brown sugar
- 2 tablespoons (about 16 g) ground cinnamon
For the Vanilla Cream Cheese Glaze
- 4 ounces (113 g) full-fat brick-style cream cheese, softened
- 1 cup (113 g) powdered sugar, measured before sifting; sift if lumpy
- 1 teaspoon (5 ml) vanilla extract
- 2–3 tablespoons (30–45 ml) whole milk; begin with 2 tablespoons and add the final tablespoon gradually only if needed
Instructions
- Measure and prepare. Measure 3 cups (360 g) flour into a large bowl and keep up to 1/2 cup (60 g) separately for adjustments and bench dusting. Lightly grease a proofing bowl and a light-colored 9 × 13 × 2-inch metal pan. Bring the pumpkin and egg to room temperature. Soften the filling butter during the first rise and the cream cheese near glaze-making time.
- Warm the milk and butter. Gently warm 1/2 cup (120 ml) whole milk with 1/4 cup (57 g) unsalted butter until the butter melts, without boiling or reducing the milk. Cool to 100–110°F / 38–43°C before adding it to the dough.
- Mix the pumpkin dough. Whisk the initial 360 g flour with the granulated sugar, instant yeast, salt, 1 teaspoon cinnamon, and nutmeg. Add the warm milk mixture, pumpkin purée, and egg. Stir until no loose flour remains, then cover and rest for 5 minutes. The dough should be soft and rough, with no dry pockets.
- Knead until supple. Knead by hand for about 8–12 minutes or with a dough hook at low speed for about 6–10 minutes, then judge the dough. It should be smooth, elastic, slightly tacky, and able to stretch into a thin membrane before tearing. Add reserved flour only if it keeps smearing wetly after kneading, about 1 tablespoon (7–8 g) at a time. Count bench dusting within the 60 g reserve. Stop adding when the dough holds together and lifts with a scraper; do not try to make it completely dry. Aim for a finished dough temperature around 75–80°F / 24–27°C and pause if mixing makes it noticeably warmer.
- Let the dough rise. Place the dough in the greased bowl, cover, and let rise in a moderate warm spot around 75–78°F / 24–26°C until nearly doubled, rounded, and aerated, about 60–120 minutes. A cooler kitchen may take longer. Mark the starting height if possible and avoid forcing the rise in a hot oven.
- Make the cinnamon filling. Near the end of the first rise, stir together 1/2 cup (113 g) softened butter, 3/4 cup (160 g) light brown sugar, and 2 tablespoons (16 g) cinnamon. The filling should be a cohesive, spreadable paste. If the butter is oily or liquid, cool it until soft before spreading.
- Roll, fill, and cut. Gently press out large gas pockets and roll the dough into an even 15 × 10-inch / 38 × 25-cm rectangle, with the long sides horizontal. If it springs back, cover and rest for 5–10 minutes. Spread the filling evenly, leaving about 1/2 inch / 1.3 cm bare along the far long edge. Roll from the opposite long side into a 15-inch log, snugly without pulling tight, and seal the seam. Cut 12 equal 1 1/4-inch / 3.2-cm pieces without trimming away the ends. Arrange cut-side up in three rows of four in the prepared pan.
- Proof and preheat. Cover and let the rolls become visibly expanded and pillowy, with the gaps narrowing, about 45–75 minutes. A light indentation in a dough band should return slowly and partly; rapid rebound means they need more time. Use both volume and touch. During the latter part of proofing, fully preheat a conventional oven to 350°F / 175°C with a rack in the center. For the overnight route, follow the note below before this room-temperature rise.
- Bake until the centers are set. Bake for about 25–30 minutes, checking from 20 minutes. If the tops brown early, tent loosely with foil. Check a middle roll: the bread layers should be set and gently springy, with an instant-read thermometer inserted into bread rather than filling reading about 190°F / 88°C. Look for light golden edges and fully baked bread around a moist cinnamon ribbon. A pasty stripe of raw dough needs more baking even if the thermometer reads near the target.
- Cool and make the glaze. Set the pan on a rack for about 15–20 minutes, until the rolls are warm rather than steaming. During this time, beat the softened cream cheese smooth, then add the powdered sugar and vanilla. Mix in 2 tablespoons (30 ml) milk and add the remaining tablespoon gradually only if needed. The glaze should fall in a smooth, thick ribbon.
- Glaze and serve. Spread the glaze over the warm rolls, leaving the shape of the cinnamon spirals visible, and serve warm. The glaze softens and settles into the layers; it stays more visibly white on cooler rolls. Refrigerate leftovers promptly as directed below.
Notes
- Flour and pan preparation. Begin with 360 g flour and use only as much of the remaining 60 g as the dough needs, including dusting the work surface. Use a light coating of neutral oil or nonstick spray for the bowl and pan.
- Time. Allow about 4 hours for the same-day route. Estimated hands-on preparation is about 45 minutes, including filling and glaze work during the rises and cooling. The full elapsed range is about 3 hours 5 minutes to 4 hours 45 minutes, plus a 5–10-minute shaping rest if needed. Cooler dough can take longer. The timing fields use a 30-minute bake and include the remaining rest, rise, and cooling time without counting overlapping work twice.
- Overnight option. Immediately after shaping, cover the pan and refrigerate at or below 40°F / 4°C for 8–12 hours, before the room-temperature second rise. The next day, allow about 60–120 minutes at moderate room temperature for the rolls to become pillowy and show slow, partial spring-back. Follow the dough cues, then bake as directed.
- Refrigerate the glaze and glazed rolls. Keep covered at or below 40°F / 4°C and use within 3 days for best quality. Limit total time out of refrigeration to 2 hours, or 1 hour above 90°F / 32°C. Chill leftovers in manageable portions rather than leaving the whole glazed pan out for hours.
- Freeze and rewarm. Freeze fully baked, cooled, unglazed rolls, individually wrapped and sealed, for up to 2 months for best quality. Thaw overnight in the refrigerator. Warm loosely covered at 300°F / 150°C, checking around 10–15 minutes, then glaze near serving.
- Ingredient choices. Use plain canned pumpkin, not pumpkin pie filling, and full-fat brick-style cream cheese. Gluten-free flour, sourdough starter, and vegan ingredient swaps need a separately developed recipe. Contains wheat, milk, and egg.
- Nutrition estimate. Approximately 406 calories per roll with one-twelfth of the glaze, calculated using 420 g flour and 3 tablespoons glaze milk. Values vary with the flour and milk actually used, brands, and glaze portions. The light coating of oil or spray for the bowl and pan is not included.
Nutrition Information:
Yield: 12 Serving Size: 1 rollAmount Per Serving: Calories: 406Total Fat: 16gSaturated Fat: 10gCholesterol: 57mgSodium: 242mgCarbohydrates: 61gFiber: 2gSugar: 32gProtein: 6g
Nutrition information is provided as an estimate only and may vary based on specific ingredients, brands, and portion sizes used. This information should not be considered medical or nutritional advice.
12 Sweet Favorites — Yours, Free 🍰
Tiramisù, no-bake cheesecake, the perfect chocolate chip cookie & 9 more reader-loved desserts — gathered into one beautiful free recipe book. From my kitchen to yours.
No spam, just sweet things. Unsubscribe anytime.