White Cake Recipe
🎁 FREE E-BOOK: 12 Sweet Favorites — reader-loved desserts in one beautiful recipe book.
Some cakes are made to satisfy a sweet craving. Others become part of life’s biggest celebrations. A beautiful White Cake belongs in the second category.
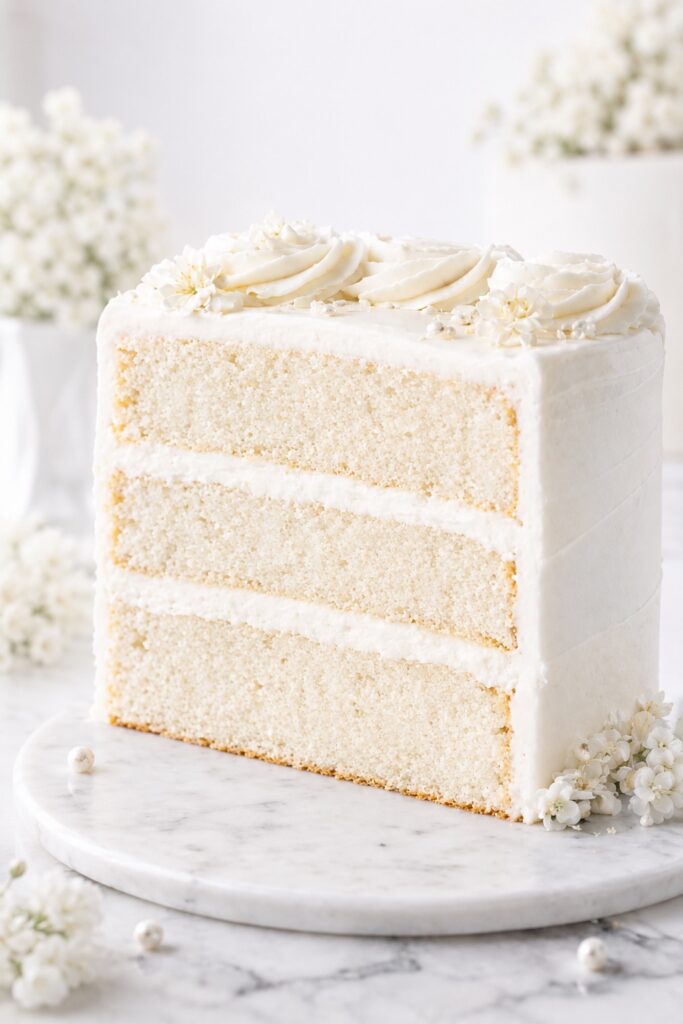
Its snowy white layers, silky vanilla frosting, and incredibly soft crumb have made it a timeless favorite for birthdays, weddings, baby showers, anniversaries, Easter celebrations, and countless family gatherings. Slice into a well-made white cake and you’ll immediately notice what makes it different: the crumb is remarkably fine, almost velvety, with a delicate richness that feels elegant rather than heavy. Every bite is light, buttery, and infused with gentle vanilla flavor.
That’s exactly what this recipe was designed to deliver. After studying traditional American bakery techniques, modern cake science, and the small details that separate an average layer cake from an exceptional one, this recipe focuses on producing a cake that is both beautiful and dependable. The layers bake up tall and even, the crumb stays soft and moist for several days when stored properly, and the finished cake slices cleanly without becoming dense or dry.
One of the reasons people save this White Cake recipe again and again is its versatility. Dress it up with fresh berries for spring, decorate it with elegant buttercream flowers for a wedding shower, add colorful sprinkles for a birthday, or simply enjoy a classic slice with coffee on a quiet afternoon. It never feels out of place because its simple elegance allows every occasion to shine.
If you’ve ever baked a white cake that turned out dry, yellow instead of white, crumbly, or disappointingly dense, you’re certainly not alone. White cake is one of those classic recipes where small changes in ingredients or mixing method can dramatically affect the final texture. Throughout this guide, I’ll explain not only what to do, but why each step matters, so you can bake this cake with confidence from the very first attempt.
Save this recipe for birthdays, holidays, baby showers, bridal showers, or anytime you want a truly classic homemade layer cake that never goes out of style.
What Is White Cake?
White Cake is a classic American vanilla layer cake made primarily with egg whites instead of whole eggs, giving it its signature bright white interior and exceptionally delicate crumb. Unlike yellow cake, which gets its richness and golden color from egg yolks, white cake relies on carefully balanced ingredients to create a lighter appearance while still delivering a buttery flavor and tender texture.
Modern bakery-style white cakes often combine butter for flavor, a small amount of neutral oil for lasting moisture, buttermilk for tenderness, and cake flour for an exceptionally fine crumb. When prepared correctly, the result is a cake that is soft yet sturdy enough to support multiple layers of frosting without becoming heavy.
Today, white cake remains one of the most popular celebration cakes because it pairs beautifully with almost any filling or frosting, from classic vanilla buttercream to fresh berries, lemon curd, raspberry preserves, chocolate ganache, or whipped cream.
Quick Recipe Overview
| Texture | Soft, velvety, fine crumb with a moist interior |
| Flavor | Buttery vanilla with a delicate sweetness |
| Difficulty | Intermediate |
| Prep Time | 30 minutes |
| Bake Time | 23–28 minutes |
| Total Time | About 2 hours including cooling |
| Servings | 12–14 slices |
| Method | Reverse Creaming |
| Best For | Birthdays, weddings, baby showers, holidays, elegant celebrations |
In short: This White Cake combines bakery-style techniques with reliable home baking methods to produce exceptionally soft, pale, classic white cake layers that stay moist, stack beautifully, and slice cleanly every time.
Why This White Cake Recipe Works
A truly exceptional white cake isn’t created by using more butter or more sugar. It’s created by balancing structure, moisture, fat, and mixing technique so each ingredient supports the others.
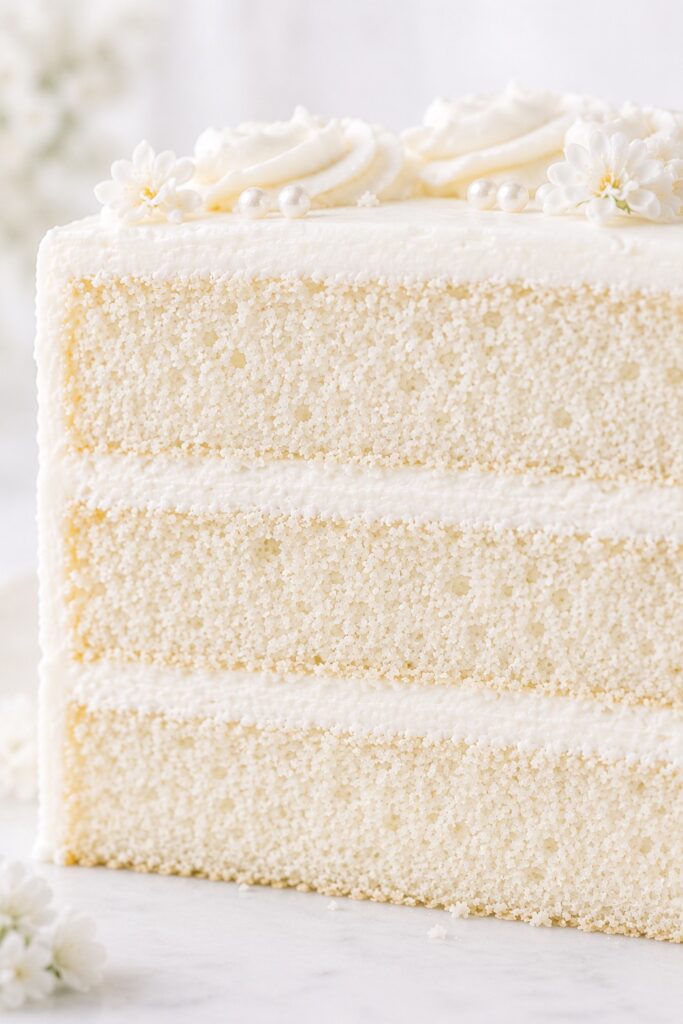
This recipe begins with cake flour, which contains less protein than all-purpose flour. Less protein means less gluten development, producing the remarkably fine, almost silky crumb that defines a great white cake. It’s one of the biggest reasons this cake feels light rather than chewy.
Instead of relying entirely on butter, this recipe combines butter and a small amount of neutral oil. Butter provides the rich flavor people expect from a celebration cake, while the oil helps the cake stay soft even after refrigeration. It’s a simple combination that gives you the best qualities of both ingredients without making the cake feel greasy.
Another key ingredient is cultured buttermilk. Its gentle acidity tenderizes the batter while reacting with a small amount of baking soda to create an even, delicate rise. The result is a moist cake with a soft bite instead of a dry or crumbly texture. One small detail that’s easy to overlook is shaking the buttermilk well before measuring—it helps redistribute the cultured solids for more consistent results.
Perhaps the biggest difference between this recipe and many traditional white cake recipes is the reverse creaming method. Instead of creaming butter and sugar together first, the butter is mixed into the dry ingredients before the liquids are added. Coating the flour with fat limits gluten development from the very beginning, creating a remarkably fine crumb with small, even air pockets. This technique also helps the layers bake flatter, making assembly much easier.
Using only egg whites keeps the cake beautifully white while providing enough protein to support three tall layers. Many recipes sacrifice moisture when they remove the yolks, but this one restores that balance with buttermilk, butter, and oil, so the finished cake remains tender instead of dry.
Finally, every ingredient in this recipe is measured with the finished cake in mind rather than in isolation. The sugar is balanced to complement a generous layer of vanilla buttercream rather than compete with it, the leavening is calibrated for even rising without excessive doming, and the fat ratio creates slices that feel luxurious while still holding their shape on the plate.
These small decisions may seem subtle individually, but together they produce the kind of white cake people remember long after the celebration is over.
Why You’ll Love This Recipe
There are countless white cake recipes online, but this one was developed with one goal in mind: creating a cake that looks elegant enough for special occasions while remaining approachable for home bakers.
Here’s why you’ll find yourself coming back to it:
- Beautifully white layers. Using only egg whites creates the bright, classic appearance that defines a traditional White Cake.
- Exceptionally soft crumb. Cake flour, buttermilk, and the reverse creaming method work together to create a velvety texture that stays tender from the first slice to the last.
- Moist for days. The combination of butter and a small amount of oil helps the cake stay soft much longer than recipes made with butter alone.
- Bakes into even layers. The batter is designed to rise evenly with minimal doming, making stacking and frosting much easier.
- Easy to customize. Pair it with vanilla buttercream, chocolate frosting, fresh berries, lemon curd, raspberry filling, or your favorite celebration decorations.
- Perfect for any occasion. From birthdays and weddings to baby showers and holidays, this timeless cake always feels appropriate.
- Built on proven baking techniques rather than trial and error. Every ingredient and every step has a purpose, giving you consistent results you can trust.
Whether you’re baking your very first layer cake or adding another classic to your collection, this recipe was designed to become the one you reach for year after year.
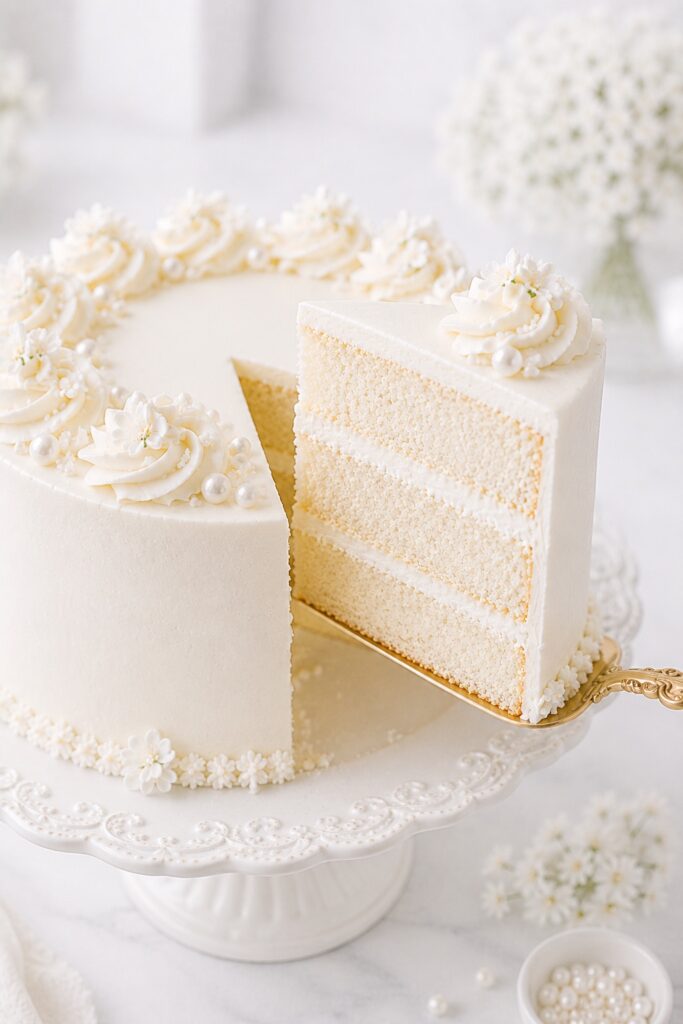
Baking Science: Why This White Cake Is So Soft
White Cake may look simple, but achieving a cake that’s bright white, incredibly tender, and sturdy enough for layering depends on several small scientific principles working together.
The first is protein control. Cake flour contains less protein than all-purpose flour, so it forms less gluten when mixed. Less gluten means a softer, finer crumb instead of a chewy or bread-like texture.
The second is fat distribution. During reverse creaming, softened butter coats the flour before the liquid ingredients are added. This thin layer of fat acts like a barrier, slowing gluten formation and producing the smooth, velvety texture that’s difficult to achieve with the traditional creaming method.
Moisture is equally important. Butter contributes flavor but firms up when chilled, while oil remains liquid at cooler temperatures. By combining the two, this cake stays pleasantly soft even after a night in the refrigerator without losing its buttery character.
The buttermilk also plays a quiet but important role. Its acidity gently weakens gluten while activating the baking soda for a lighter, more even rise. Instead of creating large air pockets, the batter develops countless tiny air bubbles that bake into a refined, uniform crumb.
Finally, using only egg whites keeps the crumb naturally pale while providing enough protein to stabilize the structure during baking. The cake rises evenly, sets without becoming tough, and slices neatly once cooled.
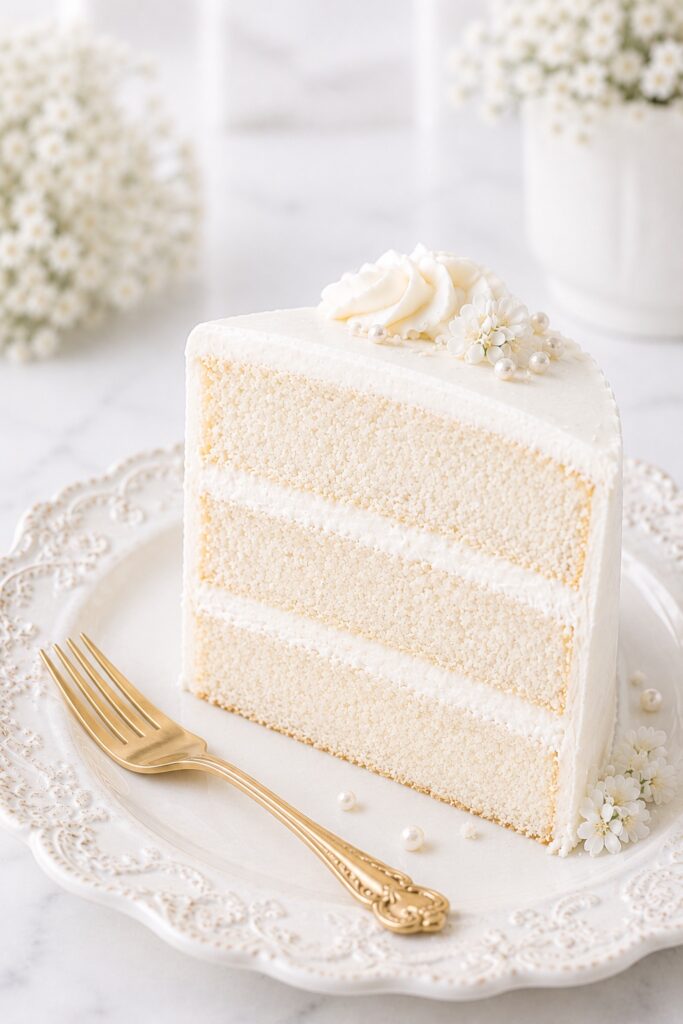
None of these techniques are complicated on their own. What makes this recipe special is how they work together. Rather than depending on a single “secret ingredient,” it relies on a series of thoughtful, balanced decisions that consistently produce a cake with the soft texture, elegant appearance, and reliable structure expected from a true bakery-style White Cake.
Why Isn’t My White Cake Pure White?
Many bakers expect White Cake to bake up completely snow white, but a slight cream-colored crumb is perfectly normal. The goal is a cake that stays noticeably lighter than a traditional yellow cake, not one that’s paper white.
Several factors influence the final color:
- Egg yolks are the biggest cause of yellow cake, which is why this recipe uses only egg whites.
- Pure butter naturally has a pale yellow color. Using part oil helps reduce that effect while keeping the cake moist.
- Pure vanilla extract can tint the batter slightly. For the brightest possible crumb, use a clear vanilla extract if appearance is more important than flavor, though pure vanilla provides the best taste.
- Overbaking deepens the color of both the crust and the crumb, so remove the cakes as soon as they pass the doneness tests.
The finished cake should have a soft ivory-colored crumb with only lightly golden edges—a hallmark of a properly baked White Cake.
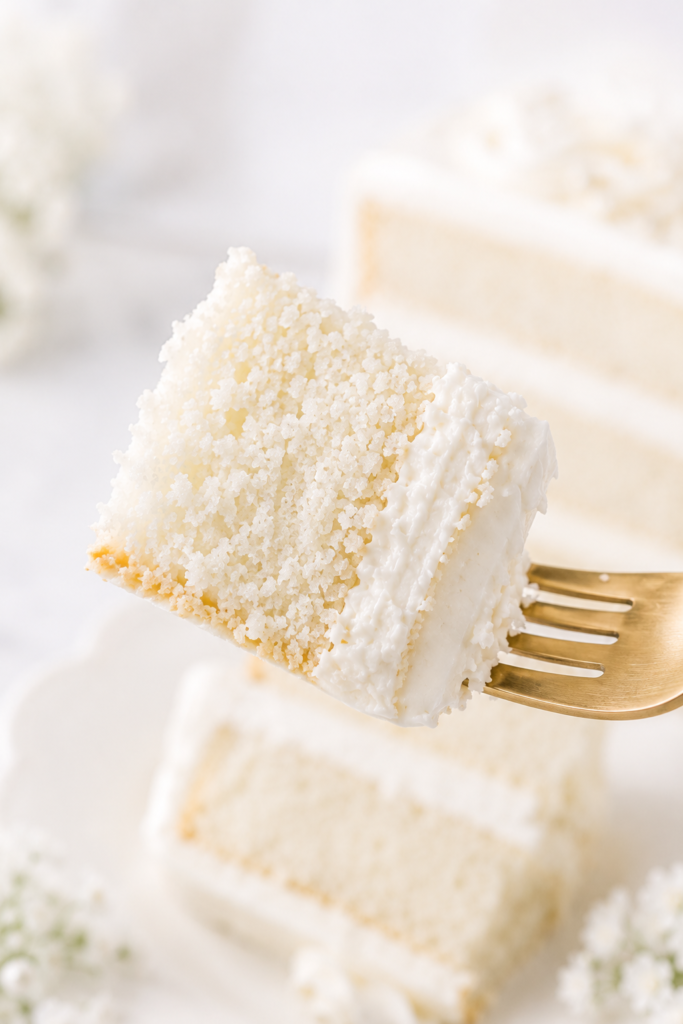
Before You Begin
White Cake may look simple, but a few minutes of preparation can make the difference between a good cake and one with a beautifully soft, bakery-style crumb. Before you start mixing, take a moment to set yourself up for success.
- Bring the butter, egg whites, and buttermilk to room temperature. Ingredients at a similar temperature blend more easily and create a smoother batter.
- Weigh the ingredients whenever possible. White cake is less forgiving than many other cakes, and accurate measurements help produce consistent results.
- Prepare all three cake pans before mixing. Grease them well, line the bottoms with parchment paper, and have them ready so the batter can go straight into the oven.
- Read through the recipe once before beginning. Because this cake uses the reverse creaming method, the order of mixing is slightly different from many traditional cake recipes.
- Preheat the oven completely. An oven that hasn’t reached full temperature can affect how evenly the layers rise.
Taking just five extra minutes before you begin makes the entire baking process smoother and helps produce the soft, even layers this White Cake is known for.
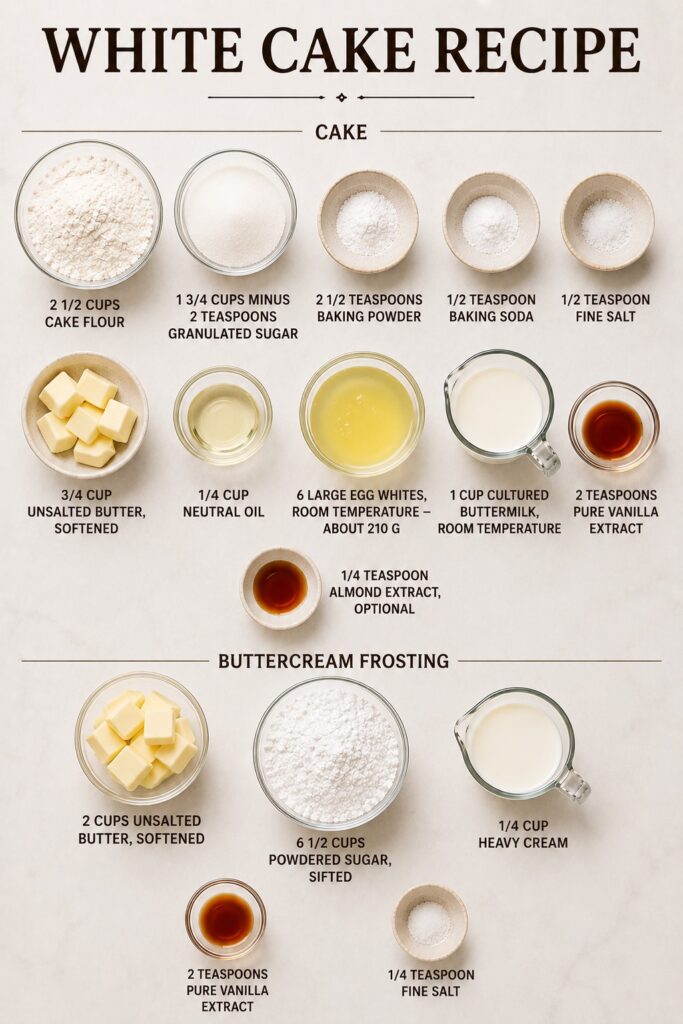
Ingredients
This White Cake uses simple baking ingredients, but the balance matters. Each ingredient has a specific job: softness, structure, moisture, flavor, or color. For the most consistent results, use a kitchen scale when possible, especially for the cake flour and sugar.
For the White Cake Layers
- 2 1/2 cups (300 g) cake flour
- 1 3/4 cups minus 2 teaspoons (340 g) granulated sugar
- 2 1/2 teaspoons baking powder
- 1/2 teaspoon baking soda
- 1/2 teaspoon fine salt
- 3/4 cup (170 g) unsalted butter, softened
- 1/4 cup (60 ml) neutral oil
- 6 large egg whites, room temperature — about 210 g
- 1 cup (240 ml) cultured buttermilk, room temperature
- 2 teaspoons pure vanilla extract
- 1/4 teaspoon almond extract, optional
For the Vanilla Buttercream
- 2 cups (454 g) unsalted butter, softened
- 6 1/2 cups (780 g) powdered sugar, sifted
- 1/4 cup (60 ml) heavy cream
- 2 teaspoons pure vanilla extract
- 1/4 teaspoon fine salt
Important note: For the cleanest white cake flavor and texture, use real cultured buttermilk if possible. Milk mixed with vinegar can work in some cakes, but cultured buttermilk gives this recipe a softer crumb and more consistent structure.
Ingredient Intelligence
A White Cake has fewer ingredients than many celebration cakes, which means each one plays a bigger role. Small changes that might go unnoticed in another cake—like using warmer butter or a different flour—can noticeably affect the final texture here.
Cake Flour
Cake flour is one of the most important ingredients in this recipe. It has a lower protein content than all-purpose flour, which helps create a finer, softer crumb. This is what gives the cake that delicate bakery-style texture instead of a chewy or heavy bite.
If measuring by cups, spoon the cake flour into the measuring cup and level it off with a knife. Do not scoop directly from the bag, because packed flour can add too much dry matter and make the cake less tender. For the best result, use 300 g cake flour.
Unlike many recipes where ingredient substitutions work well, White Cake is less forgiving. Using cake flour isn’t simply a preference here, it’s one of the reasons this recipe achieves its signature delicate texture.
Egg Whites
Egg whites keep the cake naturally pale and provide structure without adding the yellow color that comes from yolks. Six large egg whites give the cake enough strength to rise into three layers while still keeping the crumb soft and light.
Whisk the egg whites briefly before adding them to the wet mixture. They should look loose and blended, not foamy. This small step helps them incorporate more evenly into the batter.
Butter + Oil
Butter gives the cake its classic rich flavor, while neutral oil helps the crumb stay moist for several days. A cake made with only butter can taste wonderful on day one but become firmer after refrigeration. The small amount of oil keeps the slices softer without making the cake greasy.
The butter should be softened but still cool to the touch. When you press it gently, it should hold a fingerprint without looking shiny or melted.
If the butter feels greasy or starts sticking heavily to your fingers, it has become too warm. Let it rest in the refrigerator for 5–10 minutes before using it. Properly softened butter mixes more evenly into the flour, which is essential for the reverse creaming method.
Buttermilk
Buttermilk adds moisture, tenderness, and a gentle tang that balances the sweetness. Its acidity also works with the baking soda to help the cake rise evenly.
Shake the buttermilk well before measuring. This redistributes the cultured solids and helps the batter stay smooth and consistent.
Cold buttermilk can make the butter firm up too quickly when the wet ingredients are added. Let it sit at room temperature for about 20–30 minutes before mixing for the smoothest batter.
Vanilla and Almond Extract
Vanilla is the main flavor in this cake, so use a pure vanilla extract you enjoy. The optional almond extract is used in a very small amount. It should not make the cake taste like almond; it simply adds that subtle bakery-style flavor that makes people wonder why the cake tastes so special.
If you prefer a completely classic vanilla flavor, simply leave out the almond extract. The cake will still have a rich vanilla aroma with no loss of texture.
Powdered Sugar for the Buttercream
Sifting the powdered sugar helps create a smoother frosting with fewer tiny lumps. If your powdered sugar feels slightly lumpy after storage, don’t skip this step. Sifting takes only a minute and helps create a noticeably smoother buttercream. This matters especially for a white cake because the frosting is part of the visual appeal. A silky buttercream makes the cake look cleaner, softer, and more polished once sliced.
Equipment You’ll Need
- Three 8-inch round cake pans — this recipe is designed for three even layers.
- Parchment paper rounds — essential for clean release.
- Stand mixer or hand mixer — a stand mixer makes the reverse creaming method easier and more consistent.
- Large mixing bowl
- Measuring jug — useful for combining the wet ingredients before adding them to the batter.
- Kitchen scale — recommended for dividing the batter evenly between the pans.
- Offset spatula — helpful for smoothing batter and frosting.
- Wire cooling rack
- Thin knife — for loosening the cake layers after baking.
Practical note: If you only have two 8-inch pans, bake two layers first, then bake the remaining batter separately. Keep the extra batter at room temperature while the first two layers bake, and avoid letting it sit for more than 30 minutes if possible.
Professional Baker’s Checklist
Before you turn on the mixer, make sure you’ve checked each of these:
- Butter is softened but still cool to the touch
- Egg whites and buttermilk are at room temperature
- Buttermilk has been shaken well
- Cake flour has been measured by weight if possible
- All three pans are prepared with parchment
- Oven is fully preheated to 350°F (175°C)
- Ingredients are measured before mixing begins
These small details take only a few minutes but make a noticeable difference in the finished cake.
How to Make White Cake
This recipe uses the reverse creaming method, which means the butter is mixed into the dry ingredients before the liquids are added. This creates a finer crumb and helps the cake layers bake flatter and more evenly.
1. Prepare the Cake Pans
Preheat the oven to 350°F (175°C).
Grease three 8-inch round cake pans. Line the bottoms with parchment paper, then lightly grease the parchment as well.
What you should see: Each pan should have a thin, even coating of butter or baking spray. The parchment should lie flat against the bottom with no curled edges.
Why this matters: White cakes are delicate because they use only egg whites. Parchment helps the layers release cleanly without tearing.
2. Mix the Dry Ingredients
In the bowl of a stand mixer, combine the cake flour, sugar, baking powder, baking soda, and salt.
Mix on low speed for 30 seconds, just until everything is evenly combined.
What you should see: The dry mixture should look uniform, with no visible streaks of flour, sugar, or leavening.
Baking tip: Mixing the dry ingredients first helps distribute the baking powder and baking soda evenly, so all three cake layers rise at the same rate.
3. Coat the Flour with Butter and Oil
Add the softened butter and neutral oil to the dry ingredients.
Mix on medium-low speed for 2–3 minutes, until the mixture looks like fine, damp sand and no large pieces of butter remain.
What you should see: The mixture should look crumbly, soft, and evenly moistened. If you squeeze a small amount between your fingers, it should hold together briefly, then break apart easily.
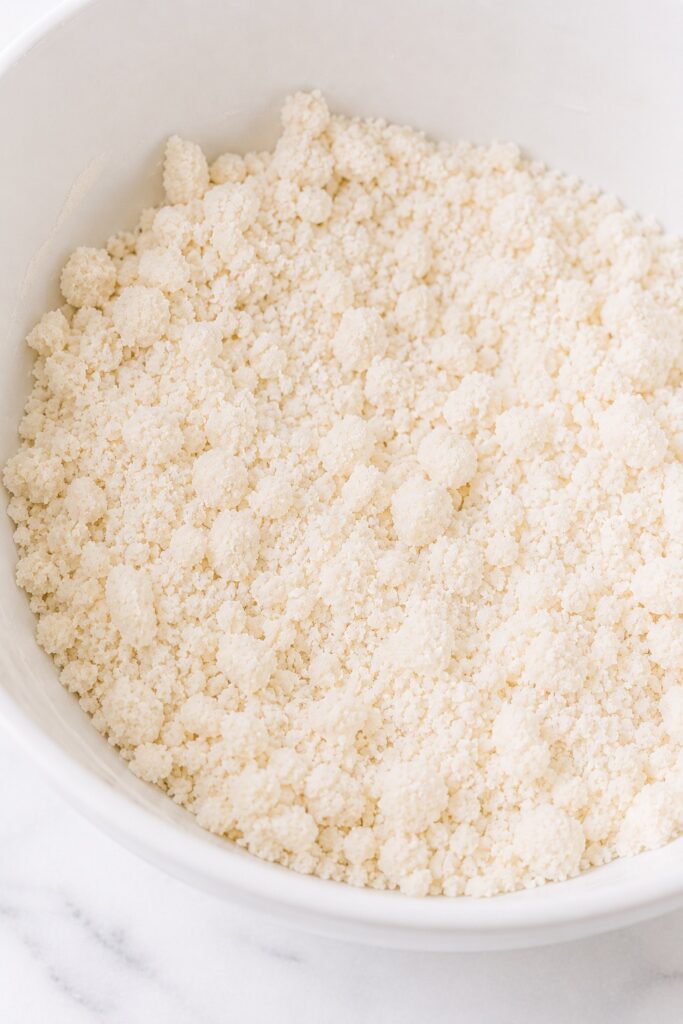
Insight: This is the step that creates the cake’s velvety texture. The butter coats the flour before the liquid is added, which limits gluten development and helps create a very fine crumb.
Don’t rush this step. The mixture should look evenly sandy before you add any liquid. If you still see visible pieces of butter, mix for another 20–30 seconds before continuing.
4. Combine the Wet Ingredients
In a measuring jug, whisk together the buttermilk, egg whites, vanilla extract, and almond extract if using.
Whisk just until smooth. Do not whip the egg whites into foam.
What you should see: The mixture should look pale ivory and fluid, with no thick streaks of egg white floating through it.
Note: If the egg whites look a little slippery at first, that is normal. A quick whisk is enough. You are not trying to make meringue.
5. Add the First Half of the Wet Mixture
With the mixer on low speed, slowly pour in about half of the wet mixture.
Mix for 30 seconds, then scrape down the sides and bottom of the bowl.
What you should see: The batter will start to look thicker and creamier, but it may still appear slightly uneven at this stage.
Do not worry: If the batter looks a little curdled after the first addition, keep going. It will smooth out as the rest of the liquid is added.
6. Add the Remaining Wet Mixture
Add the remaining wet mixture in two additions, mixing for 30–45 seconds after each addition.
After the final addition is incorporated, increase the mixer to medium speed and mix for 60–90 seconds.
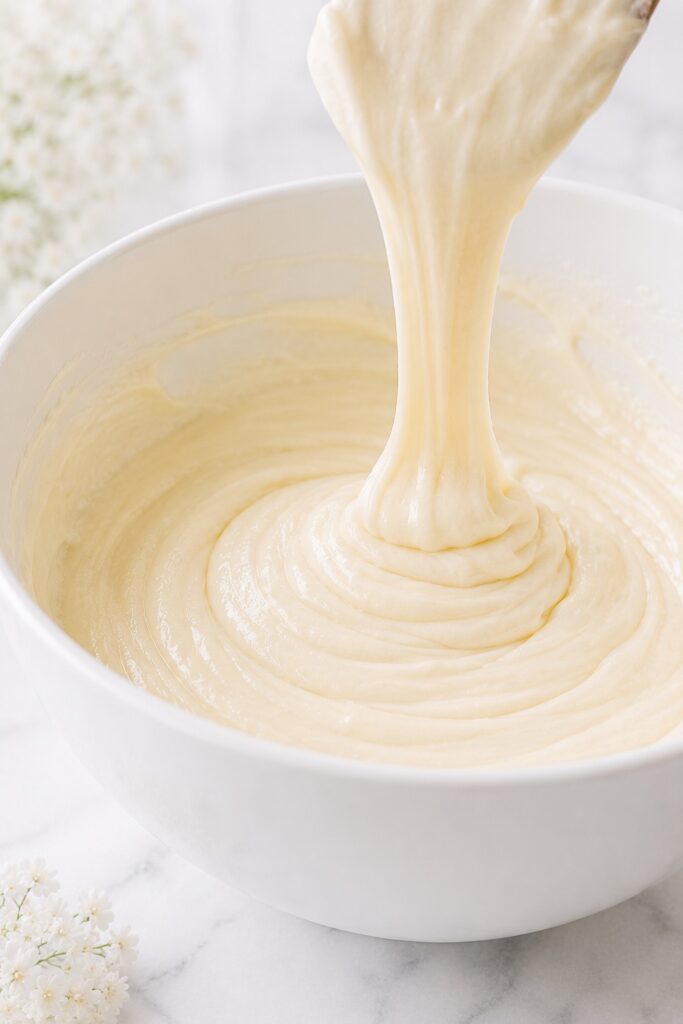
What you should see: The finished batter should look smooth, silky, and lightly glossy. A properly mixed batter should fall from the spatula in one continuous ribbon rather than breaking into thick clumps. That’s a good sign the butter and liquids have fully emulsified.
Baking tip: Do not mix longer than 90 seconds after the final addition. Overmixing can make the cake less tender and create larger air tunnels in the crumb.
7. Divide the Batter Between the Pans
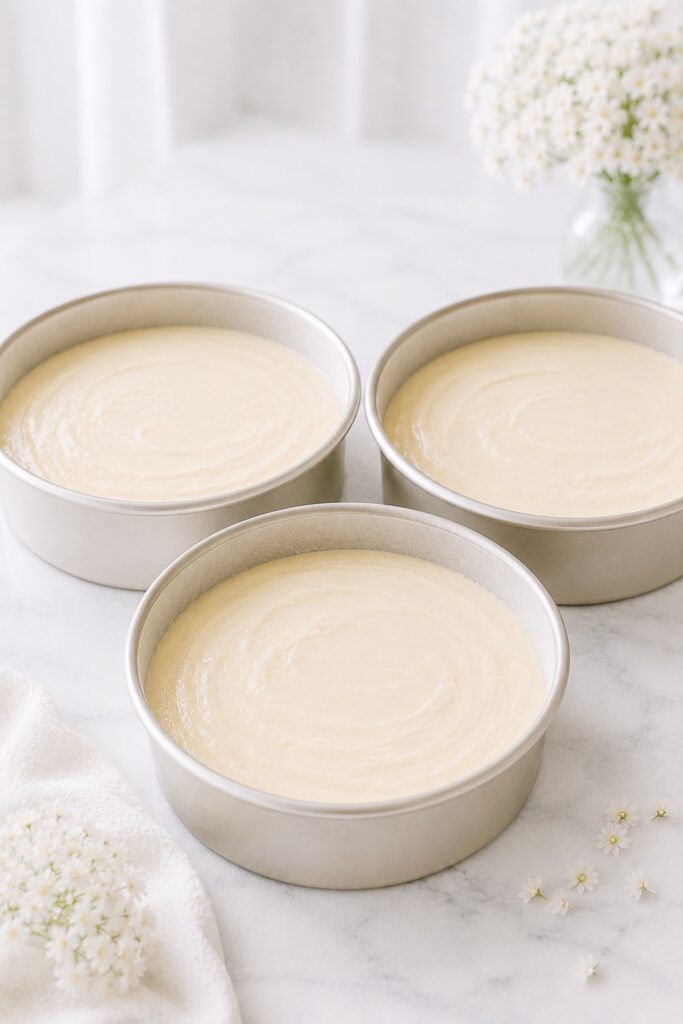
For the most even layers, weigh the finished batter and divide it equally between the three prepared pans.
Smooth the tops with a small offset spatula. Tap each pan once or twice on the counter to release any large air bubbles.
What you should see: The batter should sit evenly in each pan with a smooth, level surface. A few tiny bubbles on top are fine.
Pro tip: Weighing the batter helps the layers bake at the same rate and stack into a cleaner, more professional-looking cake.
8. Bake the Cake Layers
Bake for 23–28 minutes, checking after 23 minutes.
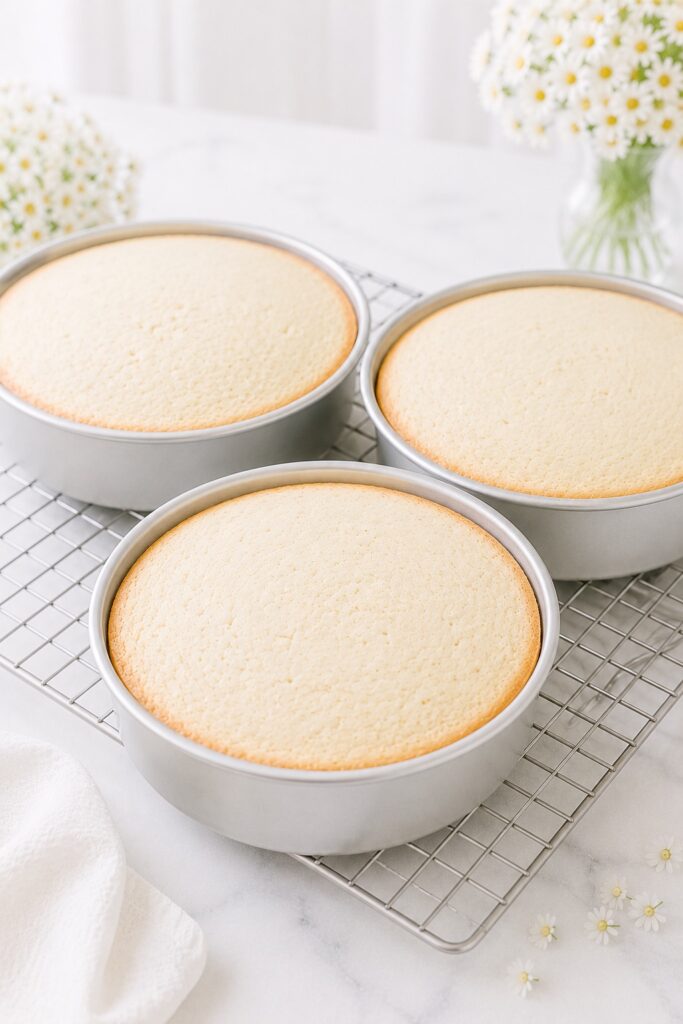
The cakes are done when the centers spring back lightly when touched, a toothpick inserted into the center comes out clean or with a few moist crumbs, and the edges just begin to pull away from the pans.
What you should see: The tops should remain pale with only very light golden edges. The center should look set, not wet or shiny. Don’t expect the cakes to brown like a yellow cake. A properly baked white cake should stay noticeably lighter, with just a hint of color around the edges.
Optional precision cue: If using an instant-read thermometer, the center of the cake should register about 205–208°F (96–98°C). Avoid opening the oven during the first 20 minutes of baking. Sudden temperature changes can affect how evenly the layers rise.
9. Cool the Cake Layers
Let the cakes cool in the pans for exactly 10 minutes.
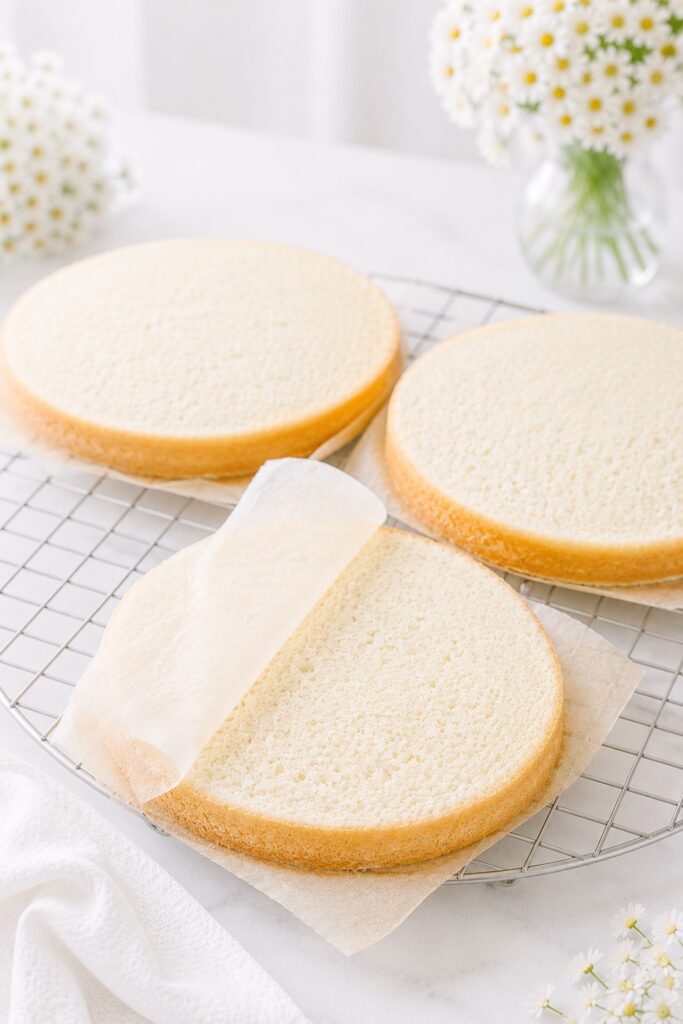
Run a thin knife around the edges, invert the cakes onto a wire rack, and gently peel off the parchment while the cakes are still warm.
Let the layers cool completely before frosting. If you’re decorating the cake later, wrap the completely cooled layers in plastic wrap and chill them for about an hour. Slightly chilled layers are firmer, easier to stack, and produce cleaner frosting edges.
What you should see: The cakes should release cleanly from the pans, with pale golden bottoms and soft, even tops. The layers will feel delicate while warm, then become easier to handle as they cool.
Handle the parchment gently. It should release easily after turning out the cakes, but pulling too quickly can disturb the soft surface.
How to Make the Vanilla Buttercream
1. Beat the Butter
Place the softened butter in a large mixing bowl. Beat on medium speed for 2–3 minutes, until creamy, smooth, and slightly lighter in color.
What you should see: The butter should look soft and spreadable, with no cold lumps.
2. Add the Powdered Sugar
Add the sifted powdered sugar gradually, about 1 cup at a time, mixing on low speed after each addition.
Once all the sugar is added, scrape down the bowl.
What you should see: The frosting will look thick at first. This is normal before the cream is added.
3. Add Cream, Vanilla, and Salt
Add the heavy cream, vanilla extract, and salt.
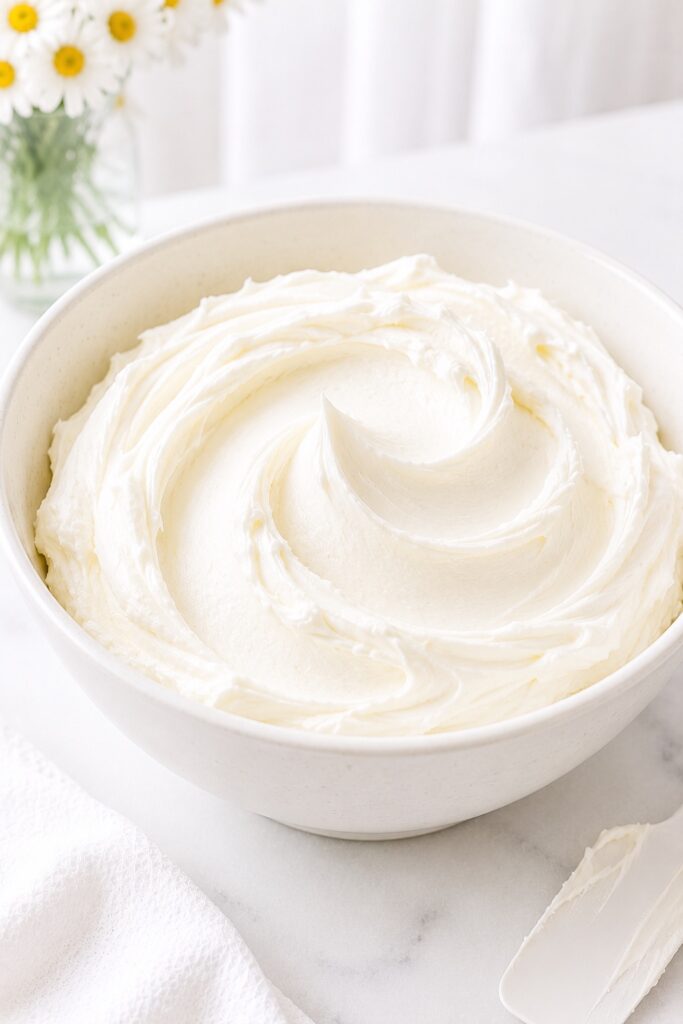
Beat on medium speed for 2–4 minutes, until the buttercream becomes smooth, fluffy, and easy to spread. If the buttercream develops small air bubbles, switch to low speed for the final minute of mixing. This helps create a smoother finish that’s easier to spread and decorate.
What you should see: The frosting should be thick enough to hold soft swirls but creamy enough to glide across the cake.
4. Adjust the Texture
If the frosting is too thick, add heavy cream 1 teaspoon at a time until it becomes spreadable.
If it is too soft, add powdered sugar 2 tablespoons at a time until it firms up.
Texture cue: For frosting a layer cake, the buttercream should hold its shape on a spatula but spread smoothly without tearing the cake.
Assembling the White Cake
1. Level the Layers if Needed
If the cake layers have a slight dome, trim the tops with a serrated knife so they stack evenly.
What you should see: The layers should be flat enough to sit securely on top of one another without rocking.
2. Add the First Layer
Place one cake layer on a cake stand or serving plate. Spread an even layer of vanilla buttercream over the top.
What you should see: The frosting layer should reach the edges and look level, not thicker on one side.
3. Stack and Frost
Add the second cake layer and repeat with more buttercream. Place the final cake layer on top.
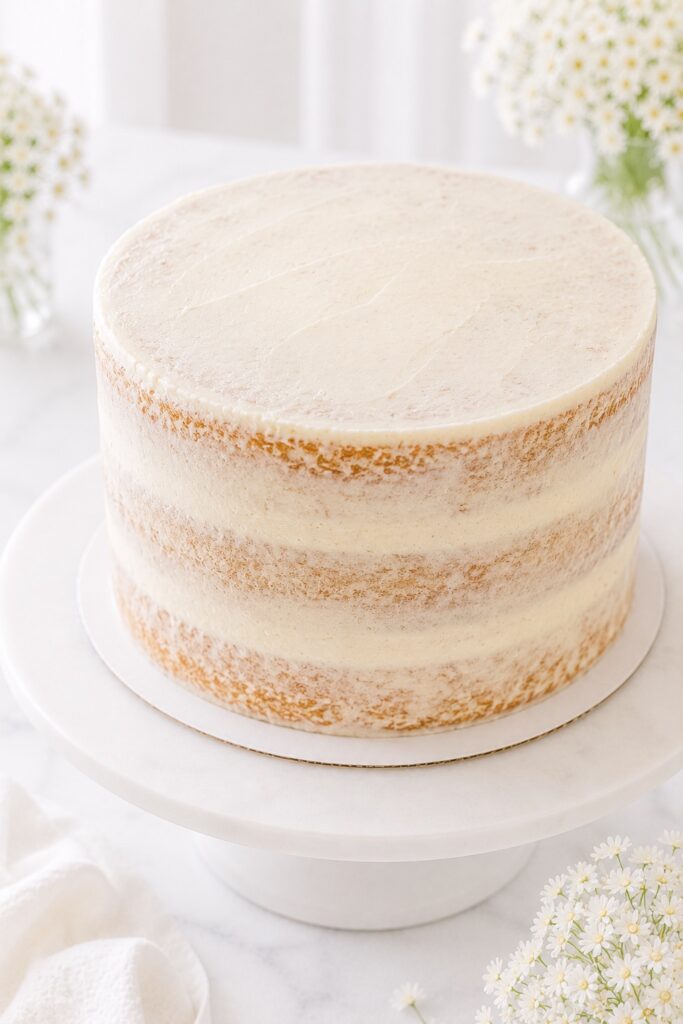
Spread a thin crumb coat over the entire cake, then chill for 20–30 minutes until the frosting feels firm to the touch.
Why this matters: A crumb coat traps loose crumbs and gives the final frosting layer a cleaner, smoother finish.
4. Add the Final Frosting Layer
Spread the remaining buttercream over the top and sides of the chilled cake. Smooth with an offset spatula or cake scraper.
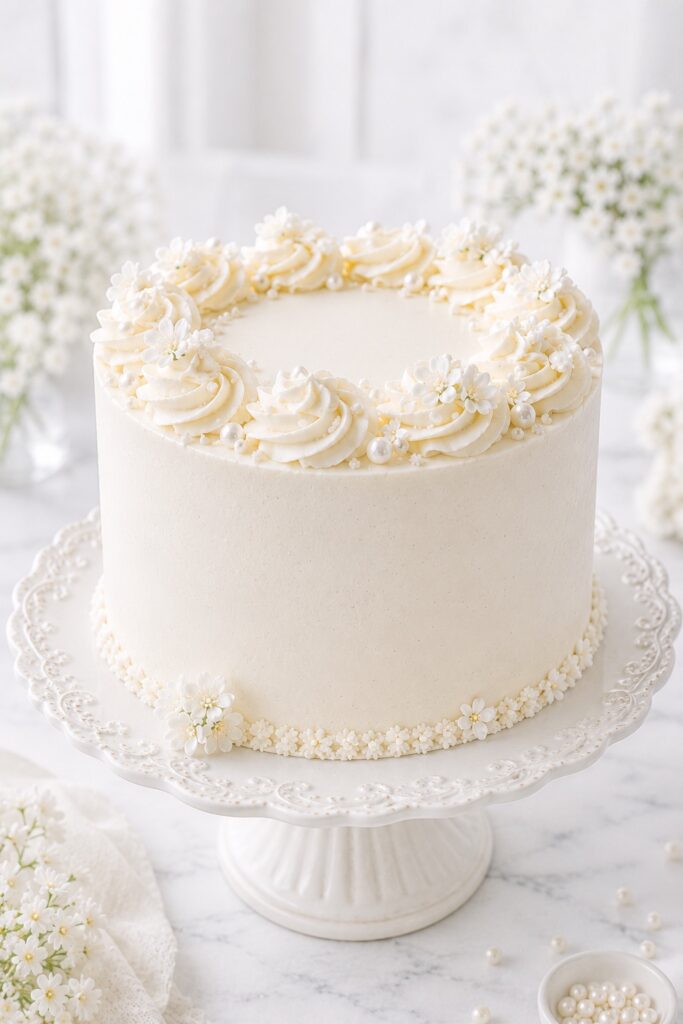
What you should see: The finished cake should look tall, smooth, and softly elegant, with clean layers hidden beneath a thick blanket of vanilla buttercream.
Save this for celebrations: This is the kind of classic white layer cake that looks beautiful with candles, buttercream flowers, fresh berries, pearl sprinkles, or a simple swirl of frosting on top.
How Bakers Get Perfectly Flat Cake Layers
Even with the reverse creaming method, professional-looking layers come from a few simple habits.
- Divide the batter evenly between the pans by weight whenever possible.
- Smooth the batter gently with a small offset spatula before baking.
- Avoid opening the oven during the first 20 minutes, which can interrupt the rise.
- Rotate the pans only if your oven bakes unevenly, and wait until the cakes are mostly set before doing so.
- If your oven tends to produce domed cakes, use damp cake strips around the pans for an even gentler rise.
Even if the layers develop a slight dome, a quick trim with a serrated knife is all that’s needed before assembling the cake.
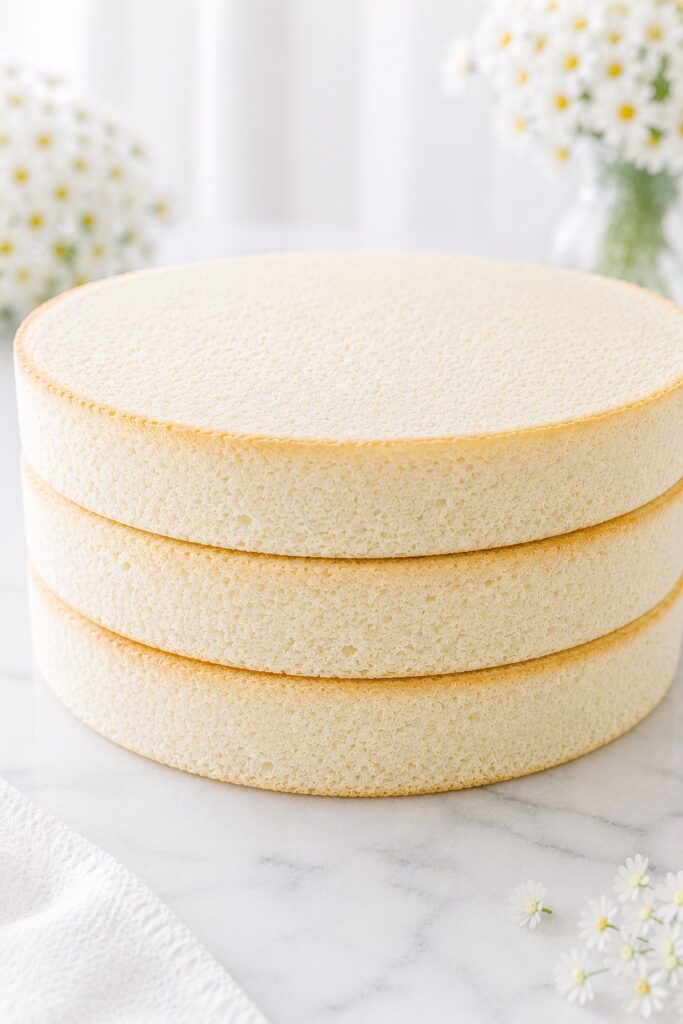
Visual Doneness Cues
White cake should never be baked until deeply golden. The goal is a pale, tender cake with a set center, soft edges, and a fine crumb. Because the layers are light in color, visual cues matter more than the timer alone.
- The tops should look set, not wet. The center should no longer appear shiny or loose.
- The edges should be very lightly golden. You want pale golden edges, not dark brown sides.
- The center should spring back gently. When touched lightly with a fingertip, it should bounce back instead of leaving a dent.
- A toothpick should come out clean or with a few moist crumbs. Wet batter means the cake needs more time.
- The edges may begin to pull away slightly. This should be subtle, not dramatic.
- The steam should reduce near the end of baking. When the cake is fully set, it looks calmer on the surface and less glossy in the center.
Baking note: If the cake looks pale but passes the spring-back test and toothpick test, trust the texture cues. A white cake should stay light in color.
Texture and Behavior Guide
| Stage | What You Should See | What It Means |
|---|---|---|
| Dry mixture after butter and oil | Fine, damp sand with no large butter pieces | The flour is coated with fat for a finer crumb |
| Wet mixture | Pale ivory, smooth, no thick egg white streaks | The egg whites are evenly loosened but not whipped |
| Finished batter | Thick, silky, glossy, slow ribbon from the spatula | The batter is properly emulsified and ready to bake |
| Baked cake layers | Pale tops, lightly golden edges, set centers | The layers are baked through without overbrowning |
| Cooled cake crumb | Fine, even air pockets with a soft spring | The cake has the ideal white cake texture |
| Buttercream | Thick, smooth, fluffy, holds soft swirls | The frosting is stable enough for layering and decorating |
Expert Tips for Best Results
Use cake flour, not all-purpose flour
All-purpose flour can make this cake heavier and less delicate. Cake flour is one of the main reasons the crumb stays fine, soft, and velvety. For the most accurate result, weigh 300 g instead of relying only on cup measurements.
Keep the butter softened but still cool
For reverse creaming, the butter should hold a fingerprint when pressed but still feel cool to the touch. If it is greasy, shiny, or almost melting, it will not coat the flour properly and the batter may become heavy.
Use room temperature egg whites and buttermilk
Cold liquids can cause the batter to look broken or curdled. Room temperature ingredients blend more smoothly and help create the silky batter texture you want before baking.
Do not whip the egg whites
This is not an angel food cake. The egg whites should be lightly whisked only until loose and blended. Whipping them into foam can create an uneven texture and larger air pockets.
Mix the final batter for 60–90 seconds
This short final mixing time helps the batter become smooth and properly emulsified. Stop once the batter looks silky and glossy. Mixing much longer can develop too much structure and make the cake less tender.
Weigh the batter between the pans
This is one of the easiest professional tricks for better layer cakes. Equal batter amounts mean the layers bake at the same speed, finish at the same height, and stack more cleanly.
Do not overbake for color
White cake should not look deeply golden. If you wait for a dark top, the cake will likely be dry. Look for a set center, pale surface, lightly golden edges, and a clean toothpick with moist crumbs.
Let the layers rest before frosting
Once completely cool, wrap the cake layers and let them rest for 1–2 hours—or even overnight if time allows. This gives the crumb time to settle, making the layers easier to frost and producing cleaner slices.
Common Mistakes
Using too much flour → dry, dense cake
Flour is one of the easiest ingredients to overmeasure. If you scoop directly from the bag, you may add 25–30 g extra flour without realizing it. That can turn a soft white cake into a dry one. Use a scale or spoon and level the flour carefully.
Butter too cold → uneven crumb
If the butter is too cold, it will not coat the flour evenly during reverse creaming. You may see small butter pieces in the mixture, and the finished cake can bake with an uneven texture. Let the butter soften until it holds a fingerprint but still feels cool.
Butter too warm → greasy batter
If the butter is too soft or melted, the mixture can become pasty instead of sandy. This affects the cake’s structure and may lead to a heavier crumb. The butter should never look shiny or oily.
Overmixing after the liquid is added → tougher texture
Reverse creaming helps limit gluten development, but overmixing can still make the cake less tender. Once the final wet ingredients are added, mix for only 60–90 seconds on medium speed.
Using whole eggs → yellow cake instead of white cake
Whole eggs add richness, but the yolks change both the color and texture. For a true white cake, use only egg whites.
Skipping parchment paper → torn cake layers
White cake layers are soft and delicate. Greasing the pan helps, but parchment gives extra protection so the layers release cleanly without sticking or tearing.
Frosting warm cake layers → sliding and melting
Even slightly warm layers can soften the buttercream and make the cake unstable. Let the layers cool completely before assembling. If your kitchen is warm, chill the layers briefly before frosting.
White Cake Comparison Guide
| Cake Type | Main Difference | Texture | Best For |
|---|---|---|---|
| White Cake | Made with egg whites only | Soft, pale, fine crumb | Weddings, birthdays, elegant layer cakes |
| Yellow Cake | Made with whole eggs or yolks | Richer, more golden, slightly denser | Classic birthday cake, chocolate frosting |
| Vanilla Cake | Can use whole eggs, whites, or a mix | Varies from light to rich | Everyday celebration cakes |
| Angel Food Cake | Made with whipped egg whites and no butter | Very light, airy, spongy | Light desserts, berries, whipped cream |
| Sponge Cake | Relies heavily on whipped eggs for lift | Springy, airy, less buttery | Filled cakes, soaked cakes, layered desserts |
How to Serve White Cake
White Cake is at its best when the slices are tall, clean, and generous, with soft white layers tucked between thick ribbons of vanilla buttercream. For the prettiest presentation, use a sharp knife dipped in hot water and wiped clean between slices. This gives each piece a smooth, bakery-style edge and shows off the fine crumb inside.
For the cleanest slices, wipe the knife clean after every cut. It takes only a few seconds and makes each slice look bakery-perfect, especially with white buttercream.
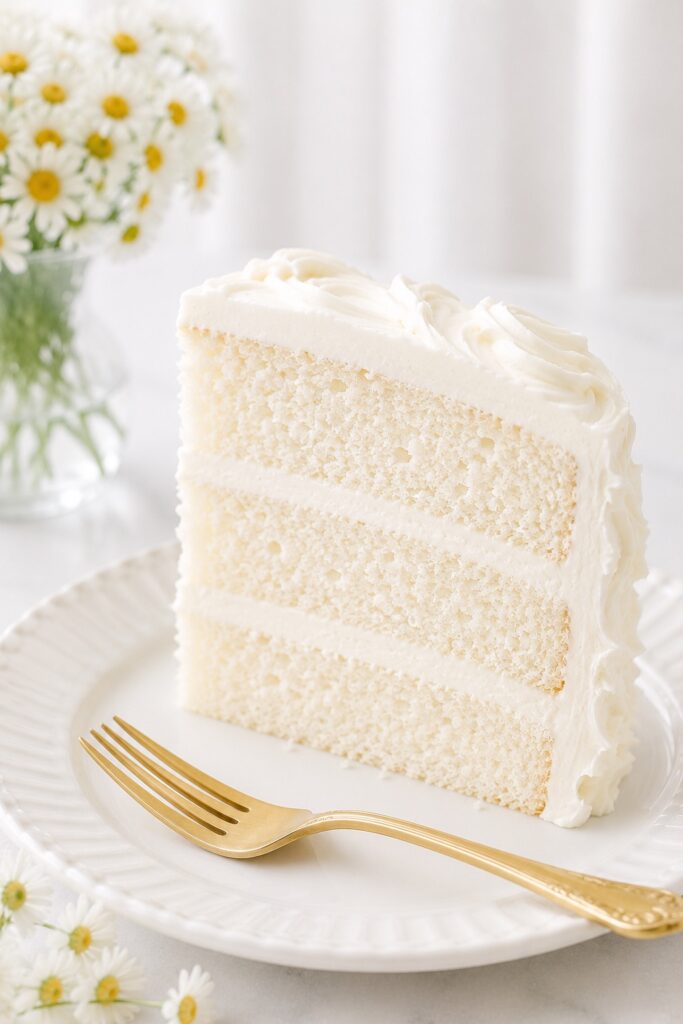
Serve this cake slightly cool or at room temperature. If it has been refrigerated, let it sit out for 30–45 minutes before slicing so the buttercream softens and the crumb becomes tender again. The difference is noticeable: cold cake can taste firmer, while room temperature cake feels softer, more fragrant, and more luxurious.
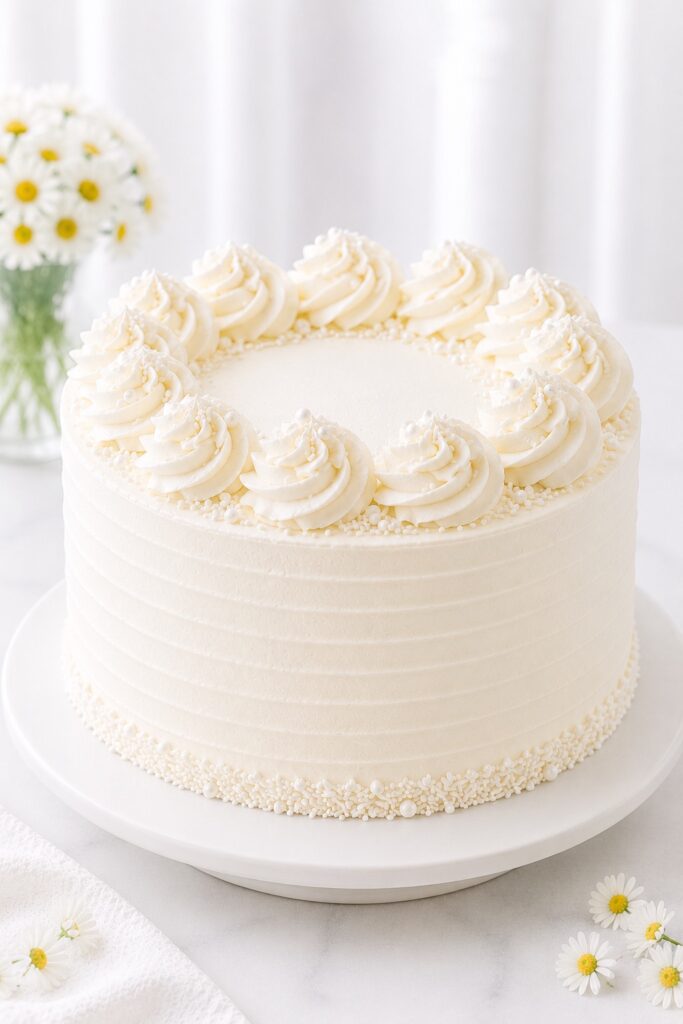
For a classic celebration look, decorate the top with piped vanilla buttercream swirls, white sprinkles, pearl sugar, or soft buttercream flowers.
For a fresh spring or summer version, add raspberries, strawberries, blueberries, or a few delicate edible flowers.
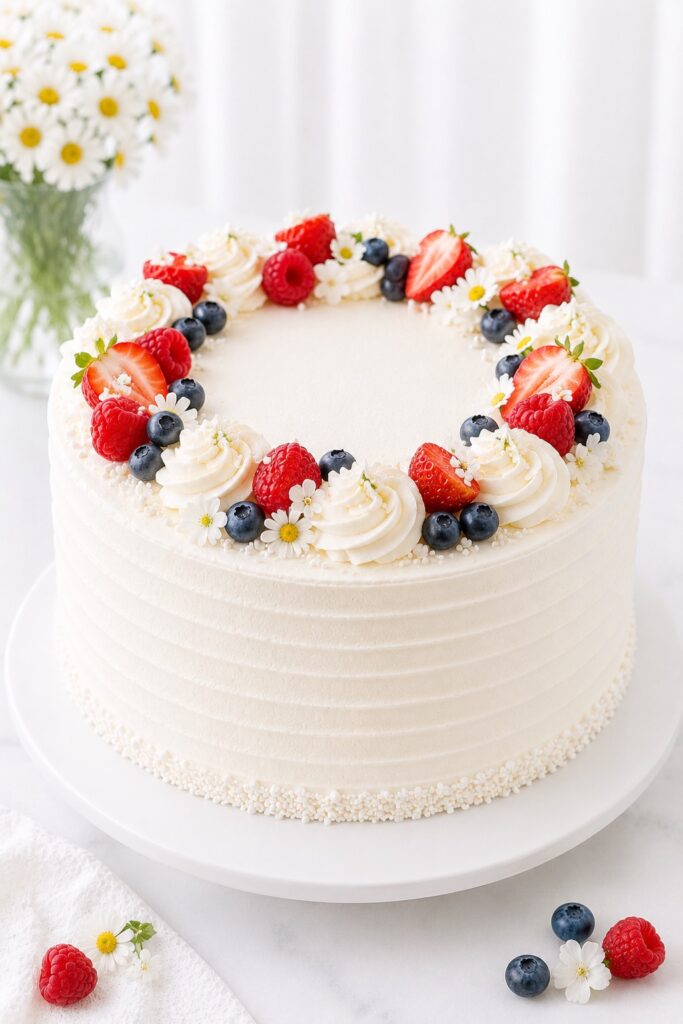
Save this for birthdays, bridal showers, baby showers, Easter, Mother’s Day, or any occasion where you want a cake that feels elegant without being fussy.
This cake also makes a beautiful blank canvas for seasonal flavors. A thin layer of raspberry preserves between the cake layers adds color and brightness. Lemon curd gives it a fresh, bakery-style finish. Chocolate ganache turns it into a striking black-and-white celebration cake.
Storage and Make Ahead
Room Temperature
Once frosted, this white cake can sit at room temperature for up to 1 day if your kitchen is cool. Keep it covered with a cake dome or in an airtight cake container to prevent the exposed crumb from drying out.
Refrigerator
Store the frosted cake in the refrigerator for up to 4 days. Cover it well to prevent it from absorbing fridge odors. Before serving, let the cake sit at room temperature for 30–45 minutes so the buttercream softens and the cake regains its tender texture.
If possible, store the cake in a cake carrier rather than covering it directly with plastic wrap. This protects the buttercream from smudges and helps the cake keep its polished appearance.
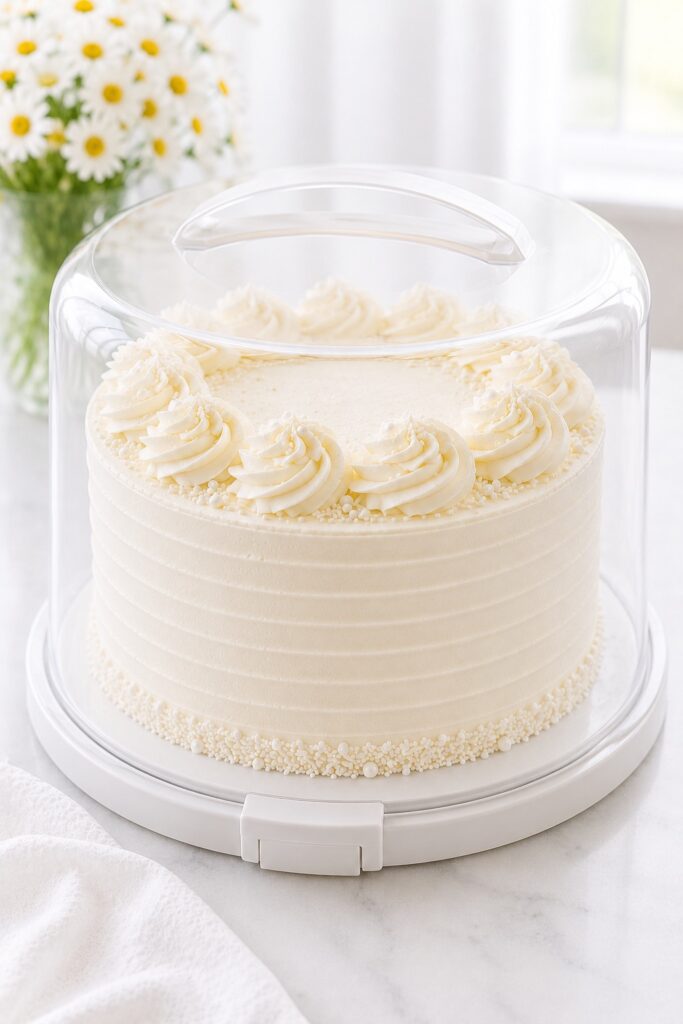
Unfrosted Cake Layers
The cake layers can be baked ahead. Once completely cool, wrap each layer tightly in plastic wrap and store at room temperature for up to 1 day, or refrigerate for up to 2 days.
Freezer
To freeze the unfrosted layers, wrap each cooled cake layer tightly in plastic wrap, then in foil. Freeze for up to 2 months. Thaw overnight in the refrigerator, then bring close to room temperature before frosting.
Buttercream Make Ahead
The vanilla buttercream can be made ahead and refrigerated for up to 1 week. Let it soften at room temperature, then re-whip for 1–2 minutes before using. If it feels too thick after chilling, add heavy cream 1 teaspoon at a time until smooth and spreadable.
Variations
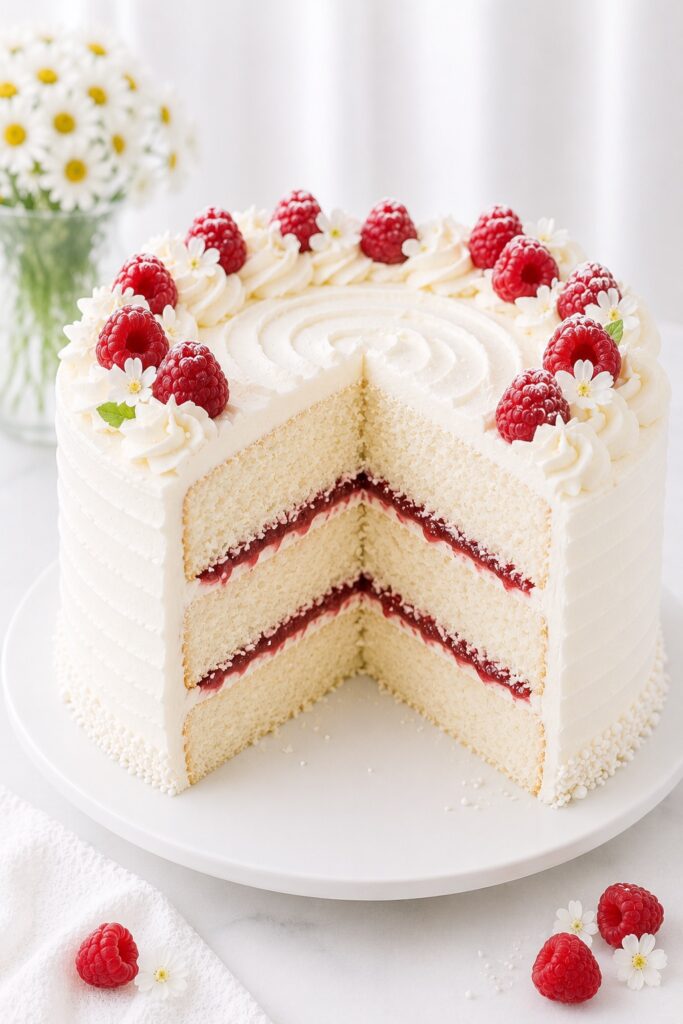
Raspberry White Cake
Spread a thin layer of raspberry preserves between the cake layers before adding buttercream. The tart fruit balances the sweet vanilla frosting beautifully.
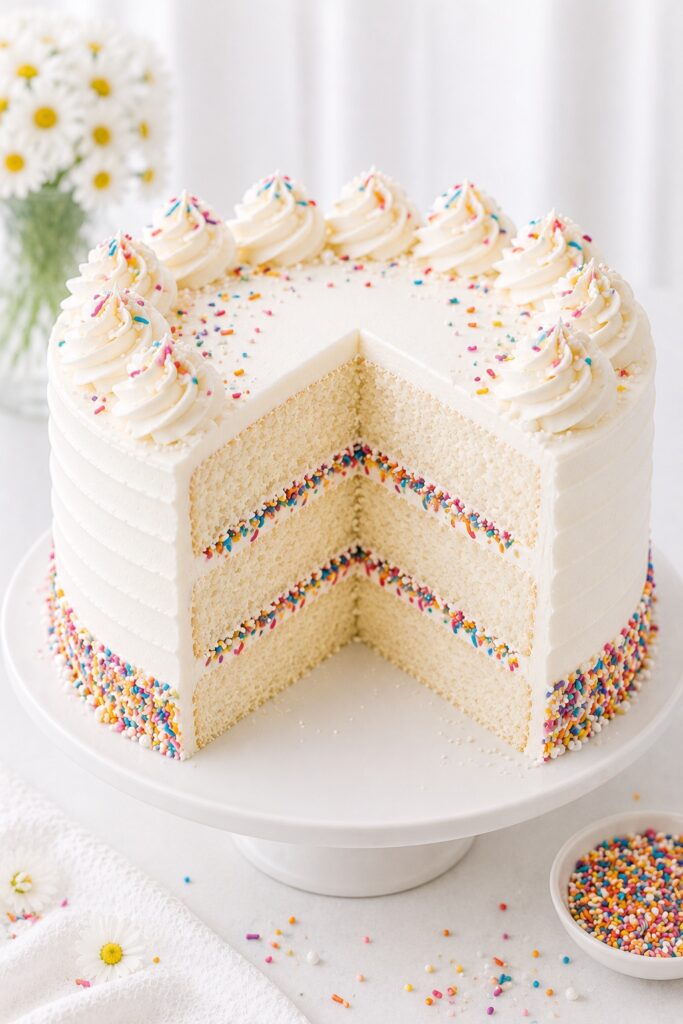
Birthday White Cake
Add colorful sprinkles between the layers or around the base of the frosted cake. For the cleanest white crumb, keep sprinkles out of the batter and use them as decoration instead.
Lemon White Cake
Add 1 tablespoon finely grated lemon zest to the dry ingredients and fill the cake with a thin layer of lemon curd. Keep the batter itself mostly vanilla so the crumb stays delicate.
White Chocolate White Cake
Drizzle a thin layer of cooled white chocolate ganache between the layers or over the top. This gives the cake a richer, more dessert-table feel without changing the base recipe.
Choosing the Best Frosting and Fillings
One of the reasons White Cake has remained a classic for generations is its versatility. Its delicate vanilla flavor pairs beautifully with everything from light fruit fillings to rich chocolate frostings. Here are some of my favorite combinations depending on the occasion.
| Filling or Frosting | Flavor Profile | Perfect For |
|---|---|---|
| Vanilla Buttercream | Classic, creamy, buttery | Birthdays and everyday celebrations |
| Cream Cheese Frosting | Lightly tangy and rich | Spring cakes and family gatherings |
| Lemon Curd | Bright and refreshing | Bridal showers and spring desserts |
| Fresh Raspberry Filling | Sweet-tart and fruity | Elegant celebration cakes |
| Chocolate Ganache | Rich and decadent | Birthdays and chocolate lovers |
| Fresh Whipped Cream | Light and airy | Summer cakes with berries |
Because White Cake has such a clean vanilla flavor, it’s one of the easiest cakes to customize. Whether you prefer classic buttercream or something lighter and fruitier, the soft cake layers provide the perfect foundation.
Decorating Ideas for Every Occasion
A beautifully frosted White Cake works like a blank canvas. With just a few simple decorations, the same recipe can look elegant enough for a wedding or playful enough for a birthday party.
- Birthday Cake: Finish with colorful sprinkles, piped buttercream swirls, and candles.
- Wedding or Bridal Shower: Decorate with smooth white buttercream, fresh flowers, pearl sprinkles, or delicate piping.
- Baby Shower: Add pastel buttercream borders and simple decorative accents.
- Easter: Top with edible flowers, fresh berries, or lightly toasted coconut.
- Christmas: Garnish with sugared cranberries, rosemary sprigs, or white chocolate decorations.
- Summer Celebrations: Arrange fresh strawberries, raspberries, blueberries, or blackberries over the top for a naturally colorful finish.
The beauty of White Cake is that its elegant appearance never competes with the decorations. It complements almost any theme while remaining timeless and refined.
Frequently Asked Questions
Can I use all-purpose flour instead of cake flour?
Technically, yes, but I don’t recommend it for this recipe. Cake flour is one of the key ingredients that gives this White Cake its exceptionally soft, fine crumb. All-purpose flour contains more protein, which develops more gluten and produces a slightly firmer, less delicate texture. If you’re looking for the bakery-style results this recipe was designed to deliver, stick with cake flour.
Why does this recipe use only egg whites?
Egg whites keep the cake naturally white while still providing enough protein for structure. Egg yolks add richness, but they also turn the crumb yellow and create a denser texture. Using only egg whites is what gives traditional White Cake its signature pale color and delicate bite.
Can I make this cake ahead of time?
Yes. The unfrosted cake layers can be baked one day in advance and stored tightly wrapped at room temperature, or refrigerated for up to 2 days. You can also freeze the layers for up to 2 months. Assemble and frost the cake once the layers have completely thawed.
Why did my cake turn out dense?
The most common causes are overmeasuring the flour, overmixing after adding the liquid ingredients, or using butter that was either too cold or too soft. Reverse creaming relies on properly softened butter to coat the flour evenly, so ingredient temperature is just as important as the measurements.
Can I use this recipe for cupcakes?
Yes. Divide the batter between lined cupcake pans, filling each liner about two-thirds full. Bake at 350°F (175°C) for approximately 18–22 minutes, checking for doneness with a toothpick and the spring-back test.
Can I color this cake?
Absolutely. Because the crumb is naturally bright white, it works beautifully with gel food coloring. Gel colors add vibrant shades without thinning the batter, making this recipe a popular choice for themed birthday cakes and celebration desserts.
Can I use a different frosting?
Yes. While vanilla buttercream is the classic pairing, this cake is also delicious with cream cheese frosting, Swiss meringue buttercream, white chocolate buttercream, chocolate buttercream, whipped mascarpone frosting, raspberry buttercream, or a layer of lemon curd beneath the frosting for a brighter flavor.
Scaling This Recipe
This recipe is written for three 8-inch round cake layers, but it’s flexible enough to work for several other popular pan sizes with a few simple adjustments.
| Pan | Adjustment |
|---|---|
| Three 8-inch round pans | Recipe as written |
| Two 9-inch round pans | Recipe as written; layers will be thicker, so begin checking around 28 minutes and bake until the centers spring back. |
| 24 cupcakes | Bake at 350°F for 18–22 minutes |
| 9×13-inch sheet cake | Bake at 350°F for about 32–38 minutes |
Regardless of the pan you choose, rely on the visual doneness cues in this guide rather than the clock alone. Ovens vary, and the cake is ready when the center springs back lightly and a toothpick comes out clean or with a few moist crumbs.
More Classic Desserts to Try
If you love this White Cake, here are a few more homemade desserts that pair beautifully with the same classic baking style. Whether you’re planning a celebration, looking for another elegant layer cake, or simply want to expand your baking collection, these reader favorites are a great place to start.
More Celebration Cake Recipes
If you’re looking for another beautiful layer cake for birthdays, holidays, weddings, or family celebrations, these homemade cake recipes offer the same balance of reliable baking techniques, soft textures, and impressive presentation.
- Vanilla Cake — A timeless vanilla layer cake with a rich buttery flavor and an incredibly soft crumb.
- Strawberry Cake — Fresh strawberry flavor paired with a light, fluffy cake that’s perfect for spring and summer celebrations.
- Funfetti Cake Recipe — Colorful, festive, and ideal for birthdays and family parties.
- Pistachio Cake — A beautiful bakery-style layer cake with a delicate nutty flavor and elegant presentation.
- Italian Cream Cake — Rich, classic, and filled with coconut, pecans, and cream cheese frosting.
Frostings & Fillings
The right filling or frosting can completely transform a classic White Cake. From silky buttercream alternatives to bright fruit fillings and rich chocolate finishes, these recipes help you customize every slice.
- How to Make Cream Cheese Frosting — A tangy, silky frosting that’s perfect for White Cake.
- Chocolate Ganache Recipe — Create a beautiful chocolate finish or an elegant drip cake.
- Lemon Curd Recipe — Bright, smooth, and delicious as a filling between white cake layers.
- How to Make Whipped Cream — A lighter alternative for summer cakes and fresh berry desserts.
Beautiful Cakes for Special Occasions
Whether you’re baking for a birthday, holiday dessert table, bridal shower, or simply because you love homemade cake, these elegant recipes are guaranteed to make any occasion feel a little more memorable.
- Red Velvet Cake — A striking celebration cake with rich cocoa flavor and cream cheese frosting.
- Coconut Cake — Soft layers filled with coconut flavor for holidays and special gatherings.
- Hummingbird Cake — A Southern classic packed with banana, pineapple, and warm spices.
- Boston Cream Pie — Tender vanilla cake layered with pastry cream and glossy chocolate ganache.
- German Chocolate Cake Recipe — Rich chocolate layers finished with the classic coconut-pecan filling.
Whether you’re baking your first celebration cake or adding another timeless recipe to your collection, these homemade favorites are perfect for birthdays, holidays, family gatherings, and every special moment in between.
Recipe Summary
This White Cake Recipe combines classic American baking with modern techniques to create an elegant layer cake that’s incredibly soft, moist, and reliable. Using cake flour, cultured buttermilk, egg whites, and the reverse creaming method produces a fine, velvety crumb while keeping the cake beautifully white.
The combination of butter for flavor and a small amount of oil for lasting moisture creates cake layers that stay tender for days without becoming heavy. Finished with silky vanilla buttercream, this recipe is equally at home on a birthday table, wedding dessert display, baby shower, or holiday celebration.
If you’re looking for a White Cake that looks impressive, slices beautifully, and works for birthdays, holidays, and special occasions, this is the kind of reliable recipe many home bakers return to again and again.
Final Thoughts
Some recipes become popular because they’re easy. Others earn a permanent place in your recipe collection because they never let you down.
This White Cake was created to be the second kind.
Every ingredient, every measurement, and every technique in this recipe was chosen with intention. The cake flour creates a delicate crumb. The butter and oil work together to balance flavor and moisture. The buttermilk gently tenderizes the batter, while the reverse creaming method produces layers that bake evenly and slice beautifully. None of these details are complicated on their own, but together they create a cake that feels elegant, dependable, and worthy of life’s biggest celebrations.
Whether you’re baking your very first layer cake or making a centerpiece for a special occasion, I hope this recipe gives you the confidence to create something that looks just as beautiful as it tastes.
And if your family starts requesting this White Cake for birthdays year after year, don’t be surprised. That’s often how the best recipes become traditions.

White Cake
This White Cake is soft, moist, and beautifully tender with a fine bakery-style crumb and a delicate vanilla flavor. Made with cake flour, cultured buttermilk, egg whites, and the reverse creaming method, it bakes into three even layers that stay light, elegant, and easy to frost. Finished with silky vanilla buttercream, it’s a timeless homemade celebration cake for birthdays, weddings, baby showers, holidays, and any special occasion.
Ingredients
For the White Cake
- 2 1/2 cups (300 g) cake flour
- 1 3/4 cups minus 2 teaspoons (340 g) granulated sugar
- 2 1/2 teaspoons baking powder
- 2 1/2 teaspoons baking powder
- 1/2 teaspoon baking soda
- 1/2 teaspoon baking soda
- 1/2 teaspoon fine salt
- 1/2 teaspoon fine salt
- 3/4 cup (170 g) unsalted butter, softened but still cool to the touch
- 3/4 cup (170 g) unsalted butter, softened but still cool to the touch
- 1/4 cup (60 ml) neutral oil (such as canola or vegetable oil)
- 1/4 cup (60 ml) neutral oil (such as canola or vegetable oil)
- 6 large egg whites (about 210 g), at room temperature
- 6 large egg whites (about 210 g), at room temperature
- 1 cup (240 ml) cultured buttermilk, at room temperature
- 1 cup (240 ml) cultured buttermilk, at room temperature
- 2 teaspoons pure vanilla extract
- 2 teaspoons pure vanilla extract
- 1/4 teaspoon almond extract (optional)
- 1/4 teaspoon almond extract (optional)
For the Vanilla Buttercream
- 2 cups (454 g) unsalted butter, softened
- 2 cups (454 g) unsalted butter, softened
- 6 1/2 cups (780 g) powdered sugar, sifted
- 6 1/2 cups (780 g) powdered sugar, sifted
- 1/4 cup (60 ml) heavy cream
- 1/4 cup (60 ml) heavy cream
- 2 teaspoons pure vanilla extract
- 2 teaspoons pure vanilla extract
- 1/4 teaspoon fine salt
- 1/4 teaspoon fine salt
Instructions
Make the White Cake
- Preheat the oven to 350°F (175°C). Grease three 8-inch round cake pans, line the bottoms with parchment paper, and lightly grease the parchment.
- Combine the dry ingredients. In the bowl of a stand mixer, mix the cake flour, granulated sugar, baking powder, baking soda, and salt on low speed for 30 seconds.
- Add the butter and oil. Mix on medium-low speed for 2–3 minutes, until the mixture resembles fine, damp sand with no large pieces of butter remaining.
- Whisk the wet ingredients. In a large measuring jug, whisk together the buttermilk, egg whites, vanilla extract, and almond extract (if using) just until smooth.
- Add the first half of the wet mixture. With the mixer on low speed, slowly pour in about half of the liquid ingredients. Mix for 30 seconds, then scrape down the bowl.
- Finish the batter. Add the remaining wet mixture in two additions, mixing for 30–45 seconds after each addition. Increase to medium speed and mix for 60–90 seconds, until the batter is smooth, silky, and falls from the spatula in a continuous ribbon. Do not overmix.
- Divide the batter evenly between the prepared pans, smoothing the tops with an offset spatula. Tap each pan gently on the counter once or twice to release large air bubbles.
- Bake for 23–28 minutes, checking after 23 minutes. The cakes are done when the centers spring back lightly, a toothpick comes out clean or with a few moist crumbs, and the edges begin to pull away from the pans.
- Cool the cakes in the pans for 10 minutes. Run a thin knife around the edges if needed, invert onto wire racks, remove the parchment, and let the layers cool completely before frosting.
Make the Vanilla Buttercream
- Beat the softened butter on medium speed for 2–3 minutes, until smooth, creamy, and slightly lighter in color.
- Gradually add the powdered sugar, about 1 cup at a time, mixing on low speed after each addition. Scrape down the bowl.
- Add the heavy cream, vanilla, and salt. Beat on medium speed for 2–4 minutes, until the buttercream is light, fluffy, and spreadable. If needed, adjust the consistency with additional cream (1 teaspoon at a time) or powdered sugar (2 tablespoons at a time).
Assemble the Cake
- Level the cake layers with a serrated knife if needed. Place one layer on a cake stand or serving plate and spread an even layer of buttercream over the top. Repeat with the remaining layers.
- Apply a thin crumb coat over the entire cake and refrigerate for 20–30 minutes, until the frosting feels firm.
- Finish frosting the top and sides with the remaining buttercream. Decorate as desired, then let the cake sit at room temperature for 30–45 minutes before serving for the softest texture.
Notes
- Cake flour creates the fine, velvety crumb that defines a classic white cake. For the most reliable results, weigh the flour instead of measuring by volume.
- Cultured buttermilk gives the cake a softer texture and more consistent structure than homemade milk-and-vinegar substitutes.
- Egg whites keep the crumb naturally pale while providing enough structure for tall, stable cake layers.
- Butter and oil work together to deliver rich flavor while helping the cake stay moist for several days.
- Pure vanilla extract provides the best flavor. If achieving the brightest possible white crumb is your top priority, clear vanilla extract can be substituted.
- The almond extract is optional, but a small amount adds subtle bakery-style depth without making the cake taste like almond.
Nutrition Information:
Yield: 12 slices Serving Size: 1 sliceAmount Per Serving: Calories: 910Total Fat: 49gSaturated Fat: 28gTrans Fat: 1gCarbohydrates: 114gFiber: 1gSugar: 95gProtein: 5g
Nutrition information is provided as an estimate only and may vary based on specific ingredients, brands, and portion sizes used. This information should not be considered medical or nutritional advice.
12 Sweet Favorites — Yours, Free 🍰
Tiramisù, no-bake cheesecake, the perfect chocolate chip cookie & 9 more reader-loved desserts — gathered into one beautiful free recipe book. From my kitchen to yours.
No spam, just sweet things. Unsubscribe anytime.