Black Bean Brownies (Rich, Fudgy, and Easy)
🎁 FREE E-BOOK: 12 Sweet Favorites — reader-loved desserts in one beautiful recipe book.
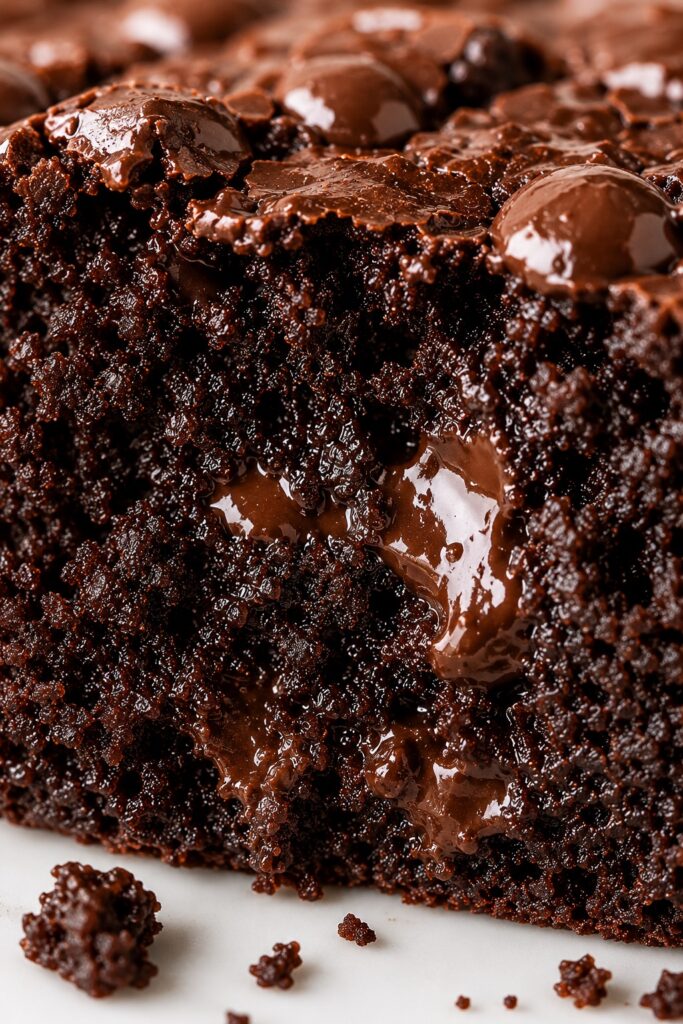
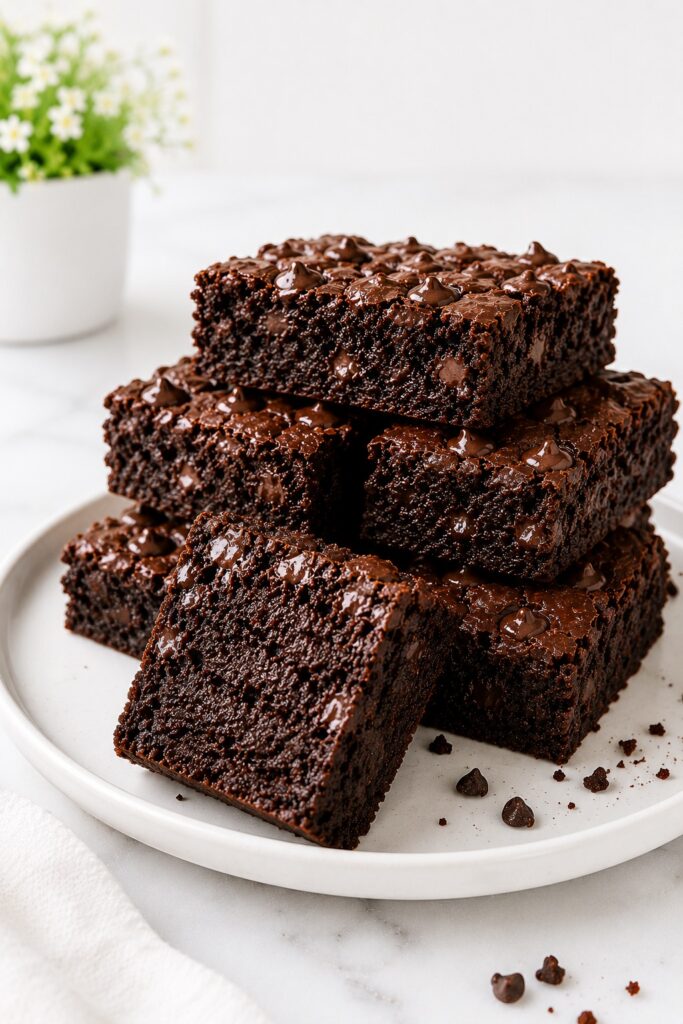
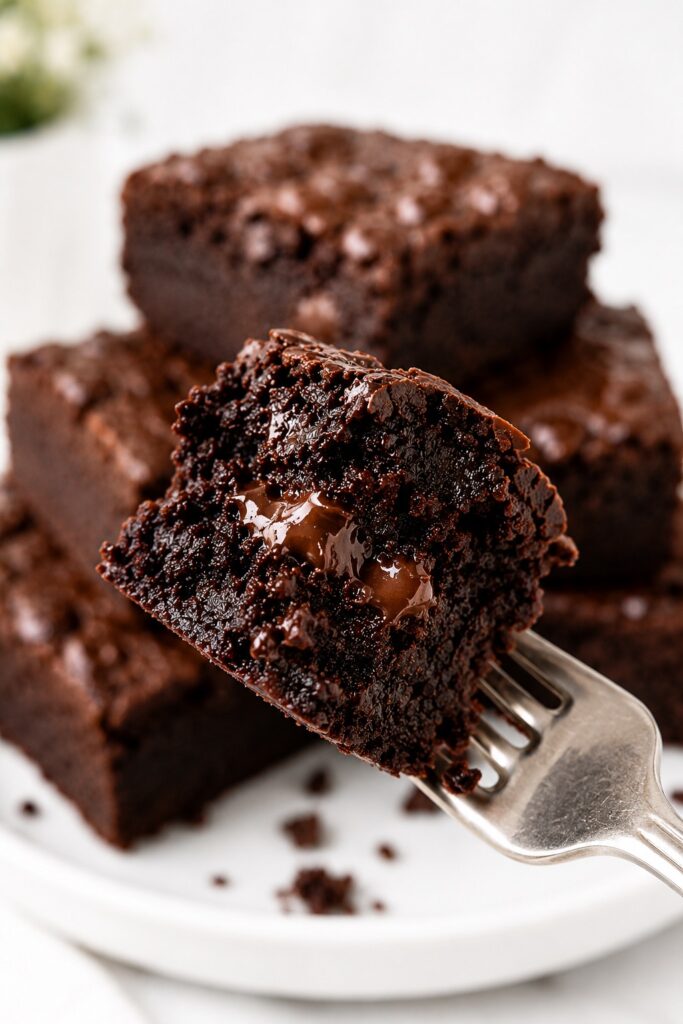
The first thing you notice about these Black Bean Brownies is not the beans. It is the deep chocolate aroma, the glossy pockets of melted chocolate, and the dense, fudgy center that clings gently to the knife as you cut the first square.
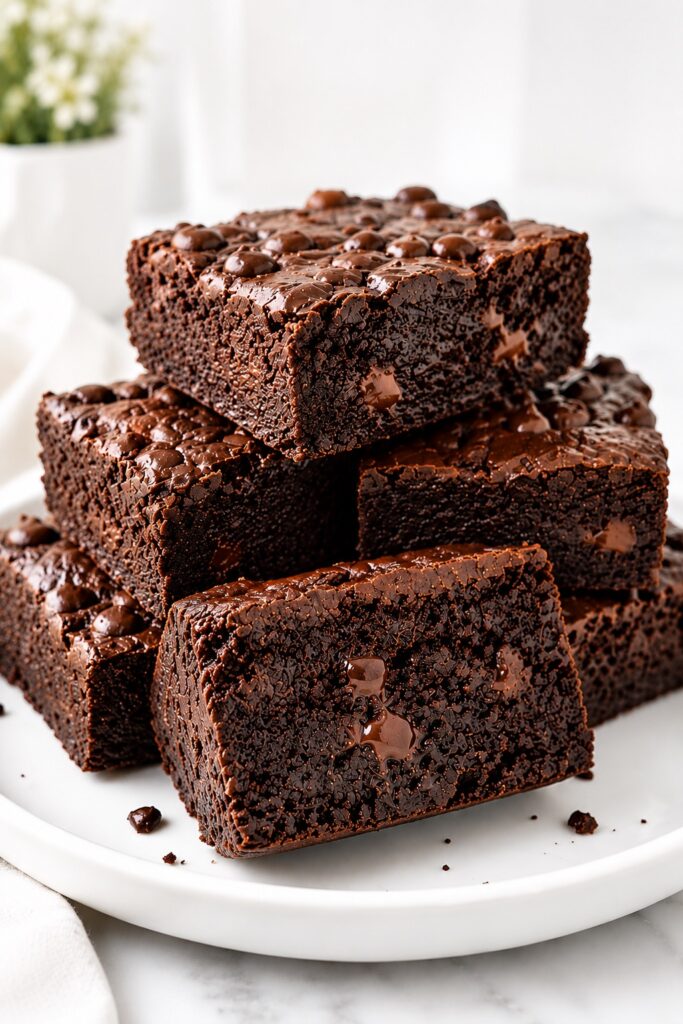
Made with one can of black beans, cocoa powder, oat flour, and plenty of semisweet chocolate chips, these brownies satisfy a real chocolate craving while adding fiber from a familiar pantry ingredient. When the beans are rinsed thoroughly and blended completely smooth, their mild flavor stays firmly in the background beneath the cocoa, vanilla, brown sugar, and chocolate.
The secret is balancing the moisture carefully. Black beans already contain plenty of water, so this recipe uses only enough oil to keep the brownies soft and fudgy without making the center greasy or gummy. A small amount of oat flour provides just enough structure for clean slices while preserving that rich, almost truffle-like texture.
This is the kind of alternative brownie recipe people return to because it still feels like dessert. The batter comes together in a blender or food processor, the ingredients are easy to find, and the finished brownies look every bit as inviting as a classic chocolate brownie.
What Are Black Bean Brownies?
Black bean brownies are chocolate brownies made with puréed black beans as a major part of the batter. The beans replace much of the flour used in traditional brownies while contributing moisture, fiber, starch, and structure. Cocoa powder, sugar, vanilla, and chocolate chips create the dominant flavor, producing a rich chocolate dessert with a dense, fudgy crumb.
Unlike cakey brownies, this recipe is intentionally soft, dense, and fudgy. A small amount of oat flour stabilizes the center so the brownies hold together after cooling without becoming dry or bread-like.
Quick Recipe Overview
| Texture | Dense, moist, smooth, and fudgy |
|---|---|
| Flavor | Deep chocolate with vanilla and optional espresso notes |
| Difficulty | Easy |
| Prep Time | 15 minutes |
| Bake Time | 23–27 minutes |
| Cooling Time | At least 1 hour |
| Total Time | About 1 hour 45 minutes |
| Servings | 16 brownies |
| Method | Blender or food processor, then baked in an 8-inch square pan |
| Best For | Chocolate cravings, make-ahead desserts, lunchboxes, and freezer treats |
In short: Rinse and drain the beans thoroughly, blend the batter until completely silky, add milk only if the blender needs help, fold in the chocolate chips, and bake just until the edges are set and the center no longer looks wet.
Why This Black Bean Brownie Recipe Works
Black bean brownies depend on a different balance of moisture, fat, and structure than traditional brownies. Each part of this recipe is designed to keep the center fudgy while preventing the batter from becoming wet, gummy, or overly dense.
The Beans Provide Moisture and Structure
Black beans contain both water and starch. Once blended, they form a thick purée that keeps the brownies moist while helping the batter hold together. This allows the recipe to use much less flour than a conventional brownie recipe.
The Moisture Is Carefully Controlled
Bean brands vary considerably in moisture. For that reason, milk is not automatically added to the batter. The recipe begins with eggs and oil as the primary liquids, and milk is added one tablespoon at a time only if the batter is too thick for the blender to process.
This small adjustment prevents one of the most common black bean brownie problems: a wet, gummy center that never develops a proper brownie structure.
Oil Keeps the Brownies Soft After Chilling
Neutral oil remains fluid at cooler temperatures, helping the brownies stay soft even after refrigeration. Butter would create a firmer chilled texture, while oil better supports the soft, fudgy result intended here.
Cocoa and Chocolate Keep the Flavor Deeply Chocolatey
A generous amount of cocoa powder provides both flavor and absorption. Semisweet chocolate chips add pockets of melted chocolate and help the finished brownies taste indulgent rather than like a lightly sweetened snack bar.
Moderate Heat Sets the Edges Without Drying the Center
At 350°F, the outside sets first while the center remains soft enough to become fudgy as it cools. The brownies leave the oven before a toothpick comes out completely clean because they continue setting from residual heat in the pan.
Why You’ll Love This Recipe
These brownies offer more than an unexpected way to use black beans. They are easy to prepare, deeply chocolatey, and especially rewarding once chilled, making them practical enough for everyday baking while still feeling like a real dessert.
- Deep chocolate flavor: Cocoa powder, vanilla, brown sugar, and chocolate chips keep the flavor firmly in dessert territory.
- Easy preparation: Most of the batter is mixed directly in a blender or food processor.
- Flour-light and easy to make gluten-free: Only a small amount of oat flour is needed for structure.
- Moist without excess flour: The beans provide body and moisture while a small amount of oat flour keeps the squares stable.
- Excellent after chilling: The brownies become denser and more truffle-like after several hours in the refrigerator.
- Freezer-friendly: Individual squares can be frozen for an easy chocolate dessert whenever a craving appears.
The Baking Science Behind Fudgy Black Bean Brownies
A successful black bean brownie depends on controlling moisture and reducing the beans to a very fine particle size. Whole or partially blended beans create an obvious grainy texture. Thorough blending breaks down the skins and distributes the bean starch evenly throughout the batter.
During baking, the egg proteins set and create a supporting network. At the same time, the bean starch, oat flour, and cocoa powder absorb and hold moisture. Together, they transform the thick batter into a stable brownie without requiring a large amount of wheat flour.
Cocoa powder is especially important because it absorbs more liquid than its appearance suggests. When the batter rests for two or three minutes, the cocoa and oat flour continue hydrating, and the mixture becomes slightly thicker.
The center continues setting after the pan leaves the oven. This carryover setting is essential in flour-light brownies. Cutting them while hot interrupts that process and can make a properly baked batch appear raw or gummy.
The chocolate chips contribute more than sweetness. They create concentrated pockets of chocolate throughout the crumb, and those pockets become slightly firmer as the brownies cool, helping the finished texture feel richer and more decadent.
Why These Brownies Don’t Have a Crackly Top
If you’re used to classic brownies with a thin, shiny, crackly crust, these may surprise you—and that’s completely normal.
Traditional crackly tops develop when dissolved sugar, eggs, and often melted chocolate form a delicate meringue-like layer on the surface during baking. Because this recipe relies on puréed black beans, uses only a small amount of flour, and contains a higher level of moisture, the surface bakes differently.
Instead of a papery crust, expect a soft top with a rich, fudgy interior underneath. That’s exactly what gives these brownies their signature texture. As long as the edges are set and the center is no longer wet, the brownies have baked exactly as intended—even without a shiny crust.
Ingredients You’ll Need
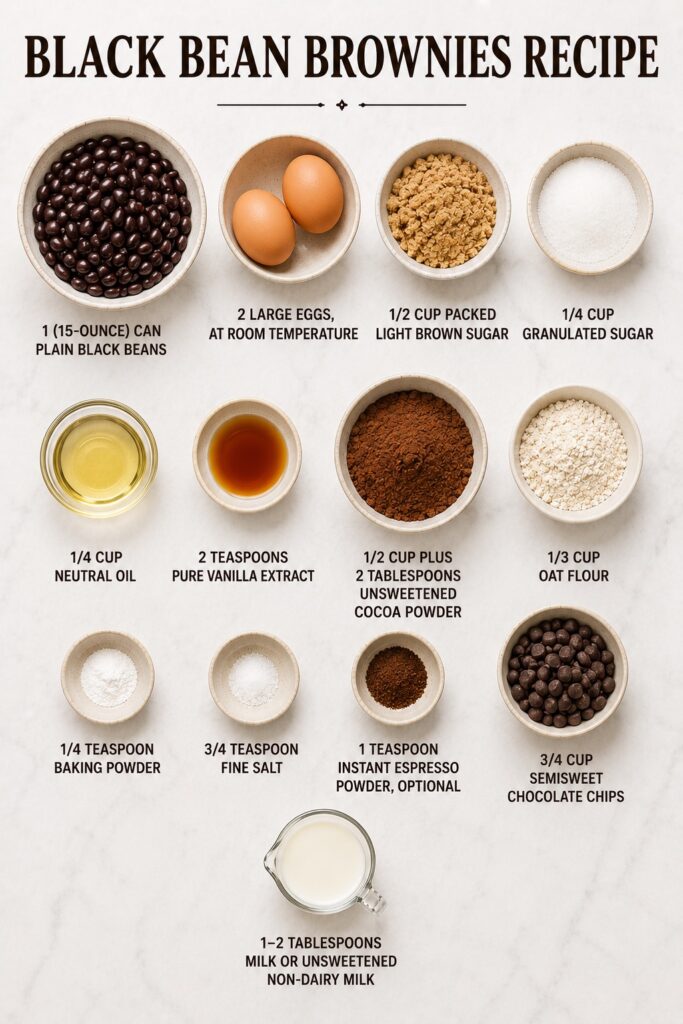
The ingredient list is simple, but accurate measurements matter because the beans, cocoa powder, and oat flour work together to control the moisture and structure of the brownies.
- 1 (15-ounce) can plain black beans, rinsed, drained very well, and weighed after draining — 250 g
- 2 large eggs, at room temperature
- 1/2 cup packed light brown sugar — 100 g
- 1/4 cup granulated sugar — 50 g
- 1/4 cup neutral oil — 60 ml
- 2 teaspoons pure vanilla extract
- 1/2 cup plus 2 tablespoons unsweetened cocoa powder — 52 g
- 1/3 cup oat flour — 35 g
- 1/4 teaspoon baking powder
- 3/4 teaspoon fine salt
- 1 teaspoon instant espresso powder, optional but recommended
- 3/4 cup semisweet chocolate chips — about 128 g, divided
- 1–2 tablespoons milk or unsweetened non-dairy milk, only as needed to help the batter process
How Each Ingredient Improves the Brownies
Every ingredient in this recipe has a specific purpose. The following are the ingredients that most strongly influence the chocolate flavor, moisture balance, structure, and final fudgy texture.
Black Beans
Black beans form the moisture-rich base of these brownies while contributing starch, fiber, and enough body to replace most of the flour used in a traditional recipe. Use plain canned black beans without seasonings or added flavors.
Rinse them under cool running water until the water beneath the strainer runs clear, then drain for 3–5 minutes. Excess canning liquid can loosen the batter and leave a more noticeable earthy flavor.
Cocoa Powder
Cocoa powder provides the dominant chocolate flavor while absorbing part of the moisture released by the beans. Natural unsweetened cocoa creates a classic, slightly brighter chocolate flavor, while Dutch-process cocoa produces a darker color and a smoother, less acidic taste.
Oat Flour
Oat flour stabilizes the soft center and helps the cooled brownies hold a clean square. Its gentle absorption keeps the crumb cohesive without making it as firm or bread-like as a larger amount of all-purpose flour would.
You can make oat flour by blending rolled oats into a very fine powder and measuring it afterward. Use certified gluten-free oat flour when the brownies need to be gluten-free.
Brown Sugar and Granulated Sugar
Brown sugar contributes moisture and a subtle caramel note, while granulated sugar provides a cleaner sweetness that balances the natural bitterness of the cocoa. Together, they soften the crumb and help keep the beans’ mild flavor in the background.
Reducing the sugar substantially changes more than sweetness: the brownies may become firmer, more bitter, and noticeably more bean-forward.
Neutral Oil
Neutral oil keeps the brownies soft at room temperature and after refrigeration because it remains fluid when chilled. Avocado, grapeseed, sunflower, canola, or another mild-tasting oil will work.
Espresso Powder and Chocolate Chips
Espresso powder is optional, but it deepens the cocoa flavor without making the brownies taste distinctly like coffee. Semisweet chocolate chips add concentrated pockets of chocolate throughout the crumb and create the glossy melted details visible on top.
The eggs, baking powder, and salt work quietly in the background: the eggs bind and set the batter, the small amount of baking powder prevents an overly compressed texture, and the salt sharpens the chocolate flavor.
Ingredient Substitutions
These substitutions preserve the recipe as closely as possible, although small differences in texture or sweetness are normal. For the most dependable first batch, prepare the brownies with the original ingredients before experimenting with swaps.
- Oat flour: Replace it with the same weight of finely ground rolled oats. If using all-purpose flour, begin with 30 g; the brownies may have a slightly firmer, less tender crumb.
- Neutral oil: Use avocado, sunflower, grapeseed, canola, or another mild oil.
- Milk: Regular milk, almond milk, oat milk, or another unsweetened non-dairy milk can be used. Add it only if needed.
- Chocolate chips: Semisweet or dark chocolate chips work best. Milk chocolate chips may also be used, but the finished brownies will taste noticeably sweeter.
- Natural cocoa: Dutch-process cocoa can be substituted in the same quantity for a darker, smoother chocolate flavor.
- Light brown sugar: Dark brown sugar may be used, although it will add a slightly stronger molasses flavor.
Equipment You’ll Need
You do not need specialized baking equipment, but the type of pan and mixing appliance can noticeably affect how easily the batter processes and how evenly the brownies bake.
- 8-inch square metal baking pan
- Parchment paper
- High-speed blender or food processor
- Fine-mesh strainer or colander
- Rubber spatula
- Measuring cups and spoons or a digital kitchen scale
- Wire cooling rack
- Large sharp knife for slicing
A metal pan provides more defined edges and a more predictable baking time than a glass baking dish. Glass retains heat longer, so the brownies may continue setting for longer after they leave the oven and can develop firmer edges.
A food processor is often easier to use with this thick batter because the bowl is wide and easy to scrape. A powerful blender can create an exceptionally smooth batter, but you may need to stop and scrape around the blades several times.
Before You Start
Take one minute to check these small details before you begin. They make the recipe smoother to prepare and help ensure the brownies bake exactly as intended.
- ✓ Drain the black beans thoroughly. Excess canning liquid is one of the most common causes of gummy brownies.
- ✓ Bring the eggs to room temperature. They blend more easily with the bean purée and create a smoother batter.
- ✓ Preheat the oven completely. Start baking only after the oven has fully reached 350°F (175°C).
- ✓ Line the pan with parchment paper. The overhang makes lifting and slicing the cooled brownies much easier.
- ✓ Measure the cocoa powder accurately. Too little cocoa changes both the chocolate flavor and the batter consistency.
- ✓ Weigh the beans after draining. Using 250 g keeps the moisture balance more consistent from one brand of canned beans to another.
What to Expect
If this is your first time making Black Bean Brownies, here’s what you should expect before they even go into the oven. Knowing these details will help you recognize when everything is going exactly as it should.
- They taste like brownies, not beans. Once the beans are thoroughly rinsed and blended until perfectly smooth, the cocoa, vanilla, and chocolate become the dominant flavors.
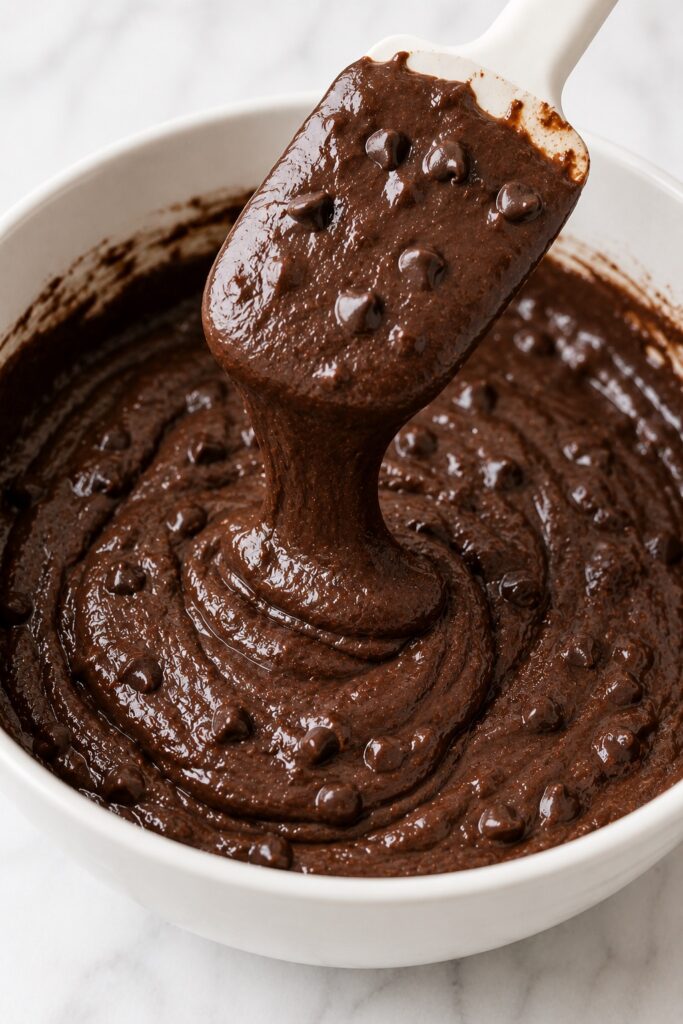
- The batter is much thicker than cake batter. It should slowly fall from a spatula in a wide ribbon rather than pour like a thin mixture.
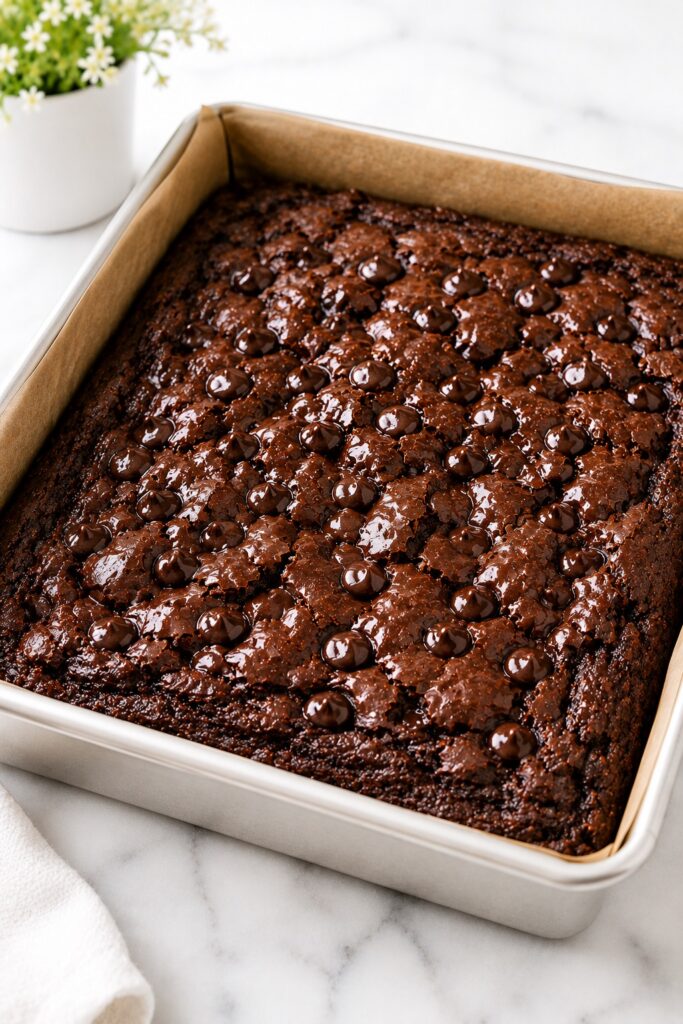
- The top won’t develop a shiny, crackly crust. That’s completely normal for this style of brownie and doesn’t mean anything went wrong.
- The center will seem very soft when the pan comes out of the oven. It continues setting as the brownies cool, creating their signature dense, fudgy texture.
- They become even better after chilling. A short rest in the refrigerator makes the crumb firmer, richer, and almost truffle-like while keeping the brownies wonderfully moist.
How to Make Black Bean Brownies
The method is straightforward, but three details make the greatest difference: drain the beans thoroughly, blend until the batter is completely smooth, and judge doneness by the surface and movement of the center rather than waiting for a clean toothpick.
1. Prepare the Oven and Pan
Preheat the oven to 350°F (175°C). Lightly grease an 8-inch square metal baking pan and line it with parchment paper, leaving an overhang on two opposite sides.
What you should see: The parchment should lie flat against the bottom and extend far enough above the sides to lift the cooled brownies from the pan.
2. Rinse and Drain the Black Beans
Pour the beans into a fine-mesh strainer. Rinse them under cool running water for 30–45 seconds, gently moving them around with your hand, until the water underneath runs clear.
Shake the strainer well and allow the beans to drain for 3–5 minutes. If they still look unusually wet, spread them briefly over a double layer of paper towels and blot the surface gently.
Why this matters: Thorough rinsing removes the thick canning liquid that can contribute an earthy flavor. Proper draining prevents excess moisture from making the brownie center gummy.
3. Blend the Wet Ingredients and Beans
For a blender, add the eggs, oil, and vanilla first so the liquid sits closest to the blades. Add the black beans, brown sugar, and granulated sugar on top. For a food processor, add the ingredients in the same order.
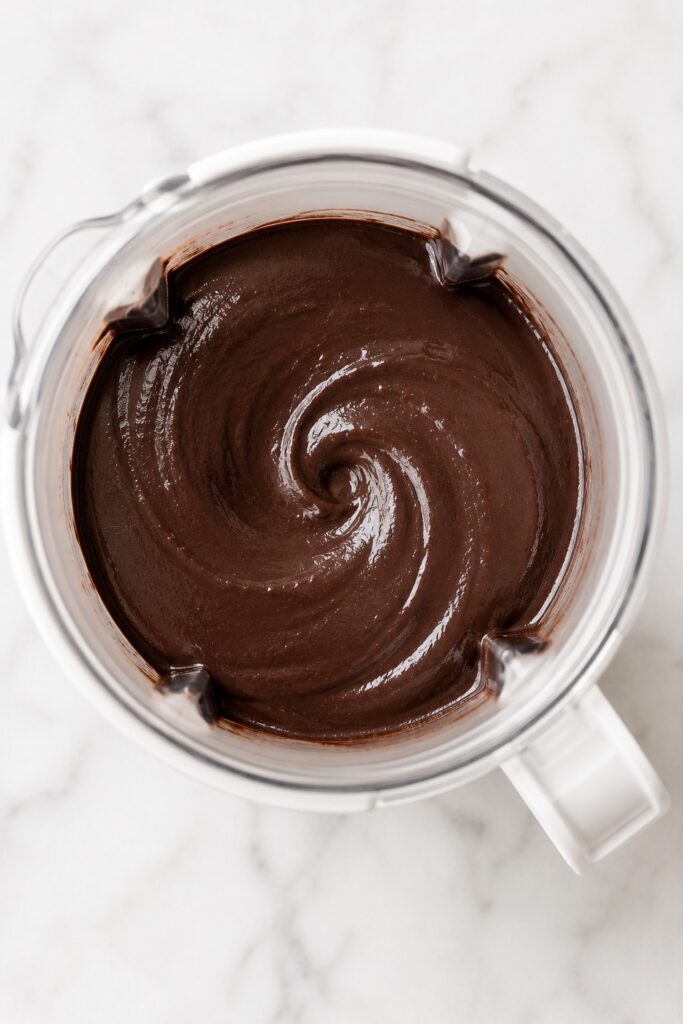
Blend or process for 60–90 seconds, stopping two or three times to scrape the sides, corners, and area near the blades. Continue processing until the mixture is completely smooth.
A few pieces of bean skin can hide near the base even when the top looks smooth. Scrape carefully, then blend or process again for 15–20 seconds.
What you should see: A glossy, thick, pourable purée with no visible beans or pieces of skin.
4. Add the Dry Ingredients
Add the cocoa powder, oat flour, baking powder, salt, and espresso powder, if using.
Process just until the dry ingredients are fully incorporated, about 15–20 seconds. Stop and scrape the sides once if needed.
Let the batter rest for 2–3 minutes. The cocoa powder and oat flour will begin absorbing moisture, and the mixture should become slightly thicker.
What you should see: The batter should be smooth, glossy, and thick but still pourable. It should fall from the spatula in a slow, broad ribbon and settle back into itself within several seconds.
5. Adjust the Consistency Only if Necessary
If the mixture is so thick that the blender or food processor cannot move it properly, or if the batter will not fall from the spatula, add 1 tablespoon of milk and process briefly.
Add the second tablespoon only if the batter remains unusually stiff. Most batches will not need the full amount.
If the batter still flows like a thin cake batter after the full 3-minute rest, process in 1 additional tablespoon of oat flour. Do not add more than this without expecting a firmer, less fudgy result.
Tip: Bean moisture varies by brand. Judging the consistency before adding milk is more reliable than using a fixed amount of extra liquid in every batch.
6. Fold in the Chocolate Chips
If using a food processor, remove the blade carefully. If using a blender, scrape the batter into a mixing bowl. Fold 1/2 cup of the chocolate chips into the batter with a rubber spatula.
Scrape the processor bowl or blender jar thoroughly so no thicker batter remains hidden around the base or beneath the blades.
Why this matters: Folding the chocolate chips in by hand keeps them intact. Processing them into the batter would chop the chocolate and alter the consistency.
7. Fill the Pan
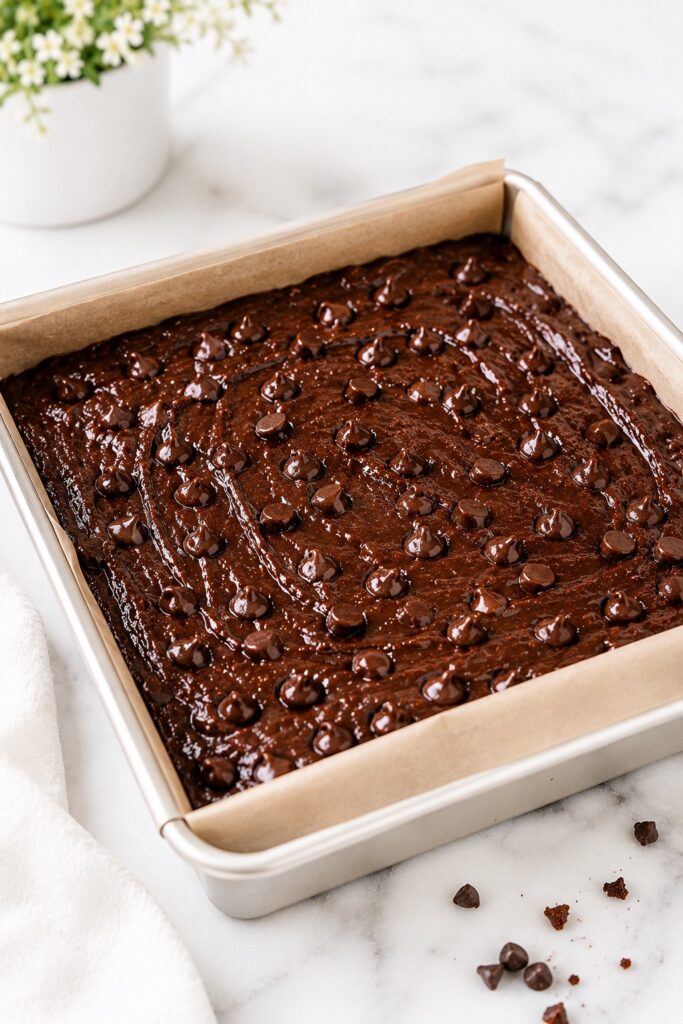
Transfer the batter to the prepared pan. Spread it into an even layer, making sure the batter reaches each corner.
Sprinkle the remaining 1/4 cup chocolate chips over the top. Tap the pan gently against the counter two or three times to release large trapped air pockets.
What you should see: A level, dark chocolate batter with visible chocolate chips scattered naturally across the surface.
8. Bake Until the Center Is Set
Bake for 23–27 minutes. Begin checking at 23 minutes.
The brownies are ready when the edges look firm and slightly raised, the surface no longer appears wet, and the center looks set but still soft.
Insert a toothpick about 1 inch from the edge. It should come out with moist crumbs rather than fluid batter. Test a second area if the toothpick passes through a melted chocolate chip.
Gently nudge the pan. The center may move very slightly as one soft piece, but it should not ripple like liquid.
Tip: Do not wait for the toothpick to come out completely clean. By that point, the edges may already be dry and the cooled brownies will lose their fudgy texture.
9. Cool Completely Before Slicing
Place the pan on a wire rack and allow the brownies to cool completely for at least 1 hour.
The center may appear extremely soft when the pan first leaves the oven. It can be tempting to return it to the oven, but the cocoa, oat flour, bean starch, eggs, and melted chocolate continue setting as the brownies cool.
For the cleanest slices and densest texture, allow the brownies to cool completely at room temperature before refrigerating them for an additional 30–60 minutes.
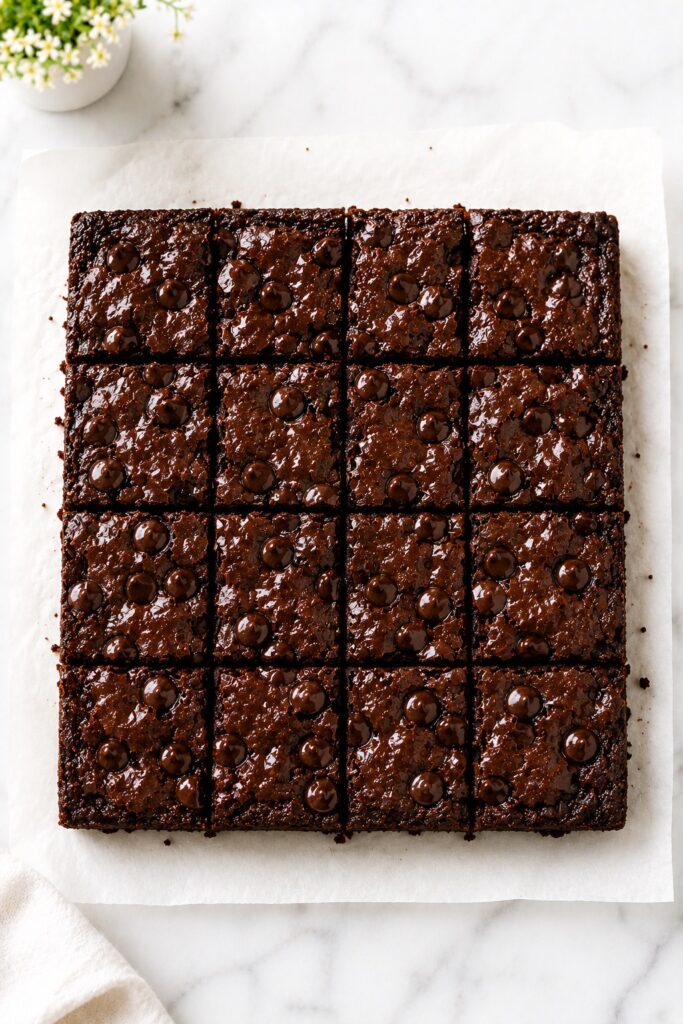
Lift the brownies from the pan using the parchment overhang. Cut them with a large, sharp knife, wiping the blade clean between cuts.
How to Tell When Black Bean Brownies Are Done
- The edges look set and slightly raised.
- The surface has changed from wet and shiny to softly glossy or mostly matte.
- The center no longer reflects light like fluid batter.
- When the pan is gently nudged, the center moves as one soft piece rather than rippling like liquid.
- A toothpick inserted about 1 inch from the edge comes out with moist crumbs rather than raw batter.
The brownies will still feel soft when they first leave the oven. Their structure continues developing as they cool, so do not extend the baking time simply because the center is not yet firm enough to slice.
Black Bean Brownie Texture Guide
The texture changes noticeably from blending through chilling. Use this guide to confirm that the batter and brownies are developing as expected at every stage.
| Stage | What You Should Notice | What It Means |
|---|---|---|
| Blended bean mixture | Silky, glossy, and completely free of visible bean skins | The finished brownies should have a smooth crumb |
| Finished batter | Thick but pourable; falls in a slow, broad ribbon | The liquid and dry ingredients are properly balanced |
| Fresh from the oven | Firm edges with a soft, set center | Carryover heat will finish setting the brownies |
| Fully cooled | Dense, moist, stable, and easy to lift | The starches, eggs, and chocolate have finished setting |
| Refrigerated | Firm, rich, and almost truffle-like | The chocolate firms while the oil helps keep the crumb from becoming hard |
Expert Tips for the Best Black Bean Brownies
Once the basic method is clear, a few smaller observations can make the results even more consistent. These are the details that matter most when judging batter consistency, baking time, make-ahead texture, and presentation.
The Batter Almost Always Looks Better After It Rests
One mistake I see often is adding extra flour too quickly. Give the batter 2–3 minutes after blending. The cocoa powder and oat flour continue absorbing moisture, and what first looks slightly loose often becomes the perfect brownie consistency without any adjustment.
Different Bean Brands Can Change the Batter
I’ve noticed that some canned black beans are much wetter than others. That’s why I never automatically add the optional milk. I always blend first, let the batter rest, and only add a tablespoon if the blender genuinely struggles to process the mixture.
The Best Texture Usually Happens the Next Day
If I’m baking these for guests, I almost always make them the day before. After an overnight rest in the refrigerator, the chocolate flavor becomes deeper, the crumb slices more cleanly, and the brownies develop an almost truffle-like texture.
The Surface Tells You More Than the Toothpick
A toothpick is helpful, but chocolate chips can easily fool you. I look at the entire pan first. Once the edges are set, the surface no longer looks wet, and the center moves as one soft piece when gently nudged, the brownies are usually ready.
A Few Extra Minutes Can Make a Big Difference
Because these brownies contain very little flour, they move from perfectly fudgy to noticeably drier faster than many classic brownie recipes. If you’re unsure, it’s almost always better to remove them a minute early than a minute late.
Clean Cuts Start With a Cold Brownie
For bakery-style squares, chill the brownies after they’ve cooled completely, then slice them with a long chef’s knife, wiping the blade clean after every cut. It takes only a minute longer and makes the finished brownies look dramatically more polished.
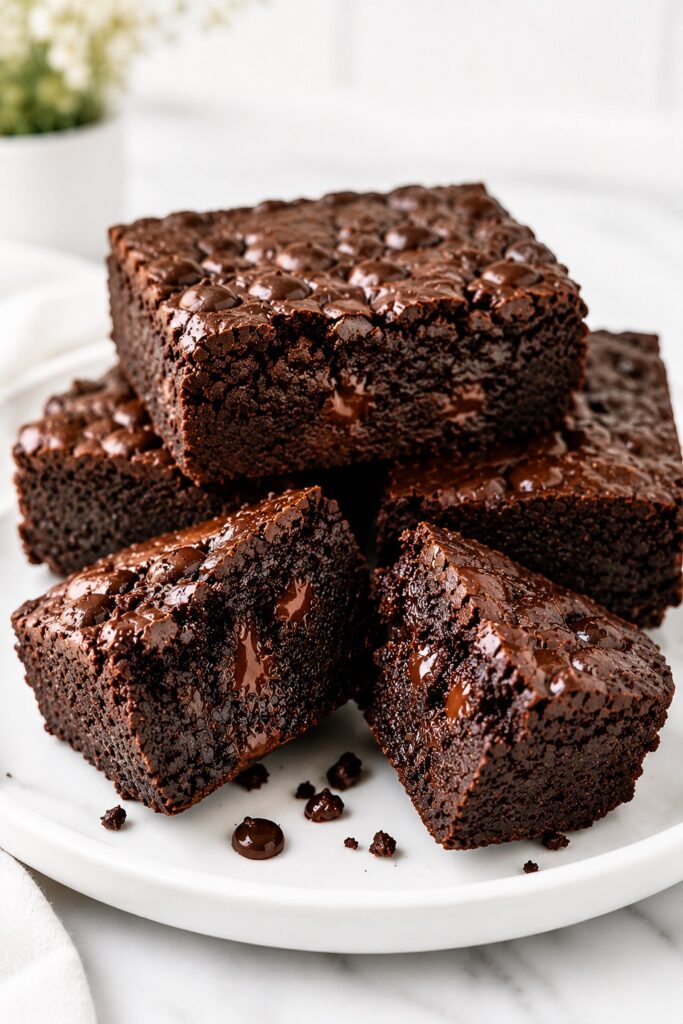
Common Black Bean Brownie Mistakes
Most problems with black bean brownies come from excess moisture, incomplete blending, or judging the center before it has cooled. The table below shows what each mistake changes and how to prevent it.
| Mistake | What Happens | How to Fix It |
|---|---|---|
| Not rinsing the beans thoroughly | The brownies may retain a faint earthy or canned flavor | Rinse for 30–45 seconds until the water runs clear |
| Leaving the beans too wet | The center may become gummy or take much longer to set | Drain for 3–5 minutes and add milk only if necessary |
| Not blending long enough | The crumb may feel grainy or contain visible bean skins | Scrape around the blades and process until completely silky |
| Adding all the optional milk immediately | The batter may become too loose | Add one tablespoon at a time only when the blender needs help |
| Overbaking | The edges become firm and the center loses its fudgy texture | Begin checking at 23 minutes and remove the pan when moist crumbs remain |
| Cutting while warm | The squares may collapse or appear underbaked | Cool for at least 1 hour before slicing |
| Reducing the cocoa or sugar substantially | The brownies may taste more bean-forward, and the moisture balance can change | Use the tested amounts for the most dependable flavor and texture |
Quick Troubleshooting
If something doesn’t look quite right, don’t worry. Here are the most common issues and the quickest ways to get back on track.
| If… | Most Likely Cause | What to Do |
|---|---|---|
| The batter is too thick to blend. | The beans are drier than average. | Add 1 tablespoon of milk, blend again, and repeat only if needed. |
| The batter seems too thin. | The beans retained extra moisture. | Wait 2–3 minutes for the cocoa and oat flour to hydrate. If it’s still loose, blend in 1 tablespoon of oat flour. |
| The brownies seem underbaked. | The center is still setting. | Cool completely before judging the texture. Bean brownies continue firming as they cool. |
| The brownies taste slightly earthy. | The beans weren’t rinsed thoroughly or the cocoa flavor is too mild. | Rinse the beans until the water runs clear and use the full amount of cocoa, vanilla, and chocolate chips. |
| The texture is grainy. | The beans weren’t blended long enough. | Blend until the batter is completely silky with no visible bean skins. |
Black Bean Brownies vs. Traditional Brownies
Black bean brownies and traditional brownies can both satisfy a chocolate craving, but they achieve their structure and texture differently. This comparison helps set realistic expectations before the first bite.
| Item | Black Bean Brownies | Traditional Brownies |
|---|---|---|
| Main Structure | Puréed black beans with a small amount of oat flour | Wheat flour with butter, oil, melted chocolate, or a combination |
| Texture | Dense, smooth, moist, and fudgy | Chewy, fudgy, or cakey depending on the recipe |
| Chocolate Flavor | Rich cocoa flavor with melted chocolate pockets | Rich chocolate flavor from cocoa powder, melted chocolate, or both |
| Sweetness | Moderately sweet with a subtle caramel note from brown sugar | Varies widely by recipe |
| Top Texture | Soft and set, usually without a thin crackly crust | May develop a shiny, crackly top depending on the formula and mixing method |
| Best Serving Texture | Soft at room temperature and denser after chilling | Often best warm or at room temperature |
| Flour Content | Uses only a small amount of oat flour | Typically uses substantially more wheat flour |
Black bean brownies are not meant to imitate a traditional brownie perfectly. Instead, they offer a rich chocolate experience with an exceptionally moist, fudgy texture while using black beans as the primary base. If you enjoy dense chocolate desserts, you’ll likely appreciate them for what they are rather than compare every bite to a classic brownie.
Beautiful Ways to Serve Black Bean Brownies
These brownies can feel casual or elegant depending on how they are served. Their dark chocolate color and dense texture pair especially well with creamy, fresh, or lightly tart accompaniments.
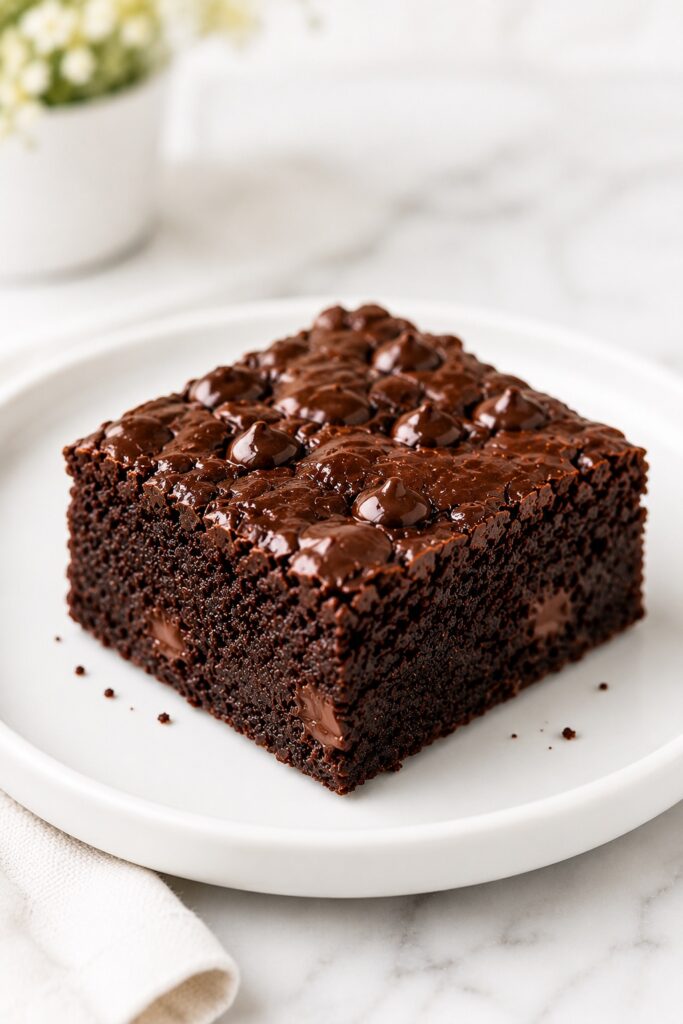
Enjoy Them at Room Temperature
Room temperature is where these brownies feel their softest and most balanced. The chocolate is fully aromatic, the crumb is tender, and every bite has that rich, fudgy texture the recipe is designed to deliver.
Pair Them with Vanilla Ice Cream
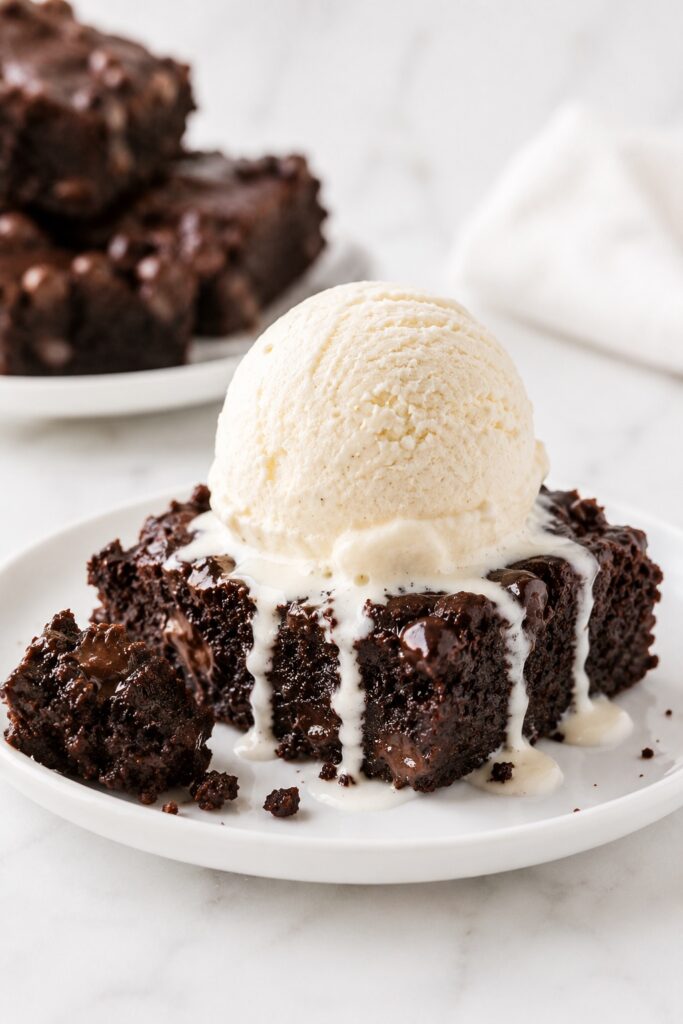
Warm one brownie in the microwave for 8–10 seconds, then top it with a scoop of vanilla ice cream. As the ice cream slowly melts into the warm chocolate, it creates an easy restaurant-style dessert with very little effort.
Add Fresh Berries for Contrast
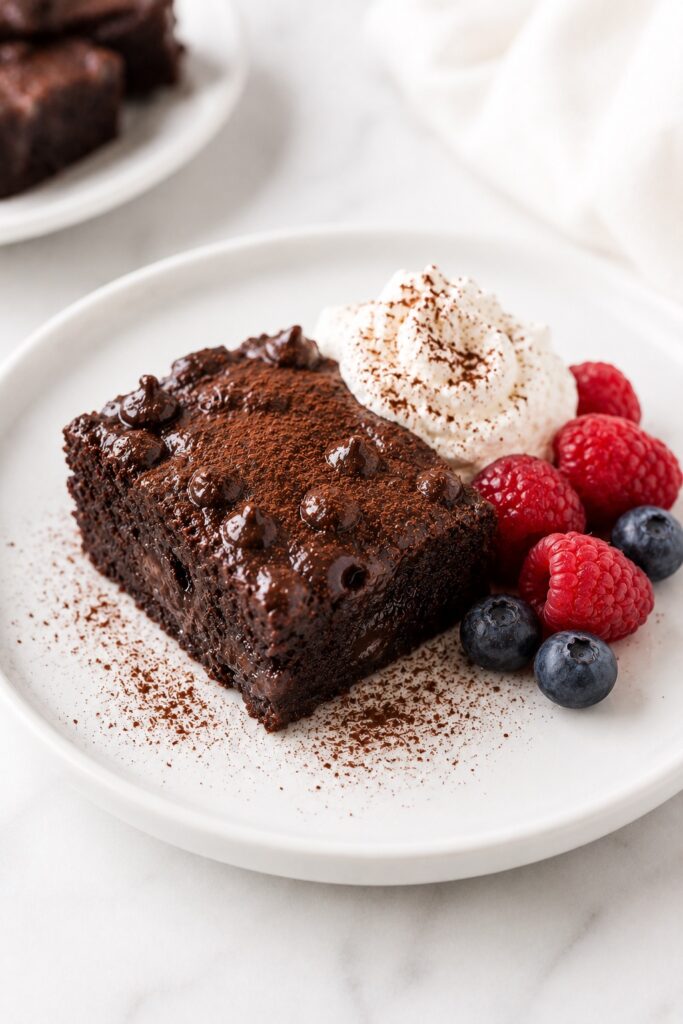
Fresh raspberries or sliced strawberries add brightness that balances the deep chocolate flavor beautifully. The contrast also makes these brownies especially attractive for spring and summer dessert tables.
Build an Elegant Dessert Plate
Serve one brownie on a white dessert plate with a spoonful of lightly whipped cream and a few fresh berries. Finish with a light dusting of cocoa powder for a simple presentation that looks polished enough for guests.
Perfect for Meal Prep and Lunchboxes
Once chilled, the brownies become firm enough to pack easily without falling apart. They’re ideal for lunchboxes, road trips, picnics, or keeping in the refrigerator whenever a chocolate craving appears.
Their glossy chocolate chips, rich dark color, and dense fudgy centers also make them a beautiful addition to dessert platters, holiday cookie trays, or casual gatherings where you want something that looks every bit as good as it tastes.
Storage and Make-Ahead Instructions
Black bean brownies store especially well because the bean-based crumb retains moisture while the chocolate firms during chilling. Choose the storage method below according to when and how you plan to serve them.
Room Temperature
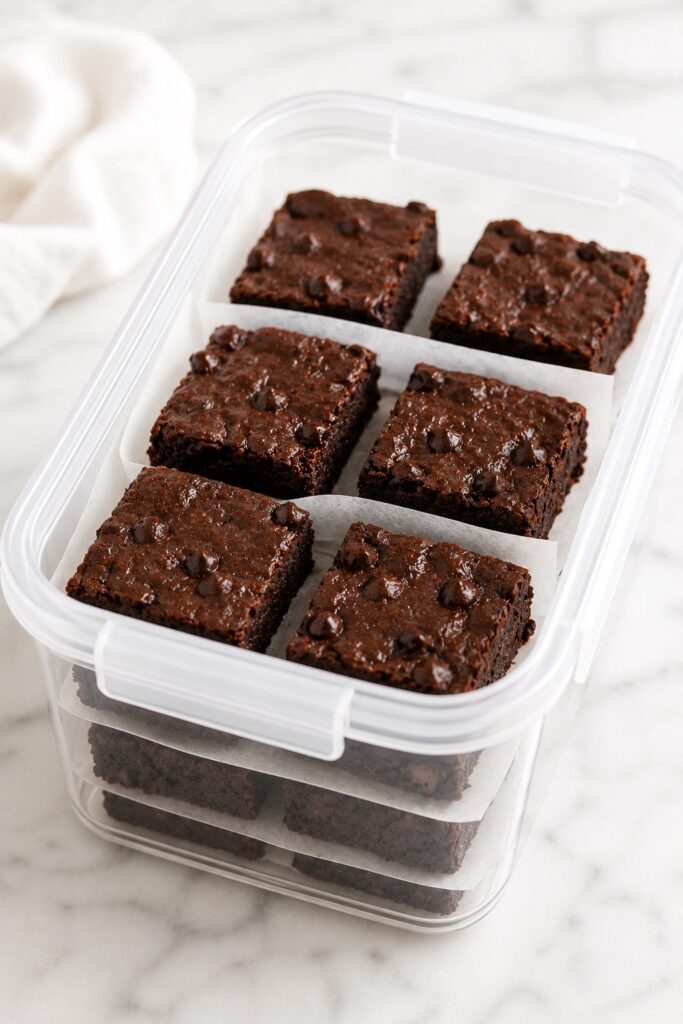
Store the brownies in an airtight container at a cool room temperature for up to 2 days. Place parchment paper between layers to prevent the surfaces from sticking together.
Refrigerator
Refrigerate the brownies in an airtight container for up to 5 days. As they chill, the chocolate firms while the bean-based crumb stays moist, creating an even denser, almost truffle-like texture that many people prefer.
For a softer texture, let a refrigerated brownie sit at room temperature for 15–20 minutes before eating.
Freezer
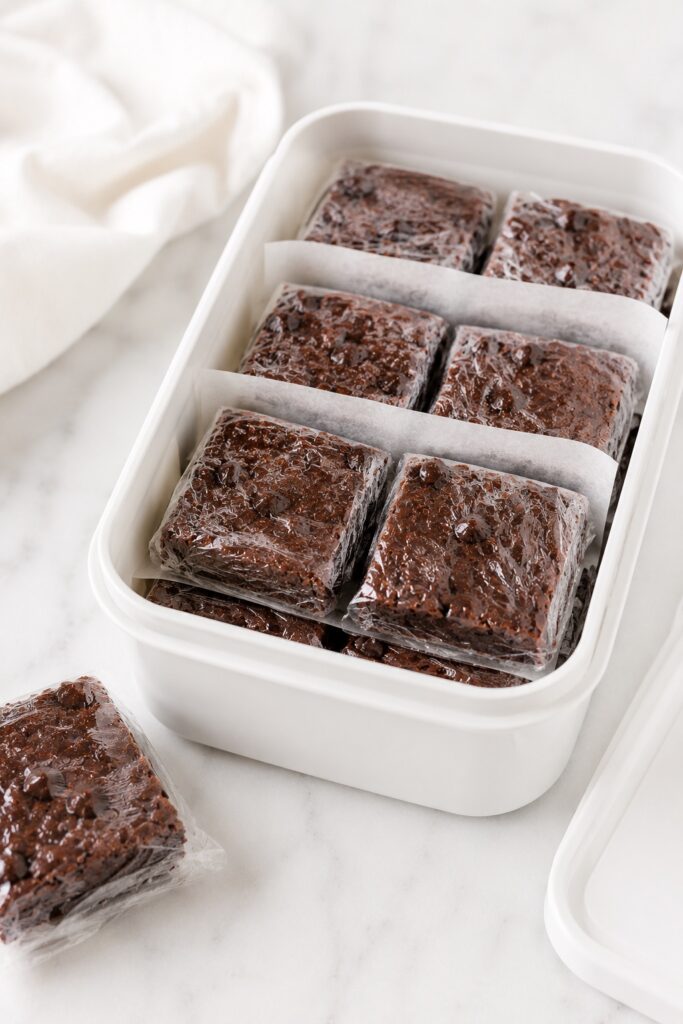
Wrap individual brownies in plastic wrap or parchment, then place them in a freezer-safe container or bag. Freeze for up to 2 months.
Thaw overnight in the refrigerator or for 30–60 minutes at room temperature.
Make Ahead
These brownies are an excellent make-ahead dessert because their flavor and texture continue improving after baking. Bake them a day in advance, cool them completely, then refrigerate the uncut slab overnight. Slice just before serving for the cleanest edges and the richest fudgy texture.
Black Bean Brownie Variations
One of the best things about these Black Bean Brownies is how easily the recipe adapts to different chocolate cravings. The bean-based batter provides a stable foundation, so you can customize the flavor and texture without changing the overall method. Here are a few simple variations worth trying once you’ve mastered the original recipe.
Double Chocolate Black Bean Brownies
Increase the semisweet chocolate chips to 1 cup. Fold 3/4 cup into the batter and reserve the remaining 1/4 cup for the top.
Peanut Butter Swirl Black Bean Brownies
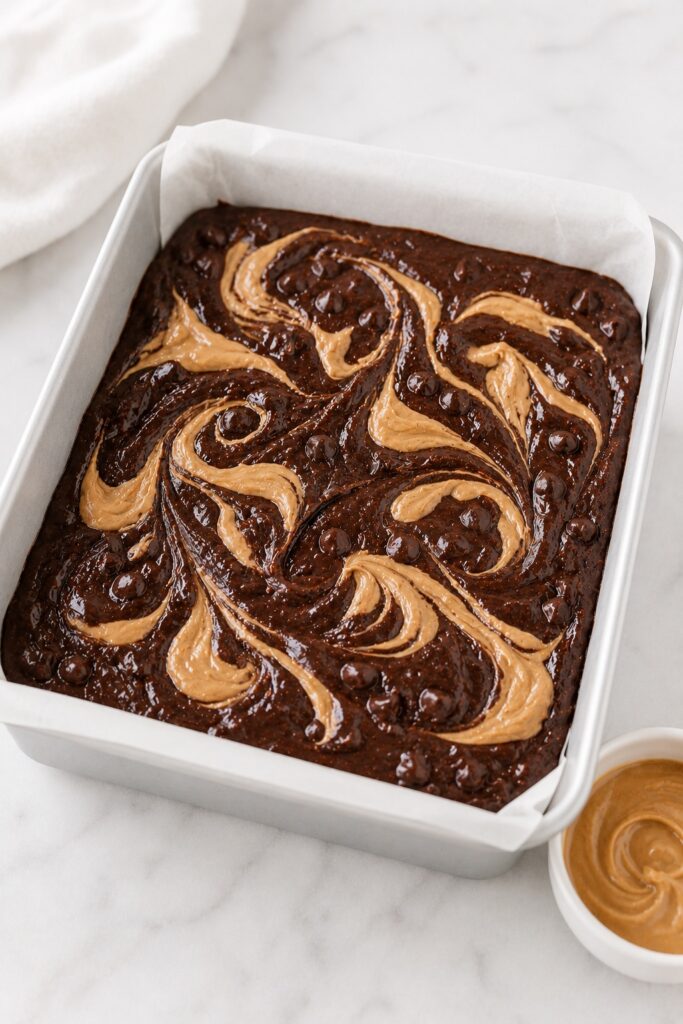
Drop 1/4 cup of creamy peanut butter over the filled pan in 8 small portions, then swirl lightly through the top of the batter with a knife. Avoid mixing it in completely so the peanut butter remains visible after baking.
Walnut or Pecan Black Bean Brownies
Fold 1/2 cup of toasted chopped walnuts or pecans into the batter with the chocolate chips for added crunch and a classic bakery-style texture.
Extra Dark Chocolate Black Bean Brownies
Use Dutch-process cocoa and dark chocolate chips for a deeper color and a richer, less-sweet chocolate flavor.
Espresso Chocolate Black Bean Brownies
Increase the espresso powder to 2 teaspoons for a stronger mocha-style depth. Depending on the brand, a faint coffee note may become noticeable alongside the chocolate.
Start with the original recipe the first time so you become familiar with the batter and its texture. Once you know how the brownies should look and feel, these variations make it easy to create a slightly different version whenever you’re in the mood for something new without sacrificing the rich, fudgy texture that makes the recipe so reliable.
Frequently Asked Questions
These answers cover the questions readers most often have about bean flavor, gluten-free ingredients, texture, substitutions, storage, and adjusting the sweetness.
Can You Taste the Black Beans in Black Bean Brownies?
The bean flavor should remain difficult to detect when the recipe is prepared as written. Thorough rinsing, complete blending, and the full amounts of cocoa, sugar, vanilla, and chocolate chips allow the chocolate flavor to stay dominant.
Are Black Bean Brownies Gluten-Free?
They can be gluten-free when made with certified gluten-free oat flour and packaged ingredients verified to be gluten-free. Regular oats may be exposed to wheat during processing.
Why Are My Black Bean Brownies Gummy?
A gummy texture usually comes from excess moisture, insufficient baking, or slicing before the brownies have cooled. Drain the beans thoroughly, add milk only when needed, bake until the center no longer looks wet, and cool for at least 1 hour.
Can I Freeze Black Bean Brownies?
Yes. Once completely cool, wrap individual brownies tightly and freeze them for up to 2 months. Thaw overnight in the refrigerator or at room temperature for about 30–60 minutes. Their texture remains remarkably fudgy after thawing.
Can I Make Black Bean Brownies Without Oat Flour?
The oat flour is important because it absorbs moisture and stabilizes the center. You can replace it with the same weight of finely ground rolled oats or all-purpose flour, but removing it entirely may produce brownies that are too soft and fragile.
Can I Use Homemade Black Beans?
Yes. Use 250 g of very tender cooked black beans. Drain them thoroughly and make sure they are completely cool before blending. Firm or undercooked beans will not produce a smooth batter.
Can I Reduce the Sugar?
You can reduce the granulated sugar from 1/4 cup to 2 tablespoons while keeping the brown sugar unchanged. A larger reduction may make the brownies taste more bitter, feel firmer, and reveal more of the beans’ earthy flavor.
Should I Refrigerate Black Bean Brownies?
They can be stored at cool room temperature for up to 2 days, but refrigeration extends their freshness and gives them an even denser, more truffle-like texture. If you enjoy extra-fudgy brownies, you’ll probably prefer them chilled.
Keep the Baking Journey Going
If these Black Bean Brownies disappeared a little faster than you expected, you’re not alone. Whether you’re craving another rich chocolate dessert, looking for a dessert with a better-for-you twist, or planning your next weekend bake, here are a few homemade favorites worth trying next.
Craving More Rich Chocolate?
- Sweet Potato Brownies – Another incredibly fudgy brownie with a naturally moist texture and deep chocolate flavor.
- Brownie Cookies – Crackly tops, chewy edges, and soft brownie-like centers packed with chocolate.
- Chocolate Lava Cake – Warm individual cakes with irresistibly molten chocolate centers that are easier to make than they look.
- Chocolate Mousse – Silky, airy, and intensely chocolatey for those moments when you’re craving an elegant dessert without baking.
Want a Dessert with a Better-for-You Twist?
- Cottage Cheese Chocolate Mousse – Rich chocolate flavor, incredibly creamy texture, and a protein-rich twist.
- Cottage Cheese Dessert – A smooth, creamy dessert made with simple everyday ingredients.
- Energy Balls – Naturally sweet, no-bake bites that are perfect for snacks or healthier dessert cravings.
- Chocolate Pudding – Smooth, deeply chocolatey, and easy to prepare ahead when you want a comforting spoonable dessert.
Ready for Your Next Bake?
- Blondies – Soft, buttery dessert bars with chewy edges and rich brown sugar flavor.
- Magic Cookie Bars – Gooey layered bars loaded with chocolate, coconut, and irresistible texture.
- Brownie Bites – Bite-sized brownies that are perfect for parties, lunchboxes, and sharing.
- No Bake Cookies – Quick chocolate oatmeal cookies that come together without ever turning on the oven.
Whether you’re exploring rich chocolate desserts or discovering recipes with a better-for-you twist, each of these homemade favorites brings something a little different to your kitchen while delivering the same comforting, from-scratch baking experience.
Why This Recipe Belongs in Your Recipe Box
Some recipes are worth making once. Others quietly become the ones you reach for whenever the craving returns. Here’s why these Black Bean Brownies deserve a permanent place in your baking collection.
- Rich Chocolate Flavor First: Every bite tastes like a true chocolate brownie—not beans—with deep cocoa flavor and plenty of melted chocolate.
- Exceptionally Fudgy Texture: Dense, moist, and almost truffle-like after chilling, with clean slices and a satisfying bite.
- Easy Pantry Recipe: Made with everyday ingredients and a blender or food processor, so there’s no complicated mixing method to master.
- Perfect for Making Ahead: The brownies taste even better the next day as the chocolate flavor deepens and the texture becomes richer.
- Freezer Friendly: Freeze individual squares whenever you want a homemade chocolate dessert ready to enjoy.
- A Recipe You’ll Actually Make Again: Once you learn the few small techniques that make this recipe successful, it becomes an easy, dependable brownie you’ll come back to again and again.
Final Thoughts
Some recipes earn a permanent place in your kitchen because they’re nostalgic. Others because they’re impressive enough for special occasions. These Black Bean Brownies belong in that collection for a different reason—they consistently deliver rich chocolate flavor, an irresistibly fudgy texture, and dependable results with surprisingly simple ingredients.
Once you’ve made them a time or two, the process begins to feel wonderfully familiar. You stop thinking about the black beans and start thinking about the dense chocolate crumb, the glossy melted chocolate chips, and the kind of rich texture that naturally invites a second piece.
Those are the recipes worth keeping close—the ones you trust, the ones people ask you to make again, and the ones that quietly become part of your baking tradition. I hope these Black Bean Brownies become one of them.

Black Bean Brownies
Rich, deeply chocolatey Black Bean Brownies with a dense, smooth, fudgy center and plenty of melted chocolate chips. The batter comes together easily in a blender or food processor, while carefully drained beans, cocoa powder, and oat flour create moist brownies that slice beautifully after cooling—without an obvious bean flavor.
Ingredients
- 1 (15-ounce / 425 g) can plain black beans, rinsed very well, drained, and weighed after draining (250 g)
- 2 large eggs, room temperature
- 1/2 cup (100 g) packed light brown sugar
- 1/4 cup (50 g) granulated sugar
- 1/4 cup (60 ml) neutral oil
- 2 teaspoons pure vanilla extract
- 1/2 cup + 2 tablespoons (52 g) unsweetened cocoa powder
- 1/3 cup (35 g) oat flour
- 1/4 teaspoon baking powder
- 3/4 teaspoon fine salt
- 1 teaspoon instant espresso powder (optional, but recommended)
- 3/4 cup (128 g) semisweet chocolate chips, divided
- 1–2 tablespoons milk or unsweetened non-dairy milk, only if needed
Instructions
- Preheat the oven to 350°F (175°C). Lightly grease an 8-inch square metal baking pan, then line it with parchment paper, leaving an overhang on two sides for easy removal.
- Rinse and drain the black beans thoroughly until the water runs clear. Let them drain for 3–5 minutes, then weigh 250 g after draining.
- Blend the wet ingredients. Add the eggs, oil, vanilla, black beans, brown sugar, and granulated sugar to a blender or food processor. Blend for 60–90 seconds, scraping the sides as needed, until completely smooth with no visible bean pieces.
- Add the dry ingredients. Blend in the cocoa powder, oat flour, baking powder, salt, and espresso powder (if using) just until combined. Let the batter rest for 2–3 minutes to thicken naturally.
- Adjust the consistency if needed. If the batter is too thick for the blender to process, blend in 1 tablespoon milk at a time until it moves easily. Most batches won’t need the full amount.
- Fold in the chocolate chips. Transfer the batter to a bowl if using a blender, then fold in 1/2 cup of the chocolate chips.
- Fill the pan. Spread the batter evenly into the prepared pan and sprinkle the remaining 1/4 cup chocolate chips over the top.
- Bake for 23–27 minutes, beginning to check at 23 minutes. The edges should be set, the center should no longer look wet, and a toothpick inserted about 1 inch from the edge should come out with moist crumbs.
- Cool completely in the pan for at least 1 hour. For the cleanest slices and the fudgiest texture, refrigerate for 30–60 minutes before lifting out and cutting into 16 brownies.
Recipe Tips
- Rinse and drain the beans very well to remove excess moisture and any earthy flavor.
- Blend until completely smooth for the best brownie texture.
- Let the batter rest for 2–3 minutes before adjusting the consistency.
- Don’t overbake—these brownies continue setting as they cool.
- Chill before slicing for dense, bakery-style brownies with clean edges.
Notes
- Rinse and drain the beans very well to remove excess moisture and any earthy flavor.
- Blend until completely smooth for the best brownie texture.
- Let the batter rest for 2–3 minutes before adjusting the consistency.
- Don’t overbake—these brownies continue setting as they cool.
- Chill before slicing for dense, bakery-style brownies with clean edges.
Nutrition Information:
Yield: 16 brownies Serving Size: 1 brownieAmount Per Serving: Calories: 154Total Fat: 7gCarbohydrates: 20gFiber: 3gSugar: 12gProtein: 4g
Nutrition information is provided as an estimate only and may vary based on specific ingredients, brands, and portion sizes used. This information should not be considered medical or nutritional advice.

Love this? There are twenty more like it.
128 pages, five chapters, 15 kitchen guides and 16 printable planning pages — in US Letter and A4.
12 Sweet Favourites — Yours, Free 🍰
Tiramisù, no-bake cheesecake, the perfect chocolate chip cookie & 9 more reader-loved desserts — gathered into one beautiful free recipe book. From my kitchen to yours.
No spam, just sweet things. Unsubscribe anytime.