Apple Crumble Pie with Buttery Crumb Topping
🎁 FREE E-BOOK: 12 Sweet Favorites — reader-loved desserts in one beautiful recipe book.
Apple crumble pie brings together tender cinnamon apples, a golden pastry base and buttery crumbs that break softly under a fork. The filling stays juicy, with recognizable apple slices beneath a craggy topping made with cold butter and two kinds of sugar.

A pie like this suits the slower part of a meal, when the plates have been cleared and there is room for something familiar. It has the warmth of an apple dessert made for sharing, with enough contrast between fruit, pastry and crumbs to make a plain slice satisfying.
Keep this apple crumble pie recipe for the days when you want the fruit measured clearly and the timing laid out before you start. A ready-made crust takes care of the pastry, while separate checks for baking and cooling help you judge the filling before the first slice.
Apple Crumble Pie at a Glance
This apple crumble pie makes one 9-inch pie with a bottom pastry crust, sliced apples and a flour-based butter crumble. Allow almost six hours from preparation to a fully cooled slice, even though most of that time is hands-off cooling.
| Detail | What to plan |
|---|---|
| Method | Oven-baked fruit pie with a cold-butter crumb topping |
| Yield | One 9-inch pie, 8 slices |
| Pan | 9-inch (23 cm) metal pie pan, approximately 1 1/2 inches (4 cm) deep |
| Prep time | About 35 minutes, including overlapping chilling and preheating |
| Bake time | About 65–80 minutes; filling cues decide when it is ready |
| Cooling time | About 4 hours, until completely cool |
| Total time | About 5 hours 55 minutes, using the upper bake estimate |
| Oven | Conventional; 400°F (200°C) for 20 minutes, then 375°F (190°C) |
| Practical fit | Ready-made pastry, no top crust to shape; fruit preparation and cue-led baking |
| Finished texture | Tender apple slices, cohesive juicy filling and separate crisp butter crumbs |
| Make-ahead option | Bake the day before, cool completely and refrigerate |
Apple crumble pie and Dutch apple pie are overlapping names for this crumb-topped pie family. This version uses refrigerated pastry and a topping without oats or nuts; for a homemade-pastry route, explore the Dutch apple pie with homemade crust. A crustless apple dessert is a different format.
Why This Apple Crumble Pie Works
The strength of this apple crumble pie is the balance between a measured fruit layer, distinct butter crumbs and enough baking time for the center. Each part has a clear job, so a brown topping does not become the only sign of success.
- A defined fruit load: 900 g of prepared apples pairs with 30 g of flour, making the filling more consistent than a count of differently sized apples.
- Separate crumbs: the flour, sugars and cold butter are worked into irregular clusters rather than spread over the fruit as a continuous paste.
- A filling-led finish: center bubbling and tender apples guide the bake, addressing the familiar problem of an attractive top above fruit that still needs time.
Why You’ll Love Making This Apple Crumble Pie
This apple crumble pie fits a planned baking day when you want a familiar dessert without making pastry from scratch. The preparation is straightforward, while the long cooling window makes it particularly useful to bake ahead.
- Purchased pastry saves a separate dough-making stage. Fit one refrigerated crust into the pan and concentrate on the fruit and crumbs.
- There is no pastry lid to roll or weave. The topping is shaped by hand into small, uneven clusters.
- It serves eight. One pie can be the apple dessert on a shared table.
- The previous-day route is clear. Bake, cool and refrigerate, then choose how to serve the slices the next day.
How the Apples, Crumbs and Crust Bake Together
The filling, crumble and pastry need different things from the oven. Understanding how moisture and heat move through this apple crumble pie makes the baking cues easier to use without turning the clock into a guarantee.
Flour Thickens the Juices as the Filling Heats
Flour takes up liquid from the apples and thickens that liquid as it heats. The center of a full pie warms more slowly than the exposed topping, which is why surface browning can arrive before the filling is ready.
Bubbling through gaps toward the center shows that heat has reached the filling there; a skewer adds a separate check for apple tenderness. Cooling then allows the hot juices to settle into a more cohesive filling. These are different stages, and waiting cannot replace an adequately baked center.
Butter and Moisture Shape the Crumbs
Butter distributed through the flour helps the topping form small clusters rather than a dry blanket. As the pie bakes, moisture leaves the exposed crumbs and their surfaces brown, giving contrast to the softer fruit beneath.
The practical goal is a mixture that holds when squeezed but breaks into separate pieces. A greasy paste covers the fruit differently from loose clusters, so the texture of the unbaked crumble is worth checking before it goes onto the pie.
Metal Carries Heat to the Pastry Base
A metal pan and a preheated metal baking sheet carry heat to the pastry beneath the apples. That contact matters because the bottom crust is sheltered from the direct oven heat that reaches the crumbs.
Keep the specified pan and hot-sheet setup for this apple crumble pie. You cannot see the underside through metal, so use the complete baking method and filling cues rather than claiming that a view of the top proves the base is browned.
Ingredients for the Apple Filling, Pastry and Crumble
The ingredients for apple crumble pie fall into three parts: the pastry, a fresh apple filling and the butter crumble. Measure the apples after peeling and coring, and keep the topping butter cold until you work it into the dry ingredients.
Ingredient List
Use the quantities below for one 9-inch pie. The apple volume is approximate; 900 g of prepared fruit is the more dependable measure when the slices pack differently into a cup.

For the Crust
- 1 refrigerated, ready-made pastry crust for a 9-inch pie (about 7 oz / 200 g), prepared for unrolling as directed on its package.
For the Apple Filling
- About 8 loosely filled cups (900 g) peeled, cored and sliced apples, half Granny Smith and half Honeycrisp by prepared weight.
- 1 tablespoon (15 ml) lemon juice.
- 1/2 cup (100 g) granulated sugar.
- 1/4 cup (30 g) all-purpose flour, spooned and leveled.
- 1 teaspoon (about 2.5 g) ground cinnamon.
- 1/4 teaspoon (about 0.5 g) ground nutmeg.
- 1/4 teaspoon (1.5 g) fine table salt.
For the Crumble Topping
- 1 1/4 cups (150 g) all-purpose flour, spooned and leveled.
- 1/3 cup (71 g) packed light brown sugar.
- 1/4 cup (50 g) granulated sugar.
- 1/8 teaspoon (about 0.75 g) fine table salt.
- 1/2 cup (113 g) unsalted butter, cold and cut into small cubes.
Choosing and Measuring the Apples
Use equal prepared weights of Granny Smith and Honeycrisp for this apple crumble pie: 450 g of each. Granny Smith supplies tartness, while Honeycrisp adds a sweeter apple flavor. Keeping the blend measured makes the sweet-tart balance easier to repeat.
Buy roughly 2 1/2 to 3 lb (1.1 to 1.35 kg) of whole apples to allow for cores and peel, then weigh the trimmed fruit. The exact purchase amount varies with waste. Slice to about 1/4 inch (6 mm) so thick pieces do not lag behind thin ones in the center.
Pastry and Butter Details That Matter
Choose refrigerated pastry intended for a filled 9-inch fruit pie, and follow the package directions for bringing it to an unrolling temperature. A shallow frozen shell, puff pastry or graham crust will not behave like this fitted pastry base.
Cold unsalted butter belongs in the crumble. Spoon and level the flour if measuring by cups, and pack the brown sugar as listed. Extra flour changes the crumb texture; soft, greasy butter makes it harder to maintain distinct clusters. Check the purchased crust label when considering allergens.

Kitchen Tools for a Crisp Crust and Tender Apples
The most important tools for apple crumble pie are the metal pan, a heated baking sheet and a way to check the fruit beneath the topping. These five groups cover preparation through slicing without requiring a mixer or food processor.
- Pan and heat support: a 9-inch (23 cm) metal pie pan, approximately 1 1/2 inches (4 cm) deep, and a sturdy rimmed metal baking sheet; use a conventional oven with a rack in the lower third.
- Fruit preparation: a digital scale, peeler, sharp knife and cutting board for weighing the prepared apples and cutting even slices.
- Mixing and measuring: two bowls, measuring cups and spoons, a spatula, and a pastry blender or fork; fingertips can also work the butter into the crumble.
- Doneness and browning control: a thin skewer to check apple resistance and aluminum foil to shield the rim or tent the topping.
- Cooling and serving: a wire rack, sharp slicing knife and pie server to support the pie as it cools and the slices as they are lifted.
Before You Begin Your Apple Crumble Pie
Check the pan, oven setting, butter temperature and cooling window before starting this apple crumble pie. These are the conditions that are hardest to correct once the pastry is full.
- The metal pan is 9 inches across and approximately 1 1/2 inches deep.
- The oven is set for conventional baking, rather than a fan-oven conversion.
- The unsalted butter for the topping is still cold.
- There is time and rack space for about four hours of cooling before slicing.
What to Expect from the Apples and Crumble
An apple crumble pie changes shape and texture as it bakes and cools, so the unbaked mound and a hot slice should not look exactly like the finished wedge.
- The crumble contains both smaller loose crumbs and pea- to small-marble-size clusters.
- The apples form a gentle mound above the fitted pastry before baking.
- The fruit settles as the apple slices soften.
- Hot juices are looser than the filling in a completely cooled slice.
How to Make Apple Crumble Pie
Make the apple crumble pie in six stages, beginning with the oven and chilled pastry. The fruit goes into the shell raw, the topping goes on in separate clusters, and the finished pie cools fully before it is cut.
1. Prepare the Oven and Chill the Crust
Place a sturdy rimmed metal baking sheet on a rack in the lower third of the oven and preheat to 400°F (200°C). Prepare the refrigerated crust for unrolling according to its package directions, then fit it into the specified metal pie pan without stretching it.
Ease the pastry against the base and sides, shape the rim and refrigerate while preparing the filling and crumble. Do not prick or blind-bake the base for this method. Stretching the pastry to reach the rim can pull it away from the pan as it bakes.
What you should see: the pastry rests against the pan without being pulled tight and feels cool when it is time to fill it.

2. Coat the Apple Slices
Prepare the fruit for apple crumble pie by peeling and coring the apples, then weighing 900 g of prepared fruit, half Granny Smith and half Honeycrisp. Cut into slices about 1/4 inch (6 mm) thick and toss with the lemon juice.

Combine the filling sugar, flour, cinnamon, nutmeg and salt separately, then toss thoroughly with the apple slices. Mixing the dry ingredients first spreads the flour through the fruit instead of leaving thick pockets in the filling. Continue with the topping and assembly rather than leaving the sugared apples standing for a long time.
What you should see: the apple slices carry a thin, even coating, with no visible pockets of dry flour.

3. Make the Cold-Butter Crumble
Combine the topping flour, brown sugar, granulated sugar and salt. Add the cold cubed butter and work it in with a pastry blender, fork or fingertips until the mixture resembles coarse crumbs and holds together when squeezed.

Squeeze portions into clusters, then break them into irregular small pieces. Stop before the mixture becomes a continuous paste. If it feels soft or greasy, refrigerate briefly until cool before topping the apple crumble pie.
What you should see: loose crumbs mixed with pea- to small-marble-size clusters, without large bare pieces of butter or a smooth greasy mass.

4. Fill the Crust and Add the Crumbs
Arrange the apple slices compactly in the chilled pastry, minimizing large gaps and making a gentle mound at the center. Scrape the coating and juices from the bowl into the shell so the measured filling stays together.
Scatter the crumble over the apples in separate clusters. Let the pieces sit loosely instead of pressing them into a sealed layer; the irregular surface is part of the finished apple crumble pie texture.
What you should see: the pastry supports the fruit, and the topping covers the apple surface as distinct crumbs rather than a single compressed sheet.

5. Bake Until the Center Is Ready
Place the metal pan on the hot baking sheet. Bake the apple crumble pie for 20 minutes at 400°F (200°C), then reduce the oven to 375°F (190°C) without removing the pie. Continue for approximately 45–60 minutes.
Check the color after the first 20 minutes. Shield the pastry rim and loosely tent the topping with foil as soon as they are sufficiently browned. The foil allows the filling to keep cooking while slowing further browning of the exposed surface.

Finish when the filling bubbles actively through gaps toward the center and a thin skewer inserted through a gap meets little resistance in the apples. If the center is not ready, continue in 5–10-minute increments under the foil. Apple condition, slice thickness, pan color and oven accuracy can shift the total bake time.
What you should see: deep-golden crumbs and rim, thick bubbling juices toward the center, and tender center apples. A pale, doughy-looking rim or firm fruit calls for more baking; the topping color alone is not enough.

6. Cool Completely and Slice
Transfer the pan to a wire rack and cool the apple crumble pie uncovered for about four hours, until completely cool. Leave it in the pan while the filling settles. Cutting early releases the hot juices before the filling can support a neat wedge.
Cut into eight slices with a sharp knife and lift with a pie server. If you want warm pie, rewarm an individual slice after the whole pie has first cooled and set.
What you should see: a slice that holds a moist apple filling, with identifiable fruit layers beneath the crumbs. A little juice is compatible with a tender fruit pie; a hot slice is not the reference for how well the cooled filling holds.

How to Tell When the Filling and Slice Are Ready
Apple crumble pie has two readiness points: tender, bubbling filling marks the end of baking; complete cooling marks readiness for a supported slice. Use the center of the filling to judge the first and the temperature of the whole pie to judge the second.
I once sliced an apple pie before it had cooled completely, and the juices spread across the plate. That taught me to separate two milestones: baking the apples until tender and letting the filling settle before cutting.
| What you notice | What it means | What to do |
|---|---|---|
| The topping is brown, but the center apples resist the skewer or the center is not bubbling. | The exposed surface is ahead of the filling. | Shield the browned areas and continue baking, checking in 5–10-minute increments. |
| The center bubbles, the apples are tender and the pie is still hot. | The bake is complete, but the filling has not yet settled for slicing. | Cool on the rack until completely cool, allowing about four hours. |
| The pie is completely cool but releases excessive liquid. | Cooling alone has not resolved the filling problem. | Review prepared fruit weight, flour measurement and whether the center reached the baking cues; there is no single guaranteed rescue. |
Begin watching browning after the initial 20-minute stage; assess final filling readiness toward the end of the 65–80-minute total window. A firm center needs more time even when the surface looks finished. Conversely, very dark crumbs should be shielded rather than left exposed while waiting for the apples.
The metal pan hides the underside of this apple crumble pie. A baked-looking rim gives useful information about the exposed pastry, but it does not let you inspect the base. The hot-sheet setup, adequate filling bake and complete cooling work together to give the bottom crust its best chance.

Small Details for Better Apple Pie Slices
A few small judgments make apple crumble pie easier to measure, protect and slice. Use these when the basic method is already in hand, rather than adding more ingredients to solve a texture problem.
- Separate purchase weight from bowl weight. Buy enough whole apples for trimming losses, then tare the empty bowl before weighing the prepared fruit; including the bowl would make the apparent apple quantity larger than the actual filling.
- Judge crumbs with a squeeze, not by loose flour alone. A bowl can contain fine crumbs and still form clusters when pressed; check that behavior before deciding the mixture needs a different butter or flour amount.
- Give the foil a little headroom. A loose tent slows browning without pressing the small clusters into the filling; keep the foil off the crumb surface where possible.
Apple Crumble Pie Problems and How to Respond
Most apple crumble pie problems become easier to diagnose when you separate fruit measurement, baking readiness and slicing temperature. The action that helps a pie still in the oven is different from the adjustment to make on the next bake.
| Symptom | Likely cause | Action now | Prevention next time |
|---|---|---|---|
| The center apples are firm beneath browned crumbs. | The topping has colored before the fruit has softened. | Use the readiness table above to shield and continue baking. | Keep slices near 1/4 inch and judge the filling as well as the surface. |
| The bottom pastry is soft or seems doughy. | The base may not have received enough heat, or the pie may have been covered while still warm. | If the pie is still baking, finish using the center cues; extra topping color cannot prove the base is done. Once cooled, reheating a slice may refresh texture but cannot promise a fully corrected crust. | Use the specified metal pan and preheated sheet; cool uncovered before covering. |
| The crumble becomes a greasy, compact layer. | The butter became too warm, the flour was undermeasured or the topping was pressed flat. | Before baking, chill a soft mixture and form separate clusters. After baking, the texture cannot be returned to raw crumbs. | Weigh the topping flour and butter; stop mixing before a paste forms. |
| A completely cooled slice releases a pool of liquid. | Too much prepared fruit, too little flour or an incomplete filling bake may be involved. | Serve with a spoon if needed and review the measurements and baking endpoint; do not expect more waiting alone to repair every cause. | Weigh the trimmed apples and flour, then check center bubbling and fruit tenderness before cooling. |
Beautiful Ways to Serve Apple Crumble Pie
Serve apple crumble pie after its first complete cooling, then choose the temperature and accompaniment that suit the meal. Keep additions modest enough for the apple layers and butter crumbs to remain the main part of the dessert.
A Plain Slice at Room Temperature
A plain slice of apple crumble pie shows the contrast most clearly: tender apple layers, a thin pastry base and irregular crumbs on top. Serve it at room temperature within the storage limits below, on a plate wide enough to catch a few falling crumbs.
This is a useful choice after a rich meal because the pie needs no additional sauce. Lift the slice with a pie server, then slide it onto the plate rather than trying to balance the fruit on the knife.

A Rewarmed Slice with Vanilla Ice Cream
A cooled, set slice of apple crumble pie can be rewarmed and served with a modest scoop of vanilla ice cream. The warm apple filling and cool scoop create a clear temperature contrast without requiring the whole pie to be cut while hot.
Follow the individual-slice warming guidance below, then add the ice cream just before serving. Place it beside the slice or partly against the cut face so some of the crumble remains crisp and visible.

A Slice with Lightly Whipped Cream
Lightly whipped cream gives apple crumble pie a soft accompaniment without another baked component. Add a small spoonful beside the slice so the topping still has room to shed a few crumbs as it is cut with a fork.
Keep the cream refrigerated separately and add it at serving. Storing a cream-topped slice follows the needs of the perishable cream as well as those of the pie.

Smaller Slices for a Dessert Table
For a table with several desserts, cut smaller portions of the fully cooled apple crumble pie and offer them on individual plates. A narrow wedge lets the apple flavor join the meal without requiring every guest to take a full dessert-sized slice.
The recipe yield remains eight standard slices; smaller party portions simply divide the same pie further. Support each wedge from beneath, especially when making the slices narrower.

Storing, Freezing and Rewarming Apple Crumble Pie
Cool apple crumble pie completely before covering, then refrigerate it and use within four days of baking. That is the simplest storage plan; the crumbs are usually crisper earlier and soften with covering or refrigeration.
Bake It the Day Before
For a day-ahead apple crumble pie, finish the bake, cool the pie completely and refrigerate it covered. Keeping the baking and full cooling on the previous day removes the longest waiting period from the serving day.
Serve the pie cooled, or rewarm individual slices as described below. The overnight route here is for the baked pie; the raw assembled pie is not held overnight as part of this method.
Room Temperature and Refrigerator Storage
Refrigerate the cooled pie for up to four days total from baking. If a plain, sugar-sweetened pie made without eggs spends time covered at room temperature, limit that time to two days and count those days within the same four-day total.
The University of Maine’s pie-storage guidance allows up to two days at room temperature for sugar-sweetened fruit pies with no eggs and directs refrigerator thawing. Check the purchased pastry label before applying that egg-free category, and keep whipped cream, ice cream or other perishable accompaniments stored separately as appropriate.
Freeze the Baked Pie and Thaw in the Refrigerator
Freeze a fully cooled, baked apple crumble pie or individual slices in airtight wrapping for up to three months as a quality target. Protect the crumb surface from being crushed while wrapping, and keep portions covered during storage.
Thaw in the refrigerator overnight. Freezing and thawing can soften the topping, so judge the result as stored fruit pie rather than expecting the same crumb texture it had before wrapping.

Rewarm Individual Slices
To refresh a refrigerated or thawed slice of apple crumble pie, place it on an oven-safe tray at 350°F (175°C) and start with about 10–15 minutes. Continue until pleasantly warm, shielding the topping if its color is already deep.

A thick, cold wedge can need longer than a smaller slice. This is a warming estimate for texture and serving temperature, so check the slice rather than treating one timer as universal.
When to Start for a Fully Cooled Apple Pie
Start this apple crumble pie roughly 5 hours 40 minutes to 5 hours 55 minutes before you want to slice it, with extra margin for a slower bake or cooling room. The cooling window begins only after the filling has finished baking.
| Window | What happens | Readiness dependency |
|---|---|---|
| First 35 minutes or so | Prepare the oven, pastry, apples and crumble, with preheating and chilling overlapping. | Cool pastry and butter are ready for assembly. |
| Next 65–80 minutes, or longer if needed | Complete the two-temperature bake. | Center bubbling and tender apples must arrive before cooling starts. |
| About the next 4 hours | Cool uncovered on a wire rack. | The pie is completely cool before you judge a supported slice. |
| At serving | Cut the set pie; rewarm individual slices if wanted. | Optional warming follows the first complete cooling and is outside the base total. |
For apple crumble pie at a fixed meal time, the previous-day route is the less time-sensitive choice. Bake and cool the pie before refrigerating it, leaving the serving day for portioning and any individual warming.
Choosing a Crumble Pie or a Crustless Apple Dessert
Choose this apple crumble pie when you want both a bottom pastry crust and a crumb topping. If your aim is an apple dessert without pastry, use the separate apple crisp with oat topping recipe for that format.
Leaving out the crust changes how the fruit and topping sit in the dish and how portions are served. Following a recipe written for the crustless dessert gives you its own dish, proportions and baking directions instead of treating the pie as an interchangeable format.
Apple Crumble Pie Questions, Answered
Use a refrigerated pastry crust for apple crumble pie and bake the apple slices from raw. Judge the filling’s support only after complete cooling; for advance preparation, choose the baked-and-refrigerated route or freeze the fully baked pie.
Can I use a store-bought crust for apple crumble pie?
Yes. This recipe is written for one refrigerated pastry crust fitted into a 9-inch metal pie pan about 1 1/2 inches deep. Follow its package directions for unrolling, then chill the fitted pastry while preparing the filling.
Do I need to precook the apples?
No. The apples go into this apple crumble pie raw, weighed after peeling and coring and sliced about 1/4 inch thick. Give the pie the full cue-led bake; do not combine this method with a precooked, drained filling from another recipe.
Why is my apple crumble pie filling watery?
First check when it was cut: hot filling is looser than a completely cooled slice. If excess liquid remains after full cooling, review the prepared apple weight, flour amount and whether the center bubbled while the apples became tender. Cooling cannot correct every underbaked filling.
Should I blind-bake the crust?
Not for this apple crumble pie method. Use the fitted, chilled and unpricked pastry with the specified metal pan on a preheated metal baking sheet. The oven schedule is written for a filled, unbaked crust.
What if the crumbs are brown but the apples are firm?
Shield the browned topping and rim loosely with foil, then keep baking in 5–10-minute increments. Stop when the filling bubbles toward the center and the skewer meets little resistance; brown crumbs alone do not establish apple tenderness.
Which apples should I use for apple crumble pie?
Use equal prepared weights of Granny Smith and Honeycrisp, 900 g total after peeling and coring. Weighing the fruit matters more than the number of apples; cup measurements are only an approximate guide for these sliced pieces.
Can I bake apple crumble pie ahead or freeze it?
Yes. Bake it a day ahead, cool completely and refrigerate. For longer keeping, freeze the baked pie or slices for up to three months for quality, then thaw in the refrigerator. Use the four-day total storage plan for the unfrozen pie.
Can apple crumble pie stay on the counter?
Refrigerating it after complete cooling is the simplest plan. The two-day room-temperature allowance applies only to a plain sugar-sweetened fruit pie with no eggs, and those days count toward the four-day total used here. Cream or other perishable toppings need their own storage.
Continue Your Apple and Pie Baking Journey
When the last slice of apple crumble pie is gone, follow the part you loved most: cinnamon apples, buttery pastry or the contrast between a crisp top and a soft filling. These recipes give each of those pleasures a different place at the table.
Keep Baking with Fresh Apples
Keep the apples and change the occasion. A cake to slice with coffee, a batch of muffins and small pastry bakes each offer a different way to enjoy the fruit.
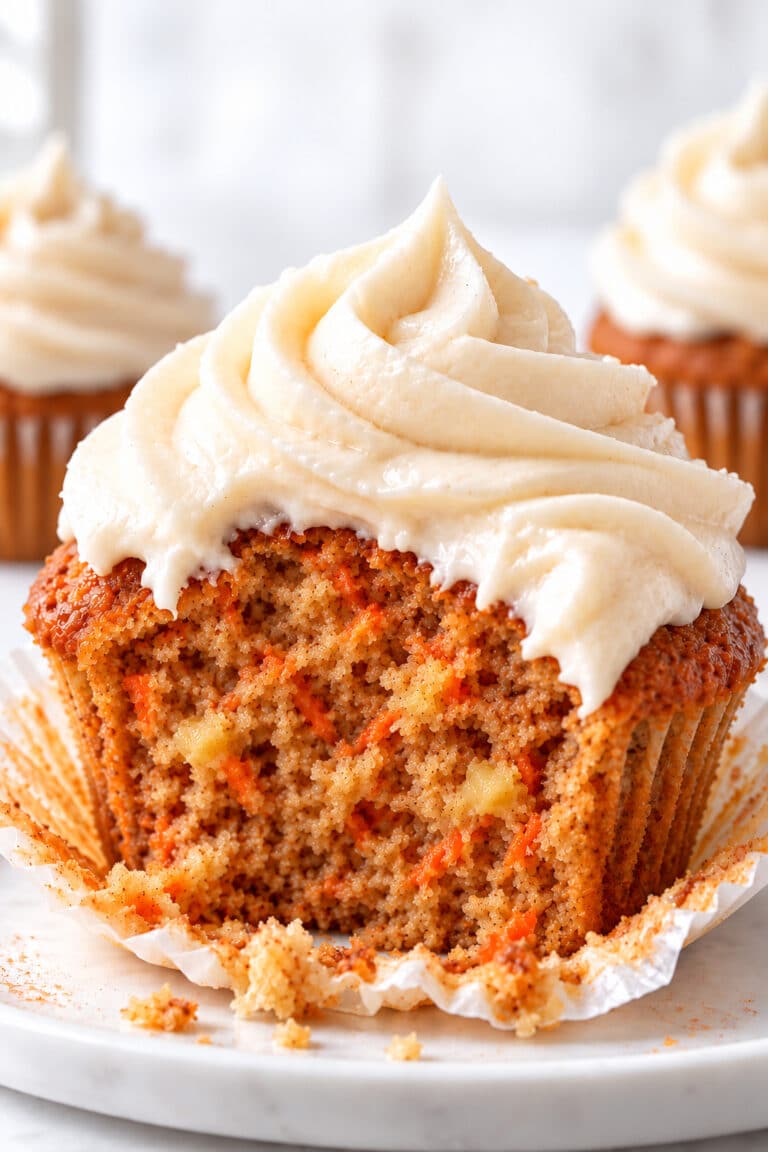
- Apple cake with a cinnamon-sugar top has a moist, hand-mixed crumb and a delicate sweet crust, ready to cut into squares for afternoon coffee.
- Apple muffins combine chopped apples, cinnamon, Greek yogurt and maple syrup in individual bakes for breakfast or a coffee break.
- Apple pie cookies bring together all-butter pastry, a cooked apple filling and little lattice tops when you want to spend time shaping something special.
- Apple brownies are soft cinnamon-and-brown-sugar squares with fresh apple pieces, an inviting choice when you want a pan dessert without rolling pastry.
Plan a Holiday Pie Table
Alongside apple crumble pie, a smooth custard or a nut-filled pie gives the table a different texture. For a smaller gathering, one fruit pie and one richer option make a lovely pair.
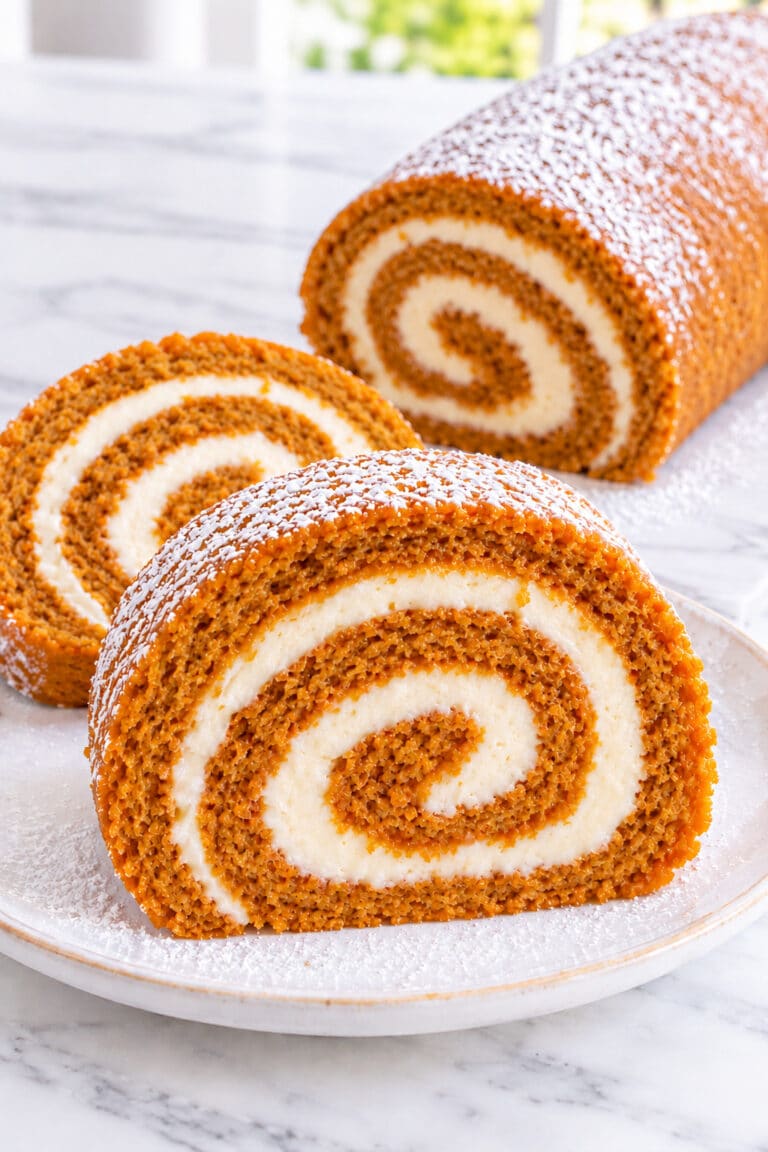
- Pumpkin pie offers a silky, warmly spiced custard, a creamy companion to the tender apples and crisp crumbs.
- Sweet potato pie brings a velvety, spiced filling in buttery pastry for another classic Southern addition to the dessert table.
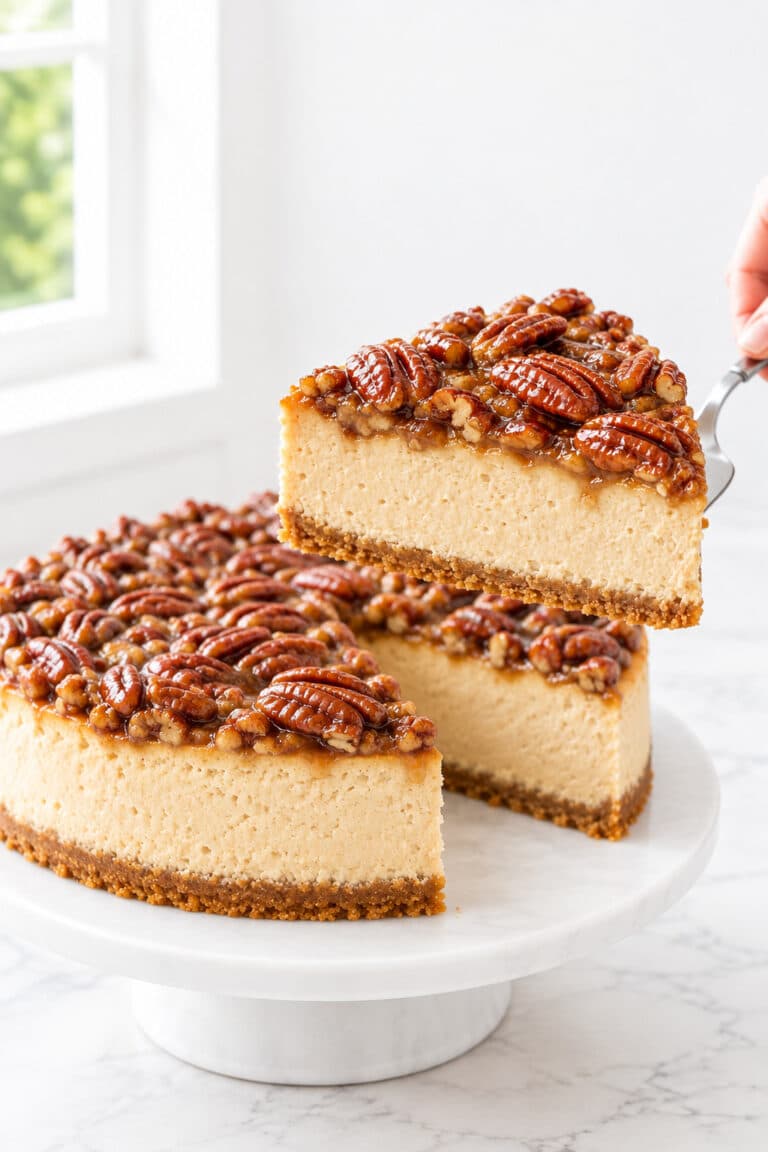
- Pecan pie pairs nuts with a rich, sticky filling. Cut small wedges when serving it after a generous holiday meal.
- Chocolate pecan pie adds toasted pecans and pockets of semisweet chocolate, giving chocolate lovers a slice of their own.
Explore More Pie Fillings and Crusts
To explore the fruit-and-pastry appeal of apple crumble pie, start with another apple preparation or move into summer fruit. For a different finish, choose a creamy vanilla custard.
- Classic apple pie keeps the cinnamon apples and replaces the crumb topping with golden lattice pastry.
- Blueberry pie trades apple layers for a juicy berry filling, with a little lemon brightening the fruit.
- Peach pie uses fresh yellow peaches and reduced peach juices beneath an all-butter lattice, a lovely project for peach season.
- Vanilla chess pie finishes with a rich butter-and-vanilla custard, a fine cornmeal texture and a thin golden surface.
Why This Apple Crumble Pie Belongs in Your Recipe Box
A generous layer of cinnamon apples, golden butter crumbs and pastry beneath the filling make this a pie to linger over. This apple crumble pie is worth keeping for Sunday lunch or a holiday table because its small, practical choices leave room to enjoy both the baking and the serving.
- Apples with a little tang. Equal weights of Granny Smith and Honeycrisp bring tartness and sweetness together, so the fruit still has character alongside the sugar and buttery topping.
- Buttery clusters with a little crunch. Cold butter and brown sugar give the topping its rich flavor and uneven clusters. There is no second sheet of pastry to roll or weave.
- A welcome head start on the pastry. A refrigerated crust keeps the preparation manageable while you spend your time on the fresh apples and homemade crumbs. The filling goes in raw.
- Baking cues you can actually see. Thick bubbles in the center and apples that yield to a skewer tell you more than a browned top alone, especially when your fruit or oven behaves differently.
- A dessert you can finish before guests arrive. Bake it the day before, let it cool completely and refrigerate it. The long cooling time becomes part of the plan, with the oven free for the meal.
- Another slice to look forward to. Once apple crumble pie has cooled and set, you can rewarm individual portions. A small wedge with afternoon coffee is a lovely reason to keep the leftovers.
A Familiar Apple Pie Worth Returning To
Apple crumble pie brings together the things that make a fruit dessert feel complete: apples with a little shape left, pastry beneath them and butter crumbs that give way under a fork. The cinnamon supports the fruit without needing an elaborate finish.
Apple crumble pie is useful to return to when dessert needs to be prepared before the rest of the meal takes over. Once the baking and cooling are behind you, serving can be as simple as lifting a slice onto a plate.
A few fallen crumbs and a slightly uneven wedge belong comfortably on that plate. The most satisfying slice is the one whose apples have had time to soften and whose filling has had time to settle.

Apple Crumble Pie
Apple crumble pie with a refrigerated pastry base, tender cinnamon apples and a cold-butter crumb topping. Cool completely before slicing.
Ingredients
For the Crust
- 1 refrigerated, ready-made pastry crust for a 9-inch pie (about 7 oz / 200 g), prepared for unrolling as directed on its package.
For the Apple Filling
- About 8 loosely filled cups (900 g) peeled, cored and sliced apples, half Granny Smith and half Honeycrisp by prepared weight.
- 1 tablespoon (15 ml) lemon juice.
- 1/2 cup (100 g) granulated sugar.
- 1/4 cup (30 g) all-purpose flour, spooned and leveled.
- 1 teaspoon (about 2.5 g) ground cinnamon.
- 1/4 teaspoon (about 0.5 g) ground nutmeg.
- 1/4 teaspoon (1.5 g) fine table salt.
For the Crumble Topping
- 1 1/4 cups (150 g) all-purpose flour, spooned and leveled.
- 1/3 cup (71 g) packed light brown sugar.
- 1/4 cup (50 g) granulated sugar.
- 1/8 teaspoon (about 0.75 g) fine table salt.
- 1/2 cup (113 g) unsalted butter, cold and cut into small cubes.
Instructions
- Prepare the oven and chill the crust. Place a sturdy rimmed metal baking sheet on a rack in the lower third of a conventional oven. Preheat to 400°F (200°C). Prepare the refrigerated pastry for unrolling as directed on its package, then fit it into a 9-inch (23 cm) metal pie pan approximately 1 1/2 inches (4 cm) deep without stretching. Shape the rim and refrigerate while preparing the fruit and crumble. Do not prick or blind-bake. What you should see: The fitted pastry rests against the pan without tension and feels cool before filling.
- Coat the apple slices. Peel and core the apples, then weigh 900 g prepared fruit, half Granny Smith and half Honeycrisp. Slice about 1/4 inch (6 mm) thick and toss with the lemon juice. Mix the filling granulated sugar, flour, cinnamon, nutmeg and salt separately, then toss with the apples. Continue with the topping and assembly without extended standing. What you should see: The slices have an even, thin coating with no pockets of dry flour.
- Make the cold-butter crumble. Combine the topping flour, brown sugar, granulated sugar and salt. Work in the cold cubed butter with a pastry blender, fork or fingertips until coarse crumbs hold together when squeezed. Break squeezed portions into small irregular clusters. Refrigerate briefly if soft or greasy. What you should see: There are loose crumbs and pea- to small-marble-size clusters, without a continuous paste or large bare pieces of butter.
- Fill the crust and add the crumbs. Arrange the apples compactly in the chilled crust, minimizing large gaps and making a gentle mound. Scrape in the coating and juices from the bowl. Scatter the crumble over the fruit without compressing it into a solid layer. What you should see: The pastry supports the apples and the topping sits in separate clusters.
- Bake until the center is ready. Place the apple crumble pie on the hot baking sheet. Bake for 20 minutes at 400°F (200°C), then reduce to 375°F (190°C) without removing the pie and bake about 45–60 minutes more. Check color after the first 20 minutes; shield the rim and loosely tent the topping with foil as soon as they are sufficiently browned. Finish when filling bubbles actively through gaps toward the center and a thin skewer meets little resistance in the apples. If needed, continue in 5–10-minute increments under foil. What you should see: Crumbs and rim are deep golden, center juices bubble thickly and center apples are tender; topping color alone does not establish doneness.
- Cool completely and slice. Transfer the pan to a wire rack and cool uncovered for about four hours, until completely cool. Cut into eight slices with a sharp knife and pie server. If warm pie is wanted, rewarm an individual slice after the whole pie has first cooled and set. What you should see: The filling supports a moist slice; hot, loose juices are not the reference for the finished wedge.
Notes
- Equipment: A 9-inch (23 cm) metal pie pan about 1 1/2 inches (4 cm) deep; sturdy rimmed metal baking sheet; conventional oven with lower-third rack; digital scale, peeler, sharp knife and cutting board; two bowls, measuring cups/spoons, spatula and pastry blender or fork; thin skewer and aluminum foil; wire rack, slicing knife and pie server.
- Measurement: Weigh apples after peeling and coring; use 450 g of each variety. Buy roughly 2 1/2 to 3 lb (1.1 to 1.35 kg) whole apples to allow for trimming. About 8 loosely filled cups of sliced apples is only an approximate guide. Spoon and level flour and pack the brown sugar as listed.
- Pan and timing: The ingredient quantities make one 9-inch pie. Keep the stated pan, conventional oven settings and filling cues. Bake time is about 65–80 minutes, but apple condition, slice thickness, pan color and oven accuracy can change it. Complete cooling governs slicing, even if it takes longer than four hours.
- Make ahead: Bake apple crumble pie the day before serving, cool completely and refrigerate. This overnight route is for the baked pie.
- Storage: Refrigerate the completely cooled apple crumble pie covered and use within four days total from baking. For a plain sugar-sweetened fruit pie with no eggs, up to two days covered at room temperature is an outer limit; count those days within the same four-day total. Check purchased pastry ingredients. Store whipped cream and ice cream separately. Covering and refrigeration soften the crumbs.
- Freeze and rewarm: Wrap the cooled baked pie or slices airtight and freeze for up to three months for quality. Thaw in the refrigerator overnight. To rewarm a refrigerated or thawed slice, use an oven-safe tray at 350°F (175°C), starting with 10–15 minutes and continuing until pleasantly warm; shield the topping if needed.
- Nutrition: Nutrition is an estimate for one of eight slices of apple crumble pie, using a representative refrigerated crust and excluding serving toppings; values vary with pastry brand.
Nutrition Information:
Yield: 8 Serving Size: 1 slice (1/8 pie)Amount Per Serving: Calories: 445Total Fat: 17.9gSaturated Fat: 9.7gCholesterol: 35mgSodium: 244mgCarbohydrates: 71.4gFiber: 2.3gSugar: 38.8gProtein: 3.8g
Nutrition information is provided as an estimate only and may vary based on specific ingredients, brands, and portion sizes used. This information should not be considered medical or nutritional advice.
12 Sweet Favorites — Yours, Free 🍰
Tiramisù, no-bake cheesecake, the perfect chocolate chip cookie & 9 more reader-loved desserts — gathered into one beautiful free recipe book. From my kitchen to yours.
No spam, just sweet things. Unsubscribe anytime.
One Comment