Cherry Pie Recipe
🎁 FREE E-BOOK: 12 Sweet Favorites — reader-loved desserts in one beautiful recipe book.
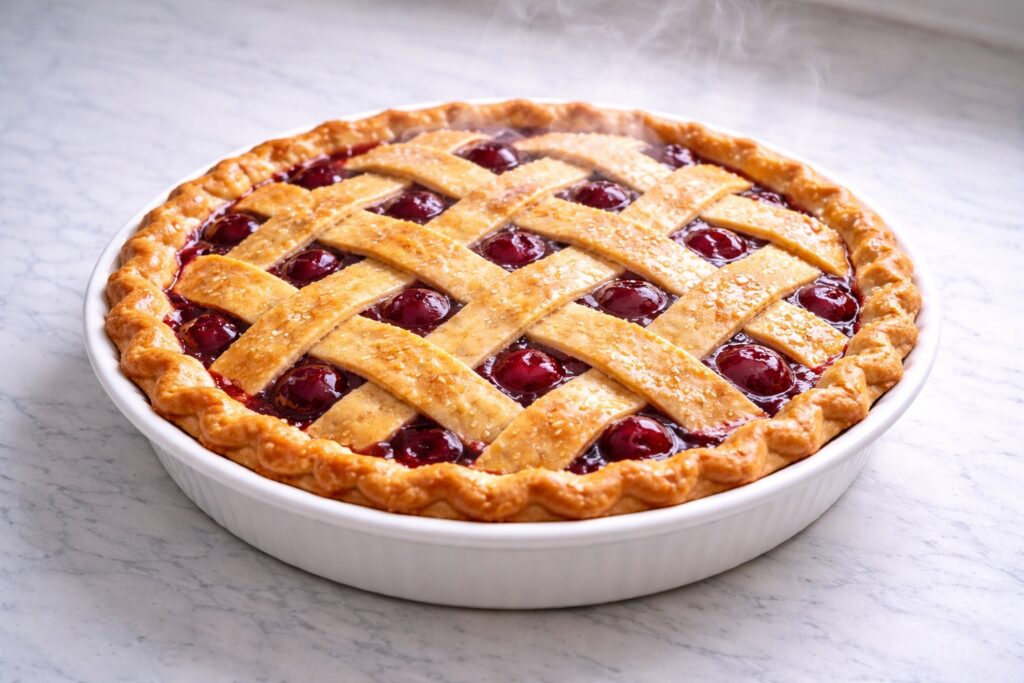
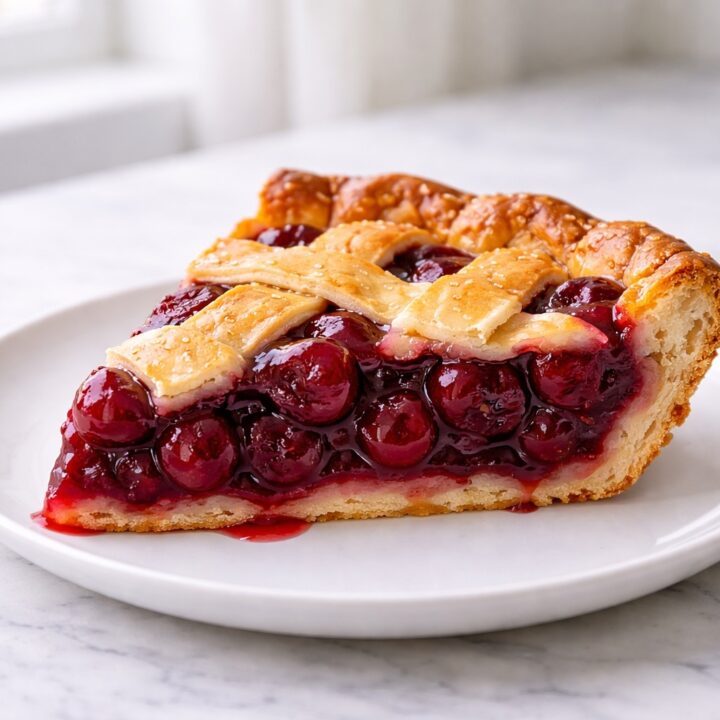
This cherry pie recipe is made with juicy cherries, sugar, lemon juice, and cornstarch to create a thick, glossy cherry pie filling baked inside a flaky buttery double crust. It is sweet, tart, sliceable, and classic, perfect for holidays, summer baking, or any time you want a truly homemade fruit pie.
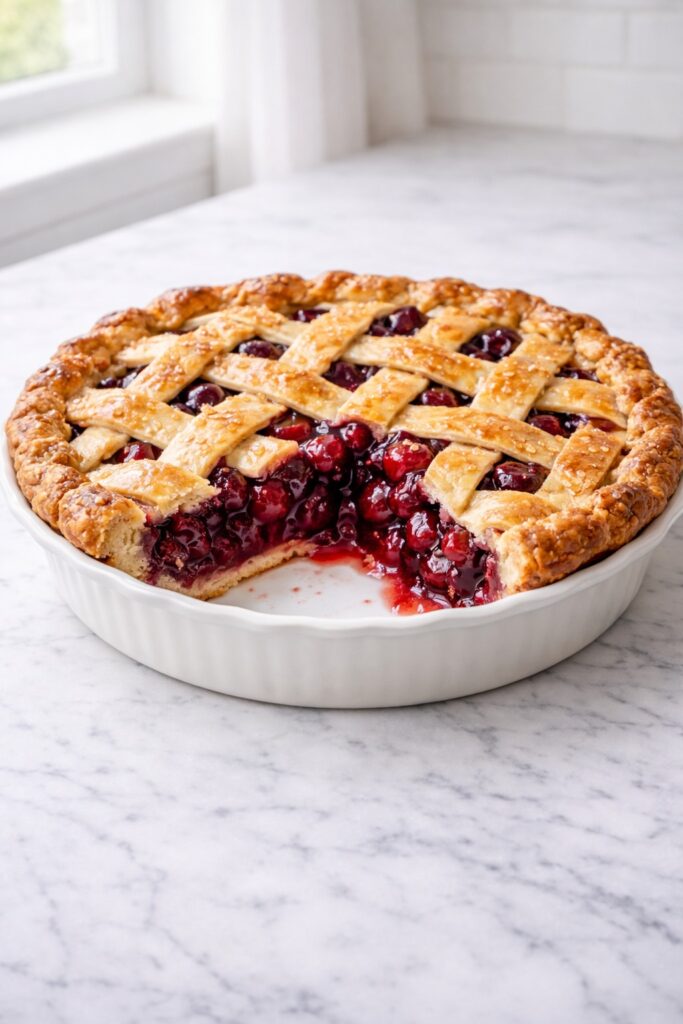
There is something timeless about a homemade cherry pie cooling on the counter. The deep ruby filling, the golden flaky crust, and that sweet-tart fruit aroma drifting through the kitchen create the kind of dessert moment that feels both nostalgic and quietly beautiful.
This cherry pie recipe is rich with juicy cherry flavor, balanced sweetness, and a filling that bakes into a glossy, sliceable texture instead of turning runny or overly stiff. Wrapped in a buttery double crust and baked until deeply golden, it is the kind of classic fruit pie that feels just as right for summer gatherings as it does for holiday tables or slow weekend baking.
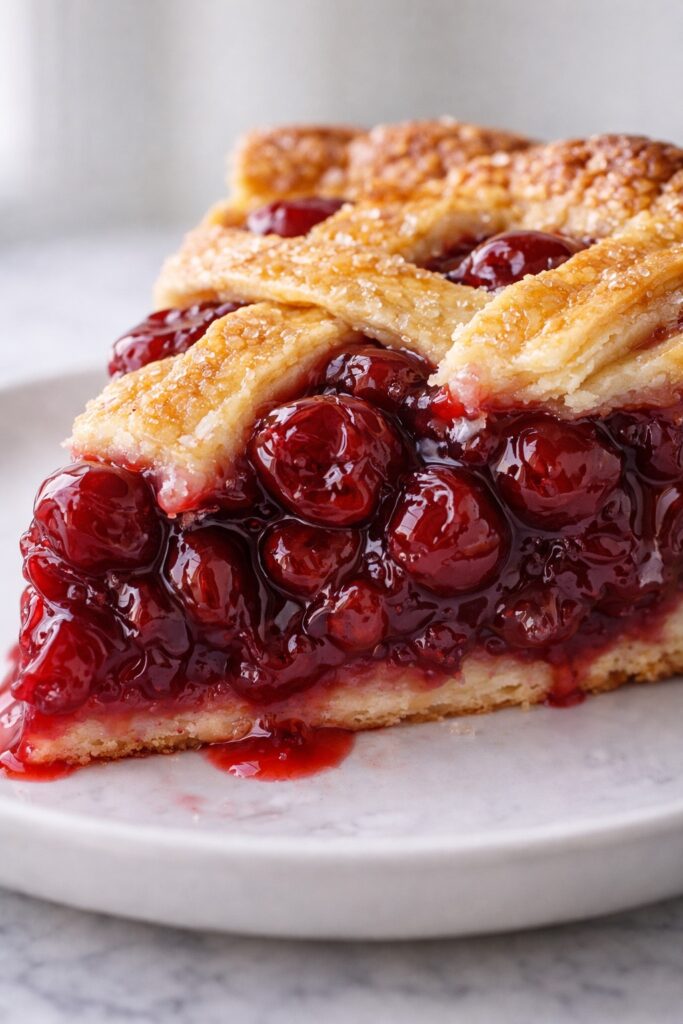
What makes a good cherry pie so special is contrast. The fruit filling should taste vibrant and bright, never flat or overly sugary. The crust should feel tender and flaky, with enough structure to hold the filling without becoming heavy. When those two parts come together well, every slice feels generous, comforting, and a little celebratory.
I especially love that cherry pie has a way of feeling both rustic and elegant. It does not need complicated decoration to be beautiful. Even a simple lattice or a few hand-cut pastry strips over that dark jewel-toned filling can make it look stunning on the table, which is one of the reasons cherry pie appears so often in vintage cookbooks and old bakery windows.
If you love classic fruit desserts that feel homemade in the best way, this cherry pie deserves a place in your baking rotation alongside other favorites like apple pie or peach pie.
What Is Cherry Pie?
Cherry pie is a classic fruit pie made with sweet or tart cherries baked inside a flaky pastry crust. The filling is thickened with cornstarch or tapioca and balanced with sugar and lemon juice to create a glossy, sliceable fruit filling. A lattice or full top crust is typically baked until golden while the cherry juices bubble underneath.
Cherry Pie Recipe Overview
This recipe uses a classic fruit pie structure with a homemade cherry filling and double crust.
- Style: Traditional baked fruit pie
- Flavor: Sweet-tart, fruity, buttery, vibrant
- Texture: Glossy soft filling with flaky golden crust
- Difficulty: Moderate but very manageable
- Best for: Summer desserts, holiday baking, weekend pies, family gatherings
Quick Recipe Snapshot
| Category | Details |
|---|---|
| Prep Time | 30 minutes |
| Chill Time | 30 minutes |
| Bake Time | 50 to 60 minutes |
| Cooling Time | 4 hours |
| Total Time | About 6 hours |
| Servings | 8 slices |
| Pan | 9-inch pie dish |
Cherry Pie Recipe Key Points
- Classic American fruit pie made with fresh or frozen cherries
- Flaky butter crust with juicy cherry filling
- Thickened with cornstarch or tapioca for a glossy texture
- Balanced with lemon juice to highlight the cherry flavor
- Baked until the filling bubbles and the crust turns golden
Why You Will Love This Cherry Pie Recipe
This pie is more than just a classic dessert. It delivers the kind of balance that makes homemade baking feel deeply rewarding.
- Bright, rich cherry flavor: The filling tastes fruity, vibrant, and naturally luscious, with enough tartness to keep each bite from feeling too sweet.
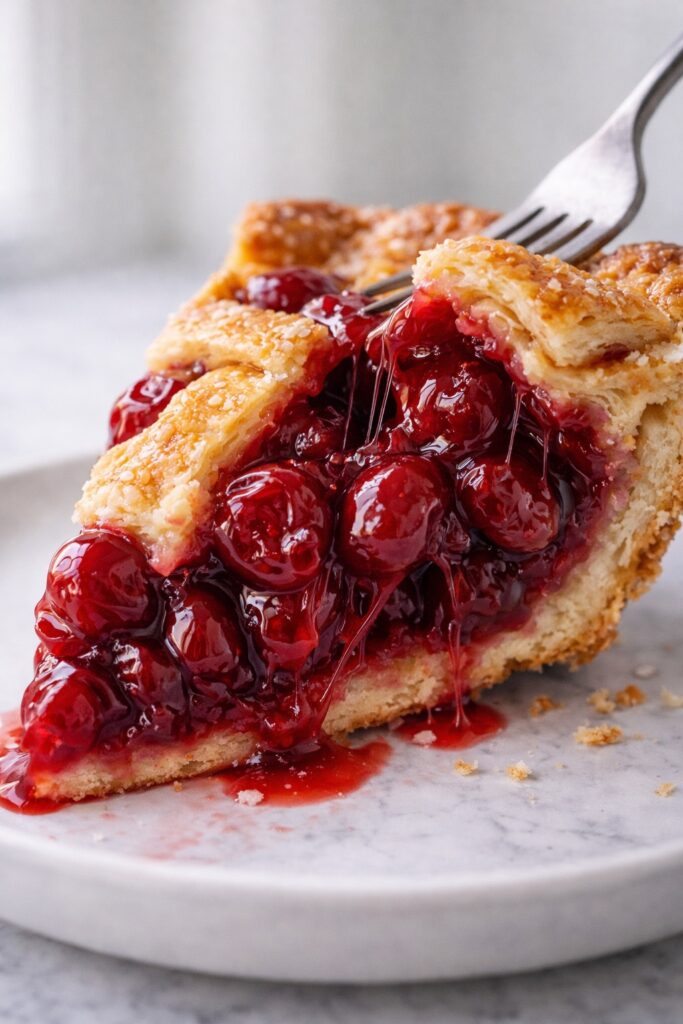
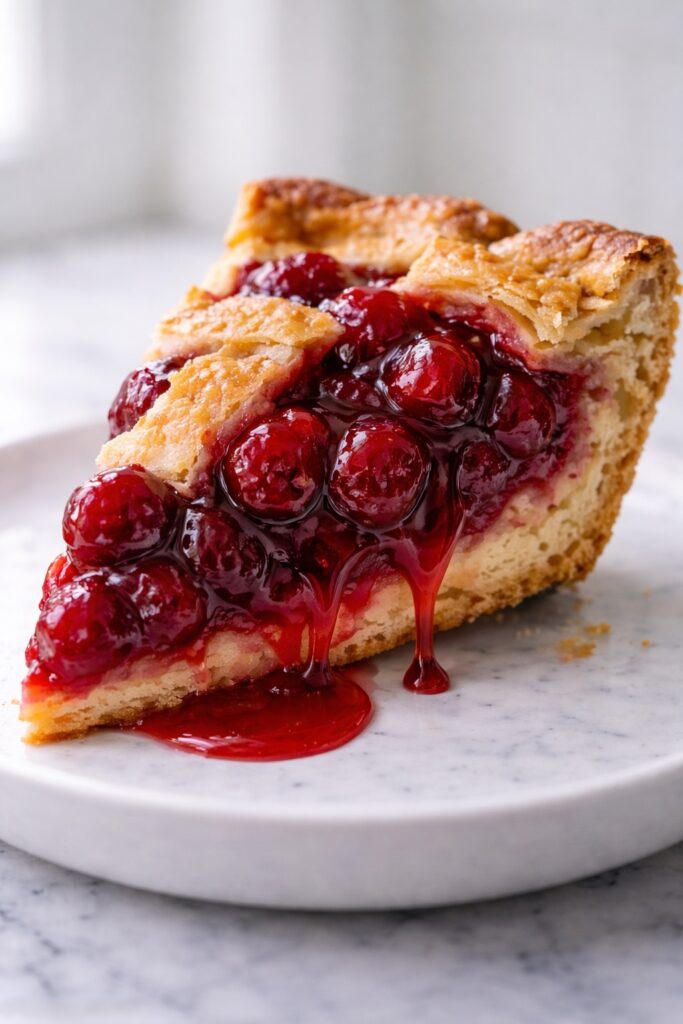
- Thick, glossy filling that slices well: A good cherry pie should hold its shape once cooled. This recipe is designed to give you a filling that sets properly while still feeling juicy and soft.
- Flaky buttery crust: The crust bakes up golden and crisp around the edges, creating the perfect contrast to the soft fruit center.
- Beautiful for holidays or everyday baking: Cherry pie looks special enough for celebrations, but the process itself is wonderfully approachable for home bakers.
- Works with fresh or frozen cherries: That flexibility makes this recipe practical all year, not just during cherry season.
What Cherry Pie Tastes Like
Cherry pie has one of the most satisfying flavor profiles in classic baking. It is fruity and full, but not delicate in the way some berry pies can be. Cherries bring depth. Their flavor feels rounder, darker, and slightly richer, which gives the pie a more luxurious quality.
The sweetness is balanced by natural tartness, especially if you use sour cherries or a combination of sweet and tart cherries. That contrast keeps the filling lively and prevents the pie from tasting one-note. Lemon juice quietly sharpens the fruit flavor, while vanilla and almond extract can add a soft bakery-style warmth in the background.
Texturally, the filling should feel silky and thick with tender fruit pieces throughout. The crust adds the buttery, flaky contrast that makes each bite feel complete.
When baked well, cherry pie tastes bright, juicy, cozy, and deeply comforting all at once.
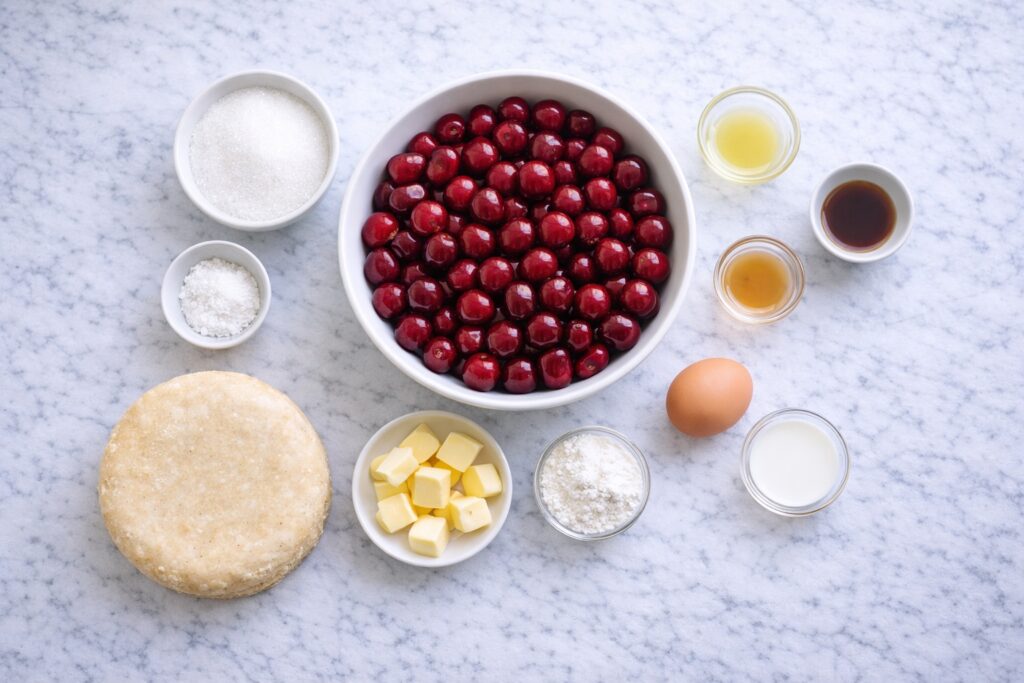
Ingredients
For the double crust
- 1 double pie crust for a 9-inch pie, chilled
For the cherry filling
- 6 cups cherries, pitted
- 3/4 to 1 cup granulated sugar, depending on cherry sweetness
- 1/4 cup cornstarch
- 1 tablespoon lemon juice
- 1 teaspoon vanilla extract
- 1/4 teaspoon almond extract, optional
- 1 tablespoon unsalted butter, cut into small pieces
- 1/4 teaspoon salt
For finishing
- 1 egg
- 1 tablespoon milk or water
- coarse sugar for sprinkling, optional
Ingredient Notes and Substitutions
A cherry pie has a surprisingly short ingredient list, which means each component plays an important role in the final texture and flavor. Small adjustments can change how the filling sets, how bright the fruit tastes, or how flaky the crust becomes.
Understanding how these ingredients work will help you make small substitutions when needed while still keeping the pie balanced and sliceable.
For the crust
A classic cherry pie works best with a double pie crust, either homemade or store-bought.
An all-butter crust creates the most flavorful and flaky result, while a butter-shortening crust can add extra structure if you prefer a slightly sturdier slice.
Substitutions
- Store-bought refrigerated pie crust works well for convenience.
- A lattice top crust can be replaced with a full crust with vents.
- For a more rustic pie, the top crust can also be replaced with a buttery crumble topping.
The most important factor is that the dough stays well chilled before baking, which helps create flaky layers. For more detail on why chilling matters, King Arthur Baking also explains how cold dough helps pie crust keep its shape.
Cherries
Cherries are the heart of this pie, and their natural balance of sweetness and tartness determines the final flavor. If you want a neutral ingredient reference for different types of cherries, you can also check the USDA food database.
You can use sweet cherries, sour cherries, or a mixture of both.
Sweet cherries create a softer, rounder fruit flavor, while sour cherries bring the bright, classic tartness many people associate with traditional cherry pie. A combination of the two often produces the most balanced filling.
Cherries are naturally high in pectin, which helps fruit pies thicken as they bake, especially when combined with cornstarch or tapioca.
Substitutions
- Frozen cherries work beautifully and are often easier to find year-round.
- If using frozen cherries, thaw them first and include the juices when mixing the filling.
- Jarred sour cherries can work in a pinch, but should be well drained and may require adjusting the sugar.
Sugar
Sugar sweetens the fruit and helps draw juices out of the cherries, which then combine with the thickener to form the pie filling.
The goal is balance. Too little sugar can make the filling overly sharp, while too much sugar can mute the natural brightness of the cherries.
Substitutions
- Light brown sugar can replace up to half of the granulated sugar for a slightly deeper, caramel-like sweetness.
- Honey or maple syrup are not recommended for this pie because they change the moisture balance of the filling.
Cornstarch
Cornstarch thickens the cherry juices as the pie bakes, creating the glossy, cohesive texture that allows the pie to slice cleanly. If you want a deeper comparison of fruit pie thickeners, King Arthur Baking has a very helpful pie thickener guide.
It is one of the most important ingredients in the filling because cherries release a significant amount of liquid during baking.
Substitutions
- Arrowroot powder can replace cornstarch in equal amounts.
- Tapioca starch can also work, though it may produce a slightly more gel-like texture.
- Flour can be used in a pinch, but it tends to make the filling look cloudier.
| Thickener | Result in Cherry Pie |
|---|---|
| Cornstarch | Clear glossy filling and clean slices |
| Arrowroot | Similar clarity but slightly softer set |
| Tapioca starch | Slightly gel-like texture |
| Flour | Thicker but cloudy filling |
Lemon juice
Lemon juice brightens the cherry flavor and balances the sweetness. It does not make the pie taste lemony, but it prevents the filling from feeling flat.
Even sweet cherries benefit from a small amount of acidity.
Substitutions
- Lime juice can work if lemon is unavailable.
- A small splash of orange juice can also provide mild acidity while keeping the flavor soft.
Vanilla extract
Vanilla adds warmth and depth to the filling, helping round out the fruit flavor without overpowering it.
It quietly enhances the cherries and makes the overall flavor feel more complete.
Substitutions
- Vanilla bean paste can be used for a slightly richer flavor.
- You can omit vanilla entirely if you prefer a very pure cherry flavor.
Almond extract
Almond extract is optional but very traditional in cherry desserts. The flavor pairing between almond and cherry comes from their shared aromatic compounds.
Only a small amount is needed, as almond extract is very potent.
Substitutions
- If you prefer a more fruit-forward pie, simply omit it.
- A few drops of amaretto can provide a similar subtle almond note.
Butter
Small pieces of butter dotted over the filling melt into the cherries during baking, adding richness and helping the juices develop a silky texture.
This small step enhances the overall mouthfeel of the pie without making it heavy.
Substitutions
A small amount of coconut oil can work as an alternative if dairy-free.
The butter can be omitted if needed, though the filling will be slightly less rich.
Why These Ingredients Work So Well
Cherries bring both flavor and natural pectin
Cherries release plenty of juice during baking, which is why thickener matters so much. Their natural fruit structure helps create body, but it is not enough on its own for a clean pie slice.
Cornstarch thickens without making the filling muddy
Flour can work in some fruit pies, but cornstarch gives cherry pie a clearer, glossier finish. That allows the jewel-toned filling to stay visually beautiful.
Lemon balances sweetness
Even very ripe cherries taste better with a little acid support. Lemon juice sharpens the fruit flavor and keeps the pie tasting fresh.
Almond and cherry are natural partners
A touch of almond extract can make cherry flavor feel deeper and more fragrant. It is not essential, but it often makes the pie taste more complete.
Best Cherries for Cherry Pie
The type of cherries you use has a noticeable impact on the flavor of the finished pie. Some cherries are naturally sweeter and softer, while others bring the bright tartness that many people associate with traditional cherry pie.
Both types work beautifully, but understanding the difference helps you adjust the sweetness and acidity of the filling for the best result. If you enjoy fruit pies, cherries also work beautifully in creamy desserts like cherry cheesecake, where the bright fruit flavor pairs perfectly with rich filling.
Sour cherries (tart cherries)
Sour cherries are often considered the classic choice for cherry pie. Their natural tartness balances beautifully with sugar, creating a filling that tastes bright, vibrant, and deeply fruity rather than overly sweet.
Because sour cherries contain more acidity, they naturally highlight the flavor of the fruit once baked. The result is a pie that feels lively and refreshing, even with a rich buttery crust.
Sour cherries are commonly sold frozen or jarred, since they are less often found fresh in grocery stores.
Sweet cherries
Sweet cherries create a slightly different style of pie. They produce a rounder, softer fruit flavor with less tartness and a deeper natural sweetness.
This type of pie often feels richer and more mellow. When using sweet cherries, adding a small amount of lemon juice helps restore the balance that sour cherries naturally provide.
Sweet cherries are the variety most commonly sold fresh in supermarkets during cherry season.
Using a mix of sweet and sour cherries
Many bakers consider a blend of sweet and sour cherries the ideal combination.
The sweet cherries contribute body and natural fruit sweetness, while the sour cherries provide brightness and complexity. Together they create a filling that tastes layered, vibrant, and balanced.
If you have access to both types, this mixture often produces the most flavorful cherry pie.
Quick comparison
| Cherry Type | Flavor Profile | Best Use |
|---|---|---|
| Sour cherries | Bright, tart, classic pie flavor | Traditional cherry pie |
| Sweet cherries | Softer, sweeter fruit flavor | Richer, mellow pies |
| Mixed cherries | Balanced sweet-tart flavor | Most complex flavor |
In the end, the best cherries for cherry pie are the ones that taste good on their own. A quick taste before baking helps you adjust the sugar level and ensure the final pie feels balanced rather than overly sweet.
Fresh vs Frozen Cherries
Both fresh and frozen cherries can produce an excellent cherry pie. The most important difference between them is how much liquid they release during baking, which can slightly affect the thickness of the filling.
Understanding how each behaves helps you adjust the filling so the pie still sets properly and slices cleanly.
Fresh cherries
Fresh cherries create a pie with wonderful texture and bright seasonal flavor. When cherries are in peak season, their natural sweetness and firmness can produce an especially vibrant filling.
The main drawback is preparation time. Fresh cherries need to be washed, stemmed, and pitted before baking, which can take a little patience if you are making a large pie.
Because fresh cherries contain slightly less surface moisture than frozen fruit, the filling often thickens more predictably.
Fresh cherries are ideal when you want the most natural fruit texture and flavor, especially during summer.
Frozen cherries
Frozen cherries are one of the most reliable options for cherry pie because they are usually frozen at peak ripeness. This makes them convenient and flavorful even outside cherry season.
However, freezing breaks down some of the fruit’s cell structure. As the cherries thaw, they release more juice than fresh cherries.
That extra liquid is not a problem as long as it is handled correctly.
For best results:
- thaw the cherries before baking
- keep the released juices when mixing the filling
- make sure the filling thickener is well distributed
Those juices contain a lot of concentrated cherry flavor, so including them helps create the glossy, rich filling that cherry pie is known for.
When to choose fresh or frozen
Both options work beautifully, and many bakers use frozen cherries regularly with excellent results.
Fresh cherries are wonderful when they are in season and easy to find. Frozen cherries are often the most practical choice the rest of the year.
Quick comparison
| Type | Benefits | Considerations |
|---|---|---|
| Fresh cherries | Bright seasonal flavor, firm fruit texture | Requires pitting and prep time |
| Frozen cherries | Convenient year-round, often very flavorful | Releases more liquid when thawed |
In most cases, the choice between fresh and frozen cherries comes down to availability. With the right balance of sugar and thickener, either one can produce a beautiful cherry pie filling.
Equipment You’ll Need
You do not need fancy tools, but a few basics make pie baking easier.
- 9-inch pie dish
- rolling pin
- large mixing bowl
- saucepan if pre-cooking filling slightly
- measuring cups and spoons
- pastry brush
- baking sheet
- cherry pitter, very helpful but optional
A baking sheet under the pie is especially useful because fruit pies often bubble over slightly. It protects the oven and makes handling easier.
Quick Tip
Place a baking sheet on the rack below the pie while baking. Fruit pies often bubble over slightly, and the baking sheet protects the oven while also helping stabilize the pie as you transfer it in and out.
How to Make Cherry Pie
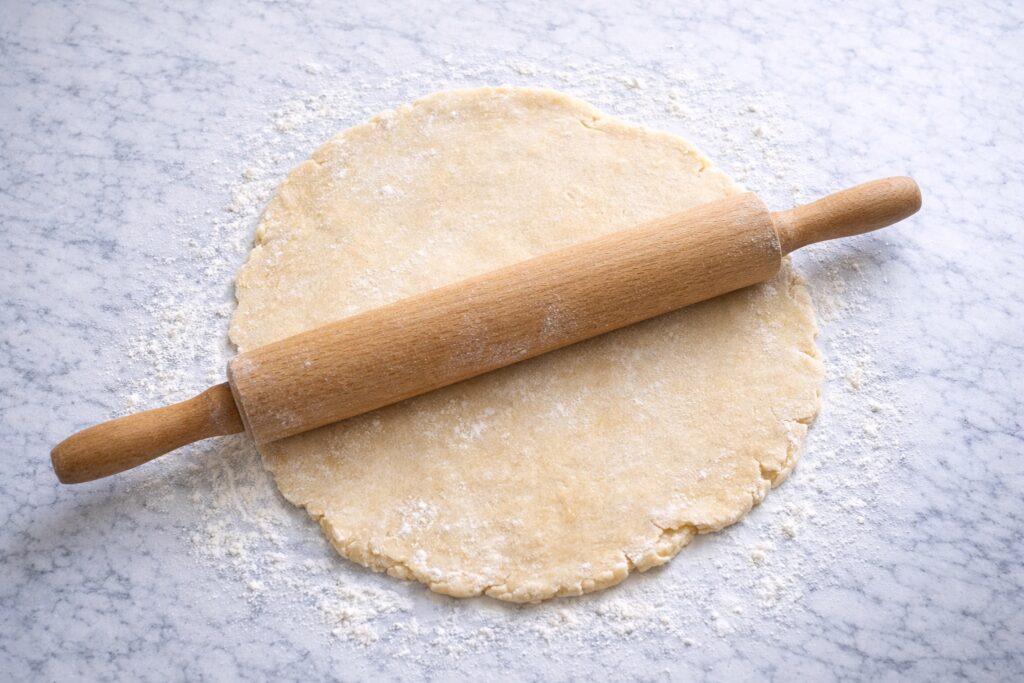
1. Prepare the crust
Roll out one chilled pie crust and fit it into a 9-inch pie dish. Gently press it into the bottom and sides without stretching it. Place the lined pie dish in the refrigerator while you prepare the filling.
If you stretch pie dough into the dish, it often shrinks during baking. Letting it fall naturally into place helps preserve its shape.
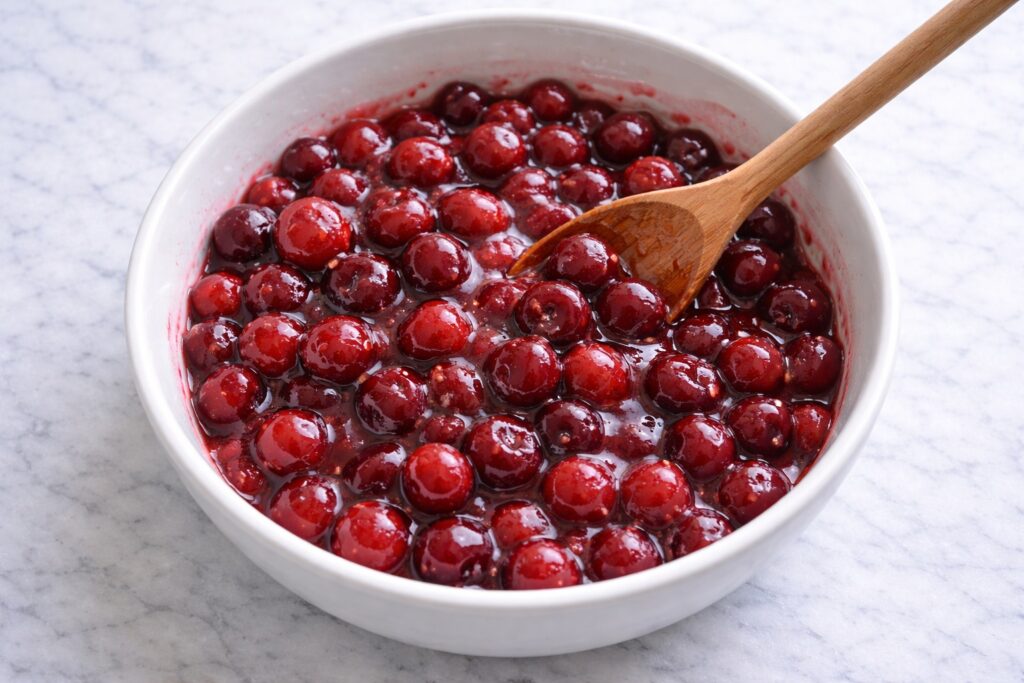
2. Make the cherry filling
In a large bowl, combine the cherries, sugar, cornstarch, lemon juice, vanilla, almond extract if using, and salt. Toss until evenly coated.
Let the mixture sit for about 10 to 15 minutes. This short rest helps the sugar begin drawing juices from the fruit, which allows the thickener to distribute more evenly.
3. Fill the pie
Spoon the cherry filling into the chilled bottom crust, including all the juices in the bowl. Dot the top with the small pieces of butter.
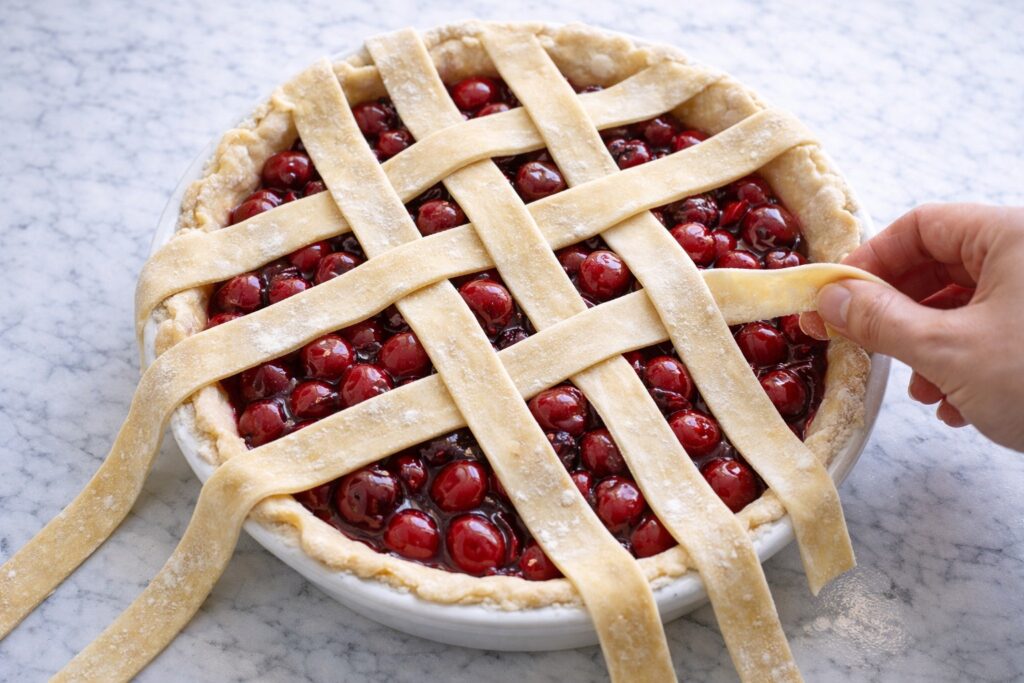
4. Add the top crust
Roll out the second crust and place it over the filling, or cut it into strips for a lattice top. Trim excess dough, then seal and crimp the edges.
If using a full top crust, cut several vents so steam can escape during baking.
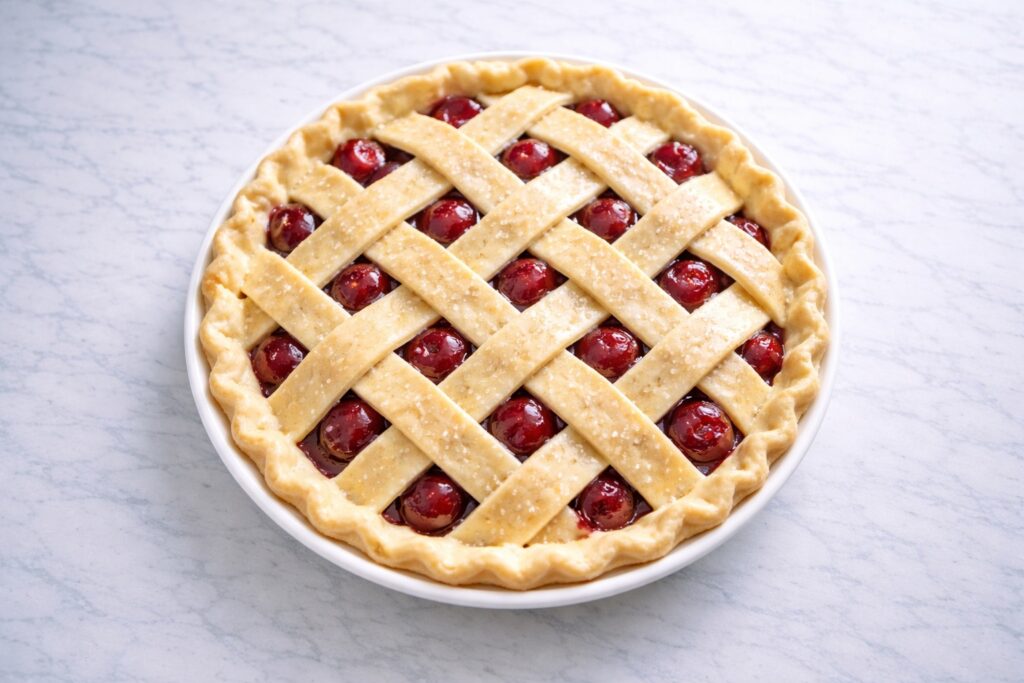
5. Chill before baking
Place the assembled pie in the refrigerator for about 20 to 30 minutes. This helps the crust hold its shape and supports better flaking.
This small step often makes a visible difference. Cold pastry entering a hot oven tends to bake up more cleanly and with better texture.
6. Brush and finish
Whisk the egg with milk or water and brush it lightly over the top crust. Sprinkle with coarse sugar if desired.
7. Bake
Place the pie on a baking sheet and bake at 425°F for 20 minutes. Then reduce the oven temperature to 375°F and continue baking for 30 to 40 minutes more, until the crust is golden and the filling is actively bubbling.
If the edges brown too quickly, shield them loosely with foil or a pie shield.
If the filling is not bubbling visibly in the center, the pie likely needs more time. Fruit pies must reach a full bubbling point so the starch thickener can activate properly.
8. Cool completely
Let the pie cool at room temperature for at least 4 hours before slicing.
This is one of the hardest parts, but it matters. The filling continues to set as it cools. Cutting too early can make even a properly baked pie seem runny.
Baking Signals That Tell You Cherry Pie Is Done
Experienced bakers often rely on visual cues more than exact times, especially with fruit pies.
Deep golden crust
The top should look fully baked, not pale or doughy. A properly baked cherry pie crust should have rich golden color across the surface.
Thick bubbling filling
You should see the filling bubble through the vents or lattice, and the bubbling should look thick and glossy rather than thin and watery. This is one of the strongest signals that the starch has activated properly.
Fruit looks collapsed and jammy
The cherries should soften and settle into the filling rather than looking stiff and raw.
Aromatic, buttery fruit scent
The kitchen should smell distinctly of baked cherries, butter, and pastry. That deep baked-fruit aroma is often a sign the pie has developed enough heat throughout.
Cherry Pie Doneness Guide
| Signal | What It Means |
|---|---|
| Deep golden crust | The pastry has baked fully and developed structure. |
| Thick bubbling filling | The starch has activated and the filling will set properly once cooled. |
| Bubbles look glossy and slow | The fruit juices have thickened rather than remaining watery. |
| Strong baked cherry aroma | The filling has reached a full baking temperature throughout. |
Why Cherry Pie Sometimes Turns Runny
A runny fruit pie usually comes from one of a few common issues.
Not enough thickener
Fruit releases more liquid than many bakers expect, especially frozen fruit.
Underbaking
The filling needs enough time at a bubbling temperature for the starch to fully activate.
Slicing too soon
Even a perfectly baked pie can look runny if cut while still warm.
Very juicy fruit
Some cherries simply contain more water, so slight adjustments may be needed depending on the batch.
Why cherries release so much juice
Cherries contain a large amount of natural water and relatively little natural pectin compared to fruits like apples. As the fruit heats in the oven, those juices release quickly and combine with sugar to form the filling.
That is why a reliable thickener like cornstarch is essential in cherry pie. Once the filling reaches a full simmer inside the crust, the starch gelatinizes and turns the juices into the glossy sauce that allows the pie to slice cleanly after cooling.
Expert Tips for the Best Cherry Pie
- Use cold crust: Cold pastry is easier to handle and bakes more flaky.
- Taste the fruit before sweetening: Some cherries are much sweeter than others. Adjust sugar based on the fruit itself rather than treating every batch the same.
- Do not skip the cooling time: This is one of the biggest differences between a pie that slices neatly and one that spills apart.
- Use almond extract lightly: A small amount gives beautiful depth. Too much can dominate the fruit.
- Bake until the filling visibly bubbles: Pale crust or weak bubbling usually means the pie needs more time.
Common Mistakes to Avoid
- Adding too much sugar: This can make the filling overly syrupy and mute the cherry flavor.
- Using warm dough: Warm dough becomes sticky, harder to shape, and less flaky after baking.
- Pulling the pie too early: Fruit pies often need longer than people think. A deeply golden crust and active bubbling matter more than a minimal bake time.
- Forgetting to vent the top crust: Steam needs a place to escape. Without vents, the top can crack unpredictably or trap excess moisture.
Variations
Sour Cherry Pie
Use tart cherries for a more traditional, bright pie flavor. You may need slightly more sugar depending on their sharpness.
Sweet Cherry Pie
Perfect if you want a gentler, rounder fruit profile. Increase lemon juice slightly to maintain balance.
Cherry Berry Pie
Add a small amount of raspberries or blueberries for a softer mixed-fruit variation. If you love blueberry desserts, you might also enjoy this blueberry pie or blueberry cobbler.
Lattice Cherry Pie
A lattice crust is beautiful and practical. It allows steam to escape easily and helps the filling reduce properly.
Crumble-Topped Cherry Pie
Swap the top crust for a buttery crumble topping if you want something a little more rustic. If you enjoy crumb toppings on fruit desserts, you might also like apple crumble or apple crisp.
How to Serve Cherry Pie
Cherry pie is wonderfully versatile because it can feel casual or elegant depending on how you serve it.
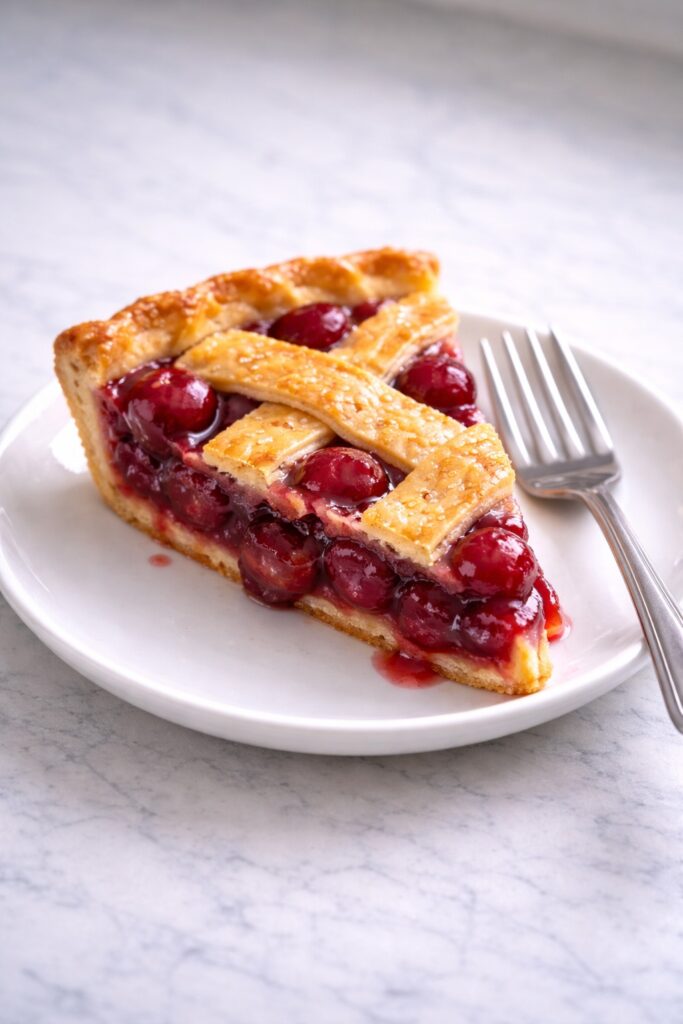
It is delicious slightly warm, at room temperature, or fully cooled. The texture changes subtly at each stage. Warm pie feels softer and more comforting, while fully cooled pie gives cleaner slices and a glossier filling texture.
You can serve it:
- plain, for a classic old-fashioned finish
- with vanilla ice cream for a classic hot-and-cold contrast
- with lightly whipped cream for a softer topping
- with a dusting of powdered sugar for a simple bakery-style look
- with extra fresh cherries on the side when in season
When served with vanilla ice cream, the cold cream slowly melts into the warm cherry filling and flaky crust, creating one of those desserts that feels almost impossible to eat slowly.
What to Serve with Cherry Pie
Cherry pie pairs especially well with simple accompaniments that do not compete with the fruit.
Best pairings
- vanilla ice cream
- softly whipped cream, especially if you make homemade whipped cream
- crème fraîche
- hot coffee
- black tea
- cold milk
The pie already carries enough flavor on its own, so neutral creamy pairings usually work best.
Storage
- At room temperature: Cherry pie can usually sit at room temperature for up to 1 day, loosely covered.
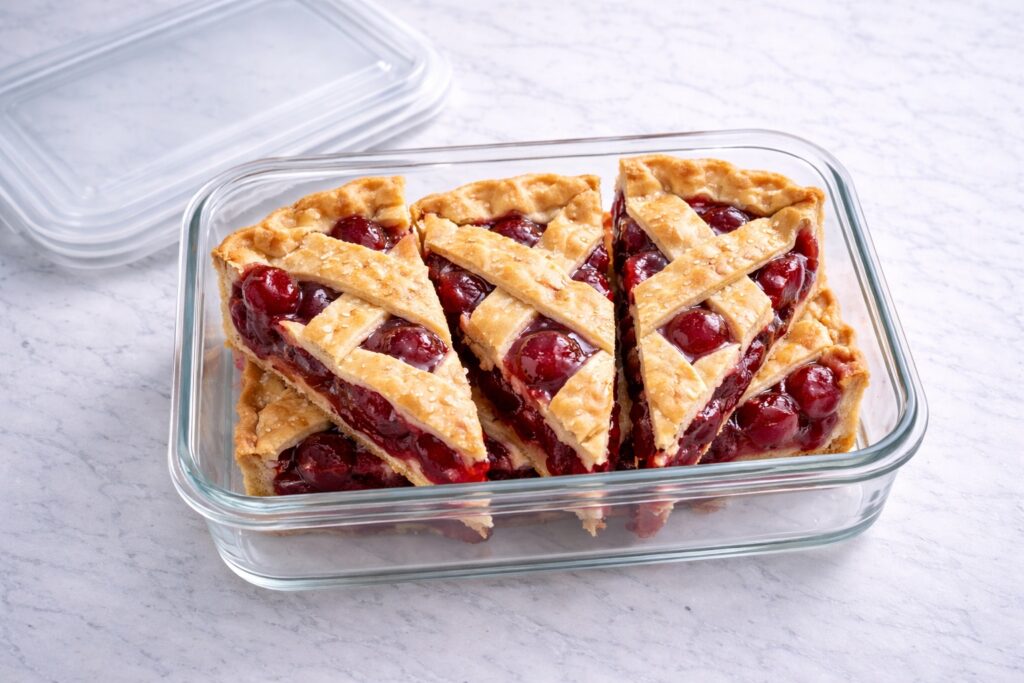
- In the refrigerator: Store covered in the refrigerator for up to 4 days. The crust softens slightly over time, but the flavor remains excellent.
- In the freezer: You can freeze baked cherry pie for up to 2 months. Wrap it well and thaw in the refrigerator before serving or reheating.
How to Reheat Cherry Pie
To bring back some of the crust texture, warm slices in a 300°F oven for about 10 to 15 minutes. This works better than the microwave if you want the pastry to stay pleasant rather than soft.
Can You Make Cherry Pie Ahead?
Yes, and it is actually a very good make-ahead dessert.
You can bake it one day in advance and let it cool completely before storing. In many cases, the flavor feels even more settled and rounded the next day. That makes cherry pie especially useful for holidays, gatherings, and dinner plans where you do not want to bake at the last minute.
Cherry Pie Troubleshooting
- The filling is too runny – Most likely causes are underbaking, too little cornstarch, or cutting the pie before it had time to cool fully.
- The crust is browning too fast – Tent the edges with foil during the later part of baking.
- The bottom crust seems soft – Bake the pie on a preheated baking sheet and make sure the filling is not overly wet.
- The pie tastes too sweet – Next time reduce the sugar slightly or increase lemon juice a little for better balance.
Frequently Asked Questions
Do I have to pre-cook the filling?
Not necessarily. This recipe works well with a raw filling, but some bakers prefer partially cooking the filling first for even more control over thickness. A raw filling gives a more classic, straightforward pie process.
Can I use canned cherries?
You can, but the texture and flavor are often less vibrant than fresh or frozen cherries. If using canned cherries, drain carefully and adjust sugar because many canned versions are already sweetened.
How do I know when the pie has set?
The filling should be fully cooled, ideally for several hours. Once cooled, slices should hold their shape without the filling pouring out.
Can I make this without almond extract?
Yes. The pie will still be delicious. Almond extract is optional and should only be used if you enjoy that classic cherry-almond pairing.
What is the best thickener for cherry pie?
Cornstarch is one of the best choices because it gives a glossy finish and clean texture without clouding the filling.
What Makes a Great Cherry Pie
A beautiful cherry pie depends less on decoration than on judgment. The filling should look thick before it ever reaches the table, the crust should feel cold before it goes into the oven, and the final pie should bake long enough for the fruit juices to properly activate the starch.
One of the most reliable signs of success is the bubbling. Not just any bubbling, but slow, thick, glossy bubbling that pushes through the vents or lattice. That visual cue often matters more than the clock. It tells you the interior has reached the right point for the filling to set later as it cools.
Another small but important detail is sugar balance. Cherries vary more than many people expect. Some are mellow and sweet, others sharp and bright. Tasting them before mixing the filling gives you much better control over the final pie.
This is the kind of recipe where patience improves everything. Cold dough, proper baking, and full cooling time are what transform a good cherry pie into one that feels truly bakery-worthy.
If you want a quick reminder while baking, these small tips summarize the most important details that help cherry pie turn out beautifully every time.
Recipe Tips at a Glance
| Goal | What Helps |
|---|---|
| Cleaner slices | Cool the pie fully |
| Better crust texture | Chill dough before baking |
| Brighter flavor | Add lemon juice |
| More depth | Use a little almond extract |
| Less risk of runny filling | Bake until thick bubbling appears |
Final Thoughts
Cherry pie is one of those desserts that never truly goes out of style. With its deep ruby filling and golden flaky crust, it brings a quiet sense of comfort and celebration to the table at the same time.
What makes this recipe so satisfying is the balance it creates. The cherries stay bright and flavorful, the filling sets into a glossy, sliceable texture, and the buttery crust adds the perfect contrast to the juicy fruit. It is the kind of pie that feels beautiful and impressive, yet still wonderfully approachable for home bakers.
If you take the time to chill the crust, bake the pie until the filling bubbles thickly, and allow it to cool completely before slicing, the result is a cherry pie that feels both classic and deeply rewarding. Whether served simply on its own or with a scoop of vanilla ice cream slowly melting over the top, it is the kind of dessert that always feels worth making.
With its deep ruby filling and golden flaky crust, this cherry pie recipe is one of the most satisfying classic fruit desserts you can bake at home.
More Classic Fruit Pie Recipes
If you love homemade pies, these classic recipes are worth trying next. Each one brings its own flavor, texture, and seasonal charm to the table.
- Apple Pie – a timeless dessert with tender cinnamon apples baked in a flaky golden crust.
- Peach Pie – juicy peaches baked into a sweet summer pie with buttery pastry.
- Blueberry Pie – a vibrant berry pie with a rich jammy filling and crisp crust.
- Strawberry Pie – fresh strawberries in a glossy filling that tastes bright and summery.
- Lemon Pie – smooth citrus filling with a refreshing sweet-tart balance.
You Might Also Love These Desserts
If you enjoy homemade cherry pie, there are many other classic desserts that bring the same comforting flavors and seasonal fruit goodness to the table.
- Strawberry Shortcake – soft cake layered with fresh strawberries and whipped cream.
- Peach Cobbler – warm baked peaches with a golden buttery topping.
- Blueberry Cobbler – sweet blueberries baked under a tender biscuit-style crust.
- Apple Crisp – baked apples topped with a crunchy oat crumble.
- Banana Cream Pie – a creamy classic with bananas, custard, and whipped topping.
- Vanilla Ice Cream – the perfect cold and creamy pairing for fruit desserts.
Cherry Pie
A classic homemade cherry pie with a thick glossy cherry filling and a flaky golden double crust. Sweet, tart, and beautifully sliceable, this pie is perfect for holidays, summer gatherings, or any time you want a timeless fruit dessert.
Ingredients
For the Crust
- 1 double pie crust for a 9-inch pie, chilled
For the Filling
- 6 cups cherries, pitted
- 3/4 to 1 cup granulated sugar, depending on the sweetness of the cherries
- 1/4 cup cornstarch
- 1 tablespoon lemon juice
- 1 teaspoon vanilla extract
- 1/4 teaspoon almond extract, optional
- 1 tablespoon unsalted butter, cut into small pieces
- 1/4 teaspoon salt
For Finishing
- 1 egg
- 1 tablespoon milk or water
- coarse sugar for sprinkling, optional
Instructions
- Roll out one chilled pie crust and fit it into a 9-inch pie dish. Gently press it into the bottom and sides without stretching the dough. Place the lined pie dish in the refrigerator while you prepare the filling.
- In a large bowl, combine the cherries, sugar, cornstarch, lemon juice, vanilla extract, almond extract if using, and salt. Toss until evenly coated. Let the mixture sit for about 10 to 15 minutes so the sugar can begin drawing juices from the fruit and the thickener distributes evenly.
- Spoon the cherry filling into the chilled bottom crust, including all the juices in the bowl. Dot the top with the small pieces of butter.
- Roll out the second crust and place it over the filling, or cut it into strips for a lattice top. Trim excess dough, then seal and crimp the edges. If using a full top crust, cut several vents so steam can escape during baking.
- Place the assembled pie in the refrigerator for about 20 to 30 minutes. This helps the crust hold its shape and improves flakiness.
- Whisk the egg with the milk or water and brush it lightly over the top crust. Sprinkle with coarse sugar if desired.
- Place the pie on a baking sheet and bake at 425°F for 20 minutes. Reduce the oven temperature to 375°Fand continue baking for 30 to 40 minutes more or until the crust is golden and the filling is actively bubbling. If the edges brown too quickly, shield them loosely with foil or a pie shield.
- Let the pie cool at room temperature for at least 4 hours before slicing so the filling can fully set and the pie slices cleanly.
Notes
Taste the cherries before mixing the filling. Sweeter cherries may need closer to 3/4 cup sugar, while tart cherries may need the full cup.
Frozen cherries work well for this recipe. Thaw them first and include the juices when mixing the filling for the best flavor.
Do not skip the chilling step before baking. Cold dough helps the crust hold its shape and bake up more flaky.
Bake the pie until the filling is bubbling thickly through the lattice or vents. This indicates the thickener has fully activated.
Allow the pie to cool completely before slicing. The filling continues to set as it cools, which helps the pie slice cleanly.
Nutrition Information:
Yield: 8 slices Serving Size: 1 sliceAmount Per Serving: Calories: 410Total Fat: 18gCarbohydrates: 58gFiber: 2gSugar: 32gProtein: 4g
Nutrition values are estimates and vary depending on the exact ingredients used.
12 Sweet Favourites — Yours, Free 🍰
Tiramisù, no-bake cheesecake, the perfect chocolate chip cookie & 9 more reader-loved desserts — gathered into one beautiful free recipe book. From my kitchen to yours.
No spam, just sweet things. Unsubscribe anytime.


One Comment
Comments are closed.