Pumpkin Pancakes (Easy, Spiced & Tender Every Time)
🎁 FREE E-BOOK: 12 Sweet Favorites — reader-loved desserts in one beautiful recipe book.
Pumpkin pancakes bring warm spice, golden surfaces and a tender orange crumb to the breakfast table. These are gently sweet, with enough pumpkin flavor to hold its own beneath a little butter and maple syrup. Cut into a warm stack and the center should look moist and softly aerated, with small air spaces throughout.

A pan of pumpkin pancakes gives a cool morning an unhurried rhythm: a bowl on the counter, a spatula beside the stove and something warm arriving at the table. Canned pumpkin makes that breakfast possible without roasting a whole squash, whether autumn has just arrived or the craving turns up months later.
Keep this pumpkin pancake recipe handy for the mornings when you want to cook a whole batch with confidence. The first-pancake check helps you judge the center as well as the color, and the timing notes show how your pan size affects breakfast for four.
Pumpkin Pancakes at a Glance
Plan on a warm, spiced breakfast for four, with a little time at the stove while the pumpkin pancakes cook in batches. This snapshot covers the recipe’s character as well as the practical commitment.
| Detail | What to expect |
|---|---|
| Recipe type | Pumpkin pancakes for breakfast or brunch |
| Cuisine | American |
| Method | Stovetop skillet or electric griddle |
| Difficulty | Easy mixing; moderate attention needed for batch cooking and heat control |
| Yield | 12 pancakes, about 4 inches (10 cm) across |
| Servings | 4 servings of 3 pancakes |
| Prep time | 10 minutes |
| Rest time | 5 minutes |
| Cook time | About 25 minutes, in four batches of three |
| Total time | About 40 minutes with the reference skillet capacity |
| Cooking surface | Heavy 12-inch (30 cm) skillet with about a 10-inch (25 cm) flat base, or a wide griddle |
| Texture | Tender, moist, fully set crumb; golden surfaces and a modest rise |
| Flavor | Pumpkin, warm spice, butter and light brown sugar; moderately sweet |
| Best served | Warm, freshly cooked or briefly held while the remaining batches cook |
| Make ahead | Measure components separately the night before, or cook and store the pancakes |
| Refrigeration | Up to 3 days, untopped, at 40°F (4°C) or below; refrigerate promptly as detailed below |
| Freezing | Up to 2 months for best quality, untopped, at 0°F (-18°C) or below |
The 40-minute schedule assumes three pumpkin pancakes fit comfortably in the skillet. If only two fit, allow about 45–55 minutes overall. An oven is optional for a brief warm hold; it is not the main cooking method.
Why This Pumpkin Pancake Recipe Works
Pumpkin adds both flavor and weight to pancake batter, so these pumpkin pancakes balance the puree with enough structure and a manageable cooking thickness. The choices below address the common gap between a golden surface and a center that is actually cooked.
- A measured pumpkin-to-flour balance. The 3/4 cup (170 g) of puree is paired with 1 1/2 cups (180 g) of flour and one egg. That gives these pumpkin pancakes a clear pumpkin flavor while supporting a crumb that can set. Emptying a whole can into this same batter would change that balance substantially.
- Leavening suited to ordinary milk. Double-acting baking powder provides the lift for these pumpkin pancakes without a separate baking-soda addition. There is no need to improvise an acid or borrow the leavener amounts from a buttermilk recipe. The intended result is a modest rise with small air spaces through the crumb.
- Richness in the pancake itself. Whole milk and melted butter give these pumpkin pancakes a tender crumb and rounded flavor, while 40 g of light brown sugar adds sweetness and a little molasses character. The flavor does not depend on soaking the stack in syrup; optional toppings can finish the breakfast without hiding the pumpkin.
- A bounded consistency adjustment. The five-minute rest comes before the decision to add more milk. That makes the rested batter the reference point and limits correction to a small, deliberate amount. It avoids turning a properly thick pumpkin batter into a thin, freely running mixture simply because it looks different from plain pancake batter.
- Thickness and heat work together. Evenly spread, 4-inch pumpkin pancakes cook through more readily than tall mounds of batter. Moderate heat leaves time for that center to set before the outside becomes too dark. The first-pancake check then helps you adjust the remaining batch to your own pan.

Why You’ll Love These Pumpkin Pancakes
Choose these pumpkin pancakes when you want the flavor of a fall breakfast and have time for a few rounds at the stove. They suit a relaxed morning, a breakfast for four or a cook-ahead session for smaller breakfasts later.
- Warm spice with pumpkin still at the center. Pumpkin pie spice, vanilla and brown sugar give the pumpkin pancakes a cozy flavor, while the sweetness stays moderate. You can enjoy a buttery forkful with a small drizzle of maple syrup and still taste the pumpkin underneath.
- Simple preparation with familiar tools. Canned puree saves the work of roasting and preparing a whole pumpkin, and a purchased spice blend keeps measuring straightforward. Two bowls, a whisk and a spatula handle the batter, so there is no mixer or blender to set up and clean.
- A realistic plan for sharing breakfast. Twelve pumpkin pancakes make four portions of three. The pan-capacity notes help you choose a sensible starting time, and the optional short oven hold lets the earlier batches wait while you finish the last round.
- Each plate can have its own finish. Butter and maple syrup stay optional and can be added at the table. A lightly buttered plate, a syrup-topped stack and pancakes served with syrup alongside can all come from the same bowl of batter.
- More than one way to prepare ahead. Separate ingredient preparation can shorten the morning setup, while cooked pumpkin pancakes can be refrigerated or frozen in portions. That makes the recipe useful both for a freshly cooked weekend breakfast and for mornings when reheating is the more practical choice.
The Science Behind Tender Pumpkin Pancakes
The texture of pumpkin pancakes depends on how moisture, lift and structure work together. Understanding those three things helps explain why a little extra pumpkin or vigorous stirring can change the result.
Pumpkin adds water and solids. Puree moistens the batter, but it also makes it thicker than a plain milk-based pancake batter. Flour and egg help that mixture set as it heats. Measuring the puree and spreading the portions evenly gives the centers a better chance to cook before the surfaces become too dark.
Baking powder supplies its own acid and base. Double-acting baking powder releases gas as the batter is mixed and heated. There is no separate baking soda in these pumpkin pancakes, and adding some is not a shortcut to a taller pancake. Use the specified amount of baking powder and check that it is still fresh.
Mixing builds structure. Once flour meets liquid, continued mixing develops gluten. A little structure holds the pancake together; too much stirring can make the crumb tough. Fold until the dry flour disappears, then let the batter rest briefly instead of beating out every small lump.
Ingredients for Pumpkin Pancakes
Use plain canned pumpkin puree, whole milk and unsalted butter for these pumpkin pancakes. Pumpkin pie filling already contains sugar and seasonings, so it changes more than the pumpkin flavor.

Ingredient List
Measure the batter ingredients before you begin, keeping the pan oil separate. Butter and maple syrup for serving are optional and can be added to individual plates.
For the Pancakes
- 1 1/2 cups (180 g) all-purpose flour, spooned and leveled
- 2 teaspoons (8 g) double-acting baking powder
- 1 1/2 teaspoons (about 3 g) pumpkin pie spice
- 1/2 teaspoon (3 g) fine table salt
- 3/4 cup (170 g) canned 100% pure pumpkin puree, not pumpkin pie filling
- 3 tablespoons (40 g) packed light brown sugar
- 1 large egg (about 50 g without the shell)
- 1 cup (240 ml) whole milk, plus up to 2 tablespoons (30 ml) only if needed after resting
- 3 tablespoons (42 g) unsalted butter, melted and cooled until lukewarm
- 1 teaspoon (5 ml) pure vanilla extract
For the Pan
- 2 teaspoons (10 ml) neutral oil, divided into thin coatings across the batches
For Serving, Optional
- Butter, to taste
- Pure maple syrup, to taste
Choosing Pumpkin, Flour and Milk
Choose a can labeled 100% pure pumpkin and measure out 3/4 cup (170 g). Keep the remaining puree for another use rather than emptying the can into the bowl; a whole can adds substantially more moisture and pumpkin solids.
For the flour, use the 180 g weight if you have a scale. Otherwise, spoon it gently into the measuring cup and level the top. Scooping a packed cup directly from the bag can add enough flour to make this already-thick batter difficult to spread.
Whole milk gives the pumpkin pancakes a rounded, rich flavor. The extra milk in the ingredient list is only for a batter that needs loosening after its five-minute rest; it is not part of the default pour.
If you are looking for the tangy flavor of a classic breakfast pancake, try our buttermilk pancakes for a recipe built around that ingredient. Here, ordinary whole milk keeps the pumpkin and spice at the center of the flavor.
Light brown sugar should be packed for the spoon measurement, or weighed at 40 g. Break up firm lumps before they reach the flour mixture; they are easier to disperse in the pumpkin mixture, where whisking will not overwork the flour.
Melt the unsalted butter early enough that it is lukewarm when added. Cold milk is usable, and a few tiny butter flecks are harmless; hot butter poured onto the egg is the condition to avoid. Unsalted butter keeps the listed salt amount as the seasoning reference.
Choose a purchased pumpkin pie spice blend whose flavor you enjoy, since blends vary in their balance of cinnamon and other spices. Use fine table salt for the listed spoon measurement. These pumpkin pancakes contain wheat, milk and egg.

Kitchen Tools for Evenly Cooked Pumpkin Pancakes
A heavy skillet with a reasonably wide flat base makes it easier to keep the pumpkin pancakes evenly spaced and turn them cleanly. Check the usable cooking area, since a pan’s rim measurement includes its sloping sides.

- Cooking: A heavy 12-inch (30 cm) nonstick skillet with about a 10-inch (25 cm) flat base; a wide electric griddle is an alternative.
- Measuring and portioning: A kitchen scale, dry and liquid measures, measuring spoons, and a scoop or 1/4-cup measure as a portioning aid.
- Mixing: Two bowls, a whisk and a flexible spatula for folding and scraping the bowl.
- Turning and greasing: A broad, thin nonstick-safe turner and a pastry brush for spreading thin films of oil.
- Holding and reheating: A wire rack, baking sheet and optional oven; a thin-tip food thermometer is useful for checking reheated leftovers.
Three pumpkin pancakes per batch is the reference for the timing below, but only cook that many if there is room to slide the turner between them. Two comfortably spaced pancakes are easier to manage than three crowded ones.
What to Expect from This Pumpkin Batter and Crumb
Expect a thick, scoopable batter and pumpkin pancakes with a moist, softly aerated crumb. Their rise is modest and their texture tender, rather than towering like a soufflé or setting into a custard-like middle.
- The batter falls from a spoon in a slow, broad ribbon instead of pouring freely like milk.
- Small soft lumps can remain after folding; dry pockets of flour should not.
- The cooked pumpkin pancakes have golden surfaces with a warm orange interior.
- A finished center contains small air spaces and feels softly set, with no glossy stripe of liquid batter.
How to Make Pumpkin Pancakes
To make pumpkin pancakes, prepare the dry and wet mixtures separately, fold them together, then rest the batter before cooking. Use the first batch to settle on a heat level that gives both a golden surface and a fully set center.
1. Prepare the Equipment and Dry Ingredients
Set out the measuring tools, turner and rack so they are ready before the first pancake goes into the pan.
If you want to serve the whole batch together, preheat a conventional oven to 200°F (95°C) and place a wire rack on a baking sheet. Keep this ready for the cooked pumpkin pancakes.
In the first bowl, whisk the flour, baking powder, pumpkin pie spice and salt. Break up any visible clumps of baking powder so the leavener is distributed through the flour.
What you should see: An evenly speckled dry mixture, with no dense white clumps of baking powder.

2. Whisk the Pumpkin Mixture
Combine the wet ingredients in a second bowl, using melted butter that has cooled until lukewarm.
Whisk the pumpkin and brown sugar together, then add the egg, the base 1 cup (240 ml) of milk, the melted butter and vanilla. Whisk until the egg and pumpkin are evenly blended.
A few tiny flecks of butter can appear if the milk is cold. They are not a reason to heat the whole mixture. Avoid pouring hot butter directly onto the egg.
What you should see: A uniform orange mixture without egg streaks or dense lumps of brown sugar.

3. Fold the Batter and Rest
For tender pumpkin pancakes, fold the wet mixture into the dry mixture just until no dry flour remains, scraping around the bowl and across its bottom.
Leave small soft lumps alone. Rest the batter for five minutes while preparing the skillet according to its manufacturer’s preheating guidance. Do not whisk it smooth after resting.
If the rested batter stands rigidly like dough and cannot be spread gently, fold in 1 tablespoon of milk. Check again and add one more tablespoon only if necessary, for a maximum of 2 tablespoons (30 ml) extra. If the measurements were substantially wrong, extra milk alone may not correct them.
What you should see: A thick batter that falls in a slow ribbon and can be gently spread, without running across the pan.

4. Spread and Cook the First Batch
Start with medium-low to medium stovetop heat, or around 350°F (175°C) on an electric griddle, and adjust according to how the first pumpkin pancakes brown.
Brush on a thin film of the measured pan oil. Divide the batter into twelve approximately equal portions, roughly 62 g each before any extra milk, using a scoop or 1/4-cup measure as a portioning aid.
Gently spread each portion to about 4 inches (10 cm) across rather than leaving it in a tall mound. Cook up to three pumpkin pancakes at a time in the reference skillet, leaving space for turning.
Start checking the underside around two minutes. The first side usually needs about 2–3 minutes. Flip when the bottom is golden, the rim looks increasingly matte and set, and some bubbles leave open holes near the surface edge. Do not wait for the entire top to dry.
If the underside becomes dark before the rim sets, lower the heat and let the skillet cool briefly before adding the next batch.

What you should see: An evenly spread pancake with a golden underside, a setting rim and a few open surface holes.

5. Finish the Centers and Repeat
Turn each pancake once with the broad spatula and give the second side time to finish the middle.
Cook for about 1 1/2–2 minutes more, adjusting for the pan. Avoid pressing down with the spatula. The pancake should feel set and softly resilient rather than loose in the center.
Open the first pancake after about one minute off the heat, while the others continue cooking. Look for a moist crumb with small air spaces and no glossy batter stripe. If it is still wet, return it to gentle heat to finish; lower the heat and spread the next portions evenly.
Before changing the bowl or the burner, connect what happened during spreading with the underside color and the opened center. This first-pancake check helps you choose the adjustment that matches the problem.
| First-pancake observation | Decision for the remaining batch | Limit of the adjustment |
|---|---|---|
| Batter falls slowly but was left in a tall mound | Keep the batter as it is and spread the next equal portion more evenly. | Extra milk changes the whole bowl; it is not needed solely because one portion was left too thick. |
| Evenly spread portion darkens before its center sets | Reduce the heat and let the pan cool briefly before the next portion. Finish the underdone pancake gently. | Surface color alone does not prove the center is done. |
| Rested batter will not spread gently at all | Check the flour and pumpkin amounts, then use the bounded milk adjustment in Step 3 if appropriate. | A little milk can loosen ordinary variation; it cannot reliably repair a whole extra can of pumpkin. |
Continue with the remaining batter, brushing on a thin film of the remaining pan oil as needed. Keep watching later batches as you cook.
What you should see: Golden surfaces and a moist, set interior without a dense wet band.

6. Serve Warm or Hold Briefly
Serve the pumpkin pancakes as they finish, or hold the earlier batches on the prepared rack while you complete the rest.
For a shared breakfast, keep the pumpkin pancakes in a single layer in the 200°F (95°C) oven, ideally for no more than about 20 minutes. This holding time overlaps the cooking; it is not an extra stage added to the total.
Avoid a tightly covered stack, which traps steam against the surfaces. Add optional butter and maple syrup when the pumpkin pancakes reach the table.

What you should see: Pancakes resting separately on the rack, with no moisture collecting under a tight cover.
How to Tell When Pumpkin Pancakes Are Done
Finished pumpkin pancakes have a moist, tender crumb that holds together when cut. Judge the inside as well as the surface: pumpkin naturally gives the crumb moisture and color, so a dry-looking center is not the goal.
| Check | Ready or normal | Needs attention |
|---|---|---|
| Surface and rim | Golden surfaces with a set edge; a slightly uneven circle is normal. | Very dark browning while the center still feels loose suggests the surface is cooking too quickly. |
| Gentle touch | The middle feels set and softly resilient. | A loose, unset middle needs more cooking; pressing firmly is not a useful test. |
| First pancake, opened after about one minute | Small air spaces in an evenly set, moist orange crumb. | Glossy liquid batter or a dense wet stripe is underdone, even if the outside looks golden. |
| Finished eating texture | Tender and moist, with a modest rise. | A firm, dry crumb is past the intended texture; more cooking will not make it tender again. |
Start checking the first underside around two minutes; the second side usually needs another 1 1/2–2 minutes after the flip. These are starting ranges, not a substitute for the center check. The brief one-minute pause makes the first cut easier to assess while other pumpkin pancakes cook; it is not a way to finish a visibly raw center off the heat.
If the center is glossy and unset, return that pancake to gentle heat. Use the first-pancake guide in the method to decide whether the remaining portions need a change in spread, heat or batter consistency.

Small Adjustments for Better Pumpkin Pancake Batches
When cooking pumpkin pancakes, small batch decisions matter most when they help you understand what the pan is doing. Keep a useful comparison from one round to the next, rather than changing several things at once.
I once flipped a pumpkin pancake with a beautifully golden underside, only to find that the middle still needed more time. For the next batch, I lowered the heat and spread the batter a little more evenly. It was a useful reminder: a golden surface is only part of the story.
- Use one change to learn something. Heat and thickness can both leave a wet center in pumpkin pancakes. Once the ingredients are correctly measured, keep the portion size consistent while you assess a heat adjustment, or keep the heat steady while correcting an obvious mound. Changing the milk, spread and burner together makes it harder to know what helped the next pancake.
- Watch the trend across batches. If equally sized pumpkin pancakes brown progressively sooner at the same setting, the pan may be accumulating heat. Respond to that pattern with a small heat reduction and a brief cooling pause, rather than steadily shortening every cooking round. This preserves time for the centers to cook as the pan gets hotter.
- Treat portion weights as a distribution guide. The approximate 62 g portion comes from dividing the base batter into twelve; the full milk adjustment raises that average to about 65 g. Those are planning estimates, not a reason to leave batter in the bowl or to assume a level 1/4 cup weighs exactly the same. Aim for twelve similar portions so the last pancake does not become an unusually large, slow-cooking one.
- Let holding space set the serving plan. The rack needs enough room for the earlier batches to sit separately while the last batch cooks. If that space is limited, serve successive warm rounds instead of building a covered pile. Matching the serving plan to the rack keeps the lower pumpkin pancakes from sitting in trapped steam.
Pumpkin Pancake Problems and How to Fix Them
If your pumpkin pancakes fall short, start with the action that may have caused the problem, then decide what can still be changed. Some adjustments help the remaining batter; others can only prevent the same result in a fresh batch.
| Mistake | What happens | Why it happens | How to prevent or fix it |
|---|---|---|---|
| Using high heat or leaving tall mounds | The outside darkens while the center stays wet. | The surface cooks faster than heat can reach the thick middle. | Finish the underdone pancake gently. Use the first-pancake guide to correct the heat or spread for the next portion. |
| Packing in flour or adding extra puree | The rested batter is too stiff to spread easily. | The flour or pumpkin-solids balance has changed. | Verify the measured amounts. Use only the specified small milk correction for ordinary consistency variation; do not expect it to repair a major ingredient error. |
| Whisking after the flour is incorporated | The crumb can turn tough or rubbery. | Continued mixing develops more gluten than this tender pancake needs. | Stop stirring the remaining batter. Longer resting cannot undo the mixing; use a gentler fold for the next fresh batch. |
| Cooking on an underheated pan, or overlooking a leavener or liquid error | Pancakes stay unusually pale and flat. | Insufficient heat, missing or stale baking powder, and over-thinning can each contribute. | Check heat first, then the ingredient amounts and leavener. A heat adjustment may help later portions; adding flour or more baking powder by guesswork is not a reliable rescue. |
| Holding a tightly covered stack | Surfaces become damp instead of staying pleasantly golden. | Steam is trapped between the pancakes. | Use the single-layer rack while finishing the batch. Separate a damp stack promptly, but do not expect that step to recreate a freshly cooked surface. |
A Breakfast Timeline for Twelve Pumpkin Pancakes
For pumpkin pancakes served together, work backward from breakfast using the number your pan can comfortably hold. The mixing and rest stay much the same; the number of cooking rounds changes the total.
| Time before serving | What happens | Dependency |
|---|---|---|
| 40–30 minutes | Measure ingredients and prepare the dry and wet mixtures. | Have the turner, scoop and optional holding rack ready. |
| 30–25 minutes | Fold and rest the batter for five minutes; prepare the cooking surface. | Assess consistency after the rest. |
| 25 minutes to serving | Cook four batches of three, allowing for scooping, turning and heat adjustments. | Check the first pancake before settling into the remaining batches. |
| During later batches | Hold earlier pancakes in one layer on the rack if needed. | Warm holding overlaps cooking; aim to keep it within about 20 minutes. |
If your pan holds only two pumpkin pancakes, allow roughly 30–40 minutes for cooking and 45–55 minutes overall. A wide griddle can reduce the number of rounds, but the exact time depends on its usable area and heat. For twice the quantity, allow time to mix and cook two successive batches.
Beautiful Ways to Serve Pumpkin Pancakes
Serve pumpkin pancakes warm, with the butter and syrup added just before eating. A small stack, an open plate or a shared platter each gives the breakfast a different feel without changing the pancakes themselves.
A Classic Butter-and-Maple Stack
For a generous individual breakfast, stack three warm pumpkin pancakes on a plate with the edges slightly offset. The staggered layers show their golden surfaces and give a small drizzle of maple syrup a path down the side. Place the optional butter on top while the stack is still warm enough to soften it.
Start with a little syrup and keep the jug nearby, so each person can choose the sweetness. Assemble the stack as it goes to the table; it is a serving shape, while the rack remains the better place for pancakes waiting through another cooking round.

An Open Plate with the Crumb on Show
Arrange a serving of three pumpkin pancakes in a loose fan with shallow overlaps, then cut one open to show the soft orange crumb. This arrangement suits anyone who likes to butter each pancake individually or dip a forkful into syrup served alongside.
Leave part of the cut pancake uncovered so the crumb and golden surface remain visible together. Keeping the syrup beside the pancakes also lets the last few bites stay closer to their freshly cooked texture instead of sitting in a pool of syrup.

A Shared Breakfast Platter
For a breakfast where everyone serves themselves, transfer the warm pumpkin pancakes to a broad platter in loose, shallow rows. Set butter and maple syrup alongside, and use the three-pancake serving as a guide when dividing the twelve-piece batch among four people.
Bring the platter out once everyone is ready to eat. If the pan or holding rack cannot accommodate the whole breakfast comfortably, a smaller first platter followed by another warm round works better than a tall pile that waits on the table.

Coffee or Tea Alongside
Coffee brings a roasted contrast to the pumpkin, warm spice and optional maple syrup. Plain black tea is another useful choice when you prefer a less roasted accompaniment; its flavor leaves room for the spice in the pumpkin pancakes.
Have the cups and serving dishes ready before the final cooking round, then pour the drinks close to serving. Keeping the drink simple also lets each person decide how much sweetness to add to the plate, without turning the breakfast into several competing sweet flavors.

Storing, Freezing and Reheating Pumpkin Pancakes
Cooked pumpkin pancakes can be refrigerated for up to three days or frozen for a later breakfast. Preparing ingredients ahead is a separate option: keep the wet and dry components apart until the morning you plan to cook.
Prepare Components the Night Before
Measure the dry ingredients into a covered bowl and keep it dry overnight. Measure the pumpkin and milk separately and refrigerate them. Leave the egg and butter preparation for the morning, then mix the batter and give it the usual five-minute rest.
Avoid treating the short rest as permission to leave the mixed batter overnight. If you want breakfast ready further ahead, cook the pumpkin pancakes first and refrigerate or freeze them instead.
Refrigerate Cooked Pancakes Promptly
Refrigerate untopped pumpkin pancakes within two hours, or within one hour when the surrounding temperature is above 90°F (32°C). Keep refrigerated food at 40°F (4°C) or below, following the FDA guidance on safe food storage.
Let the visible steam dissipate briefly on a rack, then refrigerate in shallow containers; do not leave them out for hours waiting for complete cooling. Once cool, separate layers and seal the container against drying. Use within three days and add syrup after reheating.
Freeze Untopped Pancakes
Freeze the cooked, untopped pumpkin pancakes in one layer until firm, then pack them into an airtight freezer bag with parchment between the layers. Keep the freezer at 0°F (-18°C) or below and use within two months for best quality.
Separating the pumpkin pancakes makes it easier to take out only what you need. Label the bag with the date and pack in three-pancake portions if that matches your breakfast plans. The two-month window is a quality guide rather than a point when continuously frozen food suddenly becomes unsafe.

Reheat Without Drying the Centers
Reheat refrigerated or frozen pumpkin pancakes in a single layer on a baking tray at 350°F (175°C), loosely covered to limit drying. There is no need to thaw them first for this method. Begin checking after eight minutes and continue until the center reaches 165°F (74°C); frozen pancakes may need longer.
For one or two pumpkin pancakes, a microwave is convenient. Cover lightly with a damp paper towel and heat in 20–30-second intervals, rearranging and checking until the same center temperature is reached. Appliance power and starting temperature affect the time, so avoid relying on one fixed interval.
Expect reheated pumpkin pancakes to be softer at the edges than a fresh batch. Dry edges or freezer drying are quality changes; reheating cannot fully restore lost moisture. Add butter or syrup after reheating, when you can judge the texture of the warmed pancake.
The brief low-oven hold during cooking is intended for serving a batch together. An oven setting alone does not prove the food is at a safe hot-holding temperature, and it should not become an extended wait on a buffet. Refrigerate leftovers promptly.
Simple Swaps and Format Choices for Pumpkin Pancakes
Small changes to the milk or sugar can work within this pumpkin pancake recipe, but changing the flour, removing the egg or switching cooking methods needs a different approach. Keep the pumpkin quantity and the measured leavener unchanged.
Milk and Sugar Swaps
These narrow substitutions keep these pumpkin pancakes close to the original recipe. They are ingredient-based alternatives with expected flavor differences, rather than a promise that every version will taste or cook identically.
| Replace | Use instead | Expected difference | Adjustment |
|---|---|---|---|
| 1 cup (240 ml) whole milk | 1 cup (240 ml) 2% milk | Slightly less richness. | Use the same method; any extra milk still stays within the 2-tablespoon (30 ml) limit after resting. |
| 3 tablespoons (40 g) light brown sugar | 3 tablespoons (40 g) packed dark brown sugar | Stronger molasses flavor and darker color. | Keep the same quantity and whisk it into the pumpkin mixture. |
| 3 tablespoons (40 g) light brown sugar | 40 g granulated sugar, about 3 tablespoons plus 1/2 teaspoon | Less molasses character. | Use the weight when possible; the spoon volume is different from packed brown sugar. |
Keep the unsalted butter, egg and all-purpose flour for this version. Almond flour, coconut flour, gluten-free blends and egg-free substitutions need their own formula adjustments. Watery homemade puree also changes the batter’s moisture balance, so plain canned puree remains the practical reference here.
Bigger Batches and Different Cooking Formats
For twice as many pumpkin pancakes, mix and cook two successive batches. That keeps the second bowl from waiting through all the cooking time of the first, and it gives you a fresh opportunity to check the pan temperature. Allow additional time rather than expecting double the yield within the same 40 minutes.
For a waffle-iron breakfast, use our pumpkin waffles, with instructions written for that format. Pouring this pancake batter into a waffle iron or an oven pan changes how it cooks; the skillet timing does not transfer. For an oven breakfast, the Sheet Pan Pancakes recipe in the Baking Journey below is a more useful starting point.
Pumpkin Pancake Questions, Answered
A thick pumpkin batter can make the center harder to judge than the surface. These two checks help you decide whether to adjust the cooking or loosen the batter.
Why are my pumpkin pancakes still wet in the middle?
A portion that is too thick or a pan that is too hot can leave the middle wet while the outside browns. Finish the pancake over gentle heat, then lower the heat and spread the next portion to about 4 inches. Check for set crumb rather than color alone.
What should I do if my pumpkin pancake batter is too thick?
Wait until after the five-minute rest. If the batter will not spread gently, fold in 1 tablespoon of milk, then one more only if needed. Stop at 2 extra tablespoons (30 ml); the batter should remain thick and scoopable, not freely pourable.
Continue Your Baking Journey from Pumpkin Pancakes
If these pumpkin pancakes put you in the mood for another homemade breakfast, choose a recipe that fits what you want to use next: fruit, sourdough discard or more pumpkin. The options below range from another quick pan of pancakes to a leisurely baking project.
More Pancakes for Your Breakfast Table
Keep the skillet out for another breakfast, changing the main flavor or using a different ingredient from the kitchen.
- Apple Pancakes for an apple-filled breakfast when you want fruit in the batter.
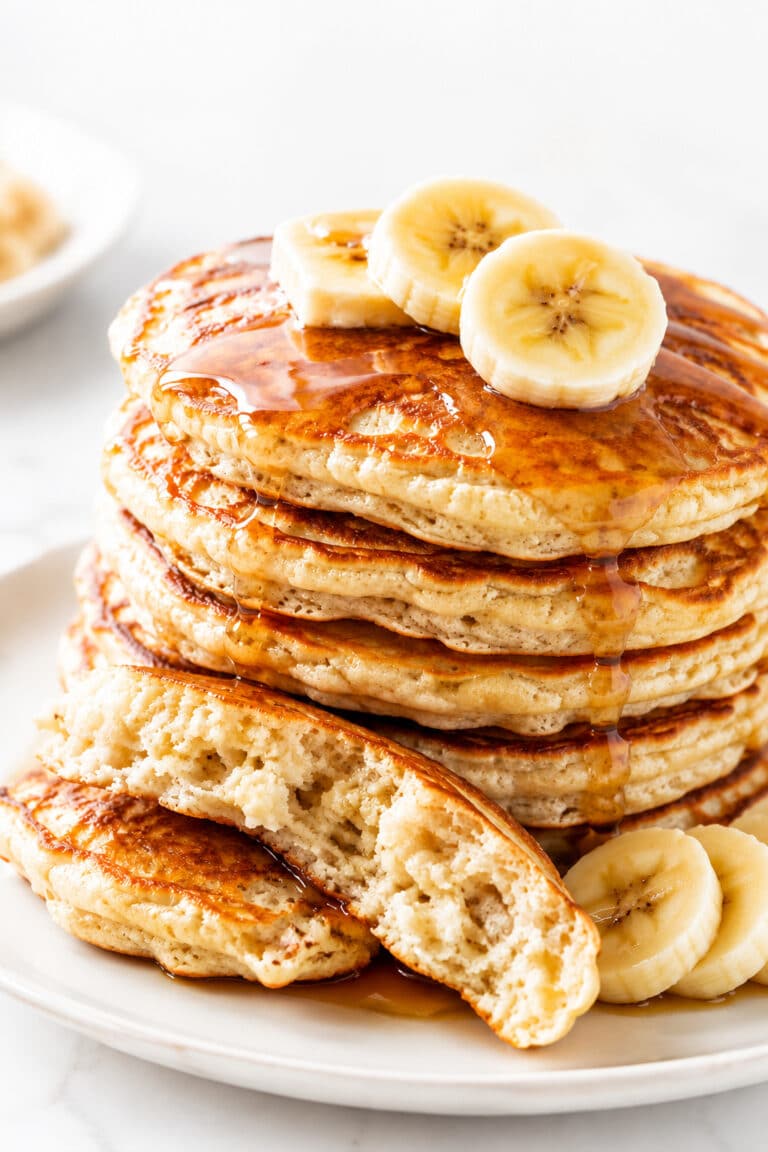
- Banana Pancakes for a breakfast built around ripe bananas.
- Blueberry Pancakes when you want berries throughout the pancakes.
- Sourdough Discard Pancakes for a dedicated way to use some discard from your jar.
Keep Baking with Pumpkin
Choose the shape of your next pumpkin bake: individual portions, a loaf to slice or something to bring to the middle of the table.
- Pumpkin Muffins for individual pumpkin bakes that are easy to portion.
- Pumpkin Bread when a sliceable loaf is what you want.
- Pumpkin Cinnamon Rolls for a pumpkin yeast-dough project with time to rise.
- Pumpkin Coffee Cake for a pumpkin bake finished with cinnamon streusel.
Try Another Weekend Breakfast
A different cooking format can change the pace of breakfast, whether you are using a waffle iron, leftover bread or an oven tray.
- Belgian Waffles for a classic waffle-iron breakfast.
- Sourdough Waffles for a same-day waffle recipe that uses discard.
- French Toast when bread is the starting point for breakfast.
- Sheet Pan Pancakes when you would rather cook an oven batch than stand over the skillet.
Why These Pumpkin Pancakes Belong in Your Recipe Box
Keep these pumpkin pancakes in your recipe box for mornings when you want warm spice and a clear plan for getting breakfast onto the table.
- Measured Pumpkin. The clear puree quantity helps you plan a breakfast without committing an entire can to the bowl.
- First-Pancake Confidence. The center check gives you a concrete reference when you come back to a pan you have not used for pumpkin pancakes in a while.
- Breakfast for Four. The portion and batch notes help you decide when to start before everyone sits down.
- Freezer Breakfasts. Separately packed cooked pumpkin pancakes let you set aside a few portions for another morning.
- Seasonal Morning Ritual. A can of pumpkin and familiar spice make it easy to revisit the flavor when the weather calls for a warm breakfast.

A Final Note on Making Pumpkin Pancakes
These pumpkin pancakes have a soft orange crumb and a flavor that feels at home with brown sugar, butter and warm spice. A little maple syrup is welcome, but the pumpkin should still be there in each forkful.
Pumpkin pancakes are a breakfast to return to when the kitchen is cool, the coffee is brewing and there is time for a few batches at the stove. The appeal is familiar: a warm plate, a little spice and a recipe whose rhythm becomes easier to recognize each time.
A pancake does not need to be a perfect circle to belong on that platter. Its uneven edge, the small patch of butter melting on top and the first cut through the warm center are part of a breakfast made at home.

Pumpkin Pancakes
Tender pumpkin pancakes with golden surfaces, a moist orange crumb and warm spice. Made with canned pumpkin, whole milk and melted butter, this recipe makes twelve pancakes for a cozy breakfast for four.
Ingredients
For the Pancakes
- 1 1/2 cups (180 g) all-purpose flour, spooned and leveled
- 2 teaspoons (8 g) double-acting baking powder
- 1 1/2 teaspoons (about 3 g) pumpkin pie spice
- 1/2 teaspoon (3 g) fine table salt
- 3/4 cup (170 g) canned 100% pure pumpkin puree, not pumpkin pie filling
- 3 tablespoons (40 g) packed light brown sugar
- 1 large egg (about 50 g without the shell)
- 1 cup (240 ml) whole milk, plus up to 2 tablespoons (30 ml) only if needed after resting
- 3 tablespoons (42 g) unsalted butter, melted and cooled until lukewarm
- 1 teaspoon (5 ml) pure vanilla extract
For the Pan
- 2 teaspoons (10 ml) neutral oil, divided into thin coatings across the batches
For Serving, Optional
- Butter, to taste
- Pure maple syrup, to taste
Instructions
Prepare the Equipment and Dry Ingredients. Set out the measuring tools, turner and rack. For a shared breakfast, preheat a conventional oven to 200°F (95°C) and place the rack on a baking sheet. In one bowl, whisk the flour, baking powder, pumpkin pie spice and salt until evenly combined, with no visible clumps of baking powder.
Whisk the Pumpkin Mixture. In a second bowl, whisk the pumpkin and brown sugar together. Add the egg, 1 cup (240 ml) whole milk, lukewarm melted butter and vanilla. Whisk until the mixture is evenly orange, with no egg streaks or dense sugar lumps. A few tiny butter flecks from cold milk are fine; do not pour hot butter directly onto the egg.
Fold the Batter and Rest. Pour the wet mixture into the dry ingredients. Fold with a flexible spatula, scraping the bottom of the bowl, just until no dry flour remains. Leave small soft lumps. Rest for 5 minutes while preparing the cooking surface according to its manufacturer’s preheating guidance. The rested batter should fall in a broad, slow ribbon and spread gently. If it stands rigidly and will not spread, check the measurements, then fold in 1 tablespoon of milk; add one more only if needed, for a maximum of 2 tablespoons (30 ml) extra. Do not beat the batter smooth.
Spread and Cook the First Batch. Use medium-low to medium stovetop heat, or start an electric griddle at about 350°F (175°C). Brush on a thin film from the measured 2 teaspoons (10 ml) of pan oil. Divide the batter into 12 approximately equal portions, about 62 g each before any extra milk, using a scoop or 1/4-cup measure as an approximate aid. Gently spread each portion to about 4 inches (10 cm). Cook up to three at a time in the reference skillet, leaving room to turn. Begin checking the underside around 2 minutes. After roughly 2–3 minutes, flip when the underside is golden, the rim is becoming matte and set, and some bubbles leave open holes. Do not wait for the entire top to dry. If the bottom darkens before the rim sets, lower the heat and let the skillet cool briefly before the next batch.
Finish the Centers and Repeat. Turn each pancake once and cook the second side for about 1 1/2–2 minutes, adjusting to the pan. Do not press down. The middle should feel set and softly resilient. Open the first pancake after about 1 minute off the heat while the others continue cooking: look for a moist crumb with small air spaces and no glossy liquid batter or dense wet stripe. If it is underdone, return it to gentle heat; lower the heat and keep the next portions evenly spread. Repeat with the remaining batter, brushing on thin films of the remaining oil as needed and watching for faster browning in later batches.
Serve Warm or Hold Briefly. Serve warm with optional butter and pure maple syrup. To serve the batch together, hold earlier pancakes in one layer on the rack in the 200°F (95°C) oven while finishing the rest, ideally for no more than about 20 minutes. This brief hold overlaps cooking. Avoid a tightly covered stack, which traps steam, and add toppings at serving.
Notes
Equipment
- Heavy 12-inch (30 cm) nonstick skillet with about a 10-inch (25 cm) flat cooking area, or a wide electric griddle
- Kitchen scale, dry and liquid measures, measuring spoons, and a scoop or 1/4-cup measure for portioning
- Two mixing bowls, a whisk and a flexible spatula
- Broad, thin nonstick-safe turner and a pastry brush
- Wire rack and baking sheet; optional oven for a brief warm hold and a thin-tip food thermometer for reheated leftovers
- Pumpkin and flour: Use 100% pure canned pumpkin puree, not pumpkin pie filling, and measure only 3/4 cup (170 g). Weigh the flour or spoon and level it. Adding a whole can of pumpkin or a packed cup of flour changes the batter; the small milk adjustment cannot reliably fix a major measurement error.
- Portions and timing: The recipe makes 12 pancakes, about 4 inches (10 cm) across, or 4 servings of 3. The 40-minute total assumes four batches of three. If the pan holds only two, allow about 30–40 minutes cooking and 45–55 minutes overall. A 1/4-cup measure is an approximate aid, not an exact weight conversion; with the full extra milk, equal portions average about 65 g. Divide and scrape the bowl evenly.
- Simple substitutions: Use the same base volume of 2% milk for slightly less richness. Replace the light brown sugar with 40 g dark brown sugar for a stronger molasses flavor, or 40 g granulated sugar, about 3 tablespoons plus 1/2 teaspoon, for less molasses character. Keep the same method and milk-adjustment limit. Other flour types, egg-free changes, watery homemade puree and buttermilk need separate adjustments.
- Larger batches: For twice the quantity, mix and cook two successive batches. Allow additional time; changing the yield does not shorten cooking or increase the number that fit in the skillet.
- Prepare ahead: The night before, measure the dry ingredients into a covered bowl and keep it dry. Measure the pumpkin and milk separately and refrigerate them. Prepare the egg and melted butter in the morning, then mix and rest the batter as directed. Do not hold the combined batter overnight.
- Refrigerate: Let steam dissipate briefly on a rack, then refrigerate untopped pancakes in shallow containers within 2 hours, or within 1 hour above 90°F (32°C). Do not wait hours for complete cooling. Keep at 40°F (4°C) or below, separate layers once cool and seal against drying. Use within 3 days.
- Freeze: Freeze untopped pancakes in one layer until firm, then pack in an airtight freezer bag with parchment between the layers. Keep at 0°F (-18°C) or below and use within 2 months for best quality.
- Reheat: Place refrigerated or frozen pancakes in one layer on a tray at 350°F (175°C), loosely covered. Begin checking after 8 minutes and continue until the center reaches 165°F (74°C); frozen pancakes can take longer. Alternatively, microwave one or two under a lightly damp paper towel in 20–30-second intervals, rearranging and checking until the same temperature is reached. Add toppings afterward. Edges will be softer than freshly cooked.
- Brief warm holding: The 200°F (95°C) oven hold is only for finishing and serving the batch together. Oven setting alone does not establish the food temperature for extended buffet holding. Refrigerate leftovers promptly.
- Nutrition: Nutrition is an estimate for 3 pancakes, including the measured pan oil and the base milk amount. Optional serving butter, maple syrup and any extra milk are excluded. Brands and the amount of oil left in the pan will affect the values.
Nutrition Information:
Yield: 4 Serving Size: 3 pancakesAmount Per Serving: Calories: 374Total Fat: 14.6gSaturated Fat: 7.2gCholesterol: 75mgSodium: 500mgCarbohydrates: 51.8gFiber: 2.6gSugar: 14.6gProtein: 8.8g
Nutrition information is provided as an estimate only and may vary based on specific ingredients, brands, and portion sizes used. This information should not be considered medical or nutritional advice.
12 Sweet Favorites — Yours, Free 🍰
Tiramisù, no-bake cheesecake, the perfect chocolate chip cookie & 9 more reader-loved desserts — gathered into one beautiful free recipe book. From my kitchen to yours.
No spam, just sweet things. Unsubscribe anytime.

One Comment