Sugar Cookie Recipe (Soft & Chewy Classic)
🎁 FREE E-BOOK: 12 Sweet Favorites — reader-loved desserts in one beautiful recipe book.
Few cookies feel as timeless and comforting as classic sugar cookies. The smell of butter, vanilla, and warm sugar drifting through the kitchen has a way of making everything feel softer, calmer, and a little more familiar. They look simple, but when they’re made well, sugar cookies have that perfect balance of tender centers, lightly crisp edges, and a clean buttery sweetness that never goes out of style.

This sugar cookie recipe is the kind people come back to again and again because it works for almost everything. It’s easy enough for an everyday batch, reliable enough for holiday baking, and sturdy enough for decorating, stacking, and gifting. Whether you want soft round cookies with sparkling sugar on top or neat cut-out shapes for a cookie tray, this dough gives you that classic bakery-style result without feeling fussy.
What makes this version especially dependable is the balance. The dough comes together quickly, chills just long enough to hold its shape, and bakes into cookies that stay soft and tender instead of turning dry or overly cakey. The edges set with the slightest golden color, while the centers keep that delicate softness that makes a sugar cookie feel truly worth baking from scratch.
This is also the kind of recipe people save because it fits so many moments. It works for Christmas baking, birthdays, spring cookie boxes, simple weekend baking, or those afternoons when you just want something homemade and familiar with a cup of coffee or tea. Once you make a batch and see how cleanly the dough rolls and how evenly the cookies bake, it quickly becomes one of those core recipes you keep for years.
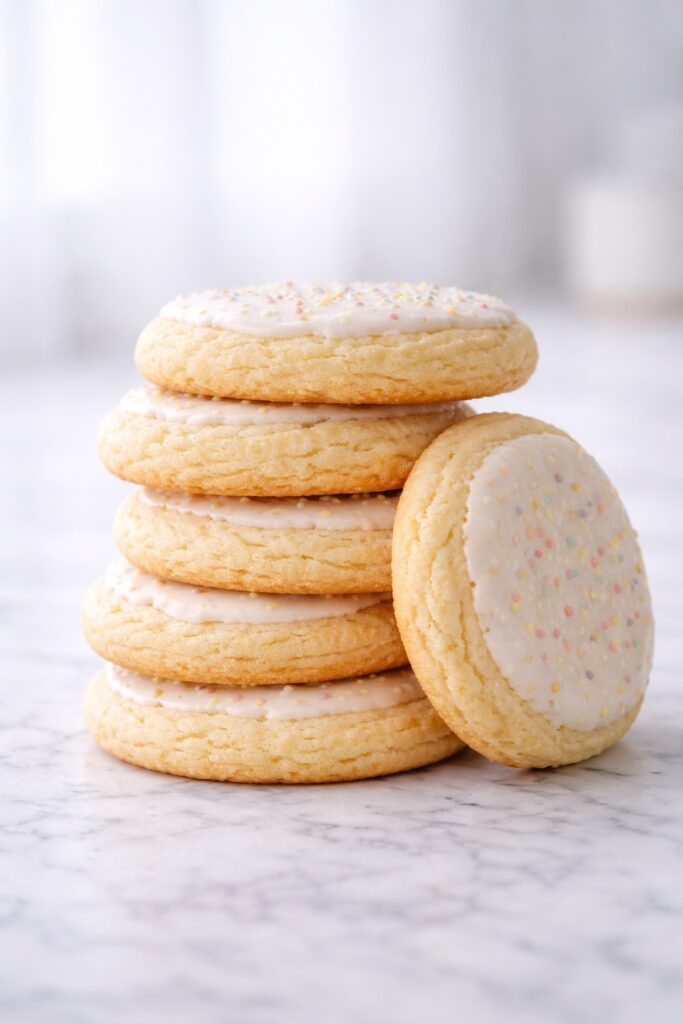
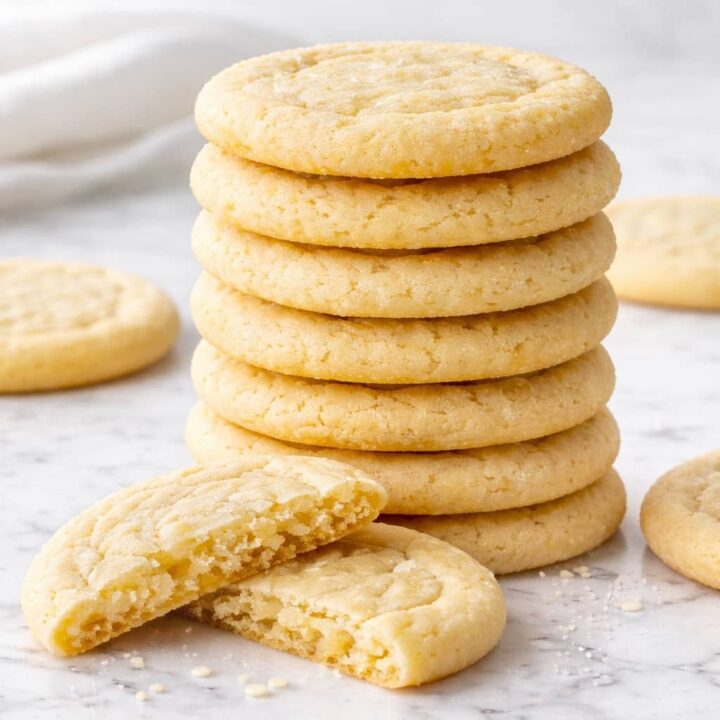
Rolled smooth and baked just until pale gold at the edges, sugar cookies have that clean, classic bakery look that makes them especially beautiful on cookie trays, gift boxes, and holiday dessert tables.
Sometimes the first batch disappears before it even cools completely — and that’s usually how you know you got them just right.
If you’re building a classic cookie collection, you might also love our soft chocolate chip cookies recipe for a timeless favorite.
What Is a Sugar Cookie?
A sugar cookie is a classic butter-based cookie made with simple ingredients like flour, sugar, butter, eggs, and vanilla. It is known for its balanced texture, with lightly crisp edges and soft, tender centers, and a clean, sweet flavor that highlights butter and vanilla.
Unlike richer or more complex cookies, sugar cookies are designed to be versatile. The dough can be rolled and cut into shapes for decorating, or baked as simple rounds for everyday treats. Their structure is stable enough to hold defined edges, while still remaining soft and delicate after baking.
Because of this balance, sugar cookies are commonly used for holidays, celebrations, and decorative baking, but they are just as popular as a simple, comforting homemade cookie. Their neutral flavor also makes them ideal for pairing with icing, glazes, or flavored additions like citrus zest or spices.
Sugar Cookie Recipe at a Glance
| Texture | Soft, tender centers with lightly crisp, golden edges |
| Flavor | Buttery, lightly sweet, with warm vanilla notes |
| Difficulty | Easy, beginner-friendly |
| Time | About 55 minutes (including chilling) |
| Servings | 24 cookies |
| Method | Creaming method + short chill + quick bake |
| Best For | Decorating, holidays, gifting, everyday baking |
In short: A classic sugar cookie recipe that delivers soft, buttery centers, clean edges for decorating, and consistent results with minimal effort.
What Makes This Sugar Cookie Recipe Work
A great sugar cookie recipe isn’t just about ingredients — it’s about balance. The texture, spread, and final structure all depend on how moisture, fat, flour, and heat interact during baking. This recipe is designed to control each of these elements so the cookies bake consistently soft, tender, and evenly shaped.
Moisture Balance
The combination of butter and egg provides just enough moisture to keep the cookies soft without making them cakey. The sugar helps retain that moisture during baking, so the centers stay tender even after cooling.
A small but important detail: slightly underbaking the cookies allows residual heat to finish setting the centers gently, preventing them from drying out.
Structure Control
Flour builds the structure through gluten formation, but in this recipe, it’s carefully balanced so the cookies hold their shape without becoming dense or tough.
Mixing just until combined is key here. Overmixing develops too much gluten, which can make the cookies firmer instead of soft and tender.
Fat Behavior
Butter plays a dual role — it adds richness and controls how the cookies spread. Starting with properly softened butter allows for good aeration during creaming, while the chilling step firms the fat so the cookies don’t spread too quickly in the oven.
If the butter is too warm, the dough will feel soft and the cookies may lose their shape before the structure sets.
Heat & Baking Timing
A moderate oven temperature (350°F / 175°C) allows the cookies to bake evenly without over-browning. The edges set first, creating a light golden frame, while the centers remain soft and finish baking from residual heat after being removed from the oven.
This timing is what gives sugar cookies their signature contrast: lightly crisp edges with soft, tender centers.
This is the kind of recipe people come back to again and again because it simply works every time.
Why These Sugar Cookies Stay Soft and Chewy
Sugar cookies may seem simple, but their texture is the result of a few key reactions happening at the right time and temperature. Understanding these small shifts is what makes the difference between cookies that spread too much, bake up dry, or come out perfectly soft and balanced.
Butter Melting & Spread Control
As the cookies begin to bake, the butter melts first. This is what causes the dough to spread. If the butter is too warm from the start, the cookies will spread too quickly before the structure has time to set.
That’s why chilling the dough matters — it slows down how fast the butter melts, giving the cookies time to hold their shape while baking.
Sugar & Texture Formation
Sugar does more than sweeten. As it heats, it helps create those lightly crisp edges while also limiting gluten development, which keeps the cookies tender instead of tough.
It also plays a role in moisture retention, which is why sugar cookies can stay soft for days when baked correctly.
Gluten Development (Controlled)
Flour forms gluten when mixed with liquid, giving the cookies structure. In this recipe, gluten is intentionally kept minimal by mixing only until the dough comes together.
This keeps the cookies soft and delicate rather than firm or bread-like.
Residual Heat & Final Texture
One of the most important (and often overlooked) details is what happens after baking. When you remove the cookies from the oven while the centers still look slightly soft, residual heat continues to cook them gently.

This is what locks in that soft, tender center instead of drying it out.
For another chewy classic, our oatmeal cookie recipe follows a similar balance of moisture and structure to keep the centers tender.
Why This Recipe Is Different
Unlike overly cakey sugar cookies, this version keeps the ratio balanced so the centers stay tender without becoming dense. The short chill gives structure without turning the cookies hard.
This approach keeps the texture consistent, so every batch bakes evenly without turning dense or dry.
How This Recipe Compares to Drop Sugar Cookies
Unlike drop sugar cookies, this dough is designed to roll cleanly and hold its shape when baked. The short chill ensures structure without sacrificing softness.
Drop-style sugar cookies typically spread more and require less handling, while this version provides cleaner edges for decorating and stacking.
Why Sugar Cookies Spread (And How to Control It)
If your sugar cookies spread too much or lose their shape, one of these is usually the cause:
Butter too warm
Very soft or melted butter causes the dough to spread quickly in the oven.
Not enough flour
Always measure flour using the spoon-and-level method to avoid dense or flat cookies.
Skipping the chill time
Chilling solidifies the butter and reduces excessive spreading.
Overmixing
Too much mixing develops gluten, which changes texture and structure.
If you’re curious how mixing affects gluten development and cookie texture, this beginner’s guide to gluten from King Arthur Baking explains how structure forms in baked goods.
For clean edges and thicker cookies, chill the dough for at least 30 minutes before baking.
Ingredients That Make a Difference (What Actually Matters)
Not all sugar cookies are the same. These ingredients matter most:
Butter (Texture + Spread Control)
Butter is the foundation of both flavor and texture. Properly softened butter creams smoothly with sugar, creating tiny air pockets that help keep the cookies tender.
If the butter is too cold, it won’t cream properly. If it’s too soft or slightly melted, the cookies will spread too quickly in the oven.
👉 Practical insight: The butter should feel soft when pressed, but still hold its shape — not shiny or greasy.


Sugar (Structure + Moisture Retention)
Granulated sugar does more than sweeten. It helps create lightly crisp edges while also limiting gluten development, keeping the cookies soft instead of firm.
It also helps retain moisture, which is why these cookies stay tender even after a day or two.
👉 Substitution: You can replace a small portion with brown sugar for a slightly softer, more moist cookie, but it will reduce edge crispness and change the classic flavor.
Flour (Structure Balance)
Flour provides structure through gluten, but in this recipe, the amount is carefully balanced to avoid dense or dry cookies.
Too much flour will make the cookies thick and dry, while too little will cause excessive spreading.
👉 Important: Always use the spoon-and-level method for accuracy.
Egg (Binding + Softness)
The egg binds the dough and adds just enough moisture to keep the interior soft without making the cookies cakey.
It also contributes to structure during baking.
Baking Powder (Light Lift)
Baking powder gives a subtle lift, helping the cookies stay soft and slightly airy without becoming puffy or cake-like.
Vanilla Extract (Flavor Depth)
Vanilla enhances the buttery base and gives sugar cookies their classic warm aroma.
👉 Small upgrade: A higher-quality vanilla makes a noticeable difference in such a simple recipe.
Salt (Flavor Balance)
Salt sharpens the sweetness and balances the overall flavor.
Even a small amount makes the cookies taste more complete and less flat.
If you love butter-forward cookies, our shortbread cookie recipe highlights that same rich, delicate crumb with an even more pronounced buttery finish.
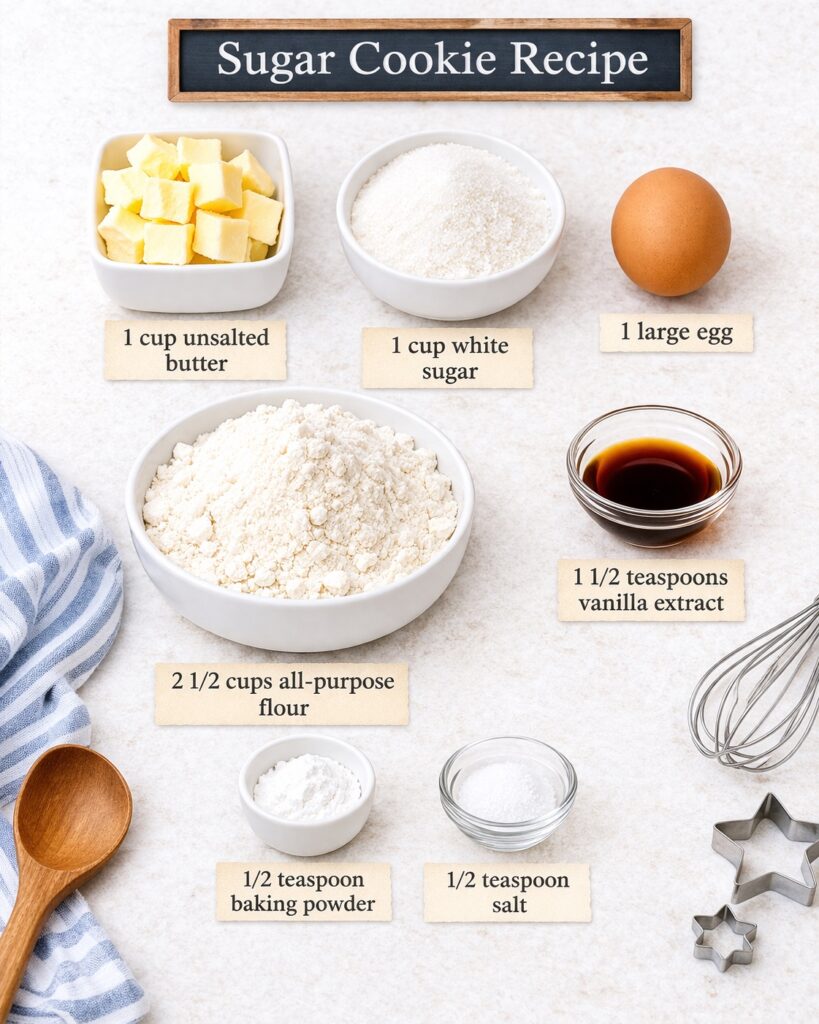
Ingredients for Sugar Cookie Recipe
This simple ingredient list keeps the flavor clean and buttery, allowing the vanilla and sugar to shine.

- 1 cup (225g) unsalted butter, softened
- 1 cup (200g) white sugar
- 1 large egg
- 1½ teaspoons vanilla extract
- 2½ cups (315g) all-purpose flour
- ½ teaspoon baking powder
- ½ teaspoon salt
Together, these ingredients create a sugar cookie recipe that bakes evenly, holds its shape, and stays soft for days without becoming dry or overly dense.
- PANTRY STAPLE: Our most versatile flour for any recipe that simply calls for flour; Brings out the best in your baked go…
- BAKING ESSENTIAL: Strong enough for high rising yeast breads, mellow enough for pizza dough, cookies, cakes, and flaky p…
- CRUST TO CRUMB: Consistent, all purpose flour that bakers can count on
Essential Kitchen Tools
- Mixing Bowls: You need at least one large bowl for combining your cookie dough.
- Electric Mixer: A hand mixer or a stand mixer is best for creaming the butter and sugar together until the mixture is light and fluffy.
- Measuring Cups and Spoons: You will need both dry measuring cups and liquid measuring cups for precise measurements of flour, sugar, and extracts.
- Rolling Pin: This is essential for rolling the cookie dough to an even thickness before cutting out your shapes.
- Cookie Cutters: Use your favorite shapes for fun, festive cookies.
- Baking Sheets: You will need at least one standard, rimmed baking sheet.
- Parchment Paper or Silicone Baking Mat: Lining your baking sheets prevents the cookies from sticking and makes cleanup very easy.
- Wire Cooling Rack: A wire cooling rack is necessary for letting the cookies cool completely after they come out of the oven.
- Spatula: A rubber spatula helps you scrape the bowl to ensure all ingredients are mixed in.
Optional but Helpful Tools
- Flour Sifter or Whisk: Useful for aerating your flour before measuring it.
- Cookie Spatula: A thin, flat spatula makes transferring the delicate cut-out cookies to the baking sheet much easier.

How To Make Sugar Cookies
1. Cream the butter and sugar
In a large bowl, beat the softened butter and sugar for 2–3 minutes, until light, fluffy, and slightly paler in color.
Visual cue: The mixture should look creamy and airy, not dense or greasy.
Tip: If it still looks heavy or grainy, keep mixing — this step builds the base texture of the cookies.
2. Add egg and vanilla
Mix in the egg and vanilla extract until fully combined. Scrape down the sides of the bowl to ensure everything is evenly incorporated.
Visual cue: The mixture should look smooth and glossy, without streaks.
3. Combine dry ingredients
In a separate bowl, whisk together the flour, baking powder, and salt until evenly distributed.
Tip: This prevents uneven rising and ensures consistent texture throughout the cookies.
4. Form the dough
Gradually add the dry ingredients to the wet mixture, mixing just until the dough comes together.

Visual cue: The dough should look soft and cohesive, not sticky or overly dry.
Important: Stop mixing as soon as no dry streaks remain to avoid developing too much gluten.
5. Chill the dough
Cover the dough and refrigerate for at least 30 minutes.
Why it matters: Chilling firms the butter, which helps control spreading and makes the dough easier to handle.
If your kitchen is warm, the dough may feel soft even after mixing — chilling fixes that instantly.
6. Roll and shape
Preheat the oven to 350°F (175°C). Roll the dough on a lightly floured surface to about ¼ inch thickness, then cut into shapes.

Visual cue: The dough should roll smoothly without sticking or tearing.
Tip: If the dough starts sticking or feels too soft, chill it again for 10–15 minutes.
7. Bake
Place cookies on a parchment-lined baking sheet and bake at 175°C (350°F) for 8–10 minutes.

Visual cue: The edges should look set and lightly golden, while the centers still appear slightly soft.
Critical insight: Do not wait for full browning — the cookies will continue setting from residual heat after baking.
Optional adjustment:
- softer cookies → bake at 170°C
- slightly crisp edges → keep 175°C

8. Cool
Let the cookies cool on the baking sheet for about 5 minutes, then transfer them to a wire rack.
Visual cue: The cookies will firm up slightly as they cool while staying soft in the center.
They may look underbaked at first — that’s exactly what keeps them soft.


- QUALITY STAINLESS STEEL CONSTRUCTION: Made from food grade stainless steel instead of metal plating or coating, the gril…
- OVEN SAFE AND EASY TO CLEAN: Our wire racks have excellent heat resistance and can withstand temperatures up to 575°F. T…
- UNIQUE PRODUCT DESIAGN: The one-piece 4 raised feet of baking rack are specially designed to allow for optimal air circu…
How to Tell When Sugar Cookies Are Done
Knowing exactly when to take sugar cookies out of the oven makes all the difference between soft, tender cookies and dry ones. Instead of relying only on time, look for these visual cues:
- Edges are set and lightly golden — a soft golden color forms around the edges, but not deep brown
- Centers still look slightly soft — the middle should not look fully baked or dry
- Surface looks matte, not shiny — the dough loses its raw sheen as it sets
- Cookies hold their shape — the edges look defined, not melted or overly spread
- Bottom is lightly golden — a quick check underneath shows a pale golden base
Important: Sugar cookies continue to bake from residual heat after leaving the oven. Pulling them out when the centers still look slightly soft is what keeps them tender and prevents overbaking.

Expert Tips for Perfect Sugar Cookies
- Use properly softened butter, not overly soft butter – it should press easily but still hold its shape. If it looks shiny or greasy, it’s too warm and will cause spreading.
- Stop mixing as soon as the dough comes together – overmixing develops gluten and leads to firmer, less tender cookies.
- Chill longer for sharper edges – while 30 minutes is enough, chilling for up to 1 hour gives cleaner cut-out shapes and thicker cookies.
- Roll dough evenly for consistent baking – uneven thickness leads to some cookies overbaking while others stay underdone.
- Bake one tray at a time – this ensures even heat distribution and more predictable results.
- Watch the edges, not the timer – lightly golden edges with soft centers are the best indicator of doneness.
- Let cookies rest before moving – they are delicate right out of the oven and firm up as they cool.
Mastering these small techniques turns a simple sugar cookie recipe into a bakery-style result at home.
Common Sugar Cookie Mistakes (And How to Fix Them)
- Cookies spread too much
Cause: Butter was too warm or dough wasn’t chilled long enough.
Effect: Flat cookies with little structure.
Fix: Chill the dough for at least 30 minutes and make sure the butter is soft, not greasy. - Cookies turn out dry
Cause: Too much flour or overbaking.
Effect: Crumbly texture with little softness.
Fix: Measure flour using the spoon-and-level method and remove cookies when centers still look slightly soft. - Cookies are tough instead of soft
Cause: Overmixing the dough.
Effect: Dense, firm texture instead of tender crumb.
Fix: Mix just until the dough comes together with no visible dry streaks. - Cookies lose their shape
Cause: Dough too warm or rolled too thin.
Effect: Edges blur and shapes distort during baking.
Fix: Chill the dough again if needed and keep thickness around ¼ inch. - Cookies taste flat or too sweet
Cause: Not enough salt or low-quality vanilla.
Effect: One-dimensional flavor.
Fix: Add a pinch of salt or use a better-quality vanilla extract for depth.
Sugar Cookie Texture & Behavior Guide
| Stage | What You Should See | What It Means |
| After creaming butter & sugar | Light, fluffy, pale mixture | Air has been incorporated properly – softer cookie texture |
| After adding egg | Smooth, slightly glossy mixture | The emulsion is stable – this supports even texture and structure |
| Finished dough | Soft, cohesive dough that is not sticky or crumbly | The flour balance is right – the dough should roll easily and bake evenly |
| After chilling | Firm, cool, easy-to-handle dough | The butter has firmed up – this helps control spreading in the oven |
| Mid-bake | Edges look set while centers still appear slightly soft | The structure is setting while the interior stays tender |
| Fresh out of oven | Lightly golden edges with pale centers | The cookies are baked at the right point – they will continue setting from residual heat |
| Fully cooled | Soft center with lightly crisp edges | The final texture is balanced and the cookies are ready to serve or decorate |
If your dough or cookies do not match these visual cues, one of the key variables – usually butter temperature, flour measurement, or baking time – likely needs a small adjustment.

Sugar Cookie Comparison Guide
| Type | Texture | Structure | Best Use |
| This recipe (balanced sugar cookies) | Soft centers with lightly crisp edges | Holds shape well without being dry | Decorating, cut-out cookies, everyday baking |
| Drop sugar cookies | Softer, more spread, less defined edges | Loose structure | Quick baking, no rolling required |
| Cakey sugar cookies | Thicker, softer, more cake-like | More aerated, less dense | Soft bite, less suitable for decorating |
| Crisp sugar cookies | Thin and crunchy | Firm structure | Snacking, long shelf life |
In short: This sugar cookie recipe is designed to sit right in the middle — soft but structured, easy to decorate, and consistent across every batch.
That balance is what makes this sugar cookie recipe especially versatile: soft enough to feel tender, structured enough to decorate, and simple enough to make repeatedly without surprises.
How to Serve Sugar Cookies
These sugar cookies are at their best when they’re freshly baked, lightly golden at the edges, and still soft in the center. Served slightly warm or fully cooled, they have that classic buttery aroma and delicate texture that makes them feel comforting and familiar in any setting.
For a simple everyday treat, serve them with a cup of coffee, tea, or a glass of cold milk. Their clean vanilla flavor pairs easily with almost anything, making them perfect for slow mornings, afternoon breaks, or quiet moments at home.
If you’re baking for holidays or gatherings, these cookies are ideal for decorating. Use royal icing, glaze, or sanding sugar to create festive designs, then arrange them on a platter or package them into gift boxes. Their smooth surface and stable shape make them especially suited for clean, polished finishes.

Save this recipe for holiday baking trays, cookie boxes, or anytime you need a reliable, classic cookie that always looks and tastes just right.
Make a batch when you want something simple, beautiful, and consistently good — the kind of cookie that works for both special occasions and everyday baking.
Stacked with a light dusting of sugar or decorated with glossy icing, these cookies always look as good as they taste.
Easy Sugar Cookie Variations
- Lemon Sugar Cookies — Add 1–2 teaspoons of fresh lemon zest to the dough for a bright, fresh flavor that pairs beautifully with the buttery base.
- Almond Sugar Cookies — Replace half of the vanilla extract with almond extract for a slightly nutty, bakery-style aroma.
- Soft Sprinkle Cookies — Roll the dough in sanding sugar or colorful sprinkles before baking for a simple decorative finish without icing.
- Vanilla Glazed Cookies — Drizzle or dip cooled cookies in a simple powdered sugar glaze for a soft, sweet coating.
- Holiday Cut-Out Cookies — Roll slightly thicker and chill longer for cleaner edges when using cookie cutters and detailed designs.
These sugar cookies are perfect plain, but also ideal for:
- Rolling in sanding sugar before baking
- Using royal icing for holiday decorating
For cut-out shapes, chill the dough slightly longer and roll between parchment sheets.
For another decorative option with a soft center, our thumbprint cookies are perfect for filling with jam or chocolate.
How to Decorate Sugar Cookies for Christmas
Because the dough bakes with controlled spread and defined edges, it works especially well for icing, stacking, and detailed cut-out designs.
- Choose Your Icing: Use royal icing or a simple powdered sugar glaze. Divide into small bowls and add food coloring for red, green, gold, or other holiday shades.
- Outline and Flood: For royal icing, start by outlining the cookie edges with a piping bag. Then fill the center (“flood”) with thinner icing for a smooth surface.
- Add Holiday Details: Use sprinkles, edible glitter, or sanding sugar in festive colors. Pipe designs like snowflakes, Christmas trees, candy canes, or stars.
- Layered Effects: Let the first layer dry for 15-30 minutes before adding details on top to prevent colors from blending.
- Finishing Touches: Add small edible pearls, chocolate chips, or colored sugar for extra sparkle. Let cookies dry completely before storing.
- Storage: Keep decorated cookies in an airtight container at room temperature for up to a week, or freeze for longer storage.

If you’re planning a full holiday cookie tray, our Italian Christmas cookies add a traditional, festive touch alongside classic sugar cookies.
Storage & Make Ahead
These sugar cookies store well and keep their soft, tender texture for several days when handled properly. The key is protecting them from air exposure, which is what causes them to dry out.

How to Store Baked Cookies
- Store in an airtight container at room temperature for up to 4 days
- Keep away from heat or direct sunlight to prevent drying
- For extra softness, you can place a small piece of bread in the container — it helps retain moisture
How to Freeze Sugar Cookies
- Freeze baked cookies for up to 2 months in a sealed container
- Layer with parchment paper to prevent sticking
- Thaw at room temperature before serving
How to Freeze Cookie Dough
- Shape the dough into balls or flatten into disks before freezing
- Store in an airtight bag or container for up to 2 months
- Bake directly from frozen, adding 1–2 extra minutes to the baking time
Make Ahead Tips
- The dough can be refrigerated for up to 48 hours before baking
- If the dough becomes too firm, let it sit at room temperature for 5–10 minutes before rolling
- For best results, bake fresh for the softest texture

- 100% Leak-proof: Guaranteed no-spill seal and secure latches
- Crystal-clear Tritan Built: Stain-resistant and odor-resistant material for a clear view of contents
- Lightweight & Sturdy: Easy to carry, yet durable for everyday use
Frequently Asked Questions
What makes this sugar cookie recipe soft and chewy?
The combination of properly softened butter, balanced flour, and slightly underbaking keeps the cookies soft. Removing them when the centers still look slightly soft allows residual heat to finish baking them gently.
Should I chill sugar cookie dough?
Yes. Chilling the dough for at least 30 minutes firms the butter, helps control spreading, and makes the dough easier to roll and shape.
How do I know when sugar cookies are done?
The edges should look set and lightly golden, while the centers still appear slightly soft. They will continue to firm up as they cool.
Can I freeze sugar cookie dough?
Yes. You can freeze the dough for up to 2 months. Shape it into balls or disks, then bake directly from frozen, adding 1–2 extra minutes to the baking time.
Why did my sugar cookies spread too much?
This usually happens when the butter is too warm or the dough wasn’t chilled long enough. Chilling the dough helps control spreading and improves structure.
Can I make sugar cookies ahead of time?
Yes. The dough can be refrigerated for up to 48 hours, and baked cookies can be frozen for longer storage. This makes the recipe ideal for holidays and batch baking.
How thick should I roll sugar cookie dough?
For best results, roll the dough to about ¼ inch thickness. This helps the cookies bake evenly and keeps the centers soft while maintaining structure.
More Cookie Recipes You’ll Love
If you enjoyed this sugar cookie recipe, there are a few other cookie recipes on the blog that bring a similar texture, baking style, or classic homemade feel. Some are very close in structure, while others offer a slightly different variation you might want to try next.
Quick picks: If you want something closest in texture, try Snickerdoodle Cookies. For a more classic buttery variation, go for Shortbread Cookies.
Closest in Texture & Style
- Snickerdoodle Cookies – soft, tender cookies with lightly crisp edges and a classic bakery-style texture.
- Thumbprint Cookies – buttery and soft with a delicate center, perfect if you enjoy shaped or decorated cookies.
- Italian Christmas Cookies – soft, lightly sweet cookies often decorated with icing, similar in style to classic sugar cookies.
Classic & Foundational Recipes
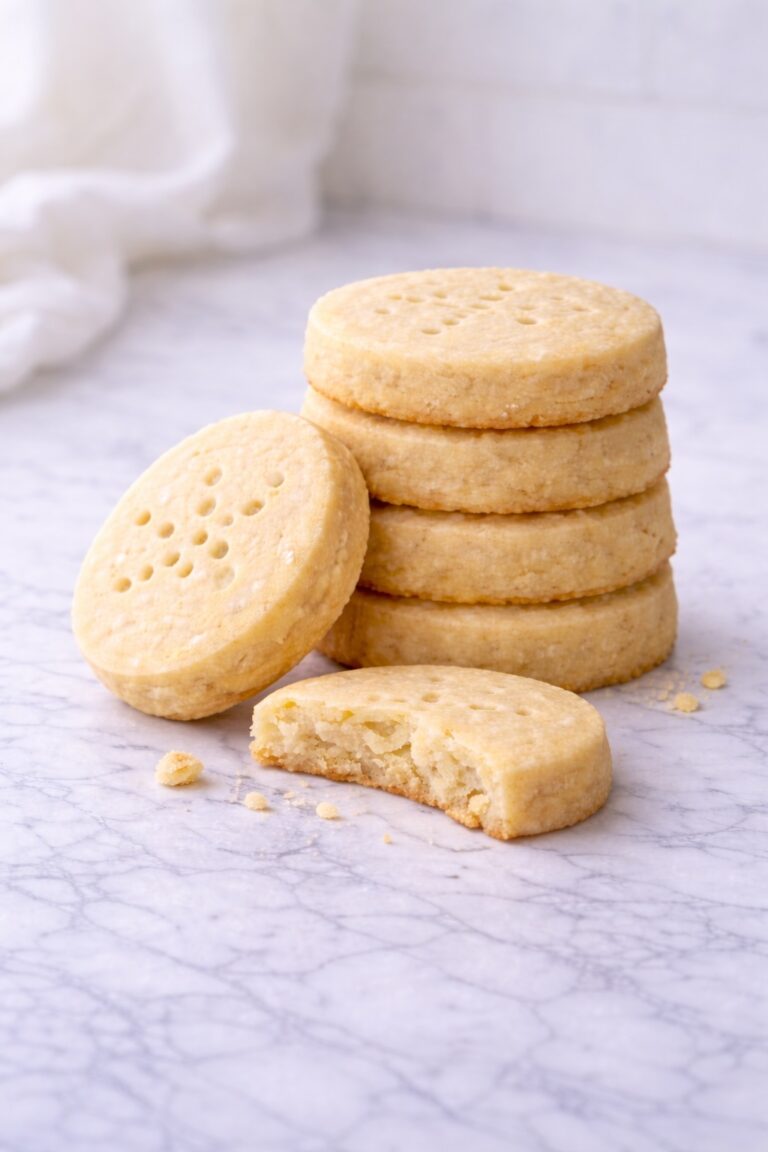
- Shortbread Cookies – rich, buttery, and simple, with a more delicate crumb and minimal ingredients.
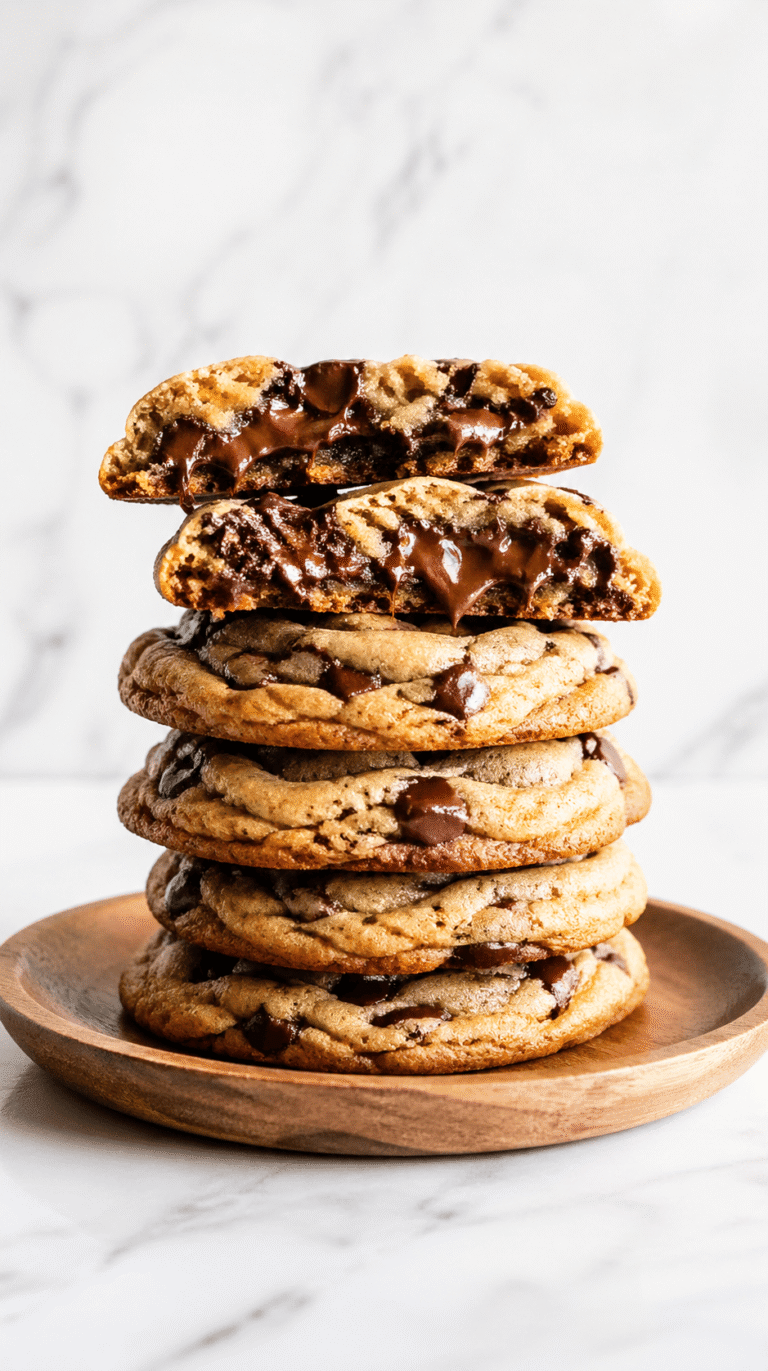
- Chocolate Chip Cookies – a timeless homemade cookie with a softer center and a more indulgent, slightly gooey texture.
Variations & Creative Options
- Funfetti Cookies – a colorful, playful variation that keeps the same soft texture with a festive twist.
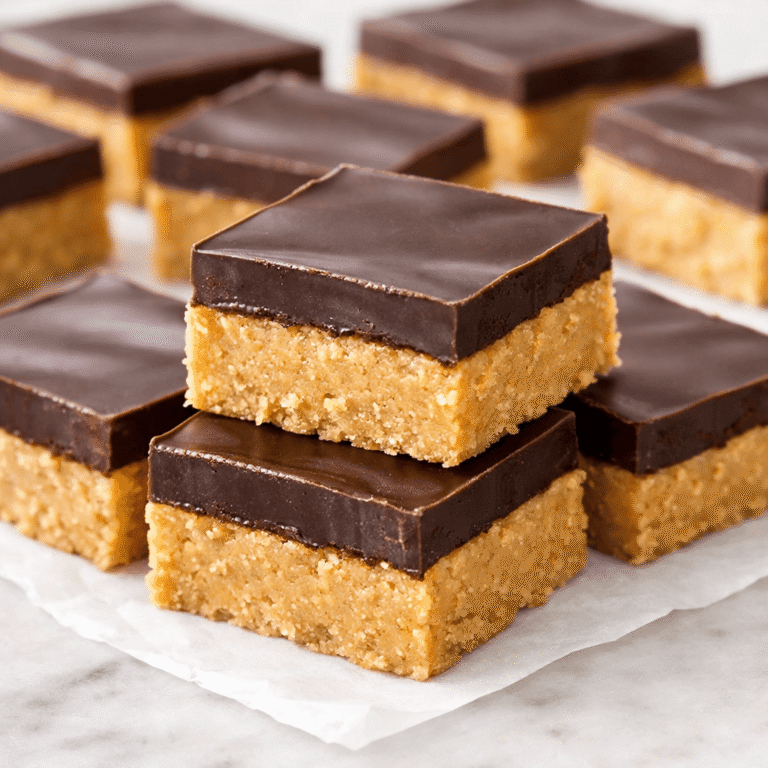
- Peanut Butter Cookies – a richer, more flavorful cookie with a slightly denser texture and classic criss-cross pattern.
Each of these recipes follows the same idea: simple ingredients, reliable results, and that familiar homemade feel that makes them easy to come back to again and again.
Sugar Cookie Recipe Summary
This sugar cookie recipe is designed to deliver consistent, bakery-style results with minimal effort. Using a balanced ratio of butter, sugar, and flour, the cookies bake up with soft, tender centers and lightly crisp edges while still holding their shape for decorating.
The dough comes together quickly, chills just enough to control spreading, and bakes in under 10 minutes, making it reliable for both everyday baking and special occasions. Small details like proper butter temperature, minimal mixing, and slightly underbaking are what keep the texture soft and the flavor clean and buttery.
Whether you’re making simple round cookies or detailed cut-out shapes, this is a classic sugar cookie recipe you can return to again and again with the same consistent results.
Final Thoughts
There’s something quietly comforting about a well-made sugar cookie. It doesn’t rely on bold flavors or complicated techniques — just simple ingredients, balanced the right way, and a few small details that make all the difference.
Once you get a feel for the dough and learn to recognize those visual cues — lightly golden edges, soft centers, and that subtle vanilla aroma — the process becomes almost intuitive. It’s the kind of recipe that feels easier every time you make it.
Whether you’re baking for holidays, sharing cookies with family, or just making a small batch for yourself, this is one of those recipes that fits naturally into everyday life. Simple, reliable, and always worth coming back to.
Sugar Cookie Recipe
Soft and chewy sugar cookies with lightly crisp edges and a buttery vanilla finish. This easy sugar cookie recipe chills briefly and bakes in 8–10 minutes, making it perfect for decorating or everyday baking.
Ingredients
- 1 cup (225g) unsalted butter, softened
- 1 cup (200g) white sugar
- 1 large egg
- 1½ teaspoons vanilla extract
- 2½ cups (315g) all-purpose flour
- ½ teaspoon baking powder
- ½ teaspoon salt
Instructions
- Cream butter and sugar: In a large bowl, beat softened butter and sugar until light and fluffy, 2–3 minutes.
- Add egg and vanilla: Mix in the egg and vanilla until fully combined. Scrape down the bowl.
- Whisk dry ingredients: In a separate bowl, whisk flour, baking powder, and salt.
- Form the dough: Gradually add dry ingredients to the wet mixture and mix just until combined (do not overmix).
- Chill: Cover and refrigerate the dough for at least 30 minutes to control spread.
- Roll and cut: Preheat oven to 350°F (175°C). Roll dough to about ¼ inch thickness on a lightly floured surface and cut shapes.
- Bake: Bake on a parchment-lined sheet for 8–10 minutes, until edges are lightly golden and centers look slightly soft.
- Cool: Cool on the baking sheet for 5 minutes, then transfer to a wire rack.
Notes
- Don’t overbake: Pull cookies when centers look slightly soft; they finish setting as they cool.
- Measure flour correctly: Spoon and level for consistent texture.
- Chill time matters: 30 minutes helps cookies hold shape and prevents excess spread.
- Thicker cookies: Chill up to 1 hour and roll slightly thicker.
Recommended Products
As an Amazon Associate and member of other affiliate programs, I earn from qualifying purchases.


Nutrition Information:
Yield: 24 cookies Serving Size: 1 cookieAmount Per Serving: Calories: 150Total Fat: 7gCarbohydrates: 18gSugar: 10gProtein: 1.5g
Nutrition information is automatically calculated and should be considered an estimate only. Actual values may vary depending on specific ingredients, brands used, and portion sizes.
12 Sweet Favourites — Yours, Free 🍰
Tiramisù, no-bake cheesecake, the perfect chocolate chip cookie & 9 more reader-loved desserts — gathered into one beautiful free recipe book. From my kitchen to yours.
No spam, just sweet things. Unsubscribe anytime.