Angel Food Cake Recipe (Tall, Cloud-Light & Fine-Crumbed)
🎁 FREE E-BOOK: 12 Sweet Favorites — reader-loved desserts in one beautiful recipe book.
This Angel Food Cake recipe rises into a tall golden ring with a pale ivory center, a fine cloud-like crumb, and the delicate spring that makes each slice feel almost weightless. Vanilla keeps the flavor clean and familiar, while the thin caramelized exterior gives the soft interior just enough contrast.

There is something quietly special about serving a cake this elegant without layers, frosting, or elaborate decoration. Its height, central ring, and airy cut surface already create the kind of classic homemade presentation that feels equally at home at a summer table or a simple afternoon gathering.
This is a recipe worth returning to because the high-risk moments are defined clearly: when to begin adding sugar, where to stop whipping, how to fold without losing the foam, and how to recognize a fully set cake before it leaves the oven. Those visible checkpoints make the process easier to judge while you are actually baking.
The essential controls are a clean ungreased aluminum tube pan, exactly 1 1/2 cups (360 g) of egg whites, carefully measured sugar and cake flour, and restraint at every stage. Angel Food Cake rewards precision, but it does not require aggressive mixing or complicated decoration.
Quick Angel Food Cake Overview
This recipe makes one tall 10-inch Angel Food Cake with a fine, gently elastic crumb and enough structure to release and slice cleanly after complete inverted cooling.
| Detail | What to Know |
|---|---|
| Method | Whipped egg-white foam, folded with sifted cake flour and baked in an ungreased tube pan |
| Texture | Cloud-light, fine-crumbed, tender, and delicately springy |
| Flavor | Clean vanilla with lightly toasted sugar notes |
| Pan | 10 × 4-inch (25 × 10 cm) uncoated aluminum tube pan, about 16-cup capacity |
| Prep Time | About 30 minutes |
| Bake Time | 40–45 minutes at 325°F (165°C) |
| Cooling Time | At least 2 hours, fully inverted |
| Total Time | About 3 hours 10–15 minutes |
| Yield | One 10-inch cake, 12 slices |
| Difficulty | Technique-sensitive; best approached by visual and temperature cues |
Why This Angel Food Cake Recipe Works
This version protects a light, fine crumb by controlling the ingredients that build and stabilize the foam, then defining exactly where mixing, folding, and baking should stop.
- Weight-first egg whites: Measuring 360 g removes the uncertainty created by eggs that vary in size.
- A purposeful sugar split: Two-thirds of the sugar stabilizes the meringue, while one-third travels with the flour for more even distribution during folding.
- Flexible rather than rigid peaks: The glossy medium-soft to medium endpoint preserves expansion room instead of pushing the foam toward a dry, brittle state.
- Four controlled flour additions: Smaller additions reduce the amount of folding needed at any one time and help prevent dry pockets or collapsed batter.
- Doneness confirmed four ways: Color, dry cracks, springback, and a 205–206°F (96–97°C) center temperature protect against both a gummy underbake and a cottony overbake.

Why You’ll Love This Angel Food Cake
This cake is a beautiful choice when you want a classic vanilla dessert that feels light on the plate, looks impressive without frosting, and can be paired with whatever fruit is best in season.
- Light but sliceable: The crumb feels airy and tender while still holding a generous wedge.
- Simple vanilla profile: Fresh berries, softly whipped cream, lemon curd, or a light sugar dusting can change the presentation without competing with the cake.
- Make-ahead friendly: The unfrosted cake can be baked one day before serving and kept whole at room temperature.
- No frosting required: The golden shell and pale crumb provide their own visual contrast.
- Clear control points: Every stage includes a visible, tactile, or measured endpoint so you are not relying on time alone.
The Science Behind a Tall, Stable Angel Food Cake
Angel Food Cake rises through one delicate structural system: egg whites trap air, sugar steadies the bubbles, cake flour helps the crumb set, and the pan supports the cake until cooling is complete.
I used to think the safest way to make angel food cake was to whip the egg whites until the peaks stood completely straight. What changed my approach was understanding that a glossy, flexible meringue still has room to expand in the oven; once the foam looks dry and rigid, that margin is gone.
Clean foam comes first. Egg-white proteins need a grease-free environment to stretch around air bubbles. Even a trace of yolk or fat can interfere, which is why the American Egg Board’s meringue guidance calls for clean glass or metal equipment, cream of tartar for stability, and gradual sugar addition only after the whites begin to foam.
Sugar controls more than sweetness. Added gradually, it helps stabilize the expanding network and encourages a finer bubble structure. Adding it too early or too quickly weighs down a weak foam; withholding it until rigid peaks leaves less room for the meringue to adapt.
The ungreased pan becomes part of the structure. The batter must cling to bare aluminum as it rises and remain attached when the pan is inverted. Grease and nonstick coatings remove that grip, while a Bundt pan adds a coating and shape that make safe inverted cooling and clean release unreliable.
Heat sets the cake, but inversion protects it. The egg proteins and flour structure continue stabilizing as the hot cake cools. Turning the pan upside down immediately keeps the still-delicate crumb from compressing under its own weight.
Ingredients for Angel Food Cake
Angel Food Cake uses only a few ingredients, so their exact amounts and preparation matter. For the most consistent foam and crumb, let the metric weights control the egg whites, sugar, and cake flour.
Ingredient List
Measure the cake ingredients in this order, keeping the optional almond extract clearly separate from the required vanilla recipe.
- 1 1/2 cups granulated sugar (300 g), processed briefly into superfine sugar and divided
- 1 cup cake flour (120 g), spooned and leveled
- 1/4 teaspoon fine sea salt (1.5 g)
- 1 1/2 cups large egg whites (360 g), from about 12 large shell eggs, at 65–70°F (18–21°C)
- 1 1/2 teaspoons cream of tartar (approximately 5 g)
- 2 teaspoons pure vanilla extract (10 ml)
- 1/4 teaspoon almond extract (1 ml), optional
For serving, add confectioners’ sugar, fresh berries, berry sauce, lemon curd, or softly whipped cream as desired. These toppings are optional and are not part of the cake recipe.

Ingredient Notes for Better Volume and Texture
The most important ingredient choices protect the foam before it ever reaches the oven, so this is not the place for casual flour, sugar, or egg-white substitutions.
- Fresh shell egg whites: Separate cold eggs one at a time, then warm the clean whites to 65–70°F (18–21°C). Carton whites are not the preferred choice; if you attempt them, the label must state that they are suitable for whipping or meringue, and the ingredient list should contain no gums, salt, or other foam-limiting additives. The American Egg Board’s egg-white handling guidance also notes that packaged or pasteurized whites may not foam like fresh shell whites.
- Granulated sugar: Processing the crystals briefly helps them dissolve more smoothly. Reserve 200 g for gradual addition to the meringue and combine 100 g with the flour. Do not use confectioners’ sugar, reduce the sugar, or replace it with a sugar substitute in this recipe; sugar is structural here.
- Cake flour: Its lower protein level supports a finer, softer crumb. All-purpose flour, homemade flour-and-cornstarch blends, and gluten-free 1:1 blends are not direct swaps in this recipe. For a separate recipe designed around gluten-free flour, use this gluten-free Angel Food Cake.
- Cream of tartar: This acid helps stabilize the egg-white foam and extends the useful whipping window. Lemon juice and vinegar are not reliable direct replacements in this recipe.
- Vanilla and almond extract: Vanilla provides the main flavor. The small amount of almond extract is optional; omit it if you want a purely vanilla cake.

Kitchen Tools Needed
A few tools materially affect whether this cake can rise, cool, release, and slice correctly. The pan surface, bowl material, thermometer, and cutting tool are functional choices rather than decorative extras.
- 10-inch aluminum tube pan: Use one clean, dry, ungreased, uncoated 10 × 4-inch (25 × 10 cm) tube pan with about a 16-cup capacity. A removable bottom and cooling feet are preferred; if the pan has no feet, prepare a stable heatproof bottle or funnel for inversion. Do not use a Bundt or nonstick pan.
- Mixer and foam bowl: A stand mixer with a whisk attachment is efficient, although a strong electric hand mixer also works. Choose a large stainless-steel or glass bowl that can be cleaned completely; plastic can retain traces of grease.
- Scale, processor, sieve, and folding tools: Use a digital scale for the egg whites, sugar, and flour; a food processor for refining the sugar; a fine-mesh sieve; a dry bowl or parchment sheet; a large balloon whisk; and a flexible silicone spatula.
- Doneness, release, and slicing tools: Keep a thin skewer or narrow table knife for the single air-pocket pass, a fine-probe instant-read thermometer for the center, a long thin offset spatula or knife for release, and a long serrated knife or Angel Food Cake comb for clean slices.
Before You Begin: Six Checks That Protect the Rise
Complete these six checks before whipping begins, because Angel Food Cake batter cannot wait while the oven, pan, or dry ingredients are prepared.
- Place the oven rack in the lower third and preheat a conventional oven to 325°F (165°C) for at least 20 minutes.
- Confirm that the tube pan is bare aluminum, completely clean and dry, and has not been greased, sprayed, floured, or lined.
- Wash the stainless-steel or glass bowl and whisk with hot soapy water, rinse them, and dry them completely.
- Separate each cold egg into a small clean bowl before adding its uncontaminated white to the mixer bowl; weigh exactly 360 g.
- Refine and divide the sugar, sift the flour mixture, and place all folding tools within reach before the whites approach their final peak.
- Prepare the pan’s cooling feet or a stable heatproof bottle or funnel before the cake enters the oven.
What to Expect From This Angel Food Cake
This cake should look pale, airy, and naturally irregular rather than yellow, buttery, or perfectly uniform. Angel Food Cake is a fat-free foam cake leavened entirely by whipped egg whites; unlike chiffon cake, it contains no yolks or oil, and unlike white cake, it contains no butter or chemical leavener.
- The interior should be pale ivory with small-to-medium irregular pores, not a yellow chiffon crumb or a perfectly even manufactured sponge.
- The top develops dry cracks and a golden-blond to light golden-brown color; cracking alone is not a defect.
- A fully baked cake may settle slightly while cooling, but it should remain attached to the inverted pan and preserve most of its height.
- The thin outer crust can feel lightly chewy after cooling and will soften somewhat during airtight storage.
How to Make Angel Food Cake
Work through these nine stages in order, using the cue at the end of each step as the stopping point. Once the meringue is ready, fold, fill, and bake without unnecessary delay.
1. Prepare the Oven, Pan, and Egg Whites
Position a rack in the lower third of the oven and preheat to 325°F (165°C) for at least 20 minutes. Keep the 10-inch tube pan completely ungreased. Clean and dry the mixer bowl and whisk thoroughly. Separate cold eggs one at a time, weigh exactly 1 1/2 cups (360 g) of whites, and let them stand until they reach about 65–70°F (18–21°C).
What you should see: Clear, fluid egg whites with no yolk droplets, shell pieces, water, or grease in the bowl.
2. Make and Divide the Superfine Sugar
Process all 1 1/2 cups (300 g) of granulated sugar for 30–45 seconds, stopping while the crystals are visibly finer but not powdery. Let the sugar dust settle before opening the processor. Weigh 100 g into a dry bowl for the flour mixture and reserve the remaining 200 g for the meringue.
What you should see: Even crystals smaller than ordinary granulated sugar, with no confectioners’-sugar texture or compacted powder.
3. Sift the Cake Flour Mixture
Whisk the reserved 100 g of superfine sugar with 1 cup (120 g) cake flour and 1/4 teaspoon (1.5 g) fine sea salt. Sift the mixture through a fine-mesh sieve three times, keeping it dry and loose while you build the meringue.

What you should see: A homogeneous, lump-free mixture that falls in a light veil rather than dense clumps.
4. Whip to Glossy, Flexible Peaks
Beat the 360 g egg whites on medium-low for about 60 seconds, until fine foam covers the surface, then add 1 1/2 teaspoons cream of tartar. Continue on medium until the whites are opaque, expanded, and form very loose peaks that immediately fold back, about 2–3 minutes. With the mixer still on medium, add the reserved 200 g superfine sugar about 1 tablespoon at a time over 4–5 minutes. Continue only until glossy medium-soft to medium peaks form. Add 2 teaspoons vanilla and the optional 1/4 teaspoon almond extract; mix on low for 5–10 seconds.

What you should see: Smooth, glossy, fine-bubbled foam. When the whisk is lifted, the peak rises and bends at the tip; the ridges remain defined but never look dry, clumpy, grainy, or rigid.
Why this matters: Straight, dry peaks are not extra insurance. They indicate a less flexible foam that is harder to fold and has less room to expand evenly in the oven.
5. Fold the Flour Mixture in Four Additions
Sift one-quarter of the flour mixture evenly over the meringue. Cut a large balloon whisk down through the center, sweep along the bottom, and lift the foam over the dry ingredients while rotating the bowl. Stop when only a few pale streaks remain. Repeat with three more additions. After the final addition, use a flexible spatula for several broad bottom-to-top folds, scraping the bottom and sides once. Stop as soon as no dry pockets remain.

What you should see: Thick, luminous, highly aerated batter that falls from the spatula in soft mounds, with no flour pockets, white meringue lumps, or watery layer.
6. Fill the Tube Pan Without Tapping
Spoon the batter gently into the ungreased tube pan in alternating sections around the center tube instead of dropping it into one spot. Level the top lightly. Pass a thin skewer or narrow table knife through the batter once in a continuous shallow S-shaped or circular path to release only oversized pockets. Do not tap, bang, shake, or repeatedly stir the pan.

What you should see: Batter distributed evenly around the tube with a softly leveled top, preserved volume, and no visible voids against the pan wall.
7. Bake Until the Structure Is Fully Set
Bake at 325°F (165°C) for 40–45 minutes, keeping the oven closed for at least the first 35 minutes. Begin checking at 40 minutes. Insert a fine-probe thermometer midway between the center tube and outer wall without touching metal. Remove the cake when the major cues agree and the center reads 205–206°F (96–97°C); avoid carrying it beyond about 207°F (97°C).
What you should see: A fully risen golden-blond to light golden-brown cake with dry cracks, stable shoulders, no wet shine, and a surface that springs back promptly after a light touch.
8. Invert Immediately and Cool Completely
Turn the pan upside down as soon as it leaves the oven. Rest it on its feet or suspend it securely over a heatproof bottle neck or funnel so air can circulate and the cake does not touch the counter. Leave it undisturbed for at least 2 hours and until the pan and center tube feel completely room temperature.

What you should see: The cake remains attached while inverted and settles only slightly as the warm structure finishes setting.
9. Release and Slice Without Compressing the Crumb
Return the cooled pan upright. Run a long thin offset spatula or knife around the outer wall and center tube, keeping the blade against the metal. Lift out the removable center, then release the bottom the same way. Cut 12 slices with a gentle sawing motion using a long serrated knife or Angel Food Cake comb; never press straight down with a smooth chef’s knife.

What you should see: Tall slices with a pale ivory interior, fine irregular pores, clean edges, and no gummy compression along the base.
How to Tell When Angel Food Cake Is Done
Angel Food Cake is done only when its visual, tactile, and temperature cues agree. A timer or toothpick alone cannot confirm that the center has enough structure to survive inverted cooling.

| Cue | Fully Baked | Needs More Time |
|---|---|---|
| Color | Golden blond to light golden brown | Pale, especially around wet-looking cracks |
| Cracks | Dry and set with no glossy batter visible | Moist or shiny inside |
| Touch | Highest point feels firm and springs back promptly | Indentation remains or surface feels soft |
| Temperature | 205–206°F (96–97°C), probe clear of metal | Below the target range |
A temperature above approximately 207°F (97°C) increases the risk of a dry, cottony crumb. If the temperature is correct but the cracks still look wet, check the probe placement and let the visual and tactile cues guide the final decision.
The Angel Food Cake Texture Guide
The correct texture combines fine aeration with delicate elasticity. It should feel much lighter than butter cake without becoming wet, rubbery, uniformly foamy, or too fragile to hold a slice.

| Feature | Correct Result | Failure Signal |
|---|---|---|
| Interior color | Pale ivory to nearly white | Wet gray bands or yellow chiffon-like richness |
| Pore pattern | Fine, naturally irregular small-to-medium pores | Giant tunnels, dense bands, or artificial uniformity |
| Elasticity | Compresses gently and springs back | Rubbery resistance or permanent collapse |
| Moisture | Soft and pleasant, never wet | Gummy base, sticky streaks, or dry squeakiness |
| Slice | Holds height when gently sawn | Crushed lower edge or severe crumbling |
Expert Tips for a Taller, Finer Angel Food Cake
The most useful refinements are small choices that improve bubble size, measurement accuracy, doneness reading, and clean release without adding more mixing.
- Separate cold, whip warmer: Cold eggs separate more cleanly, while whites at 65–70°F (18–21°C) expand more readily. This sequence reduces yolk risk without sacrificing foam volume.
- Favor medium speed: A slightly slower build creates a finer, more stable bubble network than racing immediately to high speed, which can produce coarse foam that reaches a rigid appearance too quickly.
- Read the peak from the tip: The base of the peak can look defined before the meringue is overwhipped. The decisive cue is a glossy tip that bends rather than standing dry and straight.
- Keep the thermometer off metal: Touching the tube or outer wall can give a misleading reading. Aim midway between them and insert only far enough to reach the central crumb.
- Release against the pan: Keeping the blade against the metal protects the cake’s outer wall and leaves more crumb attached to the slice rather than the knife.
- Wrap only after full cooling: Trapped warmth creates surface moisture that can make the top sticky even when the cake was properly baked.

Angel Food Cake Mistakes That Cause Collapse
Most Angel Food Cake failures trace back to foam condition, pan adhesion, flour distribution, doneness, or cooling. Match the visible symptom first, then correct the stage that caused it on the next bake.
| Symptom | Likely Cause | Prevention | Realistic Recovery |
|---|---|---|---|
| Whites will not whip | Yolk, grease, wet equipment, or unsuitable carton whites | Separate individually; use clean glass or metal; choose fresh shell whites | Stop and restart with clean equipment and uncontaminated whites |
| Low, dense cake | Underwhipped foam, fast sugar addition, aggressive folding, or delayed baking | Use the flexible-peak cue; add sugar over 4–5 minutes; fold in four additions; bake promptly | No full structural repair after baking |
| Large tunnels | Coarse or overwhipped foam, poorly dispersed flour, or oversized trapped air pockets | Whip at medium speed; stop before rigid peaks; sift well; use one skewer pass | Slice around severe tunnels for private serving and correct the technique next time |
| Gummy bottom | Underbake, collapsed batter, flour pocket, or premature release | Use all doneness cues; fold completely; cool inverted for at least 2 hours | No reliable repair; the cake cannot be restored to the intended texture |
| Collapse during cooling | Underbake, overwhipped foam, poor pan adhesion, or upright cooling | Use the correct peak and temperature; keep the aluminum pan ungreased; invert immediately | A severe collapse requires a new cake for the intended presentation |
| Cake falls from the pan | Greased or nonstick surface, incompatible pan, or underbake | Use bare aluminum and verify full doneness | Catching the cake does not restore lost height |
| Dry or cottony crumb | Excess temperature, bake time, or delayed storage | Bake at 325°F; remove at 205–206°F; wrap after full cooling | Serve with cream or sauce, but the original texture cannot be restored |
| Sticky or weeping top | Undissolved sugar, humidity, underbake, or warm airtight wrapping | Use superfine sugar; add it gradually; verify doneness; cool fully before wrapping | Leave briefly uncovered in a dry room; persistent wetness may not resolve |
Beautiful Ways to Serve Angel Food Cake
Serve Angel Food Cake completely cooled and at room temperature, then add toppings lightly so the tall crumb and golden shell remain visible rather than buried.
Fresh Berries and Softly Whipped Cream
Arrange strawberries, raspberries, blueberries, or a mixed berry handful beside each slice and add a restrained spoonful of softly whipped cream. The cool cream rounds the vanilla while the berries keep the plate bright and fresh.

Lemon Curd and Summer Berries
Spoon a small ribbon of homemade lemon curd onto the plate rather than over the entire cake, then add blueberries or raspberries. The curd gives the 12 leftover yolks a practical use and adds bright contrast without softening the whole crumb.
Berry Sauce With a Light Sugar Dusting
Dust the cake with confectioners’ sugar immediately before serving and place a small pool of smooth berry sauce beneath each slice. Keeping the sauce on the plate preserves the cake’s airy structure and makes the ivory crumb stand out.
Simple Toasted Slices for Day-Two Cake
For a casual day-two serving, toast a slice very lightly until the cut surface is just warm and faintly crisp, then serve it immediately with fruit. This changes the delicate fresh texture, so reserve it for stored slices rather than the best first-day presentation.
How to Store and Freeze Angel Food Cake
Protect the crumb from air and pressure, and keep moist toppings separate. The plain cake is best the day it is baked, but careful wrapping gives it a useful make-ahead and freezer window.
- Room temperature: Once completely cool, keep the unfrosted cake whole in an airtight cake carrier or wrap it without compressing the crumb. Store in a cool, dry room for up to 2 days for best quality.
- Refrigeration: The plain cake is best kept at room temperature during that two-day quality window because refrigeration can dry the delicate crumb. Any portion combined with whipped cream, curd, sauce, or cut fruit must follow the refrigeration needs of its topping instead.
- Make ahead: Bake the cake up to 1 day before serving. Cool, release, and store it whole and airtight. Add confectioners’ sugar only shortly before serving.
- Refrigerated toppings: Store whipped cream, curd, sauces, and cut fruit separately in the refrigerator and add them only when serving.
- Freezing: Freeze the completely cooled unfrosted cake whole or in slices. Wrap first in plastic film, then in foil or a freezer-safe container, for up to 2 months.
- Thawing: Thaw the cake at room temperature while still wrapped so condensation forms on the wrapping rather than directly on the crumb.
- Reheating: Reheating is not part of the recommended serving method. Serve the cake at room temperature; do not microwave it in an attempt to restore lost moisture.

Continue Your Baking Journey
Choose your next bake by following one of three paths: stay with airy cakes, compare classic cake textures, or bring berries and bright fruit flavors to the center of the dessert.
Keep the Airy Cake Theme
These recipes continue the light-cake idea while changing the flour system, filling, or final presentation.
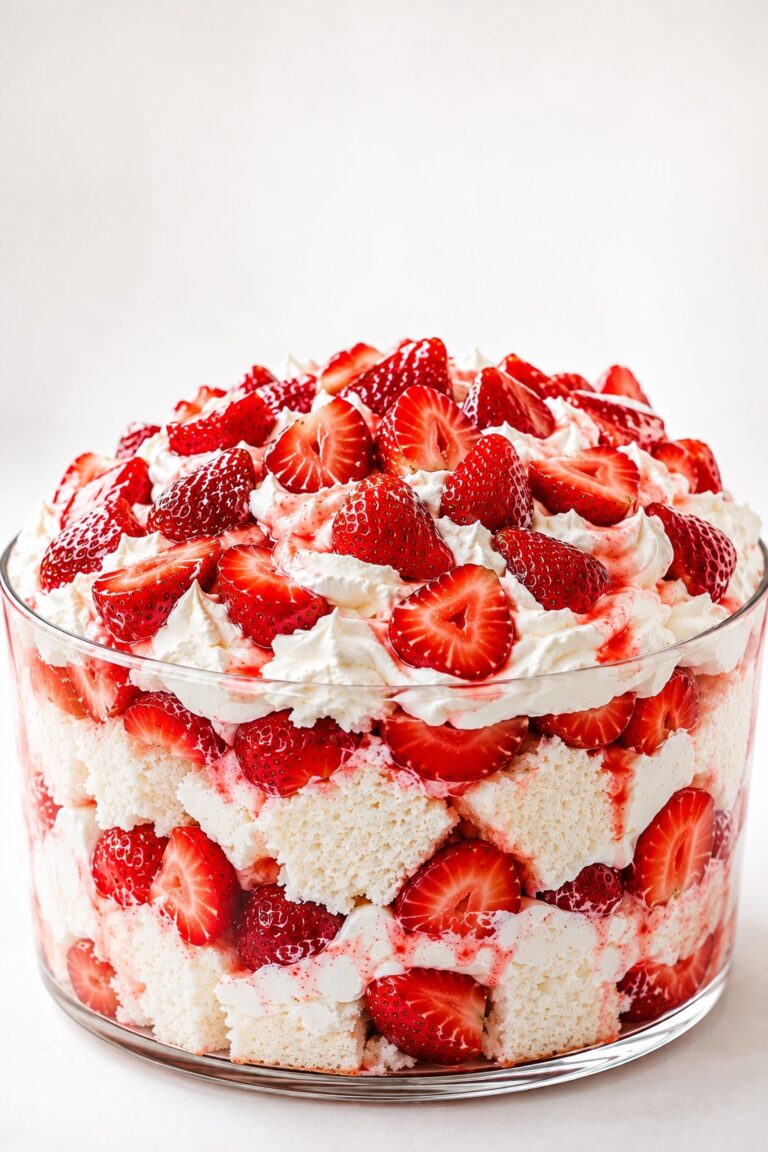
- Strawberry Angel Food Cake Dessert — turn airy cake into a chilled, creamy strawberry dessert for warm-weather gatherings.
- Gluten-Free Angel Food Cake — use the dedicated gluten-free recipe instead of modifying this wheat-based cake.
- Strawberry Shortcake Recipe — keep the berries-and-cream mood while moving to a buttery shortcake structure.
- Boston Cream Pie — explore another classic airy cake, this time layered with pastry cream and chocolate glaze.
Explore Classic Cake Textures
Move from egg-white foam to butter-rich or conventionally leavened cakes and notice how each method changes tenderness, density, and crumb.
- White Cake Recipe — compare Angel Food Cake with a soft butter-based white crumb.
- Pound Cake — explore the rich, close-crumbed opposite of this foam-leavened cake.
- Vanilla Cupcakes with Vanilla Buttercream — choose a portioned vanilla bake with conventional leavening and creamy frosting.
- Lemon Cake Recipe — continue with a soft layer cake and a brighter citrus profile.
Add Berries and Bright Flavor
Follow this path when the fresh fruit on the Angel Food Cake plate is the part you want to carry into your next full dessert.
- Strawberry Poke Cake — choose a moist strawberry-forward cake designed for generous slices and gatherings.
- Lemon Blueberry Cake — combine citrus brightness and blueberries in an elegant layer cake.
- Blueberry Cake — stay fruit-forward with a softer, simpler blueberry cake.
- Strawberry Cake — continue with fresh strawberry flavor in a richer frosted cake.
Why This Angel Food Cake Belongs in Your Recipe Box
This recipe earns long-term value by teaching a transferable foam-cake method while preserving the unmistakable simplicity of a classic Angel Food Cake.
- It gives you the tall ring, pale crumb, and clean vanilla character expected from traditional Angel Food Cake.
- The peak, fold, temperature, and cooling endpoints create a dependable framework you can revisit.
- The unfrosted cake can move from spring berries to summer fruit or a simple winter sugar dusting.
- Baking it one day early leaves the final presentation calm and uncluttered.
- The symptom-based guide helps turn a disappointing result into a specific correction rather than a guess.
- Few cakes offer the same combination of height, fine aeration, delicacy, and clean sliceability.
A Final Note on Angel Food Cake
Angel Food Cake exists to show how much structure and beauty can come from a restrained recipe. Its lightness is not a shortcut or an absence of richness; it is the result of building air carefully and protecting it all the way through cooling.
This is the cake to return to when you want clean vanilla flavor, a striking unfrosted centerpiece, and a slice that feels delicate without disappearing on the plate. Fresh fruit can change with the season, but the cake’s quiet character remains recognizable.
The lasting lesson is one of restraint: good baking is often less about doing more and more about recognizing the moment when the foam, the fold, the bake, and the cooling have each gone far enough.

Angel Food Cake
A tall, cloud-light Angel Food Cake with a fine, pale crumb, a delicate golden shell, and clean vanilla flavor. The method defines the flexible meringue endpoint, four-part fold, doneness cues, and inverted cooling so every critical stopping point is visible.
Ingredients
- 1 1/2 cups granulated sugar (300 g), processed briefly into superfine sugar and divided
- 1 cup cake flour (120 g), spooned and leveled
- 1/4 teaspoon fine sea salt (1.5 g)
- 1 1/2 cups large egg whites (360 g), from about 12 large shell eggs, at 65–70°F (18–21°C)
- 1 1/2 teaspoons cream of tartar (approximately 5 g)
- 2 teaspoons pure vanilla extract (10 ml)
- 1/4 teaspoon almond extract (1 ml), optional
Instructions
- Prepare the Oven, Pan, and Egg Whites: Position a rack in the lower third of the oven and preheat to 325°F (165°C) for at least 20 minutes. Keep the 10-inch tube pan completely ungreased. Clean and dry the mixer bowl and whisk thoroughly. Separate cold eggs one at a time, weigh exactly 1 1/2 cups (360 g) of whites, and let them stand until they reach about 65–70°F (18–21°C). What you should see: Clear, fluid egg whites with no yolk droplets, shell pieces, water, or grease in the bowl.
- Make and Divide the Superfine Sugar: Process all 1 1/2 cups (300 g) of granulated sugar for 30–45 seconds, stopping while the crystals are visibly finer but not powdery. Let the sugar dust settle before opening the processor. Weigh 100 g into a dry bowl for the flour mixture and reserve the remaining 200 g for the meringue. What you should see: Even crystals smaller than ordinary granulated sugar, with no confectioners’-sugar texture or compacted powder.
- Sift the Cake Flour Mixture: Whisk the reserved 100 g of superfine sugar with 1 cup (120 g) cake flour and 1/4 teaspoon (1.5 g) fine sea salt. Sift the mixture through a fine-mesh sieve three times, keeping it dry and loose while you build the meringue. What you should see: A homogeneous, lump-free mixture that falls in a light veil rather than dense clumps.
- Whip to Glossy, Flexible Peaks: Beat the 360 g egg whites on medium-low for about 60 seconds, until fine foam covers the surface, then add 1 1/2 teaspoons cream of tartar. Continue on medium until the whites are opaque, expanded, and form very loose peaks that immediately fold back, about 2–3 minutes. With the mixer still on medium, add the reserved 200 g superfine sugar about 1 tablespoon at a time over 4–5 minutes. Continue only until glossy medium-soft to medium peaks form. Add 2 teaspoons vanilla and the optional 1/4 teaspoon almond extract; mix on low for 5–10 seconds. What you should see: Smooth, glossy, fine-bubbled foam. When the whisk is lifted, the peak rises and bends at the tip; the ridges remain defined but never look dry, clumpy, grainy, or rigid. Stop before straight, stiff, dry peaks form.
- Fold the Flour Mixture in Four Additions: Sift one-quarter of the flour mixture evenly over the meringue. Cut a large balloon whisk down through the center, sweep along the bottom, and lift the foam over the dry ingredients while rotating the bowl. Stop when only a few pale streaks remain. Repeat with three more additions. After the final addition, use a flexible spatula for several broad bottom-to-top folds, scraping the bottom and sides once. Stop as soon as no dry pockets remain. What you should see: Thick, luminous, highly aerated batter that falls from the spatula in soft mounds, with no flour pockets, white meringue lumps, or watery layer.
- Fill the Tube Pan Without Tapping: Spoon the batter gently into the ungreased tube pan in alternating sections around the center tube instead of dropping it into one spot. Level the top lightly. Pass a thin skewer or narrow table knife through the batter once in a continuous shallow S-shaped or circular path to release only oversized pockets. Do not tap, bang, shake, or repeatedly stir the pan. What you should see: Batter distributed evenly around the tube with a softly leveled top, preserved volume, and no visible voids against the pan wall.
- Bake Until the Structure Is Fully Set: Bake at 325°F (165°C) for 40–45 minutes, keeping the oven closed for at least the first 35 minutes. Begin checking at 40 minutes. Insert a fine-probe thermometer midway between the center tube and outer wall without touching metal. Remove the cake when the major cues agree and the center reads 205–206°F (96–97°C); avoid carrying it beyond about 207°F (97°C). What you should see: A fully risen golden-blond to light golden-brown cake with dry cracks, stable shoulders, no wet shine, and a surface that springs back promptly after a light touch.
- Invert Immediately and Cool Completely: Turn the pan upside down as soon as it leaves the oven. Rest it on its feet or suspend it securely over a heatproof bottle neck or funnel so air can circulate and the cake does not touch the counter. Leave it undisturbed for at least 2 hours and until the pan and center tube feel completely room temperature. What you should see: The cake remains attached while inverted and settles only slightly as the warm structure finishes setting.
- Release and Slice Without Compressing the Crumb: Return the cooled pan upright. Run a long thin offset spatula or knife around the outer wall and center tube, keeping the blade against the metal. Lift out the removable center, then release the bottom the same way. Cut 12 slices with a gentle sawing motion using a long serrated knife or Angel Food Cake comb; never press straight down with a smooth chef’s knife. What you should see: Tall slices with a pale ivory interior, fine irregular pores, clean edges, and no gummy compression along the base.
Notes
- Pan: Use only the clean, dry, ungreased, uncoated light-aluminum 10 × 4-inch tube pan specified here. Do not grease, flour, spray, or line it. Bundt, nonstick tube, loaf, round, sheet, cupcake, and mini-pan formats are not direct equivalents.
- Egg whites: Fresh shell egg whites give the most reliable volume. Carton whites may be attempted only if the label explicitly says they are suitable for whipping or meringue and the ingredient list contains no gums, salt, or other foam-limiting additives. Equal performance is not promised.
- Sugar allocation: After refining all 300 g sugar, reserve 200 g for gradual addition to the meringue and combine 100 g with the cake flour and salt.
- Meringue endpoint: Stop at glossy, flexible medium-soft to medium peaks. Straight, stiff, dry peaks are beyond the target.
- Folding and pan loading: Fold the flour mixture in four additions. Use one controlled skewer pass after filling. Do not tap, bang, or shake the pan.
- Doneness: Time alone is not the endpoint. Dry golden cracks, prompt springback, no wet shine, and 205–206°F (96–97°C) must agree; avoid carrying the cake beyond about 207°F (97°C).
- Cooling: Invert immediately and cool undisturbed for at least 2 hours before release.
- Direct swaps not approved: Do not directly substitute all-purpose flour, homemade all-purpose-flour/cornstarch blend, gluten-free 1:1 flour, lemon juice or vinegar, confectioners’ sugar, reduced sugar, sugar substitute, egg replacer, aquafaba, whole eggs, or yolks.
- Scaling: This recipe is written for one 10-inch tube cake. For a second cake, prepare a separate full batch; other pan sizes need different portions and baking times.
Storage / Make-Ahead Note
For best texture, serve after complete cooling on the day of baking. Store the completely cooled unfrosted cake whole and airtight at room temperature for up to 2 days for best quality; it may be baked 1 day ahead. Refrigerate whipped cream, curd, sauces, and cut fruit separately and add them at serving. Freeze the cooled unfrosted cake whole or in slices, double wrapped, for up to 2 months. Thaw while still wrapped at room temperature. Reheating is not recommended.
Nutrition Information:
Yield: 12 Serving Size: 1Amount Per Serving: Calories: 152Total Fat: 0gSaturated Fat: 0gCholesterol: 0mgSodium: 99mgCarbohydrates: 33gFiber: 0gSugar: 25gProtein: 4g
Nutrition information is provided as an estimate only and may vary based on specific ingredients, brands, and portion sizes used. This information should not be considered medical or nutritional advice.
12 Sweet Favorites — Yours, Free 🍰
Tiramisù, no-bake cheesecake, the perfect chocolate chip cookie & 9 more reader-loved desserts — gathered into one beautiful free recipe book. From my kitchen to yours.
No spam, just sweet things. Unsubscribe anytime.