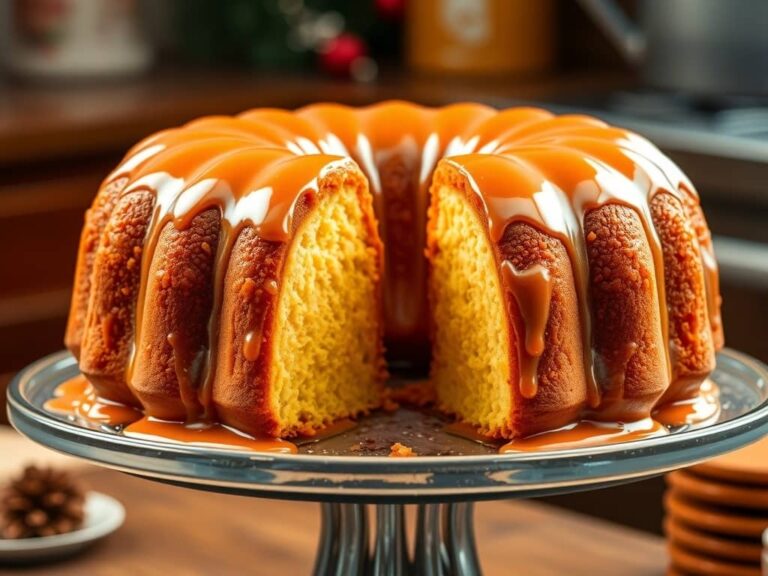
Sweet Potato Cake with Cream Cheese Frosting
🎁 FREE E-BOOK: 12 Sweet Favorites — reader-loved desserts in one beautiful recipe book.
Sweet potato cake brings an orange-gold crumb, cinnamon and nutmeg together beneath a smooth layer of tangy vanilla cream cheese frosting. The sweet potato is present as mellow flavor and moisture, while the finished slice still reads clearly as cake.

There is something familiar about that combination of warm spice and cool frosting. It suits an autumn gathering or a family dessert table, but it does not need elaborate decoration to feel generous.
Keep this recipe for the days when you want a layer cake with every important detail close at hand: the right amount of cooked mash, enough cooling time, evenly divided layers and cream cheese frosting that stays where you spread it.
Plan it as a two-layer cake rather than a quick snack cake. The main schedule begins with 360 g of plain roasted sweet potato mash that is smooth and completely cool.
Sweet Potato Cake at a Glance
This recipe makes two 8-inch layers with vanilla cream cheese frosting and includes the cooling time needed for a stable finish. Everything can be made with familiar layer-cake equipment.
| Decision | What to expect |
|---|---|
| Style | Two-layer, 8-inch sweet potato cake with vanilla cream cheese frosting |
| Defining flavor | Mellow roasted sweet potato with cinnamon, nutmeg and a tangy vanilla finish |
| Intended texture | Moist and tender, yet firm enough to stack and cut into defined wedges |
| Yield | One cake, cut into 12 wedges |
| Pans | Two matching 8-by-2-inch light-metal round pans |
| Active work and bake window | About 35 minutes of preparation and assembly, plus 30 to 40 minutes of baking |
| Cooling and final chill | About 15 minutes in the pans, approximately 90 minutes on racks and 30 minutes after frosting |
| Total from cooled mash | About 3 hours 30 minutes |
| Make-ahead option | Prepare the mash or bake and wrap the completely cooled layers one day ahead |
This is a sliceable layer cake made with smooth mash dispersed through the batter. It is not a custard-style sweet potato filling, and it is not built around visible strands of grated vegetable.
If you begin with raw sweet potatoes instead of cooled mash, allow roughly 5 to 5 3/4 hours overall. That longer path includes roasting, handling and mash cooling before the cake schedule can properly begin.
Why This Sweet Potato Cake Works
The amount of sweet potato, the strength of the batter, the size of the pans and the frosting all work together. The cake keeps its mellow sweet potato character while remaining sturdy enough to stack and slice.
Measured Mash, Predictable Balance
The recipe aims for a moist, sliceable crumb by specifying 360 g of cooked sweet potato flesh. A weight is more dependable than a count because whole potatoes vary widely in size, skin loss and cooked yield.
The 360 g of mash is paired with 300 g of flour, so resist adding an extra spoonful simply to deepen the flavor. More puree also brings more moisture and cooked solids, which can leave the center heavier than intended.
Tenderness Without Losing Structure
Neutral oil supports tenderness, while eggs and flour provide the structure needed for two layers that can be moved, stacked and sliced. The sweet potato adds moisture within a fixed amount instead of being treated as an unlimited tenderizer.
Together, those ingredients keep the crumb from tasting dry without letting it become soft or pudding-like. Extra puree is not needed to make the cake moist.
Two Layers That Bake as a Pair
Two matching light-metal pans give both portions the same diameter, depth and heat response. Dividing the actual batter equally also makes the layers easier to align and frost.
The batter weighs about 1,315 g before some remains in the bowl, which usually places roughly 655 g in each pan. Use that number only as a guide; equal portions and a fill level below two-thirds of the pan depth matter most.
A Frosting Ratio That Keeps the Cake in Focus
There is enough frosting for a visible filling, a defined top and a thin coat on the sides. It adds creamy contrast without turning every forkful into mostly frosting.
Spread about 200 g between the layers and about 220 g over the top, then use what remains for a thin coat on the sides. A modest middle layer is less likely to squeeze outward and shift the cake above it.

Why You’ll Love This Spiced Sweet Potato Cake
This is the kind of cake that feels at home after a family dinner and still looks special enough for a small celebration. Its simple finish does not require a decorating kit.
- Twelve shareable wedges: One cake serves a small gathering without requiring a second bake. Each wedge shows both orange-gold layers and the pale cream cheese filling.
- Warm, rounded flavor: Cinnamon and nutmeg support the sweet potato without covering it. Tangy cream cheese frosting keeps the finish from feeling one-note.
- Ordinary equipment: Two round pans, bowls, a scale, a hand mixer and an offset spatula handle the work. No piping bags or specialty molds are required.
- A day-ahead head start: The mash or the cooled unfrosted layers can be prepared one day in advance. That lets the final mixing or assembly happen on the day you plan to serve.
- Clear readiness cues: Each step tells you what the batter, center, layers or frosting should look like. You can rely on what you see instead of the clock alone.
How Sweet Potato, Oil, Leavening, and Cooling Shape the Cake
Sweet potato mash brings both moisture and cooked solids, oil keeps the crumb tender after chilling, leavening helps the layers rise and cool temperatures keep the cream cheese frosting firm. Understanding those four parts makes it easier to judge the batter, the bake and the final assembly.
Roasted Sweet Potato Brings Water and Solids
Cooked sweet potato puree is not equivalent to the same volume of milk or water. It contributes moisture as well as starches, fibers and other cooked solids, so both its amount and its consistency influence how freely the batter moves and how much structure it must set around.
Use 360 g of plain, smooth mash with no liquid pooling around it, and do not add extra for a stronger flavor. If roasting produces more than you need, save the remainder for sweet potato pancakes.
Oil Supports Tenderness After Cooling
Neutral vegetable oil is liquid at typical refrigerator temperatures, unlike a fat that firms substantially when cold. In an oil-based batter, it also disperses without depending on a butter-creaming stage for aeration.
Because the finished cake must be refrigerated, oil helps the crumb feel tender again after an individual slice stands for a short, food-safe interval before serving.
Leavening Needs a Structure That Can Set
Baking powder and baking soda help produce gas in the batter, and heat expands that gas. The surrounding flour starches and egg proteins still need enough time to set, which is why a raised top can appear before the center is actually ready.
Judge the center rather than relying on height or color. It should hold its shape, spring lightly and leave no wet batter on a tester, even if the surface already looks baked.
Temperature Controls Frosting Stability
Cream cheese frosting depends on butter and cream cheese remaining firm enough to hold a ridge. Residual warmth from a cake layer softens those fats, while frosting ingredients left too warm for too long can produce the same loss of body.
Assembly becomes more stable when the layers feel cool on both surfaces and the frosting is merely pliable. If either state is wrong, waiting or using a short chill is more useful than adding unplanned sugar or forcing the stack into place.
Ingredients for Sweet Potato Cake and Cream Cheese Frosting
You will need ingredients for the cake, the cream cheese frosting and a separate thin film of oil for the pans. Measure the sweet potato after roasting and peeling, then let it cool completely before mixing.

Ingredient List
Use the exact amounts below for two 8-inch layers. Keep the preparation oil separate from the 180 ml of oil measured for the batter.
Cake
- 360 g; approximately 1 1/2 cups Orange-fleshed sweet potato, roasted, peeled, smoothly mashed, plain and completely cooled
- 300 g; 2 1/2 cups Unbleached all-purpose flour, spooned and leveled if measured by cup
- 8 g; 2 tsp Double-acting baking powder
- Approximately 1.5 g; 1/4 tsp Baking soda
- 3 g; 1/2 tsp Fine salt
- Approximately 2.5 g; 1 tsp Ground cinnamon
- Approximately 1 g; 1/2 tsp Ground nutmeg
- 149 g; 3/4 cup Granulated sugar
- 107 g; 1/2 cup Packed light brown sugar
- 180 ml; 3/4 cup Neutral liquid vegetable oil
- 3; approximately 150 g Large eggs, out of shells
- 5 ml; 1 tsp Pure vanilla extract
- 60 ml; 1/4 cup Whole milk
Frosting
- 227 g; 8 oz Full-fat block cream cheese, just softened, not warm or runny
- 113 g; 1/2 cup Unsalted butter, pliable, not melted
- 340 g; approximately 3 cups Confectioners’ sugar, measured before sifting
- 5 ml; 1 tsp Pure vanilla extract
Preparation
- As needed, separate from the 180 ml batter oil A thin film of neutral oil for the pans
Sweet Potato and Flour Set the Moisture Boundary
Use orange-fleshed sweet potatoes roasted whole, then peeled and mashed without butter, milk, sugar or seasoning. The finished mash should be smooth enough to disperse through the batter, with persistent fibers removed and no free liquid collecting in the bowl.
Weigh both the 360 g mash and the 300 g flour when possible. If you measure flour by cup, spoon it into the cup and level it rather than packing it, because excess flour can produce a firmer, drier crumb.
Sugars, Oil, Eggs, and Milk Build the Batter
Pack the light brown sugar into its measure, and break up any firm lumps before the eggs are added. Granulated sugar supplies the remaining sweetness, while whole milk loosens the mixture enough for the flour to be folded in evenly.
Measure the neutral oil by volume at 180 ml or 3/4 cup. Three large eggs usually weigh about 150 g without their shells, but weighing them is optional.
Block Cream Cheese Makes a Stable Frosting
Choose full-fat block cream cheese, not whipped or spreadable cream cheese in a tub. Pair it with butter that bends under light pressure but is not glossy or melted, and measure the confectioners’ sugar before sifting.
For a closer look at product choice and consistency, use the cream cheese frosting guide. Keep the amounts listed here so there is enough for the filling, top and lightly covered sides.
Supported Swaps and Important Non-Swaps
Neutral canola or sunflower oil can replace neutral vegetable oil by the same volume. Both stay quietly in the background so the sweet potato and spices remain easy to taste.
Do not replace the sweet potato with pumpkin puree or use gluten-free flour, egg replacers, lower-fat dairy or tub cream cheese as one-for-one swaps. Each can change the moisture, crumb or frosting consistency enough to need different amounts or a different method.

The Pans and Tools for a Two-Layer Sweet Potato Cake
Matching pans, accurate measurement and enough cooling space matter more here than decorative equipment. Gather the full working set before the batter is mixed so one portion does not wait while you solve a pan or rack problem.
- Pans and oven: Two 8-by-2-inch light-metal round pans, parchment circles, a conventional oven with a center rack and room for both pans, plus an oven thermometer if available. Matching light-metal pans reduce differences in heat response between the layers.
- Roasting and mashing: A rimmed roasting tray, a fork or potato masher and a shallow bowl for cooling the mash. A shallow bowl exposes more surface area and helps the measured puree lose heat before mixing.
- Measuring and mixing: A digital scale, measuring spoons, a liquid measure, two mixing bowls, a whisk and a flexible spatula. The scale controls the mash, flour and final batter division, while the spatula reaches the bottom of the bowl without extended beating.
- Frosting and assembly: A hand mixer with beaters, an offset spatula and a serving plate or cake board. The offset blade spreads a modest amount of frosting without requiring a thick cushion between hand and cake.
- Cooling and serving: Wire racks, covered refrigerator space or a container, and a knife for optional leveling and portioning. Both layers need unrestricted rack space, and the assembled cake needs a level chilled home.
Plan Your Sweet Potato Cake from Roasting to Serving
Begin the main schedule with prepared, completely cooled mash. Later, allow the baked layers to lose every trace of warmth before frosting, even if that takes longer than expected.
| Approximate point | Work | Ready when | Can be held? |
|---|---|---|---|
| 0 to 25 minutes | Prepare pans and mix the batter | Mash is cool and the oven has settled at 350°F (175°C) | Bake promptly after mixing |
| 25 to 65 minutes | Bake both layers | Each center passes the set, spring and tester checks | No; assess each pan independently |
| 65 to 80 minutes | Cool in the pans | Layers are stable enough to turn out | Keep the rest near 15 minutes |
| 80 to 170 minutes | Cool upright on wire racks | Tops and undersides have no lingering warmth | Yes; wait longer if needed |
| 170 to 180 minutes | Mix frosting and assemble | Frosting holds a soft ridge and layers are cool | Use a short chill if frosting softens |
| 180 to 210 minutes | Chill the assembled cake | Frosting is firm enough for defined cuts | Keep refrigerated until the serving window |
Starting with raw sweet potatoes adds about 10 minutes of handling, 45 to 75 minutes of roasting and approximately 30 to 45 minutes for the mash to cool. That produces the longer overall estimate of roughly 5 to 5 3/4 hours.
For a day-ahead route, prepare and refrigerate the plain mash, or bake the layers and wrap them only after they are completely cool. Bring the mash out only long enough to lose its refrigerator chill before mixing, and keep the layer storage details below.
Before Mixing Your Sweet Potato Cake
Before the wet and dry mixtures meet, make sure the mash, oven, pans, cooling racks and refrigerator space are ready. Once mixed, the batter should go into the oven without waiting while you rearrange the kitchen.
- Check the mash: It is plain, smooth, exactly 360 g, completely cool and free of pooled liquid.
- Reset the oven: If the potatoes roasted at 400°F (205°C), the oven has fully settled at 350°F (175°C) conventional before the cake goes in.
- Match the pans: Both 8-by-2-inch light-metal pans are lined, lightly oiled and fit together on the center rack with air space.
- Clear the landing zones: Two wire racks and level covered refrigerator space are available before baking begins.
- Time the dairy: Butter and block cream cheese remain cold until late in the layer-cooling period, then soften only to their stated workable condition.
The Flavor and Texture of This Sweet Potato Cake
Expect a moist, warmly spiced slice with mellow sweet potato flavor and a cool tang from the frosting. The batter, color and finished crumb may look different from a light butter cake without signaling a problem.
- A substantial batter: The mixture is cohesive and thicker than a whipped, highly aerated cake batter. It should still spread across the pan without needing added liquid.
- Natural color variation: The layers may range from orange-gold to warm brown as sweet potato color and surface browning vary. Color alone does not determine doneness.
- A moist, sliceable crumb: A fully cooled wedge should hold its shape and show a cake crumb, not a wet or custard-like center. Judge that texture only after cooling.
- A modest frosting finish: Expect one even filling band, a defined top coat and thinly covered sides. The finish is not designed for deep piping or an oversized middle layer.
How to Make Sweet Potato Cake
Work through the steps in order and check the visual cue before moving on. If 360 g of plain mash is already prepared and completely cool, begin with the oven and pans.
1. Roast, Mash, and Cool the Sweet Potato
Scrub and pierce whole sweet potatoes. Roast them on a rimmed tray at 400°F (205°C) for about 45 to 75 minutes, until a knife passes easily through the center. Cool until safe to handle, remove the skins, mash thoroughly and remove persistent fibers. Weigh 360 g into a shallow bowl and cool it completely without adding water or milk.
What you should see: Fully soft flesh and smooth mash that mounds on a spoon without pooled liquid.

2. Prepare the Oven and Cake Pans
Set the oven to 350°F (175°C) conventional and position a rack in the center. Lightly oil two 8-by-2-inch light-metal round pans, line the bases with parchment circles and lightly oil the parchment. If the potatoes were just roasted, allow the oven to settle at the lower temperature before baking.
What you should see: Two evenly prepared pan bases and enough open space for air to circulate around both pans on the rack.

3. Whisk the Dry Ingredients
Whisk 300 g flour, 8 g baking powder, approximately 1.5 g baking soda, 3 g salt, approximately 2.5 g cinnamon and approximately 1 g nutmeg for about 30 seconds. Reach around the bowl so the small amounts of spice and leavener do not remain in one area.
What you should see: An even-colored dry mixture with no visible spice or leavener pockets.

4. Combine the Wet Ingredients and Sweet Potato
In a second bowl, whisk 180 ml oil with 149 g granulated sugar and 107 g packed light brown sugar, breaking up brown-sugar lumps. Whisk in 3 large eggs, 5 ml vanilla and 60 ml whole milk, then add the completely cooled 360 g sweet potato mash and combine until even. This is a mixing step, not a request to whip in volume.
What you should see: An even orange mixture with no large potato pieces or persistent sugar lumps.

5. Fold the Batter Just Until Combined
Add the dry mixture to the wet mixture. Fold with a flexible spatula, scraping the bottom and sides of the bowl, and stop as soon as no dry flour remains. Do not keep beating in pursuit of a perfectly glossy surface.
What you should see: Cohesive batter with no dry flour streaks at the bottom or around the bowl.

6. Divide the Batter Between Two Pans
Weigh the actual finished batter and divide it equally between the prepared pans. Approximately 655 g per pan is a planning reference before bowl losses, not a number to force if your actual total differs. Smooth the tops and keep each pan below two-thirds full; if the batter exceeds that capacity, recheck the measurements rather than overfilling.
What you should see: Matching fill levels below two-thirds of each pan’s depth.

7. Bake Until the Centers Are Set
Bake both layers for approximately 30 to 40 minutes and begin checking at 30 minutes. Assess each center for shape, a light spring and a tester without wet batter. A few moist crumbs are fine. If a layer is not ready, bake another 3 to 5 minutes and check again, avoiding repeated early oven opening.
What you should see: Centers that hold their shape, spring lightly and leave no wet batter on a tester.

8. Cool the Cake Layers Completely
Let the cakes rest in their pans for about 15 minutes. Loosen the edges, carefully turn out the layers, remove the parchment and place them upright on wire racks for about another 90 minutes, or longer if needed. Check the underside as well as the top. If a cooled layer has a pronounced dome, trim only enough to create a flat stacking surface.
I once started frosting a layer cake while the layers were still a little warm. The cream cheese frosting softened as I spread it, and keeping the layers neatly stacked became much harder than it needed to be. Since then, I let the cakes cool completely before assembling them, checking the underside as well as the top for any lingering warmth.
What you should see: Stable layers that feel cool on top and underneath.

9. Mix the Cream Cheese Frosting
Beat 113 g pliable butter on medium speed for about 1 minute, until smooth. Add 227 g just-softened block cream cheese and mix on low to medium for about 30 to 60 seconds, only until combined. Add 340 g sifted confectioners’ sugar in three portions on low speed, then mix in 5 ml vanilla. Scrape the bowl and stop when smooth and spreadable. If it is soft, refrigerate for 15 minutes, stir gently and reassess; repeat a short chill if necessary.
What you should see: Smooth frosting that holds a soft spatula ridge instead of flowing flat.

10. Stack and Frost the Cake
Place the first layer flat side down on a serving plate. Spread approximately 200 g frosting over it, stopping just short of the edge, then add the second layer flat side up. Spread approximately 220 g on top and use the remainder for a thin coating on the sides. If the layers begin to slide, refrigerate the assembly for 15 minutes before continuing.
What you should see: Two aligned layers, one even filling band and a modest outer coating.

11. Chill and Cut Twelve Slices
Refrigerate the assembled cake for approximately 30 minutes before cutting it into 12 wedges. If it has chilled overnight, let individual portions stand for about 20 to 30 minutes before serving for a softer texture, while respecting the food-safety limits below. Return the remaining cake promptly to the refrigerator.
What you should see: Frosting firm enough for a defined cut while the layers remain aligned.
How to Tell When Sweet Potato Cake Is Baked
Do not remove the layers by time or color alone. Begin checking at 30 minutes, then look for a set center, a light spring and a tester without wet batter.
| Signal | Not ready | Ready | What to do |
|---|---|---|---|
| Clock and check window | The layer is below 30 minutes or an early oven opening has interrupted the rise | The cake is within the 30 to 40 minute range and other center cues agree | Begin at 30 minutes; extend in 3 to 5 minute intervals only as needed |
| Center set and spring | The center ripples, sinks under light touch or keeps a clear indentation | The center holds its shape and springs lightly | Continue baking the unready pan, even if its companion is done |
| Tester | Wet batter coats the tester | No wet batter remains; a few moist crumbs are acceptable | Check the middle rather than an edge or a sweet potato streak |
| Appearance and cooling | Surface color looks convincing but the center cues fail, or a warm cut looks compressed | The structural cues pass and the fully cooled crumb is moist but sliceable | Do not use color alone, and wait for cooling before judging final crumb |
A warm layer can look heavier when cut because steam, softness and compression are still changing. Let the layer cool completely before deciding whether the final crumb is properly sliceable.

Expert Details for Even Sweet Potato Cake Layers
A few small habits make the layers easier to match, bake and frost. Use them when you want a straighter stack and less last-minute adjustment.
Use Pan Weight, Not Eyeballing
Matching fill lines can still hide a meaningful difference in batter mass. If the empty pans match closely in weight, compare the filled-pan weights and move small spoonfuls from the heavier pan to the lighter one before baking. That adjustment improves layer parity without chasing an arbitrary per-pan number.
Let Two Pans Finish Independently
Even matching pans can finish a few minutes apart because home ovens have hot spots and airflow differences. Remove each pan only when its own center is set, springs lightly and leaves no wet batter on the tester. One layer should not stay in the oven simply because the other needs more time.
Budget the Frosting Before Assembly
Set aside 220 g for the top before spreading the 200 g filling, then use what remains for the thin side coat. This keeps an overfilled center from using frosting that the top still needs.
Coordinate Ingredient Temperatures Late
Wait until the layers are well into rack cooling before softening the butter and cream cheese. The dairy then reaches a workable state near the moment of mixing instead of sitting warm through the entire cooling period, reducing the chance that assembly begins with loose frosting.
Troubleshooting Dense Cake, Uneven Layers, and Soft Frosting
Match what you see to the likely cause before changing anything. Some problems can still be corrected during baking or frosting, while others are best prevented in the next batch.
| Mistake | What happens | Why | Prevent or fix |
|---|---|---|---|
| Using wet or unweighed mash | Batter becomes looser and the crumb may set heavy or damp | Extra water and an unknown amount of solids make the batter harder to set | Use 360 g plain, smooth, cooled mash with no pooled liquid; do not add more flour by instinct |
| Measuring excess flour | The cake can feel firm, dry or muted in sweet potato character | Packed cups add more flour and absorb too much moisture | Weigh 300 g, or spoon and level the cups without compressing |
| Overmixing after flour is added | The crumb can become tighter and less tender | Repeated stirring after the flour is moistened develops more gluten | Fold only until the last dry streak disappears; this cannot be reversed after baking |
| Unequal batter or mismatched pans | Layers differ in height or finish at different times | Portion mass, depth or pan heat response is not shared | Use matching pans, weigh the actual batter and compare filled-pan weights before baking |
| Removing by clock or color alone | A damp center may compress after cooling, or an overbaked edge may dry | Time and browning do not prove that the center structure has set | Use the 30-minute check as a start, then require center spring and no wet batter on the tester |
| Using tub cream cheese or dairy that is too soft | Frosting flows, loses ridges or cannot support the top layer | Spreadable products and excess warmth provide less body for this ratio | Use full-fat block cream cheese; chill soft frosting for 15 minutes, stir and reassess |
| Frosting warm layers or overfilling the center | Filling squeezes outward and the stack slides | Heat softens the frosting and a thick middle layer increases lateral pressure | Cool both surfaces fully, limit filling to about 200 g and chill a moving assembly for 15 minutes |
Beautiful Ways to Serve Sweet Potato Cake
The cake’s color, clean layers and restrained frosting already supply the presentation. Serving choices should reveal those features rather than cover them with ingredients that are not part of the recipe.

Serve It Cool, Not Refrigerator-Firm
A short stand softens the eating texture of an overnight-chilled portion while the frosting stays composed. Take out only the portions you plan to serve for about 20 to 30 minutes, keeping their cumulative room-temperature time within the limits below.
Let the Whole Cake Stay Simple
Use a few natural offset-spatula sweeps across the top and keep the sides thinly coated. The quiet finish suits the modest frosting ratio and avoids suggesting that extra piping or garnish is required.
Show the Orange-Gold Cut Face
Wipe the knife between cuts and angle one wedge slightly outward on the plate. The contrast between the orange-gold crumb, pale filling band and thin outer coat becomes the decoration.
Pair Warm Spice with Coffee or Tea
Coffee or unsweetened black tea gives the cinnamon, nutmeg and cream cheese tang a calm counterpoint. Serve the drink beside the cake rather than altering the batter or adding a topping.
Keeping Sweet Potato Cake Fresh and Ready to Serve
Once the cake is frosted, keep it covered in the refrigerator. Bring out only what you plan to serve so the frosting stays firm and the cake does not spend unnecessary time at room temperature.
Refrigerating the Frosted Cake
Keep the covered cake at 40°F (4°C) or below. Following FoodSafety.gov cold-food guidance, limit cumulative unrefrigerated time during frosting preparation, assembly and serving to 2 hours, or 1 hour when the temperature is above 90°F (32°C). Refrigeration does not reset elapsed time.
For the freshest texture, frost the cake no more than one day ahead and enjoy refrigerated leftovers the following day. Let individual portions stand for 20 to 30 minutes when you prefer a softer crumb.
Preparing Mash and Layers a Day Ahead
Plain mash can be prepared one day ahead, cooled promptly, covered and refrigerated. Completely cooled unfrosted layers can also be wrapped well and refrigerated for one day; do not wrap them while warm, because trapped condensation changes their surface.
If using chilled mash, let it lose its hard refrigerator chill without leaving it out through the full cake-cooling period. If using chilled layers, keep them wrapped until the main surface chill begins to ease so condensation forms on the wrapping rather than directly on the cake.
Why Freezing Is Not Specified Here
For the best crumb and frosting finish, use the one-day refrigerator option rather than freezing this cake. Freezing and thawing can change surface moisture and make the cream cheese coating less neat.
Sweet Potato Cake Questions, Answered
Sweet potato cake shares some of the warm, familiar character of carrot cake and pumpkin cake, but the smooth roasted mash gives it a texture and flavor of its own.
What does sweet potato cake taste like?
It tastes warmly spiced and gently sweet, with mellow roasted sweet potato beneath the cinnamon and nutmeg. The vanilla cream cheese frosting adds a cool tang without covering the flavor of the cake.
Is sweet potato cake similar to carrot cake?
Both can use warm spice and cream cheese frosting, but their defining ingredients behave differently. This sweet potato cake uses smooth, cooked mash dispersed through the batter, while carrot cake typically keeps visible grated carrot and often includes a different mix of texture-building additions. The result here is an even orange-gold crumb rather than a strand-filled one.
Do you cook sweet potatoes before adding them to cake?
Yes. Roast the sweet potatoes whole until completely tender, remove the skins and mash the flesh smoothly. Weigh 360 g after cooking and peeling, then cool it completely before adding it to the wet ingredients.
Can I use canned sweet potato puree?
Use plain roasted sweet potato mash here. Canned puree can contain more moisture and may not behave the same way, so do not use it as a direct one-for-one replacement.
Why is my sweet potato cake dense?
The most common causes are wet or unweighed mash, too much flour, overmixing after the flour is added or removing the layers before the centers are set. Use 360 g of mash with no pooled liquid, weigh 300 g of flour, fold only until the dry streaks disappear and check the center rather than the clock alone.
Does sweet potato cake need to be refrigerated?
Yes. Because this cake is filled and covered with cream cheese frosting, keep it covered at 40°F (4°C) or below. Take out only the portions you plan to serve and return leftovers promptly to the refrigerator.
Can sweet potato cake be frozen?
Use the one-day refrigerator plan instead of freezing. Thawing can add surface moisture and soften the neat cream cheese frosting finish.
What to Bake After Sweet Potato Cake
If warm spice and cream cheese frosting are what brought you here, these cakes, pies and shareable bakes are natural places to go next.
More Cakes with Warm Spice
Stay with layer cakes and familiar spice profiles when the format is part of the appeal.
- Carrot cake for a cream cheese-frosted cake with grated vegetable texture.
- Pumpkin cake for another smooth-puree cake in an autumn register.
- Hummingbird cake for a fruit-led, textured layer cake.
- Apple cake for warm spice with distinct pieces of fruit.
The Same Cozy Mood in a Different Shape
Keep the seasonal comfort while changing the slice, loaf or individual-serving experience.
- Sweet potato pie for a custard-style expression of the same main ingredient.
- Pumpkin bread for a simpler loaf with puree and spice.
- Pumpkin muffins for portable individual portions.
- Apple cupcakes for a smaller frosted bake with autumn flavor.
Your Next Bake for Sharing
Move toward a different centerpiece while keeping a table-friendly yield.
- Pecan pie cobbler for a spoonable dessert with a nutty finish.
- Homemade cinnamon rolls for a pull-apart bake centered on cinnamon.
- Pumpkin roll for a rolled cake with a cream cheese filling.
- Chocolate sheet cake for an easy-to-portion cake made for a crowd.
Why This Sweet Potato Cake Belongs in Your Recipe Box
Sweet potato earns a place beside carrot cake and pumpkin cake.
- More Than Pie: Sweet potato gives a familiar layer-cake shape a distinct autumn flavor without requiring elaborate decoration.
- Useful Baking Skills: Weighing puree, reading the center and coordinating cooling with frosting will help with many moist layer cakes.
- Familiar Flavors: Warm spice and cream cheese frosting feel recognizable while the smooth sweet potato crumb sets the cake apart.
- Simple to Finish: Two neat layers and a softly swirled coating feel special without turning the project into a piping exercise.
- Worth Making Again: The orange-gold crumb and tangy frosting give sweet potato a place at the dessert table beyond pie.

A Sweet Potato Cake for a Table Worth Gathering Around
Set this cake on the table when you want something warmly spiced, generous and a little different from the usual autumn desserts.
Its orange-gold layers and tangy cream cheese frosting suit a birthday, holiday dinner or quiet weekend gathering without needing elaborate decoration.
Roast the sweet potatoes early, give the layers all the cooling time they need and serve each slice with the crumb and filling clearly in view.

Sweet Potato Cake
A moist two-layer sweet potato cake with cinnamon, nutmeg and vanilla cream cheese frosting. Made with plain roasted sweet potato mash and finished with a simple frosting coating.
Ingredients
For the Cake
- 1 1/2 cups orange-fleshed sweet potato, roasted, peeled, and smoothly mashed (360 g)
- 2 1/2 cups unbleached all-purpose flour (300 g)
- 2 teaspoons double-acting baking powder (8 g)
- 1/4 teaspoon baking soda (1.5 g)
- 1/2 teaspoon fine salt (3 g)
- 1 teaspoon ground cinnamon (2.5 g)
- 1/2 teaspoon ground nutmeg (approximately 1 g)
- 3/4 cup granulated sugar (149 g)
- 1/2 cup packed light brown sugar (107 g)
- 3/4 cup neutral liquid vegetable oil (180 ml)
- 3 large eggs (approximately 150 g without shells)
- 1 teaspoon pure vanilla extract (5 ml)
- 1/4 cup whole milk (60 ml)
For the Frosting
- 8 oz full-fat block cream cheese, just softened, not warm or runny (227 g)
- 1/2 cup unsalted butter, pliable, not melted (113 g)
- Approximately 3 cups confectioners’ sugar, measured before sifting (340 g)
- 1 teaspoon pure vanilla extract (5 ml)
Preparation
- As needed, separate from the 180 ml batter oil: a thin film of neutral oil for the pans.
Instructions
- Prepare the sweet potato mash. Scrub and pierce the whole sweet potatoes. Roast on a rimmed tray at 400°F (205°C) for about 45–75 minutes, until a knife passes easily through the center. Cool enough to handle, remove the skins and mash thoroughly. Remove persistent fibers, weigh 360 g into a shallow bowl and let it cool completely. Do not add water or milk.
- Prepare the oven and pans. Set the oven to 350°F (175°C) conventional and position a rack in the center. Lightly oil two 8-by-2-inch round light-metal pans, line the bases with parchment circles and lightly oil the parchment. After roasting, wait for the oven to settle to the lower temperature.
- Whisk the dry ingredients. Whisk the flour, baking powder, baking soda, salt, cinnamon and nutmeg in a bowl for about 30 seconds, until evenly distributed.
- Combine the wet ingredients. Whisk the oil and both sugars in a second bowl, breaking up brown-sugar lumps. Whisk in the eggs, vanilla and milk, then the completely cooled mashed sweet potato until evenly colored with no large pieces.
- Fold the batter. Fold the dry mixture into the wet mixture with a flexible spatula, scraping the bottom and sides. Stop as soon as no dry flour remains; do not continue beating.
- Divide between the pans. Weigh the actual batter and divide it equally between the prepared pans, approximately 655 g per pan before bowl losses. Smooth the tops and do not fill above two-thirds of pan depth. If the batter exceeds that limit, check the measured ingredients rather than overfilling.
- Bake until the centers are set. Bake for approximately 30–40 minutes, beginning checks at 30 minutes. The centers should be set and spring back lightly, and a tester inserted in the center should come out without wet batter; a few moist crumbs are fine. If needed, bake for another 3–5 minutes and check again. Avoid repeatedly opening the oven early.
- Cool the layers completely. Let the cakes cool in their pans for about 15 minutes. Loosen the edges, carefully turn out the layers, remove the parchment and place them upright on wire racks. Allow about another 90 minutes, or longer if needed, until completely cool. If a layer has a pronounced dome, trim only enough from the cooled top to make a flat stacking surface.
- Mix the cream cheese frosting. Beat the pliable butter on medium speed for about 1 minute, until smooth. Add the just-softened cream cheese and mix on low to medium for about 30–60 seconds, just until combined. Add the sifted confectioners’ sugar in three portions on low speed, then the vanilla. Scrape the bowl and stop once smooth and spreadable. If soft, refrigerate for 15 minutes, stir gently and reassess; repeat a short chill if necessary.
- Stack and frost the cake. Place the first layer flat side down on a serving plate. Spread approximately 200 g of frosting over it, stopping just short of the edge. Add the second layer flat side up. Spread approximately 220 g of frosting over the top and use the remainder for a thin coating on the sides. If the layers slide, refrigerate the assembly for 15 minutes before continuing.
- Chill and cut twelve slices. Refrigerate the assembled cake for approximately 30 minutes before cutting it into 12 wedges. If the cake has been refrigerated overnight, let individual portions stand for about 20–30 minutes before serving for a softer texture, within the food-safety limits below. Return the remaining cake promptly to the refrigerator.
Notes
- Timing starts with prepared, completely cooled roasted sweet potato mash. Starting with raw sweet potatoes takes roughly 5–5 3/4 hours overall, including roasting and cooling. Allow longer if the layers or frosting need more time.
- Use plain orange-fleshed sweet potato mash without added butter, milk or sugar. Weigh 360 g after cooking and peeling; a potato count is only a shopping estimate.
- Use full-fat block cream cheese and pliable, unmelted butter. Frost only completely cooled cake layers.
- Neutral canola or sunflower oil can replace vegetable oil by the same volume.
- Refrigerate covered at 40°F (4°C) or below. For a short quality-focused plan, make no more than one day ahead and use refrigerated leftovers the following day.
- Limit cumulative unrefrigerated time for frosting preparation, assembly and serving to two hours, or one hour above 90°F (32°C). Refrigeration does not reset that clock.
- Contains wheat, eggs and milk. Check ingredient labels for other allergens and cross-contact.
- Nutrition is an estimate per one-twelfth of the cake, including all frosting.
Nutrition Information:
Yield: 12 Serving Size: 1 sliceAmount Per Serving: Calories: 590Total Fat: 30gSaturated Fat: 11gCholesterol: 85mgSodium: 280mgCarbohydrates: 77gFiber: 2gSugar: 52gProtein: 6g
Nutrition information is provided as an estimate only and may vary based on specific ingredients, brands, and portion sizes used. This information should not be considered medical or nutritional advice.
12 Sweet Favorites — Yours, Free 🍰
Tiramisù, no-bake cheesecake, the perfect chocolate chip cookie & 9 more reader-loved desserts — gathered into one beautiful free recipe book. From my kitchen to yours.
No spam, just sweet things. Unsubscribe anytime.