Halloween Cake Pops
🎁 FREE E-BOOK: 12 Sweet Favorites — reader-loved desserts in one beautiful recipe book.
Halloween Cake Pops have moist vanilla centers beneath sweet candy shells, with orange pumpkins, white mummies and bright green monsters sharing the same small, round shape. Raised pumpkin ribs, delicate bandages and candy eyes give each one a distinct Halloween finish.

There is something welcoming about a Halloween dessert table with a little homemade character. These small treats bring the familiar flavor of vanilla cake and buttercream into a playful arrangement that feels festive without needing elaborate sculpting or a different filling for every design.
Keep this Halloween Cake Pops recipe for the decorating sequence as much as the finished trio: one cake, one buttercream and three clear finishing paths. The make-ahead options and visible readiness cues help you plan the project around your party rather than rush the dipping at the last minute.
Halloween Cake Pops at a Glance
This batch makes 24 Halloween Cake Pops, divided evenly into eight pumpkins, eight mummies and eight green monsters. Allow a generous decorating session plus the cooling and chilling time that keeps the centers manageable.
| Detail | What to expect |
|---|---|
| Flavor | Vanilla cake, vanilla buttercream and sweet vanilla-flavored coating |
| Texture | Moist, compact cake center with a firm candy shell |
| Yield | 24 cake pops: 8 of each design |
| Difficulty | Intermediate: baking, shaping, dipping and small piped details |
| Prep time | 90 minutes |
| Cook time | 30 minutes; estimated bake range 25 to 32 minutes |
| Additional time | 3 hours 30 minutes for cooling, chilling and setting |
| Total time | About 5 hours 30 minutes; allow longer if cooling or setting needs it |
| Method | Bake, crumble, bind with buttercream, chill, coat and decorate |
| Best For | Halloween parties, dessert tables and individually wrapped party favors |
Why These Halloween Cake Pops Hold Their Shape
The structure of these Halloween Cake Pops comes from three choices working together: a restrained amount of buttercream, equal centers and a set coating anchor around each stick. The decorations sit on a simple round base, so every design begins with the same support.
- Enough binder to hold: The buttercream joins fine crumbs into smooth centers without turning the mixture into a loose paste.
- Consistent portions: Dividing the whole mixture into 24 keeps the load on the sticks similar across the batch.
- A secure starting point: The small coating collar sets before dipping, helping the center stay attached as the shell forms.
Why You Will Love This Halloween Cake Pop Trio
Halloween Cake Pops suit a hands-on baking afternoon when you want several recognizable designs from one batch. The decorating takes attention, but the cake can be prepared the day before and the individual portions are easy to arrange together.
- Three coordinated designs: Orange, white and green give the dessert table variety without three separate cakes.
- Small individual servings: Each guest can choose a pumpkin, mummy or monster without cutting a larger dessert.
- A flexible starting day: Preparing the cake ahead leaves the next session for shaping and decorating.
The Balance Behind Firm Centers and Smooth Coating
A firm center and a coating that drains smoothly matter more than extra decoration. For Halloween Cake Pops, crumb cohesion, support at the stick and coating temperature each affect whether the next stage is ready to begin.
Crumb and Buttercream Cohesion
For Halloween Cake Pops, fine cake crumbs distribute buttercream more evenly than large pieces. Too little leaves gaps that crumble; too much makes the center soft and pasty, which can weaken its hold during dipping.
The useful decision is the squeeze test. Judge whether the mixture holds a smooth ball before adding more buttercream, rather than treating the entire small frosting batch as a required addition.
Portion Weight and the Coating Anchor
Each stick has to carry the center and its new shell while excess coating drains away. Similar portion weights and a set collar reduce variation in that load across the Halloween Cake Pops.
A large or soft center can pull against the anchor, especially in thick coating. Equal portions and a fully set collar give you a more consistent starting point without relying on a universal cake-pop weight limit.
Temperature and Coating Flow
The coating for Halloween Cake Pops needs to flow while the centers remain firm. A very cold center and hot coating create a sharper temperature contrast, while coating that is too thick leaves a heavier shell and puts more strain on the stick.
Follow the melting instructions for your candy melts and assess the flow from a spoon. Warm, fluid coating and chilled, unfrozen centers are the practical goal; a single temperature cannot cover every brand and color.
Ingredients for the Vanilla Centers and Halloween Finish
The cake and buttercream use everyday baking ingredients; precolored candy melts provide the three Halloween finishes. The frosting and coating quantities include reserves, so adding or using every gram is not the goal when making Halloween Cake Pops.

Ingredient List
Measure the vanilla cake ingredients first, then prepare the small buttercream batch and separate the dipping colors. Keep the coating reserved for stripes, ribs and leaves apart from the coating used for dipping.
Vanilla cake ingredients
- All-purpose flour: 1 1/3 cups (160 g), spooned and leveled
- Double-acting baking powder: 1 1/2 teaspoons (6 g)
- Fine salt: 1/4 teaspoon (about 1.5 g)
- Unsalted butter: 6 tablespoons (85 g), softened, not oily
- Granulated sugar: 3/4 cup (150 g)
- Large eggs: 2 (about 100 g without shells), room temperature
- Pure vanilla extract: 1 teaspoon (5 ml)
- Whole milk: 1/2 cup (120 ml), room temperature
- Separate pan grease: About 1 teaspoon neutral oil (5 ml), pan only
Vanilla buttercream ingredients
- Unsalted butter: 2 tablespoons (28 g), softened
- Confectioners’ sugar: 3/4 cup (90 g), sifted if lumpy
- Whole milk: 2 teaspoons (10 ml)
- Pure vanilla extract: 1/2 teaspoon (2.5 ml)
Coating and decorating ingredients
- Bright white vanilla-flavored candy melts: 12 ounces (340 g), reserve about 40 g for stripes and attaching details
- Orange vanilla-flavored candy melts: 6 ounces (170 g), reserve about 15 g for pumpkin ribs
- Green vanilla-flavored candy melts: 6 ounces (170 g), reserve about 15 g for pumpkin leaves
- Small edible candy eyes: 32, two per mummy and monster
- Thin pretzel pieces: 8, about 1/4 inch (6 mm), pumpkin stems
- Optional solid vegetable shortening: Up to 4 teaspoons (about 18 g), only if manufacturer allows: up to 2 teaspoons white, 1 each orange/green
Buttercream Reserve and Coating Choices
The buttercream for Halloween Cake Pops makes approximately 130 g, but the starting amount for the crumbs is 90 g. The reserve lets you adjust for the cooled cake’s moisture a little at a time; stop when the mixture holds together, even if frosting remains.
Buy bright white, orange and green vanilla-flavored candy melts intended for melting and dipping. Their working quantity provides depth in a narrow cup, and some coating will remain afterward. Real white chocolate and baking chips need their own melting, coloring and setting approach.
If the coating label permits solid vegetable shortening, use only the listed optional allowance. Water-based food coloring can seize coating, so precolored melts keep these Halloween Cake Pops simpler to finish. Check the candy-eye and coating labels when serving anyone with allergies; the cake itself contains wheat, eggs and dairy.
For a broader introduction to shaped cake-and-frosting centers, see our guide to making cake pops. The measurements and 24-pop division here belong to this vanilla Halloween batch.

Tools for Baking, Shaping and Dipping Cake Pops
A scale, narrow dipping cups and a stand with space for the whole batch make Halloween Cake Pops easier to handle. Gather the baking tools as well as the dipping setup before the cake goes into the oven.
- Cake preparation: conventional oven with a center rack; 8-inch light-colored metal round pan at least 2 inches deep (20 cm x 5 cm); parchment; bowls; whisk; electric hand mixer; spatula.
- Cooling: wire rack; parchment-lined tray; refrigerator at or below 40°F (4°C).
- Portioning: scale; small scoop or tablespoon; large crumb-mixing bowl.
- Dipping: three clean, dry, narrow heat-safe cups of approximately 1-cup capacity; a manufacturer-approved melting method.
- Decorating: 24 food-safe white lollipop sticks about 6 inches (15 cm) long; stable 24-position upright stand; three small piping bags.
Set Up the Three-Color Decorating Station
Dipping Halloween Cake Pops moves more comfortably when cold centers, dry cups and upright supports are already in place. Set aside refrigerator space for the tray and stand, and choose a work surface where the sticks cannot be knocked over.
- Keep each dipping cup no more than two-thirds full so the center can displace coating without overflow.
- Separate about 40 g white coating for mummy stripes and attachment, 15 g orange for ribs and 15 g green for leaves before melting the dipping supply.
- Lay out 32 candy eyes and eight short pretzel stems, and keep the piping bags close to the stand.
- Dry the cups, spoons and bags completely; even a little water can spoil the dipping coating.
A clear space between finished Halloween Cake Pops protects the raised details while they set. Check that your stand can hold all 24 without neighboring shells touching.
Plan the Cake, Chill and Decorating Stages
Plan about 5 hours 30 minutes for Halloween Cake Pops made in one day. Cooling, chilling and setting are separate stages; their readiness cues matter more than meeting a particular clock time.
| Stage | Planning allowance | Ready for the next stage when… |
|---|---|---|
| Bake the cake | About 30 minutes; check from 25 minutes | The top springs lightly and the center has no wet batter |
| Cool the cake | About 60 minutes | The cake has no residual warmth |
| Chill shaped centers | 2 hours | Centers are firm and stable |
| Set the coating anchors | 10 to 15 minutes; allow 15 | The coating collar holds the stick securely |
| Set the final coating and details | Generally 15 to 20 minutes; allow 15 in the estimate | The shell and decorations are dry to the touch |
Active preparation, shaping and decorating add about 90 minutes across these stages. The estimate adds that work to baking, cooling, chilling and setting without subtracting overlapping time. If the cake needs longer to cool or the coating is still tacky, extend the schedule. For a party, start at least 5 hours 30 minutes before you need the finished batch, with additional room for those variations.
To make Halloween Cake Pops over two days, bake and completely cool the cake on day one, then wrap it well and refrigerate it. On day two, make the buttercream, shape and chill the centers, and finish the dipping and decoration before the pops need to be packed or displayed.
What to Expect from the Vanilla Centers and Candy Shell
The finished Halloween Cake Pops should have a compact vanilla center and a sweet, set shell, with small handmade differences in the piped details. All three characters share the same filling.
- The interior is moist, fine and closely packed, rather than airy like a miniature cake baked in a mold.
- The pumpkin design describes the orange shape and ribs; the cake contains vanilla, with no pumpkin puree or pumpkin spice.
- Mummy stripes and pumpkin ribs stand slightly above the smooth base, while the green monsters have a simpler face.
- The shell is firm when set, with delicate eyes and raised details that need protection from rubbing.
How to Make Halloween Cake Pops
Make the vanilla cake first, then use its cooled crumbs to shape the centers. The Halloween Cake Pops need firm centers and set stick anchors before full dipping; the final three phases give each color group its own decoration sequence.
1. Mix and Bake the Vanilla Cake
Creamed butter and sugar provide the starting structure for the vanilla cake inside these Halloween Cake Pops. Keep the butter softened rather than oily so it can become pale and aerated as it is beaten.
Heat a conventional oven to 350°F (175°C) with a rack in the center. Grease the 8-inch round metal pan with the separate pan oil and line the base with parchment. Whisk the flour, baking powder and salt together in a bowl.
Beat the cake butter and granulated sugar for 2 to 3 minutes, until paler and aerated. Beat in the eggs one at a time, scrape the bowl, then add the cake’s vanilla extract. With the mixer on low, add the dry ingredients in three additions and the milk in two, beginning and ending with the dry mixture.
Stop mixing as the last flour streak disappears, then scrape and fold through the bottom of the bowl. Spread the batter in the prepared pan and bake for approximately 25 to 32 minutes, beginning the doneness check at 25 minutes.
What you should see: The batter is smooth and spreadable. The baked top springs back lightly, and a skewer inserted in the center comes out without wet batter.

2. Cool, Crumble and Bind the Cake
Completely cooled crumbs let you judge the binder for Halloween Cake Pops accurately. Warm cake can soften the buttercream and make the mixture seem wetter than it will be once chilled.
Cool the cake in its pan for 10 minutes, release it onto a wire rack and allow about 50 minutes more, or as long as needed to lose all warmth. Beat the buttercream ingredients together for 2 to 3 minutes until smooth.
Crumble the cooled cake finely into a large bowl, removing only genuinely tough or overbrowned patches. Mix in 90 g of buttercream, then squeeze a tablespoon of the mixture and roll it into a ball. If it breaks apart, add reserved buttercream about 1 teaspoon (5 g) at a time and retest.

Stop as soon as the mixture holds together without a wet, greasy smear. If the entire reserve still cannot bind it, check for overly dry cake rather than continuing to add more frosting. Halloween Cake Pops need cohesion, not a frosting-heavy paste.

What you should see: Fine crumbs become a smooth, cohesive sample that holds its shape without cracking apart or smearing buttercream onto your fingers.

3. Divide and Chill the Centers
Equal centers keep the three groups of Halloween Cake Pops similar in size and easier to dip. The whole usable mixture determines the portion weight, so weigh it before dividing.
Divide the mixture’s weight by 24 and portion it with the scale. Expect approximately 25 to 30 g per center, depending on the cake’s moisture. Roll 24 smooth balls about 1 1/4 inches (3 cm) across and arrange them on the parchment-lined tray.
Cover the centers for the Halloween Cake Pops and refrigerate for 2 hours. Keep the centers chilled rather than frozen, and gently reroll any seams before adding the sticks.
What you should see: Twenty-four similar round centers feel firm and stable, with smooth surfaces and no deep seams.

4. Melt the Coating and Set the Stick Anchors
A small set collar supports each center before it meets the full dipping coating. Keep the decoration reserves separate so dipping the Halloween Cake Pops does not use up the coating needed for the final details.
Melt each color separately in small batches, using dry tools and following the candy-melt label. Start the white dipping supply with about 6 ounces (170 g), then replenish it as the level drops. Keep every cup no more than two-thirds full; use the remaining white dipping supply gradually.
The coating should fall continuously from a spoon. If it needs thinning and the manufacturer permits shortening, stay within the allowance: up to 2 teaspoons for white and 1 teaspoon each for orange and green. More heating is not the default solution for thick coating.
Dip each stick tip about 1/2 inch (1 cm) into coating, then insert it halfway into a center without piercing through. Use the matching base color for each group of eight. Stand the pops upright and refrigerate for 10 to 15 minutes, until the anchors have set.

What you should see: The coating flows from the spoon without dropping in heavy clumps, and each stick has a set collar at the base of its center.

5. Dip the Three Base Colors
A first test pop shows whether the center, anchor and coating are ready together. Work with a small group of Halloween Cake Pops at a time so the remaining centers stay firm in the refrigerator.
Let the chilled group briefly lose its surface chill while the centers remain firm and the anchors stable. Check that the surface is dry and the coating is warm and fluid, not hot. Do not dip frozen centers.
Dip each pop once, covering the center down to the anchor seam. Lift straight out, then gently tap and rotate to let excess coating drain; avoid swirling the center through the cup. Return it upright to the stand. Make eight orange bases, eight white bases and eight green bases.
If a center slips, pause before continuing. Chill the undipped centers and check that their anchors have set and the coating is flowing easily. Replenish dipping depth in small batches without overfilling the cups.
What you should see: A complete, relatively thin shell meets the anchor collar, excess coating drains away, and the center stays steady on its stick.

| Design | Base readiness | Decoration order | Before packing |
|---|---|---|---|
| Pumpkin | Orange base fully set | Attach pretzel stem; pipe 3 to 4 orange ribs; add a small green leaf | Stem, ribs and leaf are secure and dry |
| Mummy | White base fully set | Attach 2 eyes with white dots; pipe fine diagonal bandages around them | Eyes remain visible; bandages are dry |
| Green monster | Green base slightly tacky, or fully set with attachment dots | Attach 2 eyes; keep the rest of the surface simple | Eyes are secure and shell is dry |
6. Decorate the Pumpkin Cake Pops
The pumpkin group gets its character from a few raised ribs and a short stem. Let the orange bases set first so the piped coating stays distinct instead of blending into the shell.
Attach one 1/4-inch (6 mm) pretzel stem near the top of each orange pop with a small dot of coating. Put the reserved orange coating into a piping bag and pipe three or four restrained curved ribs across the visible side. Use the reserved green coating to pipe one small leaf near the stem.
Keep the ribs fine enough that the round base remains visible. Repeat for all eight pumpkins in the Halloween Cake Pops batch.
What you should see: Each orange sphere has a secure short stem, a few raised curved ribs and a small green leaf near the top.

7. Add the Mummy Eyes and Bandages
The mummy faces stay readable when the eyes are attached before the bandages. A fully set white base gives the diagonal lines a clean surface to sit on.
Attach two candy eyes to each white pop with tiny dots of reserved white coating. Pipe fine diagonal white lines across the surface, leaving both eyes visible. Let the lines cross loosely rather than building a thick layer around the center.
Repeat for eight mummies, using 16 candy eyes. Thin stripes give these Halloween Cake Pops their wrapped appearance without burying the face.
What you should see: Two eyes remain clearly visible among delicate raised white bandages, with no coating smeared over the pupils.

8. Finish the Green Monsters and Let All Pops Set
The green monsters need only two eyes, which keeps their finish distinct from the striped mummies and ribbed pumpkins. Attach the eyes while the green base is slightly tacky, or use tiny green coating dots after it sets.
Add two candy eyes to each of the eight green pops, using the remaining 16 eyes. Let every shell and decoration set completely, generally 15 to 20 minutes for confectionery coating, following your product’s instructions.
Check the raised lines, leaves and eye attachments as well as the base shells. Bag or box the Halloween Cake Pops only when the surfaces are dry to the touch.
What you should see: All 24 characters have secure sticks, attached details and dry shells that will not smear during careful packing.

How to Tell the Cake and Coating Are Ready
The cake, centers and shells each have a different ready point. Use these signs to judge Halloween Cake Pops between stages rather than assuming that a timer alone means they are ready.
Cake Doneness
The cake for Halloween Cake Pops should be baked through while its crumb remains suitable for binding. Begin checking at 25 minutes and use the springback and skewer results together.
A lightly springing top and a central skewer without wet batter indicate the baking endpoint. The cake must then cool completely before crumbling; even a baked-through layer is not ready to mix with buttercream while it is still warm.
Center and Coating Readiness
Firm centers, flowing coating and dry finished shells are separate readiness checks for Halloween Cake Pops. A pop can look smooth while its coating is still too tacky to wrap.
| Stage | Ready sign | Wait or adjust if… |
|---|---|---|
| Bound crumbs | A squeezed sample holds a smooth ball without a greasy smear | The sample breaks apart or feels pasty |
| Chilled center | Firm, stable and smooth | The center softens, has deep seams or is frozen |
| Anchor | Set collar and steady stick | The stick turns or the collar is soft |
| Dipping coating | Warm, fluid flow from a spoon | It falls in heavy clumps or feels hot |
| Finished shell | Dry to the touch, with secure details | Bandages, ribs or attachments still smear |

Small Decorating Decisions That Keep the Trio Clear
Decoration scale makes a difference once the base shells are set. For a clear trio of Halloween Cake Pops, let the eyes and a few raised lines provide the character rather than crowding every surface.
When planning these Halloween cake pops, I chose three designs that all begin with the same round shape. The useful lesson is restraint: a few curved pumpkin ribs, delicate mummy stripes, and two candy eyes give each pop its own personality without making the decorating feel overwhelming.
- Use one finished pop as a size reference: Complete the first pumpkin or mummy before repeating the details, so rib and stripe thickness stay consistent within that group.
- Judge faces from the front: Stand back briefly after placing the eyes; visible spacing makes the mummy or monster recognizable without adding more decoration.
- Leave some smooth shell showing: Gaps between the pumpkin ribs and mummy bandages preserve the round shape and keep the piped details from becoming a heavy coating layer.

Why Cake Pops Crack, Slide or Lose Their Details
Most problems with Halloween Cake Pops begin at a stage transition: binding before cooling, dipping before anchors set or packing before the shell is dry. Identify the symptom before changing the mixture or coating.
| Mistake | What happens | Why it happens | How to prevent or fix it |
|---|---|---|---|
| Too little binder | Centers crack apart while rolling | Crumbs are dry or buttercream is not evenly distributed | Mix thoroughly, then use the reserved buttercream in 5 g additions only until the squeeze test holds |
| Too much binder or warm cake | Centers feel greasy and soft | Excess frosting or softened butter weakens the crumb mixture | Start with 90 g and use fully cooled cake; chill a warm mixture before judging it again. Chilling will not remove excess frosting |
| Dipping with an unset anchor or soft center | The pop slides or falls from its stick | The center is not supported against the weight and drag of the coating | Pause, chill undipped centers and let collars set; check equal portions and coating flow. A fallen pop may be served as a cake ball rather than reliably reattached |
| Frozen centers and hot coating | The shell develops cracks | The strong temperature contrast stresses the setting shell | Use firm, unfrozen centers and warm fluid coating. A small coating patch may cover a crack, but an invisible repair is not assured |
| Wet tools or overheated coating | Coating becomes grainy or seized | Moisture or excessive heat disrupts its texture | Keep tools dry and follow the label; replace the damaged dipping batch rather than adding water |
| Decorating at the wrong stage | Eyes slide or stripes blend into the shell | The base is too wet for the chosen detail | Let pumpkin and mummy bases set; attach eyes with matching coating dots when the base is already dry |
| Packing a tacky or damp pop | Details smear or bags cling | Coating is unset or condensation is on the surface | Wait for a dry shell before wrapping; protect cold pops in their closed container during the temperature transition |

Beautiful Ways to Serve Halloween Cake Pops
Display Halloween Cake Pops with enough space for the raised details and a support that carries the sticks securely. The orange, white and green colors provide the decoration, so a simple pale stand or box lets the characters remain the focus.
A Three-Color Halloween Display
An upright arrangement of Halloween Cake Pops keeps the faces visible and the shells apart. Alternate pumpkins, mummies and monsters across a stable stand, with clear space between their heads.
Bring out the quantity you need for the current serving period and keep the remainder protected in the refrigerator. If you want another vanilla bake alongside the Halloween Cake Pops, vanilla cupcakes with buttercream offer a different serving format.

Individually Wrapped Party Favors
Clear food-safe bags show the eyes and raised lines of Halloween Cake Pops while shielding them from casual handling. Choose bags large enough that the plastic does not press tightly against the decoration.
Slip a completely dry pop into each bag and secure it around the stick below the shell. Keep wrapped Halloween Cake Pops upright and protected until they are handed out, following the cold-storage and serving limits below.

A Protected Gift Box
A rigid box with a fitted stick support keeps Halloween Cake Pops separate during transport. The support should hold the sticks so the shells do not carry the weight or rest against each other.
Arrange the Halloween Cake Pops with clearance above the stems and between the faces. Close the box without touching the raised coating, keep it chilled during holding and avoid leaving it in a warm car.

Keeping Halloween Cake Pops Fresh and Neatly Decorated
Protecting the shell is part of storing Halloween Cake Pops well. Use a rigid airtight container with the set decorations separated, and keep the batch refrigerated until the serving period.
Storage
Refrigerate Halloween Cake Pops at or below 40°F (4°C) and aim to enjoy them within three days for best quality. That quality window is not a guarantee of shelf life; keep the container closed to protect the finish from moisture and handling.
The FDA food-storage guidance recommends a refrigerator temperature of 40°F or below and limits foods requiring refrigeration to two hours out of refrigeration, or one hour above 90°F (32°C). Use those limits when serving this refrigerated batch; they do not establish a separate cake-pop shelf life.
When bringing a closed container out of the refrigerator for serving, keep it closed briefly during the temperature transition and count that time within the handling limit. If moisture appears on a shell, wait until the surface is dry before wrapping; candy-eye colors and raised details can be affected by condensation.

Making the Components Ahead
The most convenient stopping point is the completely cooled cake. Wrap and refrigerate it the day before, leaving the shaping and decoration of Halloween Cake Pops for the next session.
You can also cover the shaped centers and refrigerate them overnight. Keep them firm and their surfaces dry before anchoring and dipping; prepare the coating and final decorations during the finishing session.
Freezing and Thawing the Centers
Undecorated centers are the preferred freezer option for Halloween Cake Pops because candy eyes and raised lines can react differently to thawing moisture. Aim to use frozen centers within one month for quality, with airtight wrapping and a protective container.
Thaw them covered in the refrigerator, then check that they are firm and their surfaces are dry before adding the coating. Finished Halloween Cake Pops may lose neat detail after freezing, so save the colored shells and faces for after thawing whenever possible.
Decoration Changes and Coating Substitution Limits
Small changes to the placement of ribs, bandages and eyes can vary the appearance of Halloween Cake Pops while keeping the same vanilla center. Changing the cake, frosting or dipping product affects more than the decoration.
You can vary the angle of mummy bandages or the spacing of monster eyes using the listed coating and candy eyes. Keep the three groups at eight each and avoid adding heavy details that increase the load on a stick.
White chocolate needs a suitable melting and coloring method, and its tempering or setting behavior differs from confectionery coating. Cream-cheese frosting, boxed cake, chocolate cake and dietary substitutions also change moisture or structure; choose a recipe written for those ingredients rather than exchanging them directly here.
Questions About Making Halloween Cake Pops
Halloween Cake Pops can be prepared in stages, but the right stopping point depends on whether you are holding plain centers or finished decorations. Binder and coating questions also depend on the ingredients used here.
How Much Frosting Should I Add to Cake Pops?
For these Halloween Cake Pops, use 90 g of buttercream to start, then add the reserve in 5 g portions only if the crumbs will not hold a ball. Stop at a cohesive, smooth center, even if frosting remains.
Why Do My Cake Pops Fall Off the Sticks?
A soft center, unset collar or thick coating can pull a pop loose. Check those three conditions before dipping the next one, and keep the portions equal rather than making some noticeably larger.
Why Does the Coating on My Cake Pops Crack?
A sharp temperature difference can crack the shell. Dip chilled, unfrozen centers into warm, flowing coating and avoid packing until the shell is fully set.
Can I Make Halloween Cake Pops Ahead of Time?
Yes. Prepare the cooled, wrapped cake the day before, or refrigerate covered shaped centers overnight. Leave dipping and decorating for the finishing session so the details can set before packing.
Do Halloween Cake Pops Need to Be Refrigerated?
For this recipe, refrigeration is the recommended storage route. Keep the finished pops protected at 40°F (4°C) or below and aim to enjoy them within three days for quality; limit the time out during serving.
Can I Freeze Halloween Cake Pops?
Freeze undecorated centers for the most predictable finish, aiming for one month for quality. Thaw covered in the refrigerator and coat only when firm and dry; freezing decorated pops can affect eyes and piped lines.
Can I Use White Chocolate Instead of Candy Melts?
Use a method written for white chocolate if you change the coating. It may need tempering and suitable coloring, so the candy-melt melting and setting instructions do not transfer automatically.
Keep the Halloween Dessert Table Going
Once the Halloween Cake Pops are planned, choose another bake according to the dessert table you want: more small treats, another decorating project or a broader fall flavor.
More Bite-Size Treats to Share
Small portions bring variety to the platter without another centerpiece. These options offer different centers and textures alongside the dipped vanilla pops.
- Oreo Balls: Cookies-and-cream centers with a coating, served without a stick.
- Brownie Bites: Small baked chocolate portions for a richer contrast.
- Sugar Cookie Fudge: Sweet squares that add a different shape to the party platter.
- Chocolate Fudge: A dense chocolate treat to cut into shareable pieces.
Try Another Halloween Decorating Project
A cookie or pan bake changes the decorating surface while keeping the seasonal theme. Pick the format that fits the time and space available.
- Peanut Butter Spider Cookies: Recognizable Halloween spiders on a peanut butter cookie base.
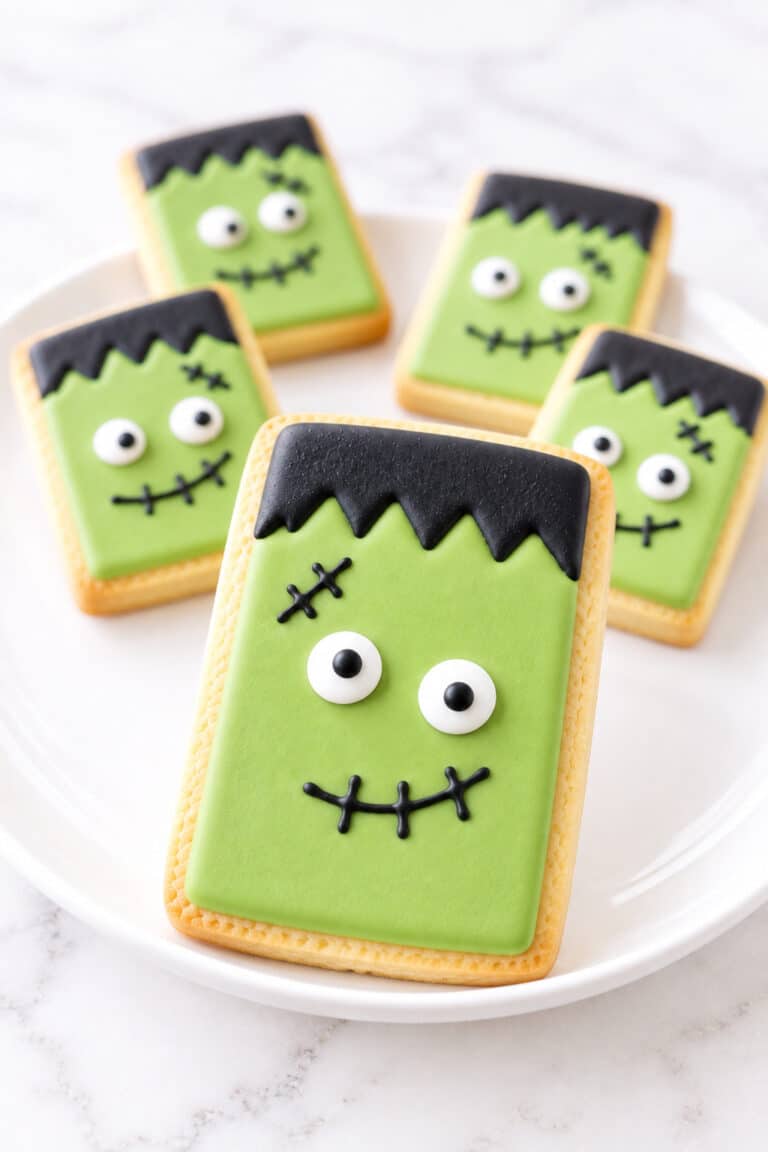
- Frankenstein Cookies: Green faces with royal-icing details on rectangular cut-outs.
- Halloween Brownies: A chocolate pan bake with seasonal finishing options.
- Halloween Cake: A larger centerpiece with orange buttercream and ghost decorations.
Take the Baking into Fall
For the next baking day, pumpkin and caramel offer a different seasonal direction. These recipes move beyond character decoration into familiar fall flavors.
- Pumpkin Sugar Cookies: Soft pumpkin cookies with a simple sugar-coated surface.
- Pumpkin Cupcakes: Individual pumpkin bakes when you want a cupcake format.
- Caramel Apples: Whole apples with a caramel coating for another handheld fall treat.
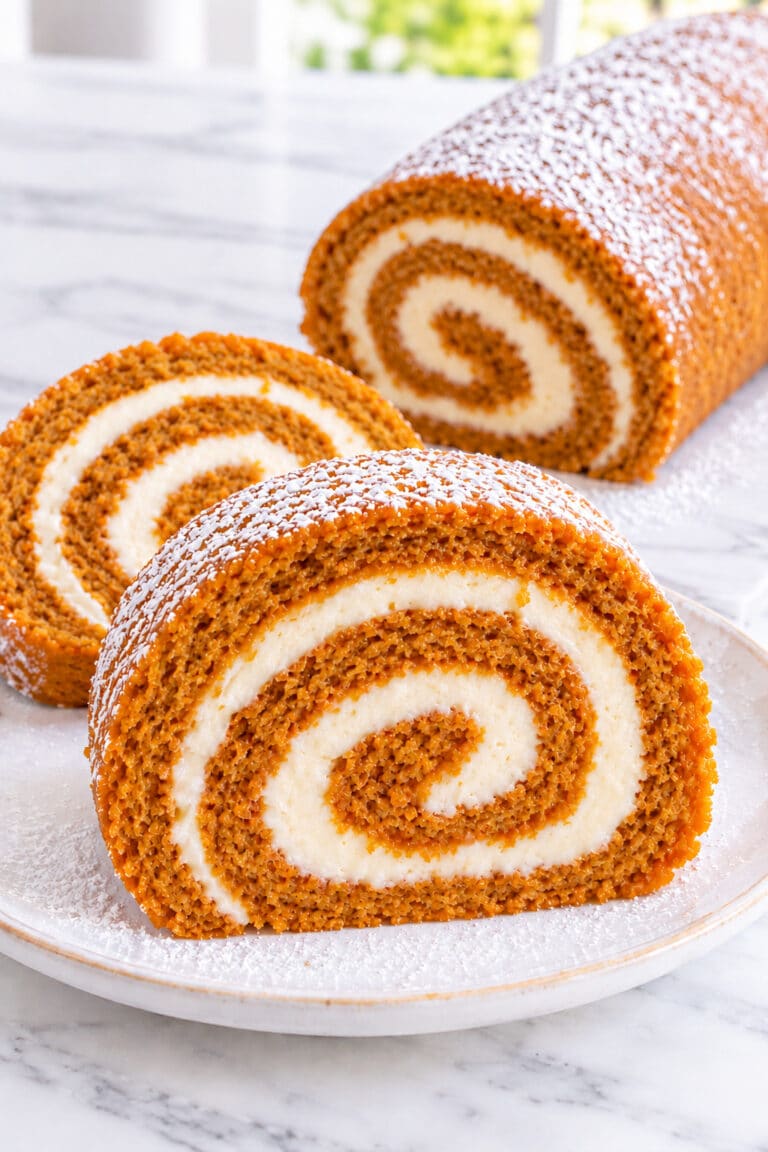
- Pumpkin Roll: A rolled pumpkin sponge with a contrasting creamy filling.
Why These Halloween Cake Pops Belong in Your Recipe Box
Halloween Cake Pops are a useful seasonal reference because the recipe brings the three designs, shopping quantities and stage planning together in one place.
- One Seasonal Reference: Keep the pumpkin, mummy and monster finishes together when planning the next Halloween dessert table.
- Clear Shopping Quantities: The measured cake ingredients and separate coating colors make the shopping list straightforward to revisit.
- Simple Character Details: Ribs, bandages and eyes provide a compact decorating vocabulary for these round centers.
- Deliberate Batch Division: The eight-of-each arrangement gives the next party plan a clear starting quantity.
- Stage Planning Reference: Separate cooling, chilling and setting allowances make it easier to choose a baking day.
- Protected Finish Planning: The stand, favor and box ideas keep presentation decisions close to the recipe.
A Little Character in Every Halloween Cake Pop
Halloween Cake Pops bring vanilla cake and buttercream into a small treat with a distinct seasonal face. The three colors and restrained details make each character recognizable while keeping the filling familiar.
For a future gathering, Halloween Cake Pops offer a clear place to begin: one vanilla cake and a balanced trio of designs. It is a recipe to return to when a little decorating time is part of the occasion.
A few curved ribs, fine white bandages and two candy eyes give the round shapes plenty of personality. The smooth shell between those details belongs in the finished look, too.
One batch of Halloween Cake Pops makes eight pumpkins, eight mummies and eight green monsters.

Halloween Cake Pops
Halloween Cake Pops with moist vanilla centers and sweet candy shells, decorated as eight pumpkins, eight mummies and eight green monsters. One homemade batch makes 24 Halloween treats.
Ingredients
For the Vanilla cake
- 1 1/3 cups (160 g) all-purpose flour, spooned and leveled if measured by cups
- 1 1/2 teaspoons (6 g) double-acting baking powder
- 1/4 teaspoon (about 1.5 g) fine salt
- 6 tablespoons (85 g) unsalted butter, softened but not oily
- 3/4 cup (150 g) granulated sugar
- 2 large eggs (about 100 g without shells), at room temperature
- 1 teaspoon (5 ml) pure vanilla extract
- 1/2 cup (120 ml) whole milk, at room temperature
- 1 teaspoon (5 ml) neutral oil, for greasing the pan only
For the Vanilla Buttercream
- 2 tablespoons (28 g) unsalted butter, softened
- 3/4 cup (90 g) confectioners' sugar, sifted if lumpy
- 2 teaspoons (10 ml) whole milk
- 1/2 teaspoon (2.5 ml) pure vanilla extract
For Coating and Decorations
- 12 ounces (340 g) bright white vanilla-flavored candy melts, reserving about 40 g for mummy stripes and attaching details
- 6 ounces (170 g) orange vanilla-flavored candy melts, reserving about 15 g for pumpkin ribs
- 6 ounces (170 g) green vanilla-flavored candy melts, reserving about 15 g for pumpkin leaves
- 32 small edible candy eyes, two per mummy and monster
- 8 thin pretzel pieces, each about 1/4 inch (6 mm) long, for pumpkin stems
- Up to 4 teaspoons (about 18 g) solid vegetable shortening, optional and only if permitted by the candy-melt manufacturer; up to 2 teaspoons for white coating and 1 teaspoon each for orange and green
Instructions
1. Mix and Bake the Vanilla Cake For the vanilla cake inside the Halloween Cake Pops, heat a conventional oven to 350°F (175°C), with a rack in the center. Grease an 8-inch light-colored metal round pan at least 2 inches deep with the separate pan oil and line the base with parchment. Whisk the flour, baking powder and salt. Beat the cake butter and granulated sugar for 2 to 3 minutes until paler and aerated. Beat in the eggs one at a time, scrape the bowl and add the cake vanilla. On low speed, add the dry mixture in three additions and the cake milk in two, beginning and ending with dry ingredients. Stop at the last flour streak, then scrape and fold through the bottom. Spread the smooth batter in the pan. Bake for approximately 25 to 32 minutes, checking from 25 minutes, until the top springs lightly and a central skewer has no wet batter.
2. Cool, Crumble and Bind the Cake Cool the cake in the pan for 10 minutes, release to a wire rack and cool about 50 minutes more, or until no warmth remains. Beat all buttercream ingredients for 2 to 3 minutes until smooth. Crumble the cake finely for the Halloween Cake Pops, removing only genuinely tough or overbrowned patches. Mix in 90 g buttercream. Squeeze and roll a tablespoon of the mixture: it should hold a smooth ball without cracking apart or leaving a wet, greasy smear. If crumbly, add reserved buttercream about 1 teaspoon (5 g) at a time and retest. Stop at cohesion; do not automatically add the full batch. If the reserve is insufficient, check cake dryness rather than adding unlimited frosting.
3. Divide and Chill the Centers Weigh the usable mixture for the Halloween Cake Pops and divide its weight by 24. Roll 24 equal smooth balls about 1 1/4 inches (3 cm) across, expecting approximately 25 to 30 g each. Place on a parchment-lined tray, cover and refrigerate for 2 hours until firm and stable. Keep them chilled, not frozen, and gently reroll seams before adding the sticks.
4. Melt the Coating and Set the Stick Anchors Set aside about 40 g white coating for bandages and attachments, 15 g orange for ribs and 15 g green for leaves. Melt colors separately in small batches with dry tools, following the package directions. Start the white dipping supply with about 6 ounces (170 g), then replenish gradually. Keep the three approximately 1-cup dipping cups no more than two-thirds full. Coating should flow continuously from a spoon. Thin only if the manufacturer permits, using up to 2 teaspoons shortening for white and 1 teaspoon each for orange and green. Dip each stick tip about 1/2 inch (1 cm) into matching coating and insert halfway into a center without piercing through. Assign eight centers to each color. Stand the Halloween Cake Pops upright and refrigerate for 10 to 15 minutes, until the anchor collars set.
5. Dip the Three Base Colors Remove a small chilled group of Halloween Cake Pops and allow brief surface tempering while centers stay firm and anchors stable. Check that surfaces are dry and the coating is warm and fluid, not hot. Do not dip frozen centers. Test one pop first. Dip once to the anchor seam, lift straight out, then gently tap and rotate to drain excess without swirling through the cup. Stand upright. Make eight orange, eight white and eight green bases. If a center slips, pause, chill undipped centers and check the set anchors, equal portions and coating flow. Replenish coating depth in small batches without overfilling.
6. Decorate the Pumpkin Cake Pops Let the eight orange Halloween Cake Pops set. Attach one short pretzel stem near the top of each with a coating dot. Pipe three or four restrained curved ribs on the visible side with reserved orange coating, then one small green leaf near the stem. Keep the round base visible between the raised details.
7. Add the Mummy Eyes and Bandages Let the eight white Halloween Cake Pops set. Attach two candy eyes to each with tiny dots of reserved white coating, using 16 eyes. Pipe fine diagonal white bandages across the surface, keeping both eyes visible. Avoid thick lines or coating over the pupils.
8. Finish the Green Monsters and Let All Pops Set Attach two candy eyes to each of the eight green bases while slightly tacky, or use tiny green coating dots after the base sets, using the remaining 16 eyes. Let every shell, rib, leaf, bandage and eye attachment set completely, generally 15 to 20 minutes or as directed by the product. All 24 Halloween Cake Pops should have secure sticks and dry-to-the-touch details before bagging or boxing.
Notes
- The buttercream for these Halloween Cake Pops makes about 130 g; begin with 90 g and add the reserve only until the crumb mixture holds a smooth ball.
- The 680 g coating supply provides dipping depth, including the decoration reserves; leftovers are expected. Melt and transfer in batches and keep cups no more than two-thirds full.
- Use precolored confectionery coating and follow its label. Water-based coloring, real white chocolate and baking chips need a different melting or coloring method.
- Times are planning estimates: 90 minutes prep, 30 minutes baking and 210 minutes cooling, chilling and setting. Allow longer if the cake is still warm or any coating remains tacky.
- Refrigerate set Halloween Cake Pops in a rigid airtight container at or below 40°F (4°C), with decorations separated. Aim to enjoy within three days for quality. Keep time out of refrigeration within two hours, or one hour above 90°F (32°C).
- For make-ahead Halloween Cake Pops, wrap and refrigerate the fully cooled cake the day before, or cover and refrigerate shaped centers overnight; dip and decorate during the finishing session.
- For freezing Halloween Cake Pops, prefer airtight undecorated centers and aim for one month for quality. Thaw covered in the refrigerator; coat only when firm and dry. Decorated pops may lose neat detail from condensation.
- The cake contains wheat, eggs and dairy. Check candy-melt, candy-eye and pretzel labels for additional allergens.
- Nutrition is approximate per cake pop and varies with coating thickness, buttercream use and ingredient brands.
Nutrition Information:
Yield: 24 Serving Size: 1 cake popAmount Per Serving: Calories: 166Total Fat: 7.8gSaturated Fat: 5.6gCholesterol: 25mgSodium: 70mgCarbohydrates: 22.9gFiber: 0.2gSugar: 17.5gProtein: 1.4g
Nutrition information is provided as an estimate only and may vary based on specific ingredients, brands, and portion sizes used. This information should not be considered medical or nutritional advice.
12 Sweet Favourites — Yours, Free 🍰
Tiramisù, no-bake cheesecake, the perfect chocolate chip cookie & 9 more reader-loved desserts — gathered into one beautiful free recipe book. From my kitchen to yours.
No spam, just sweet things. Unsubscribe anytime.