Sugar Cookie Fudge (Creamy White Chocolate & Real Cookies)
🎁 FREE E-BOOK: 12 Sweet Favorites — reader-loved desserts in one beautiful recipe book.
Sugar cookie fudge is the pale, creamy square you want beside a mug of coffee on a winter afternoon: white chocolate with pieces of fully baked vanilla sugar cookie tucked inside and scattered across the top. Each cut shows you the cookies before you take a bite.

It has the familiar vanilla sweetness of a holiday cookie tin, but the small-square ease of a candy tray. A 6-by-6 grid gives you 36 pieces to offer, pack or bring to a gathering.
This is the kind of recipe people save for the moment a tray needs one more bright, cookie-studded treat. The smaller pieces are folded through the fudge; the larger ones stay visible on top, so the finished squares look as inviting as the idea sounded.
Use cookies that are fully baked and cooled before you start. If those are ready, the fudge itself needs a gentle stovetop melt and refrigerator time, with a firm center as the cue to cut.
What Is Sugar Cookie Fudge?
The name describes two things: a chilled white-chocolate candy and pieces of real baked sugar cookie.
Sugar cookie fudge is a melt-and-set confection made from white chocolate and sweetened condensed milk, flavored with vanilla and filled with pieces of fully baked sugar cookie. It sets in the refrigerator rather than through the cooked-sugar stage used for traditional fudge. This version uses an 8-inch pan and makes 36 small squares; baking cookies from scratch is a separate step.
Sugar Cookie Fudge at a Glance
The texture, timing and yield matter when you are choosing a treat for a tray; the table puts those details together.
| Feature | What to expect |
|---|---|
| Texture | Firm when chilled, creamy as it warms slightly; cookie pieces soften over time |
| Flavor | White chocolate, vanilla and real baked sugar cookies |
| Difficulty | Approachable; gentle heat and a firm-center check matter |
| Time | About 25–35 minutes hands-on including cutting, plus at least 3 hours chilling; cookie baking is extra |
| Servings | 36 small squares from one 8-inch (20-cm) pan |
| Method | Low-heat stovetop melt, fold, refrigerate and slice |
| Best for | Holiday trays, make-ahead sharing and small sweet bites |
In short: Start with baked, cooled cookies and cocoa-butter white chocolate; spread the warm mixture in one pan, then wait for the center to set before slicing.
Planning a tray? Check that your cookies are baked and cool now; the refrigerator set is the part to schedule ahead.
Why This Cookie-Studded Fudge Works
A creamy bite and a clean slice depend on a few measured choices.
Moisture and structure: The sweetened condensed milk helps the chocolate form a creamy base, while cocoa-butter white chocolate provides the chilled structure for cutting. A cold edge alone can mislead you: the center is thicker and needs to feel firm too.
Fat and heat: A tablespoon of butter softens the bite; gentle heat lets it blend with the chocolate and milk. Pushing the heat can make white chocolate look oily or grainy before the fudge ever reaches the pan.
Cookie distribution: Weighing 90 g of pea-size pieces for the center and 40 g of larger pieces for the top avoids a layer of cookie dust and puts recognizable cookie in both the bite and the cut surface.
Why You’ll Love These Sugar Cookie Fudge Squares
Baked-cookie vanilla and a pale, cookie-studded cut make these little squares feel at home on a holiday tray.
- Real cookie pieces: You get baked vanilla cookie flavor and a visible cookie-studded center.
- One-pan finish: There is no sugar-syrup temperature to watch for this melt-and-set style.
- Small portions: A 6-by-6 cut makes a generous tray of modest squares.
- Easy to dress up: The optional sprinkle finish can match a holiday tray or stay plain.
Want a softer bite at serving time? Set out just the squares you plan to serve for 5 to 10 minutes, and keep the rest chilled.

How White Chocolate Sets Around the Cookie Pieces
Cooling firms the chocolate base; time changes the cookies tucked inside it.
This fudge sets as its white chocolate cools: the cocoa butter firms up, while the condensed milk keeps the base sweet and creamy. You are melting and cooling a mixture, not boiling it to a candy stage. That is why the word “baking” applies to the cookie pieces, not the fudge assembly.

Cookie pieces behave differently in the center and on the surface. The embedded pieces meet the moist fudge on more sides and soften with storage; the larger top pieces keep their shape more visibly. Fine cookie powder disappears into the base and can make the bite seem gritty, so pieces work better than crumbs.

Ingredients for Sugar Cookie Fudge
Measure the cookies after they are baked and completely cool. Cookie size varies, so count is less useful here than weight.
Ingredient List
Weigh the baked cookies after cooling, then keep 90 g of small pieces for the middle and 40 g of larger ones for the top.
- 18 ounces (510 g) white chocolate baking bars, finely chopped, with cocoa butter on the label
- 1 can (14 ounces / 397 g) full-fat sweetened condensed milk
- 1 tablespoon (14 g) unsalted butter, cut into small pieces
- 1/4 teaspoon (about 1.5 g) fine sea salt
- 1 teaspoon (5 ml) pure vanilla extract
- 4 1/2 ounces (130 g) fully baked vanilla sugar cookies, cooled and dry, divided into 3 ounces (90 g) pea-size pieces for the fudge and 1 1/2 ounces (40 g) larger pieces for the top
- 2 tablespoons (about 20 g) sprinkles, optional, for the top only

Why These Ingredients Matter in White Chocolate Fudge
The chocolate, milk and baked cookies each affect more than flavor.
White chocolate: Use baking bars that name cocoa butter on the label. White baking chips and confectionery coating can have different fats and may set differently; they are not verified weight-for-weight swaps in this recipe.

Condensed milk: The full-fat, sweetened 14-ounce can is the measured moisture and sweetness source. Evaporated milk is a different ingredient and cannot simply replace it.
Baked sugar cookies: Choose a dry, fully baked plain vanilla cookie. A different baked sugar cookie can be weighed at 130 g, although its sweetness and how quickly it softens may vary. The practical insight is to control piece size as well as weight: two bowls with the same cookie weight can leave very different patterns if one is mostly crumbs.
You can make the cookies from this Sugar Cookie Recipe, then cool and weigh them. Raw boxed cookie mix or dough does not belong in the ready-to-eat fudge. While planning this fudge, I learned that briefly heating raw cookie mix at home is not a reliable shortcut. I chose fully baked sugar cookies instead, so the flavor comes from actual cookie pieces. The FDA guidance on raw flour explains the concern.
Optional sprinkles: Add them on the surface so their color stays visible. Stirring colored sprinkles into warm fudge risks streaking its pale base.

Tools for a Smooth Melt and Clean Fudge Cut
The heavy saucepan helps with gentle heating, while parchment lets you lift the chilled slab without breaking the corners.
- 8-inch (20-cm) square pan with parchment long enough to make a lifting sling
- Heavy medium saucepan and silicone spatula that can scrape its base and corners
- Digital kitchen scale for the chocolate and the two cookie portions
- Knife and cutting board for the chocolate, cookies and finished 6-by-6 grid
- Refrigerator and a covered container for setting and storing the squares
A heavy saucepan gives the chocolate gentler contact with the burner. A candy thermometer is unnecessary because this mixture is melted just until smooth, then set cold.
Before You Start: Five Checks for Cookie Fudge
Check the baked cookies, chocolate and pan before heating so you can give the melt your full attention.
- ✓ Confirm that the sugar cookies are fully baked, completely cool and dry to the touch.
- ✓ Read the white-chocolate label for cocoa butter and check that you have 510 g.
- ✓ Check that the milk is one 397 g can of sweetened condensed milk, not evaporated milk.
- ✓ Set out an 8-inch square pan, parchment, a heavy saucepan and a spatula.
- ✓ Make enough flat refrigerator space for the pan for at least three hours.

What to Expect as the Fudge Sets
Here is what should look normal as the mixture warms and the slab cools.
The warm mixture should look thick, glossy and spreadable rather than pour like cake batter. Tiny bumps from the cookies are normal; an oily sheen that separates from the mixture is not.
After chilling, the edges may feel ready before the middle. The center should eventually feel firm without leaving a wet smear, and the cut squares should hold their shape. Cookie pieces inside grow softer over a few days: that change is expected, even if the top pieces remain more noticeable.
If you are wondering whether the fudge is ready after three hours, let the middle answer before you take a knife to the whole pan.
How to Make Sugar Cookie Fudge
Follow six stages, from a gentle melt to a clean cut. The center, rather than a timer alone, will tell you when the fudge is ready.
1. Prepare the pan and cookies
Set up the pan and keep the two cookie sizes separate.
Line the 8-inch pan with parchment overhang. Chop the chocolate finely, then weigh 90 g of baked, cooled cookies into pea-size pieces and 40 g into larger topping pieces; set the sprinkles aside. Look for: two distinct cookie sizes with little fine dust and parchment you can grip on two sides.
2. Melt the white chocolate gently
Aim for a smooth mixture while keeping the heat low.

Put the chopped chocolate, condensed milk, butter and salt in a heavy saucepan on the lowest practical heat. Stir and scrape the base continuously until the last small chocolate pieces melt, about 5 to 8 minutes depending on the pan and stove. Take it off the heat as soon as it is uniform; residual warmth can finish a few remaining bits. Look for: a thick, glossy base without oily streaks or grainy clumps. Avoid boiling it.

3. Fold in vanilla and the smaller cookies
The smaller cookie pieces belong inside the still-spreadable base.

Stir in the vanilla off the heat. If the mixture seems very hot, wait about a minute, then fold in the 90 g small cookie pieces just until distributed and spread in the pan at once. Look for: a soft mound that still reaches the corners with the spatula. It is fine if a corner takes one extra swipe; do not keep working the cookies until they crumble.

4. Add the visible topping
Use the larger cookie pieces while the top can still hold them.
Scatter the reserved 40 g larger cookie pieces onto the soft surface and press lightly. Add the optional sprinkles on top. Look for: cookies attached to the surface with pale fudge visible between them. A slightly uneven pattern feels natural on a holiday tray.

5. Chill for a firm center
The middle, rather than the edge, tells you when the slab is ready.
Refrigerate uncovered until the surface stops steaming, then cover loosely. Chill at least three hours and check the middle with a gentle touch: continue chilling if it leaves a wet smear. Overnight is fine; keep condensation from dripping on top. Look for: a firm center and a slab that holds together as it is lifted.
6. Slice into 36 small squares
A little patience at the knife makes the cookie-studded cuts clearer.

Lift with the parchment. If the cold slab resists a neat cut, let it stand 5 to 10 minutes, then cut six rows in each direction and wipe the knife between cuts. Look for: defined edges and centers that hold their shape rather than slump. Refrigerate the pieces in a covered container.

Ready for the tray? Cut only once the middle is firm; if the first cut drags, wipe the blade and give the slab a brief stand before the next one.
How to Tell When the Fudge Center Is Set
A smooth melt and a firm middle are the two checkpoints; the cold edges alone may look ready too soon.
- During the melt: The base looks uniformly glossy, with no unmelted chunks, oily pools or grainy patches.
- Before covering: Visible steam has faded from the surface.
- In the pan: The center looks and feels set rather than glossy-wet or rippling.
- At the first cut: The knife exposes a cohesive, creamy center without a wet smear or collapsing edges.

From Glossy Melt to Sliceable Square: A Fudge Texture Guide
From glossy saucepan mixture to a sliceable chilled square, each stage has a normal look and a warning worth noticing.
| Stage | Expected look and feel | If it differs |
|---|---|---|
| Warm base | Thick, smooth, glossy and spreadable | An oily or grainy break signals excess heat or incompatible chocolate |
| After cookie addition | Soft mound with recognizable small pieces | Fine dust can make the bite gritty; larger pieces may cluster |
| Chilled center | Firm, no wet smear, holds a cut | Keep chilling if soft; check ingredient type if still soft overnight |
| Stored squares | Creamy base, embedded cookies gradually softer | Softening cookies alone are an expected moisture change |

Expert Tips for Smooth, Cookie-Studded Fudge
The largest gains come from choosing the right chocolate, stopping the heat early and keeping the cookies in pieces.
- Choose real white chocolate: The cocoa-butter label matters more than a bag labeled “white” because the setting fat can differ.
- Chop it finely: Smaller pieces melt sooner, reducing the time the milk mixture sits over heat.
- Scrape the bottom: The first hot spots form where the saucepan meets the burner, so move the spatula through the corners too.
- Weigh both cookie portions: Keeping 90 g inside and 40 g on top protects the planned cut pattern.
- Use pieces, not powder: Dust vanishes into the pale base; distinct cookie fragments stay visible and give a clearer bite.
- Judge the middle: A cold edge sets first, so the center is the more useful endpoint than a strict timer.
- Cut cool and wipe the blade: A brief stand helps a very firm slab slice without dragging cookie pieces through every square.

Common Sugar Cookie Fudge Mistakes
When the fudge separates, smears or loses its cookie pattern, heat, ingredient choice and timing are the first things to check.
- High heat → oily or grainy base: Use the lowest practical heat and remove the pan as soon as the chocolate melts.
- White coating instead of cocoa-butter chocolate → uncertain set: Use the specified baking bars for this measured ratio.
- Raw mix or dough → unsafe ready-to-eat cookie component: Use fully baked, cooled cookies only.
- Crushing cookies to dust → gritty bite and faint cookie pattern: Keep the inside pieces roughly pea-size.
- Cutting when only edges are firm → slumping centers: Wait for a firm, smear-free middle.
- Mixing sprinkles into the warm base → streaked white fudge: Keep optional sprinkles on the top.
Troubleshooting a Soft or Split Cookie Fudge
A soft center and a loose topping have different limits and useful next moves.
Still soft at three hours? Chill longer and test the center again. If it is still soft after an overnight chill, verify the chocolate label, the full-fat sweetened condensed milk, the measured amounts and the 8-inch pan; a guaranteed rescue for a changed ratio has not been established.
Mixture looks split? Stop heating immediately and stir gently off heat to see whether the remaining small chocolate pieces melt into a smooth base. If an oily layer remains, do not promise that more heat will fix it.
Cookie topping will not stick? Press loose pieces lightly into the still-soft surface. Once set, do not warm the whole slab just to attach a few pieces; serve the loose cookies alongside.
Sugar Cookie Fudge vs. Chocolate Fudge and Baked Cookies
For a mixed dessert plate, the useful choice is which treat adds a new flavor or texture; this table compares them.
| Choice | Result to expect | When to choose it |
|---|---|---|
| This sugar cookie fudge | Creamy white-chocolate base with fully baked cookie pieces | A visible vanilla-cookie bite for a holiday tray |
| Classic chocolate fudge | Chocolate-forward flavor without cookie pieces in this version | A darker flavor contrast on the same tray |
| Plain baked sugar cookies | A baked cookie texture rather than a chilled fudge square | A separate cookie option or a starting ingredient for this fudge |
For a darker companion on the platter, see the classic Fudge Recipe. The two treats play different roles even when served side by side.
Beautiful Ways to Serve Sugar Cookie Fudge
A pale cut face with visible baked-cookie pieces needs little decoration; thoughtful contrast lets those details show.

A Bright Holiday Tray
Let the ivory squares provide a lighter note among deeper-colored sweets.
Arrange the pale squares on a dark plate with just a little space between them. The cookie flecks and scattered sprinkles show up clearly, especially beside a deeper chocolate treat. Save this for a holiday tray that needs one creamy, cookie-studded bite.
A Small Sweet Gift
A handful of chilled pieces feels thoughtful without asking for a large box.
Stack a few chilled squares with parchment between layers in a covered food-safe container, and keep the gift refrigerated until sharing. Save this for the friend who loves sugar cookies but wants a tiny after-dinner treat.
A Quiet Coffee Moment
One cool square is enough to make an ordinary break feel like dessert.
Serve one or two squares after a brief stand, when the cold firmness gives way to a creamier bite. A simple cup and a visible broken-cookie edge make the moment feel finished without decorating anything else.

How to Store These Cookie-Studded Fudge Squares
Keep the squares cool and plan for their cookie pieces to soften gradually.
Refrigerate the squares promptly in an airtight container at 40°F (4°C) or below; separate stacked layers with parchment. Plan to enjoy them within about 5 to 7 days for the best texture, an estimated quality window rather than a tested safety limit for this exact formula. The embedded cookies will soften with time.
Make the fudge the day before serving if you want a full overnight set. Keep most of the batch cold and let only the pieces being served stand 5 to 10 minutes if they feel too firm. Freezing is not a confirmed best-texture method here; thawing may soften cookies further or streak sprinkles.
Ways to Customize the Sugar Cookie Fudge Finish
You can change the finish while keeping the measured fudge base intact.
- Holiday colors: Keep the same fudge and cookie formula, changing only the color of the optional top sprinkles.
- Plain cookie finish: Leave off the optional sprinkles and show the larger baked-cookie pieces against the ivory surface.
- Cookie assortment: Use another fully baked, cooled plain vanilla sugar cookie at the same 130 g weight; sweetness and softening may differ.
- Serving format: Present the same 36 small squares in paper candy cups for a tidy tray without changing the cut size.
Keep the chocolate, milk and measured cookie allocation the same; changes to the setting ingredients need their own recipe test.
Sugar Cookie Fudge FAQ
Questions about the cookies, chocolate and set are worth sorting out before the next pan.
Can I use store-bought sugar cookies?
Yes, if they are fully baked, plain vanilla cookies that are cool and dry. Weigh 130 g and expect sweetness and softening to vary with the brand.
Can I put raw cookie dough or dry mix into the fudge?
No. This is a ready-to-eat confection, so the cookie component must already be baked. Briefly warming raw flour or mix at home is not a reliable substitute.
Can I use white chocolate chips?
This ratio specifies cocoa-butter white chocolate baking bars. Chips and coating may contain different fats and are not verified one-for-one replacements for the set.
Why are my cookie pieces less crunchy the next day?
They absorb moisture from the fudge in storage. That change is normal; use the surface pieces for a more visible cookie finish.
What if my fudge is still soft after three hours?
Check the center and give it more refrigerator time. If it remains soft overnight, verify the ingredients, amounts and pan before treating that batch as sliceable.
Can I make it in advance?
Yes. An overnight refrigerator set is fine, and a covered container makes the small squares easy to prepare ahead for a tray.
Can I freeze sugar cookie fudge?
Freezing is not a verified best-texture option for this version. Thawed cookie pieces may soften and colored sprinkles may bleed, so refrigeration is the preferred plan.
What to Bake After Sugar Cookie Fudge
If these cookie-studded squares are heading for a holiday tray, choose what to bake next by the flavor or texture you want beside them.
More Homemade Fudge
If you like chilled candy squares, these recipes keep the pan-and-slice format while changing the main flavor.
- Fudge Recipe: Dark chocolate counterpart for a mixed candy tray.
- Chocolate Fudge Recipe: Compare a second chocolate-focused version.
- Peanut Butter Fudge Recipe: Choose a nutty principal flavor.
- Fantasy Fudge Recipe: Explore a marshmallow-creme candy method.
Keep Baking Vanilla Cookies
For a cookie-first next bake, begin with the sugar cookie that goes into this fudge.
- Sugar Cookie Recipe: Bake the vanilla cookies used in this fudge.
- Shortbread Cookie Recipe: Try a more crumbly, butter-forward cookie.
- Funfetti Cookies: Carry the sprinkle theme into a baked cookie.
- White Chocolate Chip Cookies: Follow the white-chocolate flavor in a chewy cookie.
Build a Holiday Treat Tray
Beside the pale fudge, a tart note, peppermint snap or different cookie shape makes the tray more varied.
- White Chocolate Cranberry Cookies: Add tart fruit contrast.
- Italian Christmas Cookies: Add a decorated soft holiday cookie.
- Peppermint Bark: Add a crisp peppermint chocolate candy.
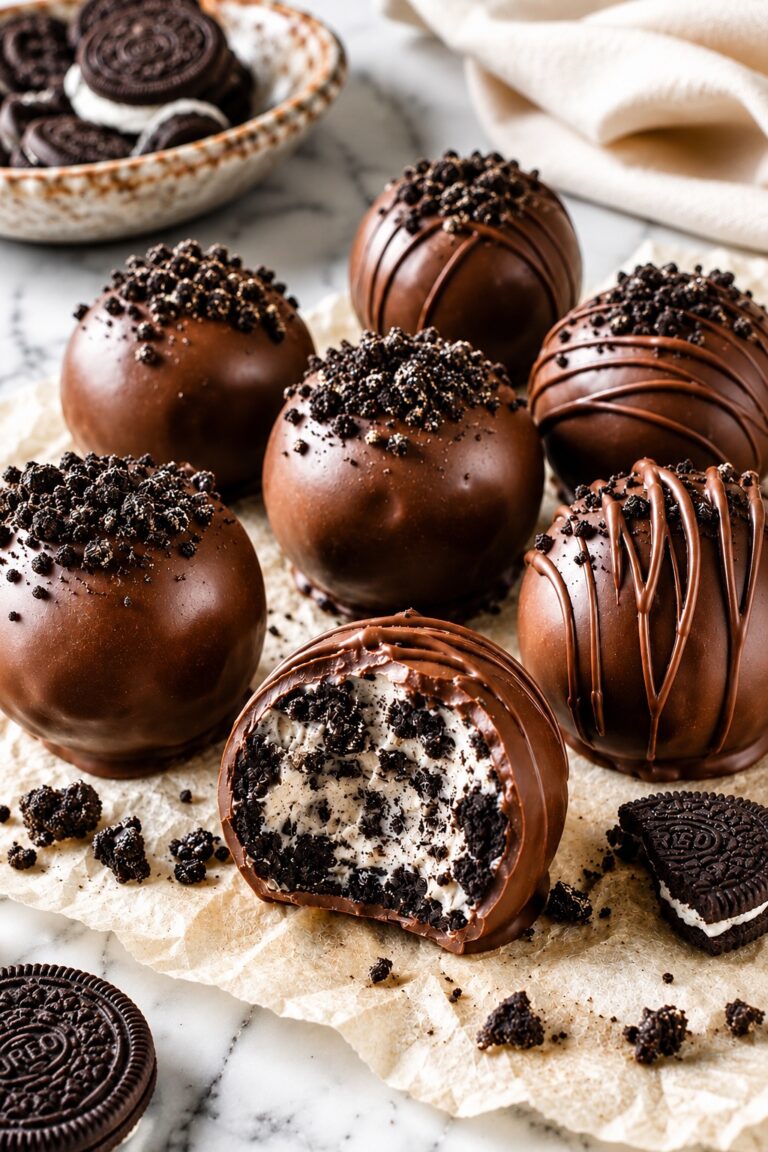
- Oreo Balls Recipe: Add a dark round cookie-based bite.
One more recipe can turn a pan of fudge into a plate worth lingering over. Follow the flavor that sounds good today and keep the rest for another afternoon.
Why These Little Fudge Squares Belong in Your Recipe Box
This is a useful one to keep close when a small, shareable sweet fits the day.
- Fork-free serving: Guests can pick up a little square without needing a dessert plate.
- Shared prep option: One person can bake the cookies while another handles the fudge later.
- Neat tray gaps: Individual pieces fit between larger pastries on a mixed platter.
- Simple gift count: A few pieces per container make it easy to prepare several small gifts.
- Small ending: One square can finish a meal without committing anyone to a large dessert.
Final Thoughts on Sugar Cookie Fudge
This recipe gives fully baked sugar cookies a place inside a creamy little square. Its two-part cookie finish makes that idea visible.
Come back to it when a holiday platter needs something pale beside darker sweets, when you have cooled cookies ready, or when preparing a treat the day before makes the gathering easier. Its best moment is after a patient chill and a clean cut.
Sometimes the most welcoming dessert is a small one that asks you to notice when it is ready, then leave room on the plate for someone else to try it.

Sugar Cookie Fudge
Creamy white chocolate fudge with fully baked vanilla sugar cookie pieces inside and on top. Chill until the center is firm, then cut into 36 small squares.
Ingredients
- 18 ounces (510 g) white chocolate baking bars, finely chopped, with cocoa butter on the label
- 1 can (14 ounces / 397 g) full-fat sweetened condensed milk
- 1 tablespoon (14 g) unsalted butter, cut into small pieces
- 1/4 teaspoon (about 1.5 g) fine sea salt
- 1 teaspoon (5 ml) pure vanilla extract
- 4 1/2 ounces (130 g) fully baked vanilla sugar cookies, cooled and dry, divided into 3 ounces (90 g) pea-size pieces for the fudge and 1 1/2 ounces (40 g) larger pieces for the top
- 2 tablespoons (about 20 g) sprinkles, optional, for the top only
Instructions
- Prepare the pan and cookies. Line an 8-inch square pan with parchment overhang. Chop the white chocolate. Divide the fully baked, cooled cookies into 90 g pea-size pieces for the fudge and 40 g larger pieces for the top. Set the sprinkles aside.
- Melt gently. Combine the white chocolate, condensed milk, butter and salt in a heavy saucepan over the lowest practical heat. Stir and scrape constantly until thick, glossy and smooth, about 5 to 8 minutes. Remove from the heat as soon as the last pieces melt. Do not boil.
- Flavor and add cookies. Stir in the vanilla off the heat. If the mixture is very hot, wait about 1 minute. Fold in the 90 g smaller cookie pieces just until distributed, then spread immediately in the pan.
- Finish the top. Scatter the 40 g larger cookie pieces over the soft surface and press lightly. Add the optional sprinkles on top only.
- Chill until firm. Refrigerate uncovered until steaming stops, then cover loosely and chill for at least 3 hours. The center must feel firm and leave no wet smear when gently pressed. Continue chilling if soft; overnight is fine.
- Cut and store. Lift the slab out using the parchment. If it is too firm to cut neatly, let it stand for 5 to 10 minutes. Cut six rows in each direction, wiping the knife between cuts. Refrigerate the squares in a covered container.
Notes
- Use white chocolate baking bars with cocoa butter; white chips and coating can set differently.
- Use only fully baked, cooled sugar cookies, not raw cookie mix or dough. Cookie pieces inside will soften during storage.
- Refrigerate at 40°F (4°C) or below. For the best texture, plan to enjoy within 5 to 7 days.
- Keep refrigerated for the best texture. Freezing may soften the cookies and streak the sprinkles after thawing.
Nutrition Information:
Yield: 36 Serving Size: 1 squareAmount Per Serving: Calories: 134Total Fat: 6.7gSaturated Fat: 3.9gSodium: 57mgCarbohydrates: 17.3gSugar: 15.6gProtein: 1.9g
Nutrition information is provided as an estimate only and may vary based on specific ingredients, brands, and portion sizes used. This information should not be considered medical or nutritional advice.
12 Sweet Favourites — Yours, Free 🍰
Tiramisù, no-bake cheesecake, the perfect chocolate chip cookie & 9 more reader-loved desserts — gathered into one beautiful free recipe book. From my kitchen to yours.
No spam, just sweet things. Unsubscribe anytime.