Peach Dump Cake (Golden, Buttery & Scoopable)
🎁 FREE E-BOOK: 12 Sweet Favorites — reader-loved desserts in one beautiful recipe book.
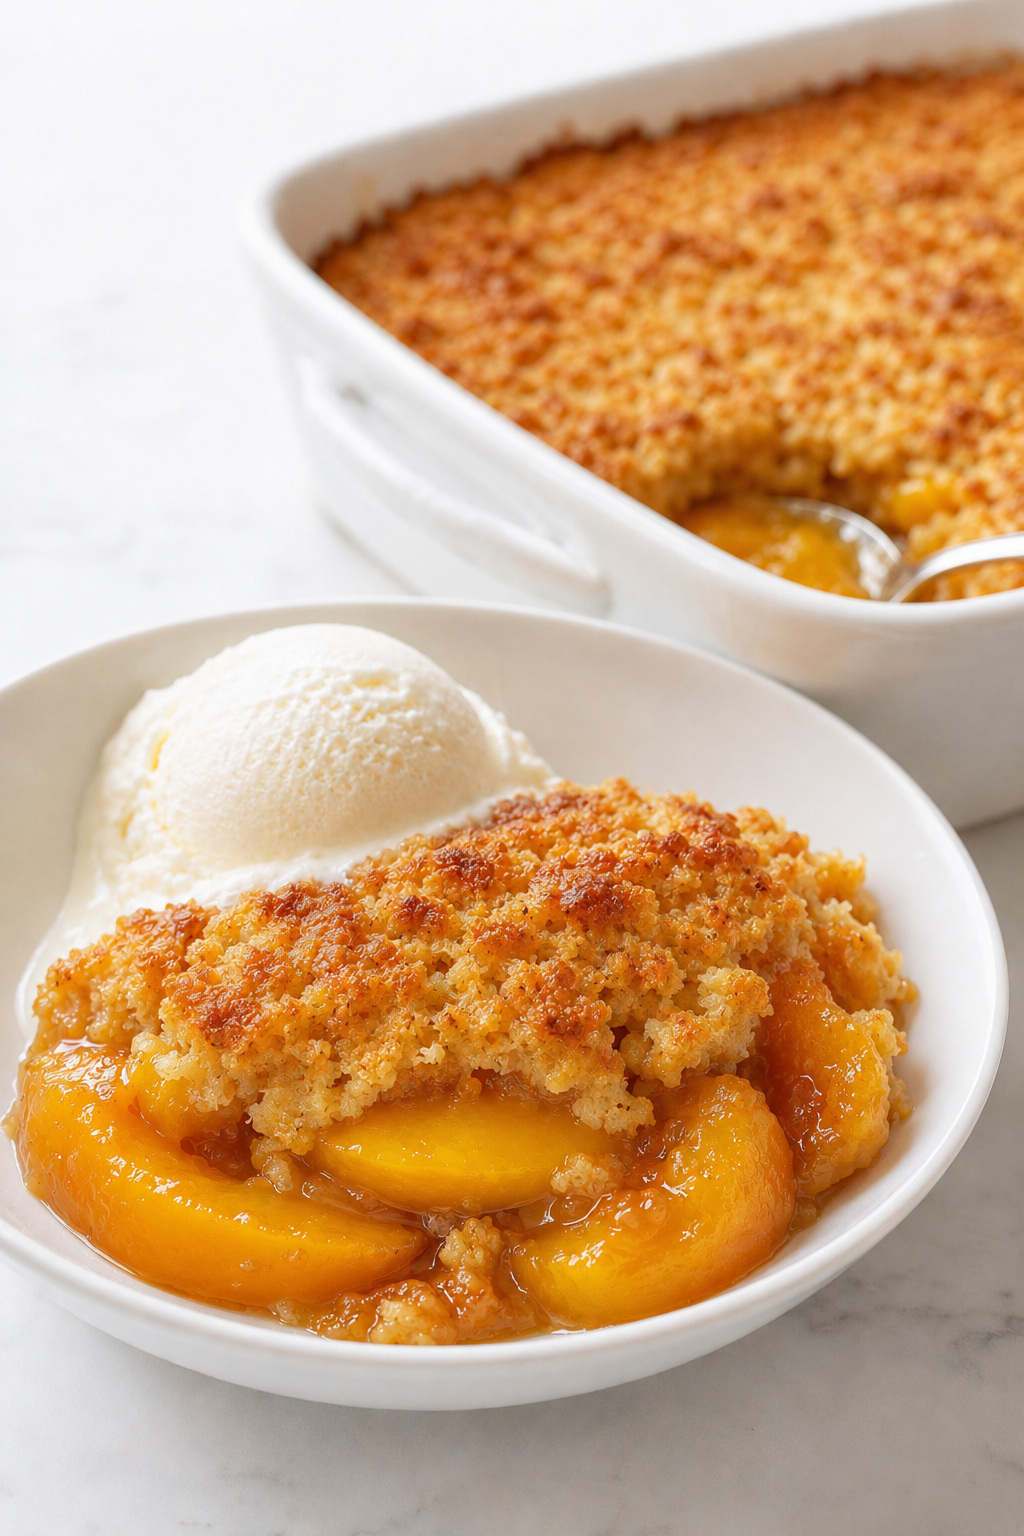
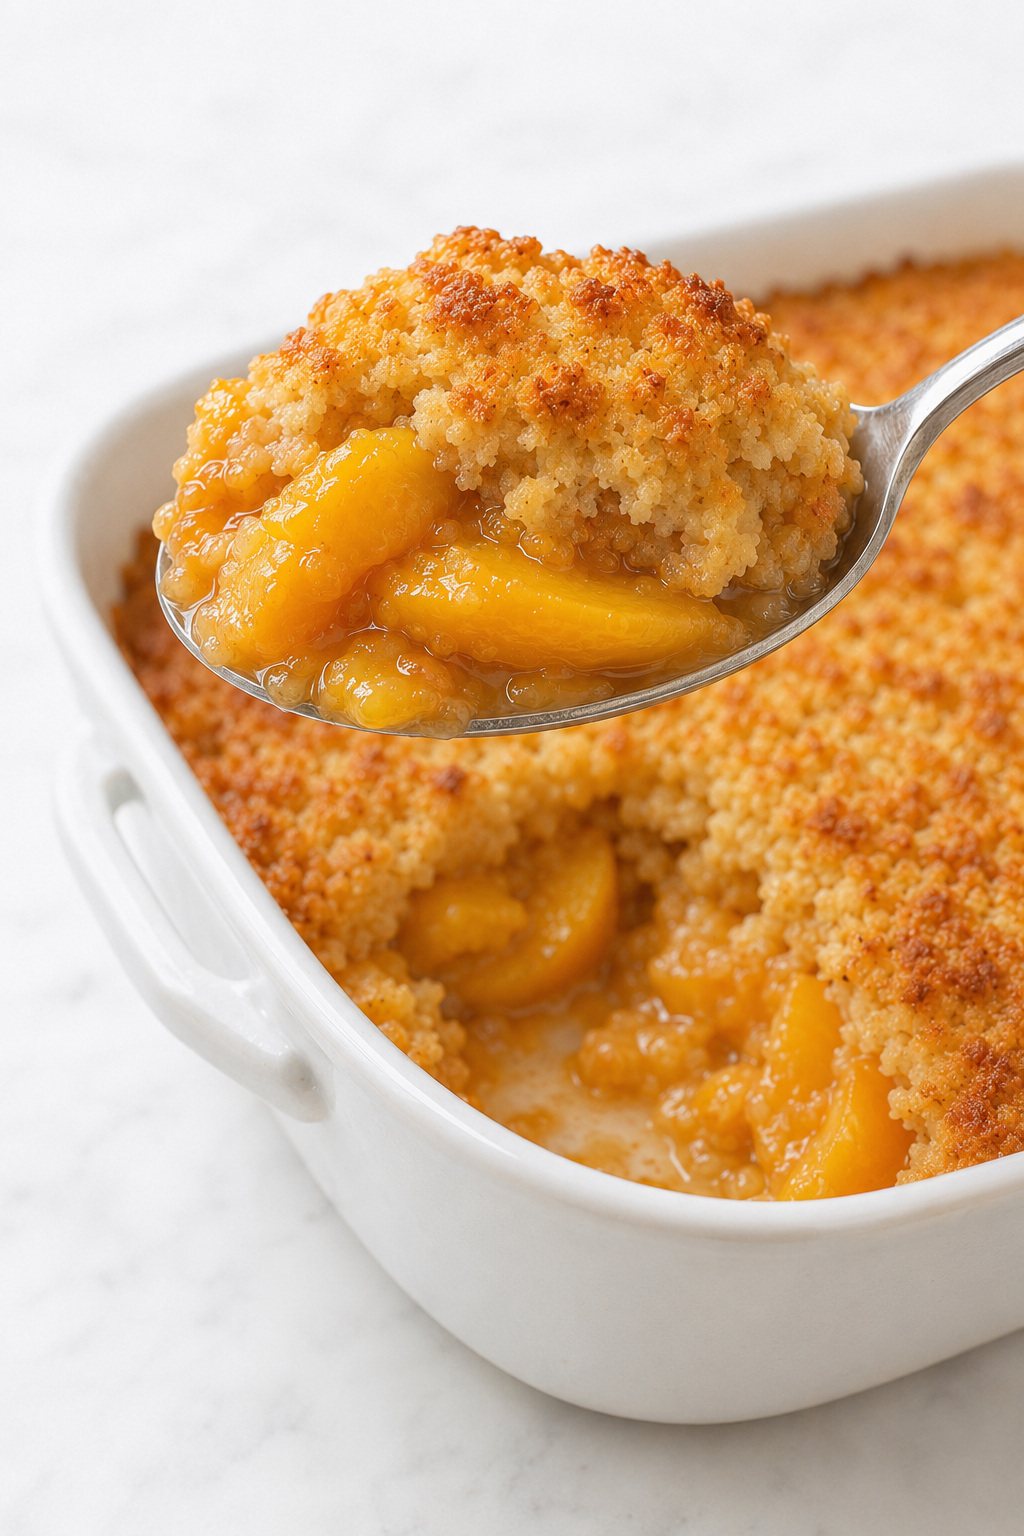
This Peach Dump Cake layers tender peach slices in a glossy vanilla-cinnamon sauce beneath a rustic yellow-cake topping that turns deep golden, buttery, and lightly crisp in the oven. It gives you the familiar comfort of a warm peach dessert with only about 15 minutes of active work.
There is something immediately familiar about a warm peach dessert served by the spoonful: soft fruit, buttery vanilla notes, and a rustic topping that belongs at a relaxed table rather than behind a pastry-shop display. This version keeps that easy comfort while making the finished texture clear before you begin.
This is a recipe worth saving for potlucks, relaxed family desserts, and the days when you want peach comfort without making pastry or a separate cobbler topping. Measuring the juice and covering the mix with 48 paper-thin butter pats keep the fruit scoopable rather than soupy and make the golden topping easier to repeat with confidence.
What Is Peach Dump Cake?
Peach dump cake is a classic American pantry dessert made by layering peaches, dry boxed cake mix, and butter directly in a baking dish. The name comes from the minimal assembly: there is no separate batter to mix and no topping to knead or roll.
The broader method is the same one used for an apple dump cake: fruit supplies moisture from below while butter melts through the dry mix from above. The layers stay distinct rather than being stirred into a homogeneous batter.
Quick Recipe Overview
This quick snapshot shows the flavor, texture, timing, pan, and serving style before you begin. Use it to confirm that the recipe fits your schedule and that a warm, scoopable fruit dessert is the result you want.
| Detail | What to know |
|---|---|
| Flavor | Peach-forward with vanilla, butter, and restrained cinnamon |
| Texture | Tender peach slices, glossy sauce, and a rustic crisp-tender topping |
| Difficulty | Beginner-friendly |
| Pan | 9 × 13-inch shallow 3-quart ceramic baking dish |
| Yield | 12 moderate dessert servings |
| Active time | About 15 minutes |
| Bake time | 52–60 minutes in the primary ceramic dish |
| Rest | 30 minutes |
| Best served | Warm, in shallow bowls, with vanilla ice cream |
This is a warm, scoopable dump cake with distinct peach slices and an intentionally rustic cake-mix topping. It is not meant to become a uniform sliceable cake, a biscuit-topped peach cobbler, or an oat-topped crisp.
Why This Peach Dump Cake Recipe Works
A dependable dump cake still needs control at the points where fruit liquid, dry cake mix, and butter meet. These six decisions keep the classic no-stir method easy while protecting the sauce, topping, and final serving texture.
- The peach liquid is measured. Exactly 1 1/4 cups (300 ml) of juice gives the topping moisture without flooding the bottom of the dish.
- A small amount of cornstarch controls the sauce. One tablespoon thickens the hot juice just enough to become glossy and spoon-coating after the rest, not firm like pie filling.
- The cake-mix weight is fixed. The formula uses exactly 15.25 ounces (432 g), so a smaller modern box does not silently change the fruit-to-topping ratio.
- The butter coverage is repeatable. Forty-eight very thin pats arranged in a 6 × 8 grid reach the edges and leave only narrow gaps.
- Doneness is judged in three ways. Look for bubbling in the center third, at least 80% deep-golden topping, and no broad dusty or greasy areas.
- The 30-minute rest finishes the texture. The fruit sauce changes from freely flowing to glossy and scoopable while the dessert remains warm.
Why You’ll Love This Recipe
This peach dump cake recipe is designed for the days when you want a generous homemade dessert without turning it into a full baking project. Its practical advantages extend from pantry-friendly preparation to relaxed oven-to-table serving.
- It uses familiar pantry ingredients and canned peaches, so you do not need to wait for peach season.
- There is no mixer, pastry, biscuit dough, or conventional cake batter.
- The preparation is genuinely short, with most of the time spent in the oven or resting.
- The exact juice measurement removes the guesswork that makes many dump cakes watery.
- The topping gives you crisp golden areas and softer fruit-fed pockets in the same spoonful.
- It serves 12 and travels well in its baking dish for casual gatherings and potlucks.
- Warm portions pair naturally with cold ice cream, whipped cream, or a simple cup of coffee.
What to Expect
The finished dessert should be spoonable and generous, not neat enough to cut into freestanding squares. Under the topping, the peach slices remain recognizable and sit in a warm sauce that lightly coats the spoon after the required rest.
The surface will look rustic. Most of it should be deep golden, with buttery crisp areas on top and softer cake-like pockets where peach steam reaches the mix. A few narrow pale seams are normal. Large dusty patches, thick floury ridges, or shiny pools of butter are not.
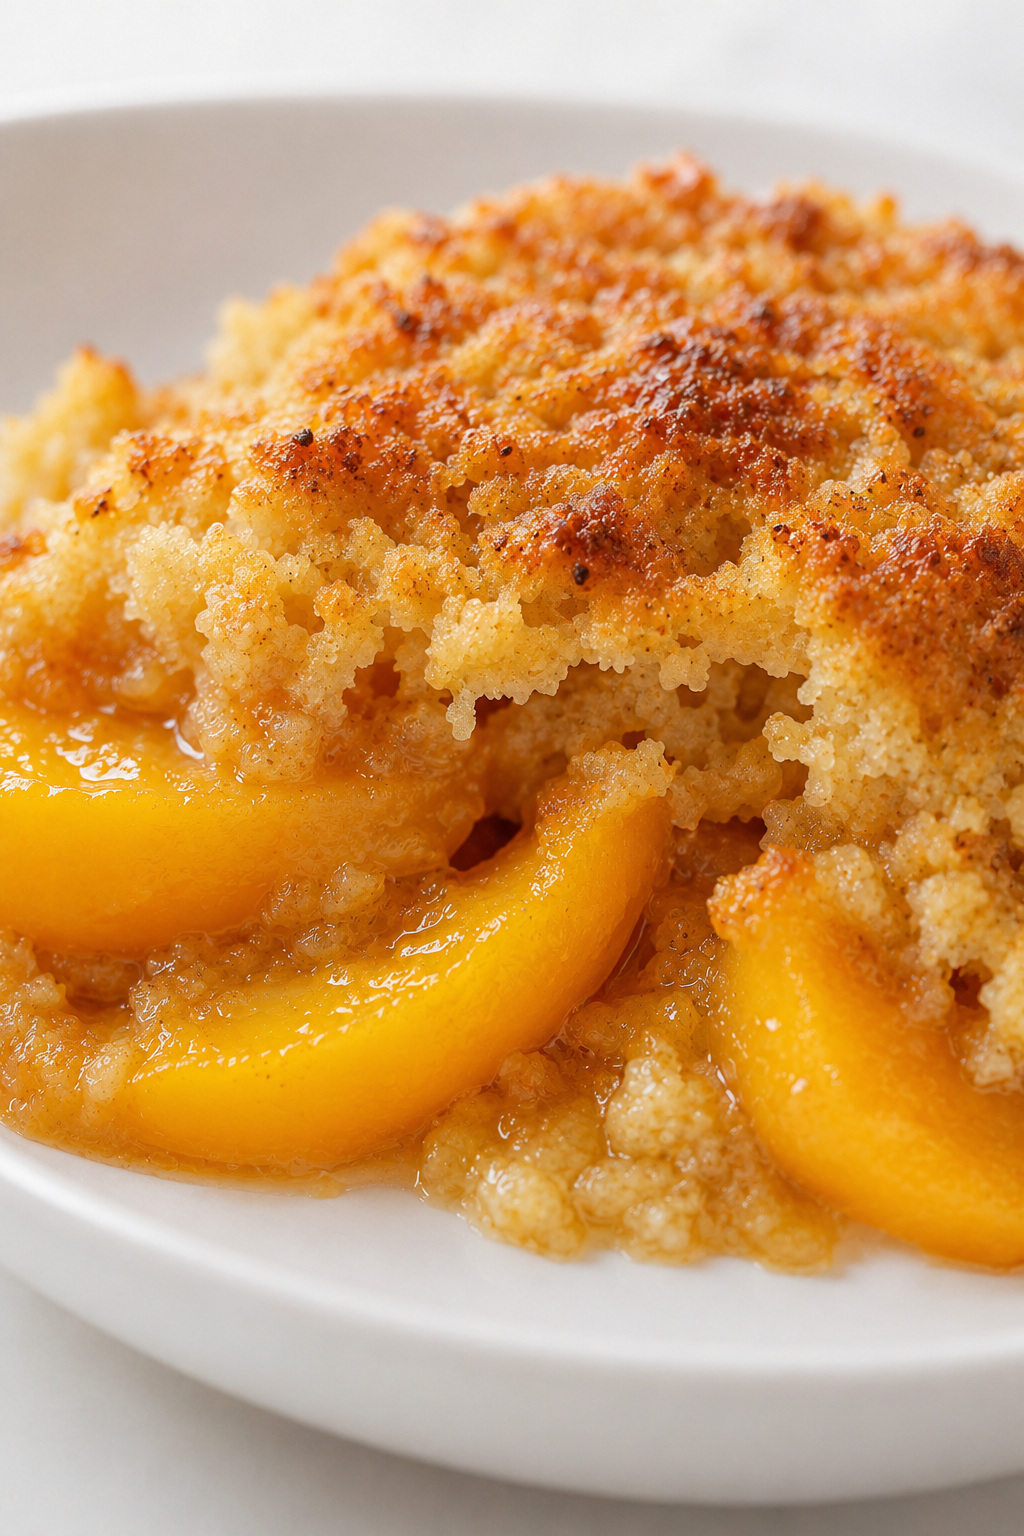
The flavor is deliberately peach-first. Yellow cake mix adds familiar vanilla sweetness, butter brings richness, and cinnamon stays in the background. Because this is a traditional dump cake, it will be sweeter than a lightly sweetened from-scratch cobbler.
Ingredients and Why They Matter
The ingredient list is short, but package type, measured weight, and temperature all affect how the layers bake. The notes below explain what each ingredient contributes and where a casual substitution would change the formula.
Ingredients
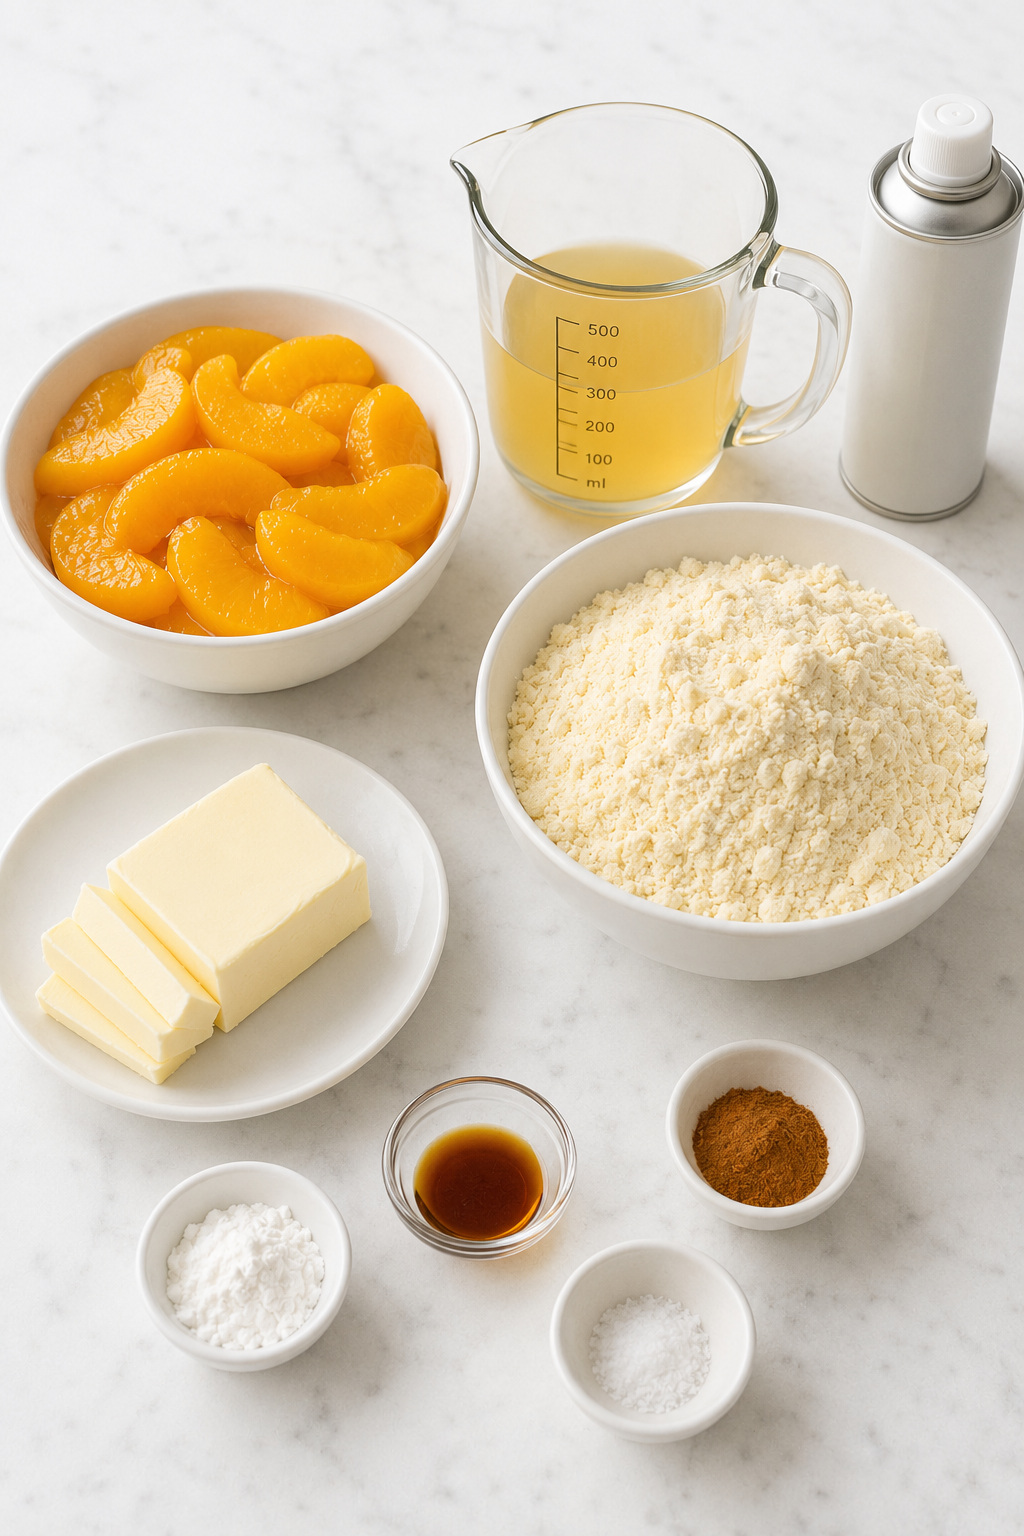
These are the exact quantities for one 9 × 13-inch Peach Dump Cake. Measure the reserved peach juice separately rather than using all the liquid from the cans, and keep the butter very cold until slicing.
- Nonstick cooking spray, as needed
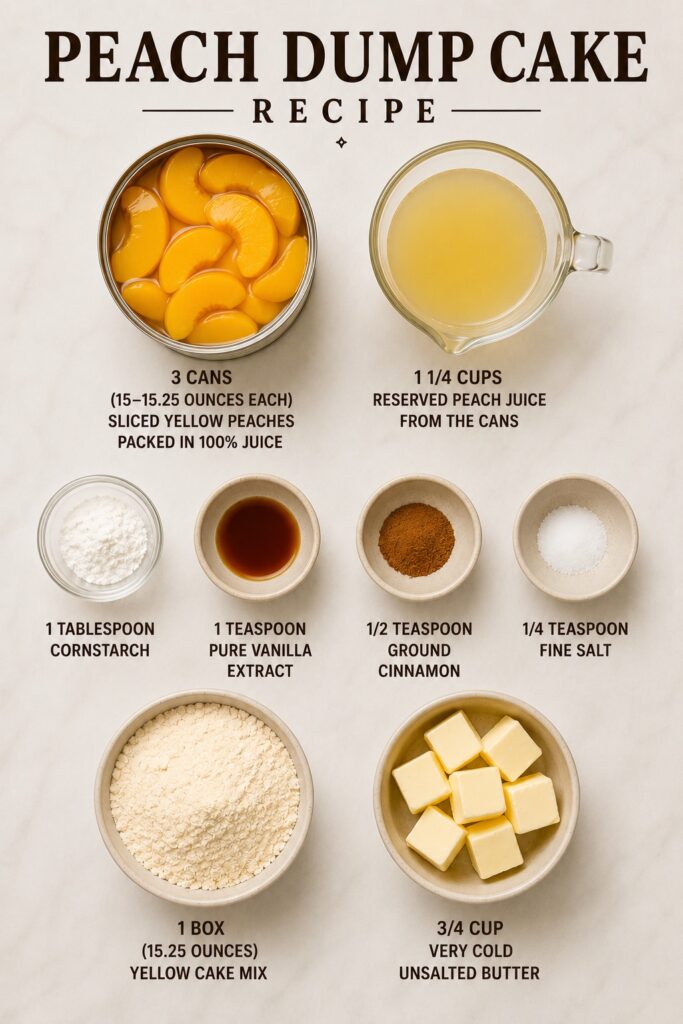
- 3 cans (15–15.25 ounces / 425–432 g each) sliced yellow peaches packed in 100% juice
- 1 1/4 cups (300 ml) reserved peach juice from the cans
- 1 tablespoon (8 g) cornstarch
- 1 teaspoon (5 ml) pure vanilla extract
- 1/2 teaspoon ground cinnamon
- 1/4 teaspoon fine salt
- 1 box (15.25 ounces / 432 g) yellow cake mix, dry
- 3/4 cup (12 tablespoons / 170 g) very cold unsalted butter
- Vanilla ice cream, optional for serving
Sliced peaches in 100% juice
Use three 15–15.25-ounce cans of sliced yellow peaches packed in juice. Drain all three cans, keep the fruit, and measure the collected liquid separately. The current Del Monte juice-packed peach specification lists peaches and fruit juices without the viscosity and added sweetness of heavy syrup.
Heavy-syrup peaches, peach pie filling, fresh peaches, and frozen peaches are not direct swaps here. Each changes the sugar, free liquid, fruit firmness, or baking behavior enough to require a different formula. If you want a fresh-peach dessert, use a dedicated peach pie recipe instead of improvising inside this one.
Reserved peach juice
Measure exactly 1 1/4 cups (300 ml). Do not pour all the liquid from the cans into the dish by default; the amount varies, and extra juice can leave the base thin even when the topping looks finished. Reserve any excess for smoothies or another use.
Cornstarch
One tablespoon (8 g) gives the juice enough body to coat the peaches after baking and resting. First whisk it with a small portion of the measured juice to make a smooth slurry. White lumps at this stage can become pale starch pockets in the finished sauce.
Vanilla, cinnamon, and salt
Vanilla supports the yellow-cake flavor, 1/2 teaspoon cinnamon adds restrained warmth, and fine salt keeps the sweetness from tasting flat. If you use salted butter, omit the added 1/4 teaspoon salt.
Yellow cake mix
Use exactly 15.25 ounces (432 g) of dry yellow cake mix. Check the net weight on the box: if yours contains 13.25 ounces (375 g), add 57 g from a second box. White, vanilla, butter-golden, gluten-free, sugar-free, and homemade mixes are not guaranteed one-for-one replacements because their starch, sugar, and hydration systems differ.
Very cold unsalted butter
Use 3/4 cup (170 g) and keep it cold enough to slice cleanly. Cut each tablespoon into four paper-thin pats, giving you 48 pieces. Most dump cakes invite you to scatter on the butter and walk away. This is the one place I would slow down: the thinner and more even the butter layer, the fewer dry pockets you leave behind. Forty-eight thin pats may sound precise for such a rustic dessert, but that small detail protects the whole topping.
Before You Begin
A few checks before assembly prevent the most common pan, measurement, and coverage problems. Set up the dish, oven, cake-mix weight, measured juice, and cold butter before the layers begin.
- Use the right dish. The full formula needs a true 9 × 13-inch shallow 3-quart dish, approximately 2 inches deep. An 8 × 8-inch or 9 × 9-inch dish is too small.
- Choose ceramic for the canonical timing. Clear glass and light metal can work with the timing adjustments below, but dark metal can overbrown the edges before the center is ready.
- Preheat fully. Set a conventional oven to 350°F (177°C) with the rack in the center before finishing the layers.
- Measure the juice. The recipe uses 300 ml, not automatically every drop collected from the cans.
- Check the cake-mix box. The required mass is 432 g, regardless of package size.
- Keep the butter cold. Warm butter is difficult to cut into the thin, even pieces needed for the 6 × 8 grid.
Pan material also changes how quickly the edges and center receive heat. Use the timing row for your pan only as the point to begin checking, then let the full doneness cues determine when the dessert leaves the oven.
| 9 × 13-inch pan | Begin checking | Expected range |
|---|---|---|
| Ceramic, primary | 48 minutes | 52–60 minutes |
| Clear glass | 48 minutes | 50–58 minutes |
| Light-colored metal | 42 minutes | 45–53 minutes |
| Dark metal | Not recommended | Not canonical |
These ranges are starting points. In every pan, wait for the complete bubbling, color, and surface cues before removing the dessert.
How to Make Peach Dump Cake
The method moves through three controlled phases: build the peach layer, add the dry cake mix and butter without stirring, then bake until the center—not only the edges—passes every doneness cue. Read each visual checkpoint before moving to the next phase.
Prepare the peach layer
Begin by controlling the quantity and distribution of the fruit liquid. A smooth cornstarch mixture and an even peach layer create the glossy base that will hydrate the topping from below.
1. Preheat and prepare the dish. Heat the oven to 350°F (177°C) with a rack in the center. Lightly coat the bottom and sides of a 9 × 13-inch shallow 3-quart ceramic baking dish with nonstick spray.
What you should see: a thin, complete film with no visible puddles of spray.
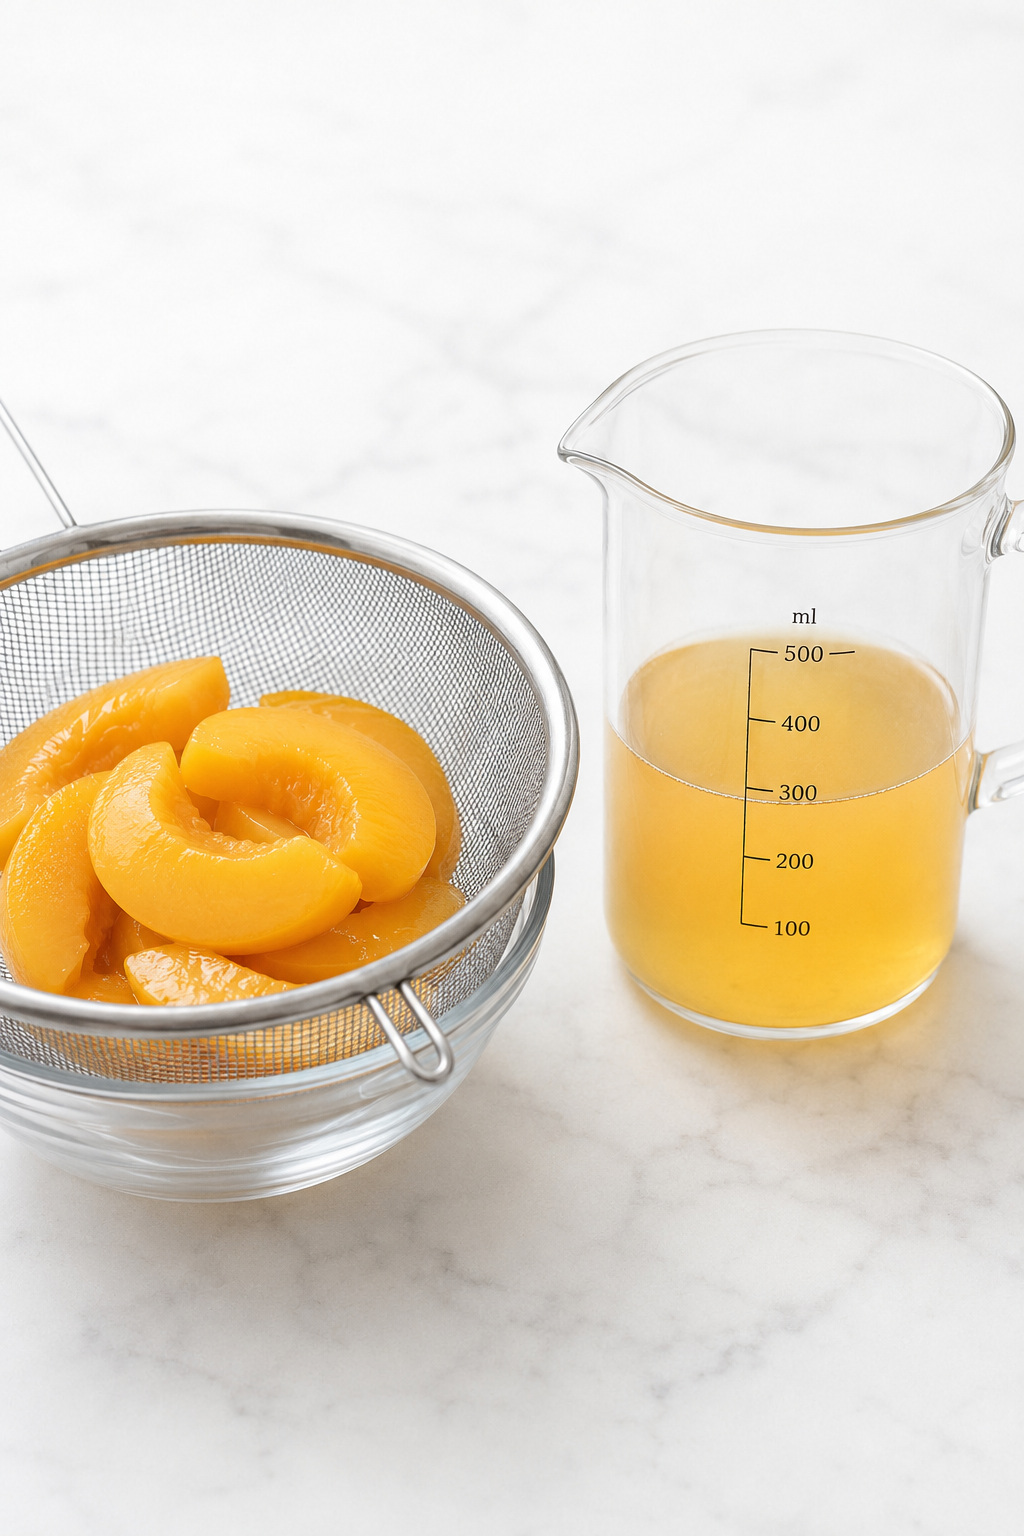
2. Drain and measure. Set a colander over a bowl and drain all three cans of peaches. Spread the drained peaches evenly in the prepared dish. Measure exactly 1 1/4 cups (300 ml) of the collected juice and set aside any excess.
What you should see: fully drained peach slices in a relatively even layer and exactly 300 ml of reserved juice.
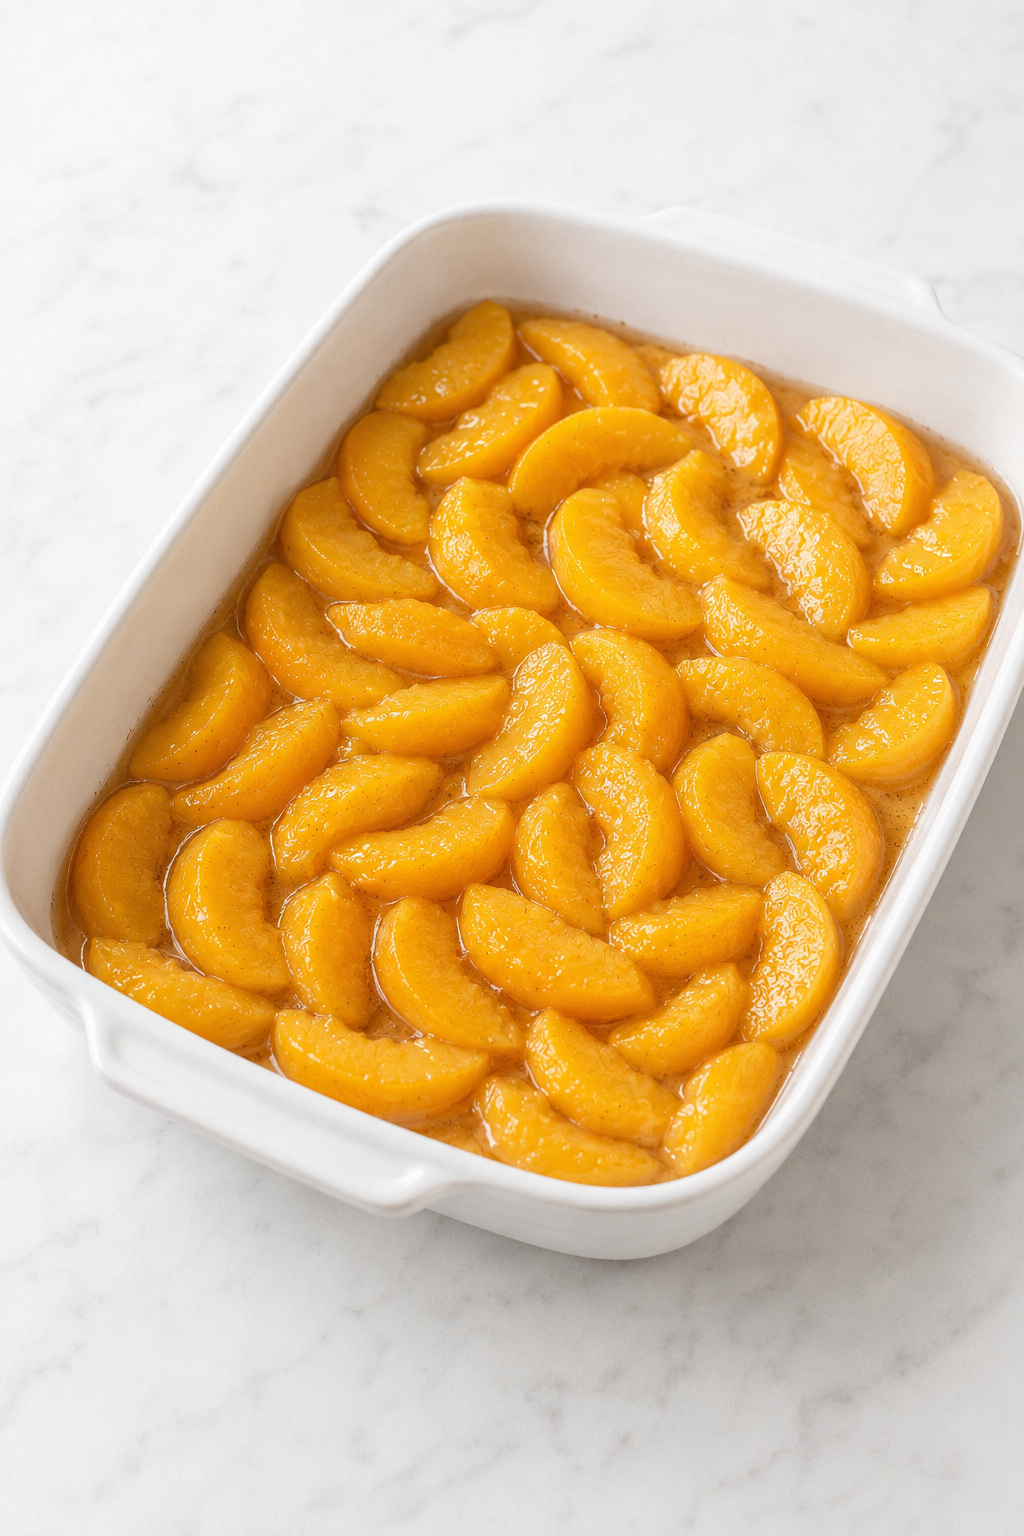
3. Make the controlled fruit liquid. Whisk the cornstarch with about 2 tablespoons of the measured juice until completely smooth. Whisk in the remaining measured juice, vanilla, cinnamon, and salt. Pour the mixture evenly over the peaches, then gently level the fruit.
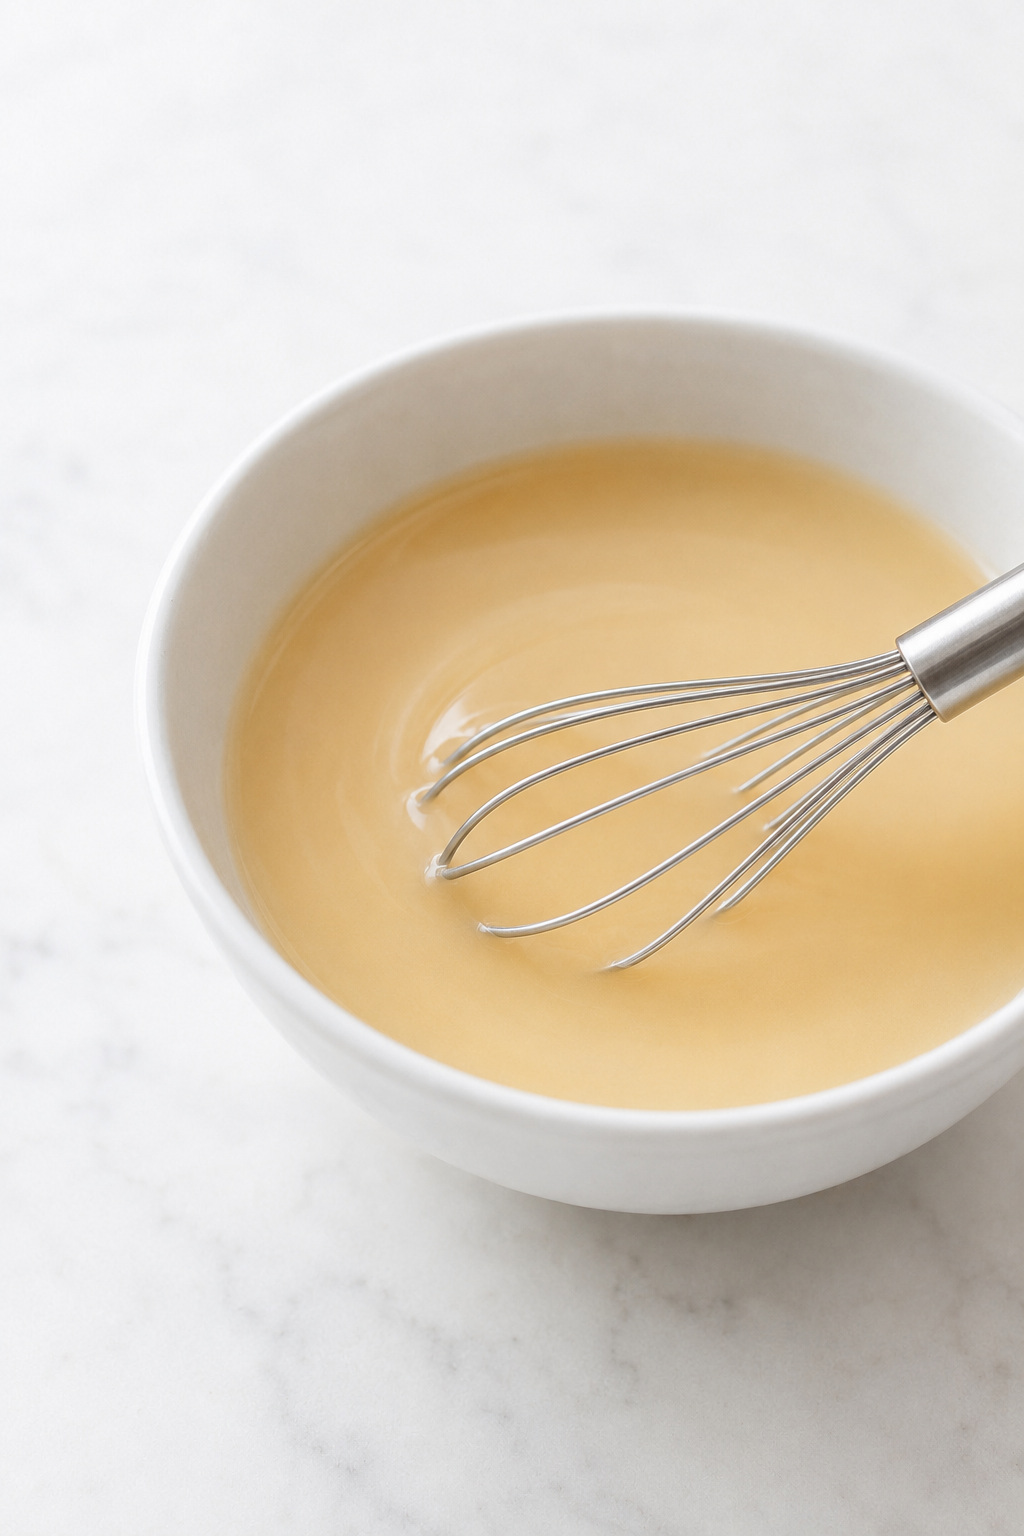
What you should see: no white cornstarch lumps; the peach slices and liquid should be evenly distributed across the dish.
Build the cake-mix and butter layers
Once the peach layer is level, the top two layers must remain separate and unstirred. Even cake-mix depth and thin, edge-to-edge butter coverage are what allow the rustic surface to hydrate and brown without broad floury patches.
4. Add the dry cake mix. Sprinkle all 432 g over the fruit in three passes, moving from one short end of the dish to the other. Use the back of a spoon to level only the top surface. Do not press down and do not stir the mix into the peaches.
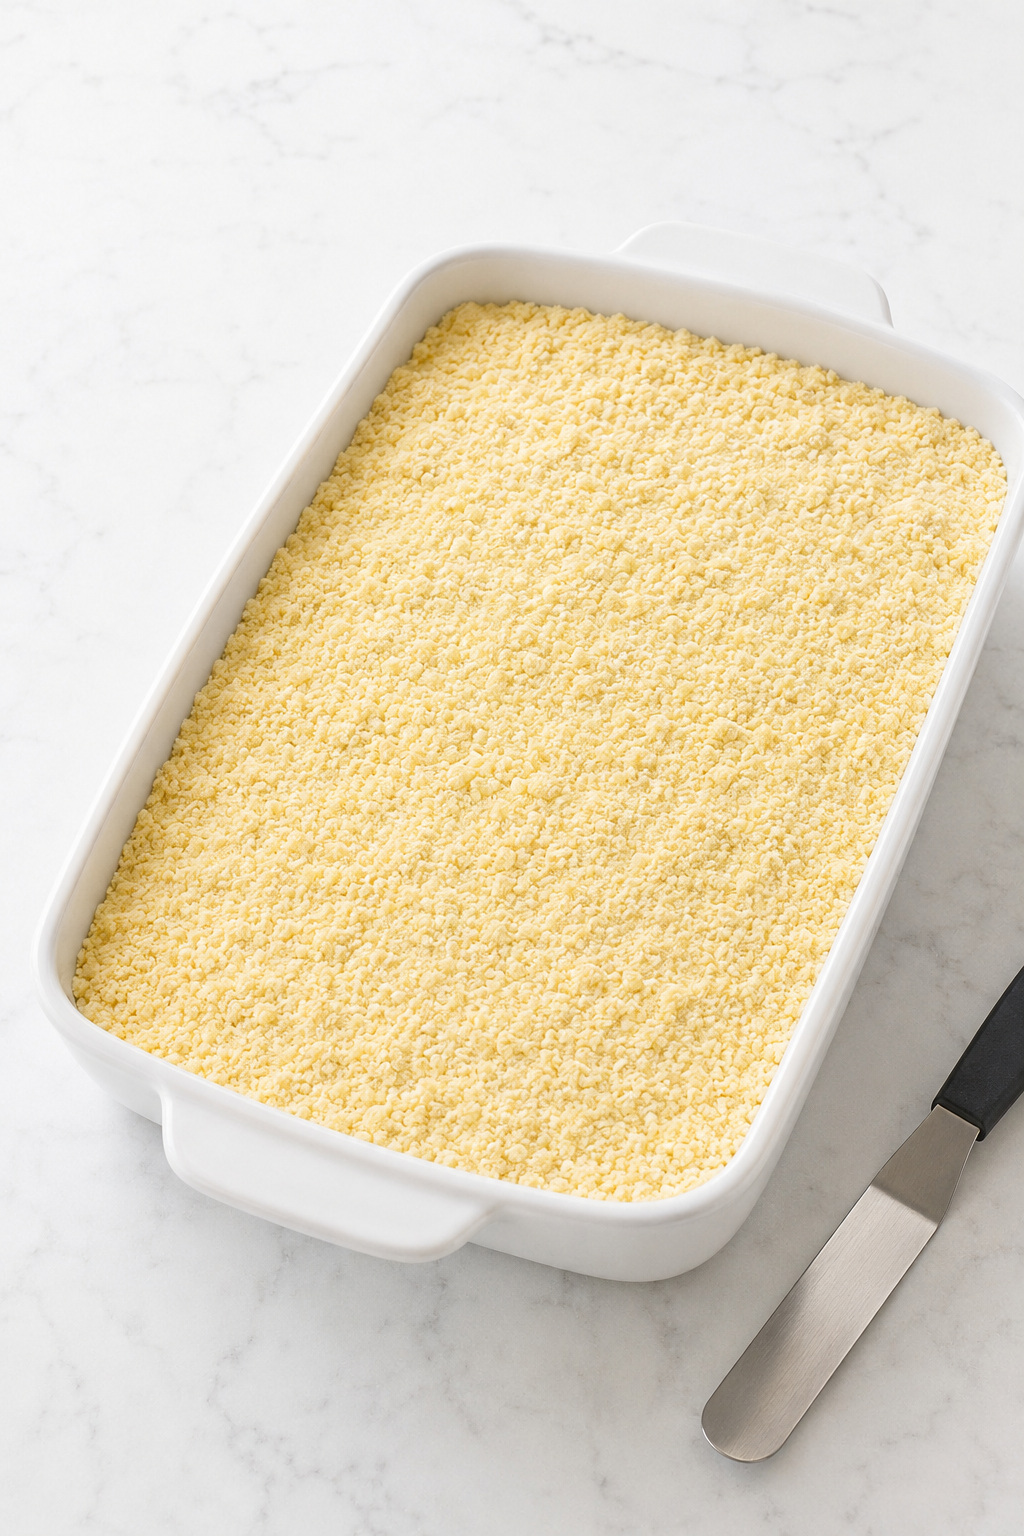
What you should see: a loose, level, edge-to-edge layer without thick ridges.
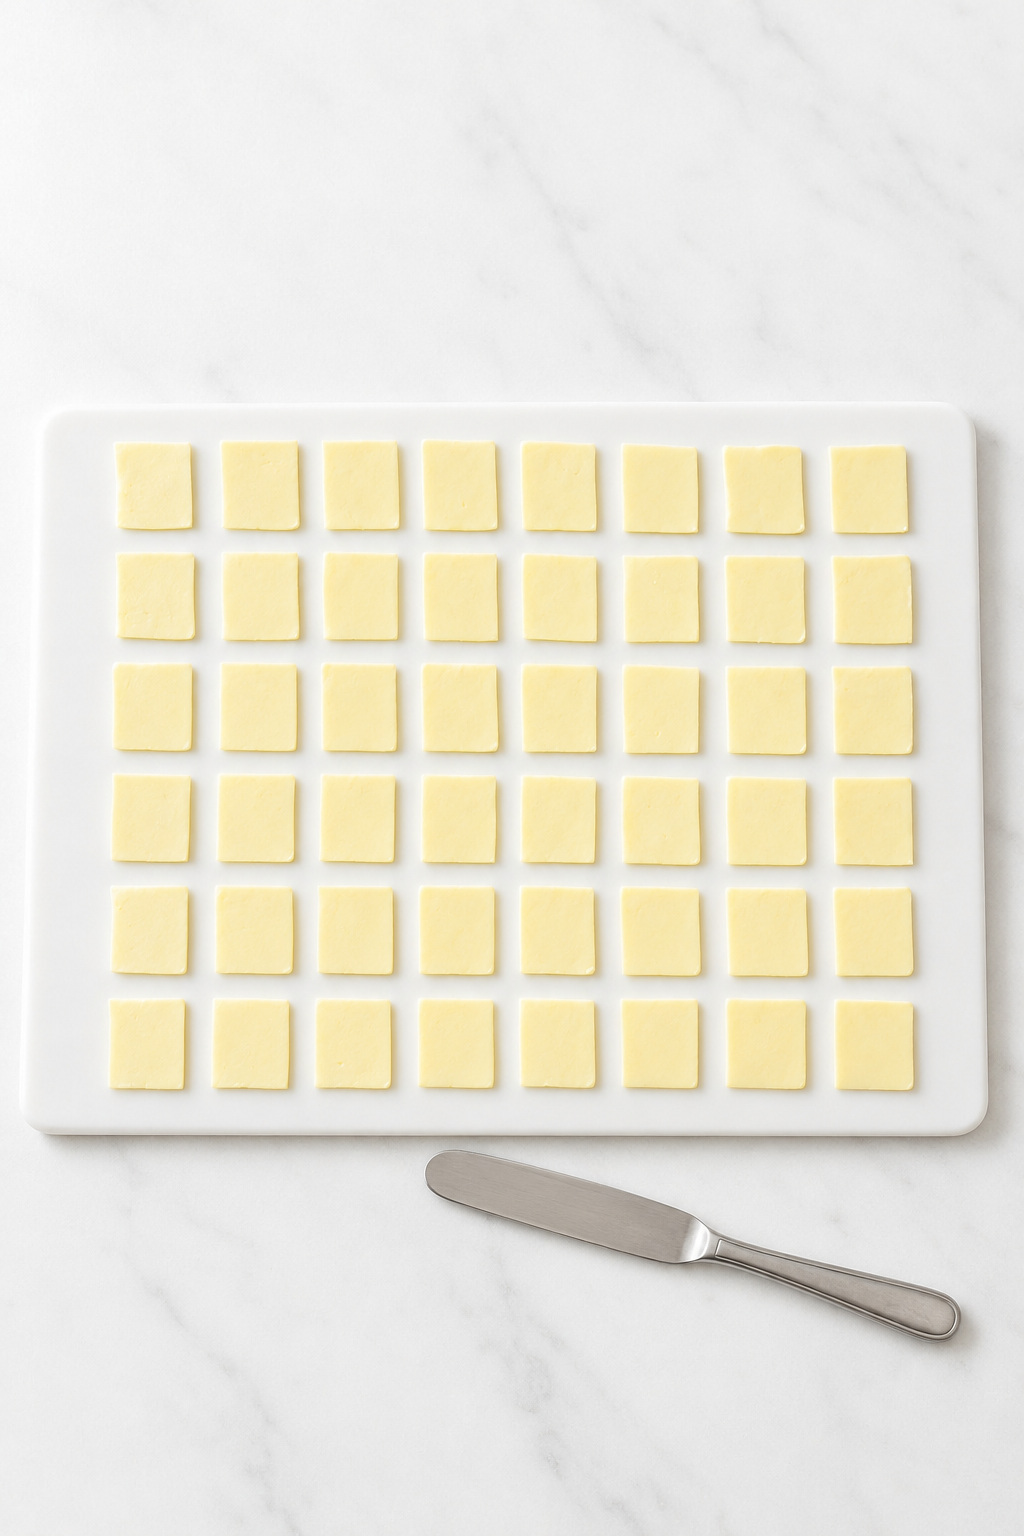
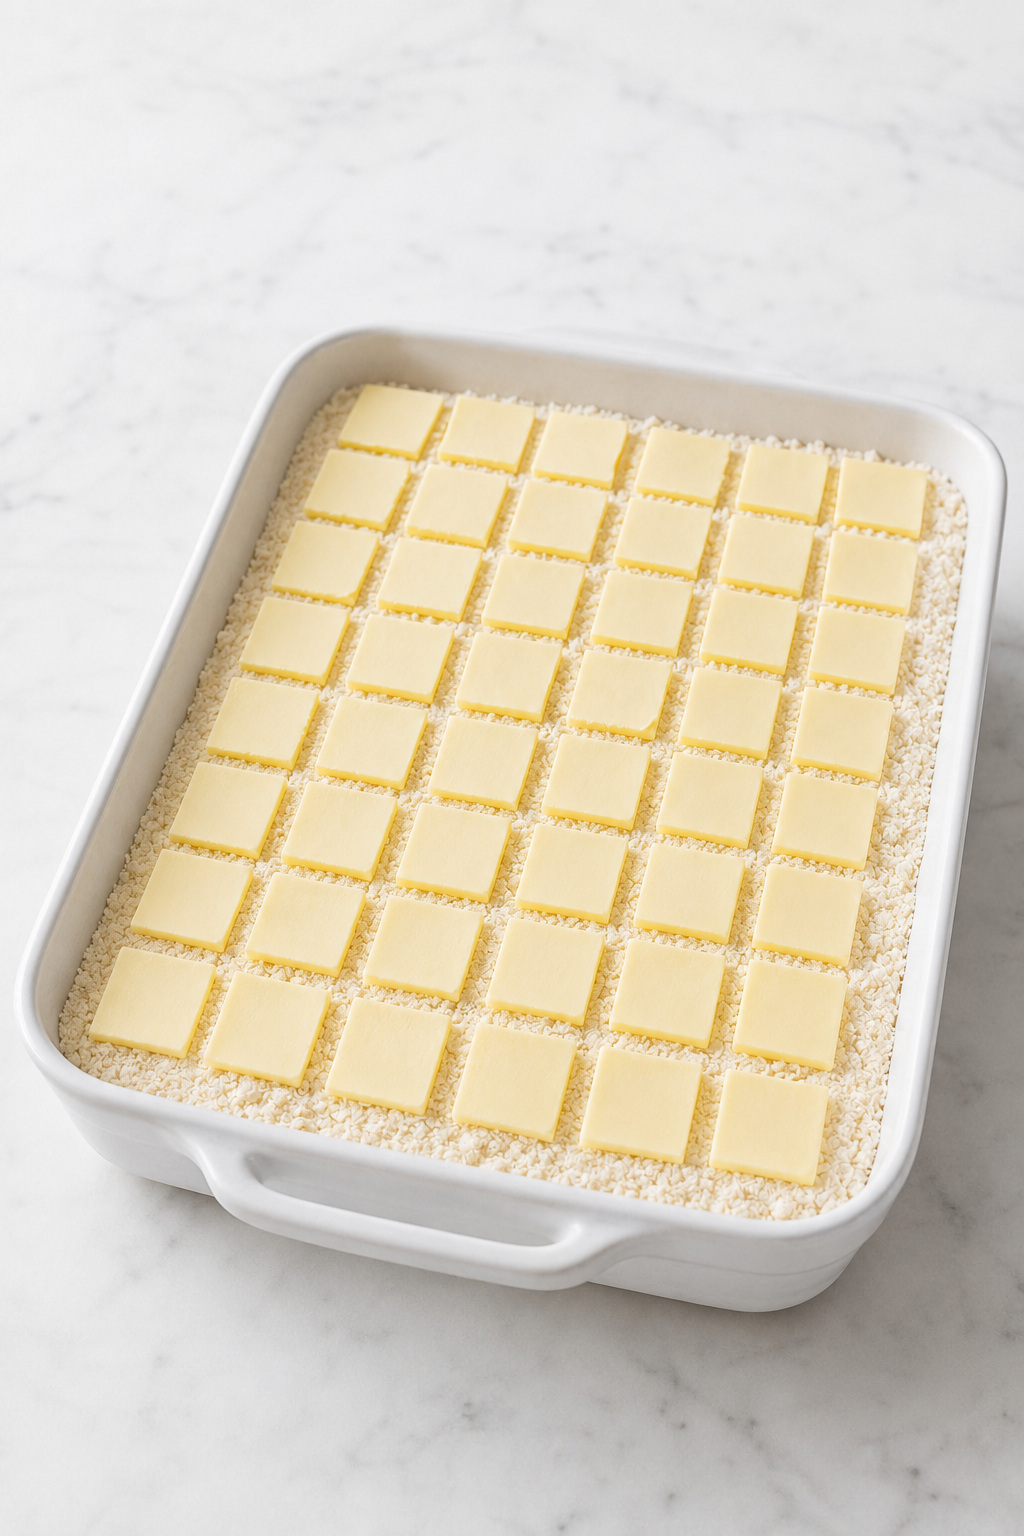
5. Cover with butter. Cut the 12 tablespoons of very cold butter into four paper-thin pats each. Arrange all 48 pats in six rows of eight, placing the outer pieces close to the edges.
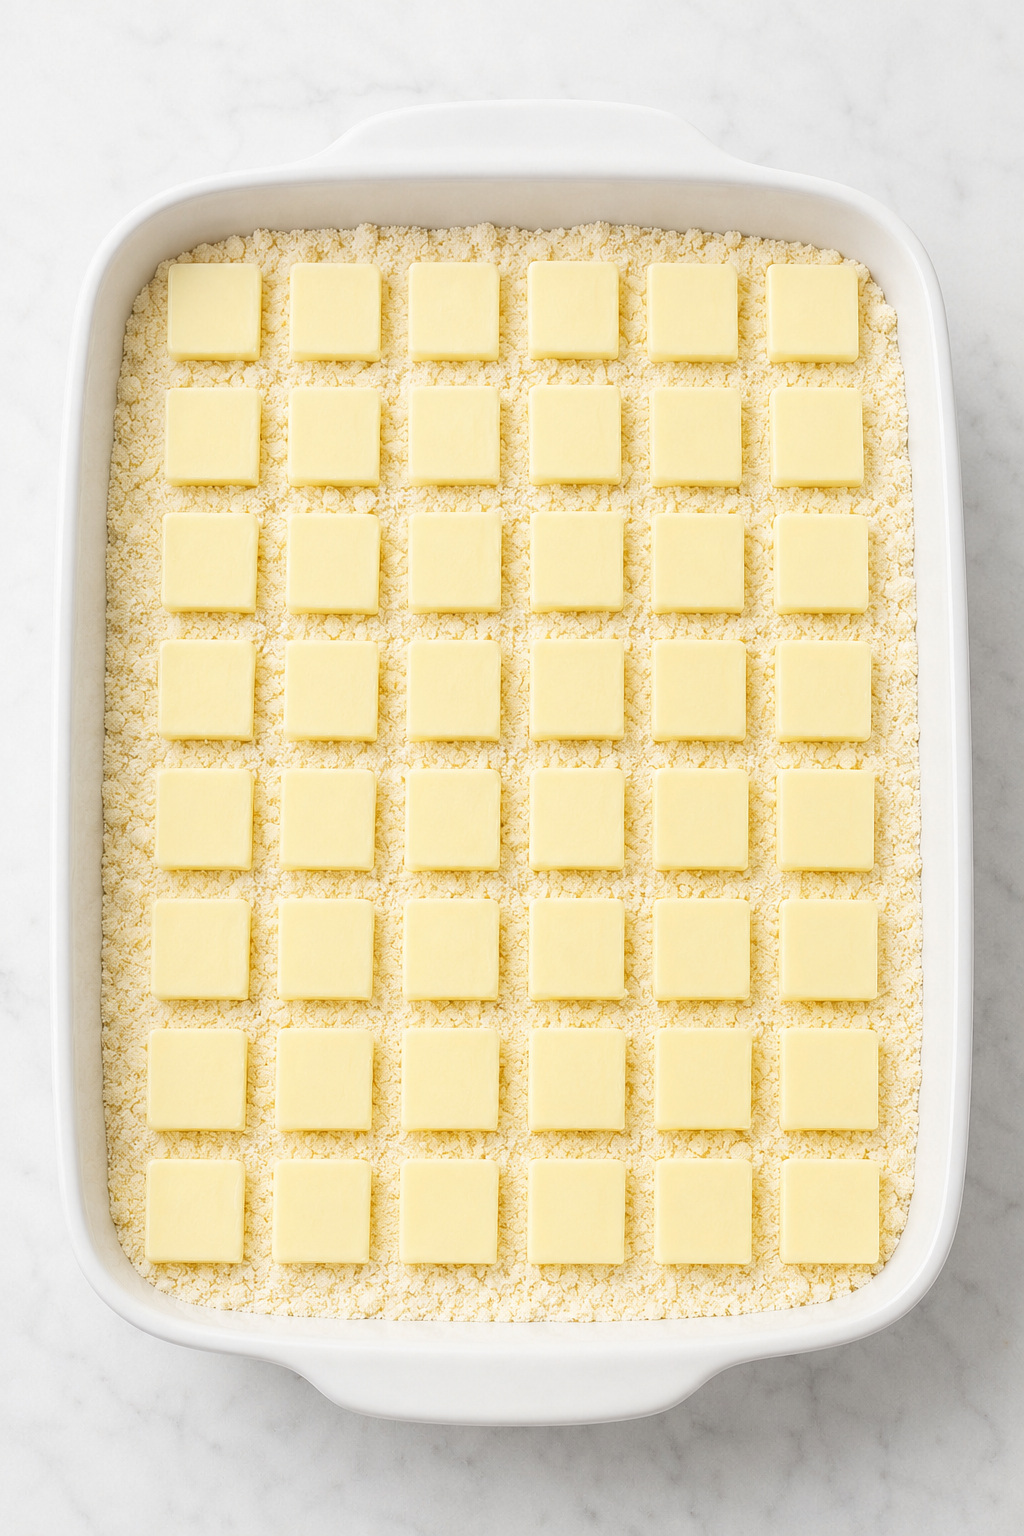
What you should see: a regular 6 × 8 grid with only narrow gaps. Move a pat if you see a large exposed zone; do not stack pieces in thick clusters.
Bake, rest, and serve
The final phase develops both the browned topping and the thickened peach sauce. Judge the bake by center bubbling and surface condition, then protect the full rest so the dessert becomes safely warm and scoopable.
6. Bake without stirring. Bake until the fruit bubbles vigorously around the perimeter and through at least two openings in the center third of the pan. At least 80% of the topping should be deep golden, with no broad dusty patches or shiny butter pools. In a ceramic dish, begin checking at 48 minutes and expect 52–60 minutes.
What you should see: active center-third bubbling, a mostly deep-golden surface, absorbed butter, and a set center topping.
7. Rest for 30 minutes. Transfer the dish to a wire rack and leave it undisturbed. This is part of the recipe, not optional cooling time.
What you should see: the vigorous bubbling subsides and the sauce changes from freely flowing to glossy and spoon-coating.
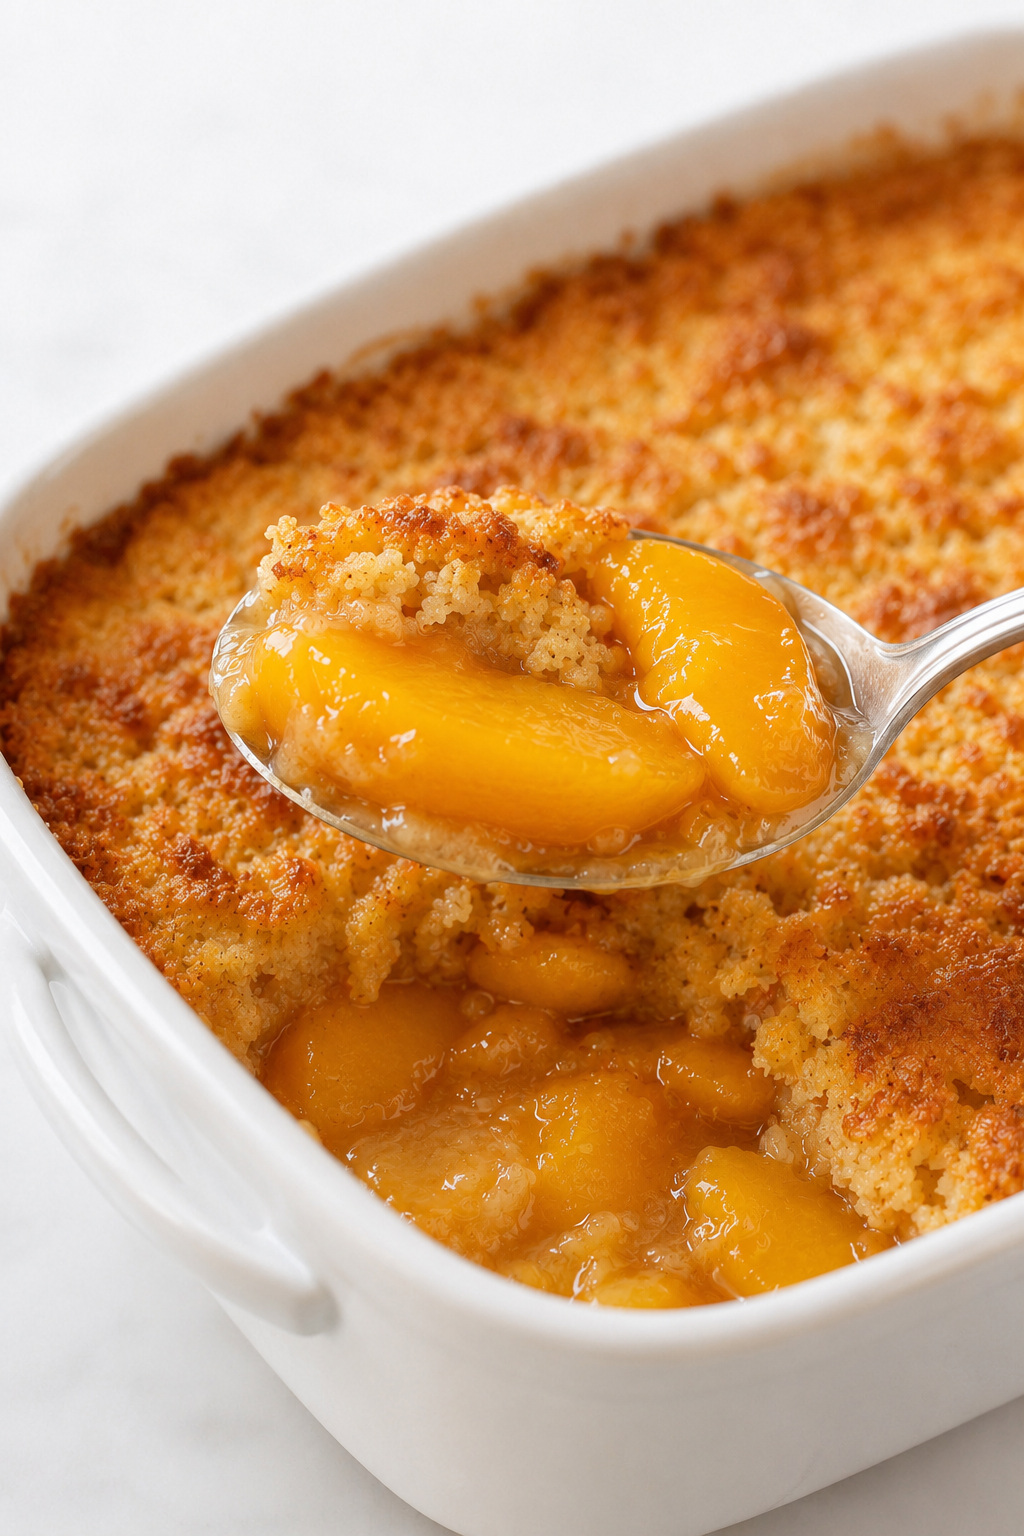
8. Serve warm. Scoop into shallow bowls. Add homemade vanilla ice cream only at serving so the topping stays crisp for as long as possible.
Why the Layered Method Works
A dump cake does not hydrate like an ordinary cake batter. Steam and peach liquid travel upward from the fruit while melted butter moves downward from the surface. The dry mix between them becomes a combination of tender cake-like pockets, crisp golden crumbs, and buttery ridges.
Stirring destroys that contrast and turns the dessert into an uneven batter. Keep the three layers distinct, just as you would in a classic cherry dump cake. This dump-cake layering guidance from Southern Living also identifies stirring as the central mistake to avoid.
How to Tell When Peach Dump Cake Is Done
Time is a guide; the center of the dish decides doneness. Do not remove the pan simply because the edges are brown.
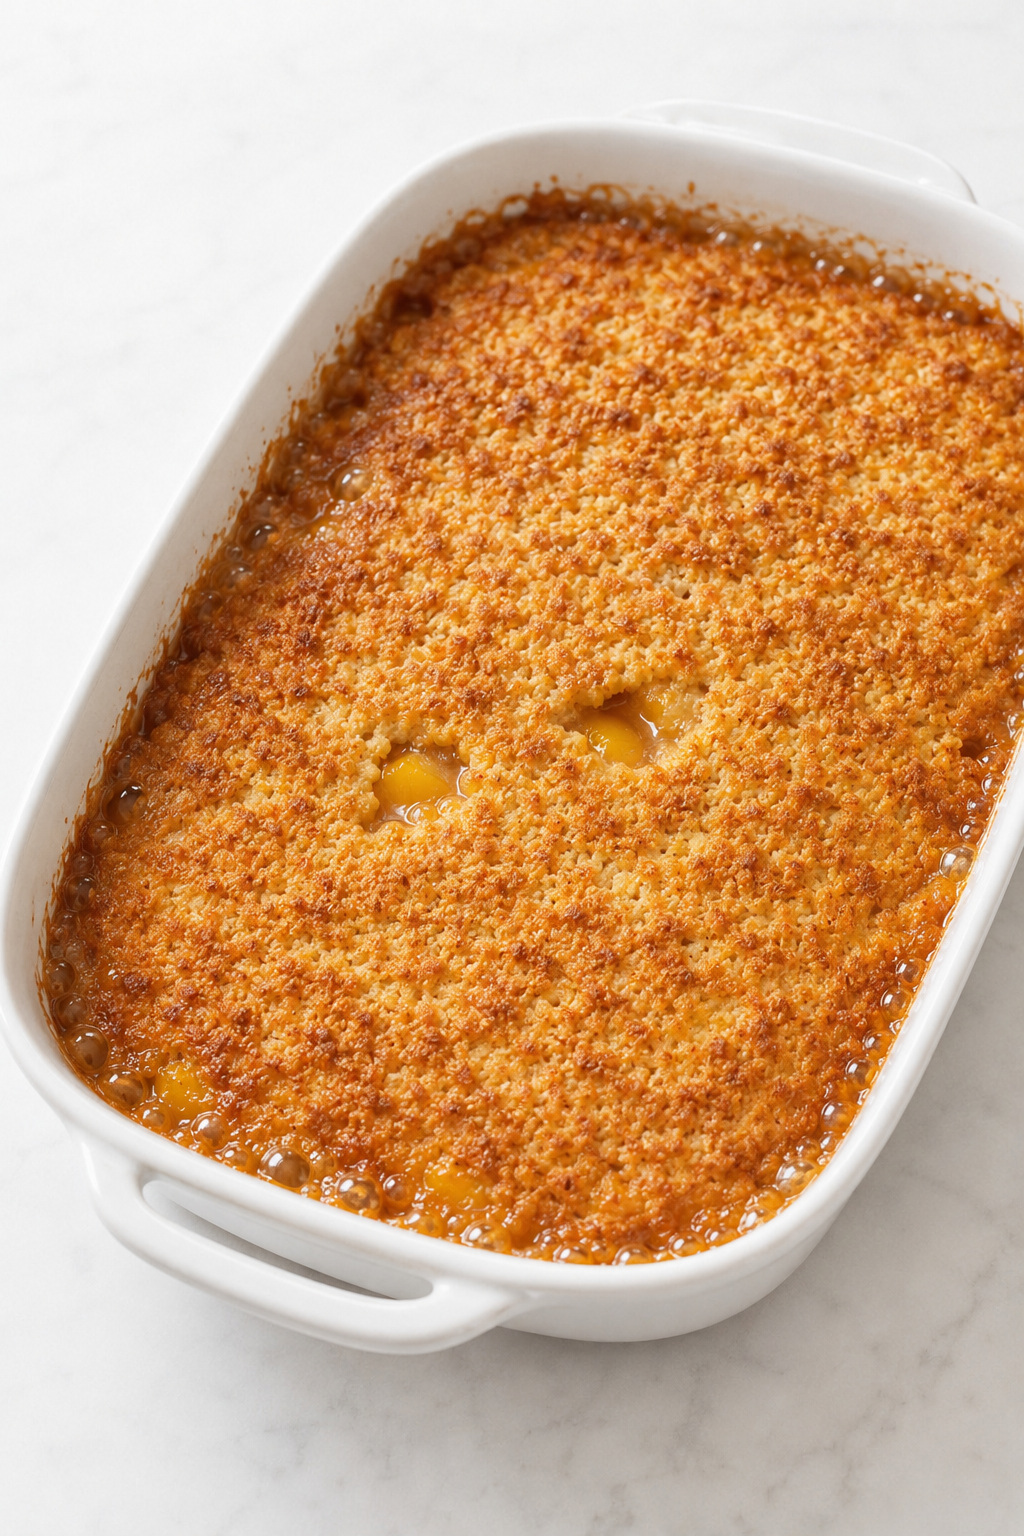
| Signal | Ready | Not ready |
|---|---|---|
| Fruit | Vigorous bubbles around the edge and through at least two openings in the center third | Bubbling only at the outer edge |
| Color | At least 80% of the topping is deep golden | Large pale or dusty zones |
| Butter | Absorbed into the topping | Broad shiny pools |
| Center | Set and visibly hydrated | Loose, thickly ridged, or floury |
| Optional temperature | Fruit liquid in a center opening reaches about 200–205°F (93–96°C) | Center liquid has not reached the thickening range |
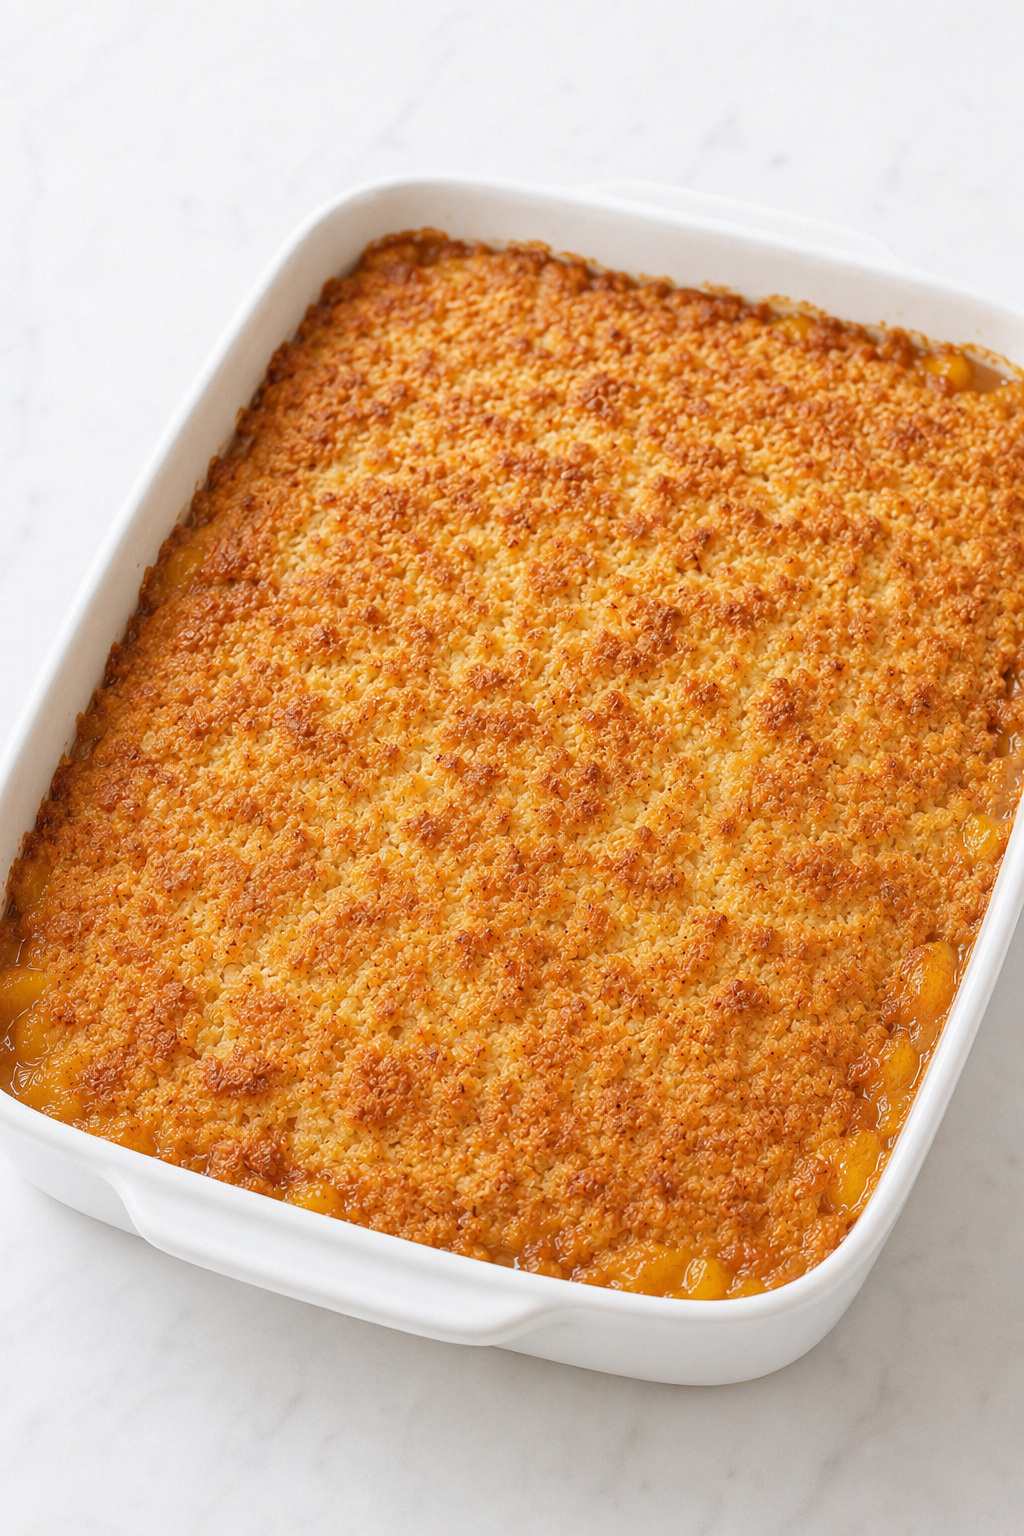
Narrow pale seams, a few darker buttery islands, and softer fruit-fed patches are normal. The goal is controlled rustic variation, not a perfectly uniform cake crust.
Common Mistakes and How to Fix Them
Most dump-cake failures can be traced to excess liquid, uneven topping depth, incomplete butter coverage, or stopping the bake too early. Use the table to connect the visible problem with the decision that prevents it.
| Mistake | What happens | How to prevent it |
|---|---|---|
| Adding all the can liquid | Thin, soupy fruit layer | Measure exactly 1 1/4 cups (300 ml) |
| Using a smaller cake-mix box | Fruit-to-topping ratio changes | Weigh exactly 432 g |
| Leaving thick cake-mix ridges | Floury, underhydrated pockets | Sprinkle in three passes and level lightly |
| Using a few thick butter slices | Greasy islands beside broad dry areas | Cut 48 paper-thin pats and arrange a 6 × 8 grid |
| Stirring the layers | Dense, uneven batter instead of dump-cake texture | Level the top only; never stir after adding the mix |
| Stopping at golden edges | Raw-looking center and thin sauce | Wait for bubbling through the center third |
| Serving immediately | Dangerously hot, freely flowing sauce | Rest for the full 30 minutes |
| Making an unvalidated peach swap | Changed sweetness, liquid, and bake time | Use sliced peaches in 100% juice for this formula |
Expert Tips for a Perfect Peach Dump Cake
These refinements address the small variables that remain after the core method is correct. They help you preserve even browning, accurate timing, and the intended crisp-tender topping across ordinary home-kitchen conditions.
- Cut the butter straight from the refrigerator. If it softens while you work, chill it briefly before finishing the grid.
- Build the cake-mix layer in three passes. A single pour creates mounds that look level from above but stay thick underneath.
- Protect the edges without sacrificing the center. If the perimeter becomes dark before the middle bubbles, loosely shield only the outer edge with narrow strips of foil.
- Use a sheet pan only as a drip catcher. Place it on the rack below rather than directly under the baking dish, where it could change bottom heat.
- Let the visual cues override the clock. Pan material and oven calibration can move the finish time several minutes in either direction.
- Keep the full rest. Cornstarch continues organizing the hot peach liquid as the temperature falls; shortening the rest changes the serving texture.
Peach Dump Cake vs. Peach Cobbler vs. Peach Crisp
These three warm fruit desserts may look similar in a bowl, but the topping and assembly method create distinctly different results. The comparison below makes the recipe boundary clear before you choose which style best fits the dessert you have in mind.
| Dessert | Topping | Method | Finished texture |
|---|---|---|---|
| Peach dump cake | Dry cake mix and butter | Layered and left unstirred | Rustic, crisp-tender, and scoopable |
| Peach cobbler | Biscuit, dumpling, pastry, or batter topping | Topping is prepared before baking | Soft or biscuit-like over juicy fruit |
| Peach crisp | Crumb mixture, usually including oats | Crumble is mixed and scattered over fruit | Crunchy, crumbly clusters |
If the oat-crumble texture is what you want, the topping style in this apple crisp recipe is a better match. Choose dump cake when minimal assembly and a buttery cake-mix topping are the priorities.
Recipe Timeline / Workback Plan
Plan from serving time rather than from the moment the pan enters the oven. The schedule includes the full 30-minute setting rest, so the dessert reaches the table warm with a glossy, spoon-coating sauce.
| Time before serving | Action |
|---|---|
| 1 hour 45 minutes | Preheat the oven, drain the peaches, and measure the juice. |
| 1 hour 30 minutes | Finish the three layers and place the dish in the oven. |
| 30 minutes | Remove the dish only after all doneness cues pass; begin the setting rest. |
| Serving time | Scoop warm portions and add vanilla ice cream if desired. |
If you need to work ahead, drain the peaches and measure the juice up to 24 hours in advance. Refrigerate them separately in covered nonmetal containers, then add the cornstarch and seasonings immediately before assembly.
Beautiful Ways to Serve
For the classic presentation, spoon the warm dump cake into shallow white bowls so each portion shows peach slices, glossy sauce, and both crisp and tender pieces of topping. Add one compact scoop of vanilla ice cream beside—not completely over—the golden surface.
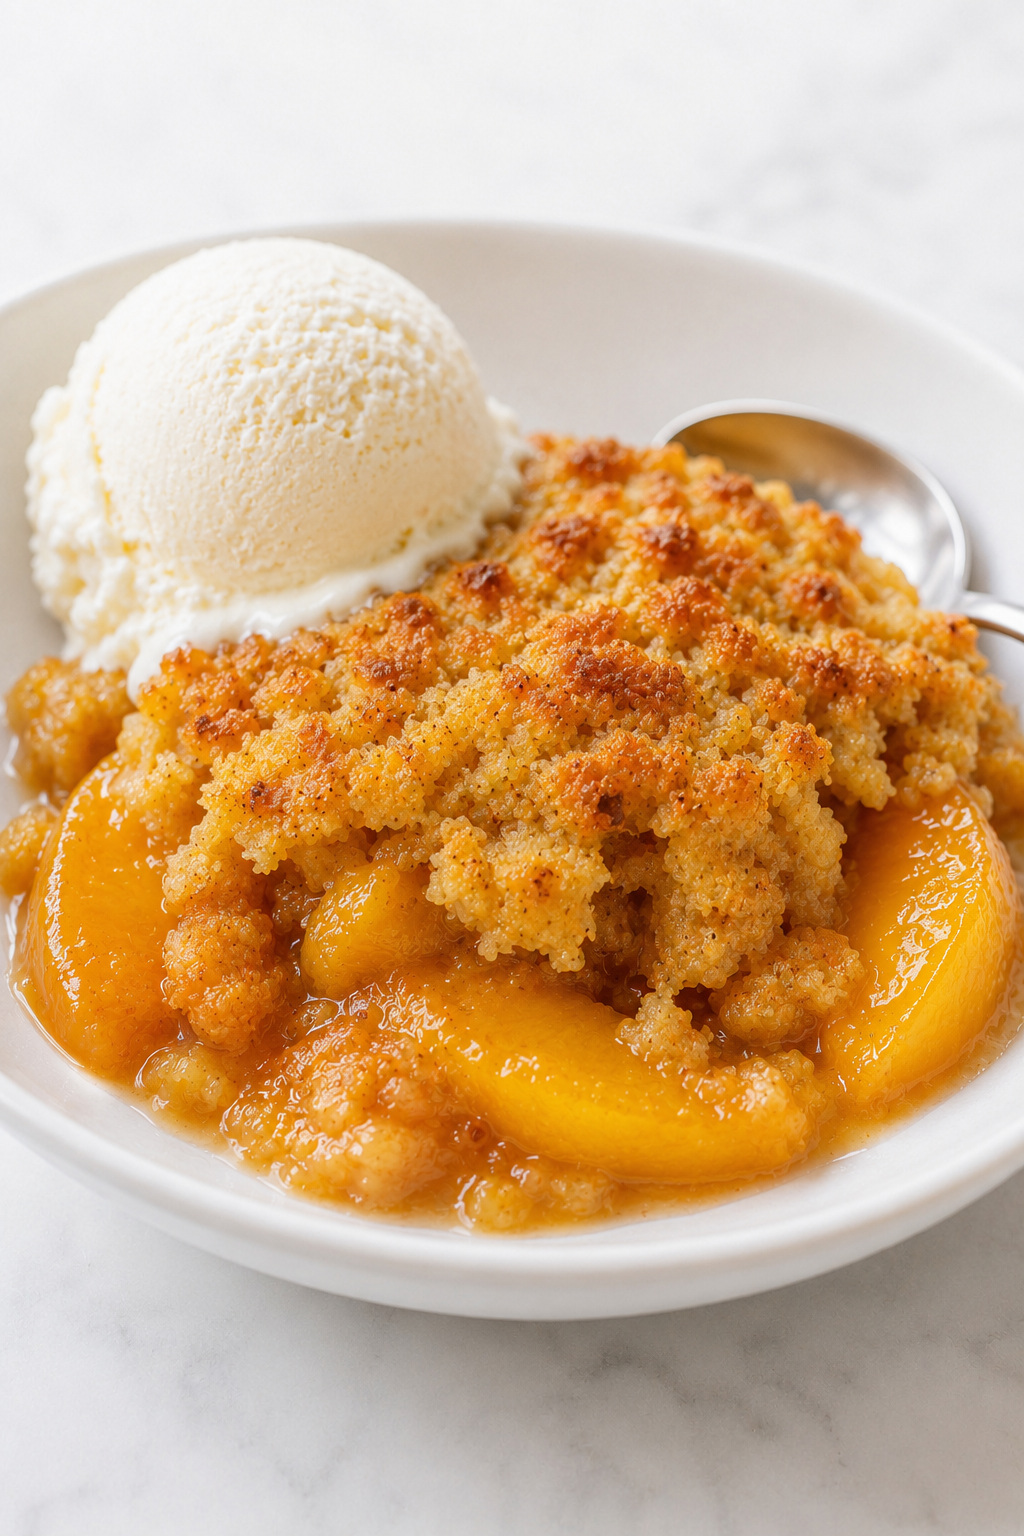
For a potluck or relaxed family table, bring the dessert in its baking dish and serve it with a wide spoon. The intentionally scoopable structure makes it generous and easy to portion without trying to preserve clean edges.
For smaller servings, use heat-safe dessert bowls and include one or two visible peach slices in every portion. A restrained spoonful of softly whipped cream works when you want a lighter finish than ice cream.
Pairings
Choose simple accompaniments that balance the dessert rather than covering the peach flavor or crisp topping. Cold dairy adds contrast, while unsweetened hot drinks temper the sweetness.
- Vanilla ice cream: the primary pairing; cold creaminess softens the warm cinnamon and buttery topping.
- Unsweetened whipped cream: a lighter contrast for an already sweet dessert.
- Hot coffee: bitterness balances the peach and yellow-cake sweetness.
- Black tea: a clean, simple pairing for an afternoon serving.
Make Ahead, Storage, Freezing, and Reheating
The topping is crispest on the day it is baked, but the dessert can still be prepared around a gathering and stored safely afterward. Use the method that matches your timing, and expect refrigeration, freezing, or microwaving to soften some of the surface texture.
Make ahead
Do not fully assemble the unbaked dessert hours ahead. The dry mix begins hydrating unevenly before the butter melts, which can create gummy islands and reduce surface crispness. You may drain the peaches and measure the juice one day ahead, or bake the entire dessert one day ahead and reheat it. Freshly baked will have the crispest topping.
Refrigerator storage
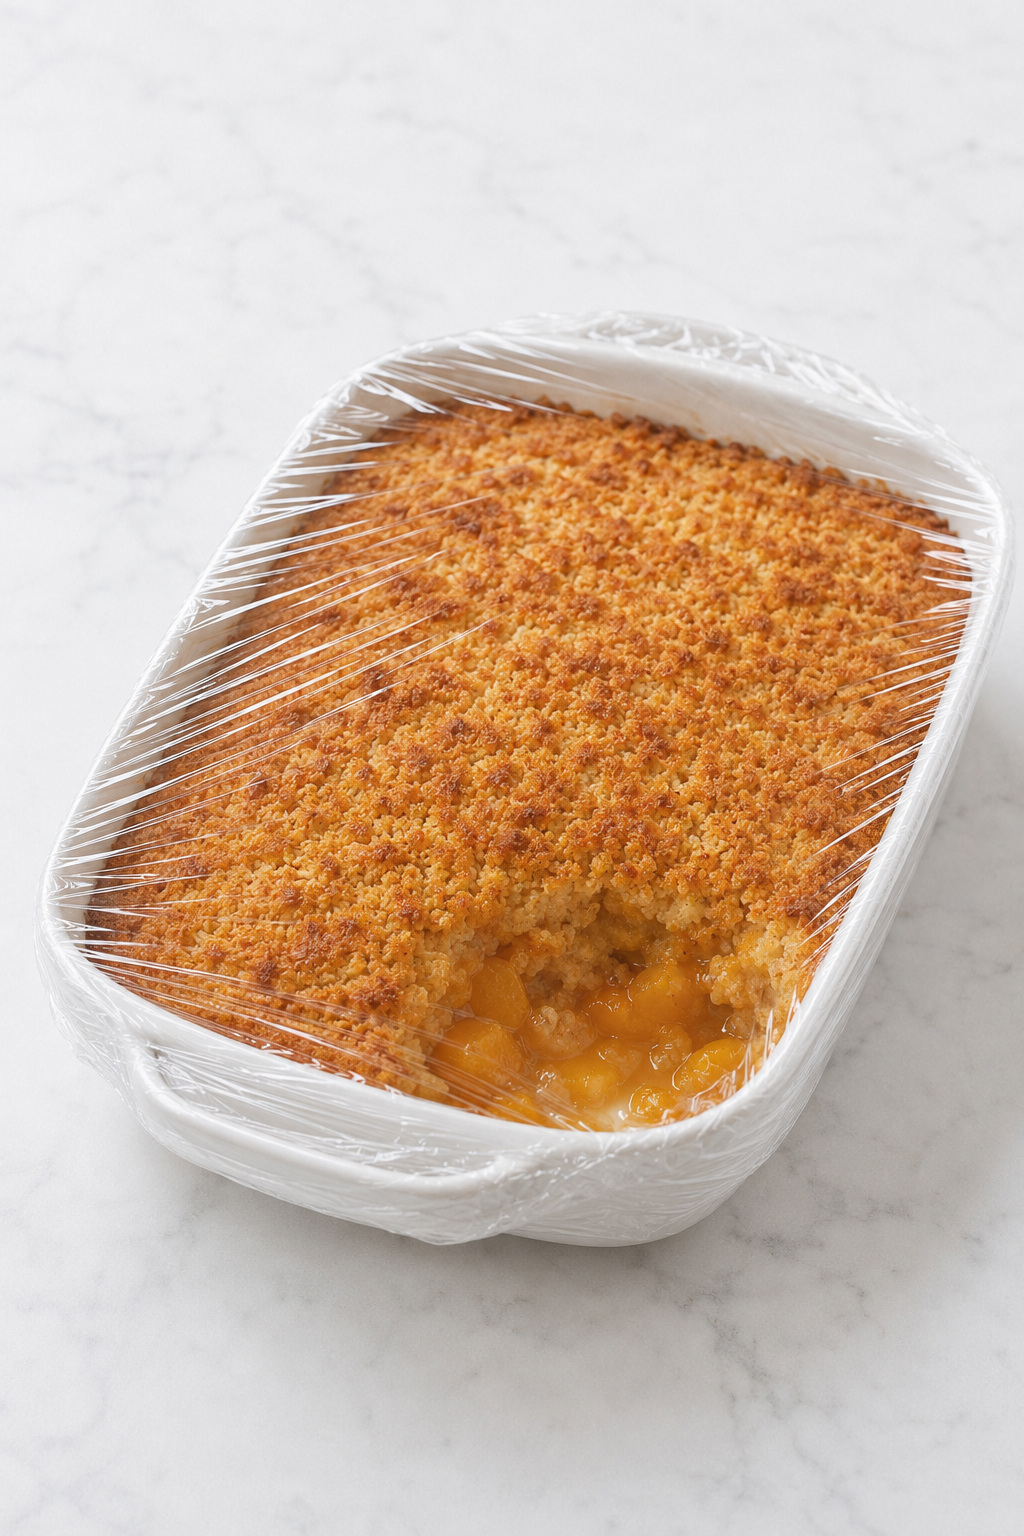
Refrigerate leftovers within 2 hours of baking, following the USDA FSIS two-hour leftovers guidance. Once cooled, cover the dish tightly or transfer portions to airtight containers. Refrigerate for up to 4 days. Do not leave the dessert at room temperature overnight.
Freezing
Freeze fully cooled individual portions in airtight freezer-safe containers for up to 2 months for best quality. Thaw overnight in the refrigerator. The peach layer holds well, but the topping will be softer after freezing; use the oven when restoring some crispness matters.
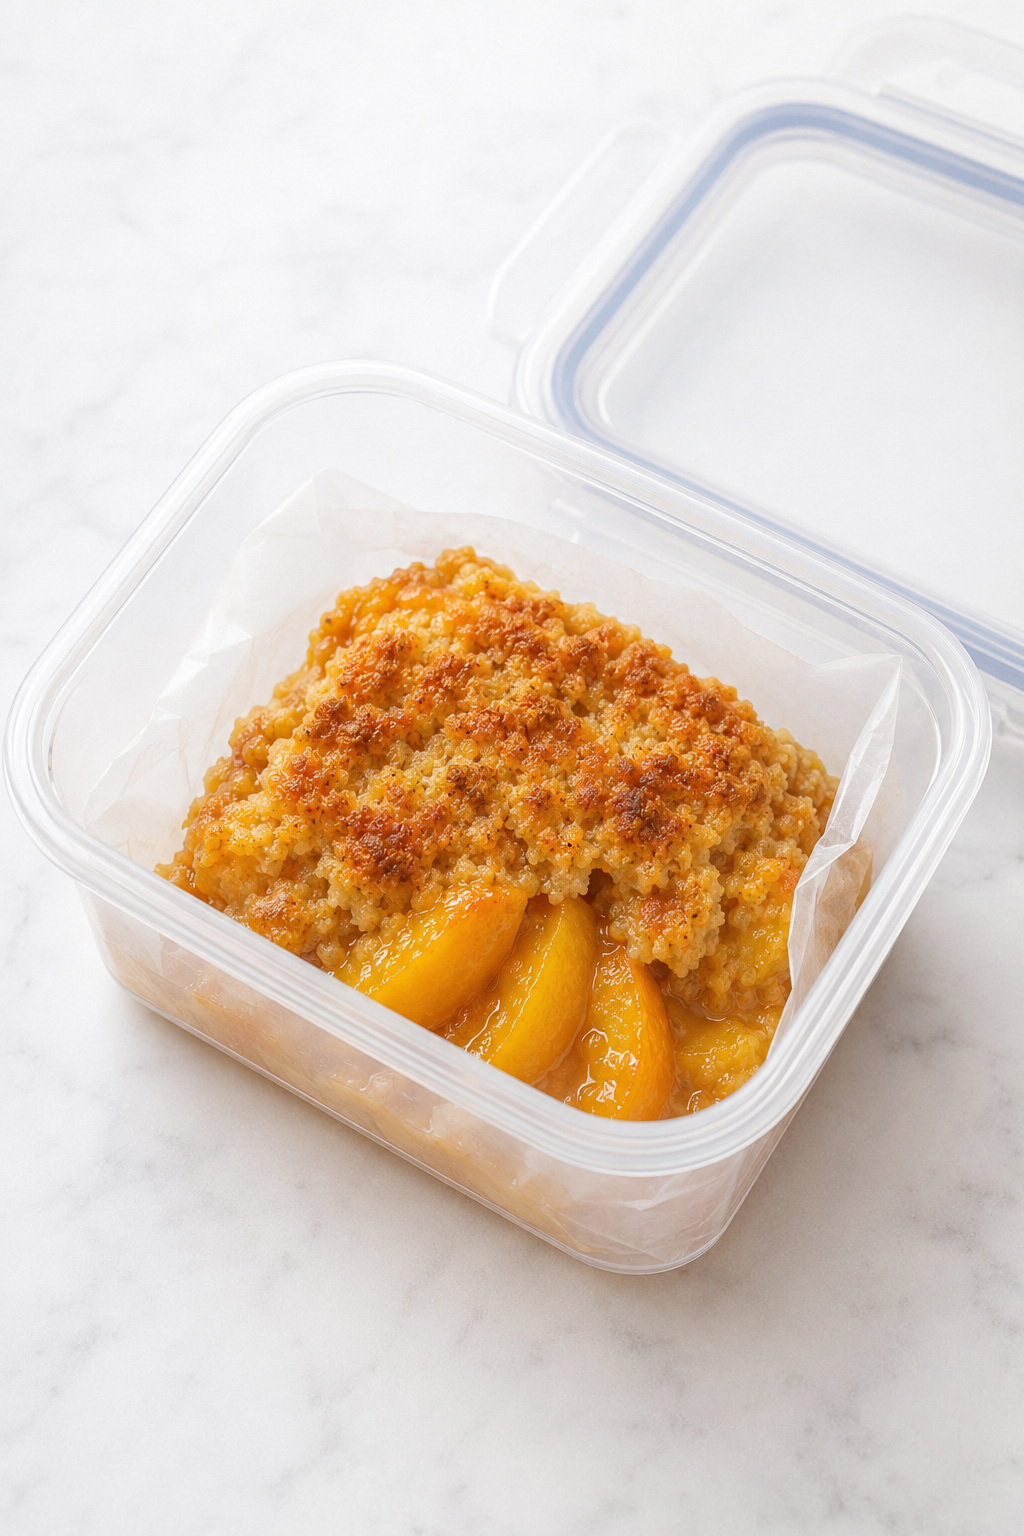
Oven reheating
Place one 120–150 g portion in an oven-safe dish and heat uncovered at 325°F (163°C) for 12–18 minutes, until hot through and lightly re-crisped. For several portions in the original dish, cover loosely for the first 15 minutes, then uncover and continue for 5–10 minutes as needed.
Microwave reheating
For one refrigerated 120–150 g portion, cover loosely and use the initial time below. Rest for 30 seconds, then continue in 10-second bursts only if needed.
| Microwave power | Initial time |
|---|---|
| 700 W | 65–80 seconds |
| 800 W | 55–70 seconds |
| 1000 W | 45–55 seconds |
| 1200 W | 35–45 seconds |
Microwaving softens the topping. That is an expected tradeoff, not a sign that the original bake failed.
Why This Recipe Belongs in Your Recipe Box
This Peach Dump Cake earns repeat-recipe status by combining genuine ease with enough technical control to make the result predictable. These are the practical reasons to keep it available for casual gatherings, potlucks, and warm family desserts.
- Fast Active Prep. About 15 minutes of hands-on work gets the dessert ready for the oven.
- Pantry-Friendly Base. Canned peaches and boxed cake mix make this practical beyond fresh-peach season.
- No Mixer Needed. The layered method skips conventional cake batter, pastry, and biscuit dough.
- Controlled Peach Sauce. One exact juice measurement protects the finished dessert from a watery base.
- Even Butter Coverage. The repeatable grid limits broad powdery patches across the topping.
- Visible Doneness Cues. Bubbling, color, and surface coverage guide the bake more reliably than time alone.
- Easy Crowd Serving. The warm scoopable format suits potlucks and casual family desserts without precise slicing.
Continue Your Cozy Fruit-Dessert Baking Journey
If this warm Peach Dump Cake satisfied the craving for bubbling fruit and a buttery golden topping, choose your next bake by deciding what you want to keep: the same effortless dump-and-bake method, the rustic comfort of a scoopable fruit dessert, or the fruit-forward flavor in a more structured project.
Keep the Easy Dump-and-Bake Method
These recipes preserve the low-effort layered format, so they are the closest next step when the no-stir method is what made this dessert useful.
- Apple Dump Cake — choose this when you want the same layered method with warm cinnamon-apple flavor and a familiar cake-mix and butter topping.
- Cherry Dump Cake — choose this for brighter fruit flavor and pantry convenience in another unstirred 9 × 13-inch dessert.
- Pumpkin Dump Cake — keeps the one-pan ease but introduces a creamy, warmly spiced pumpkin base for fall and holiday baking.
- Pecan Pie Dump Cake — takes the format in its richest direction, with a gooey brown-sugar pecan layer beneath a buttery golden topping.
Stay with Warm, Scoopable Fruit Desserts
Choose this path when the contrast between soft fruit, glossy juices, and a rustic baked topping matters more than using boxed cake mix.
- Peach Cobbler Recipe — keeps peaches front and center but replaces the dry cake-mix layer with a prepared homemade topping.
- Blueberry Cobbler — offers a jammy berry filling and soft golden topping when you want something brighter and lightly tart.
- Blackberry Cobbler Recipe — brings deeper sweet-tart berry flavor while preserving the same relaxed oven-to-table serving style.
- Apple Cobbler Recipe — turns the warm, scoopable comfort toward cinnamon apples beneath a tender golden topping.
Choose a More Structured Fruit Bake
When you are ready to move from a spoonable pan dessert to clean slices, pastry, or a centerpiece cake, these recipes provide a natural step up in structure and technique.
- Peach Pie — choose this as the closest next project when you want a peach-centered filling with pastry and a sliceable finish.
- Blueberry Pie — moves the juicy fruit experience into a jammy berry filling held inside a buttery pie crust.
- Dutch Apple Pie — combines spiced fruit, pastry, and a crisp crumb topping for a more layered baking project.
- Lemon Blueberry Cake — takes the ambitious centerpiece route, with three cake layers, two fruit fillings, and a smooth frosting finish.
Final Thoughts
This Peach Dump Cake keeps the generous, low-fuss spirit of the classic dessert while giving its most unpredictable details enough structure to become dependable.
Return to it when the occasion calls for something warm, familiar, and easy to carry from the oven to the table, especially when clean slices matter less than a comforting spoonful of peaches and golden topping.
A recipe does not lose its comfort when a few details become precise; often, those quiet controls are what make a simple dessert feel reliably like itself.

Peach Dump Cake
A warm, scoopable peach dessert with tender canned peaches in a glossy sauce and a rustic golden cake-mix topping, engineered to avoid a watery base and broad powdery patches.
Ingredients
- Nonstick cooking spray, as needed
- 3 cans (15–15.25 ounces / 425–432 g each) sliced yellow peaches packed in 100% juice
- 1 1/4 cups (300 ml) reserved peach juice from the cans
- 1 tablespoon (8 g) cornstarch
- 1 teaspoon (5 ml) pure vanilla extract
- 1/2 teaspoon ground cinnamon
- 1/4 teaspoon fine salt
- 1 box (15.25 ounces / 432 g) yellow cake mix, dry
- 3/4 cup (12 tablespoons / 170 g) very cold unsalted butter
- Vanilla ice cream, optional for serving
Instructions
- Preheat and prepare the dish. Heat the oven to 350°F (177°C) with a rack in the center. Lightly coat the bottom and sides of a 9 × 13-inch shallow 3-quart ceramic baking dish with nonstick spray. What you should see: a thin, complete film with no visible puddles.
- Drain and measure. Drain all three cans of peaches over a bowl. Spread the drained peaches evenly in the prepared dish. Measure exactly 1 1/4 cups (300 ml) of the collected juice; reserve or discard any excess. What you should see: fully drained peach slices in a relatively even layer and exactly 300 ml juice.
- Make the controlled fruit liquid. Whisk the cornstarch with about 2 tablespoons of the measured juice until completely smooth. Whisk in the remaining measured juice, vanilla, cinnamon, and salt. Pour evenly over the peaches and gently level the fruit. What you should see: no white starch lumps, with the fruit and liquid distributed throughout the dish.
- Add the cake mix. Sprinkle all 432 g dry yellow cake mix over the fruit in three passes. Level only the top surface with the back of a spoon; do not press down and do not stir. What you should see: a loose, level, edge-to-edge layer without thick ridges.
- Cover with butter. Cut each tablespoon of very cold butter into four paper-thin pats for 48 pats total. Arrange them in a 6 × 8 grid over the dry mix, reaching close to the edges. What you should see: only narrow gaps, with no thick clusters or large uncovered zones.
- Bake without stirring. Bake until the fruit bubbles vigorously around the perimeter and through at least two openings in the center third, at least 80% of the topping is deep golden, the butter is absorbed, and no broad dusty areas remain. In a ceramic dish, begin checking at 48 minutes and expect 52–60 minutes.
- Rest. Transfer the dish to a wire rack and rest for 30 minutes. What you should see: the bubbling subsides and the peach sauce becomes glossy and spoon-coating rather than freely flowing.
- Serve. Scoop warm portions into shallow bowls and add vanilla ice cream if desired.
Notes
- The canonical formula requires exactly 15.25 ounces (432 g) yellow cake mix. If the box contains 13.25 ounces (375 g), add 57 g from a second box.
- Use peaches packed in 100% juice. Heavy-syrup peaches, peach pie filling, fresh peaches, and frozen peaches are not direct one-for-one substitutions.
- If using salted butter, omit the added 1/4 teaspoon salt.
- Do not stir the cake mix into the peaches. The layered structure creates the intended dump-cake texture.
- Small pale seams and softer fruit-fed areas are normal. Large dusty patches, broad butter pools, or a center that does not bubble indicate the dessert is not ready.
- Pan timing: ceramic 52–60 minutes; clear glass 50–58 minutes; light-colored metal 45–53 minutes. Dark metal is not recommended.
- Refrigerate leftovers within 2 hours and store covered for up to 4 days.
- Freeze fully cooled individual portions for up to 2 months. Thaw overnight in the refrigerator.
- For one refrigerated 120–150 g portion, microwave loosely covered: 700 W for 65–80 seconds; 800 W for 55–70 seconds; 1000 W for 45–55 seconds; 1200 W for 35–45 seconds. Rest 30 seconds before adding 10-second bursts.
- Oven reheating gives the best topping texture: 325°F (163°C) for 12–18 minutes for one portion.
Nutrition Information:
Yield: 12 Serving Size: 1 serving, approximately 130 gAmount Per Serving: Calories: 300Total Fat: 13gSaturated Fat: 8gCholesterol: 30mgSodium: 330mgCarbohydrates: 44gFiber: 2gSugar: 29gProtein: 2g
Nutrition information is provided as an estimate only and may vary based on specific ingredients, brands, and portion sizes used. This information should not be considered medical or nutritional advice.
12 Sweet Favorites — Yours, Free 🍰
Tiramisù, no-bake cheesecake, the perfect chocolate chip cookie & 9 more reader-loved desserts — gathered into one beautiful free recipe book. From my kitchen to yours.
No spam, just sweet things. Unsubscribe anytime.