How to Make Cake Pops (From Scratch)
🎁 FREE E-BOOK: 12 Sweet Favorites — reader-loved desserts in one beautiful recipe book.
Learning how to make cake pops from scratch is all about the contrast: a thin, smooth candy shell gives way to a fine, moist vanilla center that holds together cleanly without turning gummy or greasy. These little desserts look playful, but the best ones depend on a few precise choices long before the sprinkles go on.
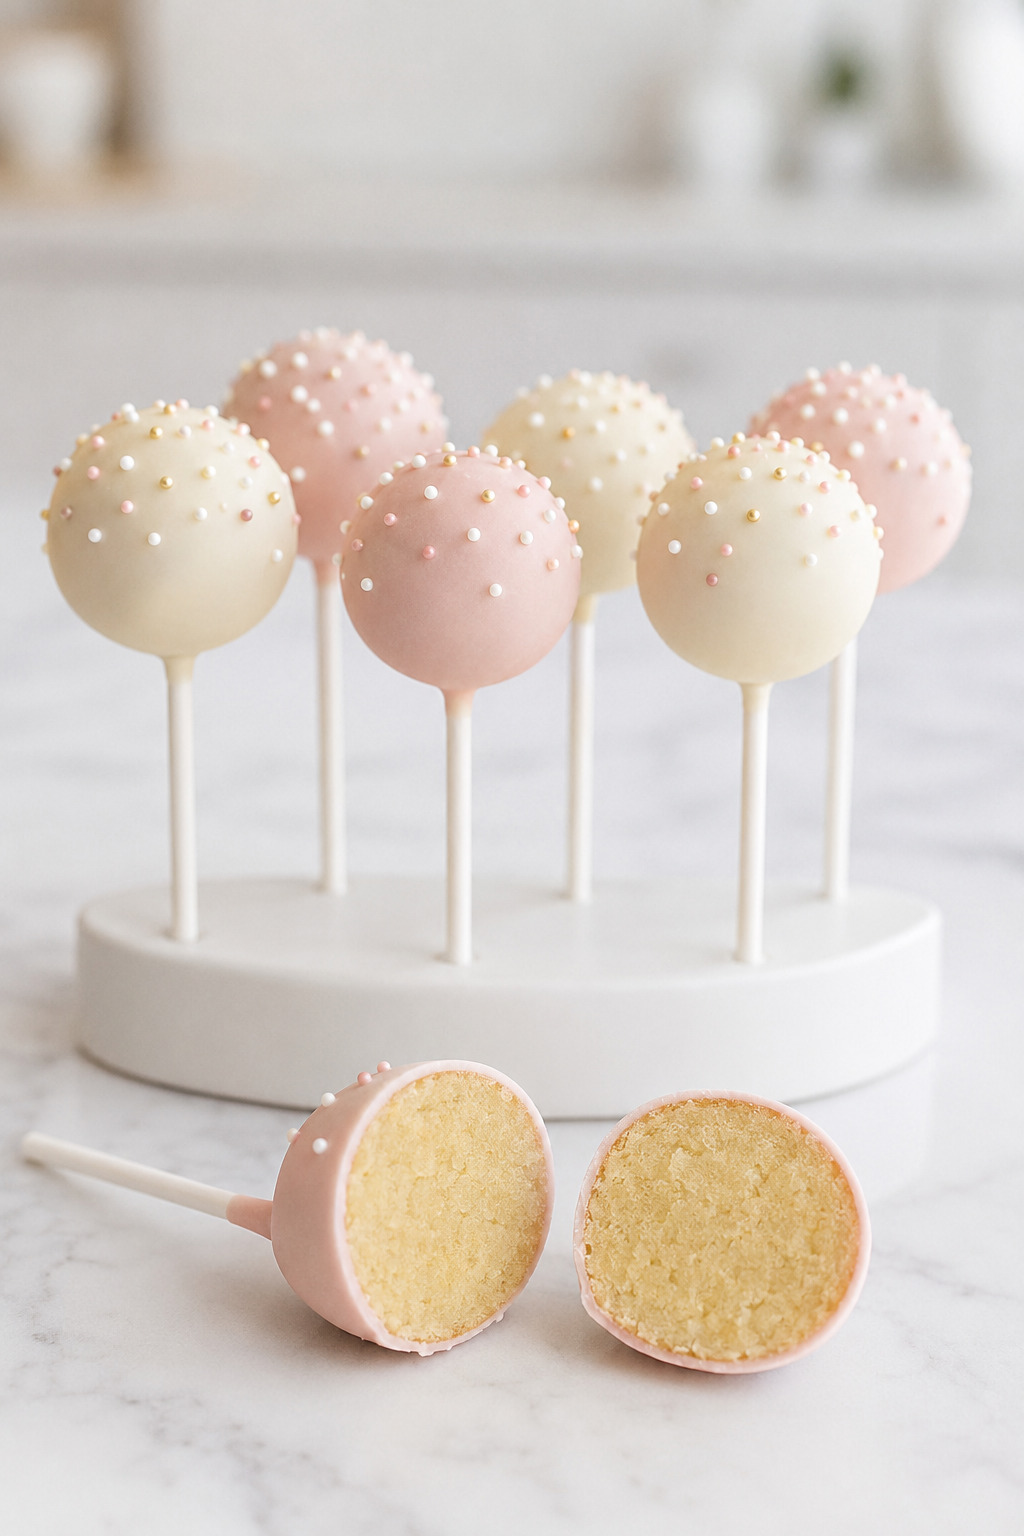
I’ve always loved how cake pops make a dessert table feel festive before anyone takes the first bite. The colors, sprinkles, and little sticks do half the decorating for you.
This is the guide worth keeping when you do not want to guess how much frosting to add, how large to roll each ball, or whether the coating is ready. You will use a simple compression test, weigh every center at 20 grams, and work within clear temperature and viscosity windows. The troubleshooting sections also tell you which problems can be corrected and which ones are better prevented from the start.
The vanilla cake and buttercream are both homemade, and the cooling and chilling time are essential rather than optional. You can complete the recipe in one focused day, but the calmest workflow is to bake the cake on Day 1, then shape, dip, and decorate on Day 2.
Cake Pops at a Glance
These are classic cake-and-frosting cake pops made from a compact homemade vanilla cake, a deliberately small amount of vanilla buttercream, candy coating, and sprinkles. The cake is cooled, crumbled, bound just until cohesive, rolled, chilled, secured to sticks, dipped, and set.
| Recipe detail | What to expect |
|---|---|
| Yield | About 30 cake pops |
| Center size | 20 g each; about 1 1/4 inches before coating |
| Flavor | Buttery vanilla with balanced sweetness |
| Interior | Fine, moist, compact, and truffle-like without being pasty |
| Coating | A thin, fully set confectionery shell |
| Pan | Light-colored 8-inch square metal pan |
| Total time | About 6 hours, including cooling, chilling, and setting |
| Best workflow | Bake on Day 1; shape and decorate on Day 2 |
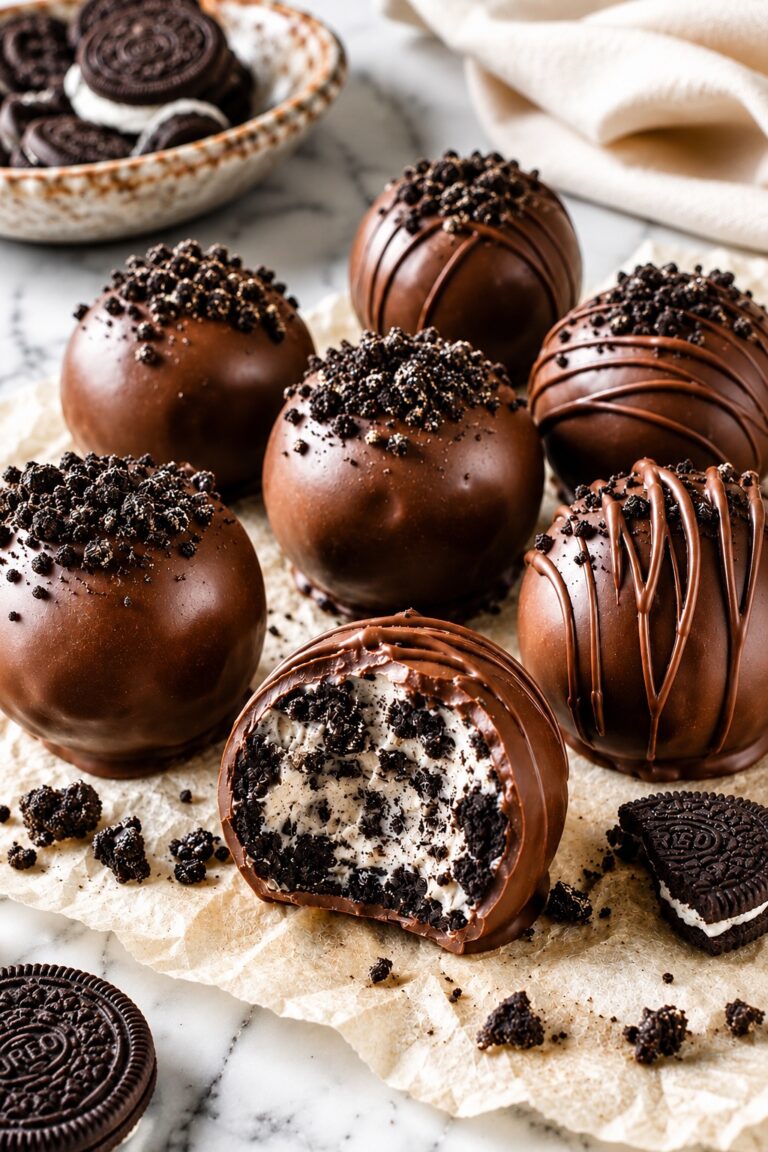
Cake pops are not the same as cake balls, which are served without sticks, or the tiny intact cakes baked in a cake-pop appliance. They are also different from cookie-based truffles such as the Oreo Balls recipe. Here, cake crumbs and buttercream form the center, and the coated stick is part of the structure—not merely a decoration.
Why This Homemade Cake Pop Formula Works
Reliable cake pops begin with a formula designed for crumbling, binding, and dipping. Each part of this recipe has a specific job, so the finished pops stay moist inside, stable on their sticks, and cleanly coated.
- A tender but sturdy vanilla cake makes fine crumbs. Butter supplies flavor, while a little oil and sour cream help the center stay moist after chilling.
- The buttercream is added by endpoint. Starting with 85 g prevents the common mistake of turning the crumbs into a greasy paste.
- Every center weighs 20 g. Small, consistent balls place less mechanical strain on the stick and give you a predictable yield.
- A dipped stick creates a real anchor. The small coating collar sets inside the center before the full pop is dipped.
- One vertical submersion protects the shape. Fluid, self-leveling coating covers the pop without the pulling and excess weight caused by swirling or repeated dipping.
Why You’ll Love Making Cake Pops This Way
This method is detailed where cake pops are genuinely sensitive, yet flexible where creativity is safe. Once the structure is under control, the colors, sprinkles, display, and occasion can change without forcing you to relearn the recipe.
- Party-friendly yield: one compact cake makes about 30 neat, shareable pops.
- A calmer two-day option: separate baking and cooling from the more focused shaping and dipping session.
- Beginner-readable cues: every critical stage explains what the mixture, coating, or finished pop should look and feel like.
- Easy visual customization: change the coating color and dry sprinkles while preserving the same structural formula.
- Make-ahead flexibility: the recipe includes refrigeration, freezing, thawing, packaging, and transport guidance.
- Honest troubleshooting: you will know when to add a little binder, when to rewarm the coating, and when a problem cannot be disguised as a clean finish.
The Ingredients Behind Smooth, Stable Cake Pops
The recipe has three distinct components: a small vanilla cake, a minimal buttercream binder, and a candy coating. Keep the ingredients grouped and measured before you begin, because the final texture depends as much on the ratio between components as it does on any one ingredient.
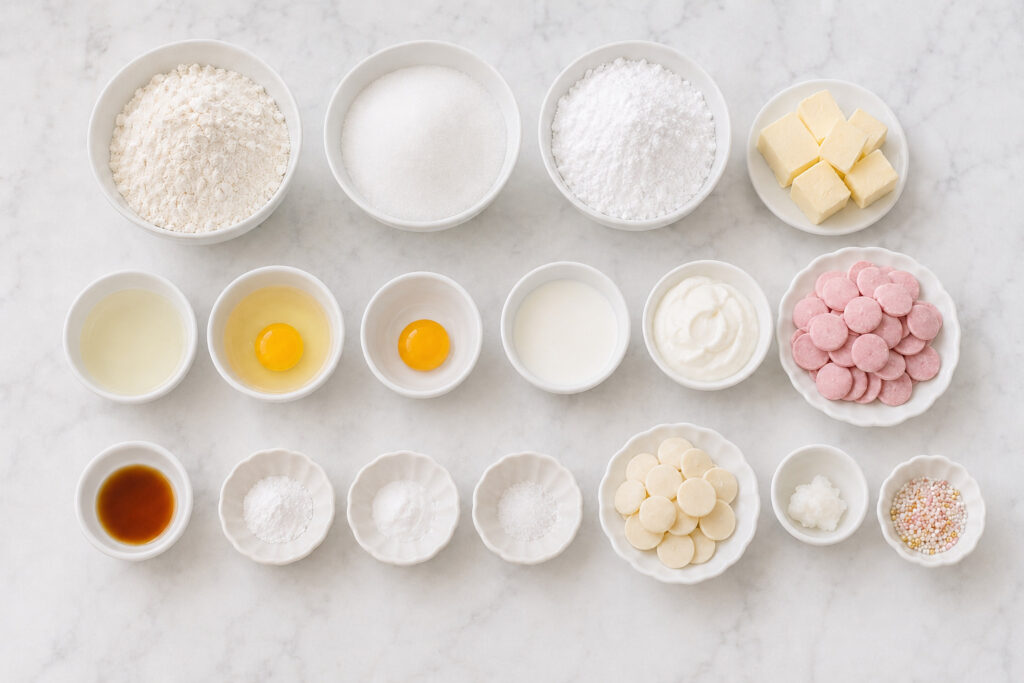
For the Vanilla Cake
This compact cake is moist enough to bind easily but sturdy enough to crumble finely. Room-temperature dairy and eggs emulsify more smoothly and help the batter bake evenly.
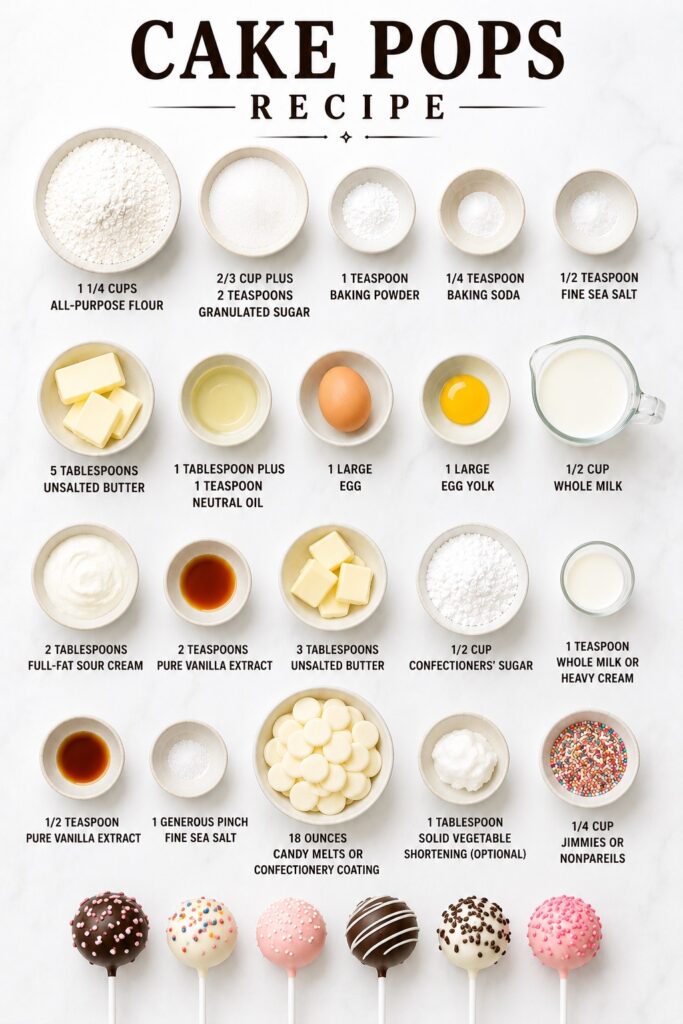
- 1 1/4 cups all-purpose flour (150 g)
- 2/3 cup plus 2 teaspoons granulated sugar (140 g)
- 1 teaspoon baking powder (4 g)
- 1/4 teaspoon baking soda (1 g)
- 1/2 teaspoon fine sea salt (3 g)
- 5 tablespoons unsalted butter (70 g), softened
- 1 tablespoon plus 1 teaspoon neutral oil (20 g)
- 1 large egg, at room temperature
- 1 large egg yolk, at room temperature
- 1/2 cup whole milk (120 g), at room temperature
- 2 tablespoons full-fat sour cream (30 g), at room temperature
- 2 teaspoons pure vanilla extract (10 ml)
For the Minimal Vanilla Buttercream
You will prepare the full small batch so it mixes properly, but you will not add it automatically. Begin with the weighed amount in the method, then let the compression test decide whether the crumbs need more.
- 3 tablespoons unsalted butter (42 g), softened
- 1/2 cup confectioners’ sugar (60 g)
- 1 teaspoon whole milk or heavy cream (5 ml)
- 1/2 teaspoon pure vanilla extract (2.5 ml)
- 1 generous pinch fine sea salt
For the Coating and Finish
A generous handling quantity keeps the coating deep enough for a clean vertical dip. You will not consume all 18 ounces; some must remain in the vessel so the final pops can be submerged without tilting.
- 18 ounces candy melts or confectionery coating (510 g), divided
- Up to 1 tablespoon solid vegetable shortening (13 g), optional and only as needed
- About 1/4 cup jimmies or nonpareils (30 g)
Ingredient Notes That Protect the Texture
Use softened butter that is pliable but still matte and cool; partially melted butter cannot trap air properly in the cake and makes the buttercream greasy. Whole milk and full-fat sour cream work together to give the cake moisture, tenderness, and enough structure to produce even crumbs. If you want a full-size layer cake for a separate occasion, use a purpose-built Vanilla Cake recipe rather than substituting another cake into this frozen cake-pop formula.
Candy melts are the canonical coating because they set without tempering and remain practical for dipping. If they need thinning, add solid vegetable shortening only in small increments. Wilton’s Candy Melts guidance permits solid shortening but warns against water, milk, butter, and ordinary liquid vegetable oil, which can compromise or seize the coating. Keep every bowl, spoon, and vessel completely dry.
The Tools That Keep Cake Pops on Track
You do not need an elaborate decorating kit, but the right pan, scale, vessel, and upright stand solve real structural problems. Set out these five equipment groups before you begin.
Baking and Cooling
Use a light-colored 8-inch square metal pan, parchment paper, and a wire rack. Dark metal, glass, convection, or a different pan size changes the approved baking behavior and may require separate timing.
Mixing
Have a hand or stand mixer with beaters or a paddle, medium and large mixing bowls, a whisk, and a sturdy spatula. The mixer builds the cake and buttercream; your fingertips or spatula finish the crumbs without turning them into paste.
Portioning and Shaping
A digital scale is the authority for 20 g portions. A 1-tablespoon cookie scoop speeds up rough portioning, while a parchment-lined rimmed tray keeps the balls stable through chilling.
Melting and Dipping
Use a microwave or very gentle indirect-heat setup and a completely dry, tall, narrow, 2-cup heat-safe vessel. The narrow shape creates enough depth for one vertical submersion without requiring an excessive amount of coating.
Anchoring and Setting
You will need thirty 6-inch paper cake-pop sticks and a cake-pop stand, craft-foam block, or sturdy pre-punched cardboard box. The stand must hold every dipped pop upright without letting wet shells touch.
Set Up for a Smooth Cake Pop Session
Cake pops become difficult when the workspace is assembled after the coating is already melted. A short preflight check keeps the cake cold, the coating fluid, and the finished shells protected.
- Allow enough uninterrupted time for the baked cake to cool completely; the center and underside must have no residual warmth.
- Clear refrigerator space for one covered tray and both chilling stages.
- Place the digital scale beside the shaping tray so every ball can be weighed at 20 g.
- Confirm that the dipping vessel, spoon, and every coating tool are completely dry.
- Assemble the upright setting stand before melting the candy coating.
- Keep the reserved 6 ounces of candy melts and the optional solid shortening close enough to correct depth or viscosity immediately.
Your Cake Pop Workback Plan
The recipe takes about six hours elapsed, but much of that time is cooling, chilling, and setting. For the easiest schedule, bake and cool the cake on Day 1, then complete the hands-on shaping and decorating on Day 2.
| Moment | What to prepare | Why it happens then | How to hold it |
|---|---|---|---|
| Day 1, with about 3 hours available | Mix, bake, and cool the vanilla cake completely. | Warm cake would melt the buttercream and create a greasy mixture. | Once fully cool, cover airtight for the next day. |
| Day 2, 3–4 hours before finishing | Crumble, bind, portion, and roll. | The mixture must pass the compression test before the error is multiplied across the batch. | Cover the tray and refrigerate. |
| 2 hours before dipping | Chill the shaped balls. | They need to become firm and cold without freezing. | Keep covered in the refrigerator. |
| About 75 minutes before completion | Melt and test the coating; build the 10-minute stick anchors. | The coating and centers must enter compatible temperature windows. | Keep most balls refrigerated and work four at a time. |
| 45–60 minutes before completion | Dip and decorate. | Sprinkles must be applied while each shell is wet. | Set every pop upright at cool room temperature. |
| Final 30–60 minutes | Let the coating set fully. | Soft shells mark, stick, and crack during packing. | Pack only when dry and firm. |
For a one-day route, keep the same dependency order and begin about six hours before the cake pops must be completely set. Do not shorten the schedule by crumbling a warm cake or freezing the shaped balls; both shortcuts create problems that show up during dipping.
Cake Pop Science: The Balance Before Dipping
Cake pops behave like a small structural system. Crumbs and buttercream control cohesion, portion size and the coating collar control the load on the stick, and temperature plus coating viscosity control the shell.
I used to think the decorating was the difficult part; the real turning point was realizing that a cake pop is won or lost before dipping, in the texture of the crumbs, the amount of frosting, and the size of each ball.
Crumb and Binder Balance
Fine crumbs expose an even surface area, so a small amount of buttercream can coat and connect them consistently. Large cake pieces create weak spots, while excess buttercream fills every space and changes a moist crumb into a dense, greasy paste. That is why the recipe starts with 85 g and adds more only if the mixture proves it needs it.
Size and Anchor Mechanics
A 20 g center is small enough to stay balanced on a 6-inch stick. Dipping the stick 1/2 inch into coating before insertion creates a collar that sets inside the ball and transfers the load more evenly. A larger ball or a stick pushed beyond the center increases leverage and weakens the structure.
Temperature and Coating Viscosity
Cold, firm centers resist sliding, but frozen centers can expand beneath warm coating and crack the shell. The coating should be warm enough to flow in a continuous ribbon, but not so hot that it softens the center or creates a severe temperature difference. When that ribbon self-levels within several seconds, it can form a thin shell before setting.
The Cake Pop Compression Test
Compress 1 tablespoon of the crumb mixture firmly in your palm before you shape the batch. Use the feel and the edge of that sample—not an automatic frosting quantity—to decide what happens next.
| What the sample does | What it means | What to do |
|---|---|---|
| Crumbles, splits, or shows dry cracks around the edge | The crumbs still need a little binder. | Add reserved buttercream 1 teaspoon at a time, mix fully, and retest. |
| Holds immediately with a smooth intact edge and leaves the palm clean | The mixture has correct cohesion. | Stop adding buttercream and begin weighing 20 g portions. |
| Smears, feels sticky or paste-like, or leaves a greasy film | The mixture is over-bound. | Do not add more frosting. Additional plain cake crumbs are the only structural correction; chilling alone will not restore the canonical texture. |
What Homemade Cake Pops Should Look and Feel Like
The finished cake pops should have a thin, set shell and a fine, moist, compact interior. The center can feel truffle-like because the crumbs are bound, but it should not feel wet, gummy, or greasy.
- Small and uniform: each uncoated center is about 1 1/4 inches and exactly 20 g, not a large dessert ball.
- Cohesive before rolling: the mixture holds a smooth compressed edge rather than staying loose like cake crumbs or wet like dough.
- Cold but not frozen: the chilled balls feel firm, dry, and stable, with no frost or condensation.
- A confectionery shell: candy melts set into a practical coating rather than the flavor and crisp snap of tempered couverture chocolate.
- Cleanly handmade: small variations around the stick or sprinkle pattern are normal. Cracks, heavy feet, exposed seams, and sliding are failure cues rather than rustic character.
How to Make Cake Pops From Scratch
The method moves through four phases: bake and cool the cake, bind and shape the centers, prepare the coating and anchors, then dip and set. Read through the dipping stages before you melt the coating, because that part of the process moves quickly.
1. Prepare the Pan and Dry Ingredients
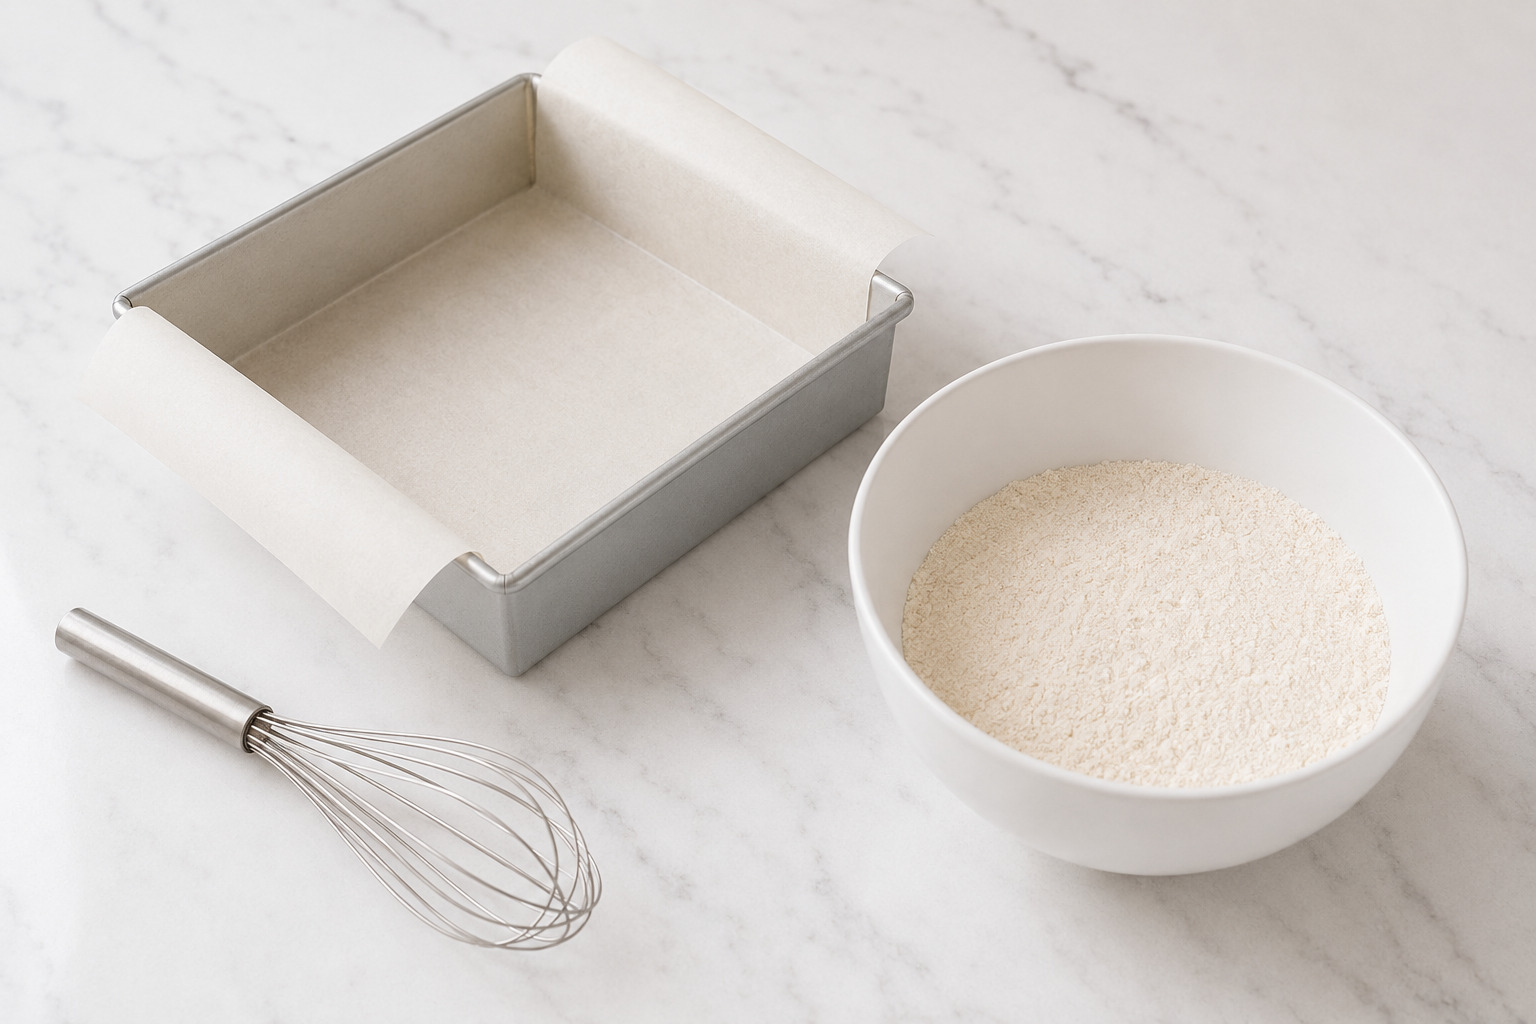
Heat a conventional oven to 350°F (177°C) with a rack in the center. Lightly grease a light-colored 8-inch square metal pan, line the bottom and two opposing sides with parchment, then grease the parchment lightly. In a medium bowl, whisk the flour, baking powder, baking soda, and salt for about 30 seconds.
What you should see: The parchment lies flat with two clean overhangs for lifting, and the dry mixture looks uniform and aerated with no visible leavener pockets.
2. Build the Vanilla Cake Batter
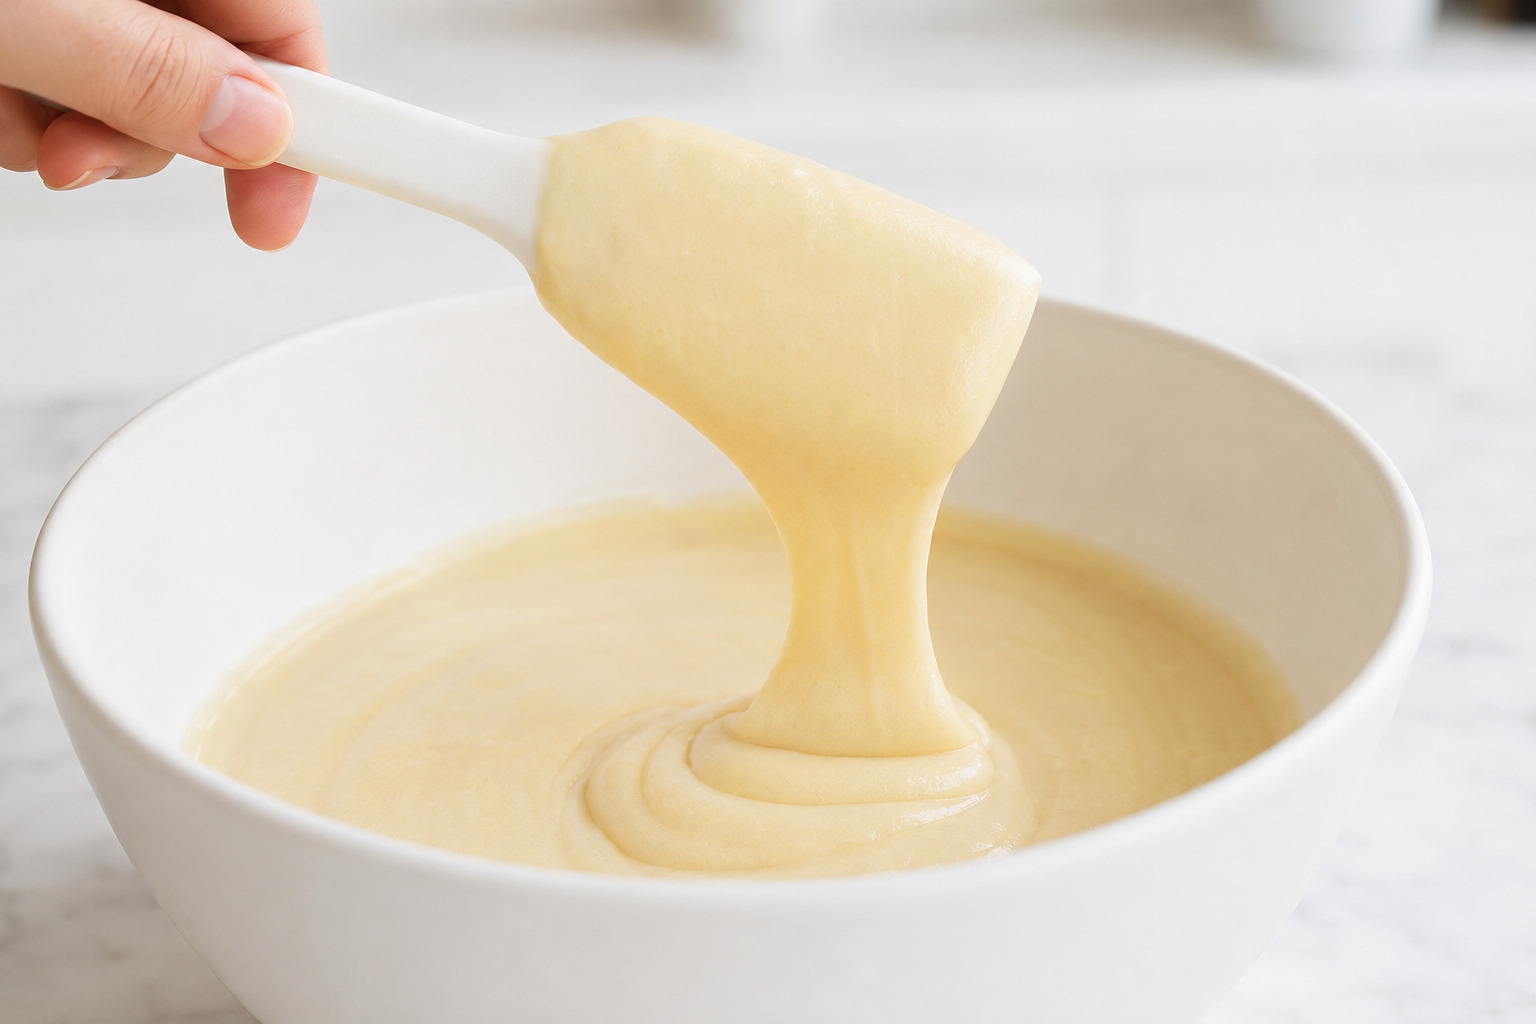
Beat the softened butter and granulated sugar on medium speed for 2–3 minutes, scraping the bowl and beaters once. Beat in the oil, followed by the whole egg, yolk, and vanilla. Whisk the milk and sour cream together separately. With the mixer on low, add the dry ingredients in three additions and the milk mixture in two, beginning and ending with dry. Stop when the final flour streak disappears, then fold once or twice by hand to check the bottom of the bowl.
What you should see: The butter mixture becomes lighter and creamy; after the liquid and dry additions, the finished batter is smooth, medium-thick, and falls from the spatula in a broad ribbon without dry pockets.
3. Bake and Cool the Cake Completely
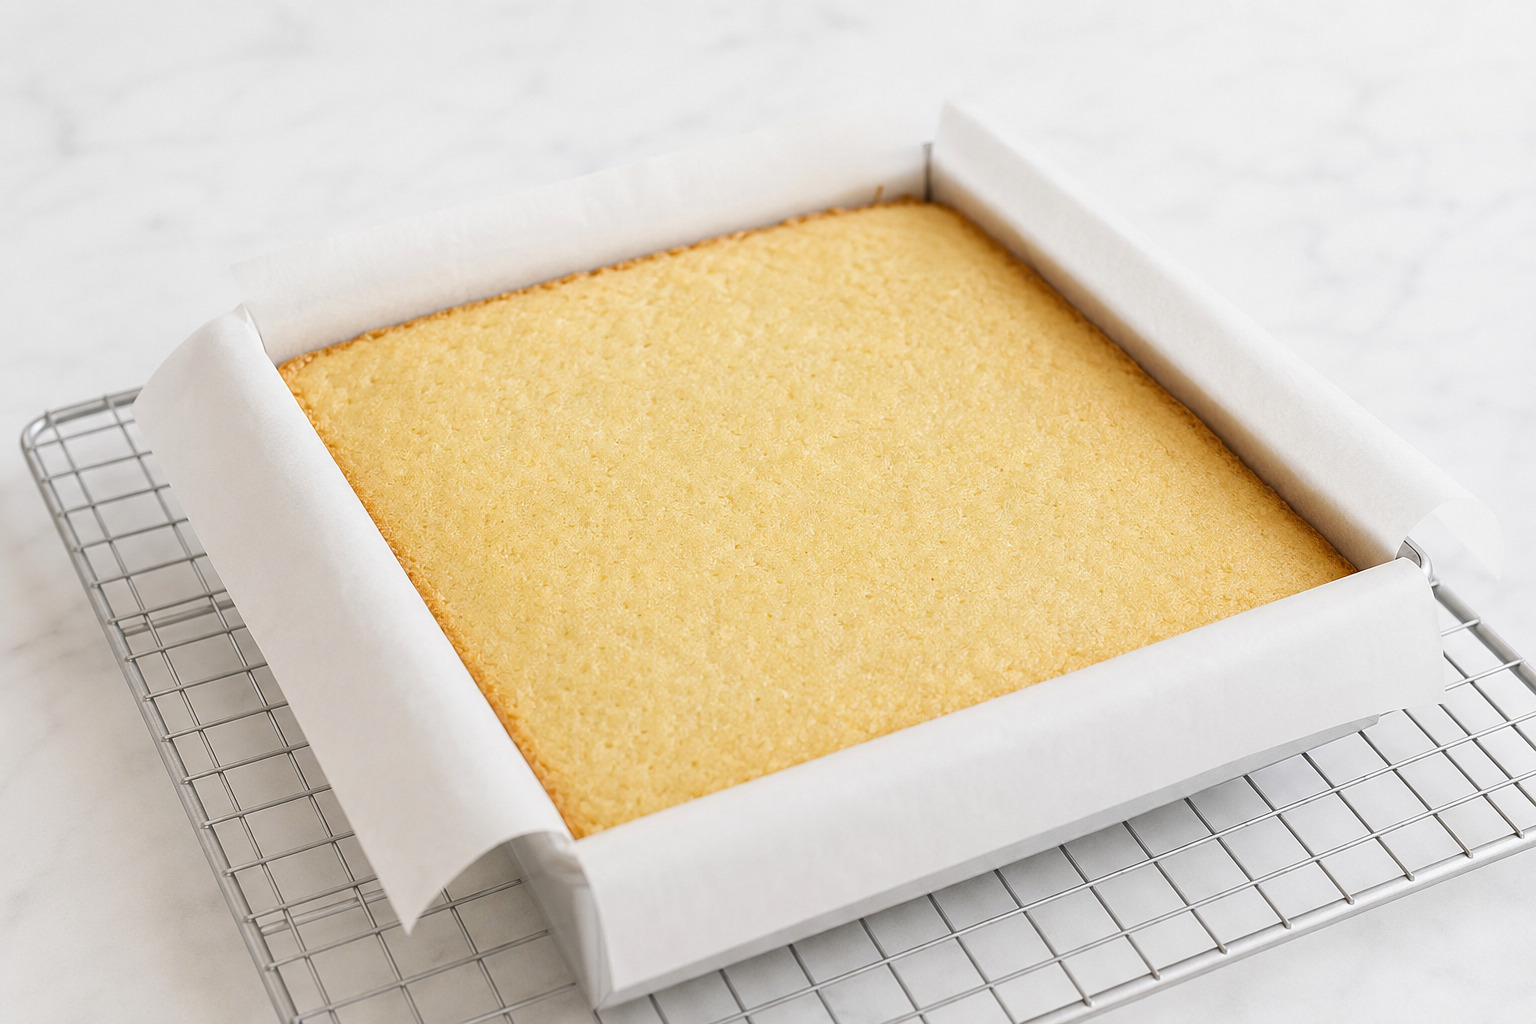
Spread the batter evenly in the prepared pan and level the top. Bake for 22–27 minutes, beginning to check at 22 minutes. Cool in the pan for 10 minutes, then lift the cake out by the parchment and place it on a wire rack for 90–120 minutes. Do not crumble it until the center and underside are completely cool.
What you should see: The baked center is set, no longer glossy, and springs back lightly. A tester returns with a few moist crumbs but no wet batter. After cooling, no warmth or steam remains anywhere in the cake.
4. Make the Minimal Vanilla Buttercream
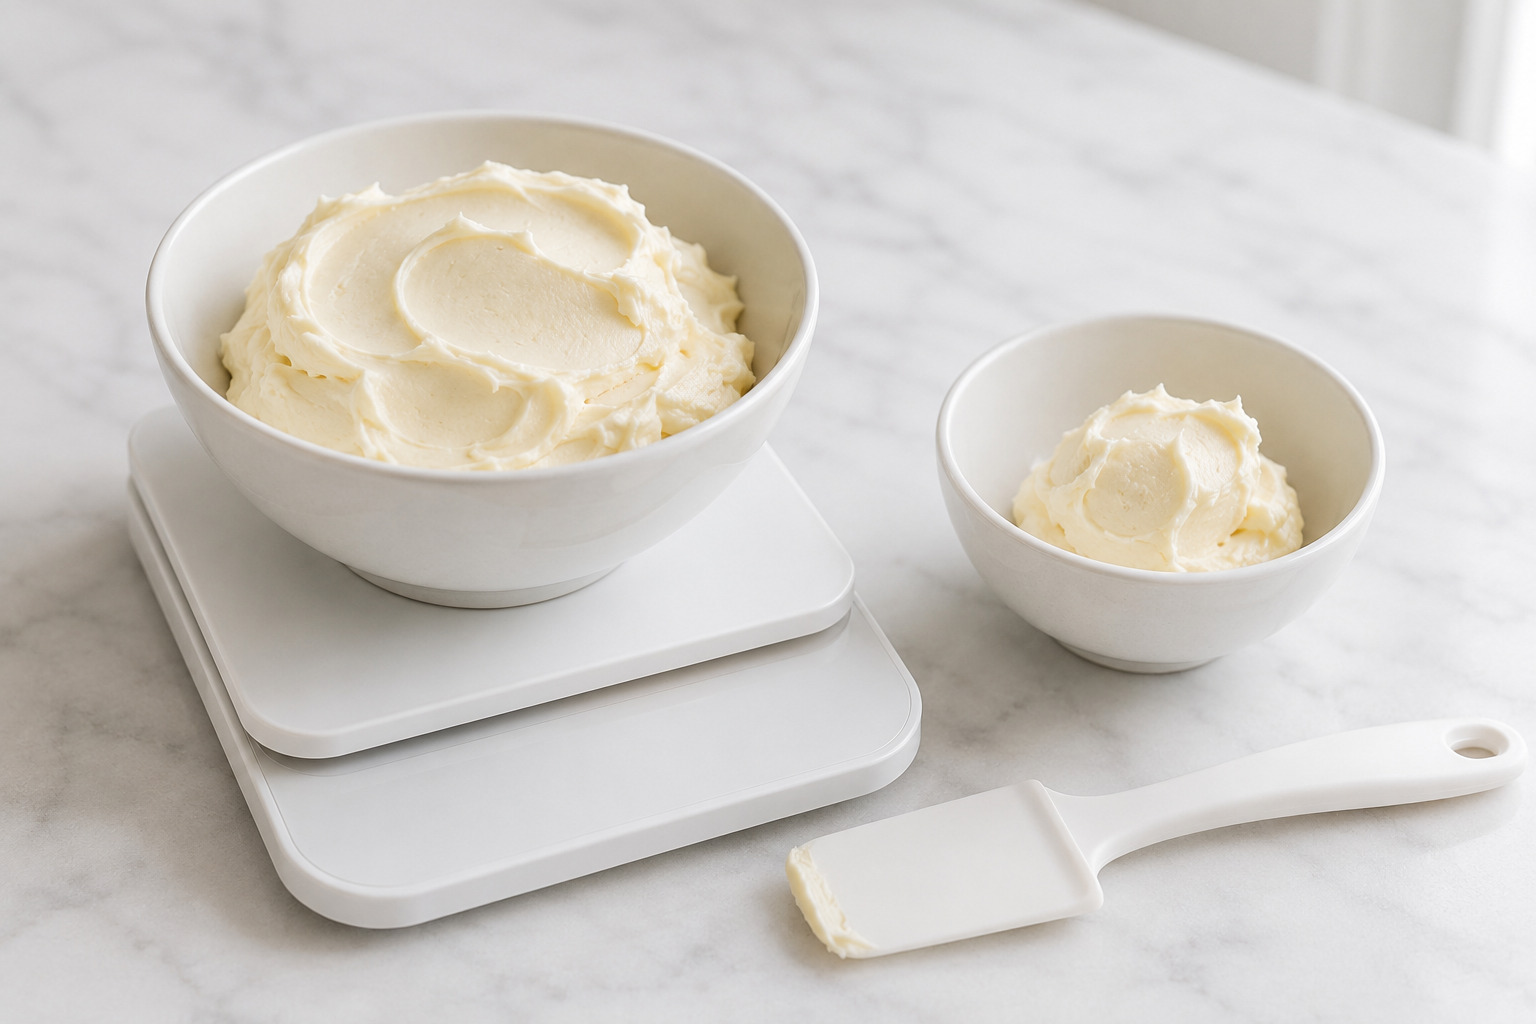
Beat the softened butter until smooth. Add the confectioners’ sugar, milk or cream, vanilla, and salt. Mix on low until combined, then briefly on medium until creamy. Weigh exactly 85 g into a separate bowl and keep the remainder reserved.
What you should see: The buttercream is smooth, soft, and shape-holding, with no dry sugar pockets. The 85 g starting portion is physically separated from the reserve so the full batch cannot be added by accident.
5. Crumble and Bind by the Compression Test
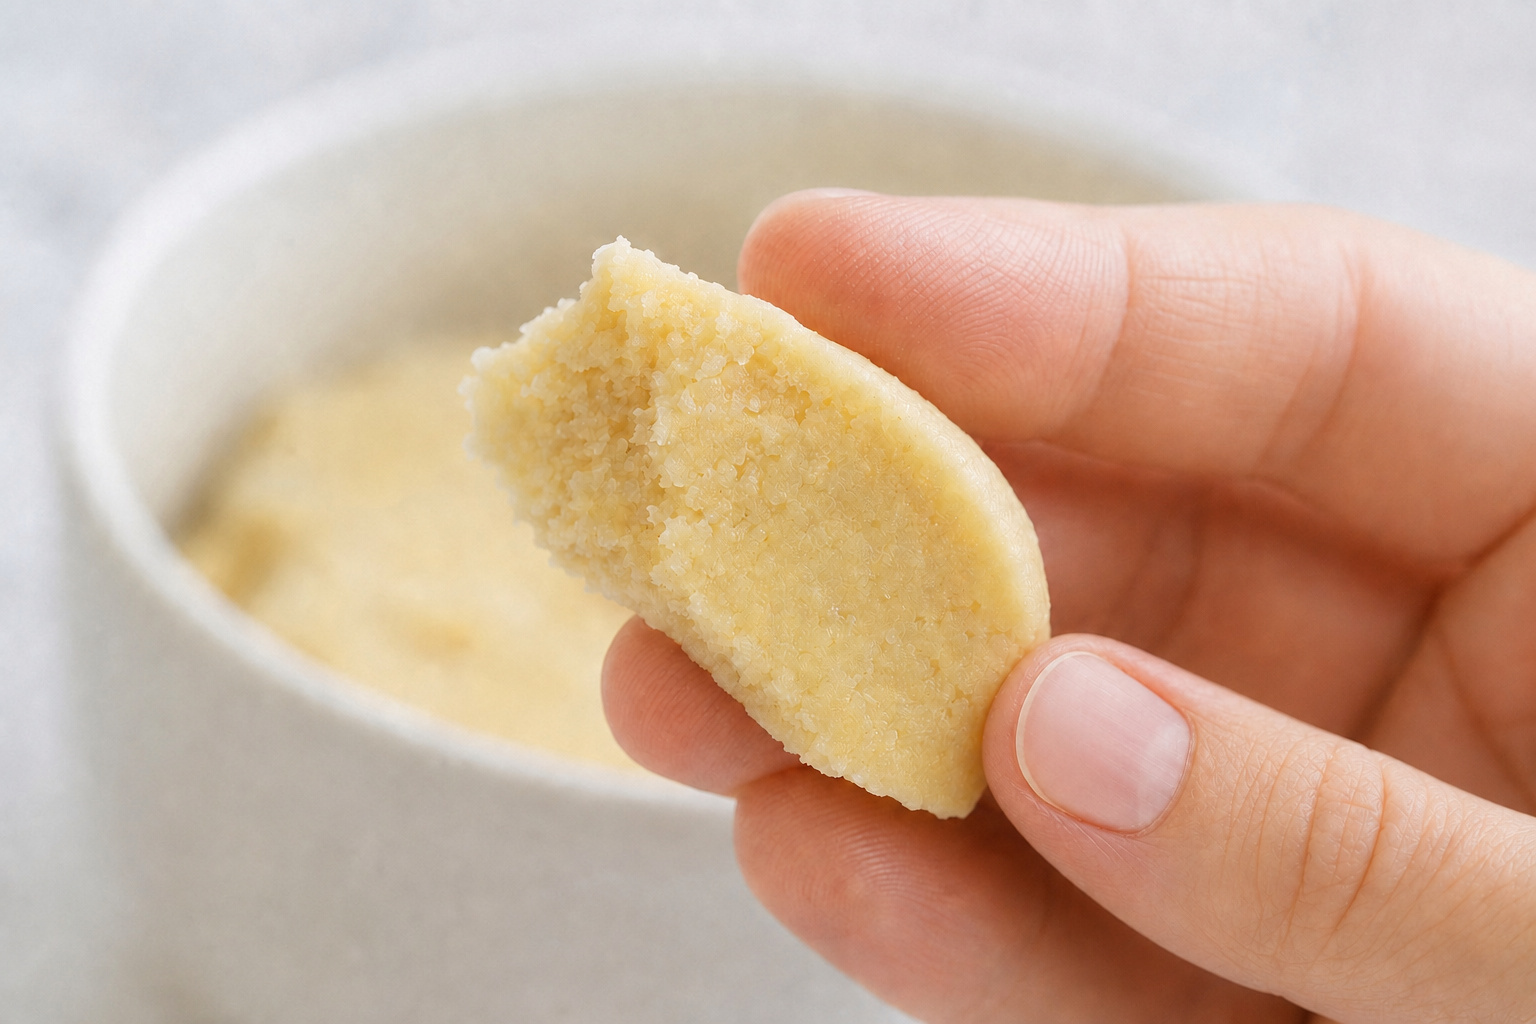
Remove an unusually hard or deeply browned edge only if necessary. Break the completely cooled cake into a large bowl and rub it gently between clean fingertips until the crumbs are fine and even, without mashing. Add the measured 85 g buttercream and mix thoroughly. Compress 1 tablespoon in your palm and compare it with the compression guide above. If it cracks, add reserved buttercream 1 teaspoon at a time and retest. The usual total is about 90–110 g, depending on the cake’s moisture.
What you should see: No cake pieces are larger than a small pea. The compressed sample holds immediately with a smooth edge, rolls without dry cracks, and leaves no greasy film on your palm.
6. Portion and Roll 20-Gram Balls
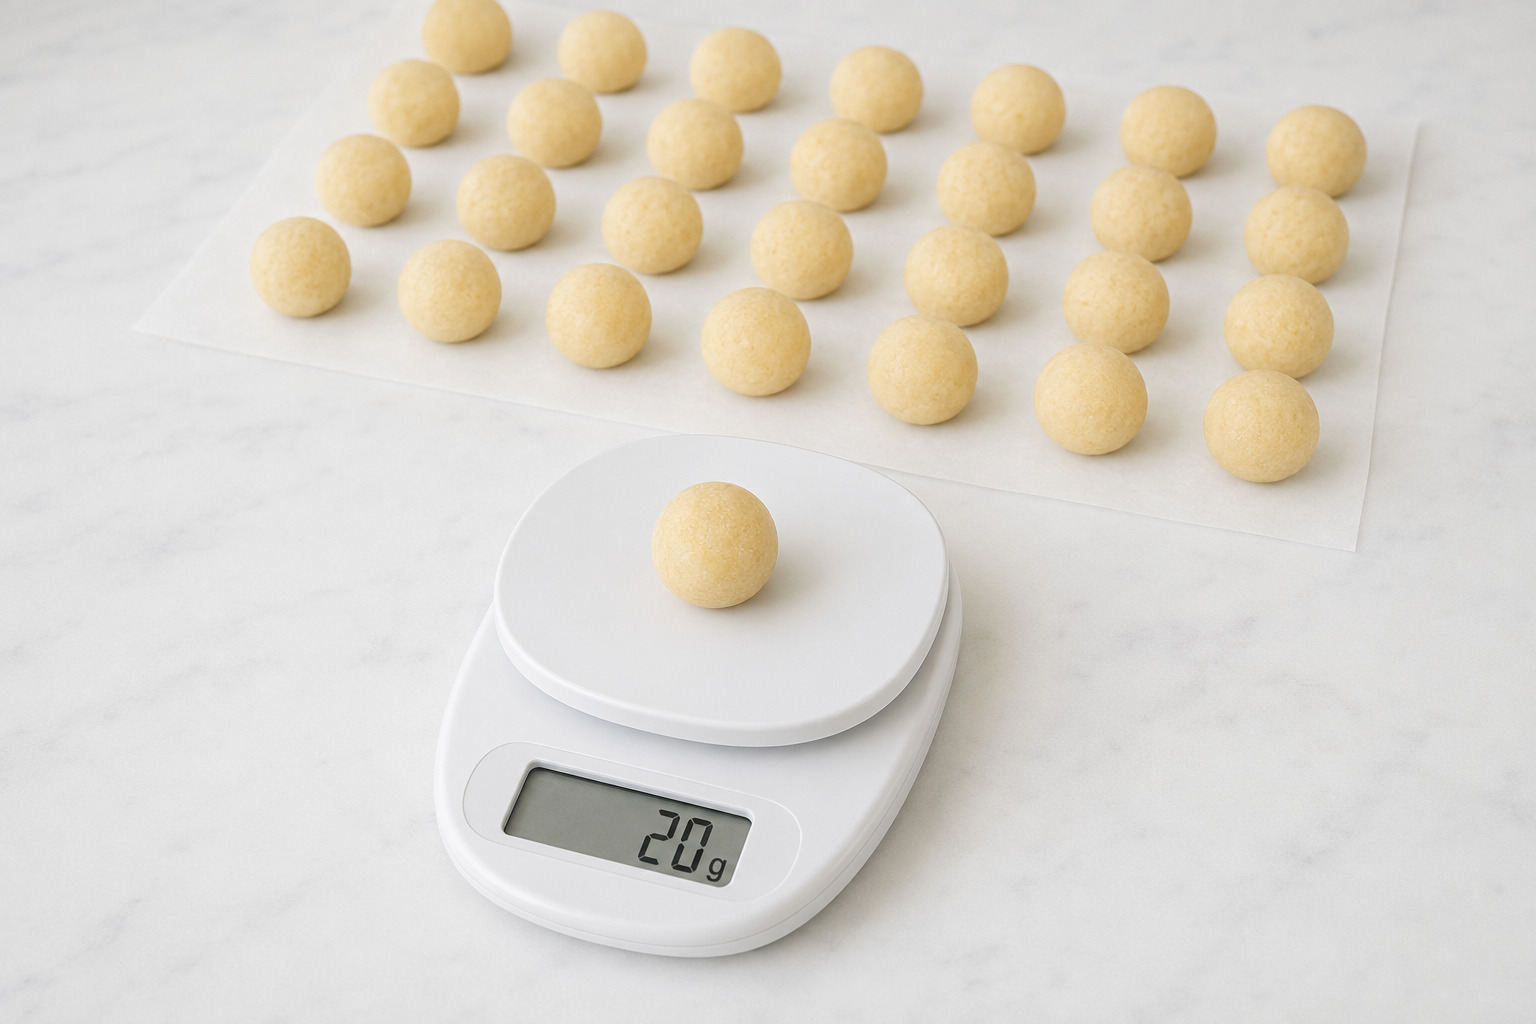
Use the scoop to make a rough portion, then weigh exactly 20 g on the digital scale. Compress only enough to close internal cracks and roll gently between your palms. Arrange the balls on a parchment-lined tray without letting them touch. Repeat with the full mixture.
What you should see: About 30 smooth, evenly sized balls, each approximately 1 1/4 inches in diameter. No center should weigh more than 22 g.
7. Chill Until Firm, Not Frozen
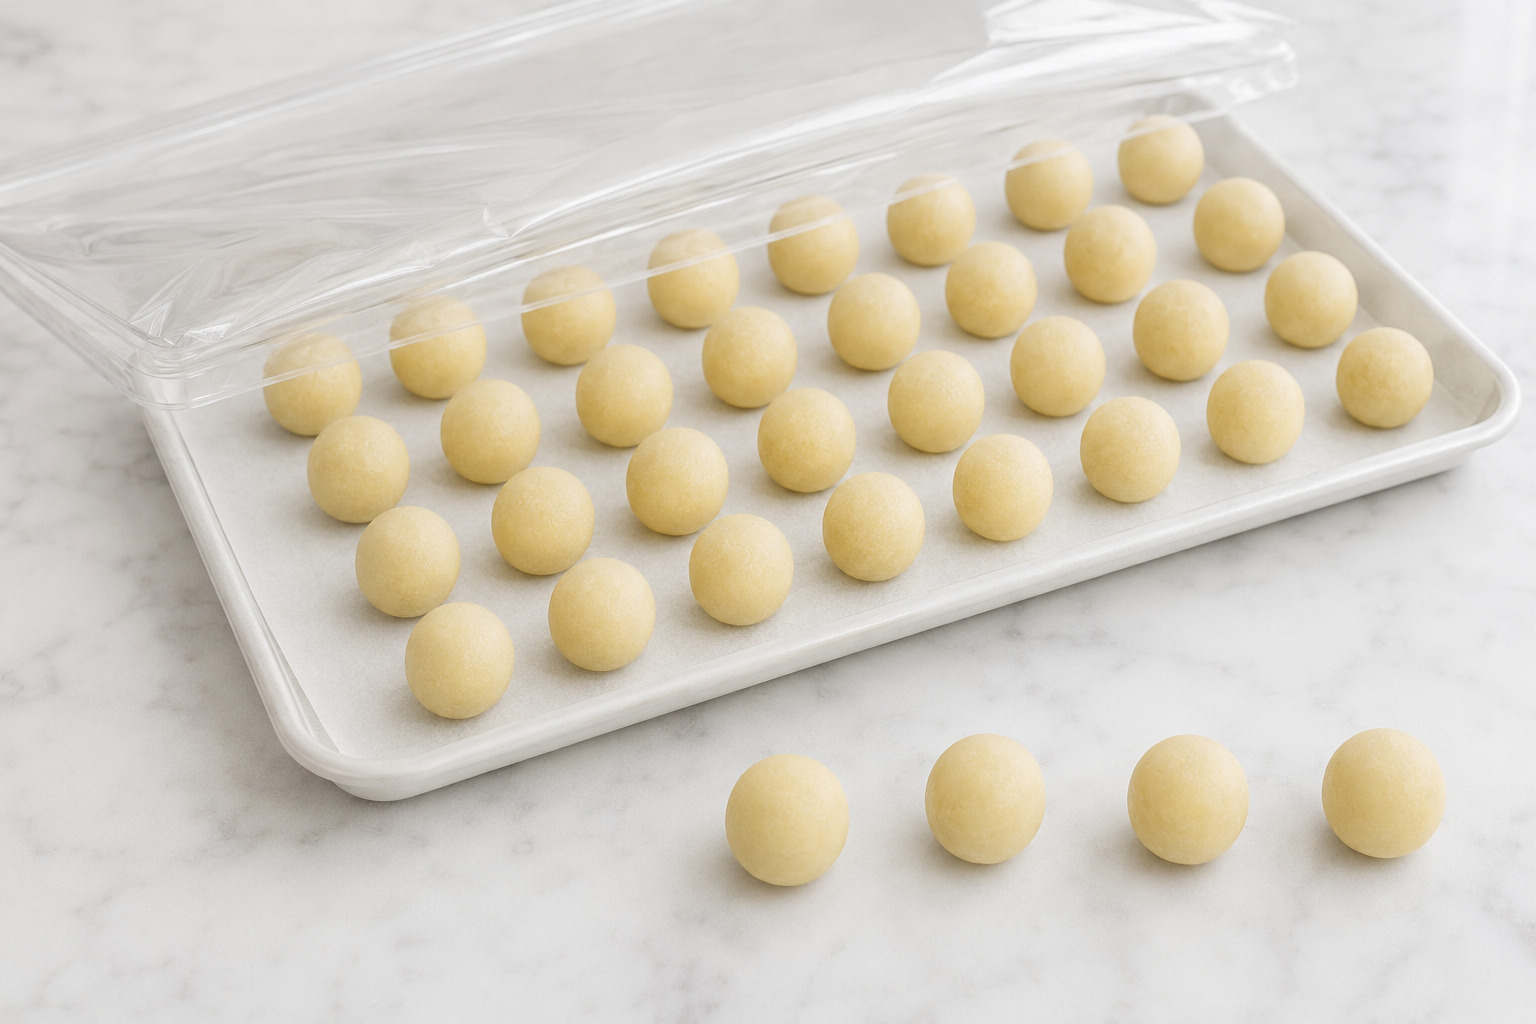
Cover the tray so the surfaces cannot dry out and refrigerate for 2 hours. If a ball needs a more polished shape, re-roll it once with light pressure after chilling. Keep the tray refrigerated until the coating is ready, and remove only four balls at a time.
What you should see: The balls are cold, firm, dry, and stable when lifted, but the centers are not frozen. Let any visible condensation evaporate before anchoring or dipping.
8. Melt and Test the Candy Coating
Place 340 g (12 ounces) candy melts in a completely dry, tall, narrow, 2-cup heat-safe vessel. Microwave in short intervals, stirring thoroughly after every interval even if the wafers still hold their shape. Use about 25-second intervals at 700 W, 20 seconds at 800 W, 15 seconds at 1000 W, or 10–12 seconds at 1200 W, shortening the intervals as the coating approaches fluidity. You can also use very gentle indirect heat, keeping all steam and water away.
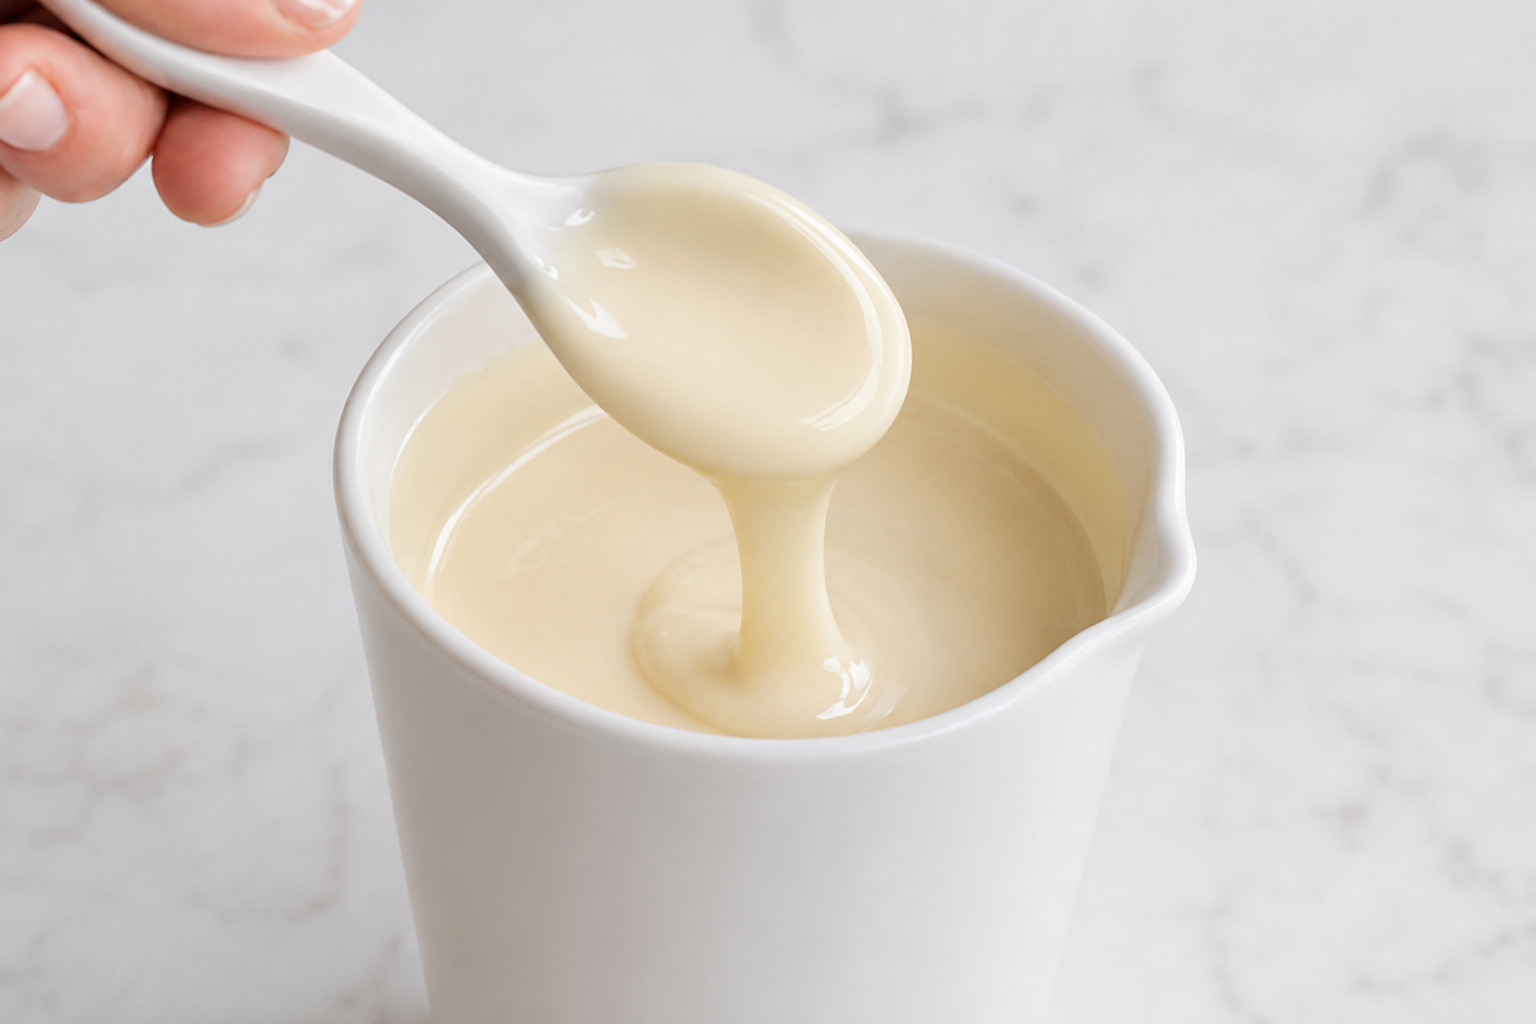
If the melted coating does not flow properly, stir in solid vegetable shortening 1 teaspoon at a time, never exceeding 1 tablespoon total. Let the coating stand for about 5 minutes, stirring occasionally, so it remains fluid and warm but no longer feels hot.
What you should see: The coating falls from the spoon in a continuous ribbon and self-levels into the surface within several seconds. It should be glossy and fluid, not clumpy, grainy, or watery-thin.
9. Anchor the Cake Pop Sticks
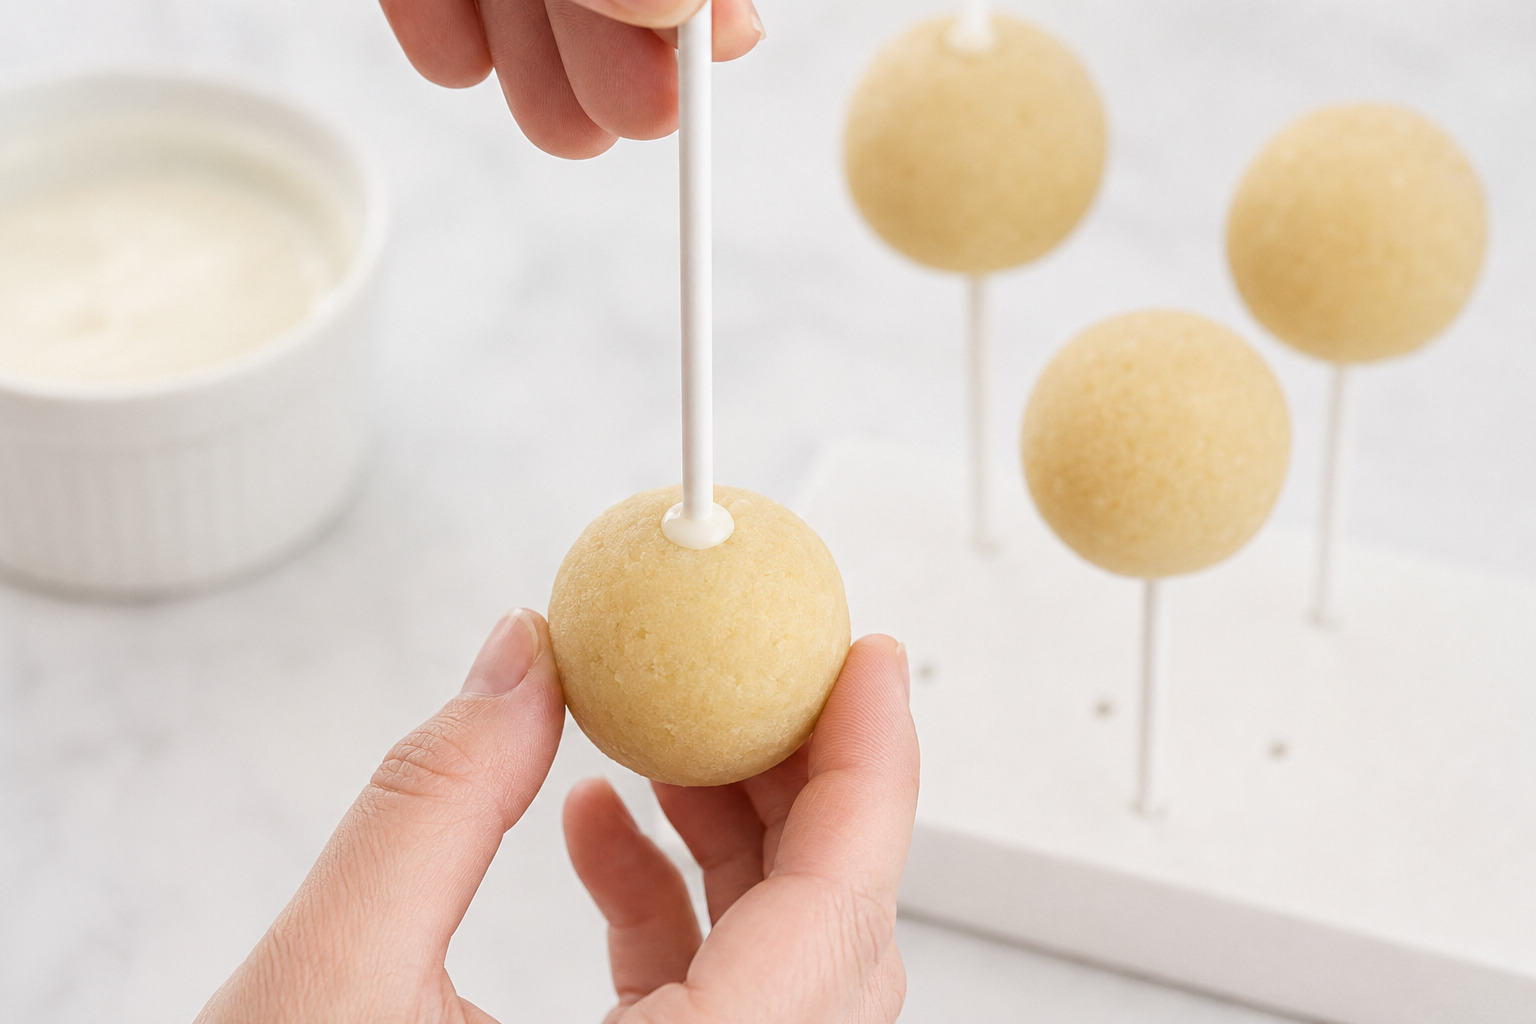
Dip the tip of one 6-inch cake-pop stick 1/2 inch into the coating. Insert it straight into the center of one cold, dry ball, stopping no farther than halfway through. Repeat with the remaining balls, then refrigerate the anchored pops for 10 minutes to set the seals.
What you should see: A small, complete coating collar surrounds each entry point without splitting the ball. Every stick is straight and ends within the center rather than pushing through the opposite side.
10. Dip Once and Remove the Excess
Check that the coating is deep enough for a full pop without the ball touching the vessel bottom. Holding the stick vertically, lower one pop straight down until the coating meets the set collar, then lift it straight out in one smooth motion. Do not swirl, stir, spoon coating over the ball, or submerge it twice.
Hold the pop over the vessel, rotate it slowly, and tap the wrist of the hand holding the stick with your opposite hand. Stop when the coating no longer streams and begins to settle smoothly. Never strike the stick against the vessel rim. Rewarm the coating briefly if it stops self-leveling.
What you should see: One complete, thin shell meets the coating collar with no exposed seam. The excess stops streaming without a long drip or heavy pool forming at the base.
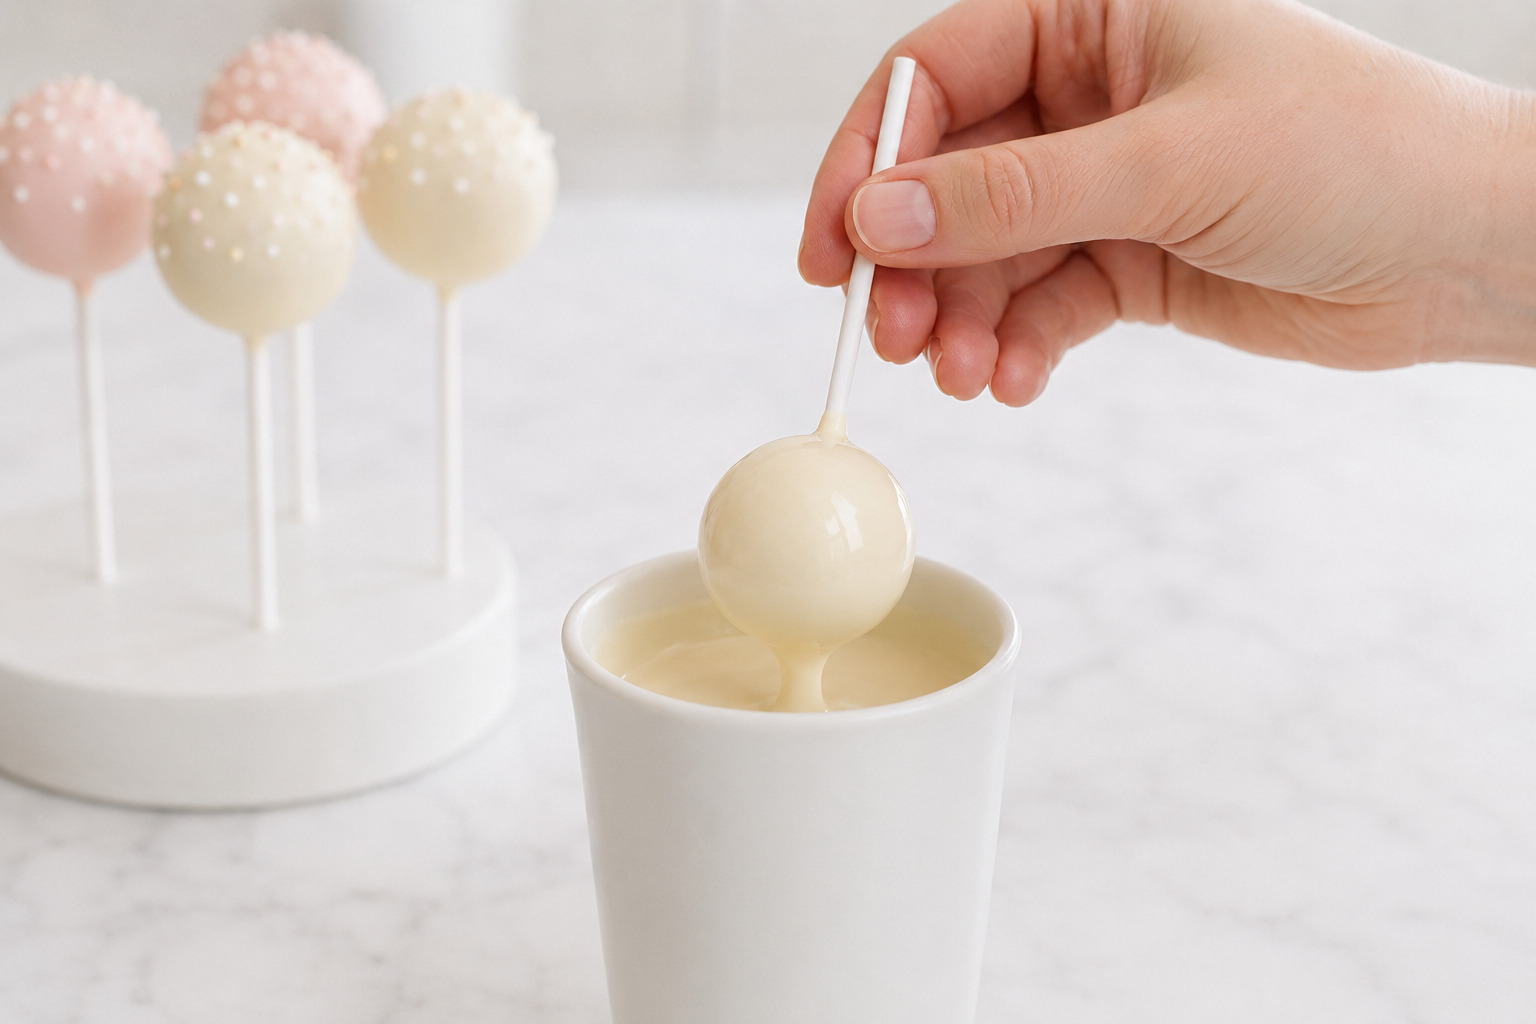
11. Decorate and Set Upright
Add sprinkles immediately while the coating is wet, then place the pop upright in the prepared stand without allowing it to touch another shell. Continue in batches of four. Replenish the vessel with the reserved 170 g (6 ounces) candy melts as needed to preserve dipping depth. Let all finished pops stand at cool room temperature for 30–60 minutes before handling or packing.
What you should see: The sprinkles adhere without sinking, every pop remains round, and the coating becomes completely dry and firm. The finished stick feels secure, and no shell has an active drip, exposed seam, or thick foot.
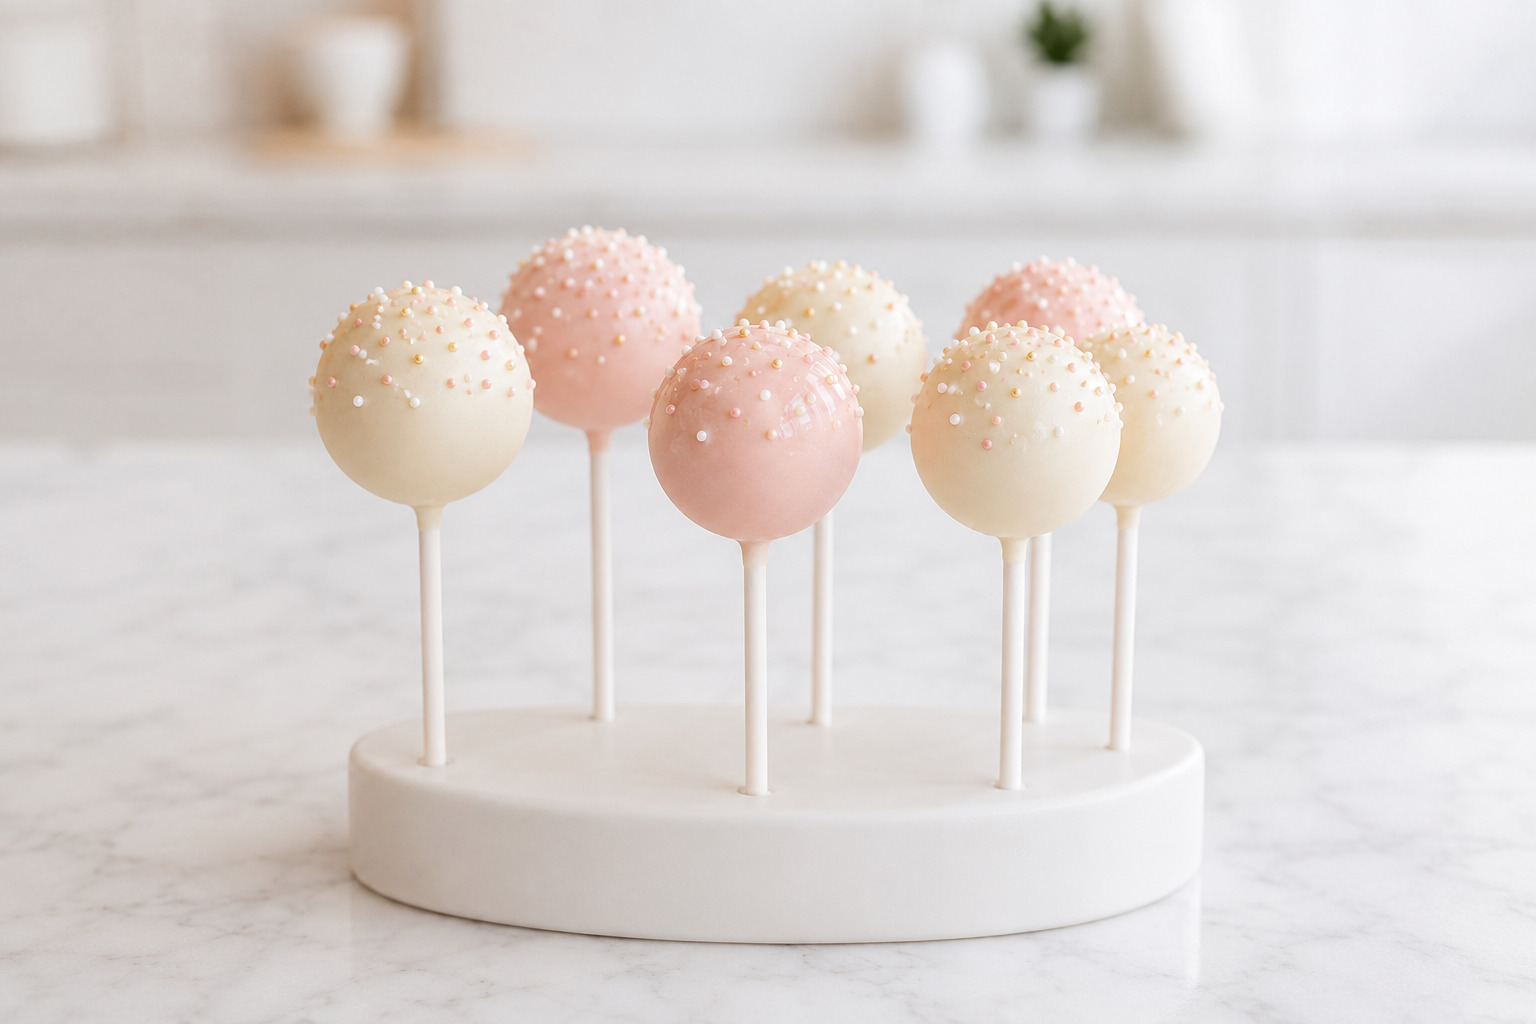
The Cake Pop Texture and Coating Readiness Guide
Use this guide when a stage looks close but you are not sure whether to continue. The correct endpoint matters more than following a time blindly, especially when cake moisture, room temperature, and coating brand vary.
| Stage | Ready to continue | Not ready or outside the target |
|---|---|---|
| Baked cake | Center springs lightly; tester shows a few moist crumbs and no batter. | Glossy or wet center needs more time; a fully dry tester may signal overbaking. |
| Bound mixture | Compressed sample holds a smooth edge and leaves the palm clean. | Dry cracks need a little binder; smearing or a greasy film means it is over-bound. |
| Chilled balls | Firm, cold, dry, and stable, with no frozen center. | Soft balls may slide; frost or condensation compromises the coating; frozen centers increase cracking risk. |
| Melted coating | Flows in a continuous ribbon and self-levels within several seconds. | Thick clumps need gentle rewarming or approved thinning; grainy seized coating is not a smooth-dipping batch. |
| Finished shell | Thin, dry, completely covered, and secure on the stick. | Cracks, heavy feet, seams, drips, or sliding show a temperature, viscosity, or anchoring problem. |
| Finished interior | Fine, moist, cohesive crumb that cuts cleanly without feeling pasty. | Loose crumbs indicate too little binder; gumminess or grease indicates too much. |
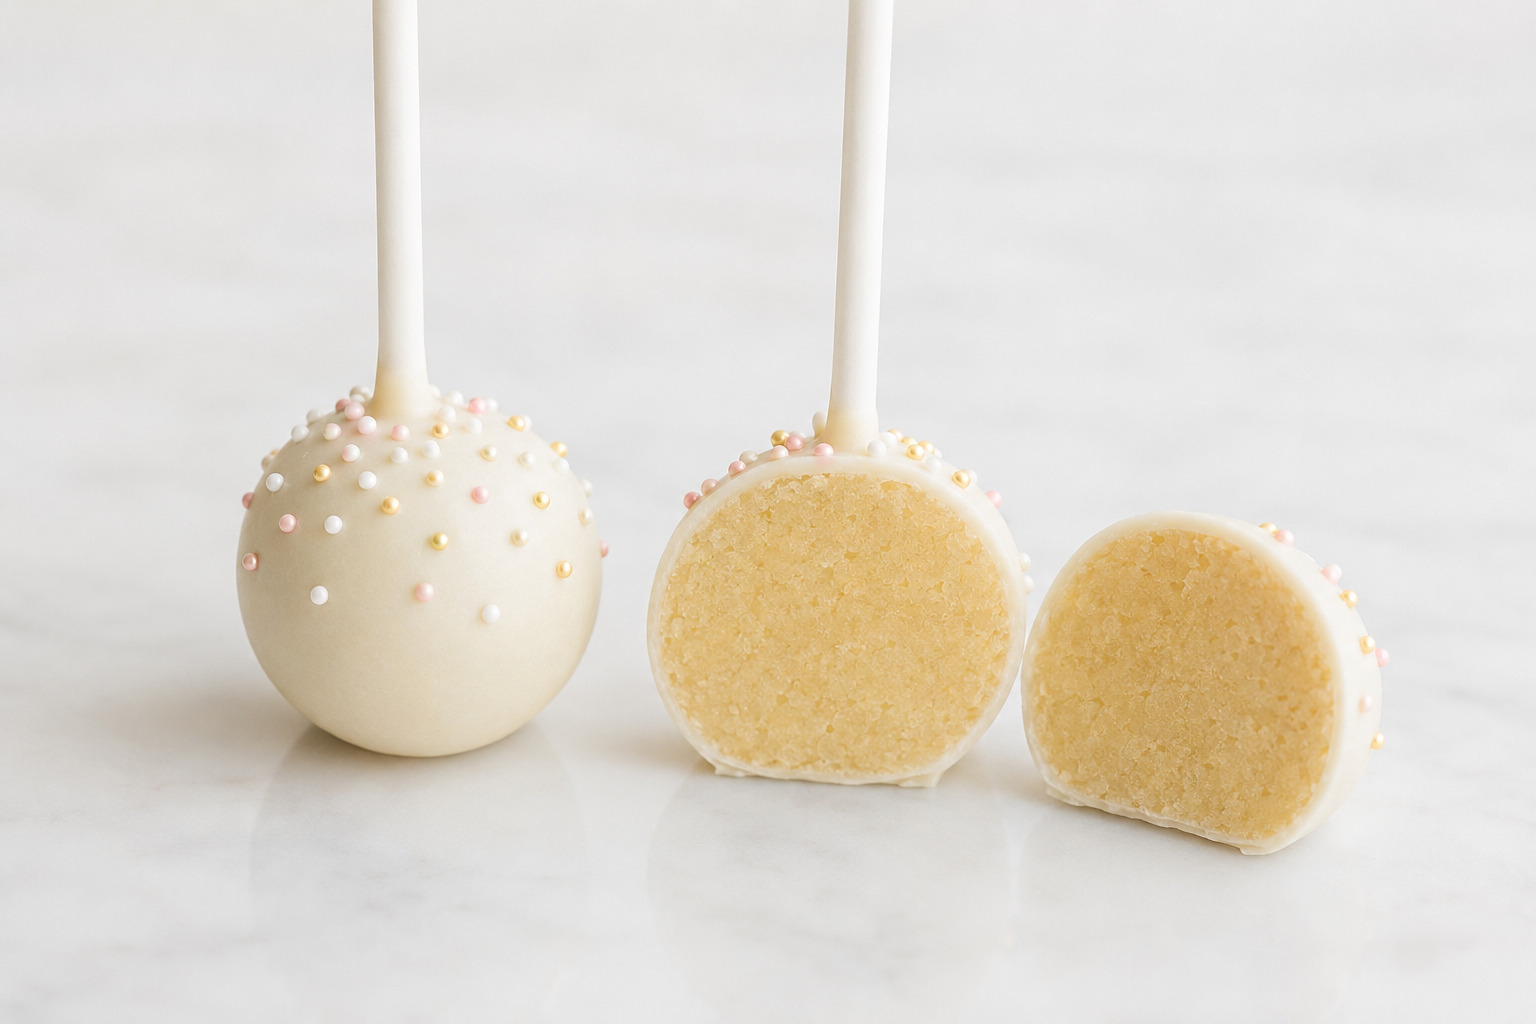
Small Decisions That Make Better Cake Pops
The biggest improvements come from controlling the batch at transition points. These are the small expert habits that keep one early problem from spreading across all 30 pops.
- Separate the 85 g starting buttercream. Physical separation prevents the full batch from being added automatically and protects the fine interior.
- Make one sentinel ball first. Compress, weigh, roll, and inspect a single 20 g ball before portioning the whole tray so you can correct the mixture once.
- Re-roll chilled balls only once. Light pressure improves the surface; repeated handling warms and compacts the center.
- Replenish depth instead of tilting. Keeping the dipping vessel tall and full lets the pop move vertically, which protects the anchor.
- Read the first test pop. If it drains slowly, cracks, or begins to slide, correct temperature or viscosity before continuing through the batch.
- Work four at a time. Small batches keep the remaining centers cold and the coating inside its usable window.
Why Cake Pops Crack, Fall, or Turn Lumpy
Most cake-pop failures can be traced to binder balance, portion weight, temperature, coating viscosity, or the stick seal. Diagnose the symptom before trying to rescue it; some batches are adjustable, while others cannot return to a clean canonical finish.
| Mistake | What happens | Why it happens | How to prevent or fix it |
|---|---|---|---|
| Adding all the buttercream automatically | The centers feel sticky, gummy, or greasy. | Too much binder fills the crumb structure and creates paste. | Start with 85 g and use the compression test. Once over-bound, only additional plain cake crumbs provide structural correction; chilling alone does not. |
| Leaving large cake pieces | The balls crack, feel uneven, or develop weak spots. | Large pieces cannot distribute the binder evenly. | Rub the cooled cake into fine, even crumbs before adding buttercream. |
| Rolling balls larger than 22 g | The pops slide, lean, or fall from the sticks. | The extra weight exceeds the reliable load of the small coating anchor. | Weigh each center at 20 g and redivide any oversized portion before chilling. |
| Freezing the centers or dipping while condensation is present | The shell cracks, sweats, or develops blotchy decorations. | A large temperature difference stresses the shell, and surface moisture interferes with coating. | Refrigerate until firm but not frozen. Let visible moisture evaporate before dipping. |
| Using hot, thick, or seized coating | The shell becomes lumpy, heavy, or unstable. | Hot coating softens the center; thick coating pulls on the anchor; moisture-seized coating loses smooth flow. | Use the ribboning test. Rewarm thick coating gently or add approved shortening. Seized coating is not reliably recoverable for a smooth dip. |
| Skipping the coated stick anchor or inserting too far | The ball spins, splits, or detaches. | There is no set collar to carry the weight, or the stick weakens the opposite side. | Dip the stick 1/2 inch and insert straight no farther than halfway; chill the anchor for 10 minutes. |
| Swirling, spooning, or re-dipping | The pop loosens and the shell becomes thick or ridged. | Lateral motion and extra coating place force on the anchor. | Use one vertical submersion and one smooth lift. A fallen pop is not a clean canonical recovery. |
| Packing before the shell sets | The coating marks, sticks, or cracks. | The shell is still soft and cannot carry contact pressure. | Set upright for 30–60 minutes and pack only when completely dry and firm. |
Beautiful Ways to Serve Homemade Cake Pops
Cake pops already bring color, height, and individual portions to a dessert table. The strongest presentations protect the shells and use restraint, allowing the clean round shapes to remain the visual focus.
A Birthday Cake Pop Stand
Arrange the pops upright with enough space between them and repeat two or three sprinkle colors from the rest of the birthday table. A controlled palette feels festive without hiding the smooth coating beneath a heavy layer of decoration.
A Refined Dessert-Table Display
Choose one or two coating colors, use restrained sprinkles, and vary the stand height rather than adding more decoration to each pop. Keep the bases stable and the shells separated so guests can lift one cleanly.
Individually Wrapped Party Favors
Wrap each cake pop only after the shell is completely set. Use food-safe bags that do not press tightly against the coating, then tie at the stick so the pop remains visible and protected.
A Gift Box or Cake Pop Bouquet
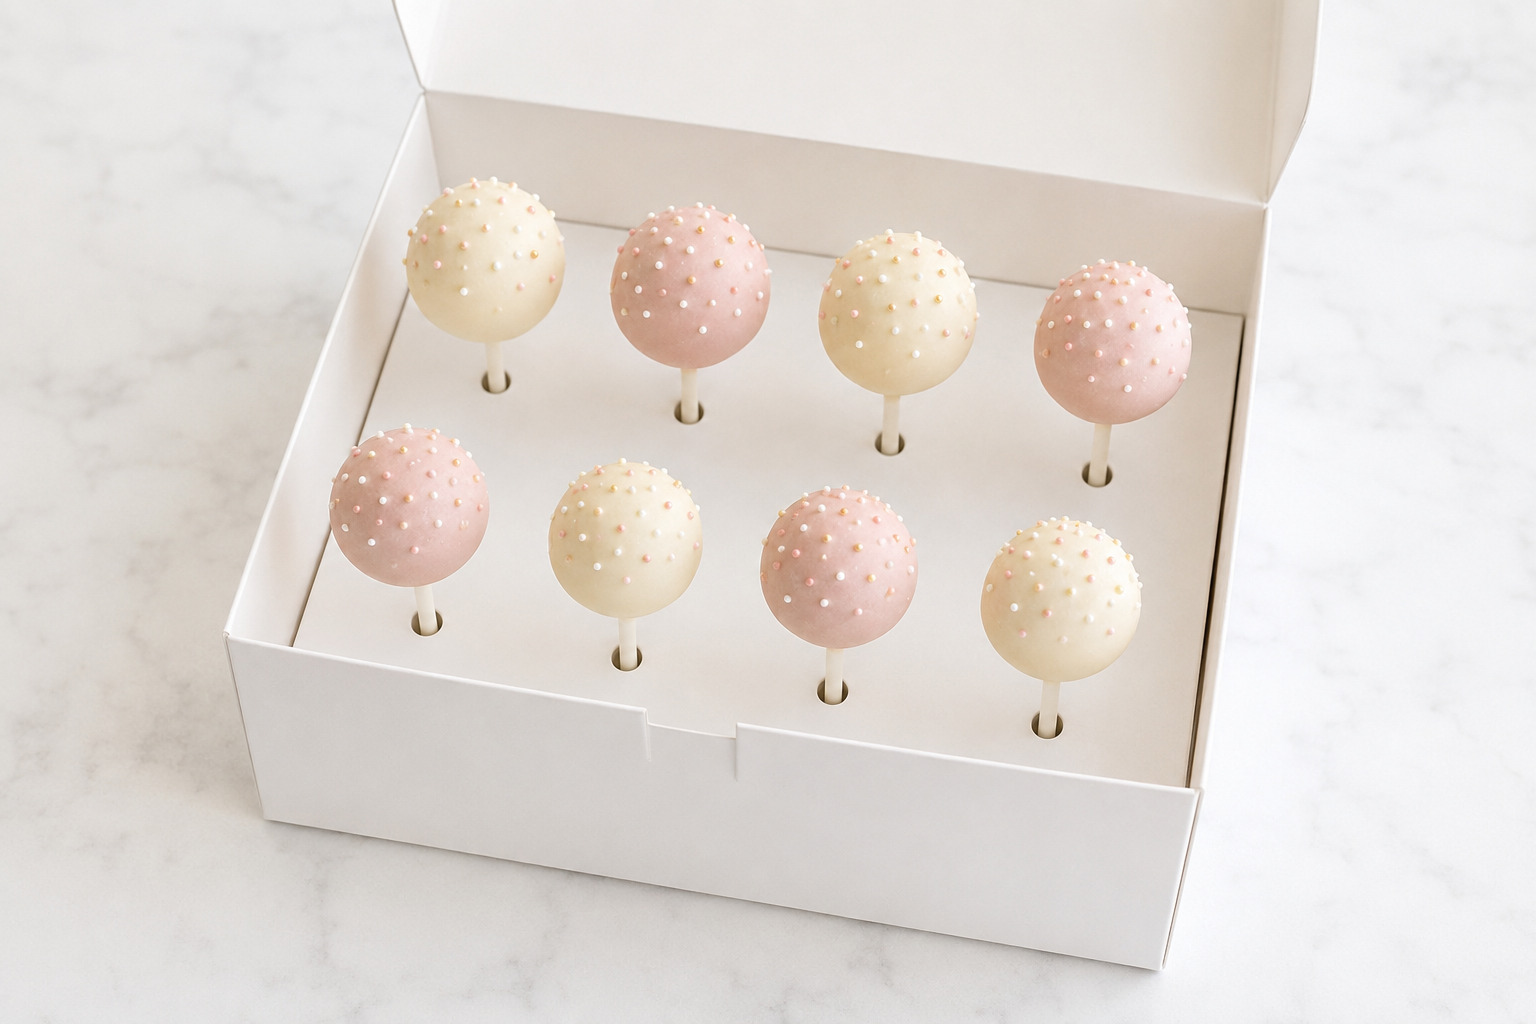
Immobilize the sticks in a fitted insert or foam base so the shells cannot touch, rub, or carry one another’s weight. For a bouquet, keep the arrangement loose enough that every cake pop can be removed without scraping its neighbors.
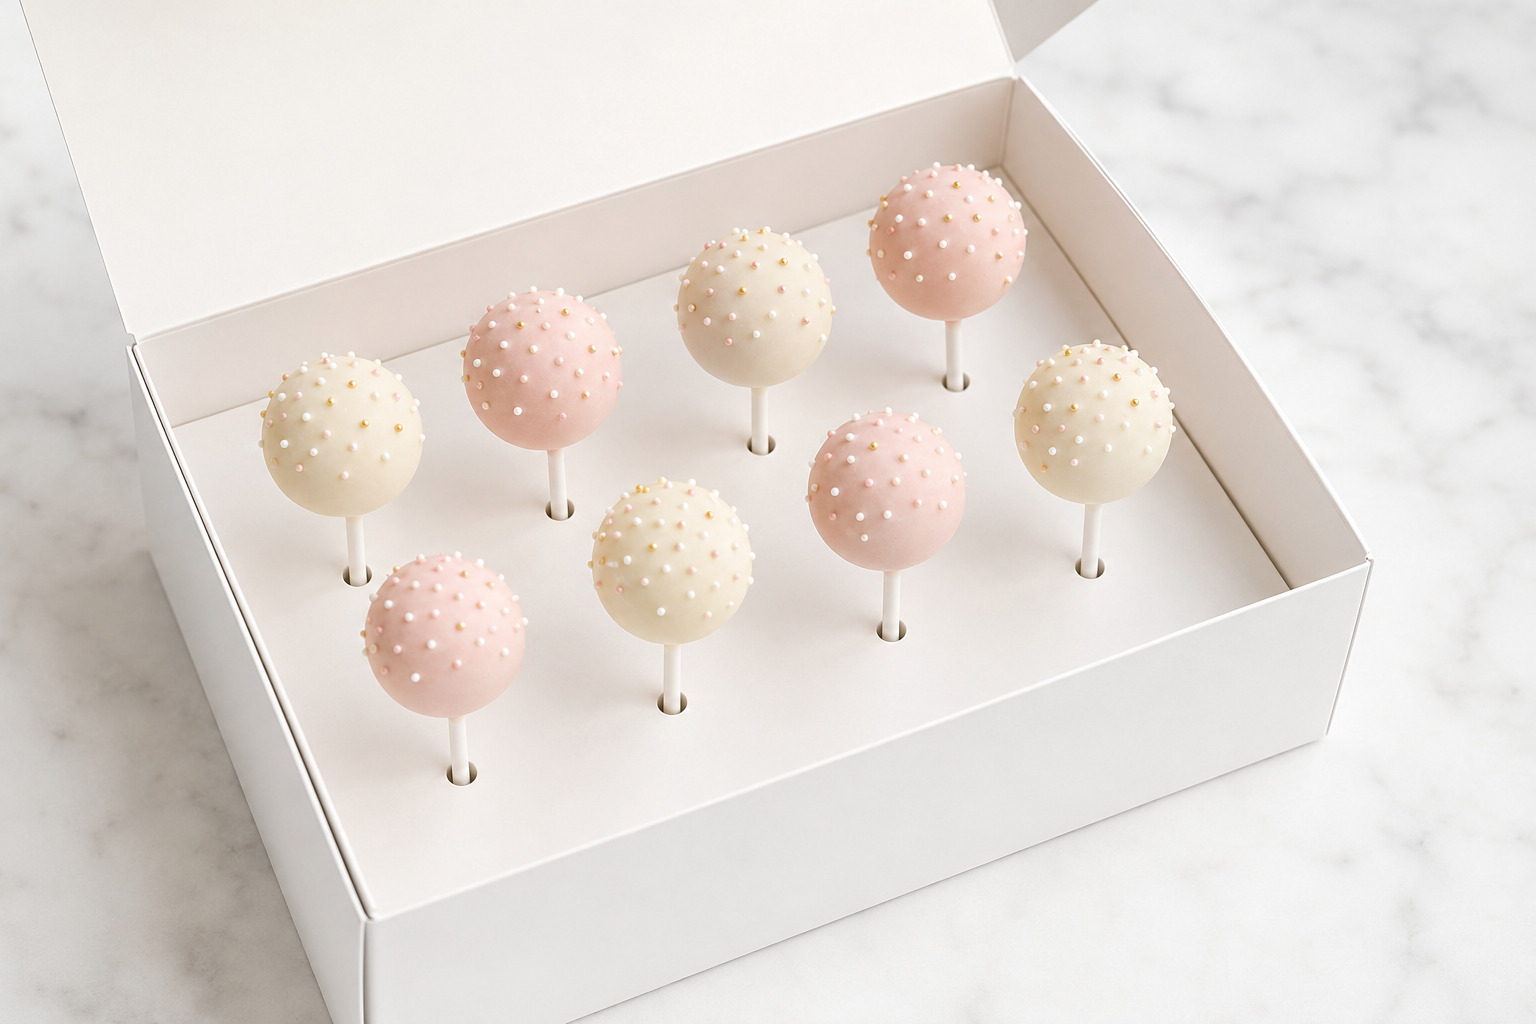
How to Store, Freeze, Thaw, and Transport Cake Pops
Storage is not only about how long the centers stay fresh; it also determines whether the shell remains smooth and the sprinkles stay clean. Let every coating set fully before any pop goes into a container.
Refrigerating and Making Ahead
Store finished cake pops in an airtight container in the refrigerator for best quality for up to 5 days. Undipped shaped balls may be refrigerated, covered, for up to 2 days before anchoring and coating. Keep finished pops at cool room temperature for no more than 2 hours; use a conservative 1-hour limit when the temperature is above 90°F (32°C), following the general perishable-food boundary from FoodSafety.gov.
Freezing and Thawing
Undipped balls or completely set finished cake pops may be frozen airtight for up to 6 weeks. Thaw them overnight in the refrigerator while the container remains closed. Then let the still-closed container stand briefly at cool room temperature before opening it. This gradual change helps condensation form on the container rather than the shells. Do not freeze wet coating or delicate decorations that are likely to bleed.
Transporting Without Cracks
Transport the pops upright in a fitted stand, foam block, or compartmented box. The sticks should be immobilized and the shells should not touch. Keep the container away from direct sun and never leave it in a hot vehicle. If refrigeration is necessary, protect the pops from abrupt temperature changes and keep the container closed until the surfaces have adjusted gradually.
Smart Cake Pop Substitutions and Shortcut Boundaries
Decoration changes are easy; structural changes are not. The following boundaries show which adaptations preserve this method and which ones need a separately engineered recipe.
Changing the Coating Color and Finish
Use oil-based candy color designed for confectionery coating and choose completely dry sprinkles. Water-based food coloring, liquid decoration, and any moisture introduced by the tools can seize or spot the coating. You can change colors and sprinkle styles without changing the center formula.
Using Real White Chocolate
Real white chocolate is not a behaviorally identical one-for-one substitute for candy melts. Its cocoa butter system may require tempering or a coating-specific formulation and a different thinning approach. Use a method written for real chocolate rather than applying the Candy Melts instructions and expecting the same setting behavior.
Changing the Cake Flavor
You can adjust the vanilla direction or choose different dry sprinkles while preserving the approved structure. Chocolate, red velvet, cream-cheese, brownie, gluten-free, and vegan versions change moisture, fat, crumb, or food-safety behavior and need separate technical formulas. Buttermilk is not a direct replacement for both the whole milk and sour cream without reconciling the acid and liquid ratio.
A Controlled Box-Mix Shortcut
If convenience matters more than keeping the cake fully homemade, weigh 500 g of completely cooled, finely crumbled baked box-mix cake. Add 60 g prepared frosting first, mix thoroughly, and perform the same compression test. Add more frosting only 1 teaspoon at a time and stop no later than 100 g total. Portion at 20 g and follow the same chilling, anchoring, dipping, and setting method. Depending on the final binder requirement, expect approximately 28–30 cake pops.
This shortcut is intentionally conservative because cake mixes and prepared frostings vary in moisture. It is a secondary route, not a replacement for the from-scratch vanilla formula in the recipe card.
Keep the Celebration Baking Going
If you enjoyed the small scale, bright finish, or celebration energy of cake pops, these recipes offer three natural directions for your next baking project.
More Bite-Size Party Treats
Choose one of these when you want another easy-to-share dessert with its own distinct center and finish.
- Oreo Balls Recipe — a no-bake coated truffle made from cookies rather than cake.
- Brownie Bites — compact chocolate portions with rich, fudgy centers.
- Cheesecake Cups Recipe — individual creamy desserts that fit naturally on a party table.
- Chocolate Covered Strawberries — a fresh fruit-centered dipping project with a glossy finish.
Bake Something Bright for the Party
These colorful celebration desserts can become the centerpiece when you want the whole table to feel finished.
- Funfetti Cake Recipe — a full-size sprinkle cake with unmistakable birthday energy.
- Vanilla Cupcake Recipe — classic individual cakes with room for a generous frosting finish.
- Strawberry Cupcakes — a naturally fruity, pink party option.
- Ice Cream Cake — a make-ahead frozen centerpiece for a larger celebration.
Choose Your Next Homemade Cake
Turn the same from-scratch baking confidence toward a larger layer cake with one of these distinct flavor directions.
- Vanilla Cake — a classic soft layer cake for nearly any celebration.
- Strawberry Cake — a fruit-led cake with a naturally festive profile.
- Red Velvet Cake — a dramatic cocoa-tinted crumb for a more formal occasion.
- Pistachio Cake — an elegant, nutty direction with a distinctive color and flavor.
Why These Cake Pops Belong in Your Recipe Box
This is more than a single party formula. It is a reusable decision system for judging crumb texture, controlling weight, reading coating, and planning a multi-stage dessert without guesswork.
- Teaches the Compression Test: replace an imprecise frosting amount with a visible, tactile binder endpoint.
- Standardizes Every Pop: use 20 g portions for predictable yield, appearance, and stick stability.
- Protects the Temperature Window: understand why cold-not-frozen centers and warm-not-hot coating belong together.
- Makes Coating Behave: rely on one ribboning test and a controlled thinning boundary.
- Plans the Whole Project: choose a focused one-day route or a calmer two-day workflow.
- Covers the Finish Line: set, package, transport, freeze, thaw, and diagnose the pops with realistic recovery limits.
A Final Thought on Homemade Cake Pops
Homemade cake pops turn a playful party dessert into a controlled from-scratch process. Once the cake is cool, the crumbs are fine, and the binder stops at the correct endpoint, the decorating stage becomes far more predictable.
The same vanilla base can move from birthdays to showers, holiday tables, gifts, and school celebrations simply by changing the coating colors and dry decorations. The structure stays consistent even when the visual identity changes completely.
A beautiful cake pop is decided before decorating begins. Every gram, temperature window, and pause earns its place. Together, those small decisions create the smooth shell, secure stick, and fine moist center you were aiming for.

How to Make Cake Pops (From Scratch)
These homemade vanilla cake pops combine a tender from-scratch cake with just enough vanilla buttercream to create a fine, moist center that holds securely on the stick. Each 20-gram cake pop is dipped once in a thin candy coating and finished with sprinkles for a smooth, festive shell.
Ingredients
Vanilla Cake
- 1 1/4 cups all-purpose flour (150 g)
- 2/3 cup plus 2 teaspoons granulated sugar (140 g)
- 1 teaspoon baking powder (4 g)
- 1/4 teaspoon baking soda (1 g)
- 1/2 teaspoon fine sea salt (3 g)
- 5 tablespoons unsalted butter (70 g), softened
- 1 tablespoon plus 1 teaspoon neutral oil (20 g)
- 1 large egg, at room temperature
- 1 large egg yolk, at room temperature
- 1/2 cup whole milk (120 g), at room temperature
- 2 tablespoons full-fat sour cream (30 g), at room temperature
- 2 teaspoons pure vanilla extract (10 ml)
Minimal Vanilla Buttercream
- 3 tablespoons unsalted butter (42 g), softened
- 1/2 cup confectioners’ sugar (60 g)
- 1 teaspoon whole milk or heavy cream (5 ml)
- 1/2 teaspoon pure vanilla extract (2.5 ml)
- 1 generous pinch fine sea salt
Coating and Finish
- 18 ounces candy melts or confectionery coating (510 g), divided
- Up to 1 tablespoon solid vegetable shortening (13 g), optional and only as needed
- About 1/4 cup jimmies or nonpareils (30 g)
Instructions
Make and Cool the Vanilla Cake
1. Heat the oven to 350°F (177°C) with a rack in the center. Lightly grease a light-colored 8-inch square metal pan, line it with parchment, and grease the parchment.
2. Whisk the flour, baking powder, baking soda, and salt together in a medium bowl for about 30 seconds.
3. Beat the softened butter and granulated sugar on medium speed for 2–3 minutes, scraping once, until lighter and creamy. Beat in the oil, then the egg, egg yolk, and vanilla until smooth.
4. Whisk the milk and sour cream together. With the mixer on low, add the dry ingredients in three additions and the milk mixture in two, beginning and ending with the dry ingredients. Stop when the last flour streak disappears.
5. Spread the batter evenly in the pan. Bake for 22–27 minutes, until the center springs back lightly and a tester shows a few moist crumbs but no wet batter.
6. Cool in the pan for 10 minutes, then lift the cake onto a wire rack. Cool completely for 90–120 minutes. Do not crumble warm cake.
Bind, Portion, and Chill
7. Beat the buttercream ingredients until smooth. Weigh 85 g into a separate bowl and reserve the remainder.
8. Crumble the completely cooled cake into fine, even crumbs with no pieces larger than a small pea. Mix in the measured 85 g buttercream.
9. Firmly compress 1 tablespoon of the mixture in your palm. It should hold a smooth edge without crumbling, smearing, or leaving a greasy film. If it cracks, mix in reserved buttercream 1 teaspoon at a time and repeat the test. The usual working amount is 90–110 g buttercream; do not add the full batch automatically.
10. Weigh 20 g portions and roll each into a smooth ball, keeping every portion below 22 g. Arrange on a parchment-lined tray, cover, and refrigerate for 2 hours, until cold and firm but not frozen.
Coat and Decorate
11. Melt 12 ounces (340 g) candy melts in a completely dry, tall, narrow heat-safe vessel, stirring after every short microwave interval. Use about 25-second intervals at 700 W, 20 seconds at 800 W, 15 seconds at 1000 W, or 10–12 seconds at 1200 W, shortening the intervals as the coating melts.
12. Test the coating: it should fall from a spoon in a continuous ribbon and self-level within several seconds. If needed, stir in solid vegetable shortening 1 teaspoon at a time, up to 1 tablespoon total. Let the coating stand for about 5 minutes, until warm and fluid but not hot.
13. Work with four cake balls at a time. Dip 1/2 inch of a 6-inch cake-pop stick in coating, insert it straight into the center of a ball no more than halfway, and repeat. Refrigerate the anchored pops for 10 minutes.
14. Holding the stick vertically, submerge one cake pop once until the coating meets the set collar, then lift it straight out in one motion. Rotate slowly and tap the wrist holding the stick with the opposite hand until the coating stops streaming.
15. Add sprinkles immediately and place the pop upright in a stand. Replenish the vessel with the remaining 6 ounces (170 g) coating as needed to preserve dipping depth. Let the finished cake pops stand at cool room temperature for 30–60 minutes, until the shells are firm and dry.
Notes
- The complete buttercream batch is prepared for consistency, but it is not added automatically. Begin with 85 g and stop as soon as the mixture passes the compression test.
- The 18 ounces of candy coating is a handling quantity that maintains enough depth for vertical dipping. Not all of it will remain on the finished cake pops.
- Use only solid vegetable shortening or another manufacturer-approved fat-based thinning aid. Water, milk, cream, butter, ordinary liquid vegetable oil, and water-based food coloring can seize or compromise candy melts.
- The correct dipping window is cold, dry cake balls with warm-but-not-hot coating. Frozen balls and overheated coating increase the risk of cracking.
- Refrigerate completely set cake pops in an airtight container for up to 5 days. Undipped balls may be refrigerated for up to 2 days. Freeze undipped balls or fully set cake pops airtight for up to 6 weeks; thaw overnight in the refrigerator inside the closed container.
Nutrition Information:
Yield: 30 Serving Size: 1 cake popAmount Per Serving: Calories: 145Total Fat: 7gSaturated Fat: 5gCholesterol: 20mgSodium: 80mgCarbohydrates: 18gSugar: 14gProtein: 1g
Nutrition information is provided as an estimate only and may vary based on specific ingredients, brands, and portion sizes used. This information should not be considered medical or nutritional advice.
12 Sweet Favourites — Yours, Free 🍰
Tiramisù, no-bake cheesecake, the perfect chocolate chip cookie & 9 more reader-loved desserts — gathered into one beautiful free recipe book. From my kitchen to yours.
No spam, just sweet things. Unsubscribe anytime.