Chess Pie with a Buttery Crust and Creamy Vanilla Filling
🎁 FREE E-BOOK: 12 Sweet Favorites — reader-loved desserts in one beautiful recipe book.
Chess pie pairs a buttery, flaky crust with a sweet vanilla filling, a fine cornmeal texture and a thin golden top. The filling is rich and creamy when cold, with enough body to hold a generous wedge once it has finished chilling.

It is an unadorned kind of dessert: a crimped pastry edge, a golden surface and familiar baking ingredients doing the work. A slice needs very little beside it, which makes it a welcome choice when you want a homemade pie without another layer of frosting or a complicated finish.
The time to allow is longer than the oven time alone. This recipe takes you from homemade pastry through a separate shell bake to a properly chilled filling, with clear cues for each stage so you can plan for the first slice as carefully as the bake.
Chess Pie at a Glance
This is a Southern-style, single-crust chess pie with a vanilla-butter filling and finely ground cornmeal. Reserve about eight hours from starting the dough to serving, or prepare the pie the day before.
| Recipe Detail | What to Expect |
|---|---|
| Texture | Creamy, dense filling with a fine cornmeal texture, a thin golden top and flaky pastry; firm enough for neat slices after chilling. |
| Flavor | Sweet vanilla and butter with a little cornmeal character; vinegar balances the filling without making this a citrus pie. |
| Difficulty | Moderate. The filling is mixed by hand; making and parbaking the pastry require the most attention. |
| Time | 35 minutes prep, about 90 minutes baking and 5 hours 45 minutes resting, cooling and chilling. About 7 hours 50 minutes total; plan 8 hours or make it the day before. |
| Servings | 8 wedges from one 9-inch (23 cm) pie. |
| Method | Make and chill an all-butter crust, parbake the shell, add the hand-mixed filling, bake gently, then cool and refrigerate before slicing. |
| Best For | A dessert prepared ahead for a family meal, holiday table or coffee gathering when a rich, sweet pie suits the menu. |
| Pan | A 9-inch (23 cm) metal pie pan about 1 1/2 inches (4 cm) deep, with at least about 4 US cups (950 ml) brim capacity. |
| Make Ahead | Prepare the dough up to 1 day ahead, or bake and chill the finished pie the day before serving. |
| Serving Temperature | Slice when cold and firm. If preferred, let individual slices soften for 15–20 minutes before serving. |
| Storage | Keep covered in the refrigerator at 40°F (4°C) or below for up to 3 days; keep cumulative room-temperature exposure within 2 hours. |
If you are choosing between two custard pies, Buttermilk Pie offers a tangier filling. This version keeps butter and vanilla at the center of the flavor, with the small-grained texture that cornmeal brings.
Why This Chess Pie Recipe Works
The pastry and filling need different treatment: a dry shell before the custard goes in, moderate heat while it bakes and a full cold set before cutting. Those choices protect the contrast between flaky pastry and a creamy center.
- A drier base beneath the custard. The shell gets its own bake before the wet filling goes in, giving the bottom a chance to dry first. That head start addresses the damp pastry layer that can develop when custard is poured into a raw shell.
- Flaky pastry with a defined shape. Cold butter pieces and two chilling stages support a flaky crust, while weights support the sides during the first bake. These choices help the shell keep its shape instead of slumping as the butter warms.
- A creamy center with a clear stopping point. The filling bakes at 325°F, with set edges and a small, cohesive wobble at the center as the key visual cues. Waiting for the hot center to become completely rigid can carry the custard past its intended creamy texture.
- Fine texture with enough body to slice. Finely ground cornmeal keeps the characteristic cornmeal texture small, and a little flour supports the body of the filling. Using the specified fine grind avoids the coarse bite that larger cornmeal particles can introduce.
- Butter and vanilla with a little contrast. Butter and vanilla give this filling its main flavor, while a small amount of vinegar adds balance to its sweetness. The result stays within the classic vanilla-butter style without turning into a lemon or buttermilk pie.
- A cold set built into the recipe. The schedule includes cooling and at least three hours in the refrigerator, so slicing is treated as a separate readiness decision. That gives a properly baked filling time to become cold and cohesive before the first wedge is lifted.

Why You’ll Love Making This Chess Pie
This pie suits a cook who enjoys homemade pastry and wants dessert ready ahead of the meal. The filling takes little equipment, the finished pie needs little decoration, and the sweetness is clear from the outset.
- Make dessert before the occasion. You can bake and chill the pie the day before, leaving dessert ready while you prepare the rest of the meal. The required cold set fits that plan naturally.
- Work with simple hand tools. The filling comes together with a hand whisk and spatula, with no electric mixer or water bath. You will still need pie weights and time for the homemade pastry.
- Choose a rich, sweet dessert. Butter, vanilla and a dense custard filling suit anyone looking for a small, satisfying slice of a sweet pie. If your menu calls for a tart or fruit-led dessert, this flavor profile helps you make that choice before starting.
- Skip elaborate finishing. The pie can go to the table with its golden surface uncovered, so there is no frosting, layered topping or decorative assembly to complete. A plain slice is a complete serving option.
- Plan eight clear portions. One 9-inch pie gives you eight wedges, making the recipe easy to match to a small gathering. You can bring the pie to the table whole and cut it after its center is cold and firm.
- See the full time commitment. The schedule counts the pastry rests and the final chill as well as the baking time. With about eight hours reserved, or a day-before start, you can plan around when the pie will actually be ready to serve.
The Science Behind Chess Pie’s Crust and Custard
Pastry becomes flaky as distinct pieces of butter melt in the dough, while the filling becomes cohesive as its eggs and starches respond to heat. Giving those components their own stages helps you judge what each one needs.
Cold butter creates separation in the pastry. When the butter stays in small pieces instead of being rubbed into a greasy paste, it interrupts the dough and helps create a flaky texture as the shell bakes. Keep the butter cold and stop mixing once the dough holds together; a perfectly smooth raw dough is not the goal.
Sugar changes how the egg custard sets. Egg proteins form the filling’s structure, and the substantial sugar amount affects how that structure develops. Reducing the sugar changes more than sweetness, while prolonged heat can tighten the custard too far. Use the stated sugar and eggs, then judge the small central wobble together with the other doneness cues.
Fine cornmeal and flour contribute body. The cornmeal adds its characteristic small-grained texture, while the flour helps support the filling as it cooks. The properly baked custard becomes more cohesive during cooling and chilling, which is why a warm pie and a cold slice look different. Refrigeration finishes the setting stage; it does not cook an underbaked center.
Ingredients for Classic Chess Pie
The crust and filling each use flour, sugar, salt and butter, so measure them into separate groups. The pastry butter must stay cold, while the filling butter is melted and cooled until barely warm.
Ingredient List
You will make one pastry shell and enough filling for a 9-inch pie. Use the gram measurements for the dry ingredients when possible, and add the pastry water according to how the dough feels.
For the crust
- 1 1/4 cups (150 g) all-purpose flour, plus a little for rolling
- 1 teaspoon (4 g) granulated sugar
- 1/4 teaspoon (about 1.5 g) fine salt
- 1/2 cup (113 g) unsalted butter, cold and cubed
- 3–5 tablespoons (45–75 ml) ice water, as needed
For the filling
- 2 cups (400 g) granulated sugar
- 2 tablespoons (18 g) finely ground yellow cornmeal
- 1 tablespoon (8 g) all-purpose flour
- 1/4 teaspoon (about 1.5 g) fine salt
- 1/2 cup (113 g) unsalted butter, melted and cooled until barely warm
- 4 large eggs (about 200 g without shells), at room temperature
- 1/4 cup (60 ml) whole milk
- 1 tablespoon (15 ml) distilled white vinegar, 5% acidity
- 1 teaspoon (5 ml) vanilla extract

Choose Fine Cornmeal
Choose finely ground yellow cornmeal, which gives the filling its characteristic texture without large, coarse particles. Coarse polenta and cornstarch are different ingredients and should not be used as equal replacements here.
Fine white cornmeal is an option if that is what you have; the filling will have a paler cornmeal color. Keep the same weight and fine grind. For a corn-free pie, choose a recipe designed around that change rather than leaving this ingredient out.
Keep the Two Butter Portions Separate
The cold butter in the crust should remain in visible pieces after mixing. The filling butter should be liquid but only barely warm, so it combines smoothly without warming the eggs abruptly.
Measure the two 113 g portions separately before you start. If the melted portion still feels hot, let it cool before adding it to the filling; do not compensate with colder eggs or extra milk.
Use the Full Sugar and Egg Amounts
The 400 g of sugar and four large eggs help define both the sweetness and the structure of this filling. Keep those amounts intact; a casual reduction in sugar or replacement of the eggs can change how the custard sets.
This is a sweet pie by design. Cutting a smaller serving is a more predictable way to enjoy less sweetness at once than changing the filling while keeping the same baking instructions.
What the Vinegar Adds
A tablespoon of 5% distilled white vinegar adds a little contrast to the sweet butter-and-vanilla filling. It does not preserve the pie or make room-temperature storage appropriate.
If you use 5% apple cider vinegar instead, keep the same tablespoon amount and expect a slightly different flavor. Lemon juice is not part of this version.

Tools for a Well-Baked Chess Pie
The pan’s capacity matters as much as its diameter: the filling needs room below the pastry rim. A metal pan, a supporting baking sheet and enough weights to hold up the shell’s sides make the two-stage bake easier to manage.
- Measure the formula. Kitchen scale, dry and liquid measures, and measuring spoons; dry-ingredient weights govern the written cup measures.
- Shape the cold pastry. Mixing bowl, pastry blender or fingers, rolling pin and wrap for making, rolling and resting the dough.
- Support the shell in the oven. Ungreased 9-inch (23 cm) metal pie pan about 1 1/2 inches (4 cm) deep with about 4 US cups (950 ml) or more brim capacity, rimmed baking sheet, parchment or foil, and enough pie weights to support the sides; conventional oven with a lower-third rack.
- Mix the filling gently. Mixing bowl, hand whisk, flexible spatula and small saucepan for melting the butter; no electric mixer required.
- Check, cool and serve. Thin instant-read thermometer, cooling rack, refrigerator, sharp knife and pie server, plus foil or a crust shield as needed.
Before You Begin Your Chess Pie
Clear a level space in the refrigerator before making the dough, and check that your pie pan has the required depth and capacity. These small preparations keep the pastry cold and give the finished pie somewhere to chill promptly.
- Check the pan. Use the specified 9-inch metal pan, about 1 1/2 inches deep and at least about 4 US cups to the brim; leave room below the crust rim when filling.
- Clear refrigerator space. The filled pan must sit level during its final chill, without balancing on other food.
- Gather enough weights. They need to support the sides of the lined shell as well as cover its base.
- Keep pastry ingredients cold. Cube the crust butter and prepare ice water before combining the dough.
- Choose your serving day. Reserve the full cooling and chilling time; a day-before bake is the least hurried route.
- Put checking tools within reach. Have a cooling rack, foil or a crust shield, and a thin instant-read thermometer ready before baking.
Plan Your Chess Pie Around Serving Time
The rests between stages account for much of the total time, so work backward from when you want a cold, firm pie. The times below illustrate a roughly eight-hour schedule; dough readiness, your oven and the final cold set still take priority over the clock.
| Time from Starting | Stage | What Must Be Ready Before Moving On |
|---|---|---|
| Start to about 1 h 15 min | Mix the pastry, then rest it for 60 minutes | A cohesive dough disk with cold butter pieces. |
| About 1 h 15 min to 1 h 55 min | Roll and fit the shell, then chill for 30 minutes | A firm shell; the oven preheated to 375°F (190°C). |
| About 1 h 55 min to 2 h 40 min | Parbake for 25–30 minutes and cool for 15 minutes | A dry shell; the oven reduced to 325°F (160°C). |
| About 2 h 40 min to 3 h 50 min | Mix the filling and bake for about 50–65 minutes | Set outer filling and a small, cohesive central wobble. |
| About 3 h 50 min to 4 h 50 min | Cool on a rack for about 60 minutes | Transfer to the refrigerator, even if the pie is still slightly warm. |
| About 4 h 50 min to 7 h 50 min or longer | Refrigerate for at least 3 hours | A cold, firm center before slicing. |
The planning total is 35 minutes of preparation, about 90 minutes of baking and 5 hours 45 minutes of resting, cooling and chilling. Allow extra time if the center needs longer to become cold and firm.
What to Expect from This Chess Pie
The raw pastry will look rougher than a smooth cookie dough, and the mixed filling will be much looser than the finished custard. A gently uneven baked surface and a denser chilled center are normal features of this style of pie.
- Variable water needs. The dough may use any amount within the stated 3–5 tablespoons; flour and handling affect when a squeezed handful holds together.
- A pourable filling. Fine cornmeal specks are expected, but a thick cap of foam is not.
- A homemade surface. The top can settle slightly and develop small surface marks as it cools; smoothness alone does not tell you whether the center is done.
- A rich cold texture. The filling becomes denser after chilling and retains a fine cornmeal texture rather than the glass-smooth finish of flan.
How to Make Chess Pie
Start with the pastry so both chilling periods are complete before you mix the filling. Keep the shell supported during its first bake, then lower the oven for the custard and leave enough time for the finished pie to become cold before cutting.
1. Make the pastry
Whisk the crust flour, sugar and salt. Cut or rub in the cold butter until the mixture contains pea-size pieces.

Toss in 3 tablespoons ice water, adding the remainder a teaspoon at a time only until a squeezed handful stays together. Press into a disk without kneading. Wrap and refrigerate for 60 minutes.
Squeeze a handful before deciding whether to add more water. Loose crumbs that will not hold need a little more; dough that already binds does not need the rest of the measured water.
What you should see: A cohesive disk with visible butter flecks; no loose flour pockets or greasy paste.

2. Fit and chill the crust
Roll on a lightly floured surface to a 13-inch (33 cm) circle, approximately 1/8 inch (3 mm) thick. Ease into an ungreased 9-inch (23 cm) metal pie pan about 1 1/2 inches (4 cm) deep, without stretching. Fold and crimp the rim. Refrigerate for 30 minutes. During this chill, preheat a conventional oven to 375°F (190°C), with a rack in the lower third.
Lower the dough into the corners of the pan instead of pulling it outward to reach them. Stretched pastry is more likely to shrink back during baking. Use conventional heat with the fan off.
What you should see: Dough touches the base and corners without tension; the rim is cold and firm before baking.

3. Parbake the shell
Line the cold crust with parchment or foil and fill with pie weights, supporting the sides as well as the base. Set the pan on a rimmed baking sheet. Bake for 20 minutes; lift out the liner and weights, then bake for 5–10 minutes more, until the base is dry and the rim pale golden. If a small bubble rises, gently press it down. Cool the shell on a rack for 15 minutes. Lower the oven to 325°F (160°C) and allow it to reach that setting.

What you should see: A dry, lightly colored base without shiny raw patches; the crust is set but not deeply browned.

4. Mix the filling
In a bowl, whisk the filling sugar, fine cornmeal, flour and salt. Stir in the barely warm melted butter, then add the eggs one at a time, mixing gently just until incorporated. Stir in the milk, vinegar and vanilla. Scrape the bowl. Do not whip until foamy. Stir once more immediately before pouring into the parbaked shell, leaving about 1/4 inch (6 mm) below the pastry rim.

Use slow whisking strokes and scrape the bottom and sides of the bowl so the dry ingredients do not stay in a dense layer. Stop short of whipping air into the eggs.

What you should see: A pourable mixture with fine cornmeal specks, evenly combined and without egg streaks, butter pools or a thick foam cap.

5. Bake to a gentle center wobble
Bake on the rimmed sheet at 325°F (160°C) for approximately 50–65 minutes; begin checking at 45 minutes. Shield the pastry rim when it becomes golden. If the surface darkens early, tent loosely with foil without touching it. Remove when the top is golden, the outer filling is set and the central 2-inch (5 cm) area trembles together rather than sloshing. A thin instant-read probe near the center should read approximately 180°F (82°C) as a supporting cue, without touching the pan.
Check the movement with a small, gentle nudge of the pan, taking care around the hot oven. A shiny wave that travels across most of the filling is different from a small center that trembles as one piece.
What you should see: A thin golden surface and a small cohesive central wobble. The whole filling should not ripple like liquid, and the center need not be rigid.
6. Cool, chill and slice
Set the pie on a rack for about 60 minutes, then refrigerate, even if still slightly warm. Do not leave it on the counter beyond 2 hours after baking. Chill for at least 3 hours and until cold and firm through the center; loosely cover during initial chilling and cover fully once cold. Cut into 8 wedges. For a softer eating texture, let individual slices stand for 15–20 minutes before serving, within the cumulative room-temperature limit.

What you should see: A cohesive cut face that holds its shape, with a creamy interior and fine cornmeal texture; no liquid flows into the cut space.

How to Tell When Chess Pie Is Baked and Ready to Slice
A baked pie and a pie ready to slice are two different things. Judge the filling while it is hot to decide when to stop baking, then judge its temperature and firmness after chilling to decide when to cut.
Ready to Leave the Oven
Begin checking the filling at 45 minutes, even though the usual bake is about 50–65 minutes. Look for golden color, set outer filling and a central area about 2 inches across that trembles together rather than sloshing.
| Stage | Useful Cue | What It Means |
|---|---|---|
| Parbaked shell | Dry base and pale golden rim | Ready for the brief cooling period before filling; a shiny raw base needs more of its unweighted bake. |
| Hot custard | Set outside with a small, cohesive central wobble | The filling can leave the oven when the other cues agree; widespread liquid rippling is not the same movement. |
| Near-center temperature | Approximately 180°F (82°C), measured with a thin probe away from the pan | Supporting guidance for this particular filling, used with appearance and movement. |
| Cold pie | Firm through the center; a lifted wedge holds together | Ready to slice after the required refrigeration; this check follows sufficient baking. |
Do not wait for the whole hot center to become rigid. Deep cracking, pronounced puffing or a grainy texture can accompany excessive baking. If the crust or surface browns too soon, shield it while continuing to judge the center, rather than taking color as the only stopping signal.

Ready for the First Slice
After at least three hours in the refrigerator, the pie should be cold and firm through the center. A pie that still feels warm or soft needs more chilling before you can expect a neat wedge; one that was liquid when it left the oven needed more baking first.
I learned to be more patient with custard pies after cutting into one before the filling had finished setting. The first slice spread across the plate, while the later slices held together much better after chilling. Now I give the cooling time the same attention as the baking time. A pie can be ready to leave the oven long before it is ready for the first slice.
Use a sharp knife and a pie server to support the base as you lift each wedge. Wipe the knife between cuts so filling left on the blade does not drag across the next cut face.

Small Details That Improve Your Chess Pie
Small checks at the bowl and oven help you keep control without changing the ingredients. Concentrate on accurate measuring, an evenly combined filling and protecting the crust before it gets too dark.
- Weigh the small dry additions. A heaped spoon makes a larger proportional change to the cornmeal and flour than it does to a large bowl of sugar; use the stated gram weights to keep the filling’s body consistent.
- Scrape before the final stir. Dry ingredients can collect at the bottom and butter can cling to the bowl; scrape both areas so what reaches the shell is evenly combined.
- Pour soon after stirring. Cornmeal can settle while a bowl waits, so give the filling its final gentle stir immediately before pouring instead of adding extra whisking earlier.
- Shape the shield in advance. Have a loose foil ring ready while the pan is cool; it is easier to protect a golden rim promptly when you do not have to shape foil around hot pastry.
Common Chess Pie Problems and What to Do
Some problems can still be corrected during the current stage, such as a crust that needs shielding or a pie that needs more chilling. Others, including a badly shrunken shell or a grainy baked custard, are better prevented on the next bake.
| What You Notice | Likely Cause | What to Do Now | How to Prevent It |
|---|---|---|---|
| The shell slides down or shrinks | Warm or stretched dough; insufficient side support | If it is still raw, ease it back into position and chill. A baked, badly collapsed shell cannot be reshaped reliably. | Fit without stretching, keep both rests and fill the lined shell with weights up the sides. |
| The bottom looks wet or doughy | The base was not dry before filling | During the shell bake, continue the unweighted stage to the dry-base cue. Once filled, extra baking can damage the custard before fixing a wet base. | Judge the bare base as well as the rim during parbaking. |
| The top is dark but the center ripples like liquid | Browning has outpaced the filling’s set | Shield the rim or tent the top loosely and continue baking until the center meets the doneness cues. | Use the stated oven temperature and begin checking early. |
| The filling is grainy, very firm or strongly eggy | Excess heat may have tightened the custard too far | Chilling will not reverse curdling or graininess; avoid additional heat once baked. | Stop at set edges and a small cohesive wobble, using temperature as support. |
| A warm slice spreads on the plate | A sufficiently baked pie was cut before its cold set | Refrigerate within the cooling limit and wait until the remaining filling is cold and firm before another cut. | Include the full refrigerator stage when planning service. |
| A fully chilled filling is still liquid | The filling may have been underbaked or its ingredients changed | Do not assume more chilling will correct an undercooked custard; review the bake and measurements before repeating. | Keep the stated amounts and use all the hot doneness cues before removing the pie. |
Beautiful Ways to Serve Chess Pie
The golden top and crimped crust give chess pie its finish, so the serving can stay simple. Choose a plain wedge or one small accompaniment, keeping the chilled pie itself as the main dessert.
Bring the Whole Pie to the Table
Set the finished pie in its pan on a simple serving board or stand so the golden surface and pastry edge remain visible. Bring it out when you are ready to serve and return the remaining pie to the refrigerator afterward.

Serve a Plain Chilled Slice
A single wedge on a small plate shows the filling and thin pastry base clearly. Leave the cut face uncovered so you can enjoy the contrast between the creamy center and the crust without another topping.

Add a Small Dollop of Cream
A modest spoonful of softly whipped cream adds an airy contrast to the dense filling. Keep it beside the slice or just at its edge so the pie’s flavor and texture remain easy to appreciate.
Use homemade whipped cream when you want to control the sweetness of the accompaniment, and add it at serving time. The cream is optional and is separate from the pie ingredients.

Pair a Slice with Coffee or Tea
Unsweetened coffee or plain black tea makes a useful contrast to the sweet vanilla filling. Serve the drink beside a moderate wedge; the pie does not need a sweet sauce to complete the plate.

Storing Chess Pie and Planning Ahead
Keep this egg-and-milk pie refrigerated, including when you prepare it a day ahead. The pastry will gradually soften during storage, so the best texture and safe holding conditions are separate considerations.
Refrigerate and Cover the Pie
After about 60 minutes on a rack, move the pie to the refrigerator even if it is still slightly warm. Loosely cover during the initial chill, then cover fully once cold; keep it at 40°F (4°C) or below and use it within 3 days of baking.
Illinois Extension’s guidance for egg-and-dairy pies supports refrigeration within two hours. Do not leave this pie on the counter overnight, and keep cumulative time out of refrigeration within two hours when cooling and serving.
The FoodSafety.gov cold-storage chart lists 3–4 refrigerated days for custard and chiffon pies. Use the shorter, three-day limit here, and count from the day you bake the pie.
Prepare the Dough or Pie a Day Ahead
You can move either the pastry work or the complete bake to the previous day. Keep the dough wrapped and refrigerated, or refrigerate the baked pie through its full cold set before covering it for overnight storage.
- Dough ahead. Make the disk up to one day before, wrap well and refrigerate. Continue with rolling, fitting and the 30-minute shell chill when ready to bake.
- Finished pie ahead. Bake the day before, rack-cool briefly and refrigerate promptly. Overnight chilling does not restart the three-day storage clock.
- Accompaniments later. Keep whipped cream separate until serving so it does not cover the golden surface or add moisture during storage.
Freezing, Thawing and Serving Temperature
Refrigeration is the preferred way to hold this pie. Freezing the finished custard pie is not recommended for texture: the filling can lose quality and the pastry can soften during thawing, even when the food has been handled safely.
Serve the pie chilled, or let individual slices stand for 15–20 minutes for a slightly softer eating texture, keeping within the cumulative two-hour room-temperature limit. Reheating is unnecessary, and there is no need to warm the whole pie before cutting.
Chess Pie Questions, Answered
A loose center, a dark top or an unfamiliar pan can make the next decision less clear. For this pie, use the specified pan and ingredients, then judge baking and cold setting as separate stages.
Why is my chess pie still runny?
First consider when it was cut. A pie that was properly baked but is still warm needs its full refrigerator set; a filling that sloshed in the oven or remains liquid when fully cold may be underbaked. Chilling cannot cook an underbaked center.
How can I tell when chess pie is done?
Look for golden color, set outer filling and a central 2-inch area that wobbles together. Approximately 180°F (82°C) near the center supports those cues for this recipe. Do not wait for the entire hot center to become rigid.
Does chess pie need to be refrigerated?
Yes. Move it to the refrigerator after about an hour of rack cooling and no later than two hours after baking. Keep it covered at 40°F (4°C) or below for up to three days, including time stored before serving.
Can I make chess pie the day before?
Yes, a day-before bake gives the filling plenty of time to chill. Refrigerate it promptly, cover fully once cold and add any whipped cream only when serving. The crust may soften a little overnight.
How do I keep the bottom crust from getting soggy?
Parbake the shell before adding the filling and look for a dry base after the weights come out. A golden rim alone does not mean the bottom is ready. Use the metal pan and lower-third oven position specified in the method.
Can I replace or leave out the cornmeal?
Keep the cornmeal in this recipe. Finely ground white cornmeal can replace the yellow cornmeal at the same weight with a color difference; cornstarch, coarse polenta and simply omitting it do not give the same ingredient balance.
What is the difference between chess pie and buttermilk pie?
This chess pie uses milk, a little vinegar and fine cornmeal for a sweet vanilla-butter filling. Buttermilk pie gets a more pronounced tang from buttermilk; choose it when you want that different flavor profile.
What should I do if the top browns before the center sets?
Shield a golden pastry rim, or place a loose foil tent over a darkening top without letting it touch the filling. Continue checking the center rather than removing the pie because of color alone; keep the oven at the stated 325°F (160°C).
Can I freeze chess pie?
Freezing is not recommended for the best texture of this version. The concern is the quality of the custard and pastry after thawing, rather than freezing being inherently unsafe. Use the refrigerated make-ahead option instead.
Do I need a deep-dish pie pan?
Use dimensions and capacity rather than the deep-dish label: a 9-inch metal pan about 1 1/2 inches deep, with at least about 4 US cups to the brim. Leave about 1/4 inch below the pastry rim and do not assume a smaller or deeper pan uses the same bake.
Why does my chess pie taste eggy?
Excess baking can make an egg custard firmer and bring an eggy character forward, especially if you wait for a completely rigid hot center. It is not the only possible cause, so also check that the ingredient amounts and vanilla matched the recipe.
Is a cracked top normal on chess pie?
A few small marks can appear as the surface settles. Large cracks with a very firm or grainy center can suggest overbaking, but a crack by itself does not establish doneness. Use the center’s movement and the other baking cues together.
Continue Your Journey Through Pies and Custards
A golden baked pie, a brighter creamy filling and a more involved pastry project each offer a different next bake. Choose according to the texture you want to eat or the skill you would like to practice.
More Golden Pies and Baked Custards
Pecan, pumpkin and sweet potato keep the familiar baked-pie format, while crème brûlée takes the vanilla-custard interest into individual dishes. These are useful choices when you want another dessert built around a rich filling.
- Pecan Pie Recipe: Keep the rich pie format and add toasted pecan texture.
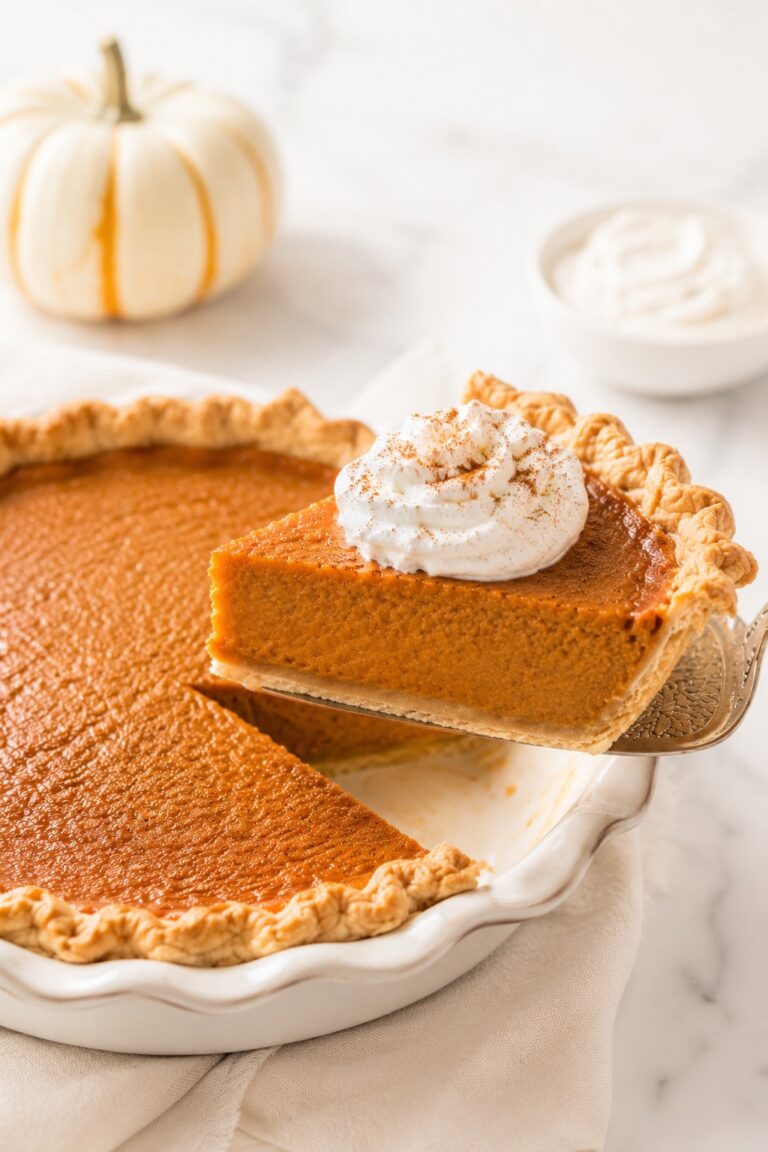
- Pumpkin Pie: Move from vanilla and cornmeal to pumpkin and warm spices.
- Sweet Potato Pie Recipe: Try a sweet-potato filling for another traditional baked pie.
- Creme Brulee: Explore vanilla custard in individual portions with a caramelized sugar finish.
Take Pie Night in a Different Flavor Direction
Chocolate, lime and coconut change the dominant flavor of a creamy dessert without leaving the pie table behind. Pick one when you want a different balance of richness, fruit or sweetness.
- Chocolate Pecan Pie: Pair chocolate with pecans for a richer nut-filled pie.
- Key Lime Pie: Choose a citrus-led chilled pie when you want sharper flavor contrast.
- Coconut Cream Pie: Keep a creamy pie center and make coconut the main flavor.
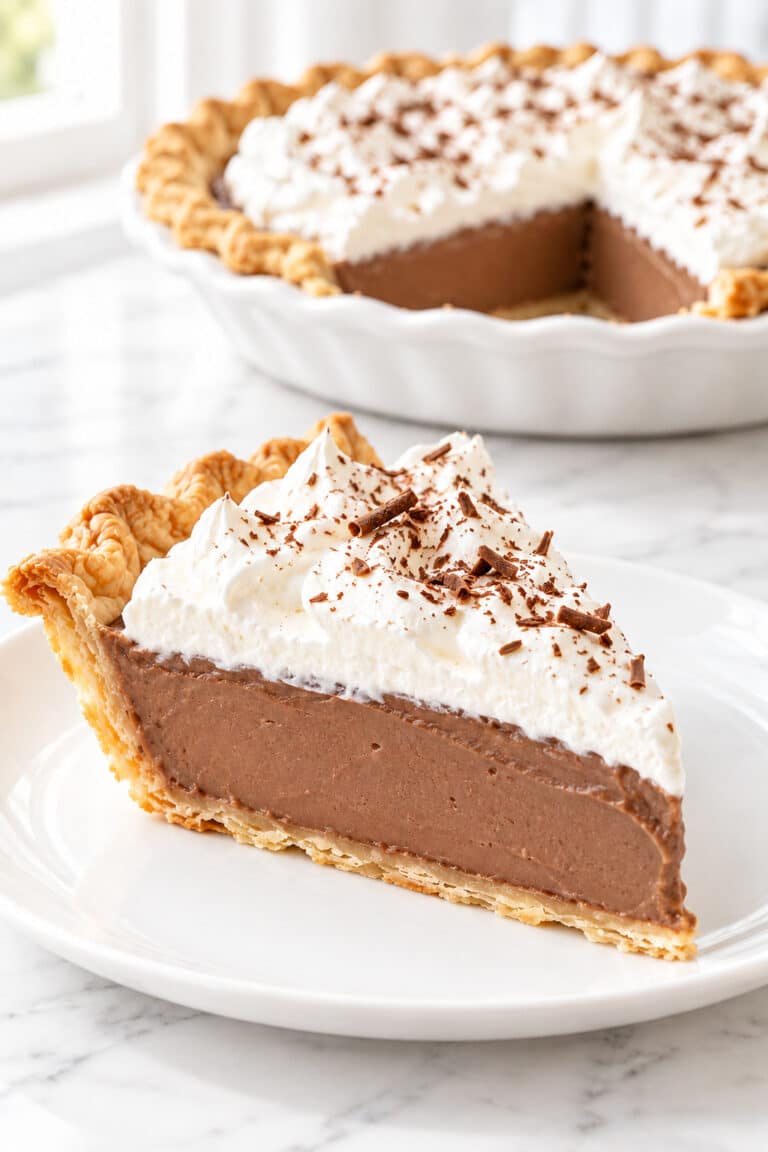
- French Silk Pie: Switch to a chocolate cream-style filling in the familiar pie format.
Build Your Next Pastry Project
A cooked cream filling, meringue, a top crust or a separate cheesecake topping adds another kind of kitchen practice. Each project builds on a different part of the pastry-and-filling work used here.
- Banana Cream Pie Recipe: Practice a fully baked shell, cooked pastry cream and cold fruit-layer assembly.
- Lemon Meringue Pie: Add a separate meringue component to a filled pie.
- Apple Pie Recipe: Move to fruit filling and top-crust pastry work.
- Pecan Pie Cheesecake: Combine a cheesecake base with a separate pecan topping.
Why This Chess Pie Belongs in Your Recipe Box
Keep this chess pie as a reference for baking pastry and custard together with a clear sense of what each needs.
- A Pastry Reference. The complete shell-and-filling recipe is useful when you want to revisit the whole pie-making process in one place.
- A Clear Baseline. A defined vanilla-butter chess pie gives you a familiar point of comparison when exploring other versions.
- Better Custard Judgment. Learning to separate baking readiness from slicing readiness carries over to other baked custard desserts.
- A Timing Habit. Working backward from a finished slice encourages a more realistic approach to recipes with long resting stages.
- An Unadorned Classic. The restrained finish makes room to notice what good pastry and a well-set filling contribute on their own.
- A Place to Return. Specific cues offer something useful to check again as your pie-making experience grows.
A Final Word on Homemade Chess Pie
Chess pie gives familiar baking ingredients a clear purpose: pastry around the edge, a rich vanilla center and a golden surface left open to view. Its appeal rests in those small differences of flavor and texture, with very little decoration between the pie and the person eating it.
It is a pie to return to when the table calls for something familiar and generous, especially when you have time to bake before the day becomes busy. A quiet afternoon in the kitchen can become dessert for the following evening.
The first wedge is only one part of a homemade pie. There is also the care in the shaped edge, the choice to leave a simple surface alone and the pleasure of setting something made by hand on the table. Chess pie gives that kind of care a place to show.

Chess Pie
A classic Southern chess pie with rich vanilla-butter custard, fine cornmeal texture and a thin golden surface in a flaky homemade butter crust. Bake it ahead, chill until firm and serve in small, creamy wedges.
Ingredients
For the Crust
- 1 1/4 cups (150 g) all-purpose flour, plus a little for rolling
- 1 teaspoon (4 g) granulated sugar
- 1/4 teaspoon (about 1.5 g) fine salt
- 1/2 cup (113 g) unsalted butter, cold and cubed
- 3–5 tablespoons (45–75 ml) ice water, as needed
For the Filling
- 2 cups (400 g) granulated sugar
- 2 tablespoons (18 g) finely ground yellow cornmeal
- 1 tablespoon (8 g) all-purpose flour
- 1/4 teaspoon (about 1.5 g) fine salt
- 1/2 cup (113 g) unsalted butter, melted and cooled until barely warm
- 4 large eggs (about 200 g without shells), at room temperature
- 1/4 cup (60 ml) whole milk
- 1 tablespoon (15 ml) distilled white vinegar, 5% acidity
- 1 teaspoon (5 ml) vanilla extract
Instructions
- Make the pastry. Whisk the crust flour, sugar and salt. Cut or rub in the cold butter until the mixture contains pea-size pieces. Toss in 3 tablespoons ice water, adding the remainder a teaspoon at a time only until a squeezed handful stays together. Press into a disk without kneading. Wrap and refrigerate for 60 minutes. What you should see: A cohesive disk with visible butter flecks; no loose flour pockets or greasy paste.
- Fit and chill the crust. Roll on a lightly floured surface to a 13-inch (33 cm) circle, approximately 1/8 inch (3 mm) thick. Ease into an ungreased 9-inch (23 cm) metal pie pan about 1 1/2 inches (4 cm) deep, without stretching. Fold and crimp the rim. Refrigerate for 30 minutes. During this chill, preheat a conventional oven to 375°F (190°C), with a rack in the lower third. What you should see: Dough touches the base and corners without tension; the rim is cold and firm before baking.
- Parbake the shell. Line the cold crust with parchment or foil and fill with pie weights, supporting the sides as well as the base. Set the pan on a rimmed baking sheet. Bake for 20 minutes; lift out the liner and weights, then bake for 5–10 minutes more, until the base is dry and the rim pale golden. If a small bubble rises, gently press it down. Cool the shell on a rack for 15 minutes. Lower the oven to 325°F (160°C) and allow it to reach that setting. What you should see: A dry, lightly colored base without shiny raw patches; the crust is set but not deeply browned.
- Mix the filling. In a bowl, whisk the filling sugar, fine cornmeal, flour and salt. Stir in the barely warm melted butter, then add the eggs one at a time, mixing gently just until incorporated. Stir in the milk, vinegar and vanilla. Scrape the bowl. Do not whip until foamy. Stir once more immediately before pouring into the parbaked shell, leaving about 1/4 inch (6 mm) below the pastry rim. What you should see: A pourable mixture with fine cornmeal specks, evenly combined and without egg streaks, butter pools or a thick foam cap.
- Bake to a gentle center wobble. Bake on the rimmed sheet at 325°F (160°C) for approximately 50–65 minutes; begin checking at 45 minutes. Shield the pastry rim when it becomes golden. If the surface darkens early, tent loosely with foil without touching it. Remove when the top is golden, the outer filling is set and the central 2-inch (5 cm) area trembles together rather than sloshing. A thin instant-read probe near the center should read approximately 180°F (82°C) as a supporting cue, without touching the pan. What you should see: A thin golden surface and a small cohesive central wobble. The whole filling should not ripple like liquid, and the center need not be rigid.
- Cool, chill and slice. Set the pie on a rack for about 60 minutes, then refrigerate, even if still slightly warm. Do not leave it on the counter beyond 2 hours after baking. Chill for at least 3 hours and until cold and firm through the center; loosely cover during initial chilling and cover fully once cold. Cut into 8 wedges. For a softer eating texture, let individual slices stand for 15–20 minutes before serving, within the cumulative room-temperature limit. What you should see: A cohesive cut face that holds its shape, with a creamy interior and fine cornmeal texture; no liquid flows into the cut space.
Notes
- Use a 9-inch (23 cm) metal pie pan about 1 1/2 inches (4 cm) deep, with a brim capacity of about 4 US cups (950 ml) or more. Leave about 1/4 inch (6 mm) below the pastry rim when filling; do not force excess filling into a shallower pan.
- Bake in a conventional oven with the fan off and the rack in the lower third. Use 375°F (190°C) for the shell and 325°F (160°C) for the filled pie.
- Choose finely ground cornmeal. Coarse polenta and cornstarch are not equal substitutes. Fine white cornmeal changes the color slightly; 5% cider vinegar adds a mild apple note.
- Keep the sugar and egg quantities as written. Sugar reduction, egg replacements and a different pan size need a separately adjusted recipe.
- The 7-hour 50-minute planning total includes 35 minutes preparation, up to 90 minutes cooking and 345 minutes for chilling and cooling. Allow about 8 hours, or bake the day before. The filling may need longer to become cold and firm.
- The center should wobble together gently rather than ripple like liquid. Approximately 180°F (82°C) near the center supports the visual cues; a browned top alone does not establish doneness.
- After about 60 minutes on a rack, refrigerate even if slightly warm. Do not leave the baked pie out for more than 2 hours. Keep at 40°F (4°C) or below, covered once cold, and use within 3 days. Keep later serving time within the cumulative 2-hour room-temperature limit.
- The dough may be made 1 day ahead, or bake the pie the day before serving. Freezing the finished pie is not recommended for its texture. Serve chilled, or let individual slices stand for 15–20 minutes before serving; reheating is unnecessary.
Nutrition Information:
Yield: 8 Serving Size: 1 sliceAmount Per Serving: Calories: 520Total Fat: 25.8gSaturated Fat: 15.2gCholesterol: 154mgSodium: 188mgCarbohydrates: 68gFiber: 0.6gSugar: 51.1gProtein: 5.8g
Nutrition information is provided as an estimate only and may vary based on specific ingredients, brands, and portion sizes used. This information should not be considered medical or nutritional advice.
12 Sweet Favorites — Yours, Free 🍰
Tiramisù, no-bake cheesecake, the perfect chocolate chip cookie & 9 more reader-loved desserts — gathered into one beautiful free recipe book. From my kitchen to yours.
No spam, just sweet things. Unsubscribe anytime.