Red Velvet Cupcakes with Vanilla Cheesecake Filling
These red velvet cupcakes have a soft, finely textured crumb, a cool vanilla cheesecake cream tucked into the center, and a generous swirl of cream cheese frosting. Mild cocoa, vanilla, and a little tang from the dairy keep the flavors familiar, while the filling makes each bite especially creamy.

Filled red velvet cupcakes feel right at home on a birthday plate or a carefully arranged dessert table. The red cake and white cream provide their own decoration, so a few fine cake crumbs can be all the finish needs. Each portion is already its own small dessert, ready to share without cutting a whole cake.
12 Sweet Favorites — Yours, Free 🍰
Tiramisù, no-bake cheesecake, the perfect chocolate chip cookie & 9 more reader-loved desserts — gathered into one beautiful free recipe book. From my kitchen to yours.
No spam, just sweet things. Unsubscribe anytime.The useful part of making these red velvet cupcakes is knowing what each component needs before they come together. The directions cover the cake, the softer filling, the firmer piping frosting, and the cooling time between them, so you can plan the batch without finding an unfinished cream or a warm cupcake at the last moment.
Red Velvet Cupcakes at a Glance
This recipe makes 12 standard filled and frosted red velvet cupcakes. The center is a chilled vanilla cheesecake cream added after baking, giving you a soft creamy pocket inside a fully baked cake rather than a cheesecake insert baked into the batter.
| Detail | What to Know |
|---|---|
| Texture | Tender red crumb, creamy center, smooth frosting |
| Flavor | Mild cocoa, vanilla, and cream cheese tang |
| Difficulty | Intermediate |
| Prep Time | About 45 minutes of active work |
| Bake Time | About 20 minutes; start checking at 18 minutes |
| Additional Time | About 85 minutes of net passive cooling and chilling |
| Total Time | About 2 hours 30 minutes to chilled readiness |
| Yield | 12 filled and frosted cupcakes |
| Method | Baked cupcakes with chilled filling and frosting |
| Pan | One standard light-metal 12-well muffin pan, approximately 1/2-cup (120 ml) wells |
| Best For | Birthdays, celebrations, and planned dessert gatherings |
| Make Ahead | Prepare the cakes and creams separately one day ahead; refrigerate the dairy creams |
The total includes preparing the two creams while the cakes cool. Cooling can take longer in a warm kitchen, and a short serving rest after refrigeration adds another 15–20 minutes. For a centerpiece in the same flavor family, our red velvet cake offers a layered dessert to slice and share.
Why These Filled Red Velvet Cupcakes Work
The cake, center, and frosting in these red velvet cupcakes have separate jobs. The batter for red velvet cupcakes needs enough tenderness for a soft bite and enough structure to survive coring; the two creams need different consistencies so the inside stays creamy and the top keeps a simple swirl.
Butter and oil work together. Butter supplies a familiar richness, while a smaller amount of neutral oil contributes to a tender mouthfeel. Keeping some butter also lets you cream the batter, instead of relying on a completely liquid fat mixture. The result to aim for is a fine, cohesive cake that sits comfortably beside the soft center.
The filling goes into fully cooled cake. Adding the vanilla cheesecake cream to fully cooled red velvet cupcakes preserves the filling’s soft, lightly aerated character. It also lets you see the cavity and control the amount of cream, rather than hoping a hidden spoonful will stay centered while the cake rises.
The frosting is a separate preparation. A center designed for a creamy spoonful does not need the same body as a piped finish. Keeping the preparations separate gives you control over the sweetness and texture of each, with less risk of making the filling stiff just to get a taller swirl.
The cavity stays modest. About 15 g filling gives the center a clear presence while leaving cake around and beneath it. The intact base matters more than forcing a measured portion into a smaller hole: a filled cupcake should still lift from its liner and hold together on a fork.

Why You’ll Love These Cream-Filled Cupcakes
Choose these cream-filled red velvet cupcakes when you want an individual celebration dessert and have time for cooling and finishing. The steps are approachable with ordinary baking tools, but the finished effect is more generous than a plain frosted cupcake.
Individual portions make serving easy. These red velvet cupcakes give you twelve separate desserts, so you can arrange a platter, fill a cupcake carrier, or set out a few portions at a time. There is no large cake to portion at the table, and each serving carries its own filling and frosting.
The center adds another creamy bite. The filling brings a softer vanilla-rich texture into the cake itself. It is especially appealing if you enjoy red velvet with cream cheese and want that contrast through the middle of the cupcake as well as on top.
You can split the preparation. Bake the cakes and prepare the creams the preceding day, holding each as directed below. That leaves the coring, filling, and piping for a shorter finishing session. The assembled red velvet cupcakes still need refrigerator space once assembled.
The decoration can stay simple. A large piping tip, a few turns of frosting, and crumbs from the removed centers are enough. You do not need a second sauce, elaborate sugar decorations, or a different topping to make the red and white contrast visible.
The Science Behind a Velvety Crumb and Creamy Center
Three small details have a practical effect on these red velvet cupcakes: the state of the butter, the balance of acidic ingredients and leaveners, and the way the cream is whipped and folded. Understanding them makes it easier to recognize when a mixture needs less mixing or a little more cooling.
How Butter and Oil Shape the Crumb
For red velvet cupcakes, pliable butter can trap air during creaming, while melted butter cannot hold that same creamed structure. Beat the butter and sugar until visibly lighter, then incorporate the oil. Once the flour is added, switch to gentle mixing so the crumb stays tender rather than becoming elastic from unnecessary mixing.
How Acid and Leaveners Create Lift
Cultured buttermilk, natural cocoa, and a little vinegar give red velvet cupcakes their particular acid balance. As King Arthur explains in its guide to how baking soda and baking powder work, baking soda needs an acidic partner, while baking powder includes an acid system. Keep both leaveners and the specified dairy in this recipe instead of exchanging them spoon for spoon.
Why Cold Cream Gives the Filling Its Lightness
Whipping cold high-fat cream builds the small air bubbles that lighten the filling. Smooth the cream cheese first, then fold in the separately whipped cream without beating out its air. A finished filling should leave a visible spoon track and hold a soft mound; a thin liquid mixture will not become a neat center simply because cake surrounds it.
Ingredients for the Cupcakes, Cheesecake Filling, and Frosting
The ingredients for these red velvet cupcakes are divided into the cake, the vanilla cheesecake filling, and the cream cheese frosting. Measure the two cream preparations separately so the small filling quantity stays distinct from the much larger frosting batch.

Ingredient List
Have the three groups measured before mixing, with the whipping cream kept cold and the cake ingredients at the temperatures described below. Weigh the flour and powdered sugar when possible, since scooping them firmly into a cup changes the amount.
For the Red Velvet Cupcakes
- 1 1/4 cups (150 g) all-purpose flour, spooned and leveled if measured by cups
- 4 teaspoons (7 g) natural unsweetened cocoa powder, sifted
- 1/2 teaspoon (2 g) baking powder
- 1/4 teaspoon (1.2 g) baking soda
- 1/4 teaspoon (1.5 g) fine salt
- 1/4 cup (57 g) unsalted butter, softened
- 3/4 cup (150 g) granulated sugar
- 3 tablespoons (45 ml) neutral oil, such as canola or sunflower oil
- 1 large egg (about 50 g without shell), at room temperature
- 1 teaspoon (5 ml) pure vanilla extract
- 1 teaspoon (5 ml) distilled white vinegar, 5% acidity
- 1 teaspoon (about 5 g) concentrated red gel food coloring suitable for baking
- 1/2 cup (120 ml) cultured buttermilk, at room temperature
For the Vanilla Cheesecake Filling
- 4 ounces (113 g) full-fat brick-style cream cheese, softened just until smoothable
- 3 tablespoons (21 g) powdered sugar, sifted
- 1/2 teaspoon (2.5 ml) pure vanilla extract
- 1 small pinch fine salt (about 0.2 g)
- 1/4 cup (60 ml) cold heavy whipping cream, at least 35% milk fat
For the Cream Cheese Frosting
- 1/2 cup (113 g) unsalted butter, softened
- 8 ounces (226 g) full-fat brick-style cream cheese, softened but still cool
- 3 cups (340 g) powdered sugar, sifted
- 1 teaspoon (5 ml) pure vanilla extract
- 1/8 teaspoon (0.7 g) fine salt
Choosing Cocoa, Cream Cheese, and Cream
In red velvet cupcakes, the dairy products and cocoa have more effect on the result than the brand name on the package. Use the ingredient types listed here, especially if you want the filling to stay softly creamy and the frosting to hold a simple piped shape.
Natural cocoa: These red velvet cupcakes have a mild cocoa flavor. Use natural unsweetened cocoa, with its usual warm brown color, rather than black cocoa or an equal-volume increase intended to make the cupcakes more chocolatey.
Cream cheese: Use full-fat, firm brick-style cream cheese for both creams. Whipped, low-fat, and loose spreadable products can give a softer mixture. Products sold in tubs outside the US vary, so do not assume packaging alone means the same water content or piping performance.
Heavy whipping cream: Choose at least 35% milk fat and keep it cold. The filling uses only 1/4 cup, so whip it in a small bowl with a hand mixer or whisk; a large stand-mixer attachment may not catch such a small quantity.
Buttermilk and butter: Cultured buttermilk belongs in this batter, and the butter should be pliable rather than melted or oily. Keep the measured dairy and fat amounts instead of replacing buttermilk with another liquid or trying to reduce the frosting sugar.
Color and oil: Concentrated red gel suitable for baking gives color without a large extra volume of liquid. Strength varies by product, so the final shade can vary. Canola or neutral sunflower oil works here. This batch of red velvet cupcakes is written for one standard pan; changing the pan size or mixing a much larger batch also changes the handling and baking demands.

Kitchen Tools for Baking, Filling, and Piping
One standard pan and a few ordinary tools are enough for red velvet cupcakes with a filled center. Check the well size before dividing the batter, and make sure there is room to cool the cakes and refrigerate the creams without crowding.
- Oven and pan: Conventional oven with a clear center rack; one light-colored metal 12-well muffin pan with approximately 1/2-cup (120 ml) brimful wells; and 12 standard paper liners. An oven thermometer is helpful.
- Measuring and preparation tools: Digital scale, measuring cups and spoons, sieve, mixing bowls, whisk, and silicone spatula.
- Mixing tools: Hand mixer or stand mixer with paddle or beaters for batter and frosting, plus a small chilled bowl and hand whisk or beaters for the 1/4 cup cream.
- Cooling and coring tools: Wire cooling rack, small sharp paring knife, and teaspoon to lift the center without tearing through the base.
- Filling, piping, and storage: Piping bags or a spoon for the filling, a large open-star or round tip for simple frosting swirls, a covered cupcake container, and a refrigerator at 40°F (4°C) or colder.
Before You Begin: Pan Size, Dairy, and Cooling
Set up the pan, ingredient temperatures, and cooling space before starting the batter. These checks are particularly useful for filled red velvet cupcakes because warm cake and loose dairy cream make the assembly harder to control.
- Use standard wells and liners, not mini, jumbo, or shallow fairy-cake cups.
- Preheat a conventional oven to 350°F (175°C) with the rack in the center.
- Have pliable cake butter and cool room-temperature egg and buttermilk ready.
- Check that both cream cheese portions are full-fat and firm, with no pooled liquid.
- Keep the whipping cream refrigerated and choose a bowl small enough to whip it.
- Clear a wire-rack area and enough refrigerator space for the creams and finished cupcakes.
What to Expect from These Filled Red Velvet Cupcakes
These filled red velvet cupcakes should have a fine red crumb around a distinct white cream pocket, with a smooth swirl above. The batter is scoopable rather than foamy, and the baked tops should be moderate enough to accept filling and frosting. The center stays softer than the frosting, while color intensity and the exact swirl silhouette vary with the coloring and piping.
How to Make Red Velvet Cupcakes with Cheesecake Filling
Make the red velvet cupcakes first, then use their cooling time to prepare the two creams. The order matters at assembly: the cake must be fully cool, the filling should hold a soft mound, and the frosting should keep a simple ridge before either cream goes into a piping bag.
1. Prepare the Pan and Ingredients
Preheat the conventional oven to 350°F (175°C) and line the 12 standard wells. Bring the egg and buttermilk to cool room temperature, and check that the cake butter indents under a finger without looking shiny or melted. Keep the whipping cream cold.
What you should see: A lined pan, pliable butter, and measured ingredients ready before the mixing begins.
2. Combine the Dry Ingredients
For the red velvet cupcakes, whisk the flour, sifted natural cocoa, baking powder, baking soda, and cake salt in a bowl until the cocoa is evenly distributed. Break up any remaining cocoa lumps now, rather than mixing the finished batter longer to remove them.
What you should see: A pale, evenly cocoa-colored dry mixture with no dark clumps.
3. Cream the Butter and Sugar
Beat the cake butter and granulated sugar on medium-high for about 2–3 minutes, scraping the bowl as needed. Once the mixture is visibly lighter and fluffy, beat in the oil on medium for about 30 seconds, just until incorporated.
What you should see: A lighter mixture with a little volume, rather than a dense butter-and-sugar paste.

4. Build the Emulsion
Beat in the egg for about 30–45 seconds, then add the vanilla, vinegar, and measured red gel. Scrape down the bowl. Small curdled-looking flecks may smooth when the flour is added; prolonged high-speed beating is not a useful way to chase them out.
What you should see: A broadly uniform red mixture, with the egg incorporated and no pool of unmixed oil.
5. Finish and Portion the Batter
On low speed, add one-third of the dry mixture, half the buttermilk, another third of the dry mixture, the remaining buttermilk, and the last dry mixture. Stop when incorporated and finish the bottom of the bowl with a spatula. Divide the available batter evenly among the 12 liners, approximately 49 g each, without filling any liner more than two-thirds full.
What you should see: Smooth, scoopable red batter and evenly filled wells with room for the cakes to rise. A little batter left on the bowl can change the exact portion weight.

Tip: Pan capacity takes priority over the approximate weight. If your wells are smaller, bake surplus separately instead of using the last spoonful to overfill the pan.

6. Bake and Cool Completely
Bake the red velvet cupcakes for approximately 18–22 minutes, checking first at 18 minutes. The tops should be set and lightly spring back, and a toothpick in the center should have no wet batter; a few moist crumbs are fine. Cool in the pan for 5 minutes, then transfer to a rack until the centers and bases feel completely cool, usually another 55–70 minutes.
What you should see: Set tops without hard browned rims, followed by cakes that have lost their warmth all the way through.
BDV Tip: If a fully cooled cake feels delicate under the knife, an extra 10–15 minutes in the refrigerator can make coring easier. That short rest does not replace cooling the warm cakes on the rack.

7. Make the Vanilla Cheesecake Cream
While the red velvet cupcakes cool, beat the filling cream cheese on low-medium for about 30–60 seconds, just until smooth. Mix in its powdered sugar, vanilla, and salt. In a separate small chilled bowl, whip the cold cream to firm peaks that stand with only the tip slightly bending. Fold one-third into the cheese to loosen it, then gently fold in the rest. Cover and refrigerate for at least 30 minutes while the cakes finish cooling.
What you should see: Smooth, softly aerated filling that holds a mound and a spoon track, without a liquid pool or grainy whipped cream.
If the filling is too soft, chill it for another 15 minutes and check again. Do not fill the cakes with a runny mixture or beat the folded cream hard in an attempt to thicken it.

8. Make the Cream Cheese Frosting
Beat the frosting butter for about 1 minute until smooth. Add the frosting cream cheese and beat on medium for only about 30–60 seconds, until combined. On low speed, add the powdered sugar in three batches, then the vanilla and salt. Scrape the bowl and mix for about 30 seconds to finish. Add no milk or cream. Cover and chill for about 20–30 minutes if the frosting is too soft, overlapping the cake cooling time.
What you should see: Smooth frosting with defined ridges that remain visible when a spoon or spatula is lifted through it.
Before frosting red velvet cupcakes, give soft frosting another short cold rest if the piping test slumps. Long beating warms the mixture, and chilling cannot always correct the texture of a loose spreadable cream cheese.

9. Core the Cooled Cupcakes
Use a small paring knife to cut a center about 1 1/8 inches (3 cm) across and up to 1 inch (2.5 cm) deep from each completely cooled red velvet cupcake. Leave at least 3/8 inch (1 cm) of cake at the base, with ample wall around it. Lift out the core, and reserve it for a little crumb garnish.
What you should see: A central cavity surrounded by intact red cake, with no opening through the bottom. The actual depth depends on the cake height; protecting the base comes first.

10. Fill the Centers
Spoon or pipe about 15 g chilled vanilla cheesecake cream into each center, stopping level with or slightly below the top. Do not press the cream into the cake or enlarge a fragile cavity just to use the target weight. A smaller cavity may take less filling, and the frosting will cover the opening without a cake cap.
What you should see: A neat creamy pocket inside the cupcake, with no bulging wall or cream spilling over the rim.

11. Pipe and Garnish
Pipe a small test swirl first. If it holds its ridges, use approximately 55 g frosting per cupcake in two or three simple turns, about 1–1 1/2 inches (2.5–4 cm) high above the cake. Exact height depends on the tip and frosting density. If you like, finish with about 1 g finely crumbled red cake from the removed cores.
What you should see: A generous, smoothly defined swirl supported by the cake, with only a light scattering of crumbs. There is no need to use every leftover crumb.

12. Chill and Serve
Refrigerate the filled and frosted red velvet cupcakes for about 30 minutes before handling or transport. For a softer eating texture, take out only the portions needed about 15–20 minutes before serving. Keep the remaining batch refrigerated and count that serving rest within the handling limits in the storage section.
What you should see: A settled swirl and an intact cupcake that can be moved without the center or frosting sliding.
How to Tell When the Cupcakes and Creams Are Ready
Judge the red velvet cupcakes and creams as separate components before bringing them together. The cake needs a fully baked center and time to cool; the filling needs a softly held shape; the frosting needs enough body to keep a ridge. None needs to look stiff or dry.
Baked Cupcake Cues
Start checking at 18 minutes and use the center of the cake, not its red color, to judge the bake. A lightly springing top and no wet batter on the toothpick indicate that the cake is set. After cooling, red velvet cupcakes should have a tender, cohesive crumb, with small irregular pores. A sticky raw paste, sunken wet middle, or gummy streak is different from desirable moistness.

A hard rim or crumb that breaks into dry crumbs can point toward too much flour or too much baking. Adding filling may soften the overall bite, but it cannot repair the structure of an overbaked or underbaked cake.
Filling and Frosting Cues
The cheesecake cream should keep a soft mound and a spoon track after chilling. The frosting should keep the ridges from a spoon or piping test. Both should feel smooth rather than grainy or oily. If either mixture flows into a puddle, pause assembly and check its temperature and ingredient type instead of relying on the cupcake to hold it in place.
Expert Tips for a Creamy Center and Defined Swirl
For red velvet cupcakes with a creamy center, small assembly decisions matter more than extra decoration. Keep the cake shell intact, respect the difference between the creams, and choose a swirl that the frosting can support comfortably.
Two Creams, Two Jobs
Choosing a filled cupcake changed the way I planned the cream cheese components. The center needed a soft vanilla cheesecake cream, while the swirl needed a firmer frosting with enough body for piping.
| Component | Its Job | Approximate Portion | Useful Cue |
|---|---|---|---|
| Vanilla cheesecake filling | A soft creamy pocket inside the cake | 15 g per cupcake, or less if the cavity is smaller | Holds a soft mound and a spoon track |
| Cream cheese frosting | A smooth, simple piped finish | 55 g per cupcake | Holds a visible ridge and a test swirl |
The filling is not a way to use up a little spare frosting. Measure the preparations separately and stop at their own texture cues, so the center stays softly creamy without asking the same mixture to carry a tall finish.

Protect the Cake and Keep the Swirl Simple
A smaller cavity in a delicate cake is better than a thin wall that splits under the cream. Keep the liners around the red velvet cupcakes during coring and filling, and let the remaining cake support the center. For the swirl, make a broad base and a few controlled turns rather than a narrow tower.
For a future cupcake project that calls for more detailed piping, our buttercream frosting guide covers a different decorating style. The cream cheese frosting here is intended for a simple generous finish, especially when kept cool.
Common Red Velvet Cupcake Mistakes and How to Fix Them
When red velvet cupcakes do not look or feel right, the symptom can help narrow the cause. Use the texture and handling clues below, and keep the limits realistic: a cold rest can help a soft cream, but it cannot bake a raw center or rebuild a broken cake wall.
| Mistake | What Happens | Why It Happens | How to Prevent or Fix It |
|---|---|---|---|
| Measuring too much flour or baking too long | Dry crumb or hard edges | The batter is too flour-heavy or loses too much moisture in the oven | Weigh the flour, check early, and stop at the set-center cues. |
| Overfilling the wells or removing the pan too early | Overflowed tops or a sunken wet middle | The pan is too full or the center has not set | Keep below two-thirds full and use springback plus the toothpick cue. |
| Coring while the cake is warm | Torn edges and a fragile cavity | The crumb has not cooled enough to handle cleanly | Cool completely; give delicate cooled cakes a short refrigerator rest. |
| Removing too much cake | A split wall or cream escaping below | The remaining base or wall is too thin | Keep at least 1 cm cake at the base and accept a smaller cavity. |
| Using loose dairy products or overworking a cream | Runny or grainy filling/frosting | Product composition, warmth, or excessive mixing changes the texture | Use the specified dairy, stop at the cue, and chill a soft mixture before reassessing. |
| Forcing in extra filling | Bulging cake or an overflowing center | The cavity cannot hold the intended amount | Fill only what fits level with or below the top. |
| Piping onto warm cake or building too high | A sliding or slumping swirl | Heat softens the frosting or the shape exceeds its support | Use completely cool cake and a firm piping test, then keep the swirl modest. |
Beautiful Ways to Serve Red Velvet Cupcakes
The red and white contrast gives these red velvet cupcakes plenty of presence without adding another topping. Choose a presentation that shows the cream, protects the swirl, and lets you serve only the portions needed while the rest stays chilled.
Show the Creamy Center on a Dessert Plate
To show the center of red velvet cupcakes, place one on a small white dessert plate and cut it through the center just before serving. The exposed cream pocket and the red cake around it make the filling easy to appreciate. Keep the portion upright rather than pulling away so much cake that the cream loses its support.

Arrange a Celebration Platter
Arrange the red velvet cupcakes in a loose, even group on a platter, leaving a little space around the swirls. For a longer gathering, bring out a few chilled portions at a time and replace the platter as needed. The same crumb finish on each cupcake makes the batch look cohesive without extra decorations.

Pair with Coffee or Tea
A plain coffee or tea makes a quiet companion to red velvet cupcakes with cream cheese and vanilla. Serve the drink alongside the dessert plate, giving the rich cupcake room to be the main sweet element. A small fork is useful for catching cake, filling, and frosting together in one bite.

Share Individually Packed Cupcakes
Use a cupcake box with an insert and enough height above the frosting, so the swirl does not touch the lid. Individually packed red velvet cupcakes still need chilled holding and transport. The box protects the shape; it does not replace refrigeration.

How to Decorate Red Velvet Cupcakes for Halloween
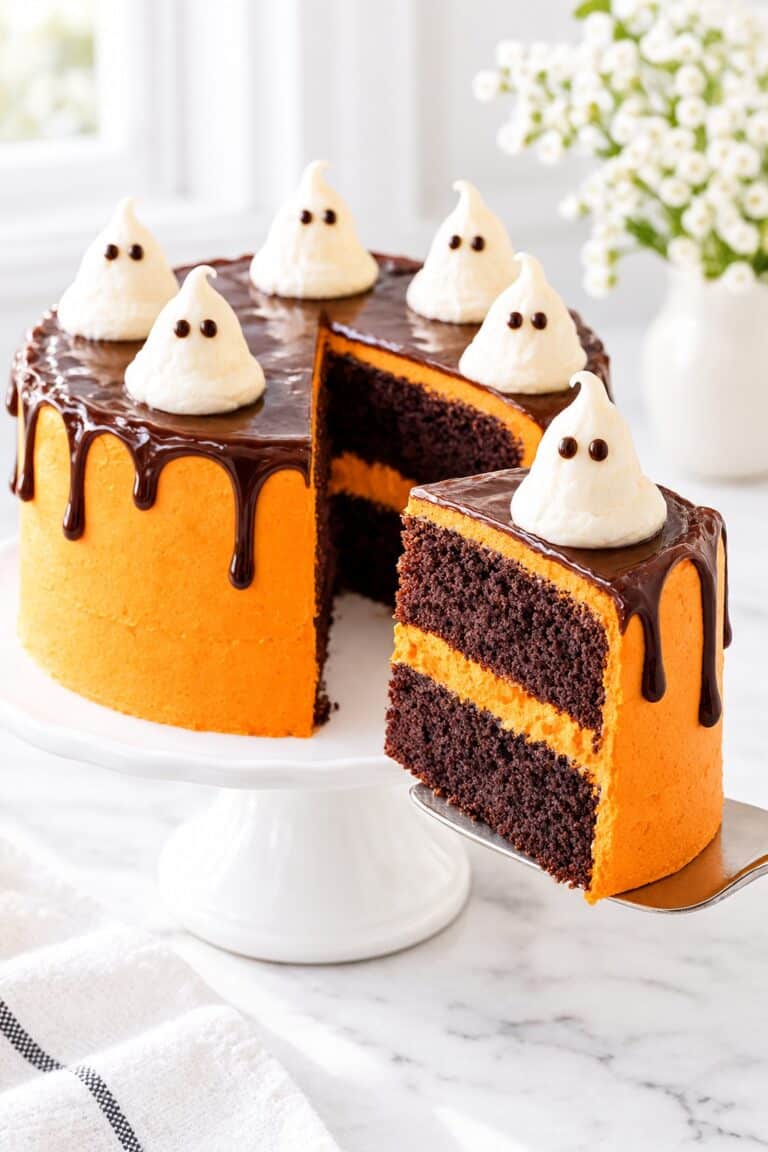
Turn these filled red velvet cupcakes into little Halloween centerpieces with bright orange cream cheese frosting, black sprinkles, and white ghosts framed by black bat wings. The vanilla cheesecake filling stays inside, so the Halloween finish adds color and character to the same creamy dessert.

To recreate this design, make lightweight sugar-paste toppers ahead of time, let them dry until firm, and add them shortly before serving. Each topper consists of a white ghost attached to a connected pair of black wings.
Ingredients and Tools for 12 Halloween Cupcakes
For the cupcakes and orange frosting:
- 12 completely cooled red velvet cupcakes, filled with the vanilla cheesecake cream from this recipe
- 1/2 cup (113 g) unsalted butter, softened
- 8 ounces (226 g) full-fat brick-style cream cheese, softened but still cool
- 3 cups (340 g) powdered sugar, sifted
- 1 teaspoon (5 ml) pure vanilla extract
- 1/8 teaspoon (0.7 g) fine salt
- Concentrated orange gel food coloring, starting with about 1/8 teaspoon and adding a little more as needed
- About 2 tablespoons black sugar strands
- About 1 tablespoon small black sugar pearls
- 1 teaspoon orange or copper-colored sprinkles, optional
For the ghost and bat-wing toppers:
- 250 g white, firm-setting edible modelling paste
- 200 g black, firm-setting edible modelling paste
- A small amount of edible sugar glue
- A little cornstarch for rolling
These paste quantities allow for rolling, trimming, and a few spare pieces. Choose modelling paste intended for freestanding cake decorations; soft fondant designed for covering cakes can leave the wings too flexible.
You will also need: a piping bag, a large open-star tip such as a Wilton 1M, a small rolling pin, parchment paper, a small food-only brush, a sharp craft knife reserved for food, and a blunt modelling tool. Ghost and bat cutters are helpful, but simple paper templates work too.
Make the Ghosts and Bat Wings Ahead
1. Cut the connected wings. Roll the black modelling paste about 1/8 inch (3 mm) thick on a lightly dusted surface. Cut 12 connected pairs of wings, each approximately 3–3 1/2 inches (8–9 cm) across.
Keep a solid central bridge about 3/4 inch (2 cm) wide between the wings. This hidden section supports the ghost and makes the decoration easier to handle than two separate wings.
Shape each wing with a raised outer point and two or three curved scallops along its lower edge. The finished outline should resemble an open pair of bat wings.
2. Add the wing details. Use a blunt modelling tool to press two shallow lines from the inner base toward the outer points of each wing. For the slightly raised detailing in the photograph, attach very thin ropes of black paste along those lines with a barely damp brush of edible glue. Keep the details light so the wings remain easy to support.
3. Shape the white ghosts. Roll the white paste about 3/32 inch (2–3 mm) thick. Cut 12 ghosts approximately 1 3/4 inches (4.5 cm) tall and 1 1/4–1 1/2 inches (3–3.5 cm) wide.
Give each ghost a smoothly rounded head, gently widening sides, and three or four soft scallops along the bottom. Avoid pointed arms: the pictured ghosts have a simple sheet-like silhouette.
Gently curl one or two lower edges outward and press a few shallow vertical folds into the lower half. Keep the face area smooth and the back mostly flat for attaching to the wings.
4. Add the faces. For each ghost, flatten two tiny black ovals, about 1/8 inch (3 mm) long, for the eyes. Make a slightly larger oval, approximately 3/16 × 1/4 inch (5 × 7 mm), for the open mouth. Attach them with tiny dots of edible glue, placing the mouth centrally below the eyes.
5. Dry before assembling. Lay the pieces on parchment in a cool, dry place, protected from dust. Allow approximately 24–48 hours, depending on the paste and humidity. The wings should lift without bending at the center. Firm decorations need advance drying; Wilton also recommends making hardened fondant decorations ahead of time.
6. Join each topper. Brush a thin layer of edible glue onto the central bridge of a wing piece. Position a ghost over it, with the wings extending behind its shoulders and the white scalloped hem sitting slightly below the black center. Let the assembled toppers dry flat until the joins hold securely.
Make and Pipe the Orange Cream Cheese Frosting
1. Prepare the frosting. Beat the butter for about 1 minute until smooth. Add the cream cheese and mix on medium for only 30–60 seconds, until combined. Add the powdered sugar in three batches on low speed, followed by the vanilla and salt.
This is the frosting batch already included in the main recipe, tinted orange for Halloween.
2. Build the orange color gradually. Fold in the orange gel with a spatula, starting with a small amount. Aim for a clear pumpkin orange. Concentrated gel gives stronger color with less added liquid than liquid food coloring.
3. Check the consistency. Lift a little frosting with a spatula. It should leave a defined ridge rather than immediately flowing smooth. If soft, cover and refrigerate for 20–30 minutes, then stir gently. Do not add milk or cream.
4. Pipe broad, ridged swirls. Fit the piping bag with the large open-star tip and fill it halfway. Hold the bag upright, with the tip approximately 1/4 inch (5 mm) above the cupcake.
Starting just inside the cake’s edge, pipe one broad circle, then continue inward and upward for another one or two turns. Release pressure before lifting the tip. Use approximately 55 g frosting per cupcake, keeping a narrow border of red cake visible around the orange swirl.
What you should see: a generous orange spiral with clear star-tip ridges and a broad base that can support the decoration.
Add the Sprinkles and Ghost Toppers
Scatter the black strands and sugar pearls over the upper half of each fresh swirl. Keep the orange ridges visible rather than coating the frosting completely. Add just a few orange or copper sprinkles if using.
Refrigerate the frosted cupcakes for about 30 minutes to firm the swirls. Shortly before serving, position one dried ghost-and-wing topper upright in the center of each cupcake. Press only the bottom 1/4 inch (5–7 mm) into the frosting, supporting the decoration by its central body rather than the wing tips.
Face all the ghosts forward for a neat platter, or turn a few slightly for a more relaxed arrangement.
Tip: Store the dried toppers separately and add them near serving time. This helps protect their shape and keeps black coloring from marking the white ghosts or orange frosting.
Make-Ahead and Serving Notes
Prepare the sugar decorations one or two days ahead. Keep them dry at room temperature in a food-safe box, away from steam and direct sunlight.
Keep the filled and frosted cupcakes refrigerated at 40°F (4°C) or colder, following the storage guidance below. Take out only the portions needed and allow about 15–20 minutes for the cake and frosting to soften slightly. Count decorating and serving time toward the total time outside refrigeration. Perishable foods should not remain out for more than two hours, or one hour above 90°F (32°C).
The modelling-paste decorations are edible but dry firm, so they can be lifted off before eating. The optional sugar toppers and sprinkles add to the nutrition values listed for the original cupcakes.
How to Store, Make Ahead, and Freeze Filled Cupcakes
Store assembled red velvet cupcakes covered in the refrigerator at 40°F (4°C) or colder. Their texture is best within 1–2 days; use them within 3 days while respecting the use-by dates of the dairy ingredients and keeping them continuously refrigerated between brief handling periods.
Refrigerating the Filled Cupcakes
Choose a container tall enough to keep the cover clear of the frosting. Refrigeration firms both creams and the butter in the cake, so take out just the portions you need for a short softening period before serving. Keep the remaining red velvet cupcakes cold instead of tempering the whole batch repeatedly.

Preparing the Components Ahead
Bake the plain cakes up to one day ahead, cool completely, and keep them airtight at a cool room temperature. Prepare the filling and frosting up to one day ahead and refrigerate them separately. Stir the folded filling gently if needed; do not rewhip it aggressively. Let the frosting soften only until pipeable and mix gently before finishing.
Assemble the red velvet cupcakes on the day of serving or the preceding day, then cover and refrigerate. Keep track of dairy handling time during preparation as well as display. Having the components ready is useful, but a warm countertop is not a holding place for the cream.
Freezing and Thawing the Plain Cakes
For the preferred freezer route, wrap the fully cooled unfilled and unfrosted cakes individually and seal them in a freezer container for up to 2 months. Thaw them wrapped overnight in the refrigerator, then fill and frost. Keeping the creams out of this freezer step avoids relying on the whipped filling to thaw with the same texture.
The complete filled cupcakes are not the recommended freezer route here. Do not reheat red velvet cupcakes once the chilled filling and frosting have been added; use the brief serving rest to soften their texture instead.
Transporting and Tempering Before Serving
Transport the covered red velvet cupcakes chilled, with a supportive insert and enough headroom for the frosting. The optional 15–20 minute rest before eating counts toward the same cumulative room-temperature handling limit as preparation and display.
Follow the FDA guidance on keeping perishable foods cold: keep cold food at 40°F or colder and discard perishables left above refrigerated holding temperatures for more than 2 hours, or 1 hour when the surrounding temperature exceeds 90°F (32°C). Putting them back in the refrigerator does not restart that clock.
A Make-Ahead Timeline for Red Velvet Cupcakes
Allow about 2 hours 30 minutes for red velvet cupcakes that are filled, frosted, and chilled enough to handle. The useful overlap is making the two creams while the cake cools. Plan extra time if the room is warm or you want the cupcakes to soften briefly before eating.
| Approximate Window | What to Prepare | Readiness Dependency | Holding |
|---|---|---|---|
| 0–20 minutes | Mix and portion the batter | Pan and ingredients ready before mixing | Bake promptly after portioning |
| 20–40 minutes | Bake the cupcakes | Center cues determine the endpoint | Five minutes in the pan, then rack |
| 40–105 minutes | Cool cakes; make the two creams during this window | Cakes completely cool before coring; creams reach their own texture cues | Cover and refrigerate both creams |
| 105–120 minutes | Core, fill, and pipe | Intact cake base, mound-holding filling, ridge-holding frosting | Keep handling time brief |
| 120–150 minutes | Chill the assembled batch | Swirls settle before moving or packing | Covered refrigeration |
These are planning windows for red velvet cupcakes, so wait longer if a cake still feels warm. A practical range is about 2 hours 15 minutes to 2 hours 45 minutes, with the optional 15–20 minute serving rest afterward. For an event deadline, aim to have the batch finished early and hold it chilled.
Red Velvet Cupcake Questions, Answered
The filling and frosting add a few practical questions to making red velvet cupcakes. These short answers give you the key condition to check, while the method and storage guidance above provide the fuller explanation.
What flavor are red velvet cupcakes?
Mild cocoa and vanilla are the main flavors in red velvet cupcakes, with a light tang from the buttermilk. This version adds a softly creamy vanilla cheesecake center and cream cheese frosting, so the dairy contrast is part of the whole bite.
Do these filled cupcakes need to be refrigerated?
Yes. These red velvet cupcakes contain both a chilled dairy filling and cream cheese frosting. Keep them covered at 40°F (4°C) or colder and use within 3 days under the storage conditions above; a brief serving rest is included in the total handling time.
Can I make red velvet cupcakes ahead of time?
Yes. You can prepare the plain red velvet cupcakes and both creams separately one day ahead, storing each as directed. Fill and pipe them on serving day, or assemble the preceding day and refrigerate the finished batch. Do not leave the creams on the counter while waiting.
Can I freeze these filled cupcakes?
Freeze plain, unfilled and unfrosted red velvet cupcakes for up to 2 months, then thaw wrapped in the refrigerator before finishing. This is the preferred route; the complete cupcakes with their softly whipped center are not the freezer recommendation for this recipe.
Why is my cream cheese frosting runny?
First check the cream cheese type and whether the mixture became warm or was beaten too long. Use firm full-fat cream cheese and give soft frosting a short refrigerator rest before testing a swirl. Adding unmeasured sugar or beating longer is not a dependable fix.
Why are my red velvet cupcakes dry?
Too much flour or too much oven time can make red velvet cupcakes dry. Weigh the flour, begin checking at 18 minutes, and stop when the center is set without wet batter. Do not wait for a browned rim or an entirely dry crumb on the toothpick.
Why did my cupcakes sink in the middle?
Red velvet cupcakes can sink because of an unset center, overly full wells, or mixing and oven issues. Check the center for wet batter and compare your fill height with the two-thirds limit. Appearance alone does not identify one cause, and frosting should not be used to hide raw cake.
Why did the cupcakes turn brown instead of red?
The shade of red velvet cupcakes depends on the coloring concentration and type, while cocoa also contributes brown color. Use the specified natural cocoa and concentrated baking-suitable red gel. Natural coloring and different gel brands can give a different result; the exact red shade is not a doneness cue.
Can I replace the buttermilk?
Use cultured buttermilk for this version. Another milk, sour cream, or an acidic liquid changes more than flavor and is not an equal swap in these red velvet cupcakes. Keep the measured amount rather than borrowing a substitution from another recipe.
Why did my pan make a different number of cupcakes?
Muffin-pan wells vary in size. The twelve-piece yield for red velvet cupcakes assumes standard wells of about 1/2 cup (120 ml) brimful capacity, with batter no higher than two-thirds full. The approximate 49 g portion is a guide; smaller wells may leave surplus to bake separately.
How much filling goes in each cupcake?
Aim for about 15 g chilled cheesecake cream per cupcake, stopping at or below the cake top. Use less if that is all the cavity holds without pressure. Preserve the cake beneath the center rather than making a larger hole to force in the full amount.
Is the cheesecake filling baked inside?
No. Bake and fully cool the red velvet cupcakes first, then remove a central core and add the chilled vanilla cheesecake cream. The filling stays a soft creamy pocket; it is not an egg-based cheesecake mixture that goes into the oven.
Continue Your Baking Journey with Cupcakes and Creamy Desserts
If you enjoy the contrast in red velvet cupcakes, a different cake format or cream-filled dessert can be a natural next project. These recipes give you three directions to explore, depending on whether you want cocoa, brighter cupcake flavors, or a larger creamy dessert.
For More Cocoa and Red Velvet Bakes
Stay with cocoa or the red velvet flavor family, while changing the bite from a filled cake to a bar, cookie, or different cupcake.
- Red Velvet Brownies: Try the flavor family as a rich bar.
- Red Velvet Cookies: Choose a cookie format.
- Chocolate Cupcake Recipe: Choose an explicitly chocolate-forward filled cupcake.
- Oreo Cupcakes: Explore cookies-and-cream flavor.
For Bright and Classic Cupcake Flavors
Choose a lighter flavor direction when you want vanilla, citrus, or fruit to lead the next cupcake batch.
- Vanilla Cupcakes: Bake a classic vanilla batch.
- Lemon Cupcakes: Try a citrus cupcake.
- Strawberry Cupcakes: Choose a fruit-led cupcake.
- Apple Cupcakes: Pair apple cake with cream cheese frosting.
For Creamy Celebration Desserts
Move toward warm spices and cream cheese, or choose a full-size creamy dessert when cupcakes are not the format you need.
- Carrot Cake Cupcakes: Explore carrot and warm spices.
- Pumpkin Cupcakes: Choose pumpkin and cream cheese frosting.
- Pumpkin Pie Cupcakes: Explore the distinct pumpkin-pie-inspired recipe.
- New York Cheesecake: Switch to a full-size creamy dessert.
Why These Cupcakes Belong in Your Recipe Box
Keep this recipe for red velvet cupcakes when you want the cake, two creams, and finishing schedule together in one place. Its lasting usefulness comes from having the small preparation decisions available again when you plan another filled batch.
- Complete Component Reference: The measured cake, filling, and frosting remain together for straightforward shopping and preparation.
- Clear Texture Benchmarks: The cake and two cream cues help you judge each component before assembly.
- Useful Buying Notes: The dairy and cocoa specifications make it easier to choose ingredients for a future batch.
- A Coordinated Schedule: The cooling and cream-preparation windows show where you can work ahead without rushing the cake.
- Practical Rescue Limits: The troubleshooting distinguishes a cream that may benefit from chilling from a cake problem that cream cannot repair.
- A Reliable Format Guide: The pan, portion, and cavity notes keep the intended size of the dessert clear when you return to it.
A Final Note on Filled Red Velvet Cupcakes
The pleasure of filled red velvet cupcakes is in their contrast: a tender red cake, a cool vanilla center, and a smooth swirl above. Each part brings a different texture to the same familiar flavor pairing.
They suit the kind of occasion where a small dessert can feel considered and generous at once. The filled center gives the cupcake its own character, while the red and white finish keeps the presentation recognizable.
The hidden cheesecake center gives this version its own character. Even beneath that familiar red velvet finish, there is still a little surprise waiting beyond the swirl.

Red Velvet Cupcakes with Vanilla Cheesecake Filling
These red velvet cupcakes pair a tender, mildly cocoa-flavored cake with a chilled vanilla cheesecake filling and a generous cream cheese frosting swirl. The two creams have separate textures: a soft center and a firmer piped finish.
Ingredients
For the Red Velvet Cupcakes
- 1 1/4 cups (150 g) all-purpose flour, spooned and leveled if measured by cups
- 4 teaspoons (7 g) natural unsweetened cocoa powder, sifted
- 1/2 teaspoon (2 g) baking powder
- 1/4 teaspoon (1.2 g) baking soda
- 1/4 teaspoon (1.5 g) fine salt
- 1/4 cup (57 g) unsalted butter, softened
- 3/4 cup (150 g) granulated sugar
- 3 tablespoons (45 ml) neutral oil, such as canola or sunflower oil
- 1 large egg (about 50 g without shell), at room temperature
- 1 teaspoon (5 ml) pure vanilla extract
- 1 teaspoon (5 ml) distilled white vinegar, 5% acidity
- 1 teaspoon (about 5 g) concentrated red gel food coloring suitable for baking
- 1/2 cup (120 ml) cultured buttermilk, at room temperature
For the Vanilla Cheesecake Filling
- 4 ounces (113 g) full-fat brick-style cream cheese, softened just until smoothable
- 3 tablespoons (21 g) powdered sugar, sifted
- 1/2 teaspoon (2.5 ml) pure vanilla extract
- 1 small pinch fine salt (about 0.2 g)
- 1/4 cup (60 ml) cold heavy whipping cream, at least 35% milk fat
For the Cream Cheese Frosting
- 1/2 cup (113 g) unsalted butter, softened
- 8 ounces (226 g) full-fat brick-style cream cheese, softened but still cool
- 3 cups (340 g) powdered sugar, sifted
- 1 teaspoon (5 ml) pure vanilla extract
- 1/8 teaspoon (0.7 g) fine salt
Instructions
- Prepare the Pan and Ingredients. Preheat a conventional oven to 350°F (175°C), with the rack in the center. Line a light-colored metal 12-well muffin pan with standard paper liners; the wells should hold approximately 1/2 cup (120 ml) brimful. Have the egg and buttermilk at cool room temperature. The cake butter should indent under a finger without looking melted or oily. Keep the whipping cream refrigerated.
- Combine the Dry Ingredients. For the red velvet cupcakes, whisk the flour, sifted natural cocoa, baking powder, baking soda, and cake salt together until evenly colored, with no cocoa clumps.
- Cream the Butter and Sugar. Beat the cake butter and granulated sugar on medium-high for 2–3 minutes, scraping the bowl, until visibly lighter and fluffy. Beat in the oil on medium for about 30 seconds, just until incorporated.
- Build the Emulsion. Beat in the egg for about 30–45 seconds, then add the cake vanilla, vinegar, and measured red gel. Scrape the bowl. The mixture should be broadly uniform and red; small curdled-looking flecks may smooth when the flour is added. Do not keep beating at high speed to remove them.
- Finish and Portion the Batter. On low speed, add one-third of the dry mixture, half the buttermilk, another third of the dry mixture, the remaining buttermilk, and the last dry mixture. Stop when incorporated and finish the bowl bottom with a spatula. Divide the smooth, scoopable batter evenly among the 12 liners, approximately 49 g each, keeping every liner below two-thirds full. If your wells are smaller, bake surplus separately rather than overfill.
- Bake and Cool Completely. Bake the red velvet cupcakes for 18–22 minutes, checking first at 18 minutes. The tops should be set and lightly spring back; a toothpick in the center should show no wet batter, though a few moist crumbs are fine. Cool in the pan for 5 minutes, then on a rack until the centers and bases are completely cool, usually another 55–70 minutes. A delicate cooled cake may benefit from an extra 10–15 minutes in the refrigerator before coring.
- Make the Vanilla Cheesecake Cream. While the cakes cool, beat the filling cream cheese on low-medium for 30–60 seconds until smooth. Mix in its powdered sugar, vanilla, and salt. In a separate small chilled bowl, whip the cold cream to firm, smooth peaks that stand with only the tip slightly bending. Fold one-third into the cheese, then gently fold in the remainder. Cover and refrigerate at least 30 minutes. It should hold a soft mound and spoon track, with no liquid pool. If soft, chill another 15 minutes and reassess; do not fill the red velvet cupcakes with runny cream.
- Make the Cream Cheese Frosting. Beat the frosting butter for about 1 minute until smooth. Add the frosting cream cheese and beat on medium for only 30–60 seconds, until combined. On low speed, add its powdered sugar in three batches, then vanilla and salt. Scrape and mix for about 30 seconds to finish. Stop when smooth with defined ridges. Add no milk or cream. Cover and chill for 20–30 minutes if soft, overlapping cake cooling. If a test swirl slumps, chill briefly again rather than beating longer; loose spreadable cream cheese cannot always be corrected by chilling.
- Core the Cooled Cupcakes. Core the completely cooled red velvet cupcakes with a small paring knife, cutting a cavity about 1 1/8 inches (3 cm) across and up to 1 inch (2.5 cm) deep. Leave at least 3/8 inch (1 cm) of cake at the base and ample intact wall. Protect the base instead of chasing a fixed depth. Lift out the cores and reserve a little for a crumb garnish.
- Fill the Centers. Spoon or pipe about 15 g chilled vanilla cheesecake cream into each cavity, stopping level with or slightly below the cake top. Use less if that is all the cavity holds without pressure. Do not compress the cake or enlarge a fragile hole to force in the target amount. The frosting covers the opening; no cake cap is needed.
- Pipe and Garnish. Pipe a small test swirl. When it holds its ridges, pipe approximately 55 g cream cheese frosting onto each cupcake in two or three simple turns, about 1–1 1/2 inches (2.5–4 cm) above the cake. The tip and frosting density affect the exact height. If desired, finish the red velvet cupcakes with about 1 g finely crumbled cake per cupcake from the removed cores.
- Chill and Serve. Refrigerate the filled and frosted red velvet cupcakes for about 30 minutes before handling or transport. For a softer eating texture, take out only the servings needed 15–20 minutes before serving, keeping the remainder refrigerated. Count this rest within the cumulative handling limits in the storage note.
Notes
Equipment:
- One light-colored metal 12-well muffin pan with standard liners and approximately 1/2-cup (120 ml) brimful wells; conventional oven with center rack.
- Digital scale, measuring cups and spoons, sieve, mixing bowls, whisk, and silicone spatula.
- Hand mixer or stand mixer with paddle or beaters; small chilled bowl and hand whisk or beaters for the 1/4 cup cream.
- Wire rack, small paring knife, and teaspoon.
- Piping bags or spoon, large open-star or round piping tip, covered cupcake container, and refrigerator at 40°F (4°C) or colder.
Ingredient Types: For red velvet cupcakes with this filling and frosting, use natural unsweetened cocoa, cultured buttermilk, concentrated red gel suitable for baking, and firm full-fat brick-style cream cheese. Whipped, low-fat, or loose spreadable cream cheese can make the creams too soft. Keep the whipping cream cold and use at least 35% milk fat. Canola or neutral sunflower oil is suitable. Color strength varies by product.
Pan and Portions: This recipe makes 12 standard red velvet cupcakes. Weigh the flour and powdered sugar when possible. Pan fill takes priority over the approximate 49 g batter portion, and an intact cake base takes priority over the 15 g filling target. The filling and frosting are separate preparations; do not exchange them.
Timing: The 2 hours 30 minutes total includes making both creams while the red velvet cupcakes cool. The 85 minutes additional time is net passive time in that overlapping schedule, not the sum of every cooling and chilling timer. Allow longer if the cakes remain warm or a cream needs more chilling. The optional 15–20 minute serving rest is additional.
Storage and Transport: Store covered red velvet cupcakes at 40°F (4°C) or colder. Best texture is within 1–2 days; use within 3 days, respecting dairy use-by dates. Transport chilled with room above the swirls. Keep cumulative time above refrigerated holding temperatures to no more than 2 hours, or 1 hour if the surroundings exceed 90°F (32°C), including preparation, display, and the serving rest. Discard after those limits; refrigeration does not restart the clock. Do not reheat filled and frosted cupcakes.
Make Ahead and Freeze: Bake the plain red velvet cupcakes one day ahead, cool completely, and hold airtight at a cool room temperature. Prepare the creams one day ahead and refrigerate separately. Stir the filling gently if needed; let the frosting soften only until pipeable and mix gently. Assemble on serving day or the preceding day, then refrigerate. For freezing, wrap completely cooled, unfilled and unfrosted cakes individually, seal in a freezer container for up to 2 months, and thaw wrapped overnight in the refrigerator before filling and frosting. Freezing the complete whipped-cream-filled cupcakes is not the recommended route.
Nutrition: Nutrition is an estimate per filled and frosted cupcake. The cake crumbs used for garnish come from the removed centers.
Nutrition Information:
Yield: 12 Serving Size: 1 cupcakeAmount Per Serving: Calories: 473Total Fat: 27gSaturated Fat: 14.5gCholesterol: 80mgSodium: 236mgCarbohydrates: 55.2gFiber: 0.6gSugar: 44.2gProtein: 4.3g
Nutrition information is provided as an estimate only and may vary based on specific ingredients, brands, and portion sizes used. This information should not be considered medical or nutritional advice.
12 Sweet Favorites — Yours, Free 🍰
Tiramisù, no-bake cheesecake, the perfect chocolate chip cookie & 9 more reader-loved desserts — gathered into one beautiful free recipe book. From my kitchen to yours.
No spam, just sweet things. Unsubscribe anytime.