Pumpkin Lush (Creamy Spiced Layers over Buttery Pecan Crust)
Pumpkin Lush is a four-layer chilled dessert with a baked pecan crust, a tangy cream cheese layer, spiced pumpkin pudding, and a fluffy white topping. Each cold forkful brings creamy pumpkin, buttery crumbs, and a little pecan crunch together.

It has the familiar warmth of pumpkin spice with a cool, gentle finish after a fall meal. With dessert already waiting in the refrigerator, there is room to linger at the table before bringing out the pan.
The details that make Pumpkin Lush easier to return to are small but consequential: the exact pudding packet size, where each portion of whipped topping goes, and how the filling should look before it touches the crust. Those checkpoints keep the four components manageable from the shopping list through the first slice.
Pumpkin Lush at a Glance
Pumpkin Lush combines a baked base with soft, chilled pudding layers. Plan for complete crust cooling and a long refrigerator rest; this is a creamy dessert that needs support when served, rather than a rigid cheesecake square or a fully no-bake recipe.
| Detail | What to plan |
|---|---|
| Style / method | Four-layer chilled pudding dessert with a baked pecan crust |
| Flavor | Pumpkin, warm spice, vanilla, tangy cream cheese and pecans |
| Texture | Soft creamy layers on a tender nutty base; portions need support |
| Active preparation | About 30 minutes |
| Bake | 20–25 minutes at 350°F/175°C, conventional oven |
| Crust cooling | 60–90 minutes, or longer until crust and pan base reach room temperature |
| Final chill | At least 6 hours; preferably 8–12 hours |
| Total planning time | About 7 hours 50 minutes–8 hours 25 minutes minimum with thawed ingredients, plus serving buffer; longer if cooling requires it |
| Yield | 16 portions, 4 × 4 grid |
| Pan | 9 × 13 × at least 2-inch light metal pan; usable capacity ≥3.5 US qt /3.3 L |
| Difficulty | Easy component mixing, with careful layering and advance planning |
| Make ahead | Assemble up to 24 hours ahead; add pecans near serving. Thaw whipped topping beforehand. |
| Best for | Fall gatherings and Thanksgiving dessert tables with refrigerator space and advance preparation time |
| Best serving temperature | Cold, directly from refrigeration |
Allow about 4 hours in the refrigerator to thaw each 8-ounce tub of whipped topping, following its label. Both tubs can thaw together, and thawing may overlap the crust work. The total above starts with ready ingredients and excludes any extra time needed for thawing, cooling, or serving.
Why This Pumpkin Lush Works in Four Layers
The four layers of Pumpkin Lush depend on giving each component a different job. The pecan crust supports the dessert, while the cream cheese and pudding mixtures provide creamy body without needing a second bake.
- A baked foundation: Flour and butter bind the chopped pecans into a base that can be cut beneath the cold filling.
- A measured pudding layer: Two correctly sized instant packets work with a fixed amount of milk and pumpkin, so the mixture can thicken before assembly.
- Gentle spreading: Small dollops shorten the distance the spatula travels and reduce the chance of dragging one layer into another.
- A long cold rest: Refrigeration gives the assembled layers time to settle together while preserving their soft texture.
Why You’ll Love Making Pumpkin Lush Ahead
Most of the work for Pumpkin Lush happens before the meal. Once the assembled pan is covered and chilling, the finishing job is simply adding pecans and serving cold portions.
- One baking stage: Only the pecan crust goes into the oven, with no water bath to manage.
- Ahead-of-time assembly: The dessert can be put together the day before, within the 24-hour make-ahead window.
- Simple portion planning: A 4 × 4 grid gives 16 servings from one pan.
- A fresh finish: Holding back the final pecans keeps their crunch for the moment dessert reaches the table.
Who This Pumpkin Lush Is Perfect For
Choose Pumpkin Lush when you want cold, spoon-soft filling with enough structure to serve on a plate. The main commitments are refrigerator space and patience between the baking, cooling, and chilling stages.
- For creamy-dessert lovers: The pumpkin layer yields readily to a fork, with cream cheese adding a gentle tang.
- For pecan fans: Finely chopped nuts run through the baked base, and a coarser finish adds contrast at serving.
- For planners: Four components are straightforward to mix, but the full pan needs a level refrigerator shelf and at least 6 hours of final chilling.
- For a table that suits the ingredients: This version contains wheat, milk, and pecans; choose a different dessert when those ingredients do not fit your guests.
For a dessert with a denser, baked cream-cheese center, Pumpkin Cheesecake Bars take pumpkin in that direction. They are a separate recipe to choose for that texture.
The Science Behind Pumpkin Lush’s Soft Layers
The texture of Pumpkin Lush comes from hydration, temperature, and the movement of moisture between layers. Understanding those three effects makes it easier to recognize a mixture that is ready to spread.
Instant pudding thickens as it hydrates. Its starch system is designed to thicken in cold milk. The pumpkin adds its own moisture and solids, so the milk quantity belongs to this complete mixture. Preparing the pudding with the box’s separate serving directions would change that balance. The short stand before folding in the topping lets thickening develop without extra beating.
Warmth softens the creamy structure. Cream cheese needs to soften enough to mix smoothly, while the aerated whipped topping needs to stay cold. Residual heat in the crust can soften both at the point of contact. Cooling the base fully protects the white layer before the pumpkin mixture is added.
The crust gradually takes up moisture. A creamy filling over a baked base will soften the surface of that base during storage. An overnight rest is compatible with this dessert’s tender texture, but the crust will not stay as crisp as it was fresh from the oven. Pecans added at serving provide a separate source of crunch.
Ingredients for Pumpkin Lush and Its Pecan Crust
The ingredients for Pumpkin Lush are divided by layer so that the milk, pudding, and whipped topping go into the right mixtures. Buy two 8-ounce tubs of original whipped topping and keep their three uses separate.

Ingredient List
Measure the crust ingredients first, then set out the cream cheese, pumpkin, and finishing ingredients in their groups. The whipped topping amounts below are portions of the same two tubs, not additional tubs for each layer.
Pecan crust
- 1 1/2 cups all-purpose flour (180 g), spooned and leveled if not weighed.
- 2 tablespoons granulated sugar (25 g).
- 1/4 teaspoon fine table salt (about 1.5 g).
- 3/4 cup finely chopped pecans (85 g), measured after chopping; raw, unsalted, not nut flour.
- 3/4 cup unsalted butter (170 g), melted and allowed to cool until warm rather than hot.
Cream cheese layer
- 8 ounces full-fat brick cream cheese (227 g), softened until easily indented but not warm or runny.
- 1 cup powdered sugar (113 g), measured unsifted; sift out lumps before mixing if needed.
- 1 teaspoon vanilla extract (5 ml).
- 4 ounces original whipped topping (113 g), thawed in the refrigerator and kept cold.
Pumpkin layer
- 2 cups cold whole milk (480 ml).
- 2 packages regular instant vanilla pudding mix, 3.4 ounces each (96 g each; 192 g total), dry and unprepared. Use US Jell-O regular instant vanilla. Package labeling rounds ounces and grams; use two complete 96 g packets. Do not use cook-and-serve, sugar-free or a different package size.
- 1 can plain pumpkin puree, 15 ounces (425 g), not pumpkin pie filling.
- 2 teaspoons pumpkin pie spice (about 4 g; volume governs because blends vary).
- 4 ounces original whipped topping (113 g), thawed and cold.
Topping
- 8 ounces original whipped topping (227 g), thawed and cold.
- 1/4 cup chopped pecans (28 g), raw, unsalted, for the finish.
Choose the Right Pudding, Pumpkin and Whipped Topping
The front of the pudding box should say regular instant vanilla, and each packet should contain 3.4 ounces, labeled 96 g. Check both the type and the weight before mixing: cook-and-serve pudding, sugar-free mix, and a larger packet are different products.
Use the two packets dry with only the 2 cups of cold whole milk listed here. Do not prepare them separately or add the box’s milk allowance. Plain canned pumpkin puree supplies the pumpkin; pumpkin pie filling would also bring its own sweetener and spice.
Full-fat brick cream cheese provides a different consistency from spreadable cream cheese in a tub. Likewise, original whipped topping keeps the ingredient choice consistent across all three cold layers. Keep these products as listed when making Pumpkin Lush.
| From two 8-ounce tubs | Amount | Where it goes |
|---|---|---|
| First half of tub 1 | 4 ounces, about 113 g | Cream cheese layer |
| Second half of tub 1 | 4 ounces, about 113 g | Pumpkin layer |
| All of tub 2 | 8 ounces, about 227 g | Top layer |
The gram figures are rounded: half, half, and whole use both tubs completely. There is no need to discard a gram to make the rounded numbers add up. For the spice, measure 2 teaspoons; the approximate gram weight varies with the blend.

If homemade pudding is the dessert you want, Vanilla Pudding is a separate stovetop recipe with its own method. Keep the instant mix here, since this layered dessert uses its particular cold-thickening behavior.
Essential Tools for Four Even Pumpkin Lush Layers
A shallow, even crust and gentle spreading matter more than specialized equipment for Pumpkin Lush. Check the pan’s usable depth and capacity before starting so there is room for all four layers and a cover above the topping.
- Pan, lining, and cover: One light-colored metal 9 × 13 × at least 2-inch pan, about 23 × 33 × 5 cm, with usable capacity of at least 3.5 US quarts (3.3 L). Use parchment across the base and two sides with modest overhang, plus a cover or foil that will not touch the topping.
- Measuring and chopping: A digital scale is recommended, with US dry cups, a liquid measuring jug, measuring spoons, a knife, and a chopping board. Measure the crust pecans after chopping.
- Mixing and folding: Two mixing bowls, each at least 2 quarts, a hand mixer, a whisk, and a flexible spatula. Use the mixer for the cream cheese and the spatula for folding the topping.
- Baking, cooling, and cold holding: A conventional oven preheated to 350°F (175°C), a center oven rack, a wire cooling rack, and a level refrigerator shelf at 40°F (4°C) or colder. A refrigerator thermometer is useful if available.
- Spreading and serving: An offset spatula, a clean knife for the 4 × 4 portion grid, and a wide dessert server. Slide the server beneath individual crust portions; leave the full dessert supported in its pan rather than lifting the whole slab.
The Pumpkin Lush baking window uses light metal. Glass, ceramic, dark metal, and convection settings can change baking or cooling behavior. For another batch, use a separate identical pan with a full set of ingredients instead of enlarging the layers in one pan.
Before You Start the Pumpkin Lush Layers
Before mixing Pumpkin Lush, make sure the cold ingredients and refrigerator space are ready. These five checks prevent a half-assembled dessert from waiting while an ingredient thaws or a shelf is cleared.
- Thawed topping: Both tubs are cold and soft throughout, with no frozen core.
- Correct labels: There are two regular instant 3.4-ounce vanilla pudding packets, plain pumpkin puree, and full-fat brick cream cheese.
- A clear shelf: The covered 9 × 13-inch pan can sit level in the refrigerator.
- Room in the schedule: Full crust cooling and at least 6 hours of final chilling fit before serving.
- Separate finishing pecans: The 1/4 cup garnish stays aside until shortly before dessert is served.
What to Expect from These Creamy Pumpkin Layers
Pumpkin Lush should feel creamy and yielding even after a full chill. These normal features help distinguish its intended texture from a mixture that has not thickened or a crust that has not cooled.
- A thin base: The pecan crust spreads across the bottom of the pan, without a raised rim.
- A spoonable pumpkin mixture: Before assembly, it falls from the spatula in a broad mound rather than pouring like milk.
- Soft, recognizable bands: A cold portion holds separate layers when supported by a wide server, but the filling is not firm or bouncy.
- A more tender crust overnight: Some softening beneath the filling is normal; the pecans on top provide the freshest crunch.

How to Make Pumpkin Lush with a Pecan Crust
Make Pumpkin Lush in the order below so the crust can cool completely before the dairy layers touch it. Keep the milk and whipped topping refrigerated until needed, and use the appearance of each component alongside the suggested times.
1. Prepare the ingredients and pan
Thaw both tubs of whipped topping in the refrigerator beforehand, following the label and allowing about 4 hours. Heat a conventional oven to 350°F (175°C) with the rack in the center. Line the pan’s base and two sides with parchment, leaving a modest overhang.
Divide one 8-ounce tub in half for the cream cheese and pumpkin layers; reserve the other whole tub for the top. Keep all portions cold. Do not beat the topping to soften a frozen center.
What you should see: The topping is cold, aerated, and soft enough to fold, with no frozen core.
2. Mix and press the pecan crust
Whisk the flour, granulated sugar, and salt together. Stir in the 3/4 cup finely chopped pecans (85 g), then add all of the melted, warm butter (170 g). Stir until the mixture is evenly moistened.
Distribute small clumps across the lined pan and press them into a thin, even base, reaching the corners without making a rim. Stop pressing once the crumbs join; repeatedly compressing the mixture can make the base harder to cut.
What you should see: No dry flour pockets remain; a squeezed portion holds together. The base has even thickness across the corners and center.

3. Bake and cool completely
Bake the crust for 20–25 minutes, beginning your check at 20 minutes. Look for a dry, set surface and lightly golden edges. If the center still looks wet or greasy, continue in short increments and check again rather than waiting for the edges to turn dark brown.
Set the pan on a wire rack and leave the crust supported in the pan. Allow about 60–90 minutes to cool, or longer until both the crust and the pan base are at room temperature. Time alone is not the cue to add the filling.
What you should see: The baked surface is set and dry with lightly golden edges. Before filling, neither the crust nor the underside of the pan retains warmth.

4. Make the cream-cheese layer
During the last 30 minutes or so of crust cooling, let the cream cheese soften until it indents easily but is not warm or runny. Beat it on medium speed for about 1 minute until smooth. Add the powdered sugar and vanilla, mix on low to incorporate, then on medium until smooth, scraping the bowl.
Fold in the first half-tub of cold whipped topping with a flexible spatula just until evenly white. Place small dollops over the completely cooled crust and gently connect them with the offset spatula. Refrigerate the pan while making the pumpkin mixture.
What you should see: The mixture is smooth and spreadable, without cream cheese lumps or runny topping. The finished white layer sits above the crust without deep crumb streaks.

With layered desserts, I’ve learned that spreading a thick filling from one large mound can pull crumbs from the crust underneath. Small dollops across the fully cooled base give me much less spreading to do. I gently join them with a spatula, keeping the cream cheese layer separate from the pecan crust.


5. Mix the pumpkin layer
Whisk the 2 cups cold whole milk with both dry pudding packets for about 2 minutes, scraping the bowl to disperse the powder. Whisk in the pumpkin puree and pumpkin pie spice until evenly combined. Let the mixture stand for about 5 minutes, then fold in the second half-tub of whipped topping.
Before layering, check the mixture with a spatula. If it still flows freely, recheck the pudding type, packet weight, and milk amount. Do not try to repair it with unmeasured flour, cornstarch, or extra pudding powder.
What you should see: The pumpkin mixture is thick and spoonable. It falls in a broad mound and holds a spatula track briefly instead of pouring like milk.

6. Add the pumpkin and top layers
Dollop the pumpkin mixture across the cream cheese layer. Use the offset spatula to join the dollops gently, keeping the blade in the pumpkin layer. Add the reserved full 8-ounce tub of whipped topping in dollops and spread it into a soft, even surface.

Keep surface swirls shallow and bring the topping to the pan edges without making deep channels. Cover the pan without letting the cover or foil press into the white layer.

What you should see: Each layer reaches the edges, with no large mixed streaks. The white top has gentle swirls rather than deep grooves.

7. Chill, garnish and serve
Cover and refrigerate the assembled Pumpkin Lush for at least 6 hours, preferably 8–12 hours. Shortly before serving, scatter the remaining 1/4 cup chopped pecans (28 g) over the top. Cut a 4 × 4 grid with a clean knife, wiping the blade between cuts.
Slide a wide server all the way beneath each piece of crust and lift the portion with its base supported. If the correctly mixed dessert is not yet cold and settled throughout, give it longer in the refrigerator. Extra chilling cannot correct the wrong pudding or too much liquid. Return the remaining pan promptly to the refrigerator.

What you should see: The dessert is cold throughout. A supported portion keeps recognizable layers, and the pumpkin filling does not flow into the cut space. The filling remains soft and creamy.

Pumpkin Lush Doneness: From Baked Crust to Chilled Layers
There are three different readiness decisions in Pumpkin Lush: when to stop baking, when to add the filling, and when to serve. A finished-looking top cannot tell you whether the crust underneath is cool or the center has chilled long enough.
| Stage | Ready cue | If it is not there yet |
|---|---|---|
| Baked crust | Set, dry surface; lightly golden edges; nutty aroma | Continue baking in short increments if the center remains wet or greasy; avoid dark brown edges. |
| Before assembly | Crust and pan base at room temperature | Keep cooling on the rack. Do not use filling to cool a warm base. |
| After final chilling | Cold throughout; supported slice keeps layers; pumpkin does not flow into the gap | Chill longer if the formula was mixed correctly and needs more time. Recheck ingredient choices if the filling remains liquid. |

Expert Tips for Keeping Pumpkin Lush Layers Distinct
The delicate points in Pumpkin Lush are mostly about controlling force, temperature, and moisture. Small adjustments in how the ingredients are handled help preserve the texture already built into each layer.
- Chop, then measure: Large pecan pieces leave uneven spaces in the thin base. Finely chop the crust pecans before measuring so they distribute more evenly, stopping short of turning them into nut flour.
- Let the butter lose its heat: Warm melted butter moistens the dry mixture without making it unnecessarily hot to handle. Stir until there are no flour pockets, then distribute small clumps for a more even crust thickness.
- Smooth the cheese before folding: Cold lumps are harder to remove once airy topping is added. Scrape and beat the cream cheese mixture smooth first, then fold gently so the topping does not need extra beating.
- Keep the blade shallow: A tilted spatula edge can cut into the layer below. Hold it nearly parallel to the surface and use short strokes to join adjacent dollops.
- Protect the finished surface: Foil pressed onto the topping can pull it away when uncovered. Leave clearance above the shallow swirls so the white layer stays intact until cutting.
Pumpkin Lush Mistakes: Runny Filling, Crumbs and Blended Layers
A problem in Pumpkin Lush is easier to address before the next layer hides it. Use the visible symptom to decide whether to wait, adjust your handling, or stop and recheck the ingredients; there is no single thickener or chilling fix for every cause.
| Mistake | What happens | Why it happens | Prevent or fix |
|---|---|---|---|
| Using the wrong pudding or extra milk | Pumpkin filling stays freely flowing | The thickening system or liquid balance differs from the recipe | Check regular instant vanilla, two 3.4-ounce packets, and only 2 cups milk before assembly; avoid unmeasured thickener repairs. |
| Spreading filling on a warm crust | White layer softens or loses definition | Heat transfers into the cream cheese and topping | Wait until crust and pan base reach room temperature; chilling later cannot restore already blended layers. |
| Dragging a large mound across the base | Crumbs pull into the white layer | Too much spreading force catches the crust | Distribute small dollops first and connect them with shallow strokes. |
| Beating topping or folding it into warm cheese | Mixture becomes loose and less airy | Excess handling or warmth weakens its texture | Use softened, not warm, cream cheese and cold topping; fold only until even. |
| Cutting before the full chill | Portions slump into the open space | The dessert is not cold and settled throughout | Give a correctly mixed pan at least 6 hours, preferably 8–12, and support each piece under its crust. |
| Expecting a rigid bar or oven-crisp base after storage | A normal creamy portion seems like a failure | The dessert has soft pudding layers and moisture moves into the crust | Look for distinct supported layers, not rigidity; add the final pecans near serving for crunch. |
Beautiful Ways to Serve Pumpkin Lush
Serve Pumpkin Lush directly from refrigeration, with its pale topping and orange pumpkin band visible at the cut edge. Keep presentation simple enough that the dessert stays cold while portions reach the table.
A Cold Square with Fresh Pecan Crunch
Set one supported square of Pumpkin Lush on a small dessert plate and let the chopped pecans remain the only finish. Their rough texture against the smooth topping makes the layers inviting without covering the pumpkin color. A fork can cut through the cream and tender base together.

Two Plates for a Cozy Dessert Course
Plate two portions just before sitting down, keeping the rest of the pan refrigerated. Place the squares with their cut sides facing outward so the white and orange bands are easy to see. This makes a quiet dessert course feel considered without requiring a new garnish.

Bring the Chilled Pan to the Holiday Table
For a fall gathering, bring the cold Pumpkin Lush pan out for a short serving round and place the wide server beside it. The 4 × 4 cuts make portions easy to identify, while the parchment stays underneath to support the crust. Return the remaining dessert to the refrigerator promptly.

A Creamy Square Beside Black Coffee
An optional cup of unsweetened black coffee offers a warm, bitter contrast to Pumpkin Lush’s sweet, cool filling. Keep the dessert on its own plate so the crust stays away from drips, and pour the coffee just as the cold portions are served.

Storing Pumpkin Lush and Planning It Ahead
Pumpkin Lush needs refrigeration before and after serving. Cover the pan without touching the topping, and treat time spent softening cream cheese, assembling, and serving as part of the ingredients’ cumulative time out of the refrigerator.
Keep the Layers Covered and Cold
Store covered Pumpkin Lush at 40°F (4°C) or colder. For best texture, enjoy it within 48 hours; use leftovers within 3 days when made with fresh ingredients, or sooner if any ingredient’s storage limit comes first.
The FDA’s refrigerated-food guidance calls for keeping perishables cold and limiting time at room temperature to 2 hours, or 1 hour when temperatures are above 90°F (32°C). Keep cumulative exposure below those limits, including preparation and serving, and return the pan promptly to the refrigerator.

Assemble Ahead and Finish with Pecans
Assemble Pumpkin Lush up to 24 hours before serving, cover it, and refrigerate. An 8–12-hour overnight rest is a convenient target within that window. Keep the finishing pecans separate and add them shortly before serving so they retain their crunch.

Freezing and Reheating the Assembled Dessert
Freezing assembled Pumpkin Lush is not recommended for its texture, and it should not be reheated. University of Nebraska–Lincoln Extension’s leftover-food guidance identifies cream fillings, puddings, and custards among foods that freeze poorly. For these soft dairy and pudding layers, use refrigerated make-ahead preparation instead of a freeze-and-thaw plan.
Plan the Bake, Cooling and Overnight Chill
Work backward from when you want to serve Pumpkin Lush, leaving the final chill uninterrupted. The schedule below shows which stage must finish before the next begins; allow extra time whenever an ingredient or layer has not reached its ready state.
| When | Allow | Dependency |
|---|---|---|
| Before mixing | About 4 hours to thaw both topping tubs together in the refrigerator, per label | No frozen core; may overlap crust work. |
| Start the crust | About 10 minutes preparation, then 20–25 minutes baking | Preheated oven; baked surface set and dry. |
| After baking | 60–90 minutes cooling, or longer | Crust and pan base at room temperature; soften cheese during the last 30 minutes. |
| After complete cooling | About 20 minutes to mix and assemble, including the short pudding stand | Pumpkin mixture spoonable before layering. |
| After assembly | At least 6 hours; preferably 8–12 hours | Covered, level, and refrigerated at 40°F (4°C) or colder. |
| At serving | A few minutes for pecans, cutting, and plating | Cold throughout; supported portions retain their layers. |
With ready ingredients, the minimum planning range for Pumpkin Lush is about 7 hours 50 minutes to 8 hours 25 minutes, plus a serving buffer and any extra cooling needed. The roughly 30 minutes of active preparation is spread across the crust and filling stages; it is not the total time until dessert is ready.
Pumpkin Lush Questions, Answered
A different pudding packet, a smaller pan, or a freezer plan can change the result even when the ingredients seem familiar. Keep the recipe’s milk, pan, and storage choices together when making Pumpkin Lush.
What size pudding packets do I need?
Use two 3.4-ounce (96 g each) packets of regular instant vanilla pudding, 192 g total. Add both packets dry to the recipe’s 2 cups of cold whole milk. A sugar-free packet or a different weight is not an equivalent box-for-box choice.
Why is my pumpkin layer still runny?
First check the pudding type, packet size, and milk amount. The mixture should be spoonable after its short stand and the final fold. A correctly mixed dessert that simply needs more chilling can stay refrigerated longer; extra time will not fix excess milk or the wrong pudding.
Can I use nondairy milk?
Use whole milk for this Pumpkin Lush recipe. A nondairy drink can change how the instant mix thickens, and replacing the milk alone would still leave cream cheese and whipped topping in the dessert. For a dairy-free need, choose a recipe formulated for that purpose.
Can I halve the recipe for an 8-inch pan?
Keep this recipe at its full quantity in the specified 9 × 13-inch pan. An 8-inch pan changes the layer area and thickness, so halving every amount does not establish the same baking and chilling results. For fewer people, plan Pumpkin Lush around the stated leftover window rather than treating a half batch as interchangeable.
Will making it the night before make it soggy?
An overnight rest fits Pumpkin Lush, with assembly up to 24 hours ahead. Expect a more tender crust where it meets the filling rather than the crispness of a freshly baked base. Add the final pecans shortly before serving to preserve their crunch.
Can I make it ahead and freeze it?
Use the refrigerator for make-ahead preparation, up to 24 hours before serving. Freezing and thawing can leave these creamy layers with a poorer texture, so the assembled dessert is not recommended for the freezer.
Follow Your Next Fall Dessert Craving
Let the part you enjoyed most in Pumpkin Lush guide the next dessert: cold creaminess, pumpkin in a different bake, or more pecan flavor. Each path below leads to a different kind of kitchen project.
Keep Dessert Cool and Creamy
Stay with chilled desserts when creamy texture is the main attraction. These recipes change the flavor or filling while keeping a cool finish.
- Pistachio Pudding Dessert keeps the layered pudding format and brings pistachio to the center.
- No Bake Pumpkin Pie puts pumpkin into an unbaked pie format for a different way to serve it.
- Banana Pudding adds fruit and vanilla wafers to spoonable pudding layers.
- No Bake Cheesecake makes cream cheese the main filling in a chilled round dessert.
Give Pumpkin a Different Shape
Choose a baked pumpkin dessert when you want custard, cake crumb, or a rolled slice. These options offer a different structure from the soft layers here.
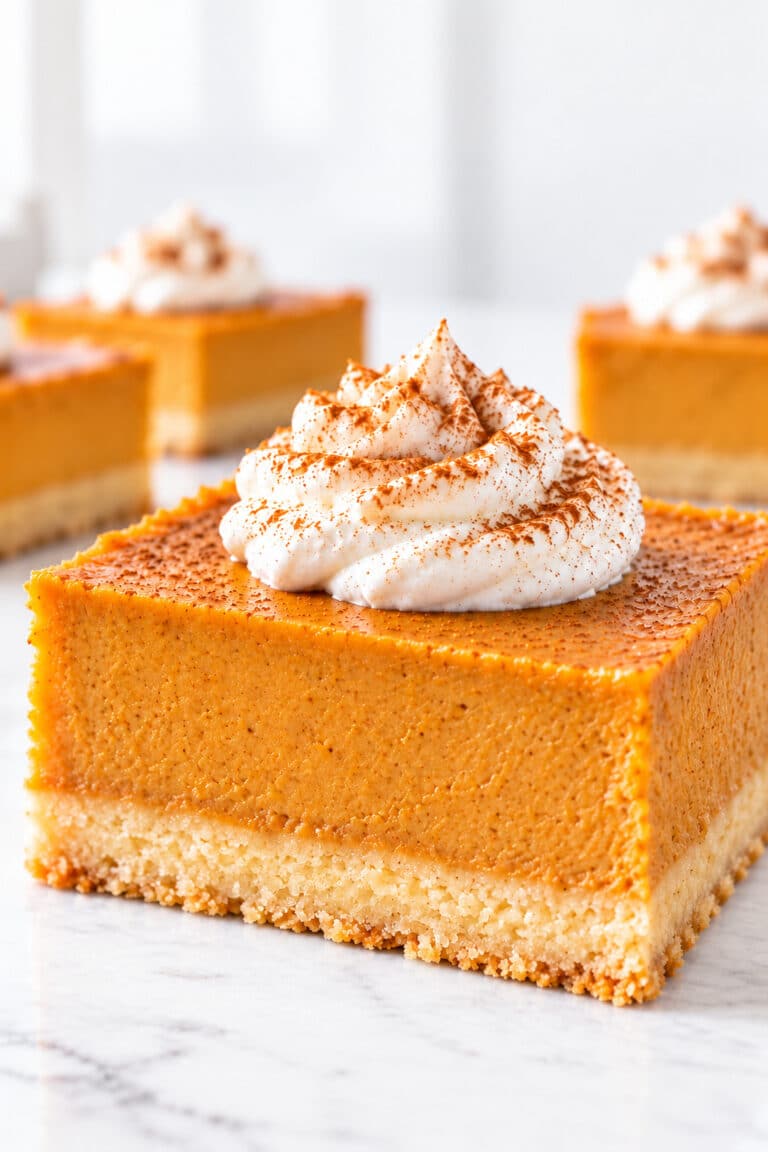
- Pumpkin Pie Bars pair baked pumpkin custard with a shortbread base.
- Pumpkin Coffee Cake brings pumpkin to a tender cake with streusel for coffee or brunch.
- Pumpkin Roll offers a sponge-rolling project around cream cheese filling.
- Pumpkin Cake turns the flavor into a frosted layer cake for a celebration.
Make Pecans the Main Event
Follow the nutty crust toward recipes where pecans have a larger role. Choose individual cookies, cut bars, or a centerpiece pie or cheesecake.
- Butter Pecan Cookies carry buttery pecan flavor into individual cookies.
- Pecan Pie Bars put a pecan filling over shortbread in a bar format.
- Chocolate Pecan Pie combines chocolate and pecans in a pastry pie.
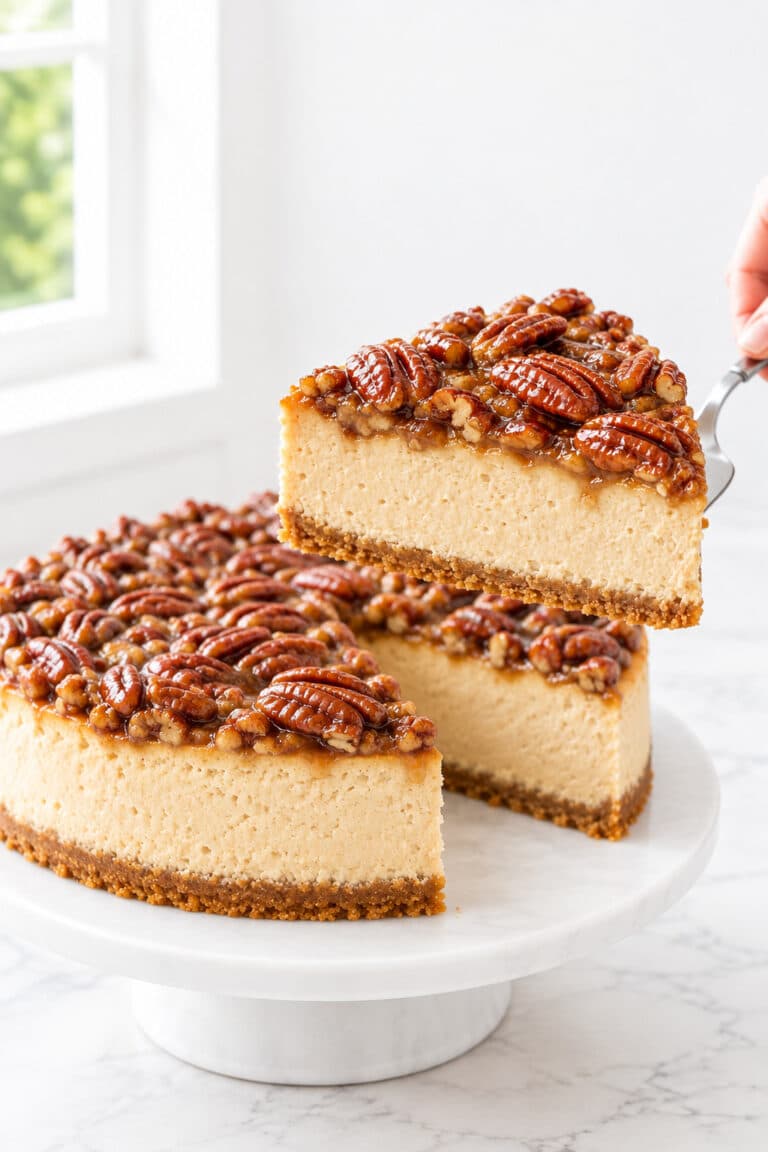
- Pecan Pie Cheesecake pairs a baked cheesecake with a separately prepared pecan topping.
Why Pumpkin Lush Belongs in Your Recipe Box
Keep Pumpkin Lush with the recipes whose small details are worth having close at hand. The useful reminders are the ones that answer a concrete question before mixing or spreading begins.
- Package Clarity: The exact pudding type and weight make the shopping decision specific.
- Divided Topping: The half, half, and whole allocation gives every portion a clear destination.
- Layer Checkpoints: Separate readiness cues show when to bake longer, cool longer, or chill longer.
- Honest Texture: Soft supported portions and a tender base set a useful expectation for the first cut.
- Calendar Planning: The timing includes cooling and chilling so dessert can fit the meal.
- Gentle Assembly: The dollop-and-join technique gives the fragile crust a little protection.
A Final Note on Pumpkin Lush at the Fall Table
Pumpkin Lush brings a cool pause to a table filled with warm fall flavors. The pumpkin and spice feel familiar, while the pale cream and buttery pecan base give each forkful a softer finish.
It is a recipe to return to when a chilled, layered dessert suits the meal and there is time to prepare it ahead. The visible bands and simple pecan finish offer plenty of character without needing an elaborate last-minute decoration.
Each component of Pumpkin Lush contributes something different: a tender foundation, a little tang, mellow pumpkin, and an airy top. Giving those differences room to remain distinct is what makes the whole pan feel complete.

Pumpkin Lush
A chilled four-layer pumpkin dessert with a buttery pecan crust, tangy cream cheese, spiced pumpkin pudding, and a fluffy whipped topping. Bake the base, cool it completely, and allow the assembled dessert a long refrigerator rest before serving.
Ingredients
Pecan crust
- 1 1/2 cups all-purpose flour (180 g), spooned and leveled if not weighed.
- 2 tablespoons granulated sugar (25 g).
- 1/4 teaspoon fine table salt (about 1.5 g).
- 3/4 cup finely chopped pecans (85 g), measured after chopping; raw, unsalted, not nut flour.
- 3/4 cup unsalted butter (170 g), melted and allowed to cool until warm rather than hot.
Cream cheese layer
- 8 ounces full-fat brick cream cheese (227 g), softened until easily indented but not warm or runny.
- 1 cup powdered sugar (113 g), measured unsifted; sift out lumps before mixing if needed.
- 1 teaspoon vanilla extract (5 ml).
- 4 ounces original whipped topping (113 g), thawed in the refrigerator and kept cold.
Pumpkin layer
- 2 cups cold whole milk (480 ml).
- 2 packages regular instant vanilla pudding mix, 3.4 ounces each (96 g each; 192 g total), dry and unprepared. Use US Jell-O regular instant vanilla. Package labeling rounds ounces and grams; use two complete 96 g packets. Do not use cook-and-serve, sugar-free or a different package size.
- 1 can plain pumpkin puree, 15 ounces (425 g), not pumpkin pie filling.
- 2 teaspoons pumpkin pie spice (about 4 g; volume governs because blends vary).
- 4 ounces original whipped topping (113 g), thawed and cold.
Topping
- 8 ounces original whipped topping (227 g), thawed and cold.
- 1/4 cup chopped pecans (28 g), raw, unsalted, for the finish.
Instructions
1. Prepare the ingredients and pan Thaw both 8-ounce tubs of whipped topping in the refrigerator beforehand, allowing about 4 hours according to the label. Heat a conventional oven to 350°F (175°C) with a rack in the center. Use a light-colored metal 9 × 13 × at least 2-inch pan with usable capacity of at least 3.5 US quarts (3.3 L). Line the base and two sides with parchment, leaving modest overhang. Keep the milk and whipped topping cold. Divide the topping by halving one 8-ounce tub and reserving the second tub for the surface.
What you should see: topping is soft enough to fold and has no frozen core, but remains cold and aerated. Do not beat it to soften it.
2. Mix and press the pecan crust Whisk the flour, granulated sugar and salt in a bowl. Stir in the 3/4 cup finely chopped pecans (85 g). Add all 3/4 cup melted, warm butter (170 g) and stir with a spatula until evenly moistened. Distribute small clumps across the pan and press into a thin, even base, reaching the corners without building a raised rim.
What you should see: no dry flour pockets remain; a squeezed portion holds together. Press just enough to join the crumbs, without repeatedly compacting the crust into a hard sheet.
3. Bake and cool completely Bake for 20–25 minutes. Begin checking at 20 minutes; the surface should look set and dry, with lightly golden edges and a warm nutty aroma. If the center remains visibly wet or greasy, continue in short increments and reassess. Do not wait for dark brown edges. Set the pan on a rack and cool fully, allowing about 60–90 minutes or longer as needed.
What you should see before filling: both crust and pan base feel room-temperature, without residual warmth. A warm base would soften the dairy layers. Leave the crust supported in its pan.
4. Make the cream-cheese layer During the later part of crust cooling, soften the 8 ounces cream cheese (227 g) for about 30 minutes, keeping cumulative time out of refrigeration below 2 hours, or below 1 hour when the room is above 90°F (32°C). Beat the cream cheese with the hand mixer on medium for about 1 minute until smooth. Add the 1 cup powdered sugar (113 g) and 1 teaspoon vanilla (5 ml); mix on low to incorporate, then medium until smooth, scraping the bowl. Fold in the first half-tub of whipped topping (4 ounces, about 113 g) with a flexible spatula just until evenly white. Dollop over the completely cool crust and spread gently into an even layer. Keep the pan refrigerated while making the pumpkin mixture.
What you should see: smooth and spreadable, without cream-cheese lumps or collapsed, runny topping. Small dollops reduce the force needed to spread over the crumbly crust.
5. Mix the pumpkin layer Whisk the 2 cups cold whole milk (480 ml) and both dry 3.4-ounce pudding packets (96 g each) for about 2 minutes, scraping the bowl to disperse powder. Whisk in the 15-ounce can of plain pumpkin puree (425 g) and 2 teaspoons pumpkin pie spice until even. Let stand about 5 minutes for thickening, then fold in the second half-tub of whipped topping (4 ounces, about 113 g).
What you should see: a thick, spoonable mixture that falls in a broad mound and keeps a spatula track briefly; it should not pour like milk. If it remains freely flowing, recheck the pudding type and milk amount before assembly. Do not add unmeasured flour, cornstarch or extra dry pudding as a repair.
6. Add the pumpkin and top layers Place the pumpkin mixture in small dollops across the cream-cheese layer. Join them gently with the offset spatula, without dragging through to the layer below. Dollop the reserved full 8-ounce tub of topping across the pumpkin layer and spread into a soft, even surface. Cover without pressing the cover into the topping.
What you should see: each layer reaches the pan edges, with no large mixed streaks or deep channels. Keep any optional surface swirls shallow.
7. Chill, garnish and serve Refrigerate the assembled dessert for at least 6 hours; plan 8–12 hours for overnight preparation. Add the 1/4 cup chopped pecans (28 g) shortly before serving. Cut a 4 × 4 grid with a clean knife, wiping it between cuts, and lift each portion with a wide server that slides beneath the crust.
What you should see: the dessert is cold throughout, the pumpkin layer does not flow into the cut space, and a supported portion retains recognizable layers. The filling remains creamy and soft. If inadequately chilled, refrigerate longer; extra time cannot correct the wrong pudding or excessive liquid. Serve chilled and promptly return the remainder to the refrigerator.
Notes
- Use two regular instant vanilla pudding packets, 3.4 ounces (96 g) each, dry and unprepared. Add only the 2 cups whole milk listed in the recipe. Do not prepare the pudding separately using the box directions, and do not substitute cook-and-serve, sugar-free, or a different packet size.
- Use two 8-ounce tubs of original whipped topping. Divide the first tub in half for the cream cheese and pumpkin layers; reserve the entire second tub for the top. Half-tub gram values are rounded to 113 g, and the whole tub to 227 g. Use both tubs completely.
- Time planning: 30 minutes preparation, up to 25 minutes baking, about 90 minutes crust cooling, and at least 6 hours final chilling give the displayed total of 8 hours 25 minutes with thawed ingredients. Baking may take 20–25 minutes and cooling about 60–90 minutes or longer. Prefer 8–12 hours of final chilling. Thaw topping beforehand for about 4 hours per label; both tubs may thaw together and overlap crust work. Allow extra time when cooling needs it and a few minutes for serving.
- The cream cheese should be softened enough to mix smoothly, not warm or runny. Keep the milk and whipped topping cold. Add the first filling only when both the crust and pan base are at room temperature.
- Use the specified pan and full ingredient quantities. For another batch, prepare a separate identical pan with its own full recipe; do not make a deeper batch in the same pan. The baking window uses a conventional oven and light metal.
- Serve cold. Cut a 4 × 4 grid for 16 portions, wipe the knife between cuts, and use a wide server beneath each piece of crust. Leave the whole dessert supported in its pan. The layers remain creamy and soft.
- Store covered at 40°F (4°C) or colder. Enjoy within 48 hours for best texture and use leftovers within 3 days with fresh ingredients, or sooner if an ingredient’s storage limit comes first. Keep cumulative time out of refrigeration below 2 hours, or below 1 hour above 90°F (32°C), including preparation and serving.
- Assemble up to 24 hours ahead and refrigerate. Add the finishing pecans shortly before serving. Freezing the assembled dessert is not recommended for its texture; do not reheat it.
- Contains wheat, milk, and pecans. Check packaged ingredients for other allergens relevant to your household.
Equipment
- Pan, lining, and cover: One light-colored metal 9 × 13 × at least 2-inch pan, about 23 × 33 × 5 cm, with usable capacity of at least 3.5 US quarts (3.3 L). Use parchment across the base and two sides with modest overhang, plus a cover or foil that will not touch the topping.
- Measuring and chopping: A digital scale is recommended, with US dry cups, a liquid measuring jug, measuring spoons, a knife, and a chopping board. Measure the crust pecans after chopping.
- Mixing and folding: Two mixing bowls, each at least 2 quarts, a hand mixer, a whisk, and a flexible spatula. Use the mixer for the cream cheese and the spatula for folding the topping.
- Baking, cooling, and cold holding: A conventional oven preheated to 350°F (175°C), a center oven rack, a wire cooling rack, and a level refrigerator shelf at 40°F (4°C) or colder. A refrigerator thermometer is useful if available.
- Spreading and serving: An offset spatula, a clean knife for the 4 × 4 portion grid, and a wide dessert server. Slide the server beneath individual crust portions; leave the full dessert supported in its pan rather than lifting the whole slab.
Nutrition Information:
Yield: 16 Serving Size: 1 portion (1/16 of recipe)Amount Per Serving: Calories: 406Total Fat: 24gSaturated Fat: 13gCholesterol: 42mgSodium: 286mgCarbohydrates: 43gSugar: 27gProtein: 4g
Nutrition information is provided as an estimate only and may vary based on specific ingredients, brands, and portion sizes used. This information should not be considered medical or nutritional advice.