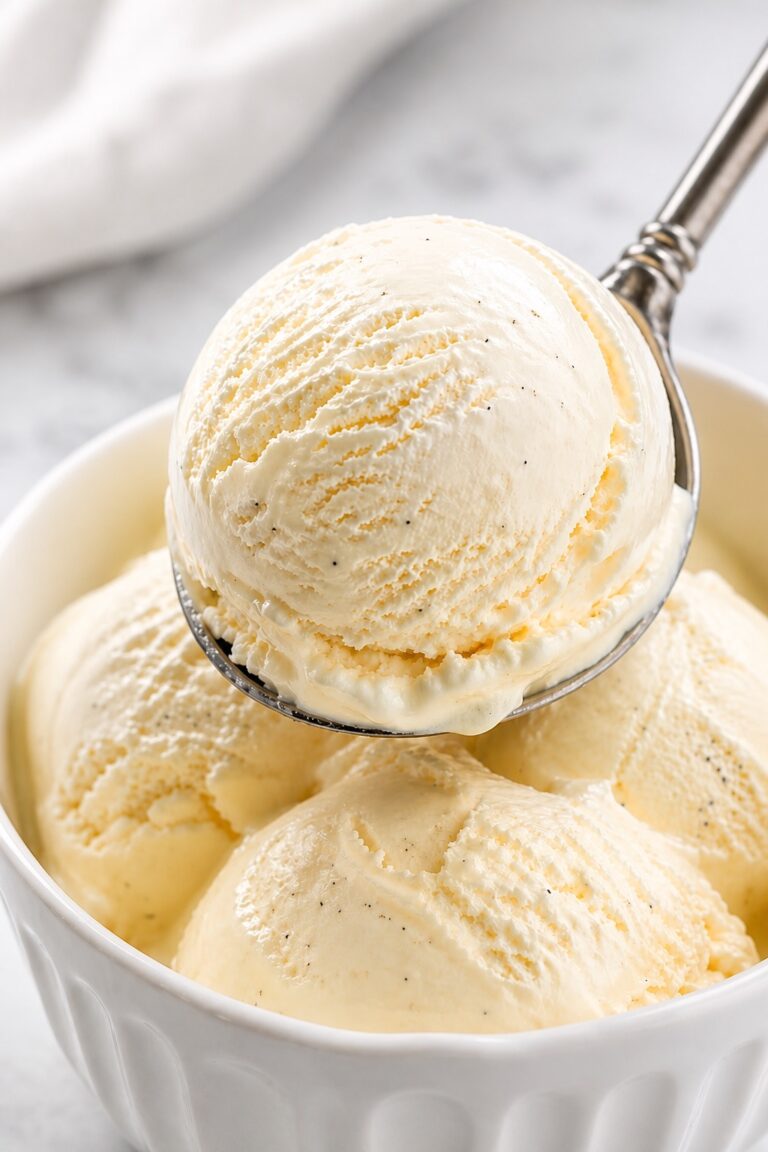
Homemade Chocolate Ice Cream (Dense, Velvety and Ultra-Creamy)
🎁 FREE E-BOOK: 12 Sweet Favorites — reader-loved desserts in one beautiful recipe book.
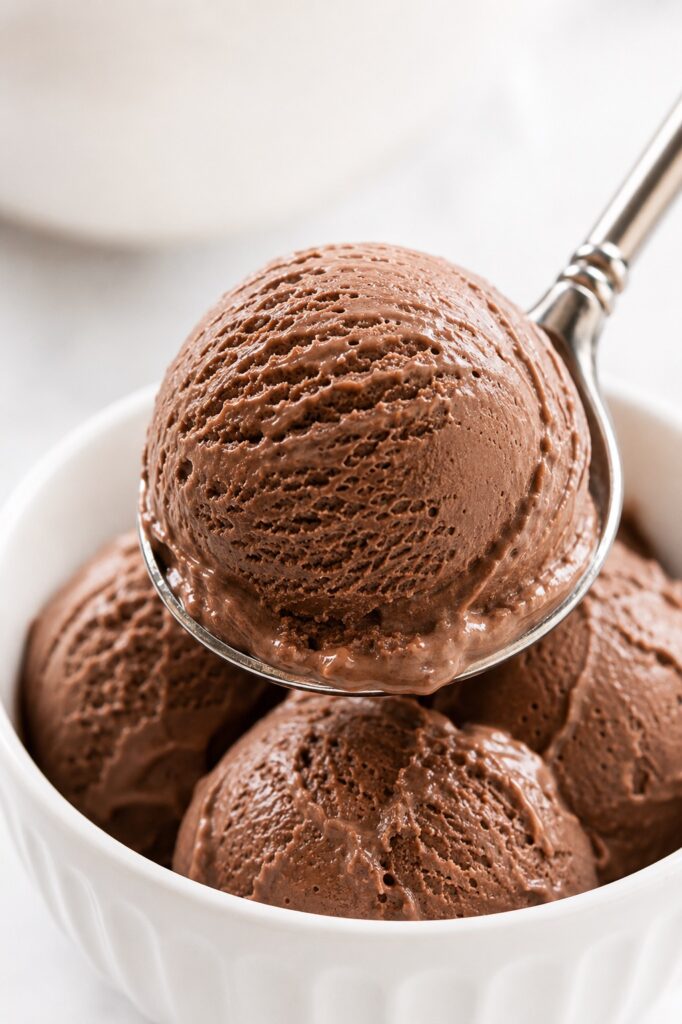
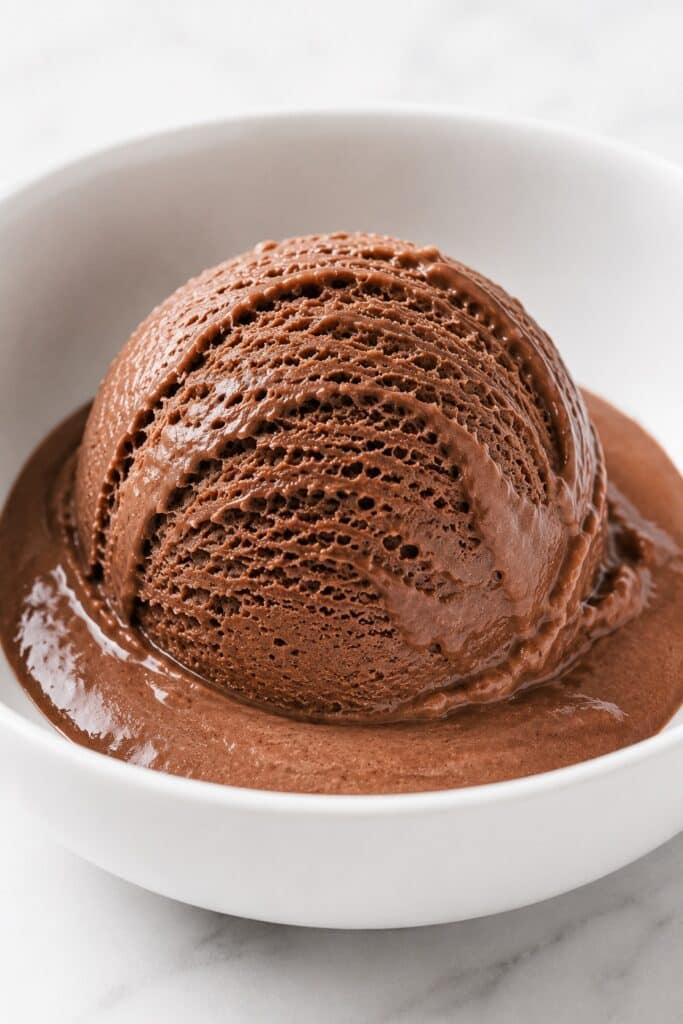
The first spoonful of this Homemade Chocolate Ice Cream is deeply chocolatey, dense, and velvety, with the smooth melt you expect from a premium scoop shop. Dutch-process cocoa gives it a dark, rounded cocoa flavor, while real semisweet chocolate adds richness, body, and a softer finish.

This is a churned, French-style chocolate ice cream made with an egg-yolk custard. The yolks help emulsify the dairy and chocolate, creating a texture that feels creamy and cohesive rather than icy, chalky, or airy. A carefully controlled balance of whole milk, heavy cream, sugar, and light corn syrup keeps the finished ice cream rich without becoming greasy or waxy.
The process takes time, but most of it is hands-off. The chocolate custard is cooked, cooled, thoroughly chilled, churned until it resembles dense soft serve, and then hardened in the freezer. Starting the recipe one day before serving gives the base enough time to mature and allows the finished ice cream to develop its proper scoopable structure.
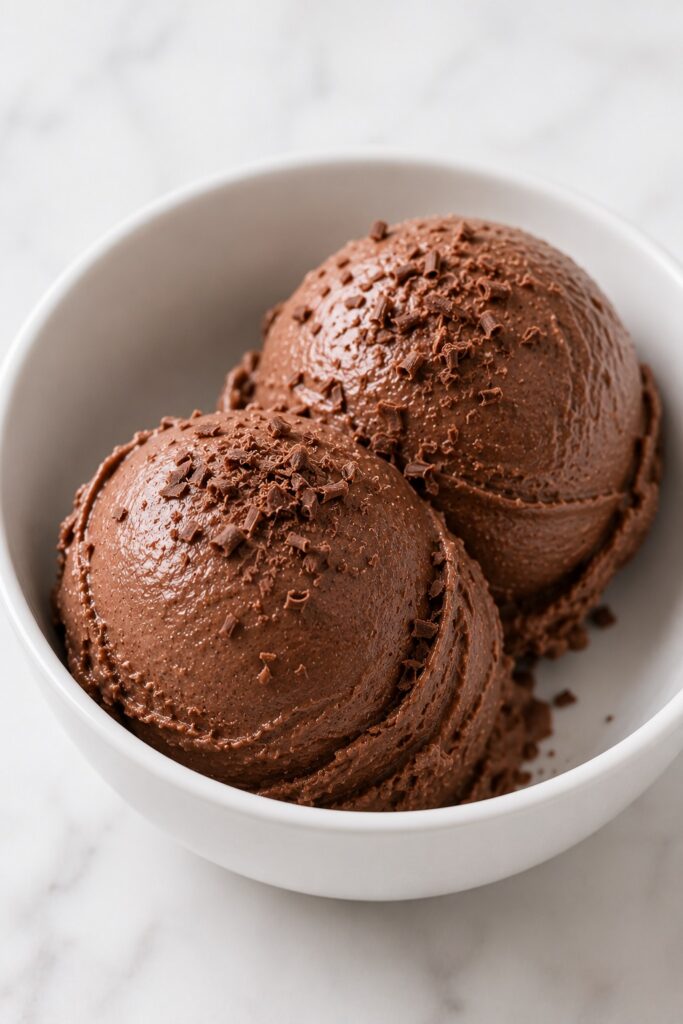
Homemade ice cream is naturally firmer than many commercial versions when it first comes out of a deep freezer. After 5–10 minutes at room temperature, this one softens into smooth, rounded scoops with visible folds and a clean chocolate finish.
What Is Homemade Chocolate Ice Cream?
Homemade chocolate ice cream is a frozen dessert made by preparing a chocolate-flavored dairy base, chilling it thoroughly, and freezing it while churning. Churning freezes the mixture while introducing a controlled amount of air, which helps create smaller ice crystals and a smoother texture than simply placing the custard in the freezer.
This recipe uses the French-style method, which means the base contains egg yolks and is cooked as a light custard before churning. It is different from Philadelphia-style chocolate ice cream, which is usually egg-free, and from no-churn ice cream, which typically relies on whipped cream and sweetened condensed milk instead of an ice cream maker.
Quick Chocolate Ice Cream Recipe Overview
This recipe is designed for a dense, premium chocolate ice cream rather than a light or highly aerated one. The base is cooked to a precise temperature, chilled until completely cold, and churned in a 1½-quart or larger ice cream maker.
| Texture | Dense, velvety, smooth, and creamy |
|---|---|
| Flavor | Deep chocolate from Dutch-process cocoa and semisweet chocolate |
| Difficulty | Intermediate |
| Active Time | Approximately 35 minutes, plus 20–30 minutes of machine churning |
| Minimum Total Time | Approximately 11 hours 5 minutes |
| Preferred Timeline | Start one day before serving |
| Yield | Approximately 1 quart |
| Servings | 8 |
| Method | French-style custard, churned |
| Equipment | 1½-quart or larger ice cream maker |
| Best For | Scoops, cones, sundaes, and plated desserts |
In short: Cook the chocolate custard, cool it rapidly, refrigerate it until fully chilled, churn it to a dense soft-serve consistency, and freeze it for at least 6 hours before serving.
Why You’ll Love This Recipe
This Homemade Chocolate Ice Cream is for anyone who wants a deeply chocolate, premium frozen dessert with a dense, creamy texture rather than a light, overly sweet, or highly aerated scoop.
- Deep, balanced chocolate flavor. Dutch-process cocoa creates concentrated cocoa depth, while semisweet chocolate adds a rounder aroma and smoother finish.
- Dense and velvety rather than fluffy. The French-style custard produces cohesive scoops with a clean, creamy melt.
- Rich without feeling greasy or waxy. The controlled milk, cream, yolk, and chocolate balance keeps the cocoa flavor clear.
- Precise cues at every critical stage. Temperature ranges and visible stopping points remove the guesswork from cooking and churning.
- Ideal for making ahead. Prepare the custard on Day 1, churn and harden it, then serve relaxed, rounded scoops on Day 2.
Why This Chocolate Ice Cream Recipe Works
The texture of chocolate ice cream depends on more than adding enough cream or chocolate. Each ingredient in this formula controls part of the final result, including flavor intensity, emulsification, freezing behavior, crystal size, firmness, and how smoothly the ice cream melts.
Cocoa Powder and Real Chocolate Do Different Jobs
Dutch-process cocoa supplies concentrated chocolate flavor, deep color, and cocoa solids without adding a large amount of fat. Semisweet chocolate contributes cocoa butter, sugar, and a rounder chocolate aroma, giving the frozen base a smoother and more complete finish.
Using only cocoa can produce a leaner texture that becomes dry or chalky if too much powder is added. Using too much melted chocolate can introduce enough cocoa butter and additional solids to make the ice cream heavy, overly firm, or waxy when cold. The controlled combination in this recipe creates intensity without sacrificing a clean melt.
The Dairy Ratio Keeps the Texture Rich but Clean
Heavy cream provides richness and lubrication, while whole milk contributes water and milk solids that keep the base fluid enough to churn efficiently. Increasing the cream does not automatically create better ice cream. Once the total fat from the cream, milk, yolks, cocoa, and chocolate becomes excessive, the flavor can feel muted and the frozen texture may leave a waxy coating on the tongue.
The dairy ratio used here gives the ice cream enough fat for a dense, velvety texture while allowing the cocoa flavor to open fully as each spoonful softens and melts.
Egg Yolks Stabilize the Custard
Egg yolks contain natural emulsifiers that help the water and fat in the base remain evenly dispersed. They also add controlled body as the custard heats, improving the finished ice cream’s cohesion and slowing its melt.
This recipe uses four yolks rather than an unusually yolk-heavy custard. That is enough to support the emulsion and texture without making the ice cream taste strongly of egg or become thick like frozen pudding.
Sugar and Corn Syrup Control More Than Sweetness
Sugar lowers the freezing point of the water in the base, which means part of that water remains unfrozen even after the ice cream hardens. This is essential for a texture that can soften and scoop rather than freezing into a solid block.
Light corn syrup adds glucose-based sugars that further limit large crystal development and improve body without making the finished ice cream taste noticeably sweeter. Reducing either sweetener would change the freezing behavior, not merely the sweetness, and could make the ice cream substantially harder and icier.
A Cold Base Freezes Faster and Forms Smaller Crystals
The cooked custard must reach 35–40°F (2–4°C) before churning. A fully chilled base allows the machine to begin freezing it immediately, creating smaller ice crystals and a smoother texture. A warm base uses much of the machine’s limited cooling capacity simply to lower the temperature before meaningful freezing begins.
The same principle explains why machine capacity matters. A batch that is too large freezes slowly, even if it physically fits inside the bowl. Keeping the batch within the machine’s working capacity gives the dasher enough time to aerate and thicken the ice cream before the bowl or compressor loses efficiency.
Before You Begin
This chocolate ice cream is easiest to manage when the equipment, cooling station, and timing are prepared before the custard goes on the stove. The base must be cooked, cooled rapidly, chilled until fully cold, churned, and then hardened before it reaches the dense, scoopable texture shown in the finished recipe.
Freeze the Ice Cream Maker Bowl Completely
If your ice cream maker uses a removable freezer bowl, freeze it according to the manufacturer’s instructions. Most models require at least 24 hours in a freezer set to 0°F (−18°C) or colder.
Shake the frozen bowl before assembling the machine. You should not hear liquid moving inside the walls. If you can still hear sloshing, the bowl is not cold enough to freeze this chocolate base efficiently.
A partially frozen bowl may allow the mixture to become cold and foamy without ever reaching dense soft-serve consistency. Once the bowl begins warming, continued churning will not correct the problem.
Use an Ice Cream Maker with Enough Working Capacity
This recipe requires an ice cream maker with a capacity of at least 1½ quarts. A nominal capacity indicates what the bowl can hold, but the machine also needs enough empty space for the mixture to expand and move around the dasher as it freezes.
Do not double the recipe and churn it as one batch unless the appliance manufacturer confirms that the machine can freeze that quantity effectively. An oversized batch freezes too slowly and is more likely to develop a dense or icy texture, even if it does not overflow.
Prepare the Chocolate, Sieve, and Ice Bath First
Finely chop the semisweet chocolate and place it in a medium heatproof bowl. Set a fine-mesh sieve securely over the bowl so the hot custard can be strained directly onto the chocolate as soon as it finishes cooking.
Prepare a separate large bowl with approximately equal amounts of ice and cold water. The ice bath must be ready before the custard reaches its final temperature because the cooked base should be strained and cooled without delay.
Use enough ice to keep the bath cold after the hot bowl is placed inside it. A bowl containing mostly water and only a few ice cubes will warm too quickly.
Plan for Chilling and Hardening Time
The cooked chocolate base must chill for at least 4 hours before churning. For the smoothest texture and most efficient freezing, allow it to mature in the refrigerator for 8–12 hours.
After churning, the ice cream needs at least 6 hours in the freezer to become uniformly firm. An 8–12-hour hardening period produces the most reliable scoopable structure.
The practical approach is to begin the recipe one day before serving. Most of the total time is passive, but neither the chilling stage nor the hardening stage should be shortened simply because the surface appears cold or firm.
Use a Shallow Freezer Container
A shallow container allows the churned ice cream to lose heat more quickly and evenly than a deep, narrow container. Faster hardening limits the time available for ice crystals to grow and makes the finished ice cream easier to portion.
When possible, chill the empty container before churning. A cold container reduces melting during transfer, especially around the bottom and sides.
Check the Refrigerator and Freezer Temperatures
The chocolate base should reach 35–40°F (2–4°C) before churning. A refrigerator that runs warmer than 40°F (4°C) may not chill the base sufficiently and is not appropriate for safe cold storage.
The finished ice cream should harden in the coldest stable section of the freezer, not in the door. A freezer temperature close to 0°F (−18°C) provides the firm structure expected from homemade ice cream.
Recommended Production Timeline
This schedule gives the custard enough time to mature and the finished ice cream enough time to harden without rushing either stage.
| Stage | Recommended Timing | What Happens |
|---|---|---|
| Freeze the machine bowl | At least 24 hours before churning | The bowl reaches its full freezing capacity |
| Cook and cool the custard | Day 1, morning or afternoon | The cocoa is dispersed, the yolks are cooked, and the chocolate is emulsified |
| Chill and mature the base | At least 4 hours; preferably 8–12 hours | The base reaches 35–40°F (2–4°C), the cocoa hydrates, and the fat structure stabilizes |
| Churn | Day 1, evening or Day 2, morning | The base freezes while a controlled amount of air is incorporated |
| Harden | At least 6 hours; preferably 8–12 hours | The soft churned ice cream becomes firm and evenly scoopable |
| Temper and serve | 5–10 minutes before scooping | The ice cream softens enough to form smooth, rounded scoops |
Tip: If you want to serve the ice cream after dinner, churn it no later than that morning. For the most relaxed schedule, cook the custard on Day 1, churn it that evening, and serve it on Day 2.
Ingredients for Homemade Chocolate Ice Cream
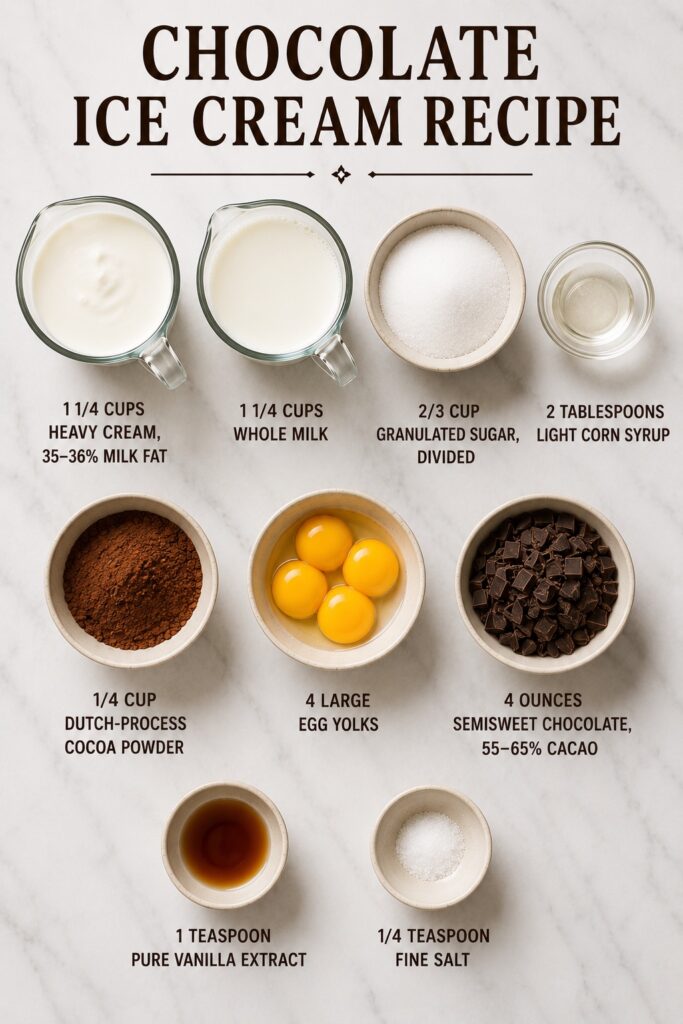
This chocolate ice cream uses a compact ingredient list, but the type and quantity of each ingredient directly affect freezing, emulsification, flavor, and scoopability. Measure the cocoa, chocolate, sugar, and dairy accurately, and keep the specified ingredients within their validated ranges.
Chocolate Custard Base
- 1¼ cups (300 ml) heavy cream, 35–36% milk fat
- 1¼ cups (300 ml) whole milk
- ⅔ cup (135 g) granulated sugar, divided
- 2 tablespoons (30 g) light corn syrup
- ¼ cup (25 g) Dutch-process cocoa powder, sifted if visibly lumpy
- 4 large egg yolks (approximately 72 g)
- 4 ounces (113 g) semisweet chocolate, 55–65% cacao, finely chopped
- 1 teaspoon (5 ml) pure vanilla extract
- ¼ teaspoon (1.5 g) fine salt
Divide the granulated sugar as follows: use ½ cup (100 g) in the cocoa and dairy mixture and 2 tablespoons plus 2 teaspoons (35 g) with the egg yolks.
Keep the ingredients grouped and measured before heating the dairy. Once the custard reaches its final temperature, the straining, chocolate melting, and rapid-cooling stages move quickly.
Ingredient Intelligence
The ingredients in this formula were selected as a system rather than as interchangeable flavor additions. Changing the cocoa type, chocolate percentage, dairy fat, or sweeteners can alter how much water freezes, how firm the ice cream becomes, and how cleanly it melts.
Use Dutch-Process Cocoa Powder
Dutch-process cocoa has been treated to reduce its natural acidity, giving it a darker color and a smoother, rounder chocolate profile. In this recipe, it provides concentrated cocoa flavor without introducing enough additional cocoa butter to make the frozen texture heavy.
Natural cocoa powder is not a direct substitute. It is typically lighter, sharper, and more acidic, so the finished ice cream would have a noticeably different flavor and color.
Do not replace the full amount with black cocoa. Black cocoa can produce an almost charcoal color and a very alkaline, less rounded flavor. A small amount would require separate validation because even a partial substitution changes both appearance and taste.
Measure cocoa by weight whenever possible. Packing extra cocoa into the measuring cup increases the dry solids in the base and may create a chalky texture or a firmer frozen result.
Choose Semisweet Chocolate with 55–65% Cacao
Chocolate within the 55–65% cacao range supplies enough cocoa solids for intensity while still contributing the sugar needed to keep the formula balanced. It also adds cocoa butter, which gives the ice cream a rounder flavor and a more luxurious melt.
A chocolate closer to 55% will produce a slightly sweeter and softer result. Chocolate closer to 65% will create a darker flavor and a marginally firmer texture. Both remain within the validated range and require no other adjustment.
Avoid substituting chocolate above 70% cacao without reformulating the recipe. Higher-cacao chocolate usually contains less sugar and more cocoa solids, which can increase bitterness and make the ice cream harder when frozen.
Use a finely chopped baking bar when possible. Chocolate chips often contain stabilizers that help them retain their shape during baking, so they may melt less smoothly into the custard. If chips are the only option, chop them before adding the hot base and stir until no pieces remain.
Heavy Cream and Whole Milk Work Together
Heavy cream provides richness, body, and lubrication, while whole milk supplies enough water and milk solids for the base to churn efficiently. The two ingredients are not interchangeable, and replacing one with more of the other changes the total fat and freezing behavior.
Do not replace the heavy cream with half-and-half or the whole milk with reduced-fat or skim milk. Those changes lower the fat and solids that support the emulsion, producing a firmer texture with a greater risk of noticeable ice crystals.
Adding extra cream is not a reliable way to soften hard ice cream. Too much dairy fat, combined with the yolks and cocoa butter in the chocolate, can mute the cocoa flavor and leave a greasy or waxy coating when the ice cream is eaten very cold.
Do Not Reduce the Sugar
Granulated sugar does more than sweeten the custard. It lowers the freezing point of the water in the base, allowing part of that water to remain unfrozen and keeping the hardened ice cream from becoming a solid block.
Reducing the sugar without rebalancing the full formula will make the ice cream harder, less scoopable, and more prone to a coarse or icy texture. The change may appear successful while the ice cream is freshly churned, then become obvious after several hours in the freezer.
The sugar is divided for technical reasons. The larger portion disperses the cocoa through the dairy, while the smaller portion is whisked into the yolks immediately before tempering.
Why Light Corn Syrup Is Included
Light corn syrup contains glucose-based sugars that interfere with the growth of large ice crystals. In this small quantity, it improves body and scoopability without giving the ice cream a noticeably syrupy taste or excessive sweetness.
Do not omit it and expect an identical result. The ice cream may still freeze, but it will generally become firmer and may deteriorate more quickly during storage.
A neutral glucose syrup may replace the light corn syrup by weight. Use 30 g glucose syrup. Because commercial glucose syrups vary in concentration and viscosity, the finished softness may differ slightly.
Use Egg Yolks, Not Whole Eggs
Egg yolks supply lecithin and other natural emulsifiers that help keep the water and fat evenly distributed. Their proteins also thicken the custard gently as it reaches 170–175°F (77–79°C).
Whole eggs are not an equivalent substitute. Egg whites add water and proteins that coagulate differently, potentially creating a firmer, less creamy base with a greater risk of visible egg particles.
Four yolks provide enough emulsification and body without turning the base into a strongly egg-flavored custard. Adding more yolks would make the ice cream heavier and could reduce the clarity of the chocolate flavor.
Add Vanilla After Cooking
Vanilla rounds the cocoa aroma and softens the perception of bitterness, but it should not taste like a separate flavor. Add it after the custard has been strained over the chocolate so less of its aroma is lost through prolonged heating.
Use Fine Salt
Fine salt dissolves evenly and sharpens the chocolate flavor without leaving noticeable salty grains. Coarse salt is harder to distribute accurately in this small quantity and is not recommended for the custard base.
Equipment for Homemade Chocolate Ice Cream
The equipment for this recipe is straightforward, but several pieces directly affect whether the custard cooks evenly, the base cools fast enough, and the ice cream freezes before large crystals can form. Use tools that give you control over temperature, batch size, and transfer speed.
- Medium heavy-bottomed saucepan: distributes heat more evenly and reduces scorching around the base and corners.
- Medium heatproof bowl: holds the chopped chocolate and hot strained custard.
- Whisk: disperses the cocoa, combines the yolks and sugar, and keeps the mixture smooth during tempering.
- Heat-resistant silicone spatula: scrapes the bottom and corners of the saucepan while the custard cooks.
- Instant-read thermometer: confirms the 170–175°F (77–79°C) custard endpoint and the 35–40°F (2–4°C) pre-churn temperature.
- Fine-mesh sieve: removes small cocoa clumps or egg particles before the custard reaches the chocolate.
- Large bowl for an ice bath: cools the hot base rapidly after cooking.
- Ice cream maker with at least 1½-quart capacity: freezes and churns the base.
- Shallow freezer-safe container with a tight-fitting lid: promotes faster, more even hardening.
- Parchment paper or another food-safe surface covering: limits direct air exposure during storage.
Ice Cream Maker Capacity Matters
A machine’s stated capacity does not necessarily equal its most effective freezing capacity. The base needs enough open space to expand, circulate around the dasher, and release heat into the cold bowl or compressor system.
This recipe is sized for a machine with a capacity of at least 1½ quarts. Do not double it in one batch unless the manufacturer specifically supports that volume and the machine can freeze it rapidly. A bowl that merely holds the mixture may still be too full to churn it efficiently.
When a machine is overloaded, the base often remains fluid for too long. It may eventually look thick around the edges while staying loose in the center, producing uneven freezing and larger ice crystals.
A Thermometer Removes Critical Guesswork
The back-of-the-spoon test is useful, but it is not precise enough to be the only custard control. A coating that looks correct can occur across a wider temperature range depending on the cocoa, chocolate, and rate of evaporation.
Use an instant-read thermometer to confirm that the custard reaches 170–175°F (77–79°C). The coating and clean finger trail then serve as supporting evidence that the yolks have thickened the base correctly without overcooking.
The thermometer is equally useful before churning. A base that feels cold to the hand may still be too warm. The target is 35–40°F (2–4°C), not simply “chilled.”
A Shallow Container Improves Hardening
Freshly churned ice cream is still soft and contains substantial unfrozen water. A shallow container exposes more of the ice cream to the cold surface area of the freezer, allowing the center to harden faster than it would in a deep tub.
Faster hardening reduces the time during which existing crystals can grow. It also creates a more uniform texture from the edges to the center and makes the ice cream easier to scoop in controlled portions.
The Saucepan Should Not Be Oversized
A very wide saucepan increases the surface area of the custard and can cause excessive evaporation before the yolks reach their target temperature. That changes the concentration of sugar, fat, cocoa solids, and water.
A medium saucepan of approximately 2½–3 quarts gives the mixture enough room for whisking while keeping evaporation and temperature control predictable.
The Science Behind Creamy Chocolate Ice Cream
Creamy ice cream is created by controlling how water, fat, sugar, proteins, cocoa solids, and air behave as the base cools and freezes. The goal is not to eliminate ice crystals, which is impossible, but to keep them small enough that the finished texture feels smooth.
Ice Crystals Grow When Freezing Is Too Slow
As the base freezes, water molecules organize into ice crystals. The longer the mixture remains in the partially frozen zone, the more opportunity those crystals have to grow.
A warm base, an inadequately frozen machine bowl, an oversized batch, or a machine that has lost cooling power all slow this transition. The result may look acceptable immediately after churning but become noticeably coarse after hardening.
Rapid freezing produces a larger number of smaller crystals. That is why the base must be fully chilled and why machine capacity is a technical control rather than a convenience detail.
Sugar Keeps Part of the Water Unfrozen
Not all of the water in finished ice cream should freeze solid. Dissolved sugars lower the temperature at which water freezes, leaving part of the mixture in a soft, concentrated liquid phase even when the ice cream is fully hardened.
This unfrozen phase allows the ice cream to bend under a scoop instead of fracturing. It also helps the frozen crystals move past one another as the ice cream softens.
Reducing sugar may appear to solve excessive sweetness before freezing, but cold temperatures suppress sweetness perception. The same reduction that makes the liquid base taste less sweet can leave the frozen ice cream unusually hard and coarse.
Light Corn Syrup Limits Crystal Growth
Light corn syrup contributes glucose-based sugars that behave differently from sucrose. Using more than one type of sugar makes it harder for molecules to arrange into large, orderly crystals.
At the validated quantity, the syrup improves body and slows texture deterioration without making the ice cream sticky or noticeably sweeter. It supports the formula; it does not replace correct chilling, churning, or storage.
Fat Creates Lubrication but Must Stay Balanced
Dairy fat and cocoa butter coat the tongue and interrupt the rigid structure formed by ice. This contributes smoothness, richness, and a slower melt.
However, chocolate ice cream receives fat from several sources at once: heavy cream, whole milk, egg yolks, cocoa, and semisweet chocolate. If the total becomes too high, the ice cream may feel greasy or leave a waxy film, particularly when served directly from a very cold freezer.
The goal is not maximum fat. It is enough fat to create body while preserving clear chocolate flavor and a clean finish.
Egg Yolks Help Water and Fat Stay Emulsified
Water and fat naturally resist remaining mixed. Egg yolks contain lecithin and other emulsifying compounds that help break the fat into smaller droplets and keep those droplets dispersed through the custard.
A stable emulsion freezes and melts more evenly. It is less likely to release oily droplets or separate into watery and fatty phases as it softens.
The yolks also contribute proteins that thicken gently during cooking. The base should gain enough body to support the emulsion, but it must remain fluid enough to churn efficiently.
Maturation Changes the Base Before Churning
During refrigeration, the base undergoes physical changes even though no visible action is taking place. Cocoa particles continue to hydrate, dairy fat partially crystallizes, and the proteins and emulsifiers settle into a more stable structure.
This is why an 8–12-hour maturation period generally produces a more controlled churn than cooling the base only until the bowl feels cold. The matured base is colder, slightly thicker, and better prepared to trap small air bubbles while freezing.
Churning Controls Air and Crystal Size at the Same Time
The dasher continuously scrapes frozen mixture from the walls of the machine and redistributes it through the softer center. This action limits crystal growth while incorporating a moderate amount of air.
This recipe is intended to remain dense rather than highly aerated. The correct endpoint is a cohesive soft-serve texture with visible ridges, not a whipped mousse or a fully hard frozen mass.
How to Make Chocolate Ice Cream
The method has three controlled phases: cook the chocolate custard, chill the base until fully cold, then churn and harden it. Temperature matters, but so do the physical cues at each stage. Use both rather than relying on time alone.
1. Prepare the Chocolate and Cooling Station
Finely chop the semisweet chocolate and place it in a medium heatproof bowl. Set a fine-mesh sieve securely over the bowl.
Fill a separate large bowl with approximately equal amounts of ice and cold water. Leave enough room for the bowl of custard to sit inside without forcing ice-bath water over the rim.
Check that the ice cream maker is ready. If it uses a removable freezer bowl, the bowl should be completely frozen with no audible liquid movement inside the walls.
Critical control point: Complete these preparations before heating the custard. Once the custard reaches its final temperature, it must be strained over the chocolate and cooled without delay.
What you should see: The chocolate should be finely and evenly chopped, the sieve should sit securely above the bowl, and the ice bath should contain enough ice to remain cold after the hot custard is added.
2. Mix the Cocoa, Sugar, and Dairy
In a medium heavy-bottomed saucepan, whisk together ½ cup (100 g) granulated sugar, the Dutch-process cocoa powder, and the fine salt.
Add approximately ¼ cup of the measured whole milk and whisk until a smooth, thick cocoa paste forms. Gradually whisk in the remaining whole milk, followed by the heavy cream and light corn syrup.
Scrape the whisk around the bottom and corners of the saucepan to make sure no dry cocoa remains trapped against the pan.
Critical control point: Add only a small portion of milk at first. Pouring all the liquid over dry cocoa at once makes it easier for powdery pockets to float on the surface or remain hidden in the mixture.
What you should see: The mixture should be fluid, evenly dark brown, and free from dry cocoa islands or pale streaks of unmixed dairy.
3. Heat the Chocolate Dairy Mixture
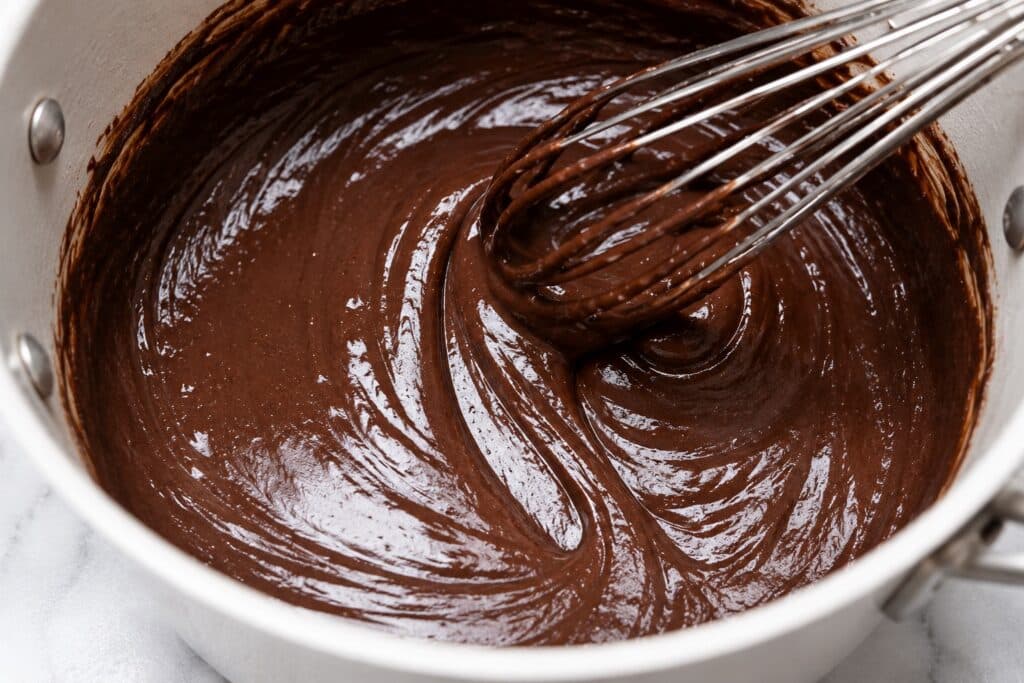
Place the saucepan over medium heat. Cook, whisking frequently and scraping the bottom and corners of the pan, until the mixture reaches 160–165°F (71–74°C).
The mixture should be visibly steaming, with small bubbles forming around the perimeter. Do not let it reach a full boil.
This stage will usually take approximately 5–8 minutes, depending on the saucepan, burner, and starting temperature of the dairy.
Critical control point: Cocoa and dairy solids can settle and scorch. Whisk across the entire base of the pan rather than stirring only through the center.
What you should see: The cocoa should be fully dispersed, the mixture should look glossy and uniform, and steady steam should rise without vigorous bubbling.
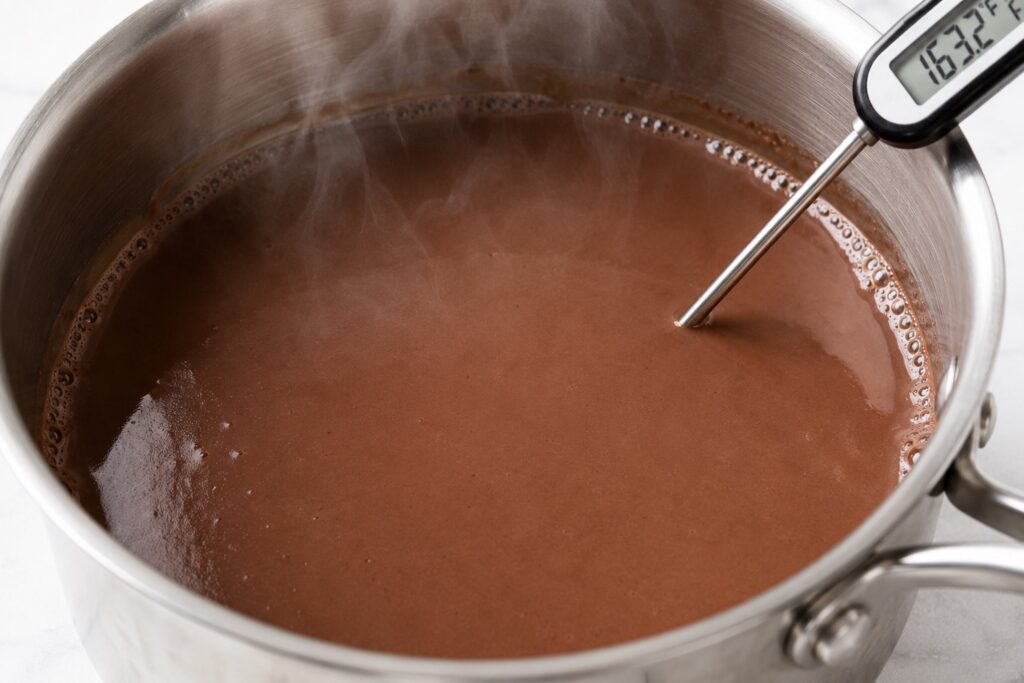
4. Whisk the Egg Yolks with the Remaining Sugar
While the dairy mixture heats, place the four egg yolks in a medium bowl. Add the remaining 2 tablespoons plus 2 teaspoons (35 g) granulated sugar.
Whisk immediately for approximately 30–45 seconds, until the mixture is smooth and slightly lighter in color.
Critical control point: Do not sprinkle the sugar over the yolks and leave it sitting undisturbed. Concentrated sugar can pull moisture from the yolk surface and create small firm granules.
What you should see: The yolk mixture should be smooth, thick, and cohesive. When the whisk is lifted, it should fall back into the bowl in a short, heavy ribbon.
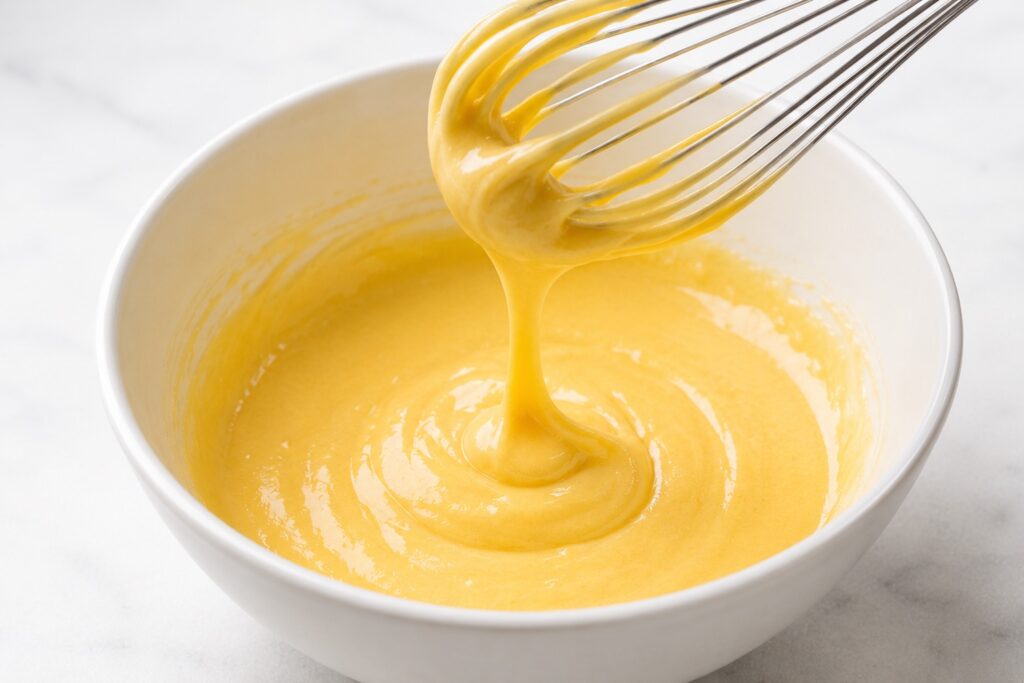
5. Temper the Egg Yolks
Remove the hot dairy mixture from the heat.
While whisking the yolks continuously, slowly pour in approximately 1 cup of the hot dairy mixture in a thin stream. Once the yolks are warm and fluid, pour the tempered mixture back into the saucepan while whisking.
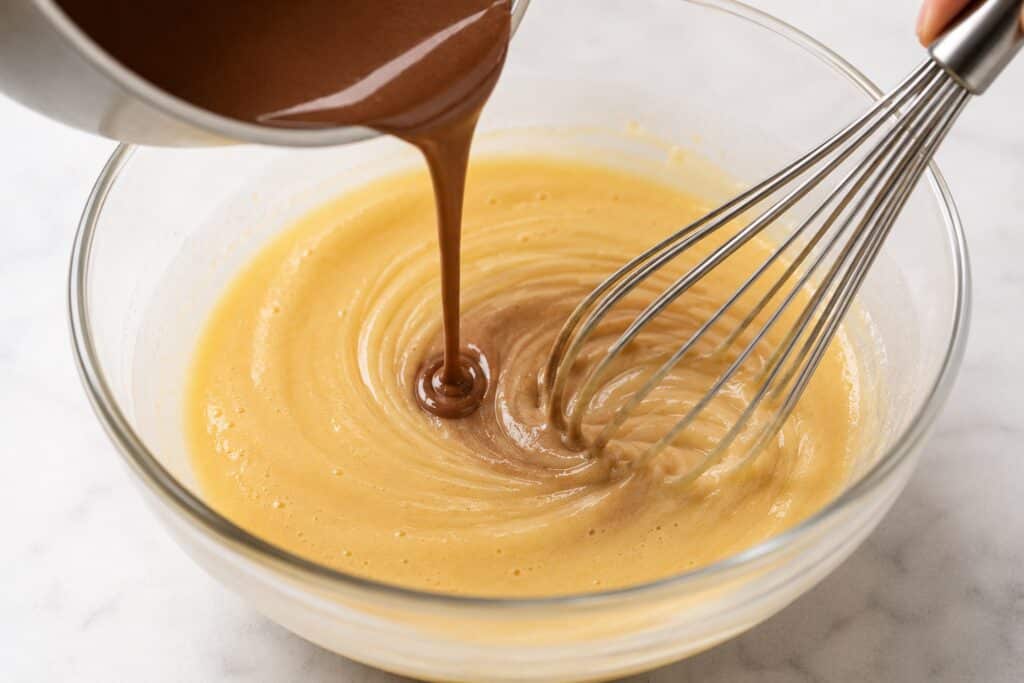
Critical control point: Add the hot dairy gradually and keep the yolks moving. Pouring too quickly can overheat one area of the bowl and create scrambled egg particles.
What you should see: The combined mixture should remain completely smooth and fluid, without visible yolk strands, pale curds, or grainy particles.
6. Cook the Custard to 170–175°F
Return the saucepan to medium-low heat. Stir continuously with a heat-resistant silicone spatula, scraping the bottom, corners, and sides of the pan.
Cook until the custard reaches 170–175°F (77–79°C). Do not let it boil and do not allow the temperature to exceed 180°F (82°C).
The custard should lightly coat the back of the spatula. Draw a finger through the coating; the line should remain visible instead of immediately closing.
This stage will generally take approximately 3–6 minutes after tempering, but the thermometer and texture cues take priority over the clock.
Critical control point: Stop while the custard is still clearly pourable. Cooking until it resembles pudding or pastry cream will over-thicken the base and may produce a grainy, egg-heavy frozen texture.
What you should see: The custard should be glossy and slightly thicker than the uncooked mixture. It should form a thin coating on the spatula but still pour in a continuous stream.
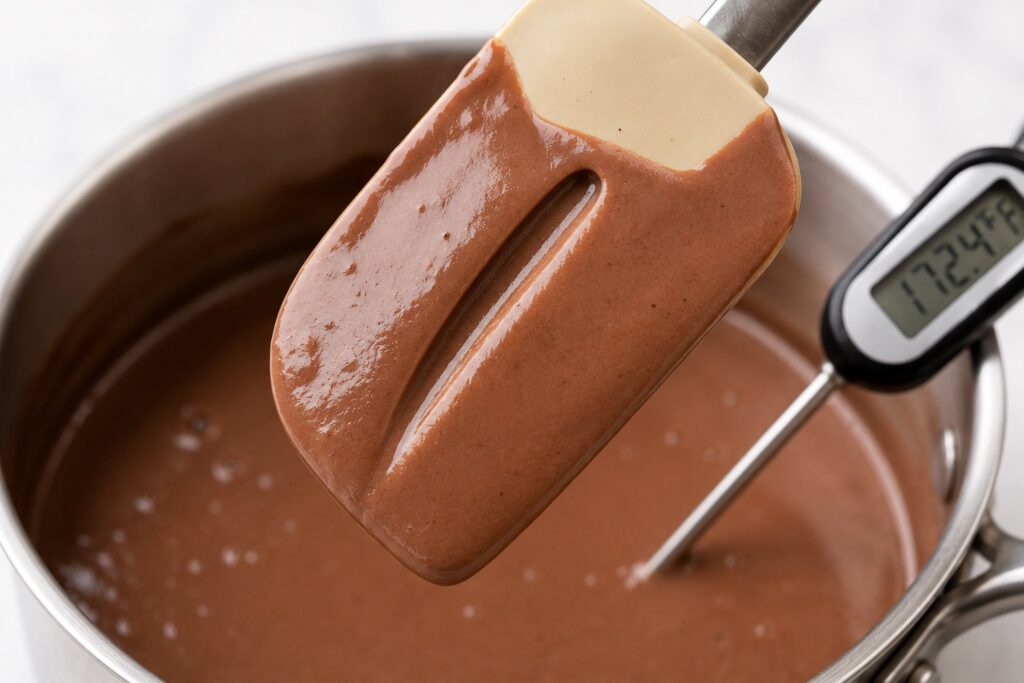
7. Strain the Custard Over the Chocolate
Immediately pour the hot custard through the prepared fine-mesh sieve over the chopped chocolate.
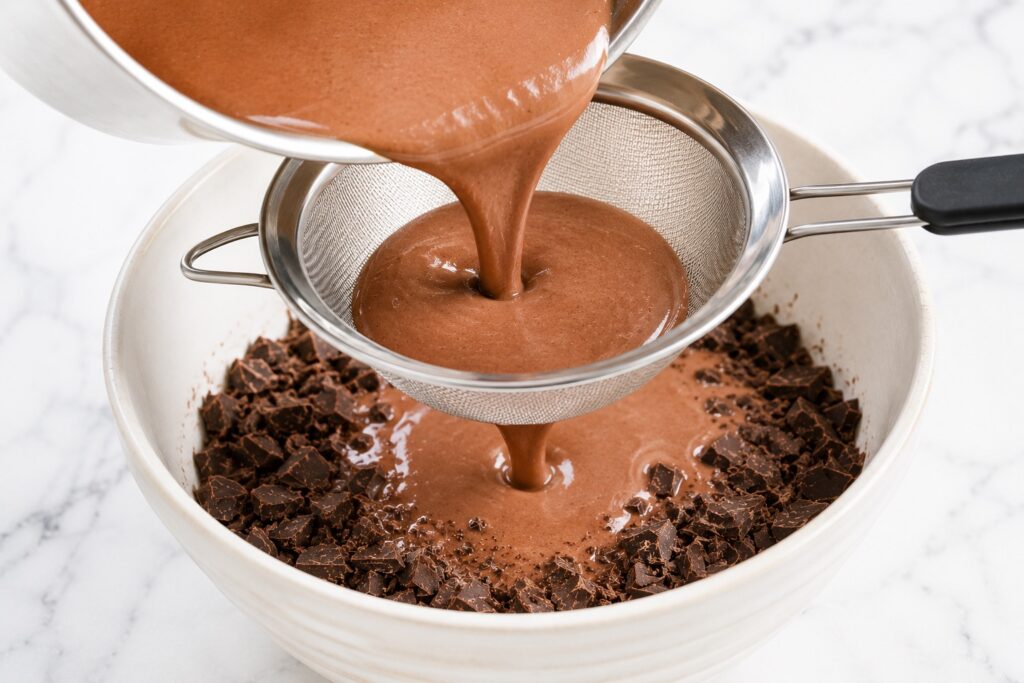
Let the mixture stand undisturbed for 1 minute so the heat can begin melting the chocolate. Then stir slowly from the center outward until the chocolate is completely melted and the base is smooth.
Add the vanilla extract and stir gently until incorporated.
Critical control point: Stir rather than whisking aggressively. Excessive agitation can incorporate unnecessary air into the hot custard and make it harder to judge whether the emulsion is fully smooth.
What you should see: The base should be dark brown, glossy, and completely uniform, with no visible chocolate fragments, cocoa lumps, egg particles, or oily streaks.
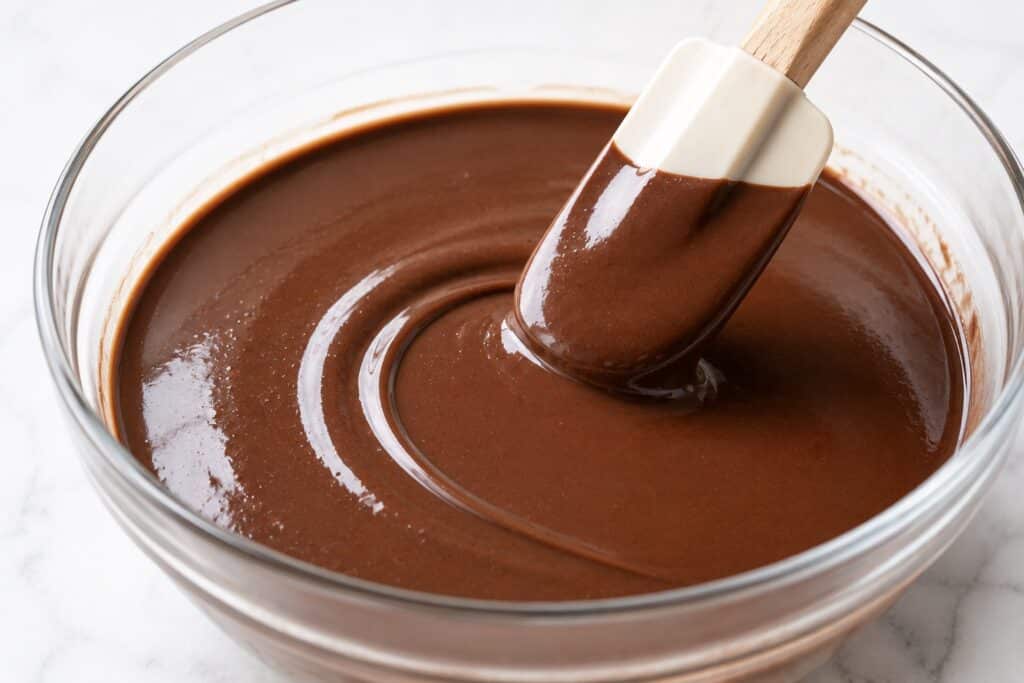
8. Cool the Base Rapidly
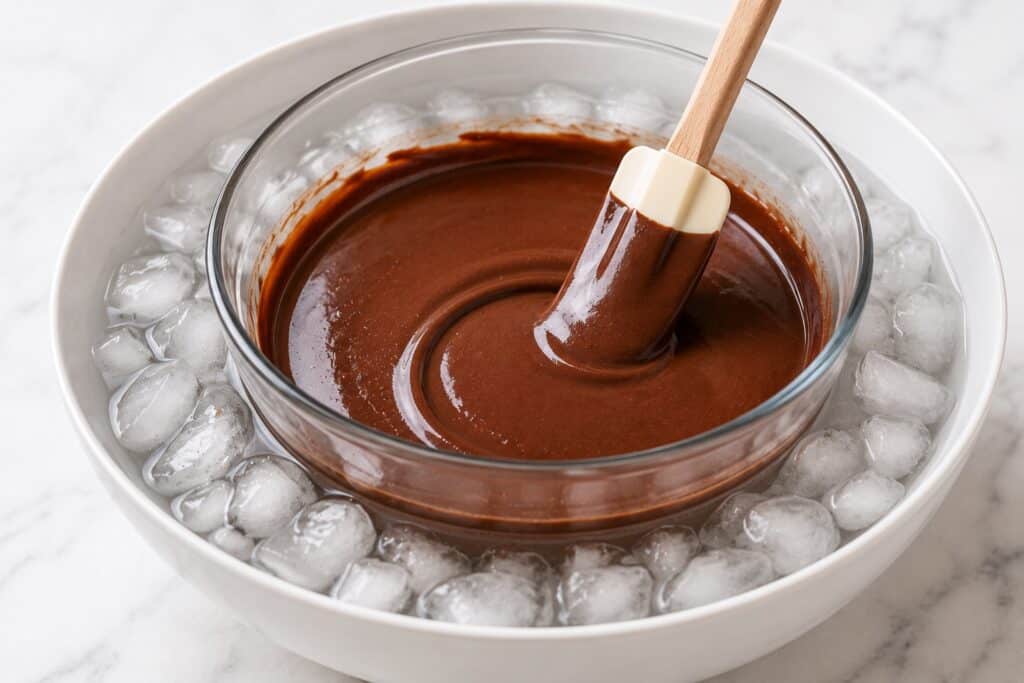
Place the bowl of chocolate custard into the prepared ice bath. Stir frequently until the base cools below 70°F (21°C).
Depending on the bowl size and quantity of ice, this should take approximately 10–15 minutes. Add more ice if the bath becomes mostly water before the custard is sufficiently cool.
Keep the rim of the custard bowl above the ice-bath water and dry the outside before transferring it to the refrigerator.
Critical control point: Do not leave the hot custard on the counter to cool slowly. Rapid cooling limits continued egg coagulation and moves the dairy base through the warm temperature range more efficiently.
What you should see: The custard should remain smooth and glossy while becoming slightly thicker as its temperature drops. It should not form a skin or separate around the edges.
9. Chill and Mature the Base
Remove the bowl from the ice bath. Cover the surface of the custard directly or transfer it to a covered container.
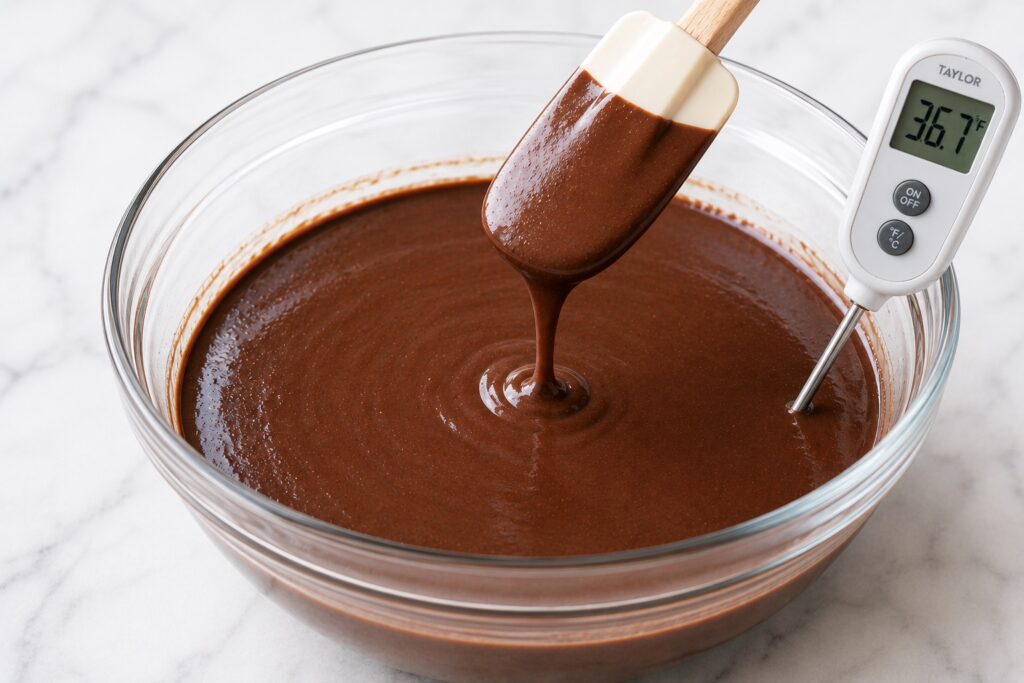
Refrigerate until the base reaches 35–40°F (2–4°C). Chill for at least 4 hours, preferably 8–12 hours. Churn the base within 24 hours.
Before churning, stir the cold custard gently but thoroughly so the cocoa, fat, and liquid are evenly distributed.
Critical control point: Do not rely only on how cold the bowl feels. A base warmer than 40°F (4°C) uses too much of the machine’s cooling capacity before efficient freezing begins.
What you should see: The fully chilled base should be noticeably thicker than it was while warm, but it should still be smooth and pourable rather than set like pudding.
10. Churn Until It Resembles Dense Soft Serve
Set up the ice cream maker according to the manufacturer’s instructions. If the machine requires the motor to run before the base is added, start it first and pour the chilled custard through the opening while the dasher is moving.
Churn until the mixture resembles dense soft serve, usually approximately 20–30 minutes. Machine design, bowl temperature, room temperature, and batch movement can all change the exact time.
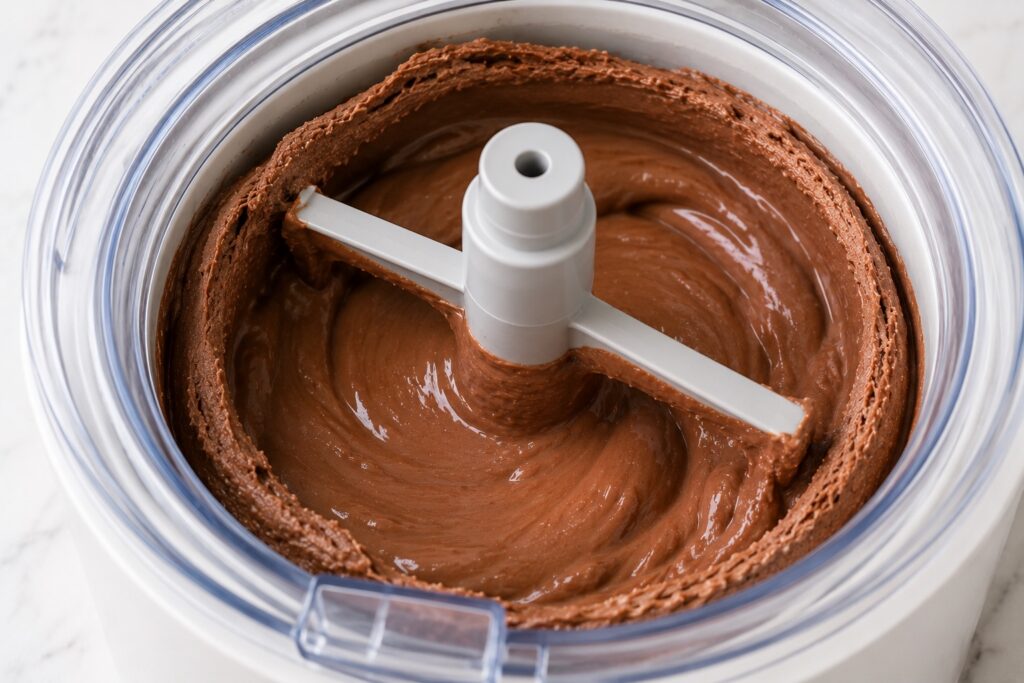
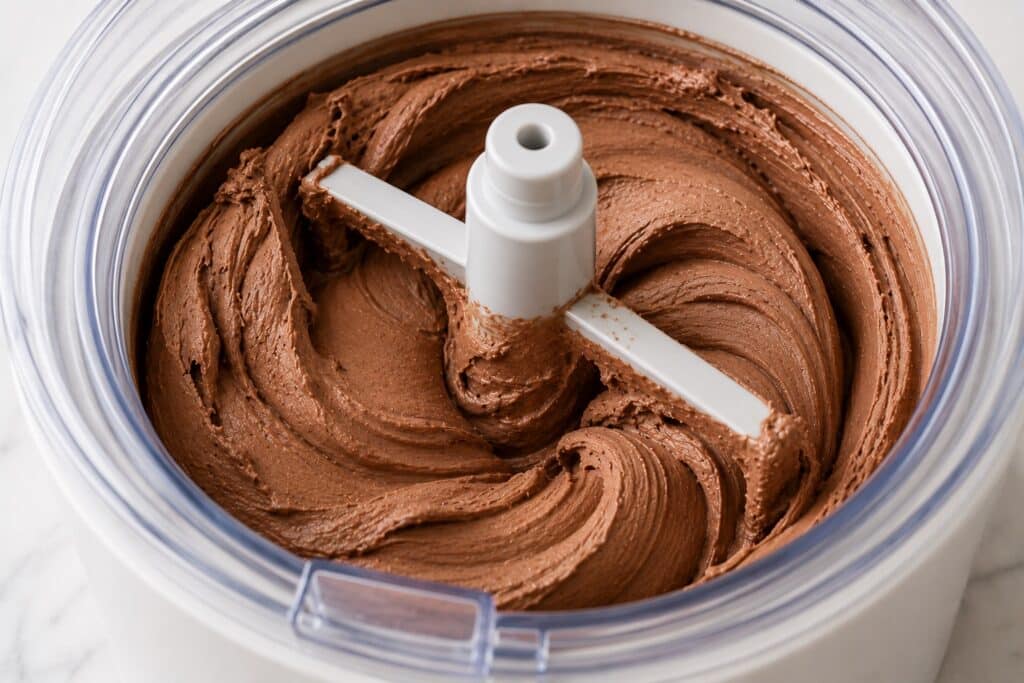
Stop when the dasher leaves defined ridges that remain visible, the ice cream moves as a cohesive mass instead of a liquid wave, and a spoonful holds a soft mound.
Where measurable, the churned ice cream will commonly be approximately 21–25°F (−6 to −4°C).
Critical control point: Do not keep churning in an attempt to make the ice cream fully hard. Prolonged churning after the correct endpoint can warm the mixture through friction or cause fat droplets to agglomerate into a slightly buttery texture.
What you should see: The ice cream should be thick, softly aerated, and visibly folded. It should hold ridges and soft peaks without looking whipped, dry, or fully frozen.
11. Transfer and Harden the Ice Cream
Transfer the churned ice cream immediately to a pre-chilled, shallow freezer-safe container. Work quickly and scrape the machine bowl efficiently so the soft ice cream does not begin melting during transfer.
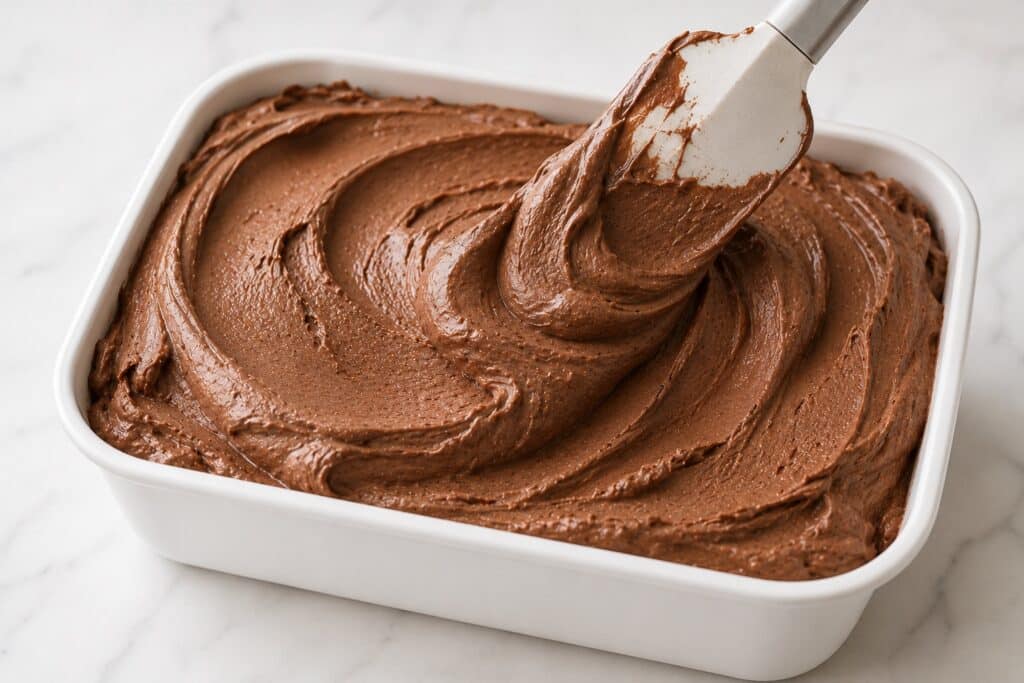
Smooth the surface gently without pressing out the air incorporated during churning. Place parchment paper or another appropriate food-contact covering directly against the surface, then seal the container with its lid.
Freeze in the coldest stable section of the freezer for at least 6 hours. For the most uniform texture, allow 8–12 hours of hardening.
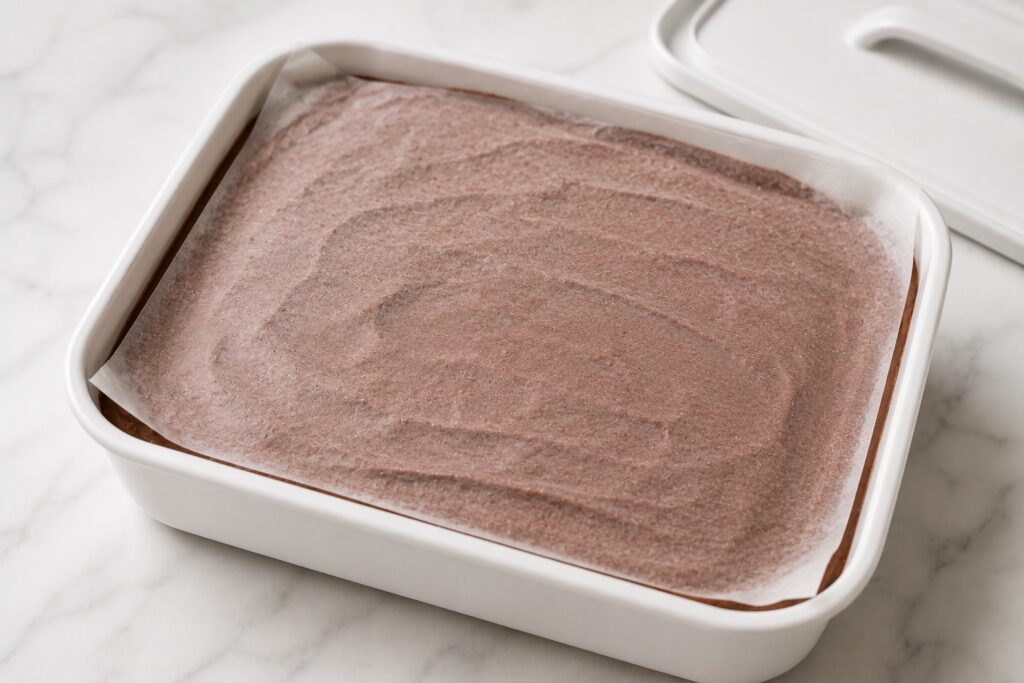
Critical control point: Avoid a deep, narrow container and do not leave the soft ice cream exposed while arranging toppings or cleaning the machine. Rapid transfer and fast hardening limit crystal growth.
What you should see: The packed ice cream should retain visible folds from churning and remain thick enough that no thin liquid layer pools around the edges.
Chocolate Ice Cream Doneness Guide
Chocolate ice cream has three separate doneness points: the custard must be cooked enough to thicken and emulsify, the base must be churned until enough water has frozen, and the finished ice cream must harden fully before it reaches its intended serving texture. Each stage has a different endpoint.
Custard Doneness
The primary doneness signal is a temperature of 170–175°F (77–79°C). At this point, the yolk proteins have thickened the base enough to support the emulsion without turning the mixture into a heavy custard.
The custard should lightly coat the back of a spatula. When you draw a finger through the coating, the line should remain clear instead of immediately closing.
The mixture must still pour in a smooth, continuous stream. A pudding-like texture means it has cooked too far.
Underdone custard: The mixture may remain unusually thin, provide less body, and melt more quickly after freezing.
Overdone custard: The base may contain fine egg particles, develop an eggy aroma, or freeze with a grainy, heavy texture. Straining can remove small curds, but it cannot fully correct an overcooked flavor or structure.
Churning Doneness
The ice cream is ready to leave the machine when it resembles dense soft serve. The dasher should leave defined ridges that remain visible, and the mixture should move as one cohesive mass instead of flowing like a liquid wave.
A spoonful should hold a soft mound for several seconds. Where measurable, the temperature will commonly be approximately 21–25°F (−6 to −4°C).
Underdone churn: The ridges disappear immediately, the mixture sloshes around the dasher, or thin liquid collects at the bottom of the bowl.
Overdone churn: The machine becomes unusually resistant, the ice cream begins warming from friction, or the mixture develops small greasy or buttery-looking flecks.
Final Doneness After Hardening
Freshly churned ice cream is not finished at the intended serving texture. After at least 6 hours in the freezer, the center should be uniformly firm rather than softer than the edges.
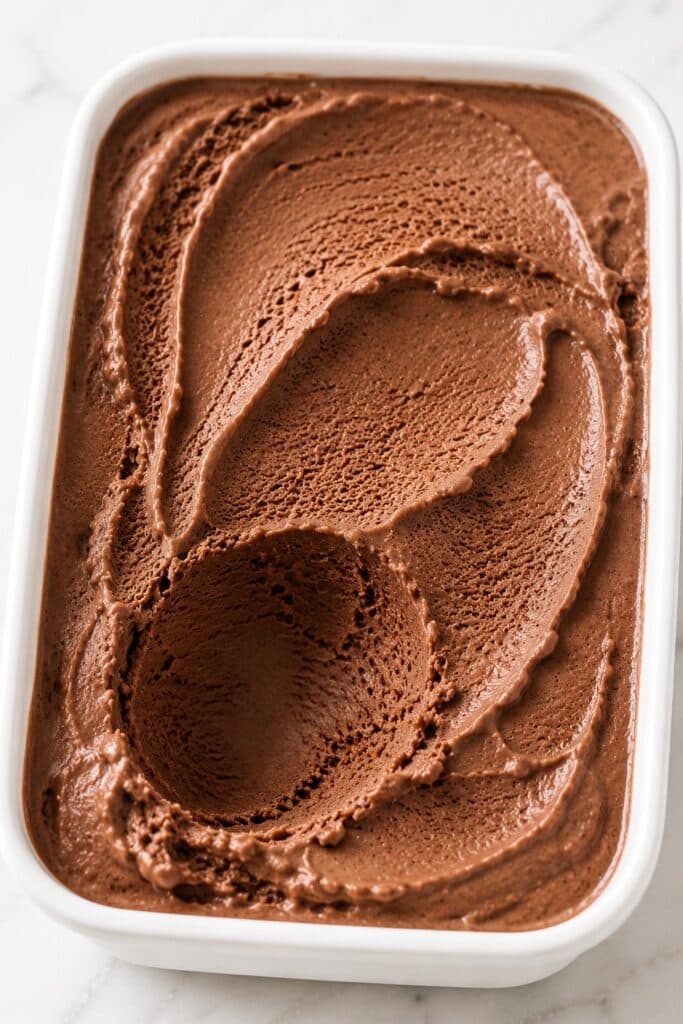
After 5–10 minutes at room temperature, the surface should yield under steady scoop pressure and curl into a rounded portion without cracking or crumbling.
If the center remains soft after the minimum hardening period, the freezer may be too warm, the container may be too deep, or the ice cream may not have frozen sufficiently during churning.
Chocolate Ice Cream Texture Guide
The correct texture changes throughout the recipe. Comparing each stage with the final scoop can be misleading, so use these physical states to judge whether the base is progressing normally.
| Stage | Correct Texture | Warning Sign |
|---|---|---|
| Cocoa paste | Smooth, thick, and free from dry powder | Floating cocoa islands or hidden dry pockets |
| Heated dairy mixture | Fluid, glossy, and evenly dispersed | Scorched specks, pale dairy streaks, or vigorous boiling |
| Cooked custard | Light coating on the spatula while remaining pourable | Pudding-thick, grainy, curdled, or eggy |
| Emulsified chocolate base | Dark, smooth, glossy, and uniform | Oily sheen, separated fat, or unmelted chocolate pieces |
| Chilled base | Thicker than when warm but still fluid | Warm center, set pudding texture, or visible separation |
| Freshly churned ice cream | Dense soft serve with persistent folds and ridges | Liquid movement, whipped mousse texture, or greasy flecks |
| Fully hardened ice cream | Firm and uniform from edge to center | Soft center, icy crust, or large visible crystals |
| Ready to scoop | Curls smoothly under pressure without breaking apart | Surface fractures, dry crumbling, or immediate melting |
| Melting | Smooth cream with an even chocolate color | Watery separation, oily droplets, or gritty residue |
The finished ice cream should feel dense and velvety rather than fluffy. Moderate air incorporation is desirable, but a mousse-like texture means the structure is too aerated for the intended result.
Expert Tips for Perfectly Velvety Chocolate Ice Cream
These advanced controls matter after the basic method is already correct. They help you judge machine performance, protect the balance of the chocolate formula, and serve the ice cream at the point where its texture and flavor are at their best.
Do Not Correct Excessive Hardness by Adding More Cream
Hard chocolate ice cream is not automatically low in fat. It is more often linked to reduced sugar, omitted corn syrup, higher-cacao chocolate, excessive evaporation, slow freezing, or an unusually cold freezer.
Keep the validated dairy ratio unchanged and diagnose the freezing-point or serving-temperature issue first. Adding more cream increases fat without reliably increasing scoopability.
This preserves the clean chocolate flavor and prevents the greasy or waxy finish that can develop when dairy fat combines with yolk fat and cocoa butter at freezer temperature.
Let the Chocolate Percentage Guide Serving Time
Chocolate closer to 65% cacao produces a slightly firmer frozen structure than chocolate closer to 55%, even when both are used within the validated range.
Begin checking the ice cream after 5 minutes at room temperature, but expect a higher-cacao batch to need slightly longer before it reaches the same scoop resistance. Do not compensate by changing the sugar or dairy in the canonical formula.
Serving each version at the correct softness preserves its intended chocolate intensity while avoiding a dry, brittle, or waxy first bite.
Serve by Scoop Resistance, Not by the Clock
Tempering time changes with freezer temperature, container depth, storage duration, and chocolate percentage. A fixed number of minutes cannot account for all four variables.
Press the scoop into one edge of the surface. The ice cream is ready when it forms a smooth curl under firm pressure without cracking and without collapsing into a soft puddle.
Serving at this resistance produces cleaner rounded scoops and allows the cocoa and dairy fats to melt evenly, giving the ice cream a smoother texture and clearer chocolate finish.
Compare Texture Only After Full Hardening
Freshly churned ice cream is not a reliable point for judging whether the finished formula is too soft, too hard, or correctly balanced. At that stage, the crystal structure is incomplete and much of the water has not yet reached its final frozen state.
Evaluate the batch only after at least 8 hours of hardening followed by controlled tempering. Make formula changes only when the ice cream remains excessively hard, waxy, icy, or weak after that complete cycle.
This prevents unnecessary adjustments based on soft-serve texture and helps preserve the balance of sugar, dairy fat, cocoa solids, and chocolate.
Common Mistakes
Most chocolate ice cream failures can be traced to temperature, batch capacity, formula changes, or slow handling during the partially frozen stages. Use the appearance and timing of the problem to identify the most likely cause before changing the recipe.
| Mistake | What Happens | Why It Happens | How to Prevent or Fix It |
|---|---|---|---|
| Churning a base that is not fully cold | The mixture stays loose for too long and may freeze with a coarse or icy texture | The machine uses much of its cooling power to lower the base temperature before rapid freezing begins | Chill the base to 35–40°F (2–4°C). If the current batch does not thicken before the machine loses cooling power, stop, refrigerate it promptly, refreeze the bowl fully, and churn only if the base has remained safely cold and fluid. |
| Using an inadequately frozen machine bowl | The base becomes cold or foamy but never reaches dense soft serve | The coolant inside the bowl is not fully frozen or warms before enough water freezes | Freeze the bowl according to the manufacturer, commonly for at least 24 hours, and confirm there is no audible sloshing. A warmed bowl cannot be rescued by continued churning. |
| Overloading the machine or doubling the recipe in one batch | The edges thicken while the center remains fluid, and the hardened ice cream becomes dense or icy | The volume exceeds the machine’s effective freezing capacity and prolongs the partially frozen stage | Use a machine of at least 1½-quart capacity for the canonical batch. Churn a doubled recipe in two independently chilled batches unless the appliance has validated capacity for more. |
| Cooking the custard until it is pudding-thick | The base may taste eggy, feel grainy, or freeze into a heavy texture | The yolk proteins over-coagulate because the custard is cooked too hot or too long | Stop at 170–175°F (77–79°C) while the base is still pourable. Strain immediately. Small curds may be removed, but a strongly eggy or heavily curdled base cannot be fully repaired. |
| Reducing or omitting the sugar or corn syrup | The ice cream freezes unusually hard, fractures under the scoop, and may become icier during storage | Less dissolved sugar allows more water to freeze solid and provides less interference with crystal growth | Use the full validated quantities. Normal firmness should be managed through tempering, not by changing the sweetener balance. |
| Using too much cocoa or chocolate above the validated cacao range | The ice cream may become chalky, bitter, overly firm, or waxy | Excess cocoa solids absorb water, while additional cocoa butter and reduced sugar alter the frozen structure | Weigh 25 g Dutch-process cocoa and use 113 g chocolate containing 55–65% cacao. An already unbalanced batch cannot be corrected reliably after churning. |
| Allowing the churned ice cream to melt during transfer | The refrozen edges become coarse and may contain larger crystals | The small crystals formed during churning partially melt and then regrow during slow hardening | Prepare a pre-chilled shallow container, transfer immediately, cover the surface, and freeze without delay. |
| Storing the ice cream without direct surface protection | Frost, dry patches, and a crystalline top layer develop | Air above the surface promotes moisture loss and ice deposition | Press parchment or another suitable food-contact layer directly against the ice cream before sealing the lid. |
| Repeatedly softening and refreezing the entire container | The texture becomes progressively coarser and the edges may turn icy | Partial melting removes the original small-crystal structure, and refreezing allows larger crystals to form | Temper only until scoopable, portion promptly, and return the container to the freezer before the edges visibly melt. |
| Expecting immediate scoopability at 0°F (−18°C) | The surface cracks, the scoop bends, or the ice cream seems incorrectly hard | Homemade ice cream has lower overrun and fewer industrial texture controls than many commercial products | Temper for 5–10 minutes and judge by scoop resistance. In a very cold freezer or deep container, allow up to approximately 15 minutes without letting the edges liquefy. |
| Leaving the hot custard to cool slowly on the counter | The base may become thicker around the edges, develop a skin, or lose smoothness | Carryover heat continues tightening the yolk proteins while the dairy remains warm | Strain immediately and cool in an ice bath to below 70°F (21°C) before refrigerating. |
| Using a very deep container for hardening | The outside freezes firmly while the center remains soft for much longer | The cold takes longer to reach the center, prolonging crystal growth in the interior | Use a shallow container and allow at least 6 hours, preferably 8–12 hours, for even hardening. |
Serving Homemade Chocolate Ice Cream
Homemade chocolate ice cream is intentionally firm after hardening. The goal is not to scoop it directly from a 0°F (−18°C) freezer, but to let it temper briefly until the chocolate and dairy fats soften enough to create smooth, rounded scoops.
Let It Temper Before Scooping
Remove the container from the freezer and let the ice cream stand at room temperature for approximately 5–10 minutes. Begin checking after 5 minutes.
In a particularly cold freezer or a deep container, it may need up to approximately 15 minutes. Avoid judging readiness by time alone.
The ice cream is ready when a scoop enters with firm, steady pressure and the surface curls smoothly instead of cracking. The edges should remain structured rather than melting into a liquid ring.
How to Make Clean Rounded Scoops
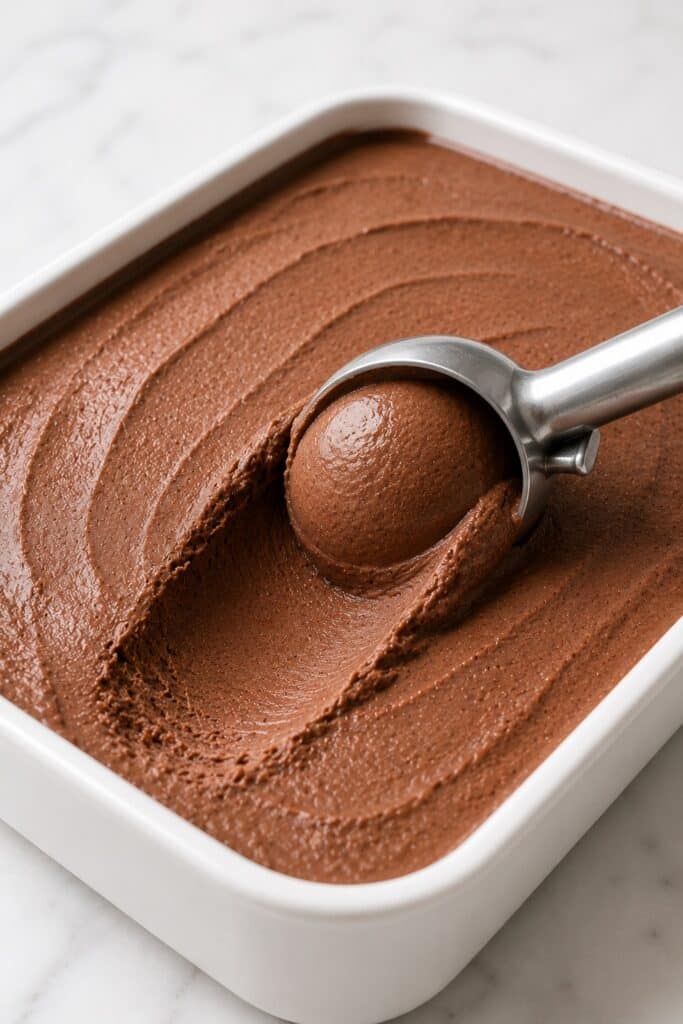
Dip the ice cream scoop briefly in warm water, then dry it completely before portioning. A slightly warmed scoop glides through the tempered surface more cleanly, while drying prevents water from freezing onto the ice cream.
Begin at one edge of the container and draw the scoop forward in a steady curve. Avoid digging straight down into the center, which creates broken chunks rather than rounded scoops.
Rewarm and dry the scoop between portions when necessary. Do not allow droplets of water to fall onto the surface because they will refreeze into hard crystals.
Choose the Right Serving Bowl
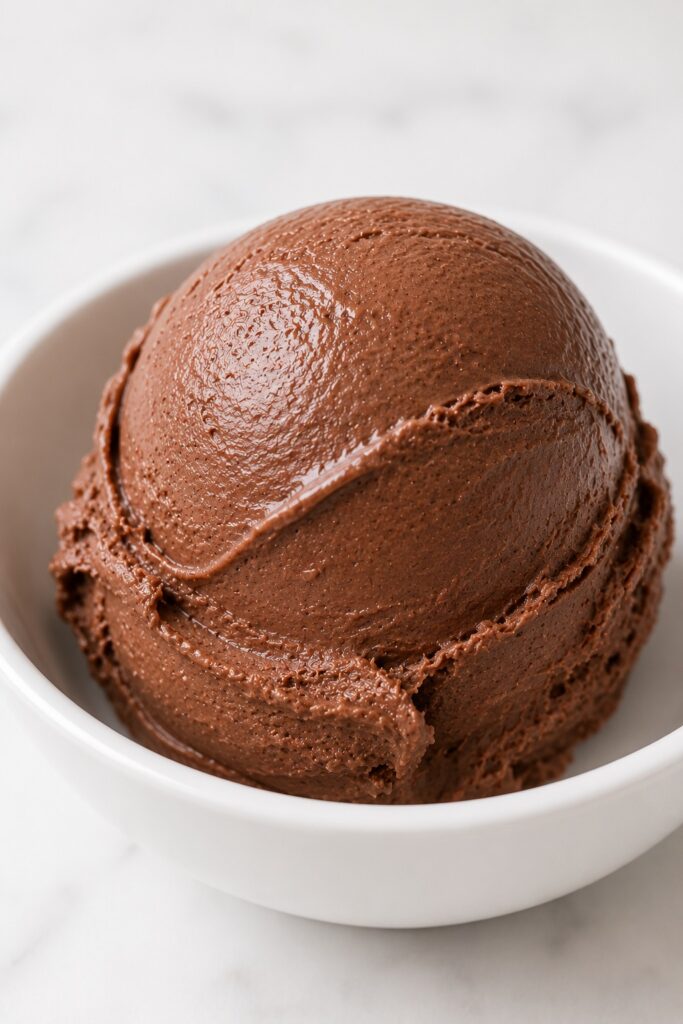
Use room-temperature or lightly chilled bowls. A warm bowl accelerates melting, while an extremely cold bowl can keep the ice cream too firm during the first few bites.
For cones, scoop only after the ice cream reaches the correct resistance. Ice cream that is still too hard will fracture and sit unevenly, while over-softened ice cream may slide or drip before serving.
What to Serve with Chocolate Ice Cream
The ice cream is rich enough to stand alone, so toppings are most effective when they add contrast rather than more weight.
- Finely shaved dark chocolate: adds delicate texture without becoming difficult to bite when frozen.
- A small amount of chocolate sauce: reinforces the flavor, but use it sparingly so it does not cover the ice cream’s clean melt.
- Crisp wafer cookies: provide a light, dry contrast to the dense texture.
- Brownie pieces: turn the ice cream into a more substantial plated dessert.
- A restrained pinch of flaky salt: sharpens the chocolate flavor when added immediately before serving.
Avoid adding a large quantity of warm sauce directly over the container. Heat melts the surface unevenly and can damage the texture when the remaining ice cream is returned to the freezer.
Storage & Make Ahead
Chocolate ice cream stores best when it is protected from air, temperature swings, and repeated partial melting. The texture is at its best during the first week, even though the ice cream may remain acceptable for longer when continuously frozen.
How to Store Homemade Chocolate Ice Cream
Transfer the churned ice cream to a shallow airtight freezer-safe container. Press parchment paper or another suitable food-contact covering directly against the surface before closing the lid.
Store the container in the coldest stable part of the freezer, away from the door. The freezer door experiences frequent temperature changes that encourage softening and recrystallization.
After each serving, smooth the exposed surface if practical, replace the covering directly against the ice cream, seal the lid, and return the container to the freezer promptly.
Best Quality and Acceptable Quality
For the intended BDV texture and strongest chocolate aroma, serve the ice cream within 1 week.
It can remain acceptable for up to approximately 2 weeks when continuously frozen and properly covered. During the second week, expect the texture to become gradually firmer and the chocolate aroma slightly less vivid.
Surface frost, dry patches, muted flavor, or increasingly coarse texture indicate quality deterioration. These changes do not automatically mean the ice cream is unsafe, but they move it away from the intended premium result.
Make-Ahead Timeline
The custard base can be prepared up to 24 hours before churning. Keep it covered and refrigerated at 35–40°F (2–4°C).
For the most reliable schedule, prepare and cool the custard on Day 1, churn it later that day after 8–12 hours of maturation, and harden it overnight for serving on Day 2.
If time is limited, the minimum functional schedule is 4 hours of chilling followed by churning and at least 6 hours of hardening. Shortening either stage further will compromise texture.
Can Melted Ice Cream Be Refrozen?
Do not treat fully melted ice cream as equivalent to the original custard base. Once the churned structure collapses, the small ice crystals and trapped air cannot be restored simply by placing the container back in the freezer.
Refreezing a fully melted batch usually produces a denser, icier texture. Rechurning is not a routine recovery method because the emulsion, air structure, and food-handling history may no longer support the intended result.
Brief tempering for scooping is different from full melting. Return the container to the freezer before the edges become liquid.
Do Not Store It in the Ice Cream Maker Bowl
Transfer the finished ice cream out of the machine as soon as churning is complete. The machine bowl is not designed for long-term storage, and leaving the ice cream inside can cause uneven hardening or make removal difficult.
For freezer-bowl machines, the bowl must also be washed, dried completely, and refrozen before the next batch according to the manufacturer’s directions.
Chocolate Ice Cream Variations
These variations stay within the technical limits of the base recipe. Each one changes the flavor or texture in a controlled way without altering the essential custard, dairy, sweetener, or freezing balance.
Chocolate Chip Ice Cream
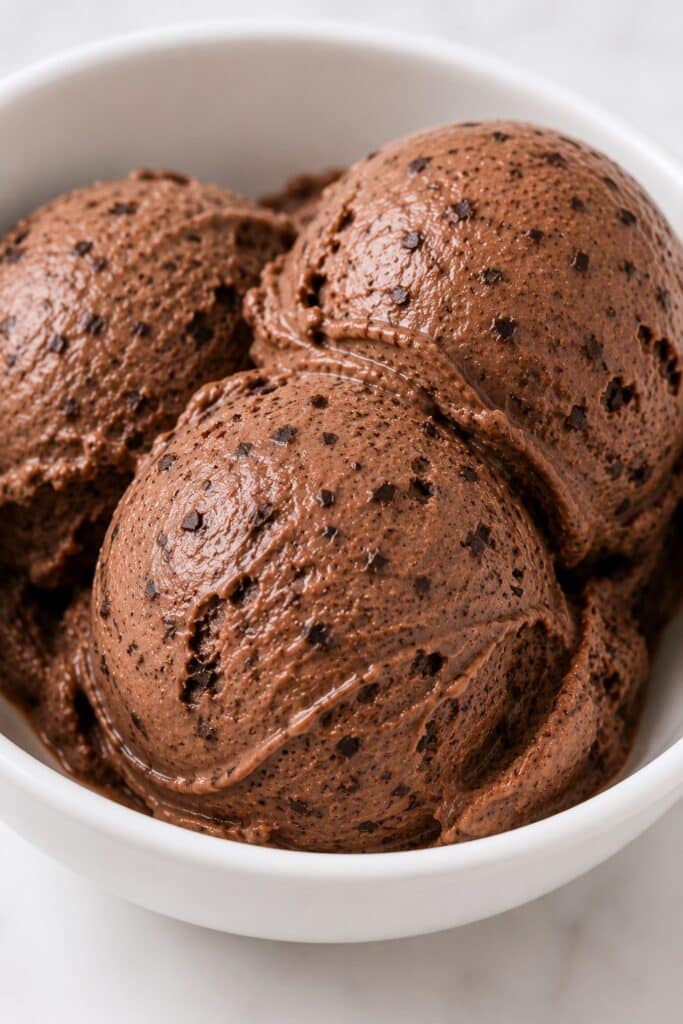
During the final 1–2 minutes of churning, add ⅓ cup (55 g) finely chopped semisweet chocolate.
Keep the pieces small. Large chunks become hard and difficult to bite at freezer temperature, while finely chopped chocolate creates delicate crisp flecks through the creamy base.
This variation increases the final yield slightly and creates a more textured eating experience than the smooth canonical version.
Darker Chocolate Ice Cream
Use semisweet or bittersweet chocolate containing up to 65% cacao in the same 4-ounce (113 g) quantity.
The finished ice cream will be slightly darker, less sweet, more cocoa-forward, and marginally firmer after hardening.
Do not exceed 65% cacao without reformulating the recipe. Chocolate above that range generally contributes less sugar and more cocoa solids, which can increase bitterness and hardness.
Chocolate Espresso Ice Cream
Add 1 teaspoon instant espresso powder to the cocoa, sugar, and salt before the milk is added.
This quantity deepens the roasted notes in the chocolate without making the finished dessert taste distinctly like coffee. The yield, churning method, and storage guidance remain unchanged.
Variations That Require a Separate Formula
Dairy-free, egg-free, no-churn, sugar-free, alcohol-flavored, peanut butter swirl, caramel swirl, marshmallow, and brownie-batter versions require separate validation. These ingredients alter freezing point, water activity, emulsion stability, component load, or machine behavior and should not be added casually to the canonical recipe.
Keep Exploring Chocolate and Frozen Desserts
If this rich Chocolate Ice Cream satisfied your deepest cocoa craving, there are several natural directions to continue. Stay with homemade frozen desserts, move toward another cool and creamy chocolate treat, or turn the same craving into a larger baking project.
Make Another Homemade Frozen Dessert
These recipes keep the focus on cold, creamy desserts while changing the flavor, format, or level of assembly.
- Vanilla Ice Cream is the closest technique match and lets you apply the same chilling, churning, hardening, and tempering skills to a clean classic flavor.
- Strawberry Ice Cream adds real fruit and a brighter profile while keeping the smooth, scoopable experience of a homemade frozen dessert.
- Homemade Ice Cream is a useful next stop when you want a broader foundation for making and customizing classic ice cream at home.
- Ice Cream Cake turns the frozen-dessert craving into a celebration centerpiece with contrasting layers and a more structured presentation.
Try Chocolate in a Different Creamy Form
When the chocolate flavor is what you want most, these desserts preserve that deep cocoa satisfaction while replacing the frozen scoop with silky, spoonable, or sliceable textures.
- French Silk Pie delivers an exceptionally smooth chocolate filling in a sliceable dessert, making it the strongest next choice for the same rich, creamy craving.
- Dirt Pudding combines cool chocolate pudding with Oreo texture for a simpler chilled dessert that remains playful and deeply chocolate-forward.
- Oreo Pie adds a crisp cookie crust and creamy filling when you want a no-bake chocolate dessert with more structural contrast.
- Chocolate Fudge concentrates the chocolate into small, dense pieces with a smooth candy texture instead of a soft frozen melt.
Turn the Chocolate Craving into a Baking Project
These larger bakes are a natural progression when you are ready to move from a make-ahead frozen dessert to layers, fillings, frosting, or a warm-from-the-oven chocolate centerpiece.
- Matilda Cake is the boldest continuation, with an intensely chocolate profile and dramatic layered presentation for a true celebration bake.
- Ding Dong Cake combines chocolate cake, creamy filling, and ganache for a project that echoes the ice cream’s contrast between deep cocoa and smooth dairy richness.
- Chocolate Poke Cake is the more forgiving option, using a soaked cake structure to deliver abundant chocolate flavor and a notably moist texture.
- Texas Sheet Cake gives you a generous, crowd-friendly chocolate dessert with a simpler single-layer format and warm, classic appeal.
Frequently Asked Questions
These questions address the remaining practical decisions that are not fully resolved by the ingredient, method, equipment, and storage sections above.
Can I Make This Chocolate Ice Cream Without an Ice Cream Maker?
Not with the same result. This custard is formulated for continuous movement while it freezes. Churning scrapes frozen mixture from the cold surface, redistributes it through the softer center, and incorporates a controlled amount of air.
Freezing the base directly in a container, even if it is stirred periodically, will generally produce a denser and more crystalline texture. A food processor, blender, or stand-mixer method would require its own validated formula and procedure rather than a simple change to this recipe.
For the intended dense, velvety result, use a traditional ice cream maker with a working capacity of at least 1½ quarts.
Do I Have to Chill the Chocolate Ice Cream Base Overnight?
No. The minimum chilling time is 4 hours, provided the entire base reaches 35–40°F (2–4°C) before churning.
An 8–12-hour rest is preferred because it gives the cocoa more time to hydrate, allows the dairy fat to stabilize, and ensures that the custard is uniformly cold. This generally helps the machine freeze the base more efficiently.
Temperature is more important than the word “overnight.” A base chilled for 8 hours in a warm refrigerator may still perform worse than one that reaches the correct temperature in 4 hours.
Why Is Homemade Chocolate Ice Cream Harder Than Store-Bought Ice Cream?
Homemade ice cream is commonly denser and contains less incorporated air than many commercial products. Commercial formulas may also use specialized sugars, emulsifiers, stabilizers, and carefully controlled freezing systems to preserve softness at standard freezer temperatures.
Firmness alone does not mean this recipe failed. After 5–10 minutes at room temperature, the ice cream should soften enough to form smooth scoops. In a very cold freezer or a deep container, it may need up to approximately 15 minutes.
The texture is abnormally hard when it still fractures or remains nearly impossible to scoop after reasonable tempering. Common causes include reducing the sugar, omitting the corn syrup, using higher-cacao chocolate, excessive evaporation, or freezing the base too slowly.
Can I Double This Chocolate Ice Cream Recipe?
You may double the ingredients, but do not automatically churn the doubled quantity as one batch. Most home machines cannot freeze twice the base at the same rate simply because the mixture fits inside the bowl.
An oversized batch remains partially frozen for longer, which gives ice crystals more time to grow and may leave the edges thick while the center remains fluid.
For the most reliable result, prepare the doubled custard, divide it into two covered containers, chill both portions to 35–40°F (2–4°C), and churn them separately. Refreeze a removable machine bowl completely between batches, or use a second fully frozen bowl.
Final Thoughts
This Homemade Chocolate Ice Cream is proof that the best texture comes from control rather than excess. A balanced custard, fully chilled base, efficient churning, and proper hardening work together to create dense, velvety scoops with deep chocolate flavor and a clean, creamy melt.
The most important details are simple: keep the ingredient ratios unchanged, cook the custard only to 170–175°F (77–79°C), chill it completely before churning, and give the finished ice cream enough time to harden. When those steps are respected, the result is smooth, richly chocolatey, and far more refined than a typical homemade frozen dessert.
Serve it after a brief temper at room temperature, either on its own or with a restrained topping that lets the chocolate remain the focus. It is the kind of make-ahead dessert that feels impressive at the table but becomes very manageable once the timing is planned in advance.
Love this? There are twenty more like it.
128 pages, five chapters, 15 kitchen guides and 16 printable planning pages — in US Letter and A4.

Chocolate Ice Cream
This Homemade Chocolate Ice Cream combines Dutch-process cocoa and real semisweet chocolate for deep chocolate flavor and a dense, velvety texture. The French-style custard base is thoroughly chilled, churned until it resembles thick soft serve, and hardened for smooth, creamy scoops without an icy, chalky, or excessively waxy finish.
Ingredients
Chocolate Custard Base
- 1 1/4 cups (300 ml) heavy cream, 35–36% milk fat
- 1 1/4 cups (300 ml) whole milk
- 2/3 cup (135 g) granulated sugar, divided
- 2 tablespoons (30 g) light corn syrup
- 1/4 cup (25 g) Dutch-process cocoa powder, sifted if visibly lumpy
- 4 large egg yolks, approximately 72 g
- 4 ounces (113 g) semisweet chocolate, 55–65% cacao, finely chopped
- 1 teaspoon (5 ml) pure vanilla extract
- ¼ teaspoon (1.5 g) fine salt
Instructions
- Prepare the chocolate and cooling station. Place the finely chopped semisweet chocolate in a medium heatproof bowl and set a fine-mesh sieve securely over it. Prepare an ice bath in a larger bowl using approximately equal amounts of ice and cold water. Confirm that the ice cream maker is ready. If using a removable freezer bowl, it should be fully frozen with no audible liquid moving inside the walls.
- Combine the cocoa, sugar, and dairy. In a medium heavy-bottomed saucepan, whisk together ½ cup (100 g) granulated sugar, the Dutch-process cocoa powder, and the salt. Add approximately ¼ cup of the measured whole milk and whisk until a smooth cocoa paste forms. Gradually whisk in the remaining whole milk, followed by the heavy cream and light corn syrup.
- Heat the chocolate dairy mixture. Place the saucepan over medium heat. Cook, whisking frequently and scraping the bottom and corners of the pan, until the mixture reaches 160–165°F (71–74°C). It should look glossy and release steady steam, with small bubbles around the edge. Do not let it boil.
- Whisk the yolks and remaining sugar. While the dairy heats, whisk the egg yolks with the remaining 2 tablespoons plus 2 teaspoons (35 g) granulated sugar for 30–45 seconds. The mixture should become smooth, slightly lighter, and thick enough to fall from the whisk in a short ribbon.
- Temper the egg yolks. Remove the hot dairy mixture from the heat. While whisking continuously, slowly pour approximately 1 cup of the hot dairy mixture into the yolks in a thin stream. Pour the tempered yolk mixture back into the saucepan while whisking.
- Cook the custard. Return the saucepan to medium-low heat. Cook while stirring continuously with a heat-resistant spatula, scraping the bottom and corners of the pan. Cook until the custard reaches 170–175°F (77–79°C). Do not allow it to boil or exceed 180°F (82°C). The custard should lightly coat the back of the spatula, and a finger drawn through the coating should leave a clear line. It must remain pourable rather than becoming pudding-thick.
- Strain the custard over the chocolate. Immediately pour the hot custard through the fine-mesh sieve over the chopped chocolate. Let it stand for 1 minute, then stir gently from the center outward until the chocolate is completely melted and the base is smooth and glossy. Stir in the vanilla extract.
- Cool the base rapidly. Place the bowl of chocolate custard into the prepared ice bath. Stir frequently until the base cools below 70°F (21°C), approximately 10–15 minutes. Do not allow ice-bath water to enter the custard.
- Chill and mature the base. Cover the custard directly at the surface or transfer it to a covered container. Refrigerate until the base reaches 35–40°F (2–4°C), for at least 4 hours and preferably 8–12 hours. Churn the base within 24 hours.
- Churn the ice cream. Stir the chilled base gently until evenly combined. Set up the ice cream maker according to the manufacturer’s instructions. Start the motor before adding the base when required by the machine. Churn for approximately 20–30 minutes, or until the ice cream resembles dense soft serve. It is ready when the dasher leaves persistent ridges, the mixture moves as a cohesive mass, and a spoonful holds a soft mound. Do not continue churning in an attempt to make the ice cream fully hard.
- Transfer and harden. Transfer the ice cream immediately to a pre-chilled, shallow freezer-safe container. Smooth the surface gently without pressing out the incorporated air. Press parchment paper or another suitable food-contact covering directly against the surface and seal the container with its lid. Freeze for at least 6 hours, preferably 8–12 hours, before serving.
Notes
- Ice cream maker: Use an ice cream maker with a capacity of at least 1½ quarts. If using a removable freezer bowl, freeze it according to the manufacturer’s instructions, commonly for at least 24 hours. The bowl should contain no audible liquid movement when shaken.
- Custard temperature: Cook the custard to 170–175°F (77–79°C). It should lightly coat the back of a spatula but remain fluid and pourable. Do not let it boil or cook until pudding-thick.
- Chilling the base: The base must reach 35–40°F (2–4°C) before churning. Four hours is the minimum chilling time; 8–12 hours is preferred for the smoothest texture.
- Chocolate: Use semisweet chocolate containing 55–65% cacao. Chocolate above 70% may make the ice cream firmer, more bitter, and less balanced.
- Cocoa powder: Use unsweetened Dutch-process cocoa powder. Natural cocoa and black cocoa are not direct substitutes because they change the flavor, color, and solids balance.
- Corn syrup: Light corn syrup helps control crystal growth and improves scoopability. A neutral glucose syrup may replace it by weight using 30 g. Do not omit the syrup or reduce the sugar and expect the same texture.
- Serving: Let the ice cream stand at room temperature for approximately 5–10 minutes before scooping. In a very cold freezer or deep container, it may need up to 15 minutes.
- Storage: Store in a shallow airtight freezer-safe container with parchment paper or another suitable food-contact covering pressed directly against the surface. For the best quality, serve within 1 week. It remains acceptable for up to approximately 2 weeks.
- Avoid refreezing: Do not repeatedly soften and refreeze the entire container. This encourages larger ice crystals and a coarser texture.
- Doubling the recipe: Do not churn a doubled batch at once unless the machine is designed to freeze that volume efficiently. For most home machines, divide the base and churn in separate batches.
Nutrition Information:
Yield: 8 servings Serving Size: 1/2 cupAmount Per Serving: Calories: 335Total Fat: 22gSaturated Fat: 13gCholesterol: 144mgSodium: 112mgCarbohydrates: 34gFiber: 2gSugar: 31gProtein: 5g
Nutrition information is provided as an estimate only and may vary based on specific ingredients, brands, and portion sizes used. This information should not be considered medical or nutritional advice.
12 Sweet Favourites — Yours, Free 🍰
Tiramisù, no-bake cheesecake, the perfect chocolate chip cookie & 9 more reader-loved desserts — gathered into one beautiful free recipe book. From my kitchen to yours.
No spam, just sweet things. Unsubscribe anytime.