Halloween Cake with Buttercream Ghosts
🎁 FREE E-BOOK: 12 Sweet Favorites — reader-loved desserts in one beautiful recipe book.
Halloween cake with buttercream ghosts brings together two tender chocolate layers, orange-colored vanilla frosting and a glossy semisweet chocolate drip. Six little white ghosts sit on top, with tapered heads and tiny ganache eyes. Cut through the orange coating and you get chocolate crumb, a distinct frosting layer and a thin, softly set ganache finish.

The dark layers, vivid orange coating and white-to-ivory ghosts make every part of the cake easy to recognize at the table. Restrained chocolate drips frame the top without hiding the frosting, while the ghost shapes add height with one simple round opening.
Save this guide for the moments when timing and texture matter most. It turns cooling, frosting allocation and ganache flow into visible decisions, so you can check the cake itself instead of relying on the clock alone.
This is a celebration cake for bakers who are comfortable making layers and want to try approachable piping. Two 8-inch layers make 12 generous wedges. Allow about six hours from the first mixing bowl to serving, including cooling and chilling, or bake the layers the day before.
Halloween Cake at a Glance
This is a two-layer chocolate cake with orange-colored vanilla frosting, semisweet ganache and buttercream ghosts. The orange is a color, not a citrus flavor, and the finished dessert is a tender layer cake rather than a brownie cake, four-layer cake or meringue-ghost project.
| At a glance | What to expect |
|---|---|
| Texture | Tender, moist chocolate crumb with creamy buttercream and soft-cutting ganache. |
| Flavor | Chocolate cake, vanilla frosting and semisweet chocolate. |
| Difficulty | Intermediate: two cake layers, frosting, a test drip and simple round-tip piping. |
| Time | About 6 hours to serve: 1 hour 30 minutes hands-on, 40 minutes baking and 3 hours 50 minutes net cooling, chilling and serving recovery. |
| Servings | One two-layer 8-inch cake, cut into 12 generous slices. |
| Method | Bake both layers together; cool, fill, crumb-coat, chill, frost, test the drip and pipe the ghosts. |
| Best for | A Halloween celebration with refrigerator space and time for decorating. |
In short: expect a tender chocolate cake, creamy vanilla buttercream, controlled semisweet drips and six simple ghosts, with a six-hour same-day route and a clear day-before option.
Why This Halloween Cake Recipe Works
An oil-based chocolate cake gives these two layers a tender crumb that is still pleasant after refrigeration. A modest layer of filling keeps the stack manageable, while a thin crumb coat holds loose chocolate crumbs underneath the orange finish.
The decorating order matters as much as the ingredients. A firm chilled coating gives the ganache a stable surface, and a small test drip lets you adjust its flow before covering the cake. Short ghosts with broad bases are easier to support than tall, narrow shapes.
The result comes from one coordinated system: one buttercream batch is divided by job, the cold exterior supports the ganache, and the test drip confirms flow before the full top is committed. Those controls make the recipe practical to stack, coat, drip and decorate.
Why You’ll Love This Halloween Cake
This cake balances a familiar chocolate-and-vanilla flavor with a playful finish that looks special without specialist molds or intricate piping.
- Chocolate cake, vanilla buttercream and semisweet ganache give every slice a clear, crowd-friendly flavor profile.
- Two ordinary round pans and one plain piping opening create a recognizable Halloween centerpiece.
- The day-before layer option separates baking from decorating when party preparation is busy.
- A defined yield of 12 generous wedges makes serving easier to plan.
- Six little ghosts make the whole cake festive while keeping the decorating approachable.

The Science Behind Tender Cake, Stable Buttercream, and Controlled Ganache
The cake, frosting and ganache respond differently to refrigeration. Their textures tell you when to move on and when to wait.
- Oil keeps the crumb tender when chilled. Oil stays fluid at refrigerator temperature, unlike butter. The cake crumb can remain tender even while the buttercream is firm, so give the decorated cake time to soften slightly before cutting.
- Frosting body depends on both warmth and cream. Softened butter should bend under pressure while holding its shape. Too much warmth weakens that structure; extra cream makes the mixture easier to spread. Keep the ghost portion separate so adjustments for coating do not loosen the piping cream.
- Ganache thickens as it cools. Gently stirring warm cream into chopped chocolate makes a smooth emulsion. As it cools, that mixture flows more slowly. Temperature helps you judge it, but chocolate brands vary, so a test on the chilled cake is the better guide for the drip.
Ingredients for Chocolate Halloween Cake and Buttercream Ghosts
The cake, buttercream and ganache each have their own ingredient group. Keep the pan-greasing oil separate from the batter oil, and use the cream quantities for their named components.
Ingredient List
Measure flour by spooning it into the cup and leveling the top; weigh it for the most consistent amount. The buttercream cream starts at 3 tablespoons, with the remaining amount used only if the orange frosting needs it.
Cake Layers
- 2 teaspoons neutral oil (10 ml), for lightly greasing the pans and parchment, separate from the batter oil
- 2 cups all-purpose flour (240 g), spooned and leveled
- 1 1/2 tablespoons cornstarch (12 g)
- 2 cups granulated sugar (400 g)
- 3/4 cup unsweetened Dutch-process cocoa powder (65 g), sifted if lumpy
- 2 teaspoons double-acting baking powder (8 g)
- 1/2 teaspoon baking soda (about 2 g)
- 1 teaspoon fine salt (5 g)
- 4 large eggs (about 200 g without shells), at cool room temperature
- 2/3 cup plus 1 teaspoon neutral oil (165 ml, about 150 g)
- 2 teaspoons pure vanilla extract (10 ml)
- 1 1/4 cups water (300 ml), at room temperature
Vanilla Buttercream and Ghost Decorations
- 1 1/2 cups unsalted butter (340 g), softened but not greasy
- 6 cups powdered sugar (720 g), sifted if lumpy; spoon into the cup, do not pack
- 3 to 5 tablespoons heavy whipping cream (45 to 75 ml), at least 35% milk fat, divided as described in the method
- 2 teaspoons pure vanilla extract (10 ml)
- 1/2 teaspoon fine salt (about 3 g)
- Concentrated orange gel food coloring, added in small increments to reach a clearly orange color; follow the product’s usage instructions
Chocolate Ganache, Including the Eyes
- 5 ounces semisweet chocolate (140 g), approximately 50-60% cocoa, finely chopped
- 1/3 cup plus 1 tablespoon heavy whipping cream (95 ml), at least 35% milk fat

Ingredient Notes and Approved Choices
These ingredient choices protect the cake structure, buttercream body and ganache balance; the approved neutral-oil option is the only same-volume substitution in this formula.
- Dutch-process cocoa: use the cocoa specified here. Natural cocoa and black cocoa behave and taste differently, so keep them out of this batter.
- Butter: it should dent easily under a finger but keep its shape, without an oily sheen. Butter that collapses or looks greasy is too warm for stable ghosts.
- Cream: use heavy whipping cream with at least 35% milk fat. Measure the buttercream and ganache portions separately.
- Chocolate: choose semisweet chocolate around 50-60% cocoa and chop it finely. Milk or white chocolate would need a different cream balance.
- Orange gel: concentrated food coloring gives the frosting its color without a large addition of liquid. Add tiny amounts according to the product instructions; gel strengths vary.
If you want more help with butter temperature and frosting consistency, the Buttercream Frosting Recipe explains those techniques in more detail. Use the quantities above for this cake.
Canola, sunflower or another mild neutral oil can replace the batter oil in the same volume. Keep the flour, eggs, cocoa, chocolate type and pan setup as written; gluten-free flour, egg substitutes and reduced sugar can change the structure. The cake contains wheat, eggs and milk, and the chocolate or other packaged ingredients may list additional allergens.
The chocolate layers are adapted from King Arthur’s Favorite Fudge Birthday Cake, with adjusted measurements and water, then paired here with vanilla buttercream and semisweet ganache.

Tools for Baking, Frosting, and Decorating the Cake
Gather the baking, coating and decorating tools before mixing so the two layers can bake together and every chilled stage can move forward without delay.
- Weighing and mixing: a digital kitchen scale, US measuring cups and spoons, two mixing bowls, a whisk and a flexible spatula. Use an electric mixer with a paddle or hand-mixer beaters for the buttercream.
- Baking and cooling: two light-colored metal 8 x 2-inch round pans (20.3 x 5.1 cm), parchment rounds, the separate 10 ml pan-greasing oil, a center-rack conventional oven and two cooling racks.
- Layer assembly: a level 10-12-inch cake board or serving plate, an offset spatula and a straight scraper. Have a long serrated knife if the cooled layers need leveling. A rotating stand is helpful but optional.
- Ganache: a small saucepan, a heatproof bowl, a flexible spatula, a teaspoon for the test drip and an instant-read thermometer. The method uses a spoon; a squeeze bottle is optional.
- Piping and storage: a piping bag with a plain 1/2-inch round opening (about 12 mm), a toothpick for the eyes, a covered cake carrier and a refrigerator at 40°F/4°C or colder with room for the finished cake.
Before You Begin Your Halloween Cake
Complete these six checks before mixing. They protect the pan setup, ingredient temperatures, chilling space and decoration tools that the method depends on.
- Confirm that two light-colored metal 8 x 2-inch round pans fit side by side on the center rack with air space between them.
- Prepare parchment rounds and a level 10 to 12-inch cake board or serving plate.
- Clear enough refrigerator space for the completed cake and every scheduled chill; keep it at 40°F/4°C or colder.
- Bring the eggs to cool room temperature and the water to room temperature, while keeping all heavy cream cold until used.
- Soften the butter until it dents under a finger but does not look oily or collapse.
- Set out a digital scale, a piping bag with a plain 1/2-inch (12 mm) opening and an instant-read thermometer.
What to Expect from the Batter, Frosting, and Finished Cake
Use these texture and appearance cues to recognize the intended result before, during and after decoration.
- The chocolate batter should be smooth and pourable, with matching levels in the two pans.
- The baked layers should have set tops and a tender, fully baked crumb. They need to feel cool underneath and through the center before frosting.
- The finished cake has a distinct orange filling layer and a thin ganache top that softens enough to cut after a short serving warm-up.
- The frosting is orange-colored vanilla, and the buttercream ghosts are softly creamy and white to ivory.
- Cooling and chilling take much of the elapsed time. The coating should feel firm before ganache, and the ganache should set before piping.
How to Make Halloween Cake with Buttercream Ghosts
Bake and fully cool the layers first. Then fill and chill the cake in stages, apply ganache only after a test drip works, and pipe the ghosts after the chocolate top has set.
1. Prepare the Pans and Oven
Heat the conventional oven to 350°F/175°C. Lightly grease both pans with the separate 2 teaspoons (10 ml) neutral oil, line the bottoms with parchment rounds and lightly grease the paper. Use pans at least 2 inches deep. Weigh the ingredients and keep the cream refrigerated until needed.
What you should see: Two lined, lightly greased pans that fit side by side on the center rack, with space for air to circulate.
2. Make and Divide the Cake Batter
Whisk together the flour, cornstarch, sugar, cocoa, baking powder, baking soda and salt until the color is uniform. In the second bowl, whisk the eggs, batter oil, vanilla and room-temperature water. Add the wet mixture to the dry ingredients and whisk just until uniform, scraping the bottom and sides once. Stop when the dry streaks disappear rather than continuing to beat in air.

Divide the batter evenly between the two pans and bake immediately. A scale can help balance the portions, but also check the depth: neither pan should be filled above two-thirds. Do not taste the raw batter.
What you should see: Smooth, pourable chocolate batter with no dry pockets and matching levels in the pans.

3. Bake the Chocolate Cake Layers
Bake for about 35-40 minutes, checking first at 32 minutes. The center should spring back after a light touch, the surface should be set without a wet central patch, and a thin tester inserted in the middle should have no liquid batter. A few fine moist crumbs are fine. If there is still wet batter, bake in 2-3-minute intervals and check again.
What you should see: Stable tops without a liquid wobble in the center. The edges may begin easing away from the pans. A wet central depression is a reason to keep baking, even if the timer has finished.
4. Cool the Layers Completely
Let the pans rest on racks for 15 minutes. Turn out each layer carefully, remove the parchment and set the layers right side up on the racks. Allow roughly 90-105 minutes more, or longer if any warmth remains. Feel the underside and center before frosting; both should be fully cool. If a pronounced dome makes stacking difficult, trim only what is necessary with the serrated knife once the cake is cool.
What you should see: Cool layers that can be handled without softening the buttercream. Do not frost a warm center to keep to the schedule.

5. Make the Buttercream and Reserve the Ghosts
Beat the softened butter at medium speed for 2-3 minutes, until creamy and lighter. Add the powdered sugar in several additions at low speed, scraping the bowl. Beat in the vanilla, salt and exactly 3 tablespoons (45 ml) cream. Mix at medium speed for about 2 minutes, then at low speed for 1 minute to reduce large air pockets.
Set aside 180 g uncolored buttercream in a covered container before adding orange gel or more cream. Color the remainder orange in tiny gel additions until evenly colored. If the orange frosting tears the cake rather than spreading, add cream 1 teaspoon (5 ml) at a time, up to 2 additional tablespoons (30 ml) in total. Leave that extra cream out of the ghost portion.
When I decorate a layer cake, I find it easier to set aside the frosting for piping before softening the rest for spreading. For this Halloween cake, that means reserving the uncolored buttercream first, then adjusting the orange portion. It keeps the two jobs separate: firm frosting for the little ghosts and a smoother consistency for coating the cake.
| Buttercream use | Working amount |
|---|---|
| Uncolored ghost reserve | 180 g, set aside first |
| Orange filling | About 220 g |
| Thin orange crumb coat | About 120 g |
| Orange exterior | About 550 g |
| Handling margin | About 48 g, plus any cream added to the orange portion |
These portions divide a standard batch of roughly 1,118 g before bowl losses and coloring. Keep unused buttercream covered and refrigerated during cake-chilling stages, then soften only the portion you are about to use. A greasy sheen is a sign to pause and cool the buttercream, not add more cream.
What you should see: Cohesive frosting with ridges that hold, without crumbling or looking greasy. The uncolored portion stays firmer for piping; the orange portion should spread without pulling up cake.

6. Fill and Crumb-Coat the Cake
Place the first cooled layer on the board or plate. Spread about 220 g orange buttercream evenly over it, aiming for a modest layer roughly 5-7 mm thick. Place the second layer bottom side up for a flat top and check that the stack is centered. Use about 120 g frosting for a thin crumb coat over the top and sides. Chill for 20 minutes, or until firm enough to hold the crumbs.
What you should see: A level, centered two-layer stack with some cake still visible through the crumb coat. This thin coat is supposed to catch crumbs rather than cover them completely.

7. Apply the Orange Buttercream Exterior
Spread about 550 g orange buttercream over the top and sides. Smooth the coating with the spatula and scraper, keeping the upper edge defined. Chill for 30 minutes, extending the time if a light touch still smears the surface. Use the refrigerator rather than freezing the cake for this step.
What you should see: An even orange coating that feels firm. If it slides, looks oily or pulls away in chunks, correct its consistency before adding the ganache.
8. Make the Chocolate Ganache
During the final-coat chill, put the finely chopped chocolate into the heatproof bowl. Heat the 95 ml cream in the saucepan until steaming with tiny bubbles at the edge, then remove it before a rolling boil. Pour it over the chocolate, wait 3-5 minutes, and stir gently from the center outward until smooth.
If small chocolate pieces remain, set the bowl over barely steaming water with its base clear of the water. Stir briefly and remove the bowl as soon as the pieces melt. Cool the ganache, stirring occasionally, toward about 86-90°F/30-32°C. Allow roughly 15-25 minutes, but let temperature and flow guide you. Reserve about 1 teaspoon (5 g) ganache for the eyes and let that small portion cool further and thicken.
What you should see: Glossy ganache flowing from the spoon in a thick ribbon. An oily layer or coarse grains means the mixture has separated; do not apply it to the cake in that state.
9. Test the Drip and Finish the Top
Put a small teaspoon-tip amount of ganache on one point of the chilled upper edge and wait about 30 seconds. It should travel roughly 1-2 inches (2.5-5 cm), then slow without melting or exposing the buttercream. If it races toward the bottom, cool the ganache a few minutes more. If it stalls in a thick bump, warm the bowl gently and test again. Do not pour until the test works.
Add modest drips around the edge, then a thin coating over the top. Use up to about 210 g for the top and drips together, with about 60 g for drips and 150 g for the top as a guide. Let the successful test control how much you apply; unused ganache can stay in the bowl. Chill for about 10 minutes, until the top is softly set.
What you should see: Controlled drips that slow partway down the cake, with an intact orange coating beneath them. Before piping, the ganache top should no longer look wet and mobile.

10. Pipe Six Ghosts and Add the Eyes
Bring the reserved buttercream just to a pipeable consistency. Fit the bag with the plain 1/2-inch (12 mm) round opening and hold it vertically over the top, inside the ganache edge. Pipe a broad base, reduce pressure as you lift, then stop squeezing before lifting away to make a tapered head. Pipe six ghosts, each about 20-25 g and 1 1/2 inches (4 cm) high.
If the first ghost sags, chill the reserve for 5-10 minutes, remix gently and try again. A shorter ghost with a broad base is more stable than a tall, narrow one; avoid adding extra powdered sugar to change its consistency.
After piping all six ghosts, use a toothpick and the reserved cooled, thickened ganache to make two tiny eye dots on each. The ganache should make a dot without running. If it is too fluid, wait; if it has gone solid, soften it gently and let it cool again before dotting.
What you should see: Six separate white-to-ivory ghosts with bases that hold and small eyes that stay in place. The reserve leaves room for frosting left in the bag and small corrections.

11. Chill, Temper, and Slice
Chill the completed cake for at least 30 minutes; allow 40 minutes in the schedule. Once the finish is firm, keep it covered. Before serving, allow about 30 minutes in a cool room for the buttercream to soften slightly, shortening that time if decoration has already used much of the unrefrigerated allowance. Cut into 12 generous wedges with a clean knife, wiping between cuts. Do not microwave the assembled cake.
What you should see: Buttercream that yields to the fork while the ghosts remain standing, and a ganache top that cuts without dragging the frosting underneath.
How to Tell When the Chocolate Cake Layers Are Done
Read the center, surface and tester together rather than using time alone. The layers are ready only when all three signs agree, and they must cool completely before frosting.
| State | What You See and Feel | What to Do |
|---|---|---|
| Correctly baked | The center springs back after a light touch, the surface is set without a wet patch, and a thin tester has no liquid batter. A few fine moist crumbs are acceptable. | Rest the layers in their pans for 15 minutes, then turn them out onto racks. |
| Underdone | The center wobbles, stays sunken or wet, or the tester carries liquid batter. | Leave the layers in the oven and bake in 2-3-minute intervals, checking all three signs again. |
| Overdone | The surface feels hard, the edges pull far from the pans, or the tester is completely dry well before the target window. | Remove the layers promptly. Avoid adding extra bake time once the correct cues are present. |
| Cooling boundary | The underside or center still feels warm, even if the outside feels cool. | Wait until both layers are cool throughout. Warm cake can soften the filling and make the stack slide. |

Expert Tips for Smooth Frosting, Clean Drips, and Stable Ghosts
These judgment calls make the biggest difference after the formula is measured correctly.
- Weigh the frosting allocations. Separating 180 g for ghosts, about 220 g for filling, about 120 g for the crumb coat and about 550 g for the exterior keeps one batch balanced across all four jobs.
- Protect the ghost reserve. Set it aside before adding orange gel or optional extra cream, then keep it covered and cool enough to hold ridges.
- Read the butter and the chilled coat. Butter should dent without looking oily, and the orange exterior should feel firm without smearing before ganache touches it.
- Give the test drip 30 seconds. A 2.5 to 5 cm path that slows on the cold surface is more useful than temperature alone because chocolate brands vary.
- Keep the ghosts modest. Six short shapes with broad bases and tapered heads are more stable than tall, narrow decorations.
Common Halloween Cake Mistakes and How to Fix Them
Most problems come from moving forward before the cake, frosting or ganache reaches its required state. Use the stopping point in the final column instead of hiding a structural problem under more decoration.
| Mistake | What Happens | Why It Happens | How to Prevent or Fix It |
|---|---|---|---|
| Stopping the bake while batter remains | The center stays wet or sinks and cannot support the finished cake. | The timer ended before the spring, set surface and tester cues agreed. | While the layers are still in their pans, bake in 2-3-minute intervals and recheck. Do not cover raw batter with frosting. |
| Frosting warm or uneven layers | The filling squeezes out, the stack leans or the coating slides. | The cake is still warm, the filling is too thick or the layers are not level. | Stop assembly, cool the layers completely and use a modest, level filling before continuing. |
| Applying warm ganache to a soft coat | The drip races downward or melts into the orange buttercream. | Either the ganache is too fluid or the exterior has not chilled firm. | Chill the coating until it does not smear, cool the ganache and repeat one small test drip. |
| Waiting until the ganache is too cool | The drip stalls in a thick bump and the top becomes difficult to spread. | The emulsion has thickened beyond the useful flow window. | Warm it gently over barely steaming water, stir smooth and test again without adding water or extra cream. |
| Softening the ghost reserve with extra cream | The ghosts slump or lose their tapered shape. | The piping portion was not separated before the orange frosting was adjusted. | Reserve 180 g first. If it is merely warm, chill it for 5-10 minutes, remix gently and pipe shorter ghosts with broad bases. |
Beautiful Ways to Serve Halloween Cake
Serve the cake after about 30 minutes in a cool room, when the buttercream yields to a fork but the ghosts still stand and the ganache cuts cleanly.

Reveal the Chocolate and Orange Layers
Cut 12 generous wedges with a clean knife, wiping the blade between cuts so the orange filling remains distinct against the dark crumb. The six ghosts decorate the whole cake, so each slice does not need its own figure.
Build a Halloween Dessert Table
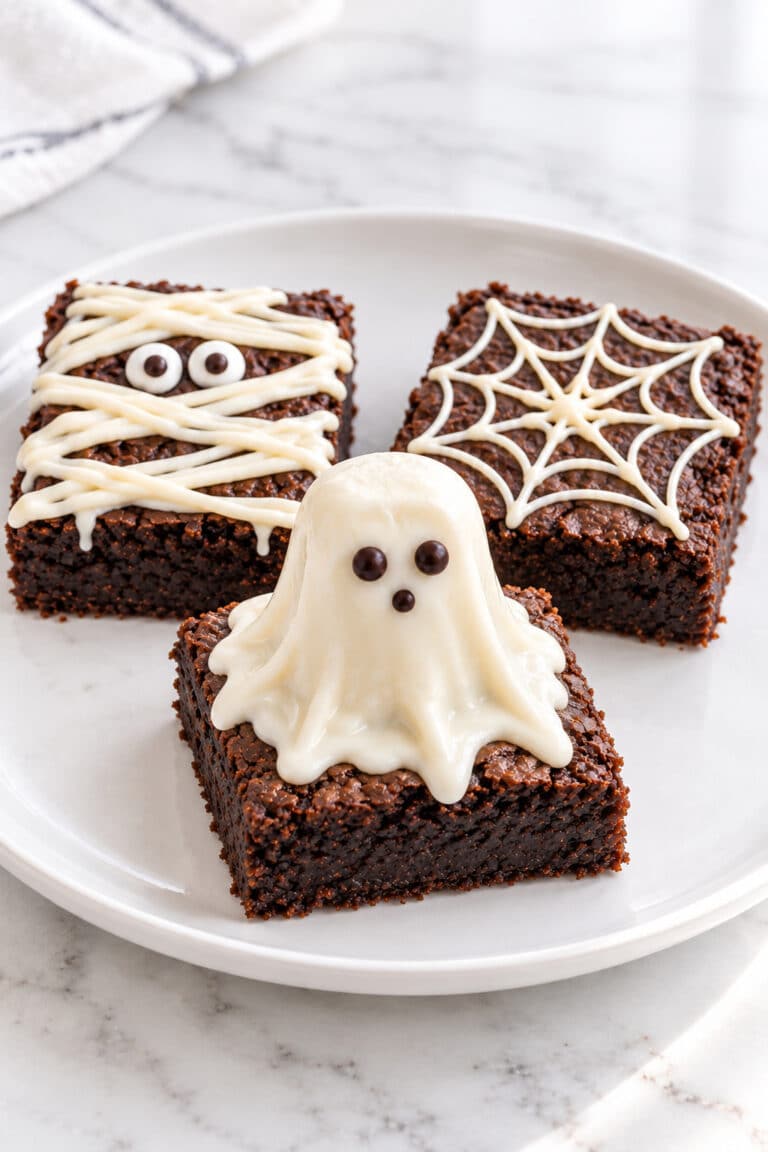
Place the whole cake at the center and add Halloween Brownies for smaller individual portions. The shared chocolate theme makes the table feel coordinated, while the two formats give guests a simple choice.
Pair Each Slice with a Simple Drink or Cold Dessert
Serve a wedge with coffee or cold milk to keep the focus on chocolate and vanilla. A small scoop of vanilla ice cream adds a cold, creamy contrast without competing with the ganache.
Make-Ahead, Storage, Freezing, and Thawing
Choose the storage route that matches the stage you have completed. Keep cream-containing components and the finished cake cold, track total time out of refrigeration and protect the ghosts from pressure and condensation.
Make the Cake Ahead
Bare layers can be baked, cooled fully and wrapped individually up to one day ahead. You can also finish the whole cake the day before serving: let the decoration firm, cover the cake without touching the ghosts and refrigerate it until the planned serving warm-up.
Store the Finished Cake Safely
Keep the completed cake covered at 40°F/4°C or colder and aim to serve it within three days for best quality. Do not microwave or otherwise reheat the assembled cake.
| What You Are Keeping | Storage and Quality Target | Before Using |
|---|---|---|
| Bare baked layers | Cool fully and wrap individually up to 1 day ahead; refrigerate if the room is warm. | Unwrap and confirm the layers are completely cool before frosting. |
| Buttercream | Keep airtight and refrigerated; aim to use within 3 days for quality. | Soften only the needed portion and remix until smooth. |
| Ganache | Keep covered and refrigerated; aim to use within 3 days for quality. | Warm gently over barely steaming water, then cool and test the flow. |
| Completed cake | Cover and refrigerate at 40°F/4°C or colder; best within 3 days for quality. | Allow about 30 minutes in a cool room, within the remaining exposure allowance. |
For this cake and its cream-containing components, follow a conservative cumulative limit of 2 hours out of refrigeration, or 1 hour when the temperature is above 90°F/32°C, based on CDC guidance for refrigerating perishable foods. Count frosting, decorating, warm-up and serving time together. Refrigerating the cake again does not reset time already spent out. The storage windows above are quality targets, not safety guarantees regardless of handling.
Freeze and Thaw Without Crushing the Ghosts
For the best finish, double-wrap bare layers and freeze them at 0°F/-18°C for up to one month, then thaw them in the refrigerator before decorating. If you freeze the completed cake or slices, first freeze until firm, then protect the surface without pressing the ghosts; aim for up to two weeks for appearance and thaw covered overnight in the refrigerator. Condensation may mark the finish, so decorating after thawing is preferable.
Halloween Cake Timeline and Workback Plan
The six-hour same-day route assumes both pans bake together and that buttercream and ganache work overlaps passive cooling and chilling. Physical cues always take priority over the clock.
Same-Day Six-Hour Plan
Use this as a workback from the first slice, leaving extra time if the layers or coatings need longer to cool and firm.
| Elapsed Time from Starting | What Must Be Ready |
|---|---|
| 0:00-0:20 | Pans and batter prepared. |
| 0:20-1:00 | Both layers bake together; doneness cues determine the actual finish. |
| 1:00-3:00 | Layers cool fully. Make the buttercream during the final part of cooling. |
| 3:00-3:15 | Fill and crumb-coat the cool layers. |
| 3:15-3:35 | Crumb coat chills until firm. |
| 3:35-3:50 | Apply the final orange coating. |
| 3:50-4:20 | Exterior chills firm; make and cool ganache during this interval. |
| 4:20-4:30 | Test the drip and finish the top. |
| 4:30-4:40 | Ganache sets enough for piping. |
| 4:40-4:50 | Pipe ghosts and add the eyes. |
| 4:50-5:30 | Finished cake chills. |
| 5:30-6:00 | Buttercream softens slightly for serving, within its remaining exposure allowance. |
Bake the Layers the Day Before
Bake both layers, let them cool fully and wrap them individually the day before. On serving day, start with completely cool layers and allow enough time for filling, both coating chills, ganache setting, ghost piping and the final chill. Keep the frosting and finished cake refrigerated during holding periods.
Halloween Cake FAQs
These concise answers give direct access to the three planning and troubleshooting questions most closely tied to this cake.
Why Is My Chocolate Ganache Too Thick or Too Runny to Drip?
Ganache thickens as it cools. Start checking it around 86-90°F/30-32°C on a firm chilled cake: if a test drip races farther than 2 inches (5 cm) in 30 seconds, cool it more; if it stalls in a bump, warm it gently and test again. Do not add water or extra cream to alter the ingredient balance.
Why Won’t My Buttercream Ghosts Hold Their Shape?
The reserve may be too warm, too soft or piped too tall. Keep the 180 g uncolored portion free of the extra cream used for spreading, chill it for 5-10 minutes if needed, remix gently and pipe short ghosts with broad bases.
Can I Make This Halloween Cake a Day Ahead?
Yes. Either bake and wrap the fully cooled layers one day ahead, or finish the cake, let the decoration firm, cover it without touching the ghosts and refrigerate it. Allow about 30 minutes in a cool room before serving, within the remaining cumulative exposure allowance.
Continue Your Halloween and Chocolate Baking Journey
Choose the next recipe by mood: another playful Halloween dessert, a rich chocolate cake or a cozy fall and party bake.
Make Another Playful Halloween Dessert
Keep the spooky theme and switch to scoopable, creamy or bite-size formats that work well on a party table.
- Dirt Cake Recipe is a scoopable Oreo dessert whose dark crumb suits a playful spooky presentation.
- Dirt Pudding Recipe gives you a creamy no-bake chocolate option for cups or a family-style bowl.
- Oreo Balls Recipe adds small chocolate-covered bites in an easy handheld format.
- Oreo Fluff is a cold cookies-and-cream dessert when the next recipe should be simpler and no-bake.
Stay with Rich Chocolate Cakes
Continue with chocolate while changing the format, richness or finishing style.
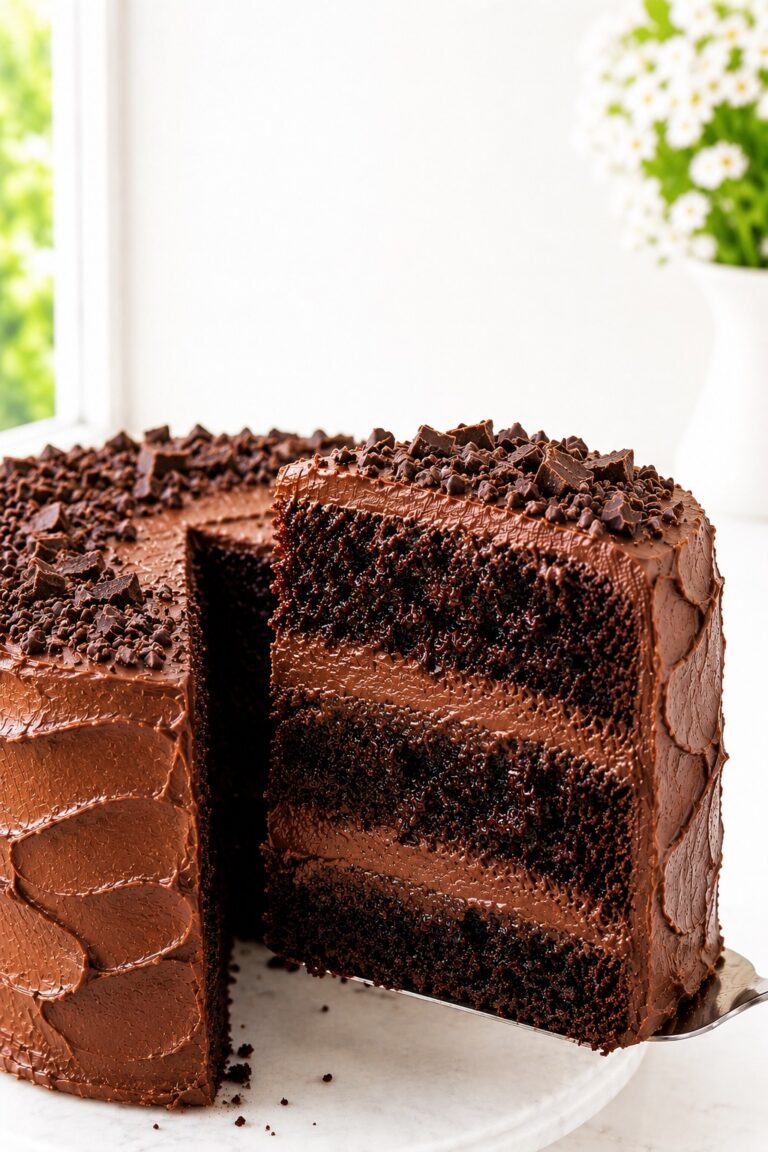
- Chocolate Sheet Cake offers deep cocoa flavor in a simpler rectangular format.
- Matilda Cake is a richer layered project when chocolate should remain the main event.
- Chocolate Poke Cake Recipe changes the texture with a moist party-cake format and a different filling approach.
- Flourless Chocolate Cake gives you a dense, smooth chocolate dessert with a completely different structure.
Bake Another Cozy Fall or Party Treat
Move from spooky chocolate to pumpkin flavors or another decorated party project.
- Pumpkin Cupcakes provide individual frosted cakes with a clear fall flavor.
- Pumpkin Dump Cake Recipe is a low-effort warm dessert for a cozy autumn gathering.
- Pumpkin Cheesecake Bars combine creamy texture with neat make-ahead party portions.
- How to Make Cake Pops reuses cake-and-frosting skills in a decorated handheld format.
Why This Halloween Cake Belongs in Your Recipe Box
This project earns a return visit because its dramatic finish is built from a small set of reusable controls.
- One-Batch Frosting: The measured allocation turns one vanilla buttercream into the filling, crumb coat, orange exterior and six ghosts.
- Visible Endpoints: The cake, frosting, ganache and piping stages each have a clear physical cue to guide the next decision.
- Approachable Decorating: Ordinary round pans and one plain piping opening create a recognizable centerpiece without a shaped mold.
- Flexible Workback: The layers can be baked a day early while the decoration remains a focused same-day project.
- Reliable Portions: The two-layer format gives 12 generous wedges with one clear filling layer.
- Repeatable Technique: The reserve-first frosting habit and test-drip method transfer to future celebration cakes.
Final Thoughts on Halloween Cake
This Halloween cake turns familiar chocolate, vanilla and semisweet flavors into a playful centerpiece, with a vivid orange coat and six little ghosts making the celebration visible before the first slice.
Return to the recipe whenever you need the exact cooling sequence, frosting allocations or drip test, and use the day-before layer option when the decorating session needs more breathing room.
The most dramatic finishes often come from the smallest controlled decisions: a fully cool layer, a protected piping reserve, a firm coat and one patient test drip.

Halloween Cake with Buttercream Ghosts
Chocolate Halloween Cake with orange vanilla buttercream, glossy semisweet ganache drips, and six easy piped ghosts. The reserve-first frosting method and test drip make the dramatic finish approachable.
Ingredients
CAKE LAYERS
- 2 teaspoons neutral oil (10 ml), for lightly greasing the pans and parchment, separate from the batter oil
- 2 cups all-purpose flour (240 g), spooned and leveled
- 1 1/2 tablespoons cornstarch (12 g)
- 2 cups granulated sugar (400 g)
- 3/4 cup unsweetened Dutch-process cocoa powder (65 g), sifted if lumpy
- 2 teaspoons double-acting baking powder (8 g)
- 1/2 teaspoon baking soda (about 2 g)
- 1 teaspoon fine salt (5 g)
- 4 large eggs (about 200 g without shells), at cool room temperature
- 2/3 cup plus 1 teaspoon neutral oil (165 ml, about 150 g)
- 2 teaspoons pure vanilla extract (10 ml)
- 1 1/4 cups water (300 ml), at room temperature
VANILLA BUTTERCREAM AND GHOST DECORATIONS
- 1 1/2 cups unsalted butter (340 g), softened but not greasy
- 6 cups powdered sugar (720 g), sifted if lumpy; spoon into the cup, do not pack
- 3 to 5 tablespoons heavy whipping cream (45 to 75 ml), at least 35% milk fat, divided as described in the method
- 2 teaspoons pure vanilla extract (10 ml)
- 1/2 teaspoon fine salt (about 3 g)
- Concentrated orange gel food coloring, added in small increments to reach a clearly orange color; follow the product's usage instructions
CHOCOLATE GANACHE, INCLUDING THE EYES
- 5 ounces semisweet chocolate (140 g), approximately 50-60% cocoa, finely chopped
- 1/3 cup plus 1 tablespoon heavy whipping cream (95 ml), at least 35% milk fat
Instructions
- Prepare the Pans and Oven. Heat a conventional oven to 350°F/175°C. Use the separate 2 teaspoons (10 ml) oil to lightly grease two 8 × 2-inch round pans and their parchment-lined bottoms. Keep the cream refrigerated until needed. What you should see: Two lined, lightly greased pans that fit side by side on the center rack, with space for air to circulate.
- Make and Divide the Cake Batter. Whisk the flour, cornstarch, sugar, cocoa powder, baking powder, baking soda, and salt until uniform. In a second bowl, whisk the eggs, 165 ml batter oil, vanilla, and water. Add the wet ingredients to the dry ingredients and whisk just until smooth, scraping the bowl once. Divide evenly between the prepared pans and bake immediately. What you should see: Smooth, pourable batter without dry pockets, with matching levels below two-thirds of the pan depth.
- Bake the Chocolate Cake Layers. Bake both layers together for about 35–40 minutes, checking first at 32 minutes. The center should spring back, the surface should be set, and a thin tester should show no liquid batter. A few fine, moist crumbs are acceptable. If liquid batter remains, continue baking in 2–3-minute intervals. What you should see: Stable tops without a wet central patch or liquid wobble.
- Cool the Layers Completely. Rest the pans on cooling racks for 15 minutes. Turn out the layers, remove the parchment, and cool right side up for roughly 90–105 minutes more, or until the underside and center feel fully cool. Level a pronounced dome only after cooling. What you should see: Layers that can be handled without warming or softening the frosting.
- Make the Buttercream and Reserve the Ghost Frosting. Beat the butter for 2–3 minutes. Add the powdered sugar gradually at low speed, then beat in the vanilla, salt, and exactly 3 tablespoons (45 ml) cream. Mix for 2 minutes at medium speed, followed by 1 minute at low speed. Set aside 180 g uncolored buttercream before adding the orange gel coloring. Color the remaining buttercream orange. Only if the orange portion tears the cake, add cream 1 teaspoon (5 ml) at a time, up to 2 tablespoons (30 ml) more. Do not add this extra cream to the reserved ghost frosting. What you should see: Cohesive buttercream that holds ridges without crumbling or appearing greasy.
- Fill and Crumb-Coat the Cake. Place the first cake layer on the cake board or stand. Spread about 220 g orange buttercream evenly over it, then add the second layer bottom side up. Use about 120 g buttercream to apply a thin crumb coat. Chill for 20 minutes, or until firm. What you should see: A level cake with a thin coating that traps the crumbs, even if some chocolate cake remains visible.
- Apply the Orange Buttercream Exterior. Spread about 550 g orange buttercream over the top and sides. Smooth it with an offset spatula and cake scraper. Chill for 30 minutes, extending the chilling time if a light touch still smears the surface. Do not freeze the cake for this step. What you should see: An even, firm orange coating with a clearly defined upper edge.
- Make the Chocolate Ganache. Place the finely chopped chocolate in a heatproof bowl. Heat 95 ml cream until steaming with tiny bubbles around the edge. Pour it over the chocolate, wait 3–5 minutes, and stir gently until completely smooth. Let the ganache cool toward 86–90°F/30–32°C, about 15–25 minutes. Reserve approximately 1 teaspoon (5 g) for the ghost eyes. What you should see: Glossy ganache that flows from the spoon in a thick ribbon, without oiliness or coarse grains.
- Test the Drip and Finish the Top. Place one small test drip on the chilled upper edge of the cake and wait about 30 seconds. It should travel 1–2 inches (2.5–5 cm), then slow. Cool the ganache if the drip races downward, or warm it gently if the drip stalls. Test again before continuing. Add modest drips around the cake and spread a thin ganache layer over the top, using up to about 210 g in total. Chill for approximately 10 minutes. What you should see:Controlled drips and a softly set top that is no longer wet or mobile.
- Pipe Six Ghosts and Add the Eyes. Bring the reserved buttercream just to a pipeable consistency. Using a piping bag with a plain 1/2-inch (12 mm) round opening, pipe exactly six broad-based ghosts about 1 1/2 inches (4 cm) tall, using approximately 20–25 g buttercream for each one. Add two tiny eye dots to each ghost with a toothpick and the cooled reserved ganache. If the first ghost sags, chill the reserved buttercream for 5–10 minutes and remix it gently. What you should see: Six separate white-to-ivory ghosts with stable bases, tapered heads, and tiny defined eyes.
- Chill, Temper, and Slice. Chill the finished cake for at least 30 minutes; the schedule allows 40 minutes. Cover it once the decorations are firm. Before serving, let the cake stand for about 30 minutes in a cool room, within the remaining safe room-temperature allowance. Cut into 12 generous wedges with a clean knife, wiping the blade between cuts. Do not microwave the assembled cake. What you should see: Buttercream that yields easily to a fork, ghosts that remain upright, and ganache that cuts cleanly.
Notes
- Reserve 180 g uncolored buttercream before adding orange gel or optional extra cream. Pipe six ghosts with about 20-25 g each.
- Use 3 tablespoons (45 ml) cream initially. Add up to 2 tablespoons (30 ml) more only to the orange portion if needed for spreading.
- The ganache uses 140 g semisweet chocolate and 95 ml cream. Reserve about 5 g for the eyes and do not force unused ganache onto the cake.
- Bake both 8 × 2-inch layers together in a conventional oven at 350°F/175°C. Check first at 32 minutes; the springing center, set surface, and tester without liquid batter control doneness.
- Chill the orange coat firm before ganache. The 86-90°F/30-32°C range is a starting point; the 30-second test drip controls application.
- Keep covered at 40°F/4°C or colder and aim to serve within 3 days for best quality.
- Follow a conservative cumulative limit of 2 hours out of refrigeration, or 1 hour above 90°F/32°C.
- Contains wheat, egg, and milk. Check chocolate and other packaged ingredients for product-dependent soy or additional allergens.
- A mild neutral oil may replace another mild neutral oil in the same volume.
- Other cocoa, chocolate, flour, egg, pan, or dietary substitutions are not validated for this formula.
Nutrition Information:
Yield: 12 Serving Size: 1 sliceAmount Per Serving: Calories: 900Total Fat: 47gSaturated Fat: 22gCholesterol: 135mgSodium: 420mgCarbohydrates: 120gFiber: 3gSugar: 98gProtein: 7g
Nutrition information is provided as an estimate only and may vary based on specific ingredients, brands, and portion sizes used. This information should not be considered medical or nutritional advice.
12 Sweet Favourites — Yours, Free 🍰
Tiramisù, no-bake cheesecake, the perfect chocolate chip cookie & 9 more reader-loved desserts — gathered into one beautiful free recipe book. From my kitchen to yours.
No spam, just sweet things. Unsubscribe anytime.