Sourdough Bagels (Chewy, Golden & Overnight)
🎁 FREE E-BOOK: 12 Sweet Favorites — reader-loved desserts in one beautiful recipe book.
Sourdough bagels pair a deeply golden crust with a close, chewy crumb and a gentle fermented tang. A brief boil gives each ring its characteristic bite, while a hot bake sets the crust and keeps the center substantial enough for slicing and toasting.

Making them over two days turns a bakery-style breakfast into a calm home project. You mix, knead, shape, and begin proofing on day one, then let the refrigerator hold the rings until you are ready to boil and bake the following morning.
This recipe is worth returning to because it explains the handoffs that matter most: when the firm dough has fermented enough, what the shaped rings should feel like before chilling, and how to respond if a cold bagel still sinks during the readiness check.
Sourdough Bagels at a Glance
These naturally leavened bagels are a two-day project with about 50 minutes of hands-on work and a long shaped cold proof.
| Texture | Golden, set crust with a close, substantial, chewy crumb |
|---|---|
| Flavor | Gently tangy, lightly sweet, and pleasantly wheaty |
| Difficulty | Intermediate, with visual fermentation checks |
| Time | About 19 hours 20 minutes to 28 hours 20 minutes, including fermentation, chilling, and cooling |
| Servings | 8 substantial bagels |
| Method | Hand-kneaded, shaped before an overnight chill, briefly boiled, then baked |
| Best For | Weekend breakfasts, breakfast sandwiches, and freezer-ready toast |
In short: Use ripe starter, weigh the firm dough, follow visible proofing cues, refrigerate the shaped rings for 12–18 hours, and boil them briefly before baking. This version uses mature starter for leavening, with no commercial yeast and no discard-only shortcut.
Why These Sourdough Bagels Work
The method coordinates dough strength, controlled fermentation, surface setting, and high heat so the rings stay structured while developing a satisfying chew.
- A firm bread-flour dough holds a rounded ring through proofing, boiling, and baking instead of spreading like a wetter loaf dough.
- Visible fermentation checkpoints keep the dough from moving forward only because a timer ended, which is especially important when starter strength and room temperature vary.
- Shaping before refrigeration gives the bagels their final form while the dough is still easy to divide and handle.
- A short sugar-water boil begins setting the outer surface without giving the rings enough time to become heavy or fragile.
- Golden sides and bases confirm that heat has reached more than the exposed tops, reducing the risk of a pale or gummy center.
Why You’ll Love These Overnight Sourdough Bagels
This recipe fits a home baker who enjoys naturally leavened dough but wants most of the shaping finished before breakfast time.
- A manageable morning: The rings are already shaped, so the second day focuses on readiness, boiling, and baking.
- A substantial texture: The close crumb stands up well to toasting, cream cheese, and sandwich fillings.
- Two simple finishes: Leave the bagels plain or add sesame seeds while the boiled surface is still moist.
- Useful freezer portions: Cooled bagels can be sliced before freezing, making individual halves easy to toast.
- Clear visual guidance: Every major stage includes a cue that helps you decide when the dough is ready to move forward.
How Fermentation and Boiling Create a Chewy Bagel
Four connected changes create the dense but fully baked texture that separates a bagel from an ordinary bread roll.
- Low hydration builds resistance: Including the flour and water in the starter, the dough is about 54.7% hydration. That limited water produces a firm mass that needs kneading and brief relaxation rather than extra flour.
- Fermentation adds gas gradually: Starter activity is strongly affected by dough temperature. Modest expansion, small side bubbles, and a slightly aerated feel are more useful together than a fixed hour alone.
- Boiling begins surface setting: Hot water swells and sets starch at the outside of the ring. This limits free oven expansion and contributes to the smooth, recognizable bagel crust.
- Baking and cooling finish the crumb: Heat must color the sides and bases, not only the tops. Cooling on a rack lets steam escape and the crumb settle before slicing.
Ingredients for Chewy Overnight Sourdough Bagels
Use a gram-reading scale for the dough, especially the starter, flour, water, sugar, and salt. Starter volume changes with aeration, so cups cannot reliably replace its weight here.
Ingredient List
Measure the dough ingredients separately from the proofing oil and water bath. The second quantities of water and sugar belong to the boiling pot.

Dough
- 125 g ripe, active sourdough starter at 100% hydration
- 245 g water (245 ml; about 1 cup plus 1 teaspoon)
- 25 g granulated sugar (2 tablespoons)
- 500 g bread flour, about 12–13% protein (approximately 4 cups plus 2 tablespoons; weigh for this recipe)
- 11 g fine sea salt (approximately 1 3/4 teaspoons; use the weight)
Proofing preparation
- 1 teaspoon neutral oil (5 ml), for lightly coating the proofing parchment
Water bath
- 8 1/3 cups water (2 liters), for the water bath
- 2 tablespoons granulated sugar (30 g), for the water bath
Optional topping
- Optional: 3 tablespoons sesame seeds (24 g), for topping
Ingredient Notes
Ripe starter: Use a starter maintained with equal weights of flour and water that reliably expands after feeding. It should be visibly aerated and at or near its peak, rather than newly mixed or fully collapsed. Colorado State University Extension’s sourdough starter guidance describes readiness through expansion, bubbles, aroma, and consistency. Do not taste raw starter, and discard a moldy starter.
If you need a small build, mix 30 g mature starter with 60 g water and 60 g flour. This makes 150 g at 100% hydration. Weigh 125 g into the dough and retain the remainder. Let the build ripen before beginning the recipe.
Bread flour: Choose flour around 12–13% protein for structure and chew. Lower-protein all-purpose flour can change absorption and give a softer result. Whole-wheat and gluten-free flours need a different water and structure balance. If you want an open, sliceable loaf crumb instead, this sourdough bread recipe is designed for that different format.
Sugar and salt: Weigh the dough sugar and fine salt. Coarse salt occupies a different volume at the same weight. Honey and malt syrup add water, so neither is a spoon-for-spoon replacement in this dough. The water bath uses a separate 30 g quantity of sugar.
Sesame: Add the optional seeds immediately after boiling, while the surface is moist. The plain bagels contain wheat, and sesame introduces an additional allergen.

Tools for Mixing, Proofing, and Boiling Bagels
A scale, a marked container, and enough tray and pot space make this firm dough much easier to judge and handle.
- Weighing and temperature: Use a gram-reading digital scale and an instant-read or dough thermometer.
- Mixing and dividing: Set out a large mixing bowl, a bowl scraper, and a bench scraper for eight even portions.
- Bulk fermentation: Use a covered, straight-sided 2-liter container with a level mark so a 40–60% rise is easier to compare.
- Proofing and chilling: Prepare two 13 x 18-inch rimmed light-metal sheet pans, oven-safe parchment rated for 425°F, and covers that do not touch the rings.
- Boiling, baking, and cooling: Use a wide 5–6-quart pot, a spider or slotted spoon, a conventional oven with two separated racks, a wire cooling rack, and a serrated knife.
Hand-kneading is the default. Use a stand mixer only if the manufacturer permits stiff bread dough, and stay within its load and speed limits. If the oven cannot hold two trays with airflow, keep the second tray refrigerated until the first tray is finished.
Before You Begin Your Sourdough Bagels
Confirm these five details before mixing so the overnight schedule does not stall midway through the process.
- Your 100%-hydration starter has expanded after feeding and is visibly aerated.
- The flour, starter, water, sugar, and salt are weighed separately.
- A marked 2-liter container is ready for measuring the bulk rise.
- Two covered 13 x 18-inch trays fit flat in the refrigerator.
- The wide pot, fresh baking parchment, spider, and cooling rack are ready for the morning finish.
What to Expect from Sourdough Bagel Dough
This dough should feel firm and resistant at first, then become smoother and more cohesive as kneading develops its structure.
- Expect a stiff dough, not a soft or tacky sandwich-bread dough.
- Expect modest bulk expansion rather than a dramatic doubling.
- Expect the shaped rings to look slightly puffed but still resilient before refrigeration.
- Expect fermentation time to shift with starter strength and dough temperature.
- Expect a close, small-pored crumb with real chew, not the open interior of an artisan loaf.
How to Make Sourdough Bagels, from Mixing to Baking
Follow the eight stages in order, using the clock to begin checking and the dough cues to decide when to continue.
1. Check the Starter and Mix the Dough
Combine 125 g ripe starter, 245 g water, and 25 g sugar in the mixing bowl. Add 500 g bread flour and 11 g fine sea salt. Mix and press until no dry flour remains, then cover and rest for 20 minutes.
Aim for a finished dough temperature around 75–79°F (24–26°C). Adjust the mixing-water temperature to the flour and kitchen rather than automatically using warm water.
What you should see: A firm, shaggy mass with evenly moistened flour. Dry, crumbly pockets need more mixing, but the dough should never look pourable.
2. Knead Until the Dough Is Smooth and Strong
Hand-knead on an unfloured or barely floured counter for about 8–12 minutes, folding and pressing until the surface smooths and the dough stretches a little without ragged tearing.
If the dough fights each fold, cover it for 5–10 minutes and then resume. This short relaxation makes kneading easier without changing the water balance. Do not add unmeasured flour or force a paper-thin windowpane.
What you should see: A stiff, cohesive ball with a smooth surface, no flour streaks, and enough tension to hold its shape.

3. Let the Dough Rise with Visible Fermentation
Put the dough into the covered, marked container. At 75–79°F (24–26°C), begin checking after about 4 hours. Allow roughly 4–6 hours, or longer when the starter or room is cooler.
Look for approximately 40–60% expansion together with a slightly rounded top, small bubbles at the container sides, and a subtly aerated feel. Use the percentage with these cues instead of waiting automatically for doubling.
One lesson I learned from working with naturally fermented dough is that the clock can tell you when to start checking, but it cannot tell you when bulk fermentation is finished. The dough’s temperature, rise, aeration, elasticity, and movement have to agree before shaping.
What you should see: Measurable, modest growth with a rounded surface and small side bubbles. A completely inactive mass calls for checking starter strength and dough temperature before shaping.

4. Divide and Shape Eight Wide-Holed Rings
Divide the approximately 906 g dough into 8 pieces, about 113 g each. Form smooth balls, cover them, and let them rest for 10 minutes.
Poke through the center of each ball, then gently rotate and stretch the opening to about 2 inches (5 cm). Keep the thickness even. If a piece shrinks or tears, cover it briefly and shape it again after the gluten relaxes.

Divide the 1 teaspoon oil between the parchment on two trays. Arrange four rings on each tray, leaving at least 2 inches (5 cm) between them.
What you should see: Even, thick rings with smooth edges and clear center openings. Narrow holes will contract further during proofing and baking.
5. Proof the Rings, Then Refrigerate Overnight
Cover the trays without touching or drying the dough. At 75–79°F (24–26°C), allow about 1–2 hours, until the rings look slightly puffed and feel lighter but still resilient.
Refrigerate the covered trays for 12–18 hours at or below 40°F (4°C). Give the rings that first visible proof before chilling, since refrigeration slows fermentation and cannot reliably replace an inactive room-temperature stage.
What you should see: A moderate increase in thickness while the rings remain rounded and easy to handle. They should not be doubled, flattened, or delicate.

6. Check Readiness, Boil, and Add the Optional Topping
The next day, preheat a conventional oven to 425°F (220°C). Bring 8 1/3 cups water (2 liters) and 2 tablespoons sugar (30 g) to a gentle boil in the wide pot.
As a supplemental readiness check, place one chilled ring in a separate bowl of room-temperature water. It should rise promptly or remain afloat. Return it to the tray and judge it together with the rings’ puffiness and resilience. Floating alone does not prove ideal fermentation.

If the ring stays dense and sinks, let the covered trays proof at room temperature and reassess every 20–30 minutes. If the rings already look flat and fragile, more proofing will not rebuild their strength.
Boil only 2–3 rings at a time for 30 seconds on each side. Keep the boil gentle, turn without squeezing, and lift with the spider. Drain for about 20–30 seconds, transfer to fresh oven-safe parchment, and add sesame while the surface is moist.

What you should see: Floating rings that retain their shape and develop a slightly fuller, glossy surface. Violent swelling, sticking, or collapse signals a handling or proofing problem.

7. Bake Until the Sides and Bases Are Golden
Bake four bagels per tray on two separated racks for about 25–30 minutes at 425°F (220°C). Rotate the trays and swap rack positions after 12–15 minutes. Check sooner if the oven runs hot.
Look at the sides and carefully lift one bagel to inspect its base. Both should be golden, and the crust should feel set. If the tops brown first, shield them loosely while the paler bases finish.
An optional center reading around 200–205°F (93–96°C) can support the visual cues. Insert the thermometer horizontally into the thickest dough area.
What you should see: Rounded, golden rings with colored bases and a dry, set crust. A pale, wet-looking band around the side needs more baking.

8. Cool Before Slicing
Move the bagels to a wire rack and wait at least 30 minutes before slicing. Let them cool completely before packing them airtight or freezing.
Cut with a serrated knife using a sawing motion instead of pressing down. Cooling lets the crumb settle, while cutting a hot bagel can compress it and make normal chew seem gummy.
What you should see: A cohesive crumb with small irregular pores that cuts cleanly. Wet, pasty bands are different from a firm, chewy bite.

How to Know Your Sourdough Bagels Are Done
A finished bagel shows agreement between color, crust, base, temperature, and cooled crumb rather than passing only one test.
- Top and sides: Look for an even golden color with no pale, damp-looking side band.
- Base: Lift one bagel carefully. The bottom should be colored and dry rather than soft and blond.
- Crust: The surface should feel set and resist a light touch without seeming leathery.
- Center temperature: About 200–205°F (93–96°C) is a useful supporting check when measured in the thickest area.
- Cooled crumb: After at least 30 minutes, the interior should cut cleanly and feel cohesive, close-pored, and chewy without wet streaks.
Expert Tips for Better Sourdough Bagels
Small decisions around resistance, temperature, and batch capacity have more influence here than trying to make the dough behave like a softer bread.
- Relax resistance instead of adding flour: A 5–10-minute covered pause lets tight gluten loosen, which makes kneading or shaping easier without drying the dough.
- Mark the starting level: A straight-sided container and a clear mark make modest bulk growth easier to recognize than a wide bowl does.
- Keep the boil gentle: A rolling, crowded boil can distort delicate rings and cool unevenly when too many are added at once.
- Protect the second tray: When baking sequentially, keep the waiting tray refrigerated so it does not continue proofing beside the hot oven.
- Start with a generous hole: A 2-inch opening gives the dough room to expand while keeping the finished bagel recognizable as a ring.
Why Sourdough Bagels Turn Dense, Flat, or Gummy
Match the finished symptom to the dough’s earlier behavior before changing the next batch, since similar problems can begin at different stages.
| Mistake | What Happens | Why It Happens | How to Prevent or Fix It |
|---|---|---|---|
| Moving on with inactive dough | The rings stay dense and may sink. | The starter was weak, the dough was cool, or bulk and shaped proofing ended too early. | If unboiled rings remain structured, proof them covered and recheck every 20–30 minutes. Next time, require visible bulk growth and ring puffiness before chilling. |
| Letting the rings become fragile | They flatten or wrinkle during lifting and boiling. | The shaped proof ran too far, handling was rough, or the boil was violent. | Use a gentle boil and minimal handling. Extra proofing cannot restore strength to already fragile rings. |
| Shaping a narrow opening | The center hole closes during proofing and baking. | The opening began too small or the dough was stretched while tense. | Rest resistant portions, then make an even opening about 2 inches across. |
| Slicing while warm | The interior compresses and seems gummy. | Steam and moisture have not settled, or the bake was incomplete. | Cool for at least 30 minutes before judging the crumb. If the intact bagels are still pale, continue baking while shielding dark tops. |
| Using dry, unoiled proofing parchment | The rings stick, tear, and lose their shape. | The damp dough bonds to the paper or dries against an uncovered surface. | Oil the proofing parchment lightly, keep the rings covered, and move boiled bagels onto fresh oven-safe parchment. |
Beautiful Ways to Serve Sourdough Bagels
Let the bagels cool enough for a clean crumb, then choose a serving style that emphasizes either the tender center or the crisp cut surface.

Serve Them Fresh and Lightly Warm
Warm a whole unfrozen bagel at 350°F (175°C) for about 5–8 minutes, then split it and add a thin layer of butter or cream cheese. The gentle warmth softens the center without turning the crust brittle.
Toast the Cut Sides for Extra Contrast
Slice a fully cooled bagel and toast the cut faces until crisp while the outer curve stays chewy. Jam, soft cheese, or a light spread settles into the toasted crumb without overwhelming the sourdough flavor.
Build a Breakfast Board with Simple Pairings
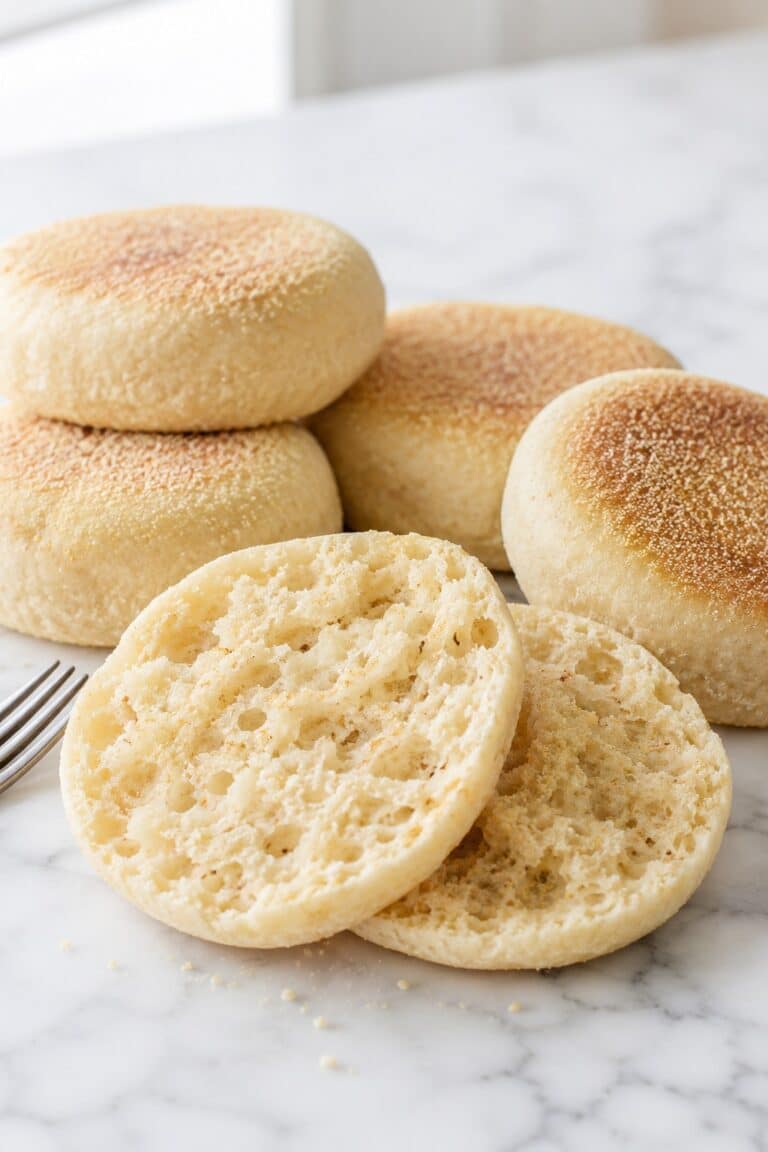
Arrange halved bagels with cream cheese, butter, preserves, sliced fruit, and freshly cooked eggs so each person can build a plate. For another griddle-cooked option with crisp edges and a lighter split interior, add these sourdough English muffins to the breakfast spread.
How to Store, Freeze, and Reheat Sourdough Bagels
Cool the bagels completely before storing them, since trapped steam softens the crust and encourages condensation inside the package.
Room-Temperature Storage
Keep plain cooled bagels airtight for 1–2 days at ordinary cool room temperature. This quality window is consistent with University of Nebraska-Lincoln’s fresh-bagel storage guidance. Freeze sooner in a hot or humid kitchen, and discard moldy bagels rather than trimming the affected area.
Freezing and Thawing
Slice each cooled bagel, wrap it, and place it in a freezer bag at 0°F (-18°C) for up to 3 months for best quality. Press out excess air without crushing the rings. Thaw a whole bagel while wrapped, or toast individual halves directly from frozen.
Reheating and Filled Bagels
Refresh a whole unfrozen bagel at 350°F (175°C) for about 5–8 minutes, or toast the cut sides to your preferred crispness. Cream cheese, meat, egg, and other perishable fillings require refrigerated handling and do not share the plain bagel’s room-temperature storage window.
A Two-Day Timeline for Fresh Morning Bagels
Work backward from the morning bake and leave room for the dough to meet its proofing cues. Starter feeding happens before the mixed-dough timeline begins.
| Moment or Window | What to Prepare | Readiness Dependency | Hold or Storage |
|---|---|---|---|
| Before day one | Prepare 125 g ripe starter. | The starter should have expanded and become visibly aerated after feeding. | Use at or near peak activity. |
| Day one, around noon | Mix, rest, and knead the dough. | The dough should finish smooth, cohesive, and near 75–79°F (24–26°C). | Move it to the covered marked container. |
| Late afternoon | Check bulk fermentation after about 4 hours. | Shape only after 40–60% growth agrees with aeration and surface cues. | Keep covered at a suitable room temperature. |
| Evening | Divide, rest, shape, and proof the rings. | The rings should look slightly puffed but remain resilient. | Refrigerate covered for 12–18 hours at or below 40°F (4°C). |
| Next morning | Check readiness, boil, bake, and cool. | Use the float check with puffiness and resilience, then bake to golden sides and bases. | Cool on a rack for at least 30 minutes. |
| If more time is needed | Extend the final proof or bake the trays sequentially. | A dense ring needs reassessment; a waiting second tray should not overproof. | Keep the second tray cold until its turn. |
The mixed-dough-to-slicing range is about 19 hours 20 minutes to 28 hours 20 minutes, with roughly 50 minutes of hands-on work. A slower starter, a cool kitchen, or a sequential second tray can extend the schedule.
Sourdough Bagel Questions, Answered
These answers address the proofing, flour, boiling, and make-ahead questions that most directly change the result.
Can I use sourdough discard instead of active starter?
Not as a direct replacement. This dough relies on 125 g ripe, active 100%-hydration starter for leavening, while unfed discard may not produce enough reliable gas for the stated schedule.
Why do my sourdough bagels sink when I boil them?
A dense sinking ring often needs more proofing, but the float check is only one clue. Keep structured unboiled rings covered, give them additional room-temperature time, and reassess puffiness and resilience every 20–30 minutes.
Can I use all-purpose flour?
Bread flour around 12–13% protein is recommended for the intended chew and water balance. Lower-protein all-purpose flour can absorb differently and produce a softer, less structured bagel.
Do sourdough bagels have to be boiled?
Yes, for the bagel texture promised here. The brief boil begins setting the surface starch, helping create the smooth crust and controlled oven expansion associated with a bagel.
Can I refrigerate the dough before shaping?
That is a different fermentation schedule. This method shapes the rings first, gives them a visible room-temperature proof, and then refrigerates them for 12–18 hours.
What is the best way to freeze homemade bagels?
Cool them completely, slice them, wrap them, and seal them in a freezer bag. Individual halves can go straight from the freezer to the toaster without thawing the entire batch.
Continue Your Sourdough Baking Journey
Choose your next bake according to the starter you have available and the breakfast texture or technique you want to practice.
Build Confidence with Naturally Leavened Dough
These recipes continue the skills of starter care, fermentation judgment, shaping, and bread structure.
- Sourdough Starter: Learn how to establish and feed the culture that leavens naturally fermented dough.
- Sourdough Bread: Practice a wetter loaf dough with a more open crumb and different shaping demands.
- Sourdough English Muffins: Move from boiling and baking to a griddle-cooked breakfast bread.
- Sourdough Discard Tortillas: Turn discard into a thin, flexible bread for wraps and quick meals.
Put the Rest of Your Discard to Work
When the starter has been fed and discard remains, these recipes give it a useful home without changing the bagel formula.
- Sourdough Waffles: Use discard in a breakfast with crisp edges and tender centers.
- Sourdough Discard Pancakes: Choose a soft skillet breakfast for a relaxed morning.
- Sourdough Chocolate Chip Cookies: Bring discard into a sweet cookie dough.
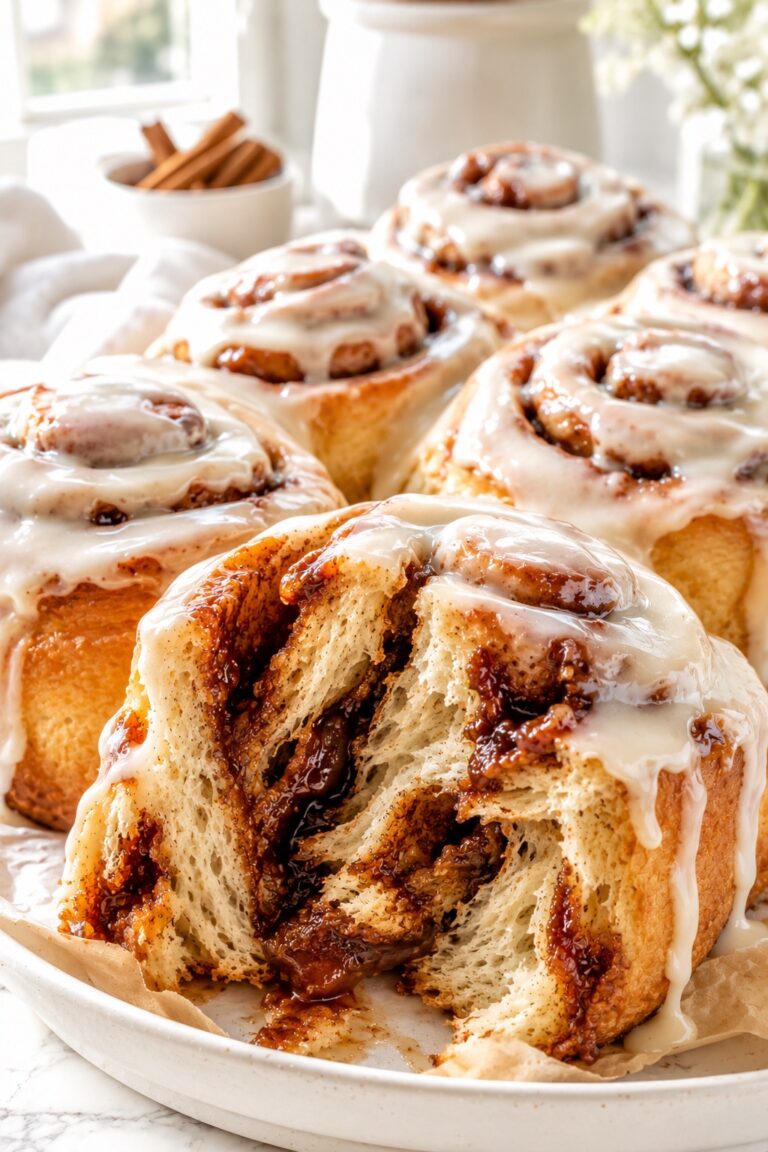
- Sourdough Discard Cinnamon Rolls: Try an enriched breakfast bake with a soft rolled crumb.
Explore More Homemade Breakfast Bakes
For a change of pace, move from chewy bagels to flaky, soft, or pull-apart breakfast breads.
- English Muffins: Make a classic griddle bread designed for splitting and toasting.
- Homemade Cinnamon Rolls: Choose a sweet, enriched roll with a soft spiral center.
- Buttermilk Biscuits: Practice cold-fat handling for flaky breakfast layers.
- Monkey Bread: Bake a sweet pull-apart centerpiece for sharing.
Why These Sourdough Bagels Belong in Your Recipe Box
This is a keeper for the skills and possibilities it brings to future breakfasts.
- Transferable Fermentation Skills: The checkpoints strengthen your ability to read other naturally leavened doughs.
- A Dependable Rhythm: The two-day structure turns a long fermentation into a sequence that can fit around home life.
- Breakfast Versatility: One neutral base works for toast, spreads, breakfast boards, and savory sandwiches.
- Freezer Convenience: Presliced portions make a homemade breakfast available without repeating the full process each morning.
- Simple Finish Choices: Plain and sesame-topped rings suit different meals without requiring a second dough.
- Practice Worth Repeating: Each batch builds judgment around dough strength, proof readiness, and gentle handling.
A Final Thought on Homemade Sourdough Bagels
This recipe exists to make a demanding bread shape feel understandable. The dough remains firm, the schedule remains long, and the guidance focuses on the few decisions that turn those constraints into a chewy, golden bagel.
You may return to it for a quiet weekend breakfast, a practical freezer batch, or the pleasure of setting fresh rings on the table. The same method can feel more familiar each time because the visual cues become easier to recognize.
Good bread is often less about forcing the clock and more about noticing what the dough is ready to do next. That patience is not extra work; it is part of learning how fermentation speaks.

Sourdough Bagels
These overnight sourdough bagels have a golden, set crust and a close, satisfyingly chewy crumb. Ripe active starter, a shaped cold proof, and a brief boil create eight substantial homemade bagels with clear fermentation cues at every stage.
Ingredients
Dough
- 125 g ripe, active sourdough starter at 100% hydration
- 245 g water (245 ml; about 1 cup plus 1 teaspoon)
- 25 g granulated sugar (2 tablespoons)
- 500 g bread flour, about 12–13% protein (approximately 4 cups plus 2 tablespoons; weigh for this recipe)
- 11 g fine sea salt (approximately 1 3/4 teaspoons; use the weight)
Proofing preparation
- 1 teaspoon neutral oil (5 ml), for lightly coating the proofing parchment
Water bath
- 8 1/3 cups water (2 liters), for the water bath
- 2 tablespoons granulated sugar (30 g), for the water bath
Optional topping
- 3 tablespoons sesame seeds (24 g)
Instructions
- Check the Starter and Mix the Dough. Mix 125 g ripe starter, 245 g water, and 25 g sugar. Add 500 g bread flour and 11 g fine sea salt; combine until no dry flour remains. Cover and rest for 20 minutes. Aim for a finished dough temperature of 75–79°F (24–26°C). The dough should be firm and evenly moistened.
- Knead Until the Dough Is Smooth and Strong. Hand-knead for about 8–12 minutes until smooth and cohesive. If the dough resists or tears, cover and rest for 5–10 minutes before finishing. Avoid adding unmeasured flour or forcing a paper-thin windowpane. The ball should hold tension with no flour streaks.
- Let the Dough Rise with Visible Fermentation. Cover in the marked 2-liter container at 75–79°F (24–26°C). Begin checking after 4 hours; allow about 4–6 hours or longer. Look for approximately 40–60% expansion together with a rounded surface, small side bubbles, and subtle aeration. Do not move on with inactive dough or wait automatically for doubling.
- Divide and Shape Eight Wide-Holed Rings. Divide the approximately 906 g dough into 8 pieces, about 113 g each. Form smooth balls, cover, and rest for 10 minutes. Poke and stretch each center to an opening about 2 inches (5 cm), keeping the ring even. Briefly rest resistant pieces. Divide the 1 teaspoon oil over proofing parchment on two trays; place four rings on each with at least 2 inches between them.
- Proof the Rings, Then Refrigerate Overnight. Cover and proof for about 1–2 hours at 75–79°F (24–26°C), until slightly puffed and lighter but resilient. Refrigerate covered for 12–18 hours at or below 40°F (4°C). The rings should stay rounded and structured; do not chill completely inactive rings expecting the cold stage to supply all their proof.
- Check Readiness, Boil, and Add the Optional Topping. Preheat a conventional oven to 425°F (220°C). Bring 8⅓ cups water (2 liters) and 2 tablespoons sugar (30 g) to a gentle boil. Check one chilled ring in separate room-temperature water: prompt flotation is a supporting cue alongside puffiness and resilience. Return it to the tray. If it stays dense and sinks, proof the covered rings at room temperature and reassess every 20–30 minutes. Flat, fragile rings do not need more proof. Boil 2–3 rings at a time for 30 seconds per side; drain for 20–30 seconds and place on fresh oven-safe parchment. Add optional sesame while moist. Floating rings should retain their shape. If the first ring stays submerged in the actual bath, pause and reassess the remaining rings.
- Bake Until the Sides and Bases Are Golden. Bake four bagels per tray on two separated racks for about 25–30 minutes at 425°F (220°C). Rotate and swap the trays after 12–15 minutes. Bake until the sides and bases are golden and the crust is set. Shield dark tops loosely if the bases need longer. An optional center temperature of 200–205°F (93–96°C), measured horizontally in the thickest part, supports the visible cues.
- Cool Before Slicing. Cool on a wire rack for at least 30 minutes before slicing with a serrated knife. Cool completely before airtight storage or freezing. The small-pored crumb should cut cleanly and feel chewy rather than wet or pasty.
Notes
- Use a scale for the dough. The starter must be ripe and at 100% hydration; starter volume changes with aeration. Approximate flour and salt volumes are guides, and their weights govern.
- Starter feeding is outside the total time. Total time includes the 20-minute mixing rest, 10-minute ball rest, 4–6-hour bulk rise, 1–2-hour shaped proof, 12–18-hour refrigerator proof, and 30-minute cooling. Slower fermentation or extra morning proof takes longer.
- Use bread flour around 12–13% protein. Honey, malt syrup, whole-wheat flour, gluten-free flour, and inactive discard need a different dough balance or leavening plan.
- Use two 13 x 18-inch trays with four bagels on each, at least 2 inches apart. If baking one tray at a time, keep the second batch cold until its turn and allow another 25–30 minutes. Boil only 2–3 rings at once.
- Plain or sesame-topped bagels follow the same dough method. The dough contains wheat; sesame adds an allergen. Serving fillings are separate.
- Cool plain bagels completely, then store airtight at cool room temperature for 1–2 days. Freeze cooled, sliced, individually wrapped bagels inside a freezer bag at 0°F (−18°C) for up to 3 months for best quality. Toast halves from frozen until hot and crisp. Perishable filled bagels need refrigerated handling.
Nutrition Information:
Yield: 8 Serving Size: 1 bagelAmount Per Serving: Calories: 266Total Fat: 1gSaturated Fat: 0.2gCholesterol: 0mgSodium: 535mgCarbohydrates: 54gFiber: 2gSugar: 3gProtein: 8g
Nutrition information is provided as an estimate only and may vary based on specific ingredients, brands, and portion sizes used. This information should not be considered medical or nutritional advice.
12 Sweet Favourites — Yours, Free 🍰
Tiramisù, no-bake cheesecake, the perfect chocolate chip cookie & 9 more reader-loved desserts — gathered into one beautiful free recipe book. From my kitchen to yours.
No spam, just sweet things. Unsubscribe anytime.