Gluten Free Chocolate Chip Cookies
🎁 FREE E-BOOK: 12 Sweet Favorites — reader-loved desserts in one beautiful recipe book.
Gluten free chocolate chip cookies should feel generous: crisp at the edges, soft through the middle, and packed with melted chocolate. Going gluten-free should not mean accepting a sandy crumb, fragile center, or a cookie that tastes like a compromise.

These gluten free chocolate chip cookies are large and bakery-style, with deep golden edges, a cohesive chewy center, and an irregular mix of semisweet chips and chopped bittersweet chocolate. Brown butter gives the dough caramel-like depth, while the higher proportion of brown sugar keeps the centers soft after cooling.
This recipe is written for Bob’s Red Mill Gluten Free 1-to-1 Baking Flour, blue bag. Resting and chilling give the rice-flour-based blend time to absorb moisture while the butter firms, helping the cookies keep their shape in the oven.
The key details are the specified flour blend, enough time for the dough to hydrate and chill, a cool baking pan, and clear visual cues for doneness.
Gluten Free Chocolate Chip Cookies at a Glance
Here is the cookie style, timing, yield, flour, and baking pan to know before you begin.
| Detail | What to Expect |
|---|---|
| Texture | Crisp golden perimeter with a soft, cohesive, chewy center |
| Flavor | Brown butter, caramelized sugar, vanilla, semisweet and bittersweet chocolate |
| Yield | 16 large cookies, portioned at 58 g each |
| Prep time | 25 minutes |
| Hydration and chill | 20 minutes at room temperature plus at least 2 hours refrigerated |
| Bake time | 12–14 minutes per pan; three one-pan batches |
| Total time | About 4 hours through complete cooling |
| Flour used | Bob’s Red Mill Gluten Free 1-to-1 Baking Flour, blue bag |
| Best pan | Light-colored aluminum half-sheet pan lined with parchment |
Why You’ll Love These Cookies
These cookies deliver the familiar pleasure of a classic chocolate chip cookie while addressing the spread, texture, and grittiness that can make gluten-free versions disappointing.
- Real bakery-style contrast: the edges turn crisp and deeply golden while the center stays soft and chewy.
- Soft, cohesive centers: the dough rests at room temperature and then chills so the flour blend can absorb moisture.
- Rich but balanced flavor: brown butter adds depth without requiring almond or oat flour.
- Chocolate in every bite: semisweet chips keep their character while chopped bittersweet chocolate forms irregular pools.
- Freezer-ready: the measured dough portions can be frozen and baked when you want fresh cookies.
- Useful visual cues: the recipe tells you what the dough and cookies should look like at each important stage.

Why This Gluten Free Chocolate Chip Cookie Recipe Works
The texture comes from the way the brown butter, sugars, eggs, flour blend, and chilling time work together.
The Brown Butter Is Rehydrated by Weight
Some water evaporates as the butter browns. Add only enough whole milk to bring the browned butter and milk back to a combined 170 g. This keeps the toasted milk solids while replacing the lost moisture.
One Whole Egg Plus One Yolk Builds Chew
The whole egg binds the dough. The additional yolk contributes fat and emulsifiers without the extra water and albumen of a second whole egg, keeping the center rich and chewy instead of puffy or cakey.
The Flour Blend and Chill Work Together
The specified blend contains rice flours, starches, sorghum flour, and xanthan gum. I learned not to judge gluten-free cookie dough immediately after mixing. The resting and chilling time lets the flour blend hydrate, helping prevent a gritty center while controlling spread.
Chocolate Chips and Chopped Chocolate
Semisweet chips stay evenly distributed, while chopped bittersweet chocolate melts into irregular pockets and keeps the cookies from tasting overly sweet.
What to Expect
The cookie changes as it cools, so judge the final texture only after the required pan rest and rack cooling.
- Warm: very soft through the center, with fluid chocolate and a delicate base.
- After 30 minutes: crisp at the outer edge, cohesive and chewy inside, with soft chocolate pockets.
- At room temperature: bendable center, lightly crisp perimeter, rich brown-butter flavor.
- The next day: still chewy when stored airtight, though the edge becomes less crisp.
The Cookie Style and Texture
These are large American bakery-style drop cookies with crisp edges and soft, chewy centers.
They are made with the specified rice-flour-based 1:1 blend. They are not flourless, grain-free, almond-flour-based, oat-flour-based, vegan, dairy-free, low-sugar, or crisp throughout. After cooling, the center should be chewy and soft—not liquid, gummy, cakey, or raw.
For a wheat-flour version, see this classic chocolate chip cookie recipe. If you want the same nutty flavor in a conventional cookie, try these brown butter chocolate chip cookies.
Before You Begin
Before mixing, use the specified flour blend, weigh the flour and dough portions, and plan for the full resting and chilling time.
- Use a scale. A gram measurement is substantially more reliable than a packed or loosely filled cup of gluten-free flour.
- Do not add xanthan gum. The blue-bag Bob’s Red Mill blend already contains it.
- Use regular American-style unsalted butter. Higher-fat European-style butter can increase spread.
- Start with room-temperature egg and yolk. Cold eggs can tighten the butter and weaken the emulsion.
- Use a cool pan for every batch. Dough placed on a hot baking sheet spreads before the structure can set.
- Do not taste raw dough. Gluten-free flour is still raw flour and must be baked.
Ingredients
The ingredients are divided into the cookie dough and the optional finishing salt.
For the Cookie Dough
These ingredients make the brown-butter dough with both semisweet chips and chopped bittersweet chocolate.
- 3/4 cup unsalted butter (170 g), cut into pieces
- 2 tablespoons whole milk (30 ml), divided; use only enough to restore the browned butter and milk to exactly 170 g
- 3/4 cup packed light brown sugar (160 g)
- 1/3 cup granulated sugar (67 g)
- 1 large egg (50 g without shell), room temperature
- 1 large egg yolk (18 g), room temperature
- 2 teaspoons pure vanilla extract (10 ml)
- 1 2/3 cups Bob’s Red Mill Gluten Free 1-to-1 Baking Flour, blue bag (247 g), weighed; contains xanthan gum
- 3/4 teaspoon baking soda (3.5 g)
- 3/4 teaspoon fine sea salt (4.5 g)
- 1 cup semisweet chocolate chips (170 g)
- 1 3/4 ounces bittersweet chocolate, 60–70% cacao (50 g), roughly chopped
For Finishing
A little flaky sea salt is optional and balances the brown butter and chocolate.
- flaky sea salt, optional

Ingredient Notes
Small ingredient changes can affect how these cookies spread, brown, and feel after cooling.
Bob’s Red Mill Gluten Free 1-to-1 Baking Flour
This recipe uses the blue-bag blend, which already contains xanthan gum; adding more may make the center rubbery. Other blends have different cup weights, grains, starches, and gum levels, so they may not produce the same spread or texture.
Unsalted Butter and Whole Milk
The butter is browned for flavor, then rehydrated by weight. Whole milk is used only until the browned butter and milk together return to exactly 170 g; you may not need all 2 tablespoons.
Light Brown and Granulated Sugars
Brown sugar contributes moisture and chew. Granulated sugar helps the perimeter spread and crisp. Replacing either one materially changes the intended texture.
Egg and Egg Yolk
The whole egg binds and hydrates the dough, while the yolk adds richness and helps the ingredients combine smoothly. An egg substitute may change the binding, spread, and center texture.
Semisweet and Bittersweet Chocolate
Use gluten-free-labeled chocolate when preparing the cookies for someone with celiac disease or strict medical gluten avoidance. Keep the total chocolate at 220 g so there is plenty in every cookie without crowding the dough.

Kitchen Tools Needed
A scale, a light-colored pan, and a few basic baking tools make the dough easier to portion and the cookies easier to bake evenly.
- digital kitchen scale
- light-colored saucepan
- heatproof mixing bowl
- medium mixing bowl
- whisk
- flexible spatula
- instant-read thermometer, useful for the brown-butter mixture
- large cookie scoop
- light-colored aluminum half-sheet pans
- parchment paper
- wire cooling rack
- large round cutter, optional for shaping
How to Make Gluten Free Chocolate Chip Cookies
Follow these ten steps in order, using the visual cue after each image to check the dough or cookies before continuing.
1. Brown the Butter
Place the 3/4 cup butter (170 g) in a light-colored saucepan over medium heat. Cook, stirring and scraping frequently, until the butter foams, the bubbles become fine, and the milk solids turn amber-brown. Immediately pour every drop and browned solid into a heatproof bowl. Add only enough of the measured whole milk to bring the combined mass back to exactly 170 g, then cool to 90–100°F (32–38°C).

What you should see: clear golden-amber butter with many fine chestnut-brown milk solids and a nutty aroma. Black solids or a bitter smell mean the butter burned and must be remade.
2. Combine the Dry Ingredients
In a medium bowl, whisk the gluten-free flour blend, baking soda, and fine sea salt for about 30 seconds. Break up every visible flour clump so the xanthan gum and leavener are distributed evenly.

What you should see: a uniform pale mixture without compact flour pockets or visible streaks of baking soda.
3. Build the Sugar-Butter Base
Add the light brown sugar and granulated sugar to the warm brown butter. Whisk firmly for 45–60 seconds, scraping the bowl, until every patch of sugar is evenly moistened.

What you should see: a thick, glossy, dark beige mixture that resembles wet sand but has no free pool of butter around the edge.
4. Emulsify the Egg Mixture
Whisk in the whole egg, egg yolk, and vanilla for about 60 seconds. Scrape the bottom and sides once, then continue until the mixture thickens slightly and becomes cohesive.

What you should see: a smooth, glossy caramel-colored emulsion that falls from the whisk in a short ribbon. An oily ring means the mixture needs more whisking.
5. Make the Dough
Reserve about 1 tablespoon of the mixed chocolate for the tops. Add the dry mixture to the wet mixture and fold just until only a few pale streaks remain. Fold in the remaining semisweet chips and chopped bittersweet chocolate until no dry flour remains.

What you should see: a soft, glossy dough that may initially look looser than conventional cookie dough but still gathers around the spatula. Do not add extra flour at this stage.
6. Hydrate, Portion, and Chill
Leave the dough at room temperature for 20 minutes. Divide it into 16 exact 58 g portions and shape each into a tall mound rather than a compressed ball. Press the reserved chocolate shallowly onto the tops. Cover and refrigerate for at least 2 hours or up to 48 hours.

What you should see: the dough should visibly thicken during the room-temperature rest and become firm but not rock-hard after chilling. Each mound should hold its height without slumping.
7. Prepare the Oven and Pans
Preheat a conventional oven to 350°F (177°C), or convection to 325°F (163°C), with a rack in the center. Line a cool, light-colored aluminum half-sheet pan with parchment. Arrange five or six chilled dough portions at least 3 inches apart.

What you should see: tall cold mounds on a completely cool pan, with enough clear parchment around each one for a 3 1/4- to 3 1/2-inch cookie.
8. Bake Until the Edges Set
Bake one pan at a time for 12–14 minutes. Remove the pan when the outer 1/2 inch is set and golden, the very edge is deeper brown, and the center remains puffed and soft but has lost its wet raw-dough sheen. Repeat with cool pans for three total batches.

What you should see: the perimeter is visibly set, the center is lighter and soft, and the top has small natural fissures. Glossy melted chocolate is expected; glossy raw dough is not.
9. Shape and Finish
While the cookies are still hot, move a large round cutter around any irregular cookie in a quick circular motion if you want a more even shape. Sprinkle lightly with flaky sea salt, if using, without pressing the soft centers.

What you should see: naturally rounded cookies with wrinkled golden edges and visible chocolate. Rounding should tidy the perimeter, not compress the center.
10. Cool on the Pan, Then Transfer to a Rack
Leave the cookies on the hot pan for 10 minutes. Transfer them carefully to a wire rack and cool for at least 20 more minutes before judging the final texture.

What you should see: after the pan rest, the base should lift cleanly and support the center. The underside should be evenly golden—not pale and greasy or dark brown and scorched.
What You Should See from Dough to Finished Cookie
Use this guide to compare the dough and cookies with the expected appearance at each stage.
| Stage | Correct Appearance | Warning Sign |
|---|---|---|
| Brown butter | Amber liquid with chestnut-brown milk solids | Black specks and bitter smoke |
| Egg emulsion | Glossy, thickened, no oily ring | Separated butter around the bowl |
| Fresh dough | Soft and glossy but gathers around the spatula | Pourable batter or dry crumbs |
| After 20 minutes | Thicker, scoopable, less glossy | Still fluid and unable to hold a mound |
| After chilling | Firm tall portions that hold their shape | Rock-hard dry surface or slumping dough |
| At oven removal | Set golden ring, soft matte center | Wet raw sheen or fully firm center |
| After cooling | Crisp edge, cohesive chewy center | Gummy paste or dry sandy crumb |
Doneness and Texture Guide
The cookies are ready when the perimeter is set and golden while the center remains soft. The 10-minute rest on the hot pan finishes setting the center.
Properly Baked
The outer 1/2 inch is golden and firm, the edge is a shade darker, and the center is puffed with a matte dough surface. After cooling, the center bends and pulls rather than crumbling.
Underdone
The center has a glossy raw-dough film between the chocolate pieces, collapses into paste, or cannot support itself after the full pan rest. Return the pan to the oven promptly for 1–2 minutes if the cookies have not yet cooled.
Overdone
The entire top looks uniformly firm and deeply browned in the oven. After cooling, the center is dry, sandy, or crisp instead of chewy. Shorten the next batch by 1–2 minutes and verify the oven temperature.

Gluten-Free Cookie Troubleshooting Guide
Use this table to match a visible problem with its most likely cause and adjust the remaining dough or batches.
| Symptom | Most Likely Cause | Prevention | Correction |
|---|---|---|---|
| Excessive spread | Warm dough, hot pan, wrong blend, or too much restored milk | Chill at least 2 hours; use a cool light pan; restore butter to exactly 170 g | Chill the remaining portions 30 minutes longer and bake one test cookie |
| Almost no spread | Too much flour, packed cup, or dough too cold and dry | Weigh exactly 247 g flour; cover the chilled portions | Let one portion stand 10 minutes and test before changing the batch |
| Gritty texture | Insufficient hydration or coarse/different flour blend | Use the specified blend; rest 20 minutes plus 2-hour chill | Give unbaked dough more chill time; baked grit cannot be reversed |
| Cakey center | Extra egg white, over-aeration, too much flour, or baking powder | Use one egg plus one yolk; whisk only as directed; use baking soda only | Verify weights before remaking; do not flatten to force spread |
| Gummy center | Extra xanthan, wrong blend, or true underbaking | Add no xanthan; bake until raw sheen disappears | Return still-hot underdone cookies to the oven for 1–2 minutes |
| Scorched underside | Dark pan, rack too low, or hot reused pan | Use cool light aluminum on the center rack | Stack an empty sheet below the active pan for later batches if bottom heat is severe |
| Cookie breaks while moving | Transferred before the center had time to set | Leave on the pan for the full 10 minutes | Let the remaining cookies rest longer before lifting |
| Dry on day two | Overbaking or air exposure | Remove at the soft-center limit and store airtight | Refresh at 300°F (149°C) for about 4 minutes |
Expert Tips
These tips help you keep the spread, texture, and browning consistent from one batch to the next.
- Restore by mass, not by spoon count. Brown-butter evaporation varies; the final combined 170 g matters more than how much milk remains.
- Keep the portions tall. A tall mound protects the chewy center while the perimeter spreads.
- Bake one test cookie first. You can check the spread and browning before baking the entire batch.
- Read dough shine correctly. Melted chocolate may look glossy; the dough surrounding it should be matte at doneness.
- Cover after the first chilling phase. If chilling overnight, keep the portions covered so the surface does not dry and restrict spread.
- Judge texture after cooling. A hot gluten-free cookie is intentionally softer and more fragile than its final state.
Common Mistakes to Avoid
Most problems come from using a different flour blend, changing the measured moisture, skipping the chill, or moving the cookies too soon.
- Using a generic “cup-for-cup” blend: brand recipes and cup weights differ enough to change spread and texture.
- Adding all the measured milk automatically: use only enough to restore the brown butter to 170 g combined.
- Adding extra flour to fresh dough: the blend has not hydrated yet and will thicken during the rest.
- Skipping the 2-hour chill: warm under-hydrated dough spreads faster and may taste gritty.
- Using a hot or dark pan: both accelerate bottom browning before the center sets.
- Waiting for a firm center in the oven: the cookies continue to set on the hot pan, so a firm center in the oven leads to a dry texture after cooling.
- Moving the cookies immediately: the hot center needs 10 minutes on the pan to become cohesive.
Beautiful Ways to Serve
Serve the cookies in ways that preserve the contrast between the crisp edge, chewy center, and soft chocolate.
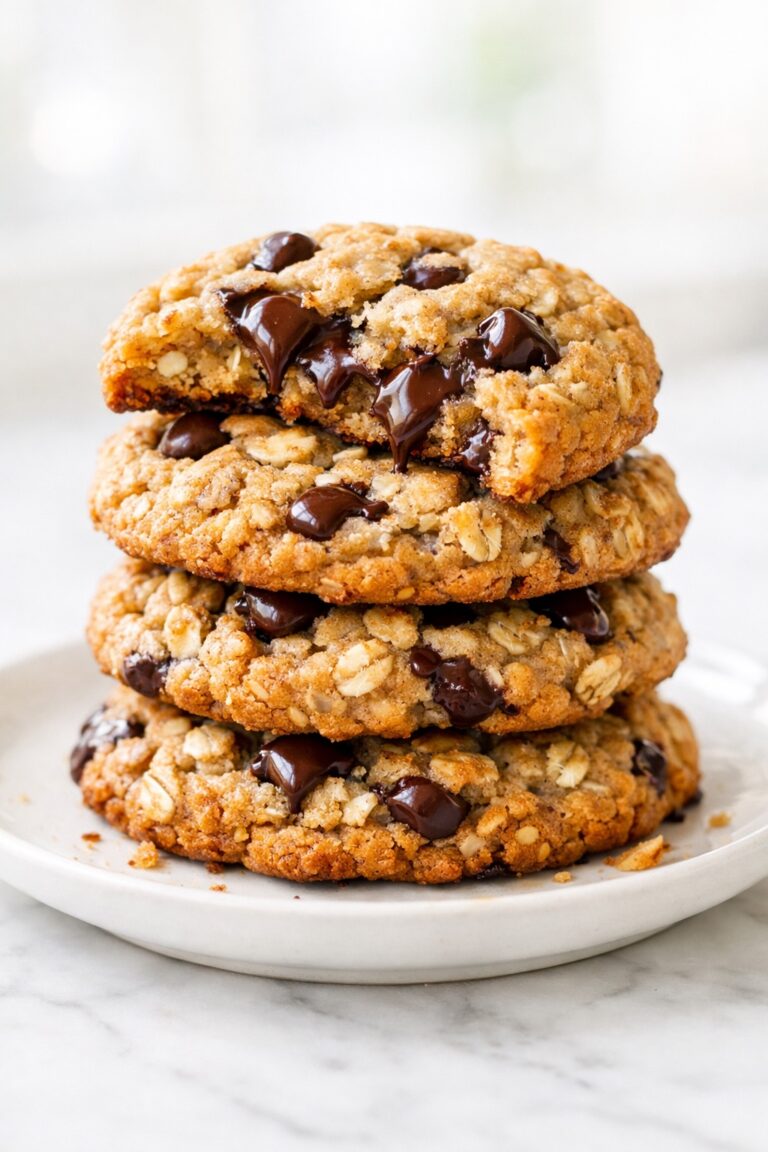
- Arrange slightly warm cookies in a low stack with one cookie broken open at the front.
- Serve at room temperature on a white platter with a restrained scattering of chopped chocolate.
- Make gluten-free ice cream sandwiches after the cookies are completely cool and firm enough to handle.
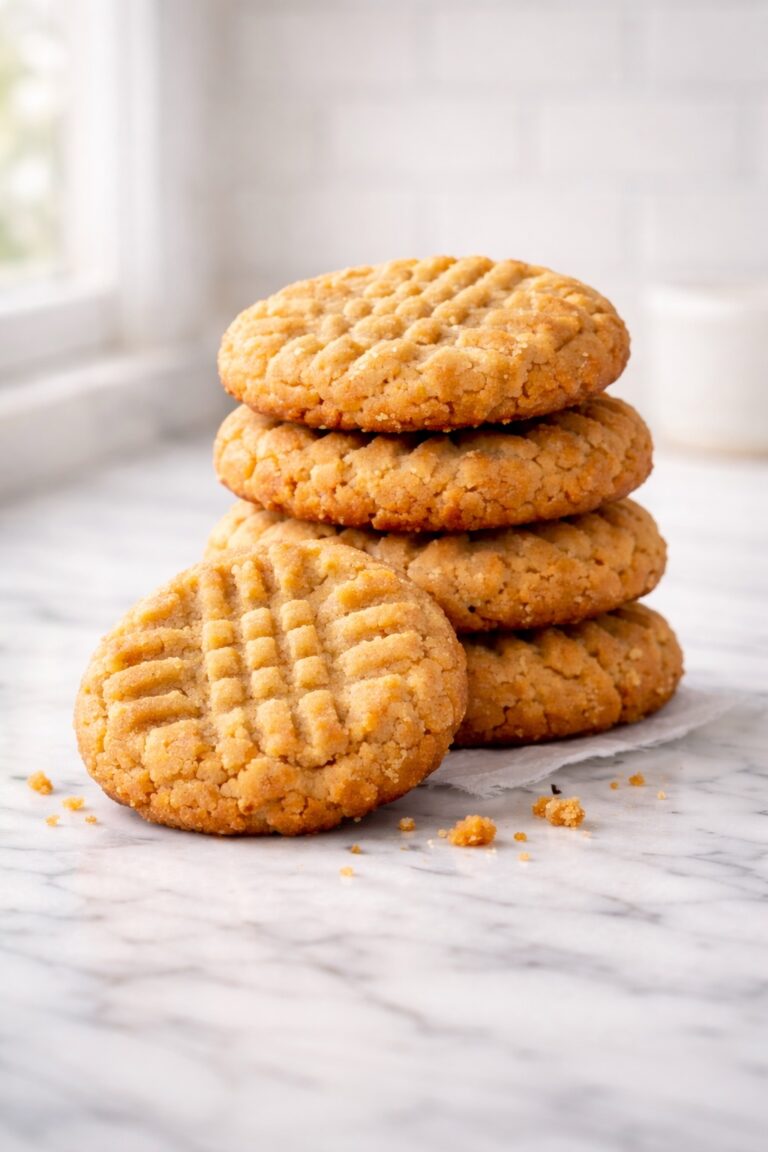
- Add them to a cookie board with 3-ingredient peanut butter cookies for a flourless contrast.

Pairings
Serve the cookies with a simple drink or a scoop of vanilla ice cream.
- cold milk
- hot coffee or espresso
- black tea
- vanilla ice cream
Make-Ahead Timeline
You can make the cookies in one day, but chilling the dough overnight makes the baking day especially easy.
| When | Action |
|---|---|
| The night before | Mix, hydrate, portion, cover, and refrigerate the dough |
| About 75 minutes before serving | Preheat the oven and prepare cool parchment-lined pans |
| About 55 minutes before serving | Bake the first batch; continue with three one-pan batches |
| About 30 minutes before serving | Allow the final batch to complete its 10-minute pan set |
| Serving time | Serve after at least 20 minutes on the rack for the true chewy texture |
Storage, Make-Ahead, and Freezing
Cool the cookies completely before enclosing them so trapped steam does not soften the edges or make the surfaces tacky.
Room-Temperature Storage
Store the fully cooled cookies in an airtight container for up to 3 days. Their best edge-to-center contrast is on days 1 and 2.
Make-Ahead Dough
Cover the 58 g portions and refrigerate for up to 48 hours. Bake directly from the refrigerator using the same visual doneness cues.
Freeze the Dough
After the minimum 2-hour chill, freeze the portions on a lined tray until solid, then transfer them to an airtight freezer container for up to 3 months. Bake from frozen, allowing approximately 2–3 additional minutes.

Freeze Baked Cookies
Freeze fully cooled cookies in an airtight container for up to 2 months. Thaw while covered at room temperature so condensation forms on the container rather than the cookies.
Refresh the Texture
Warm a room-temperature cookie in a 300°F (149°C) oven for about 4 minutes, then let it stand briefly before serving.
Substitutions and Variation Limits
Some ingredient changes work well by weight, while others can noticeably alter the spread and texture.
| Change | How to Use It | Expected Result |
|---|---|---|
| Dark brown sugar for light brown sugar | Use the same weight | Darker color and stronger molasses flavor |
| All semisweet chocolate | Keep the total at 220 g | More uniform, slightly sweeter chocolate flavor |
| All bittersweet chocolate | Keep the total at 220 g | Less sweet with more fluid, irregular pools |
| Different 1:1 gluten-free blend | Avoid as a direct swap | Spread, grittiness, and gumminess may change |
| Extra xanthan gum | Do not add it | Higher risk of gummy or rubbery centers |
| Almond flour or oat flour | Use a recipe written for that flour | These flours absorb moisture and spread differently |
| Dairy-free butter | Avoid as a direct swap | Its water and fat content may change the spread |
| Egg replacement | Avoid as a direct swap | Binding, mixing, and center texture may change |
| Reduce the sugar | Keep the listed amounts | Reducing sugar changes spread, browning, moisture, and chew |
Scaling the Recipe
Scale the ingredients by weight and keep each dough portion at 58 g so the baking time remains dependable.
- Half batch: avoid it because accurately dividing one whole egg plus one yolk is unnecessarily difficult.
- Double batch: double every gram weight and mix in two bowls if one bowl is too crowded to fold the dough evenly.
- Smaller cookies: they will need a shorter baking time, so watch the same visual doneness cues closely.
- Multiple pans: bake one pan at a time for the most consistent spread and browning.
Frequently Asked Questions
These answers cover the flour blend, chilling, freezing, spread, and gluten-free food-safety questions that come up most often.
Can I Use a Different Gluten-Free Flour Blend?
A different blend is not a reliable direct substitution. Gluten-free blends differ in cup weight, grind, starch balance, and gum content, so they can produce more spread, less spread, grit, or gumminess even at the same gram weight.
Do I Need to Add Xanthan Gum?
No. Bob’s Red Mill Gluten Free 1-to-1 Baking Flour, blue bag, already contains xanthan gum. Adding more increases the risk of a rubbery center.
Why Are My Gluten-Free Cookies Gritty?
Grittiness most often points to an under-hydrated rice-flour-based blend or a different, coarser flour blend. Use the specified flour and complete both the 20-minute room-temperature rest and minimum 2-hour chill.
Why Did the Cookies Spread Too Much—or Not Enough?
Excess spread usually comes from warm dough, a hot or dark pan, the wrong blend, or excess restored liquid. Too little spread usually comes from too much flour, a packed cup, or a dry uncovered dough surface. Bake one test cookie before changing the remaining dough.
Can I Chill the Dough Overnight?
Yes. Cover the 58 g portions and refrigerate them for up to 48 hours. An overnight chill makes it easy to bake fresh cookies the next day.
Can I Freeze the Dough and Bake It from Frozen?
Yes. Freeze the portions only after they have completed the minimum 2-hour chill. Bake them from frozen on a cool, light-colored aluminum pan and allow approximately 2–3 additional minutes, checking the same visual doneness cues rather than time alone.
Are These Cookies Suitable for Someone with Celiac Disease?
The recipe contains no gluten ingredients when every packaged product is verified gluten-free, but suitability also depends on preventing cross-contact. Check the flour, chocolate, vanilla, baking soda, and finishing salt, then use clean tools, pans, parchment, and work surfaces.
Why This Recipe Belongs in Your Recipe Box
These cookies bring together brown butter, two kinds of chocolate, crisp golden edges, and soft, chewy centers. The specified flour blend, measured moisture, 58 g portions, and visual doneness cues make every part of the method easy to follow.
For another gluten-free bake, try these gluten-free English muffins, with an airy fork-split crumb and clear mixing, proofing, and cooking cues.
Gluten-Free Baking and Food-Safety Resources
These resources explain gluten-free labeling, raw-flour safety, the flour blend used here, and the role of binders in gluten-free baking.
- FDA gluten-free labeling guidance explains the federal definition used for foods labeled gluten-free.
- FDA raw-flour safety guidance explains why uncooked flour and raw dough should not be eaten.
- Bob’s Red Mill product information lists the grains, starches, and xanthan gum in the blue-bag blend used in this recipe.
- King Arthur Baking’s gluten-free baking guide explains the structural role of binders such as xanthan gum.
More Cookie Recipes
Try another chocolate chip cookie, a deeper chocolate bake, or a gluten-free and flourless favorite.
More Chocolate Chip Cookies
These four recipes pair chocolate chips with classic dough, brown butter, oats, or sourdough discard.
- Chocolate Chip Cookie Recipe — a classic wheat-flour version with soft centers and crisp golden edges.
- Brown Butter Chocolate Chip Cookies — a deeper caramel-nutty version built around toasted milk solids.
- Oatmeal Chocolate Chip Cookies — a heartier variation with a substantial oat chew.
- Sourdough Chocolate Chip Cookies — a soft-centered cookie that uses sourdough discard for added depth.
Chocolate Cookie Favorites
Choose from fudgy cocoa cookies, peanut butter cookies, or a white-chocolate variation.
- Brownie Cookies — crackly tops and fudgy centers for a much more intense chocolate profile.
- Chocolate Crinkle Cookies — powdered-sugar tops surrounding soft, brownie-like centers.
- Peanut Butter Chocolate Chip Cookies — soft cookies with roasted peanut depth and melty chocolate.
- White Chocolate Chip Cookies — a sweeter, creamy chocolate variation with a soft cookie base.
Gluten-Free and Flourless Recipes
These recipes include another gluten-free bake, soft pancakes, and two flourless cookies.
- Gluten-Free English Muffins — a yeast-raised savory bake with an airy fork-split crumb.
- Gluten Free Pancakes — a soft gluten-free breakfast made in a completely different format.
- 3-Ingredient Peanut Butter Cookies — a naturally flourless cookie with soft centers and bold peanut flavor.
- No Bake Oatmeal Cookies — chewy chocolate-peanut-butter cookies made without turning on the oven.
With the right flour blend, enough resting and chilling time, and careful attention to doneness, these gluten-free chocolate chip cookies have crisp golden edges, a chewy middle, and melted chocolate in every bite.

Gluten Free Chocolate Chip Cookies
Large bakery-style gluten free chocolate chip cookies with crisp golden edges, soft chewy centers, nutty brown butter, and both semisweet chips and melted bittersweet chocolate pockets.
Ingredients
For the Cookie Dough
- 3/4 cup unsalted butter (170 g), cut into pieces
- 2 tablespoons whole milk (30 ml), divided; use only enough to restore the browned butter and milk to exactly 170 g
- 3/4 cup packed light brown sugar (160 g)
- 1/3 cup granulated sugar (67 g)
- 1 large egg (50 g without shell), at room temperature
- 1 large egg yolk (18 g), at room temperature
- 2 teaspoons pure vanilla extract (10 ml)
- 1 2/3 cups Bob’s Red Mill Gluten Free 1-to-1 Baking Flour, blue bag (247 g), weighed; contains xanthan gum
- 3/4 teaspoon baking soda (3.5 g)
- 3/4 teaspoon fine sea salt (4.5 g)
- 1 cup semisweet chocolate chips (170 g)
- 1 3/4 ounces bittersweet chocolate, 60–70% cacao (50 g), roughly chopped
For Finishing
- Flaky sea salt, optional
Instructions
- Brown the Butter
Place the butter in a light-colored saucepan over medium heat. Cook, stirring and scraping frequently, until it foams, the bubbles become fine, and the milk solids turn amber-brown. Immediately transfer every drop and browned solid to a heatproof bowl. Add only enough measured milk to bring the combined browned-butter-and-milk mass to exactly 170 g. Cool to 90–100°F (32–38°C).
What you should see: Clear golden-amber butter with many fine chestnut-brown milk solids and a nutty aroma. Black solids or a bitter smell mean the butter burned and must be remade. - Combine the Dry Ingredients
Whisk the gluten-free flour blend, baking soda, and fine sea salt for about 30 seconds, breaking up every visible clump.
What you should see: A uniform pale mixture without compact flour pockets or visible streaks of baking soda. - Build the Sugar-Butter Base
Add both sugars to the warm brown butter. Whisk firmly for 45–60 seconds, scraping the bowl, until all the sugar is evenly moistened and the mixture is glossy.
What you should see: A thick, glossy, dark beige mixture that resembles wet sand but has no free pool of butter around the edge. - Emulsify the Egg Mixture
Whisk in the egg, yolk, and vanilla for about 60 seconds. Scrape the bowl once and continue until the mixture is cohesive, thickened, and glossy, with no oily ring.
What you should see: A smooth, glossy caramel-colored emulsion that falls from the whisk in a short ribbon. An oily ring means the mixture needs more whisking. - Make the Dough
Reserve about 1 tablespoon of mixed chocolate for the tops. Fold the dry mixture into the wet mixture until only a few pale streaks remain, then fold in the remaining semisweet chips and chopped bittersweet chocolate until no dry flour remains. Do not add extra flour.
What you should see: A soft, glossy dough that may initially look looser than conventional cookie dough but still gathers around the spatula. Do not add extra flour at this stage. - Hydrate, Portion, and Chill
Rest the dough at room temperature for 20 minutes. Divide it into 16 exact 58 g portions and shape each into a tall mound. Press the reserved chocolate shallowly onto the tops. Cover and refrigerate for at least 2 hours or up to 48 hours.
What you should see: Dough that visibly thickens during the room-temperature rest and becomes firm but not rock-hard after chilling. Each mound should hold its height without slumping. - Prepare the Oven and Pans
Preheat a conventional oven to 350°F (177°C), or convection to 325°F (163°C), with a rack in the center. Line a completely cool, light-colored aluminum half-sheet pan with parchment. Arrange five or six chilled portions at least 3 inches apart.
What you should see: Tall cold mounds on a cool pan, with enough clear parchment around each one for a 3 1/4- to 3 1/2-inch cookie. - Bake Until the Edges Set
Bake one pan at a time for 12–14 minutes. Remove the pan when the outer 1/2 inch is set and golden, the edge is deeper brown, and the puffed, soft center has lost its wet raw-dough sheen. Repeat with cool pans for three total batches.
What you should see: A visibly set perimeter, a lighter soft center, and small natural fissures on top. Glossy melted chocolate is expected; glossy raw dough is not. - Shape and Finish
While the cookies are still hot, move a large round cutter around any irregular cookie in a quick circular motion if you want a more even shape. Sprinkle lightly with flaky sea salt, if using, without pressing the soft centers.
What you should see: Naturally rounded cookies with wrinkled golden edges and visible chocolate. Rounding should tidy the perimeter, not compress the center. - Cool on the Pan, Then Transfer to a Rack
Leave the cookies on the hot pan for 10 minutes. Transfer them carefully to a wire rack and cool for at least 20 more minutes before judging the final texture.
What you should see: A base that lifts cleanly and supports the center after the pan rest. The underside should be evenly golden, not pale and greasy or dark brown and scorched.
Notes
- This recipe is written for Bob’s Red Mill Gluten Free 1-to-1 Baking Flour, blue bag. Another blend may absorb differently and is not a direct substitution.
- Do not add xanthan gum; the specified flour blend already contains it.
- After browning, restore the combined browned-butter-and-milk mass to exactly 170 g. Use only as much of the measured milk as needed.
- The 20-minute room-temperature rest and minimum 2-hour chill are essential for the intended spread and texture.
- Begin every batch on a completely cool, light-colored pan and bake one pan at a time on the center rack.
- Judge doneness by the set golden outer ring and soft center without a wet raw-dough sheen, not by a firm-looking center.
- Do not taste raw dough because untreated flour and eggs can carry foodborne pathogens.
- For gluten-free suitability, verify every packaged ingredient for the intended eater and prevent cross-contact on tools, pans, and work surfaces.
- For 32 cookies, make a separate full double batch and preserve the 58 g portion.
- A half batch is not recommended because accurately dividing one whole egg plus one yolk is unnecessarily error-prone.
Storage and Freezing
- Store fully cooled cookies airtight at room temperature for up to 3 days. Their best edge-to-center contrast is on days 1 and 2.
- Refrigerate covered 58 g dough portions for up to 48 hours and bake directly from the refrigerator.
- After the minimum 2-hour chill, freeze dough portions on a lined tray until solid, then store airtight for up to 3 months. Bake from frozen, allowing approximately 2–3 additional minutes.
- Freeze fully cooled baked cookies airtight for up to 2 months. Thaw while covered at room temperature.
- To refresh a room-temperature cookie, warm it at 300°F (149°C) for about 4 minutes, then let it stand briefly before serving.
Nutrition Information:
Yield: 16 Serving Size: 1 cookieAmount Per Serving: Calories: 267Total Fat: 14gSaturated Fat: 9gCholesterol: 46mgSodium: 180mgCarbohydrates: 35gFiber: 1gSugar: 21gProtein: 2g
Nutrition information is provided as an estimate only and may vary based on specific ingredients, brands, and portion sizes used. This information should not be considered medical or nutritional advice.
12 Sweet Favorites — Yours, Free 🍰
Tiramisù, no-bake cheesecake, the perfect chocolate chip cookie & 9 more reader-loved desserts — gathered into one beautiful free recipe book. From my kitchen to yours.
No spam, just sweet things. Unsubscribe anytime.