Dirt Pudding Recipe (Easy, Creamy, No-Bake Chocolate Dessert)
There’s something surprisingly irresistible about a simple Dirt Pudding Recipe. The silky chocolate pudding, layers of crushed chocolate cookies, and creamy filling create a dessert that feels nostalgic, comforting, and fun all at once.
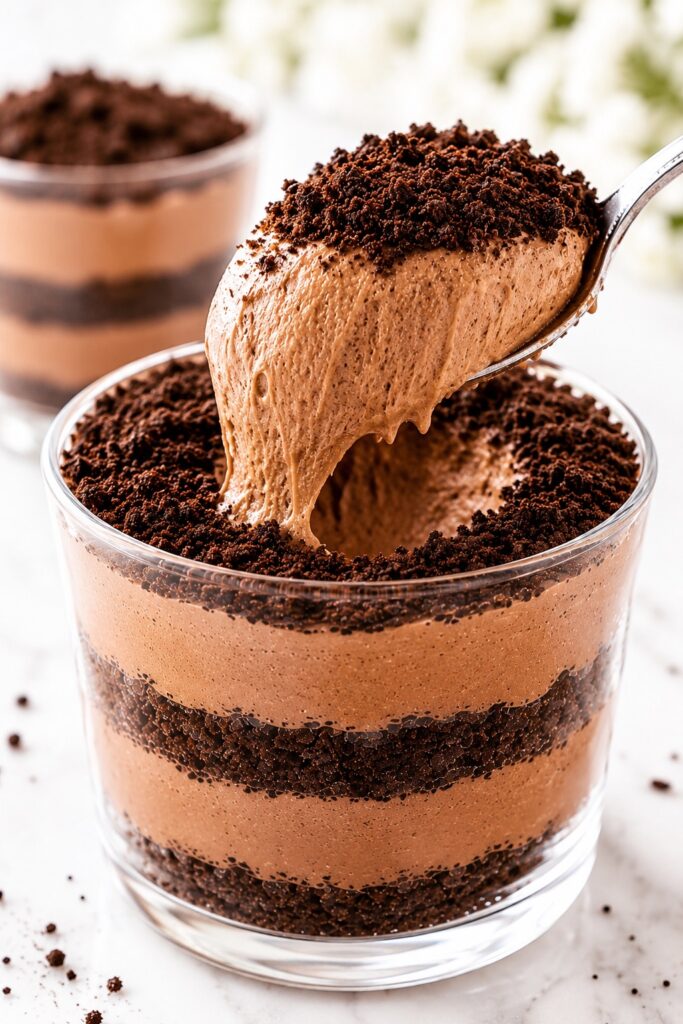
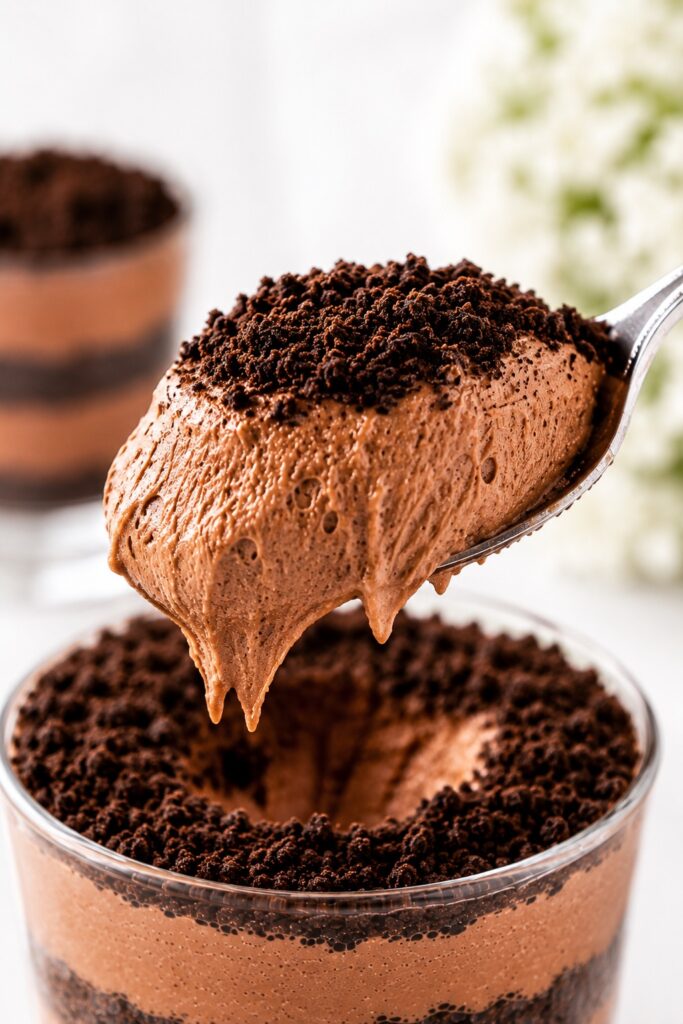
The first spoonful is always the best. The cookie crumbs soften slightly against the creamy pudding while still keeping a little texture, creating that signature contrast people love. It tastes rich without feeling overly heavy and somehow manages to appeal to both kids and adults equally.
One reason people continue saving and sharing this dessert year after year is because it delivers maximum reward with minimal effort. There’s no baking, no complicated techniques, and no special equipment required. Yet the finished dessert looks impressive enough for parties, potlucks, birthdays, holidays, and family gatherings.
It’s also incredibly forgiving. The layers don’t need to be perfect, the presentation can be rustic or elegant, and the flavors only improve after chilling. Few desserts are this easy while still feeling special enough to bring to a table full of people.
If you’re looking for a crowd-pleasing chocolate dessert that combines creamy texture, nostalgic flavor, and make-ahead convenience, this Dirt Pudding Recipe deserves a permanent place in your recipe collection.
What Is Dirt Pudding?
Dirt pudding is a classic American no-bake dessert made with chocolate pudding, whipped topping or cream-based filling, and crushed chocolate sandwich cookies layered together to resemble garden soil.
Traditionally served in a large dish or individual cups, dirt pudding often includes playful decorations such as gummy worms, making it popular for children’s parties and celebrations. Modern versions range from whimsical family-style desserts to elegant individual dessert cups.
At its core, dirt pudding combines creamy chocolate pudding with crushed cookies to create a dessert that is rich, smooth, crunchy, and incredibly easy to prepare.
Quick Recipe Snapshot
| Detail | Information |
|---|---|
| Texture | Creamy, fluffy, silky, with soft chocolate cookie crunch |
| Flavor | Rich chocolate, vanilla cream, and chocolate cookie crumbs |
| Difficulty | Easy |
| Prep Time | 20 minutes |
| Chilling Time | 4 hours |
| Total Time | 4 hours 20 minutes |
| Servings | 10–12 servings |
| Method | No-Bake |
| Make-Ahead Friendly | Excellent (up to 24 hours ahead) |
| Storage | Up to 4 days refrigerated |
| Best For | Parties, birthdays, holidays, potlucks, family gatherings |
| Crowd Appeal | Extremely High |
In short: This Dirt Pudding Recipe combines creamy chocolate pudding, fluffy cheesecake-style filling, and crushed chocolate sandwich cookies into an easy no-bake dessert that tastes even better after chilling. It’s one of the most reliable make-ahead desserts for parties, holidays, and family gatherings.
Why This Dirt Pudding Recipe Works So Well
This Dirt Pudding Recipe works so well because it balances three textures that naturally belong together: silky chocolate pudding, fluffy cream filling, and soft-crunchy chocolate cookie crumbs. Each layer brings something different, so the dessert never feels flat or overly sweet.
The chocolate pudding provides moisture, body, and that classic creamy spoonable texture. It holds the dessert together without making it feel dense, especially once it has chilled long enough to firm slightly.
The cream cheese mixture adds richness and structure. Cream cheese gives the filling a subtle tang that keeps the sweetness from becoming overwhelming, while the whipped topping lightens the mixture so it feels mousse-like instead of heavy.
The cookie crumbs are just as important as the filling. When crushed chocolate sandwich cookies sit against the pudding, they slowly absorb a little moisture. This softens the crumbs enough to create the classic “dirt” texture, while still leaving a gentle cookie bite in each spoonful.
Chilling is what brings everything together. In the refrigerator, the layers settle, the filling thickens, and the flavors blend into a smoother, more cohesive dessert. This is why Dirt Pudding often tastes even better after several hours or overnight.
A small but important detail is crumb size. Very fine crumbs create the most realistic dirt appearance, while a few slightly larger cookie pieces give the dessert better texture. I like using mostly fine crumbs with a small handful of rougher pieces mixed in so each bite feels creamy but not one-note.
Why You’ll Love This Dirt Pudding Recipe
- No baking required
- Easy enough for beginners
- Perfect make-ahead dessert
- Rich chocolate flavor
- Fun for kids and adults
- Great for parties and potlucks
- Easy to customize
- Travels well
- Can be served in cups or a large dish
- Looks impressive despite minimal effort
Save this recipe for birthday parties, family gatherings, summer celebrations, or anytime you need a dependable dessert everyone will recognize and love.
The Texture Science Behind Perfect Dirt Pudding
One of the reasons Dirt Pudding has remained popular for decades is because it relies on several simple food science principles that work together to create an incredibly satisfying texture.
The first is starch thickening. Instant chocolate pudding contains modified starches that absorb liquid and swell as they hydrate. As the pudding chills, these starches create the smooth, spoonable structure that gives dirt pudding its signature creamy consistency.
The second is aeration. Whipped topping introduces thousands of tiny air bubbles into the filling. Those air pockets make the dessert feel lighter on the palate, preventing it from becoming overly dense even though it contains rich ingredients like cream cheese and pudding.
The third is moisture migration. After assembly, a small amount of moisture slowly moves from the pudding and cream layers into the cookie crumbs. This is what transforms crunchy cookie crumbs into the soft chocolate “dirt” texture people associate with classic dirt pudding.
Temperature plays an important role as well. During the first hour of chilling, the layers are still quite separate. After several hours, the pudding firms, the cream layer stabilizes, and the cookies soften slightly. The dessert becomes smoother, more cohesive, and noticeably more flavorful.
This gradual texture transformation is one of the reasons Dirt Pudding is such a successful make-ahead dessert. Unlike many desserts that begin declining after assembly, Dirt Pudding often reaches its best texture several hours later.
| Component | What Happens | Why It Matters |
|---|---|---|
| Chocolate Pudding | Starches hydrate and thicken | Creates creamy structure |
| Whipped Topping | Introduces air | Creates lighter texture |
| Cream Cheese | Adds body and stability | Prevents a loose filling |
| Cookie Crumbs | Absorb moisture gradually | Creates classic dirt texture |
| Chilling Time | Allows layers to settle | Improves texture and flavor |
Tip: If you’ve ever wondered why dirt pudding tastes better the next day, moisture migration is the answer. The cookies soften just enough to blend into the creamy layers without completely losing their texture.
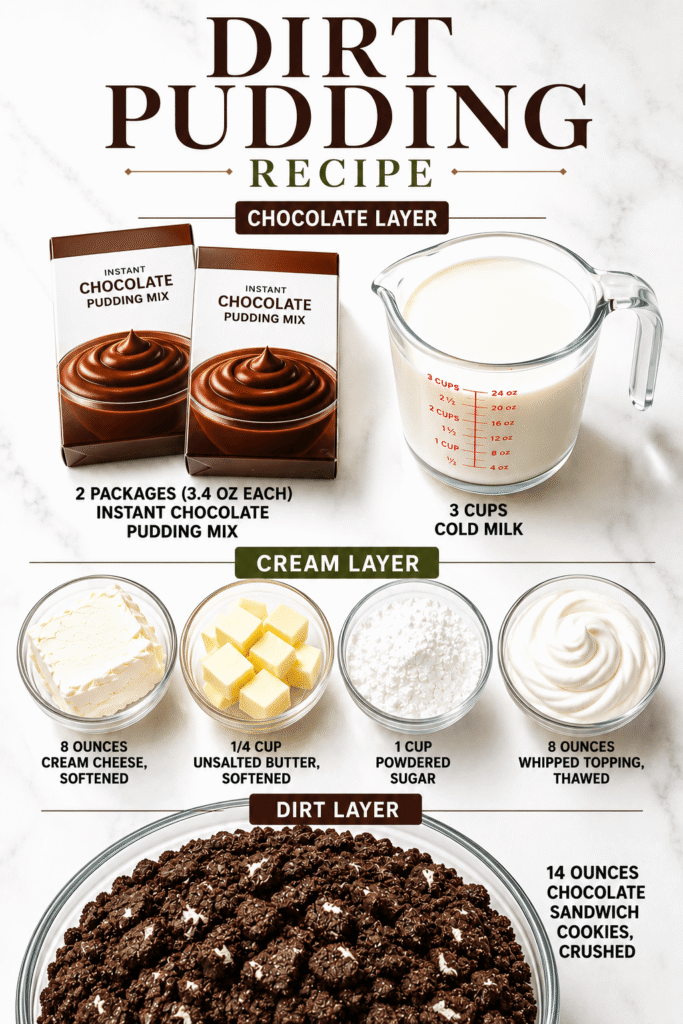
Ingredients You’ll Need
For the Chocolate Layer
- 2 packages (3.4 ounces each) instant chocolate pudding mix
- 3 cups cold milk
For the Cream Layer
- 8 ounces cream cheese, softened
- 1/4 cup unsalted butter, softened
- 1 cup powdered sugar
- 8 ounces whipped topping, thawed
For the Dirt Layer
- 14 ounces chocolate sandwich cookies, crushed
Optional Garnishes
- Gummy worms
- Chocolate shavings
- Mini chocolate chips
- Fresh berries
- Chocolate curls
Ingredient Intelligence: What Each Ingredient Brings to the Dessert
Dirt Pudding uses a relatively short ingredient list, but each ingredient plays a specific role in creating the creamy texture, stable layers, and classic flavor that make this dessert so memorable.
Instant Chocolate Pudding Mix
Instant pudding is the foundation of the dessert. It provides chocolate flavor, structure, and the thick creamy consistency that holds the layers together.
Because the pudding thickens through starch hydration rather than cooking, it creates reliable results with very little effort.
Substitution: Homemade chocolate pudding can be used, but it should be fully chilled before assembling the dessert.
Milk
Milk hydrates the pudding mix and determines the final consistency of the filling.
Whole milk typically produces the richest texture, while lower-fat milk creates a slightly lighter result.
Practical note: Using less milk than directed creates a thicker pudding layer, while additional milk produces a softer dessert.
Cream Cheese
Cream cheese does much more than add richness. It provides body, stability, and a subtle tangy flavor that balances the sweetness of the pudding and cookies.
Without cream cheese, the dessert can taste noticeably sweeter and less structured.
Substitution: Mascarpone creates an even richer and silkier filling with a milder flavor.
Whipped Topping
Whipped topping introduces air into the dessert, creating the light mousse-like texture that separates dirt pudding from ordinary chocolate pudding.
The air bubbles help keep the filling fluffy rather than dense.
Substitution: Freshly whipped cream can be used for a more homemade flavor, although the finished dessert may be slightly softer.
Chocolate Sandwich Cookies
The cookies create the signature “dirt” appearance while adding contrast to the creamy filling.
As they absorb a small amount of moisture during chilling, they soften into the familiar texture that gives dirt pudding its name.
Texture Tip: A combination of mostly fine crumbs and a few slightly larger pieces creates the most interesting texture.
Powdered Sugar
Powdered sugar sweetens the cream layer while blending smoothly into the filling.
Unlike granulated sugar, it dissolves quickly and helps maintain a silky texture.
Butter
A small amount of butter enriches the cream cheese layer and contributes to a smoother mouthfeel.
It also helps the filling feel more luxurious without making it heavy.
Why Dirt Pudding Tastes So Balanced
One reason Dirt Pudding remains such a popular dessert is that it combines multiple forms of sweetness. The pudding, cookies, and cream layer each bring sweetness differently, which creates more depth than a dessert that relies on a single sugary component. Combined with the slight tang of cream cheese and the texture contrast from the cookies, the result feels surprisingly balanced despite its simple ingredients.
Equipment You’ll Need
- Large mixing bowl
- Medium mixing bowl
- Hand mixer or stand mixer
- Rubber spatula
- Food processor or rolling pin
- 9×13-inch serving dish or dessert cups
Practical note: A food processor creates finer, more realistic dirt crumbs, but a zip-top bag and rolling pin work perfectly well.
How to Make Dirt Pudding
1. Prepare the pudding
Whisk the chocolate pudding mix and cold milk together until smooth and glossy.
The mixture will look thin at first but will begin thickening within a few minutes.
Tip: Continue whisking until no dry pudding mix remains.
2. Make the cream cheese mixture
Beat the cream cheese, butter, and powdered sugar until completely smooth.
The mixture should appear fluffy, pale, and free of lumps.
If a few tiny lumps remain, continue mixing. This is one of those steps where an extra minute makes a noticeable difference later.
3. Fold in the whipped topping
Gently fold the whipped topping into the cream cheese mixture.
The texture should become light, airy, and mousse-like.
Avoid aggressive stirring, which can deflate the mixture.
4. Combine the fillings
Fold the prepared pudding into the cream mixture.
The final filling should be smooth, creamy, and evenly colored.
5. Crush the cookies
Pulse the cookies in a food processor until they resemble rich chocolate soil.
You can leave a few slightly larger pieces for added texture.
6. Create the layers
Spread a thin layer of cookie crumbs into the bottom of your dish.
Add a layer of pudding mixture.
Repeat until all ingredients are used, finishing with cookie crumbs on top.
Don’t worry if the layers aren’t perfectly even. Once chilled, the dessert looks beautiful regardless.
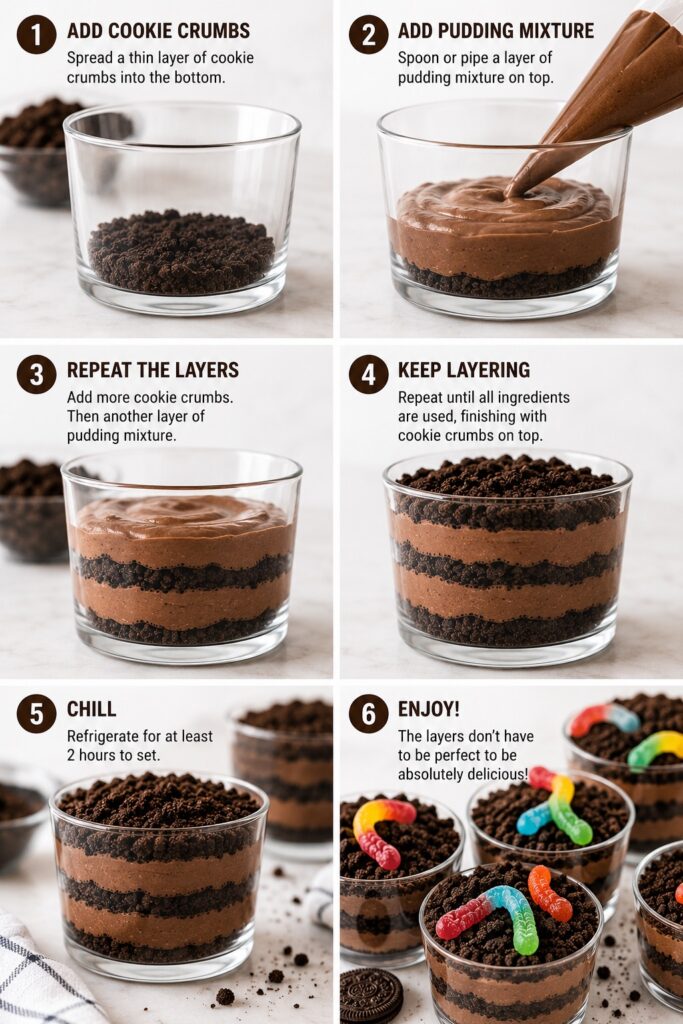
7. Chill thoroughly
Refrigerate for at least 4 hours.
The pudding will firm, the flavors will develop, and the texture will become much more cohesive.
8. Garnish and serve
Top with gummy worms, chocolate shavings, or other decorations just before serving.
Serve chilled.
Visual Doneness Cues
- Pudding layer looks thick and stable
- Cream layer appears fluffy and smooth
- Cookie crumbs remain dry-looking on top
- Layers hold shape when scooped
- Dessert feels cold and fully set
- No liquid pooling around edges
Dirt Pudding Texture Guide
| Stage | What You Should See |
|---|---|
| Freshly Mixed | Soft, airy filling |
| Layered | Distinct visible layers |
| After 2 Hours | Slightly firmer structure |
| After 4 Hours | Fully set dessert |
| Next Day | Best flavor integration |
Expert Tips for the Best Dirt Pudding Every Time
- Allow the cream cheese to fully soften before mixing. Cold cream cheese is one of the most common causes of small lumps in the filling. Even a few extra minutes at room temperature can make a noticeable difference in texture.
- Use cold milk for the pudding layer. Instant pudding thickens more consistently when mixed with properly chilled milk. Warm milk can slow thickening and create a looser filling.
- Don’t rush the chilling time. The dessert may look ready after assembly, but the texture improves dramatically after several hours in the refrigerator. Overnight chilling often produces the best results.
- Create a mix of fine and slightly larger cookie crumbs. Ultra-fine crumbs create the classic dirt appearance, while a small amount of coarser crumbs adds texture and prevents every bite from feeling exactly the same.
- Fold rather than stir aggressively. When incorporating the whipped topping, gentle folding preserves air bubbles that help create the light mousse-like consistency people love.
- Serve well chilled. Dirt Pudding tastes noticeably richer and more structured when cold. If left at room temperature too long, the layers become softer and less defined.
- Add decorative toppings shortly before serving. Chocolate curls, gummy worms, sprinkles, berries, and other garnishes look fresher and maintain better texture when added at the last minute.
Little Details That Make a Big Difference
One small trick that many experienced home bakers use is reserving some of the finest cookie crumbs exclusively for the top layer. This creates a cleaner, more realistic dirt appearance and gives the dessert a more polished presentation.
Another helpful detail is using a clear glass dish or transparent dessert cups whenever possible. Dirt Pudding is naturally beautiful because of its layers, and allowing those layers to remain visible instantly makes the dessert feel more special.
My favorite timing window: Assemble the dessert in the evening, refrigerate overnight, and serve the next day. The flavors become more cohesive, the pudding firms slightly, and the cookie crumbs reach that classic soft-but-not-mushy texture that makes Dirt Pudding so memorable.
Common Dirt Pudding Mistakes
| Mistake | Result | Fix |
|---|---|---|
| Warm cream cheese | Lumpy filling | Soften fully first |
| Under-chilling | Loose dessert | Chill at least 4 hours |
| Overmixing whipped topping | Dense texture | Fold gently |
| Large cookie chunks | Uneven texture | Crush more finely |
| Serving immediately | Weak flavor development | Allow chilling time |
Dirt Pudding vs Other No-Bake Chocolate Desserts
| Dessert | Texture | Richness | Difficulty |
|---|---|---|---|
| Dirt Pudding | Creamy + crumbly | Medium-rich | Easy |
| Chocolate Mousse | Airy | Rich | Moderate |
| Chocolate Trifle | Soft layered | Medium | Easy |
| No-Bake Cheesecake | Dense creamy | Rich | Moderate |
Beautiful Ways to Serve Dirt Pudding for Parties, Holidays, and Everyday Treats
Dirt Pudding may be one of the easiest desserts you’ll ever make, but with a little presentation, it can easily become the centerpiece of a dessert table. The contrast between dark chocolate cookie crumbs and creamy chocolate filling creates dramatic layers that look beautiful in almost any serving style.
Whether you’re making it for a birthday party, holiday gathering, potluck, baby shower, or casual family dessert, the way you serve it can completely change the feel of the finished dish.
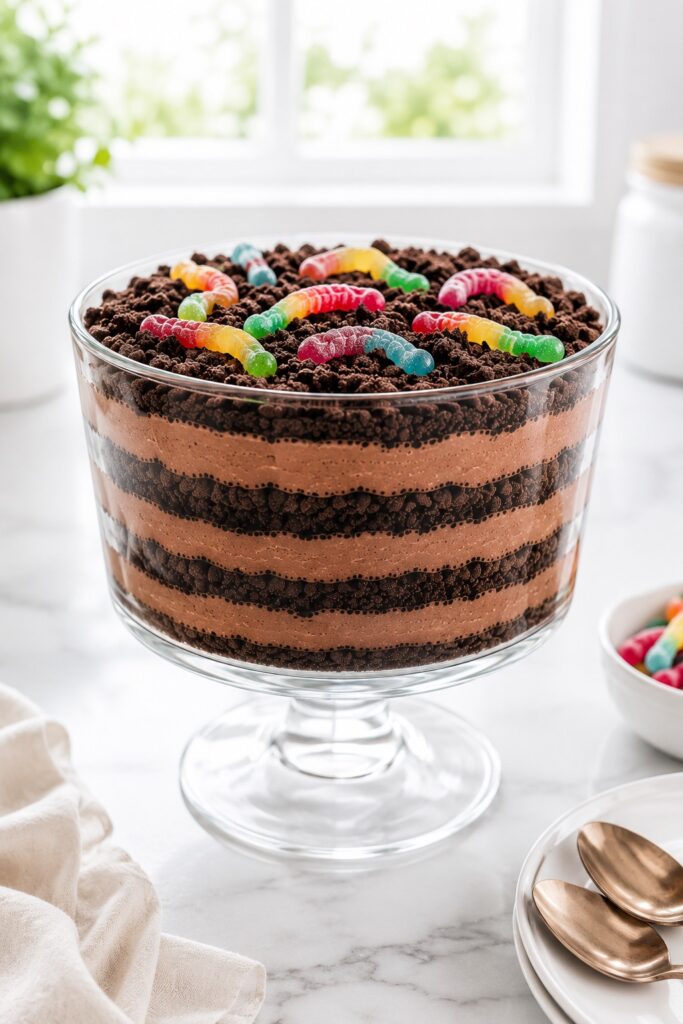
Classic Family-Style Dirt Pudding
Serve the dessert in a clear glass trifle dish or large glass bowl to showcase the layers. The visible contrast between the creamy filling and chocolate cookie crumbs creates an inviting bakery-style appearance that encourages guests to dig in immediately.
This is one of the easiest options when serving a crowd and works especially well for potlucks and holiday gatherings.
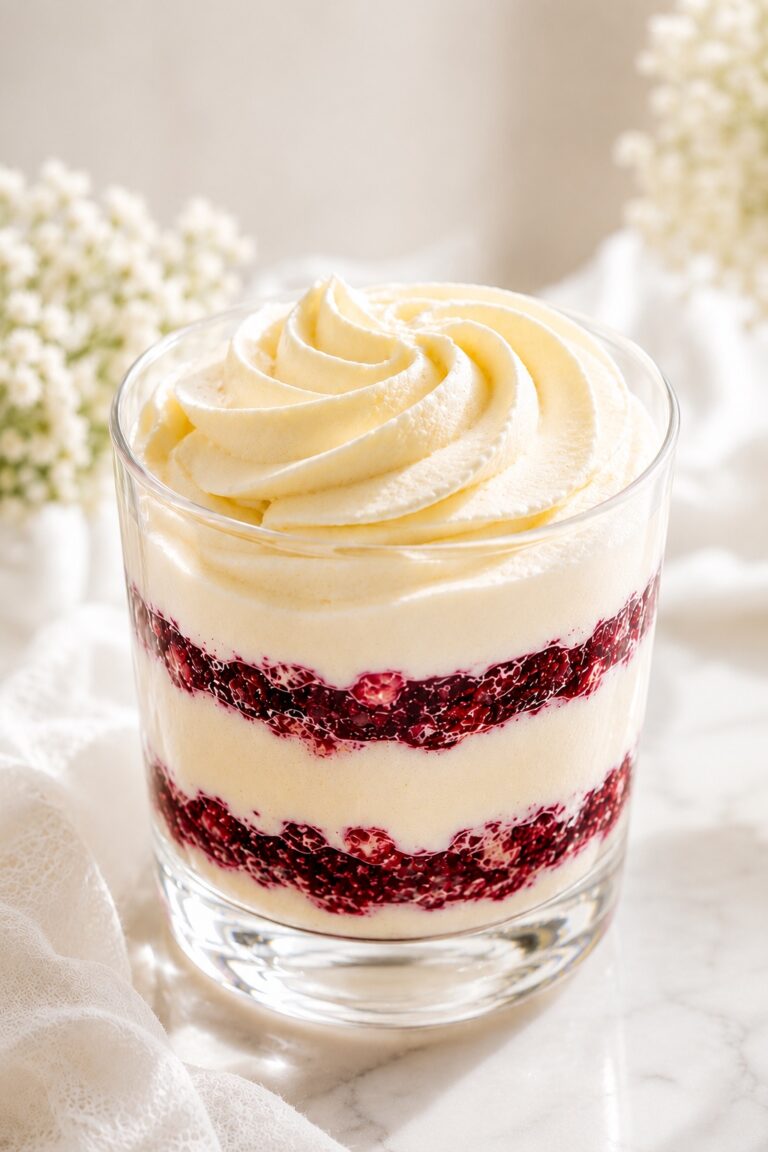
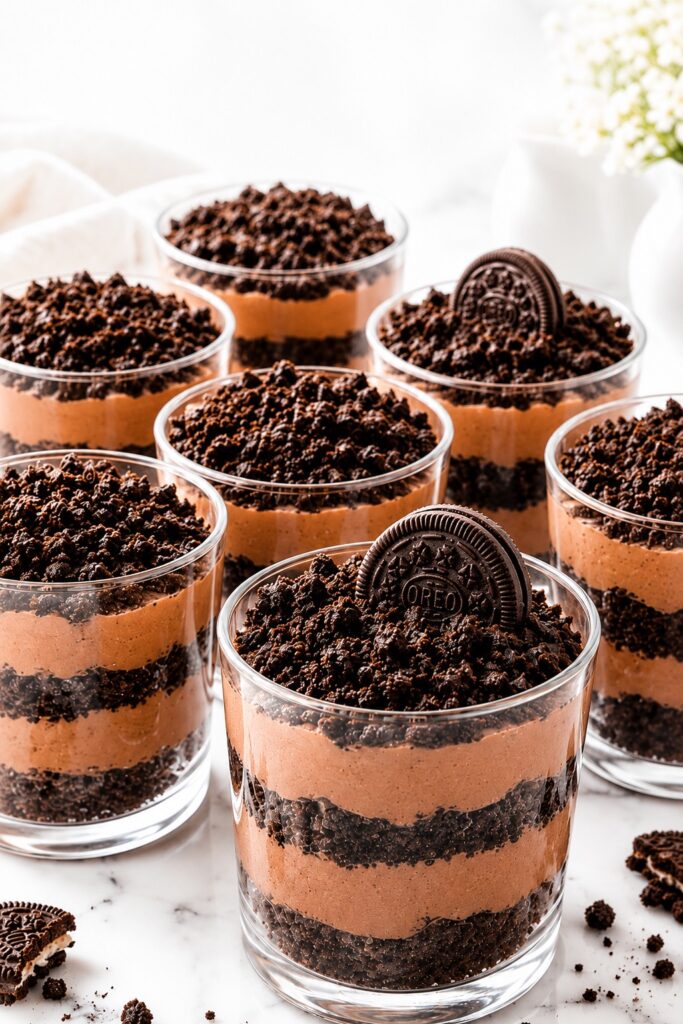
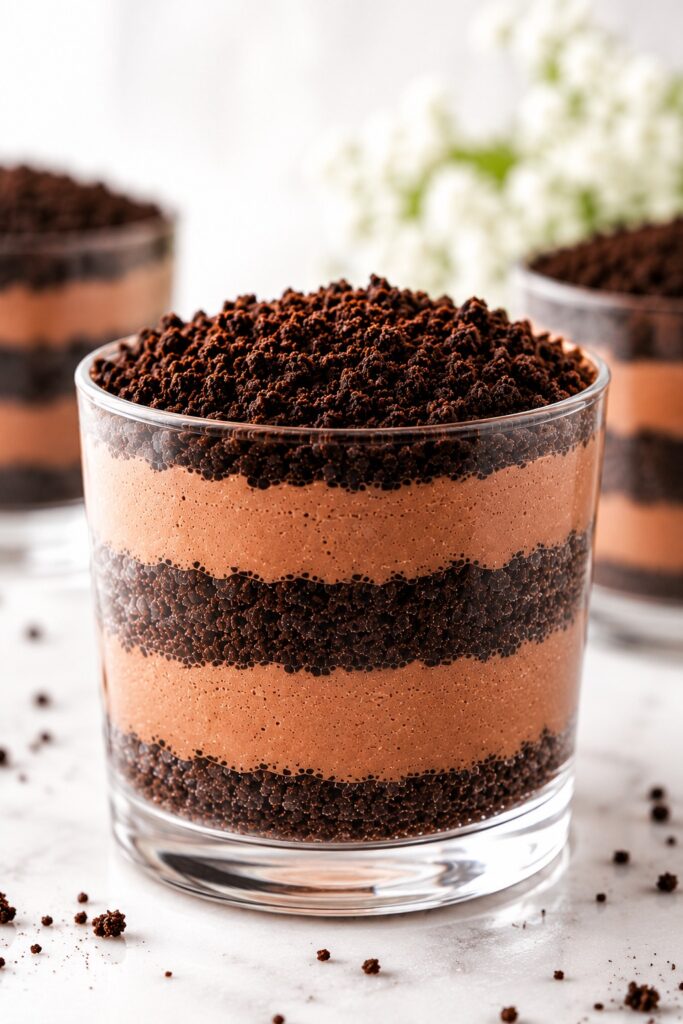
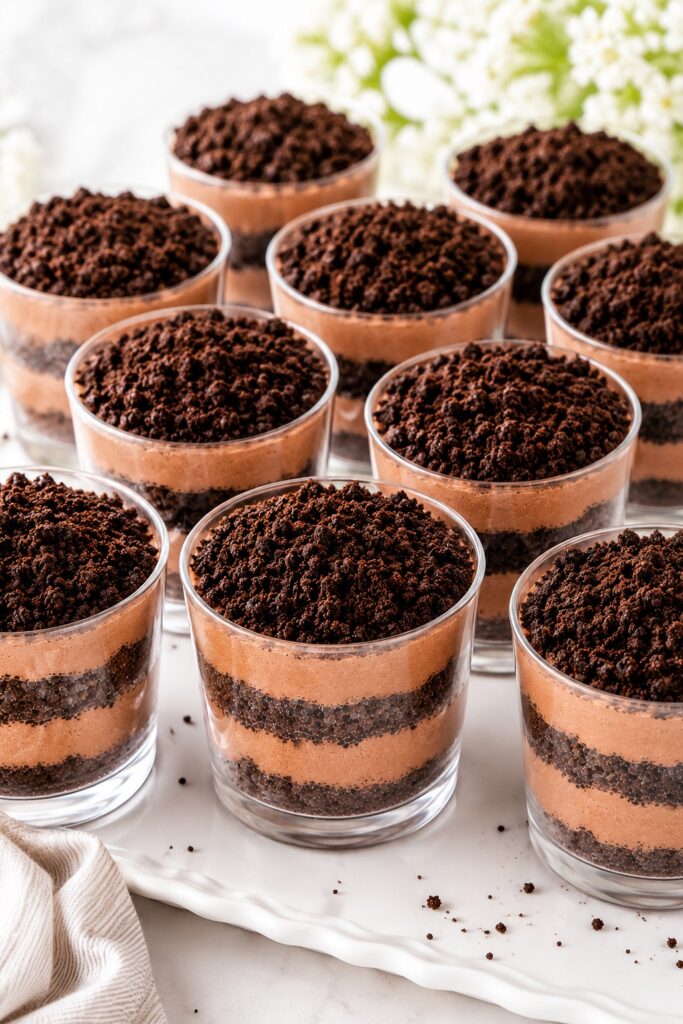
Individual Dessert Cups
Layer the pudding into clear dessert cups, small mason jars, or stemless glasses for an elegant presentation.
The individual portions highlight the beautiful layers and make serving effortless. They are also ideal for parties because guests can grab one without needing utensils for scooping.
Save this idea for birthdays, baby showers, graduation parties, and summer celebrations.
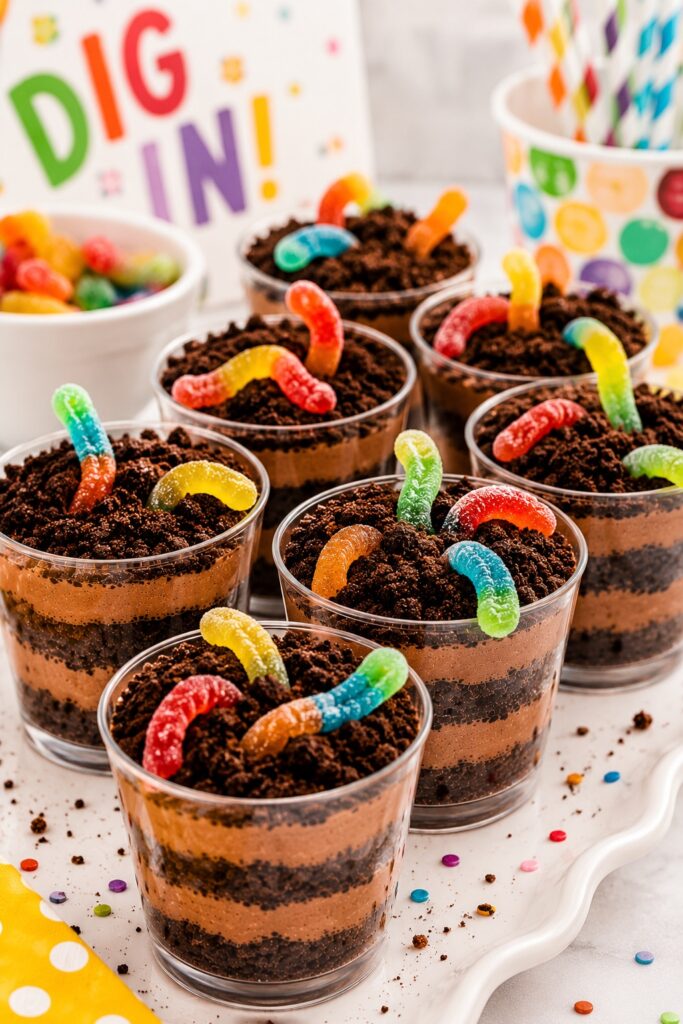
Fun Dirt Pudding Cups for Kids
Add gummy worms, chocolate rocks, candy flowers, or edible decorations to transform the dessert into a playful treat.
The whimsical presentation makes Dirt Pudding especially popular for children’s parties, Halloween events, classroom celebrations, and family gatherings.
Even adults tend to smile when they see gummy worms peeking out of the chocolate cookie “soil.”
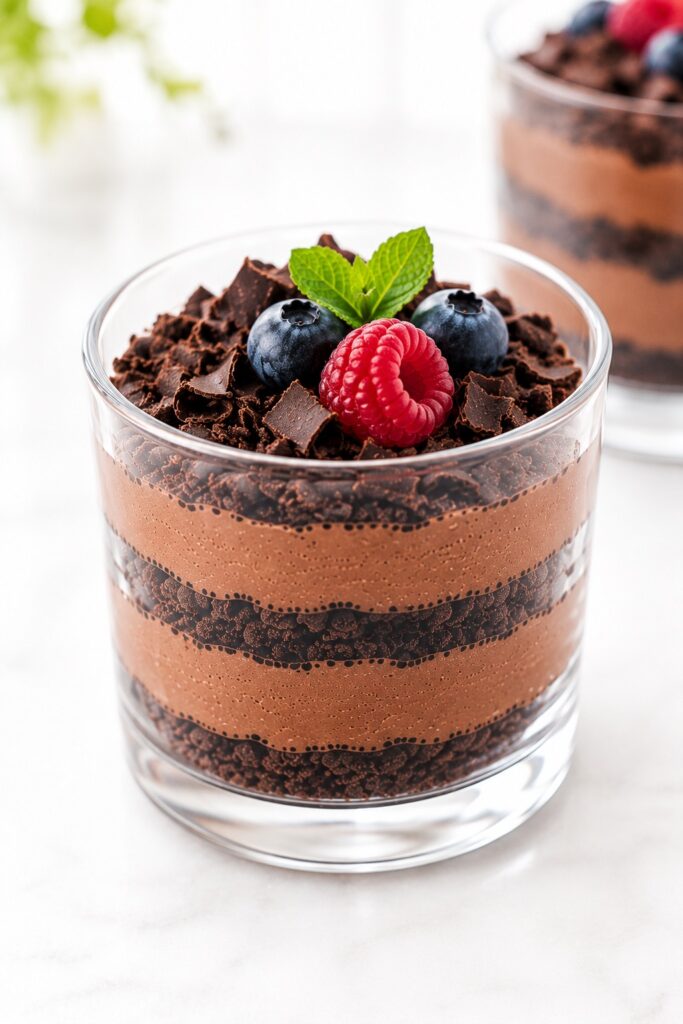
Elegant Chocolate Dessert Cups
For a more sophisticated presentation, skip the gummy worms and garnish with chocolate curls, shaved dark chocolate, chocolate pearls, or fresh berries.
The dessert instantly shifts from playful to elegant while maintaining the same creamy chocolate flavor people love.
This variation feels especially appropriate for dinner parties and holiday dessert tables.
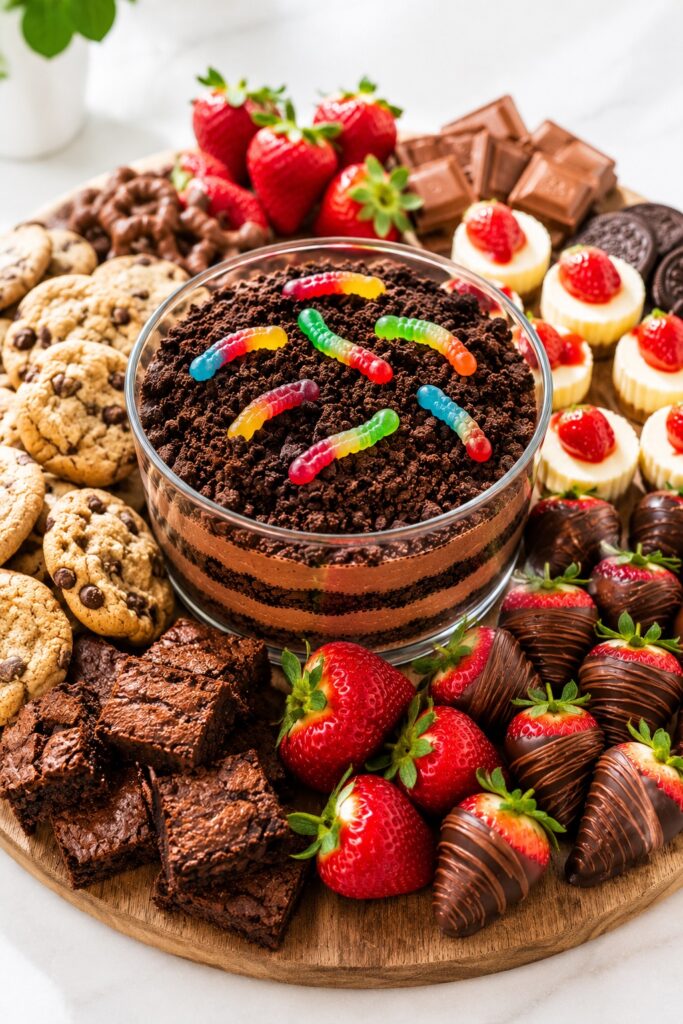
Dessert Board Presentation
For larger gatherings, serve Dirt Pudding alongside cookies, brownies, strawberries, chocolate-covered strawberries, and mini cheesecakes as part of a dessert grazing board.
The creamy texture provides contrast against the firmer desserts and creates a more varied dessert experience for guests.
Seasonal Serving Ideas
- Spring: Top with chocolate curls and fresh strawberries.
- Summer: Serve chilled in mason jars with fresh berries.
- Fall: Add candy pumpkins or autumn-themed decorations.
- Halloween: Decorate with gummy worms, candy bones, or edible graveyard toppers.
- Winter Holidays: Finish with chocolate shavings and festive sprinkles.
Perfect Pairings
Dirt Pudding pairs beautifully with coffee, cold milk, hot chocolate, espresso drinks, or vanilla ice cream.
The creamy chocolate filling also works surprisingly well alongside fresh strawberries, raspberries, and other tart fruits that help balance the richness.
Save this dessert for birthday parties, holiday dessert tables, potlucks, school events, and family gatherings when you want something easy, nostalgic, and guaranteed to disappear quickly.
And if you’re serving guests, don’t be surprised when people ask for the recipe before they’ve even finished their first cup.
Storage and Make-Ahead Guide for the Best Texture
One of the reasons Dirt Pudding remains such a popular party dessert is that it can be prepared well in advance. In fact, many people find that the texture and flavor actually improve after several hours in the refrigerator.
As the dessert chills, the pudding firms slightly, the cream layer settles into a smoother texture, and the cookie crumbs absorb just enough moisture to create the classic dirt pudding consistency. The result is a dessert that tastes more cohesive and balanced than it does immediately after assembly.
How Long Does Dirt Pudding Last?
| Storage Method | Expected Freshness | Texture Notes |
|---|---|---|
| Refrigerator (0–24 hours) | Excellent | Best balance of creamy layers and cookie texture |
| Refrigerator (2–3 days) | Very Good | Cookies soften further and flavors blend more deeply |
| Refrigerator (4 days) | Good | Softer texture but still enjoyable |
| Freezer | Not Recommended | Texture can become grainy after thawing |
Can You Make Dirt Pudding Ahead of Time?
Absolutely. Dirt Pudding is one of the best make-ahead desserts for parties, holidays, potlucks, and family gatherings.
For the best results, assemble the dessert 8–24 hours before serving. This allows enough time for the layers to settle while still maintaining some texture contrast between the creamy filling and cookie crumbs.
If serving for a special occasion, many home bakers prepare it the night before and simply add decorative toppings shortly before guests arrive.
Should You Add the Toppings Right Away?
For the freshest appearance, add gummy worms, chocolate curls, chocolate shavings, berries, or other decorative toppings shortly before serving.
This keeps garnishes looking vibrant and prevents moisture from affecting their texture.
Can Dirt Pudding Be Frozen?
Technically yes, but freezing is usually not ideal.
The pudding and cream layers contain dairy-based ingredients that can separate slightly after thawing. While the dessert will still be edible, the texture may lose some of the smooth creaminess that makes Dirt Pudding so appealing.
If you need a dessert for advance preparation, refrigeration produces significantly better results than freezing.
Best Make-Ahead Strategy
- Prepare the pudding mixture and cream layer up to 24 hours ahead.
- Assemble the full dessert the night before serving.
- Keep tightly covered in the refrigerator.
- Add decorative toppings just before serving.
- Serve well chilled for the cleanest layers and best texture.
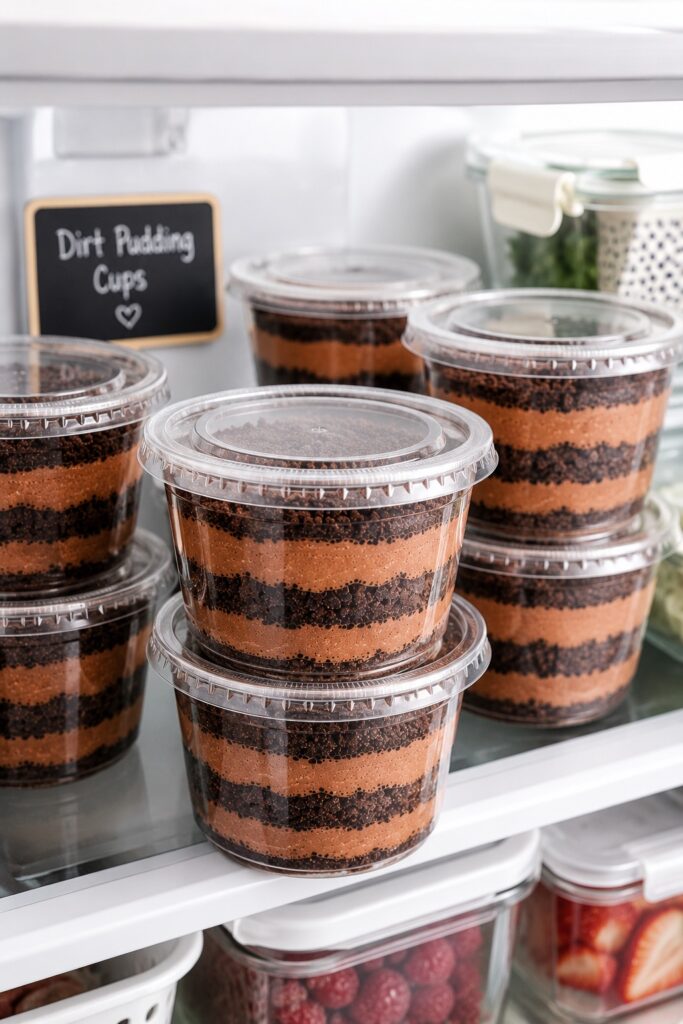
Pro tip: If you’re making Dirt Pudding for a party, individual dessert cups are often the easiest make-ahead option. They store neatly in the refrigerator, travel well, and require no serving utensils once guests arrive.
Creative Dirt Pudding Variations to Try
One of the best things about Dirt Pudding is how easily it adapts to different flavors, occasions, and seasons. The creamy pudding base works as a blank canvas for everything from peanut butter and cheesecake flavors to holiday-inspired twists.
Peanut Butter Dirt Pudding
Add 1/2 cup creamy peanut butter to the cream cheese mixture before folding in the whipped topping.
This creates a richer filling with a subtle peanut butter flavor that pairs beautifully with the chocolate cookie crumbs.
Result: Thicker texture, Reese’s-inspired flavor, and a slightly more decadent finish.
Cookies and Cream Dirt Pudding
Stir 1 cup additional crushed chocolate sandwich cookies directly into the filling before layering.
This variation doubles down on the cookie flavor and creates extra texture throughout the dessert.
Result: More cookie pieces in every bite and a stronger cookies-and-cream profile.
Mocha Dirt Pudding
Add 1 teaspoon espresso powder to the pudding mixture and whisk until fully dissolved.
The coffee flavor remains subtle but deepens the chocolate dramatically.
Result: Richer chocolate flavor without making the dessert taste like coffee.
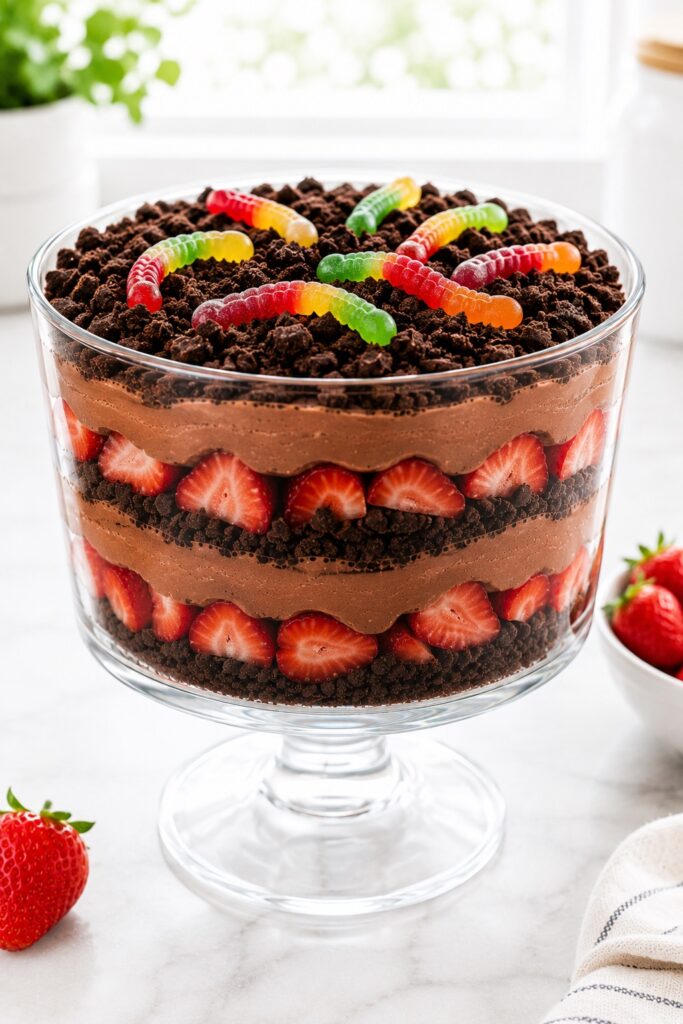
Strawberry Chocolate Dirt Pudding
Layer 1½ cups sliced fresh strawberries between the pudding layers.
The berries add freshness and brightness that contrast beautifully with the creamy chocolate filling.
Result: A lighter dessert with a fresh fruit component and more visual appeal.
Triple Chocolate Dirt Pudding
Add 1 cup mini chocolate chips between the layers and garnish with chocolate curls or shaved chocolate.
This variation is perfect for serious chocolate lovers.
Result: Extra richness, additional texture, and intense chocolate flavor.
Cheesecake Dirt Pudding
Add 1 teaspoon vanilla extract and an extra 4 ounces cream cheese to the filling mixture.
The cream cheese flavor becomes more pronounced and gives the dessert a cheesecake-like character.
Result: Tangier flavor, richer texture, and a more bakery-style dessert experience.
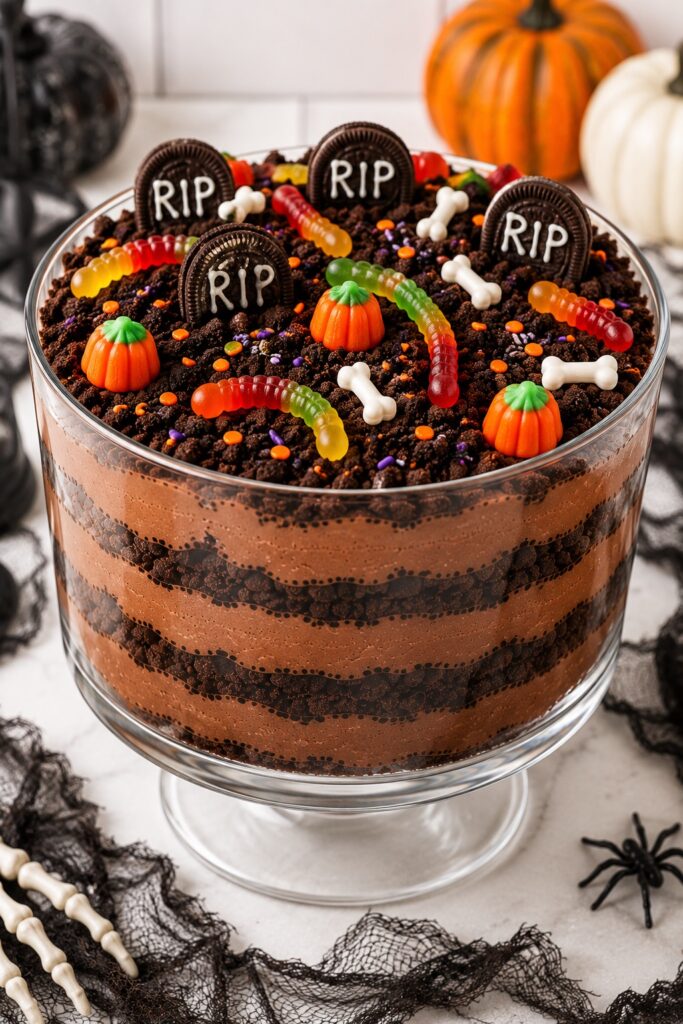
Halloween Dirt Pudding
Decorate the finished dessert with gummy worms, candy pumpkins, candy bones, cookie tombstones, or Halloween sprinkles.
This classic variation remains one of the most popular ways to serve dirt pudding during the fall season.
Result: Fun presentation that transforms a simple dessert into a holiday centerpiece.
Dirt Pudding is one of those desserts that can be made dozens of different ways without changing the basic method. Once you master the classic version, these variations make it easy to create something new for every occasion.
Frequently Asked Questions About Dirt Pudding
Can I make Dirt Pudding the day before serving?
Yes, and many people actually prefer it that way. Preparing Dirt Pudding 8–24 hours ahead allows the pudding to firm, the cream layer to stabilize, and the cookie crumbs to soften slightly into the classic dirt pudding texture.
How long does Dirt Pudding last in the refrigerator?
When stored tightly covered, Dirt Pudding typically stays fresh for up to 4 days in the refrigerator. The texture will gradually soften over time, but the dessert remains delicious.
Can I use homemade chocolate pudding instead of instant pudding mix?
Absolutely. Homemade chocolate pudding can create an even richer flavor. Just be sure the pudding is fully cooled and chilled before assembling the dessert so the layers remain stable.
Can I use homemade whipped cream instead of whipped topping?
Yes. Freshly whipped cream works well and provides a more homemade flavor. However, the finished dessert may be slightly softer because whipped topping generally offers more stability during storage.
Why is my Dirt Pudding runny?
The most common causes are insufficient chilling time, using warm ingredients, or adding too much liquid to the pudding mixture. In most cases, several additional hours of refrigeration will significantly improve the texture.
Can Dirt Pudding be frozen?
Freezing is technically possible, but it is not usually recommended. The dairy-based filling can become grainy or slightly separated after thawing, which affects the smooth texture that makes the dessert so appealing.
What cookies work best for Dirt Pudding?
Chocolate sandwich cookies are the traditional choice because they create the signature dirt appearance and chocolate flavor. Most standard sandwich cookies work well as long as they have a chocolate cookie component.
Can I make Dirt Pudding without cream cheese?
You can, but the texture and flavor will change noticeably. Cream cheese provides structure, richness, and a slight tang that helps balance the sweetness of the pudding and cookies.
How far in advance can I assemble individual Dirt Pudding cups?
Individual dessert cups can usually be assembled up to 24 hours before serving. Keep them covered in the refrigerator and add decorative toppings shortly before guests arrive.
Can Dirt Pudding sit out during a party?
Because the dessert contains dairy-based ingredients, it should not sit at room temperature for extended periods. For best quality and food safety, return leftovers to the refrigerator within about 2 hours.
What is the difference between Dirt Pudding and Dirt Cake?
The terms are often used interchangeably, but Dirt Pudding usually emphasizes the creamy pudding-based filling, while Dirt Cake sometimes includes additional layers or is served in a cake-style dish. Both feature crushed chocolate cookie crumbs and similar flavors.
Can kids help make Dirt Pudding?
Definitely. Dirt Pudding is one of the most family-friendly desserts to prepare. Children can help crush cookies, layer ingredients, and add decorations, making it a fun recipe for birthdays, holidays, and weekend baking projects.
More Creamy No-Bake Desserts You’ll Want to Make Again and Again
If you love the creamy layers, chocolate flavor, and make-ahead convenience of this Dirt Pudding Recipe, there are plenty of other easy desserts worth adding to your rotation. From nostalgic pudding desserts to rich chocolate treats and crowd-pleasing no-bake favorites, these recipes deliver the same combination of comfort, simplicity, and impressive results.
- Banana Pudding Recipe – A classic layered pudding dessert with creamy vanilla filling, soft cookies, and comforting nostalgic flavor.
- Strawberry Cheesecake Banana Pudding – A rich twist on traditional banana pudding with cheesecake flavor and fresh strawberries.
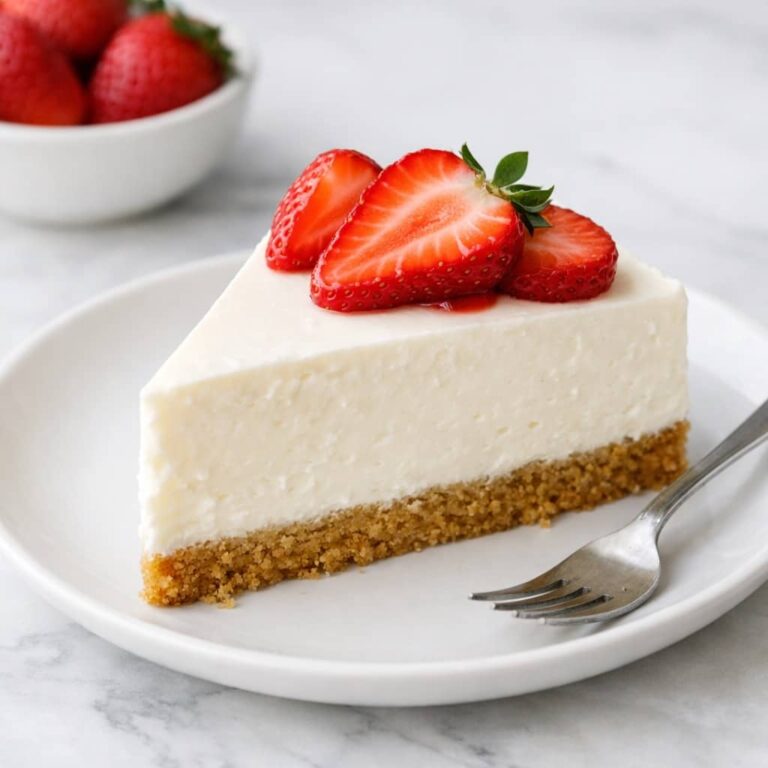
- No Bake Cheesecake – Smooth, creamy, and incredibly easy to prepare without turning on the oven.
- Oreo Balls Recipe – Bite-sized chocolate cookie truffles that are perfect for parties, holidays, and dessert trays.
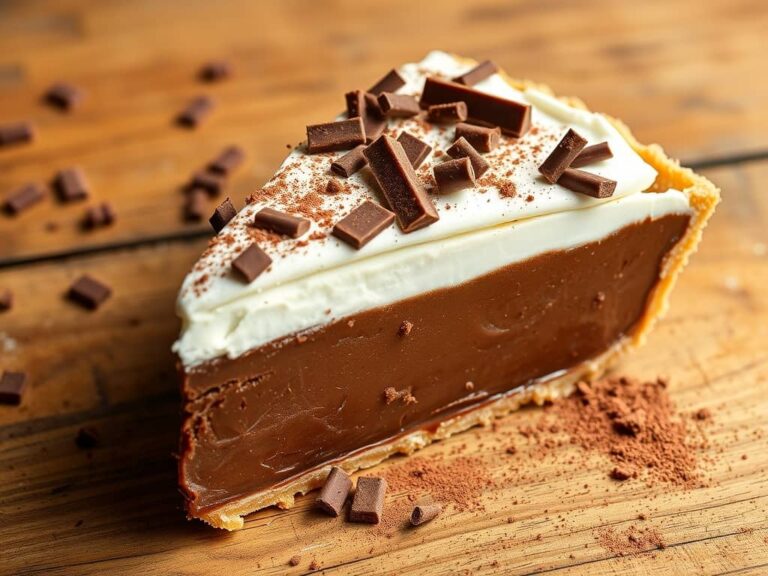
- Oreo Pie Recipe – A rich cookies-and-cream dessert featuring a creamy filling and chocolate cookie crust.
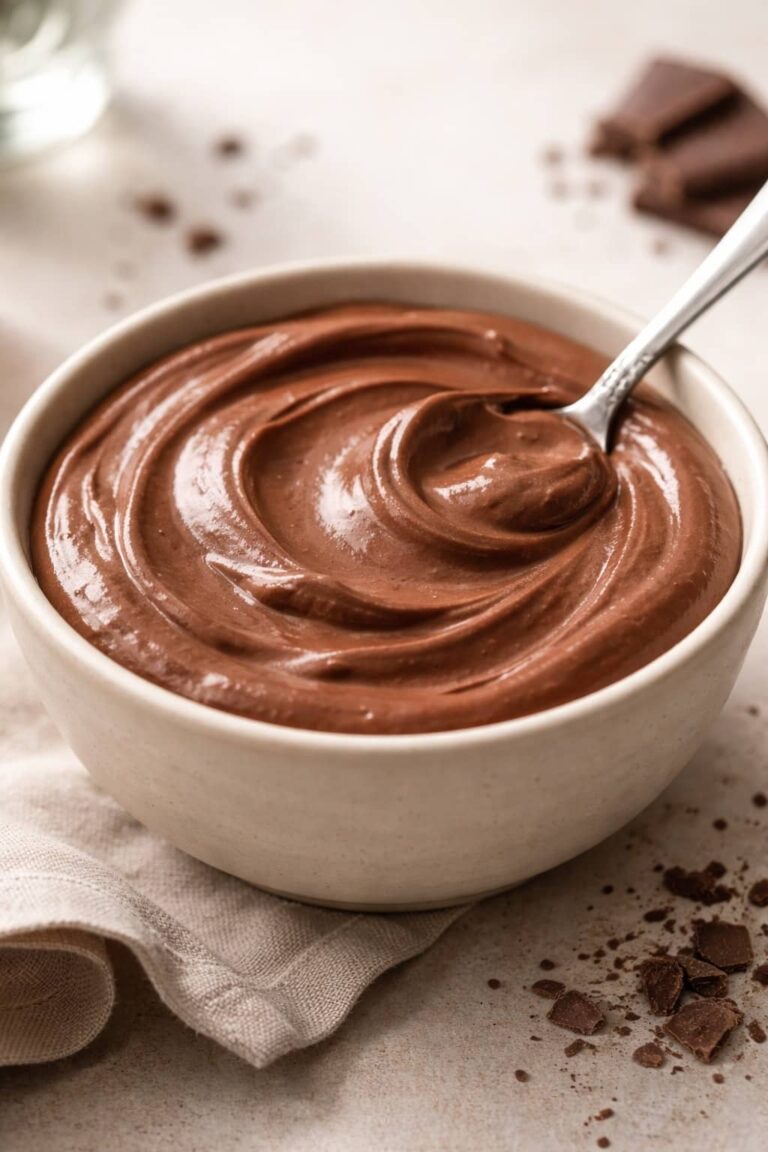
- Chocolate Pudding Recipe – Homemade chocolate pudding with a silky texture and deep chocolate flavor.
- Chocolate Mousse – Light, airy, and elegant while still delivering intense chocolate richness.
- Cheesecake Cups Recipe – Individual no-bake dessert cups that are easy to serve and always popular at gatherings.
- Dubai Chocolate Strawberry Cup Recipe – Layers of strawberries, chocolate, and creamy textures that feel both luxurious and effortless.
- Cottage Cheese Chocolate Mousse – A surprisingly creamy high-protein chocolate dessert with mousse-like texture.
Whether you’re planning a holiday dessert table, a birthday party, a summer gathering, or simply craving something sweet without baking, these easy dessert recipes offer the same crowd-pleasing appeal that makes Dirt Pudding such a longtime favorite.
Dirt Pudding Recipe Summary
This Dirt Pudding Recipe combines creamy chocolate pudding, fluffy cream filling, and crushed chocolate cookies into an easy no-bake dessert that is perfect for parties, holidays, birthdays, and everyday treats.
With simple ingredients, make-ahead convenience, and irresistible texture contrast, it remains one of the most beloved chocolate desserts for good reason.
Final Thoughts
Some desserts become favorites because they are impressive. Others become favorites because they are easy. Dirt pudding manages to be both.
It delivers rich chocolate flavor, creamy texture, nostalgic comfort, and dependable results with very little effort. Whether you serve it at a birthday party, bring it to a potluck, or simply make it for a weekend dessert, it has a way of making people smile before they even take the first bite.
And years from now, there’s a good chance this will still be one of those recipes people ask you for after the party ends.

Dirt Pudding Recipe
This easy Dirt Pudding Recipe is a creamy no-bake chocolate dessert made with silky chocolate pudding, fluffy cream cheese filling, and crushed Oreo cookie crumbs. It is perfect for parties, birthdays, holidays, potlucks, and make-ahead dessert tables.
Ingredients
- 2 boxes instant chocolate pudding mix, 3.4 ounces each
- 3 cups cold milk
- 8 ounces cream cheese, softened
- 1/4 cup unsalted butter, softened
- 1 cup powdered sugar
- 8 ounces whipped topping, thawed
- 14 ounces chocolate sandwich cookies, crushed
- Gummy worms, chocolate curls, or berries, optional for garnish
Instructions
- In a large mixing bowl, whisk together the instant chocolate pudding mix and cold milk until smooth and fully combined. Let the mixture sit for about 5 minutes until it begins to thicken.
- In a separate bowl, beat the softened cream cheese, softened butter, and powdered sugar until completely smooth, creamy, and free of lumps.
- Fold the whipped topping into the cream cheese mixture until light, fluffy, and evenly combined.
- Add the prepared chocolate pudding to the cream cheese mixture and gently fold until a smooth, creamy filling forms with no streaks remaining.
- Place the chocolate sandwich cookies in a food processor and pulse until they resemble fine chocolate crumbs. Reserve a small amount for the final topping if desired.
- Spread a thin layer of cookie crumbs across the bottom of a 9×13-inch dish or large serving bowl.
- Add a layer of the pudding mixture and spread evenly to the edges.
- Continue alternating layers of cookie crumbs and pudding mixture until all ingredients are used, finishing with a generous layer of cookie crumbs on top.
- Cover the dish and refrigerate for at least 4 hours, or overnight for the best flavor and texture.
- Just before serving, garnish with gummy worms, chocolate curls, fresh berries, or other desired decorations.
- Serve chilled and enjoy.
Notes
- For the smoothest filling, allow the cream cheese and butter to come fully to room temperature before mixing.
- Whole milk creates the richest pudding texture, but 2% milk can also be used.
- For the best texture, refrigerate the dessert overnight before serving.
- A combination of fine cookie crumbs and a few slightly larger pieces creates the most interesting texture.
- Homemade whipped cream can be substituted for whipped topping, though the dessert may be slightly softer.
- Add gummy worms, chocolate curls, sprinkles, or fresh berries just before serving for the freshest presentation.
- Store covered in the refrigerator for up to 4 days.
- Freezing is not recommended because the dairy-based filling may become grainy after thawing.
- Individual dessert cups or mason jars make excellent make-ahead servings for parties and gatherings.
- For a richer flavor, add 1 teaspoon vanilla extract to the cream cheese mixture.
- For a peanut butter variation, mix 1/2 cup creamy peanut butter into the cream cheese layer.
- For a mocha variation, whisk 1 teaspoon espresso powder into the pudding mixture.
- Dirt Pudding often tastes even better the next day as the layers settle and the flavors blend together.
Nutrition Information:
Yield: 12 servings Serving Size: 1 servingAmount Per Serving: Calories: 320Total Fat: 16gSaturated Fat: 8gTrans Fat: 0gCholesterol: 25mgSodium: 320mgCarbohydrates: 41gFiber: 1gSugar: 28gProtein: 4g
Nutrition information is provided as an estimate only and may vary based on specific ingredients, brands, and portion sizes used. This information should not be considered medical or nutritional advice.