Cannoli – Crispy & Creamy Authentic Italian Dessert
🎁 FREE E-BOOK:12 Sweet Favorites — reader-loved desserts in one beautiful recipe book.
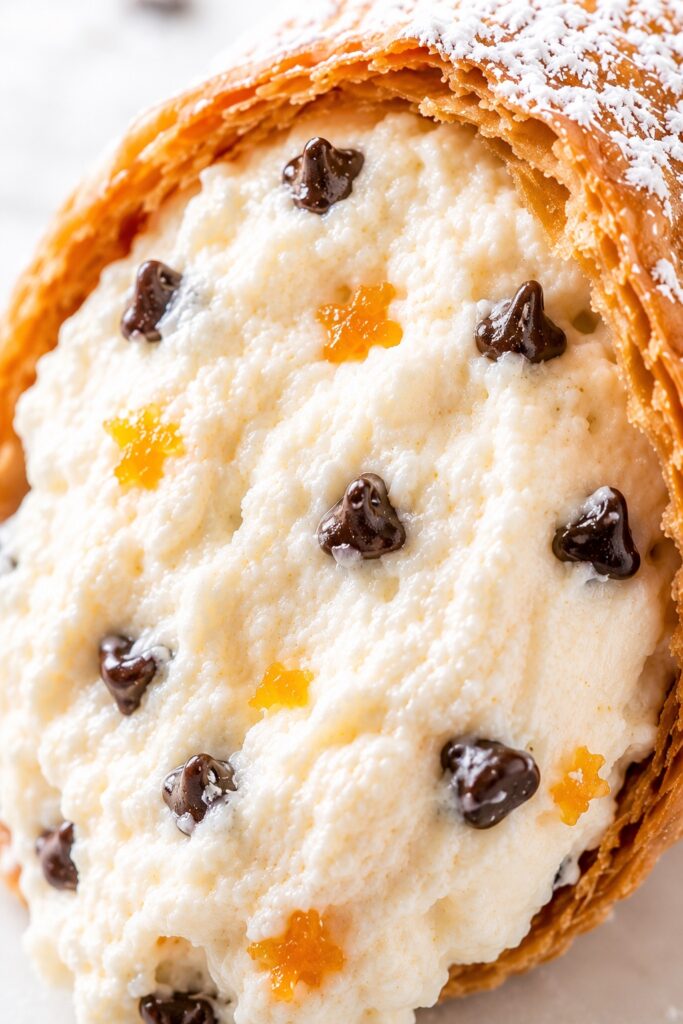
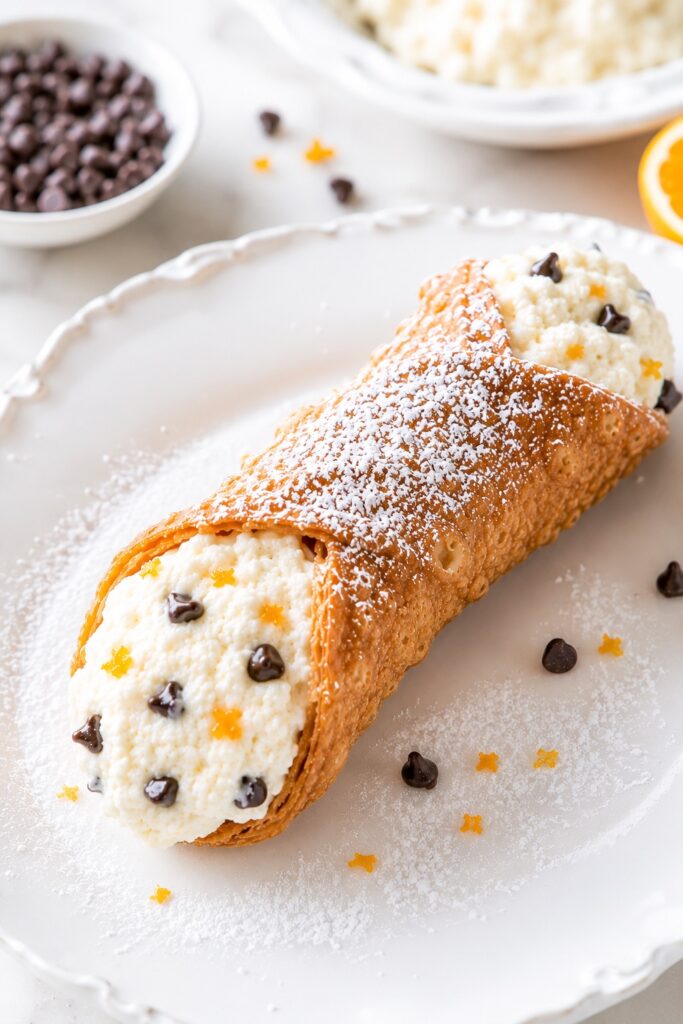
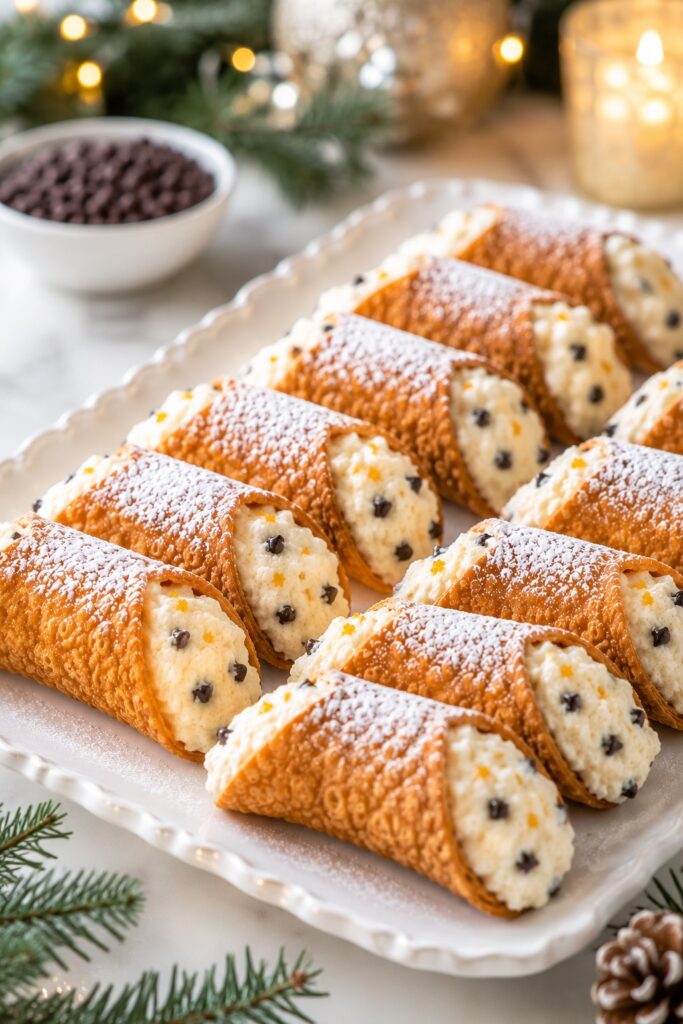
There’s something instantly recognizable about a freshly filled Cannoli. The delicate crunch of the golden shell, the creamy ricotta filling, and the dusting of powdered sugar create a dessert that feels both elegant and comforting at the same time.
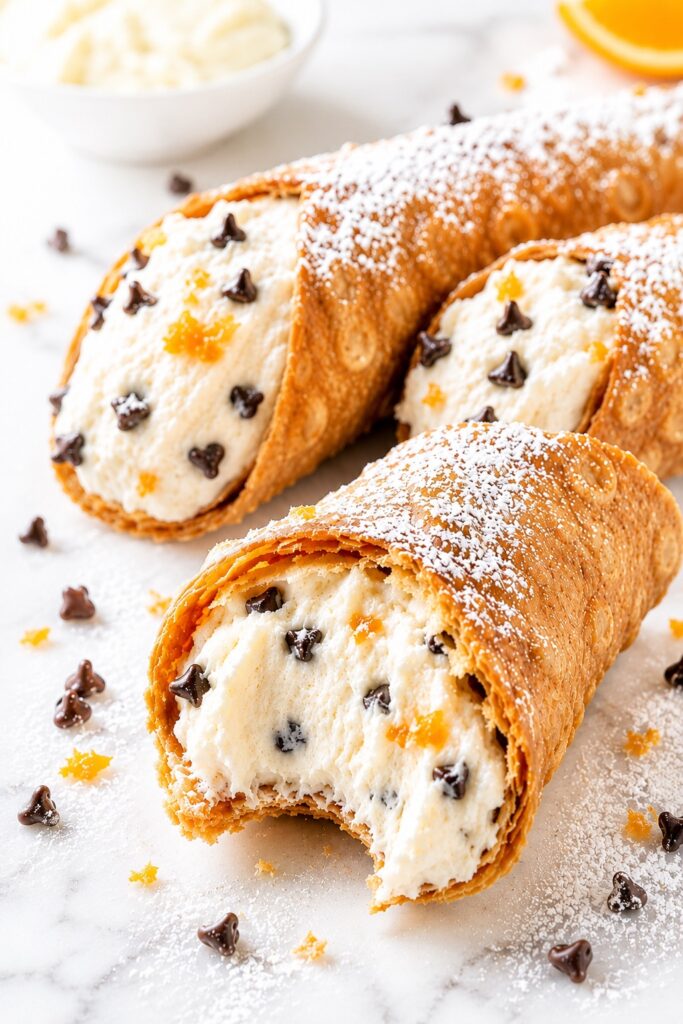
A classic Cannoli recipe has been beloved for generations because it delivers a beautiful contrast of textures in every bite. The shell is crisp and flaky, while the filling is smooth, rich, and lightly sweet. It’s the kind of dessert that feels special enough for celebrations but simple enough to enjoy with an afternoon coffee.
One reason people continue to save and revisit homemade Cannoli recipes is that nothing compares to the texture of freshly filled shells. Store-bought versions often lose their signature crunch, but homemade cannoli maintain that irresistible contrast between crisp shell and creamy filling.
Whether you’re planning an Italian-inspired dessert table, celebrating a holiday, or simply craving something a little different from traditional cakes and cookies, Cannoli bring a touch of bakery-quality charm to any occasion.
And perhaps the best part is that once you understand a few simple techniques, making authentic Cannoli at home becomes surprisingly approachable.
What Are Cannoli? A Classic Italian Pastry Explained
Cannoli are traditional Italian pastries originating from Sicily. They consist of crisp fried pastry shells that are filled with a sweet ricotta-based cream.
Traditionally, the shells are fried until golden and crisp, then filled shortly before serving to preserve their signature texture.
Classic cannoli fillings typically include ricotta cheese, powdered sugar, vanilla, and sometimes chocolate chips, pistachios, or candied citrus peel.
The History of Sicilian Cannoli
Cannoli are one of the most famous desserts in Italian pastry, but their story begins centuries ago in Sicily.
Although the exact origins are debated, food historians generally trace Cannoli back to the Palermo region, where the pastry became associated with local celebrations and festivals.
The name “Cannoli” comes from the Italian word cannolo, meaning “little tube” or “small reed,” a reference to the traditional shape of the pastry shell.
Over time, Cannoli evolved from a regional specialty into one of the most recognizable desserts in Italian cuisine. As Sicilian immigrants brought their recipes to other parts of the world, Cannoli became a staple in Italian bakeries throughout Europe, North America, and beyond.
Traditional Sicilian versions often featured fresh sheep’s milk ricotta, while many modern recipes use cow’s milk ricotta because it is more widely available.
Despite regional variations, the heart of the dessert remains unchanged: a crisp fried shell paired with a creamy ricotta filling.
Today, Cannoli continue to represent the balance of simplicity and craftsmanship that makes Italian desserts so beloved. A handful of humble ingredients are transformed into something elegant, memorable, and surprisingly difficult to resist.
Cannoli at a Glance: Quick Recipe Overview
| Texture | Crisp shell with smooth creamy filling |
| Flavor | Sweet, lightly vanilla, rich ricotta |
| Difficulty | Intermediate |
| Time | About 2 hours including chilling |
| Servings | 12 cannoli |
| Method | Fried pastry shells with ricotta filling |
| Best For | Holidays, dinner parties, Italian dessert tables |
In short: Cannoli are crisp Sicilian pastry shells filled with sweet ricotta cream. The combination of crunchy pastry and silky filling creates one of Italy’s most beloved desserts.
Why This Cannoli Recipe Works So Well
Many Cannoli recipes focus only on the ingredients, but the real magic comes from balancing structure, moisture, fat, and timing.
The pastry dough contains enough fat to create tenderness while still developing a shell sturdy enough to hold the filling.
A small amount of wine or vinegar helps relax gluten development, allowing the shells to fry into delicate, blistered layers rather than becoming tough.
The ricotta filling works because excess moisture is removed before mixing. This prevents a runny filling and creates the thick, pipeable texture associated with bakery-quality cannoli.
One particularly important detail is filling the shells shortly before serving. This preserves the contrast between crunchy shell and creamy center, which is the defining characteristic of great cannoli.
Another small but noticeable improvement comes from chilling the filling before piping. The flavors meld together while the texture becomes smoother and more stable.
Why You’ll Love These Homemade Cannoli
- Beautiful contrast of crunchy and creamy textures
- Authentic Italian bakery-style flavor
- Perfect for holidays and celebrations
- Make-ahead friendly components
- Elegant presentation with minimal decoration
- Easy to customize with chocolate, pistachios, or citrus
- Impressive dessert that feels special without requiring advanced pastry skills
The Pastry Science Behind Perfect Cannoli
Understanding a few simple baking and frying principles helps explain why Cannoli are so unique.
The dough develops enough gluten to hold its shape during frying, but the added fat prevents it from becoming overly firm.
As the shells enter the hot oil, moisture inside the dough rapidly converts to steam. This steam creates tiny bubbles and blistered layers that contribute to the shell’s signature texture.
The ricotta filling relies on proper moisture control. Draining ricotta removes excess whey, allowing the filling to remain thick and creamy rather than loose or watery.
Temperature also plays an important role. Oil that is too cool causes excessive absorption, while oil that is too hot browns the shells before they fully crisp.
One interesting detail is that cannoli often taste even better after the filling has chilled for a few hours. The vanilla becomes more pronounced and the sweetness feels more balanced.
The Secret to Crispy Cannoli Shells
Ask anyone what makes a truly great Cannoli, and the answer is almost always the same: the shell.
That delicate crunch is what separates exceptional bakery-style Cannoli from versions that feel soft, chewy, or disappointing. While the filling is important, the shell creates the texture contrast that makes this classic Italian dessert so memorable.
The good news is that achieving crisp Cannoli shells is less about complicated techniques and more about understanding a few key details.
Roll the Dough Thinner Than You Think
One of the most common mistakes is leaving the dough too thick.
Cannoli dough should be rolled extremely thin—about 1/16 inch thick. During frying, the dough expands slightly and develops its signature blistered texture.
If the dough starts thick, the finished shell can become heavy and overly crunchy rather than light and crisp.
A useful visual cue is that the rolled dough should appear slightly translucent when held toward a light source.
Why Marsala Wine Matters
Traditional Cannoli dough often contains Marsala wine, and it serves a purpose beyond flavor.
The alcohol helps create a lighter, more delicate shell while encouraging the small bubbles and blisters that are characteristic of authentic Sicilian Cannoli.
As the shells fry, the alcohol evaporates quickly, helping create tiny pockets within the pastry.
This contributes to the crisp texture and delicate structure that Cannoli are known for.
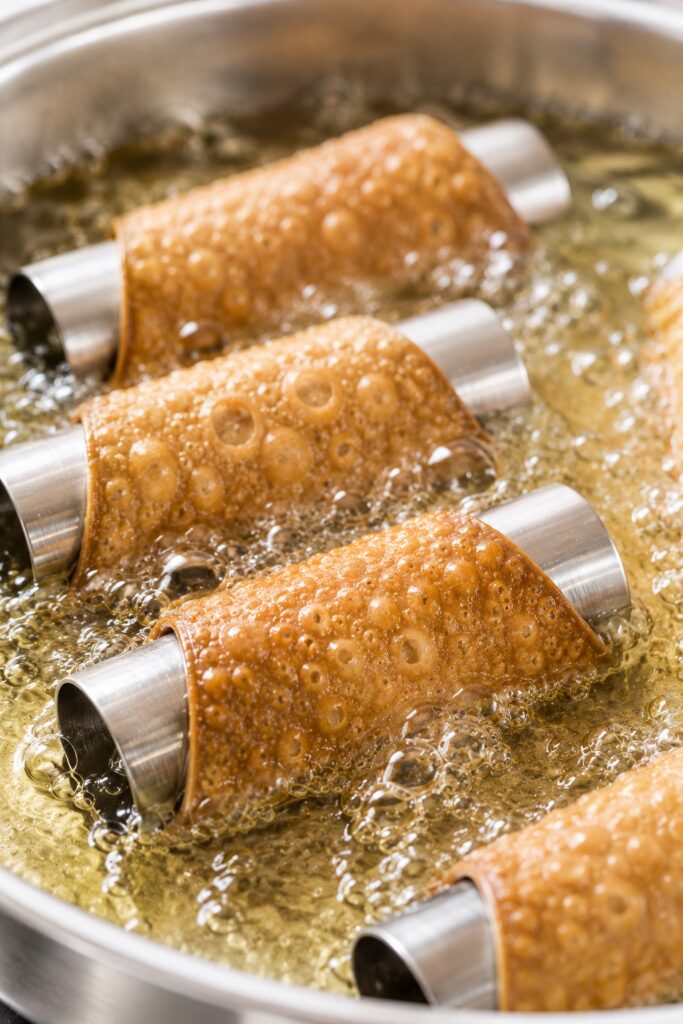
Maintain the Right Frying Temperature
Oil temperature plays a major role in the final texture.
If the oil is too cool, the shells absorb excess oil and can become greasy.
If the oil is too hot, the exterior browns too quickly before the shell fully crisps.
The sweet spot is approximately 350°F (175°C).
At this temperature, the shells develop an even golden color while becoming crisp throughout.
A thermometer is one of the most helpful tools for achieving consistent results.
Cool the Shells Completely
Freshly fried shells continue releasing steam as they cool.
If stacked while still warm, trapped steam can soften the pastry.
Allow the shells to cool completely on a wire rack where air can circulate around them.
This simple step helps preserve maximum crispness.
Fill Them at the Last Minute
This is perhaps the most important Cannoli secret of all.
Even the crispiest shell gradually absorbs moisture from the ricotta filling.
Professional pastry shops often fill Cannoli to order for exactly this reason.
For the best texture, pipe the filling into the shells shortly before serving.
The result is the classic contrast of crunchy pastry and cool creamy filling that makes homemade Cannoli so irresistible.
What Causes Soft Cannoli Shells?
- Shells were filled too far in advance.
- Dough was rolled too thick.
- Oil temperature was too low during frying.
- Shells were stored in a humid environment.
- Shells were refrigerated instead of stored at room temperature.
- Shells were not fully cooled before storage.
If you’ve ever wondered why some Cannoli stay beautifully crisp while others quickly become soft, the answer usually comes down to one of these factors. Mastering them can transform homemade Cannoli from good to truly bakery-worthy.
Ingredients You’ll Need
For the Cannoli Shells
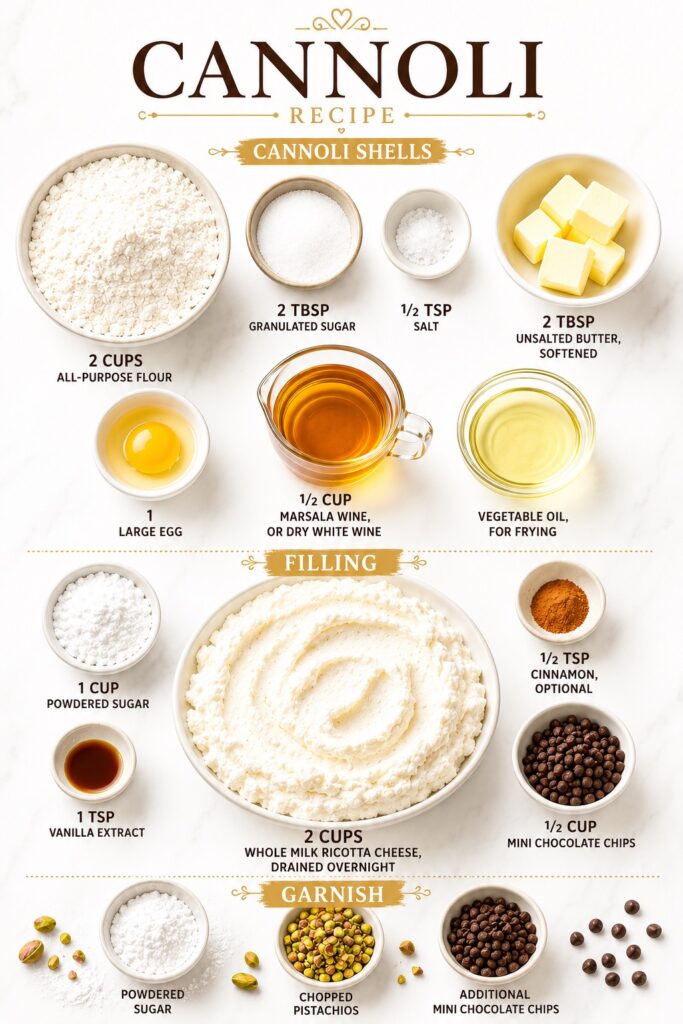
- 2 cups all-purpose flour
- 2 tablespoons granulated sugar
- 1/2 teaspoon salt
- 2 tablespoons unsalted butter, softened
- 1 large egg
- 1/2 cup Marsala wine, or dry white wine
- Vegetable oil, for frying
For the Filling
- 2 cups whole milk ricotta cheese, drained overnight
- 1 cup powdered sugar
- 1 teaspoon vanilla extract
- 1/2 teaspoon cinnamon, optional
- 1/2 cup mini chocolate chips
For Garnish
- Powdered sugar
- Chopped pistachios
- Additional mini chocolate chips
Ingredient Intelligence: What Each Key Ingredient Does
Ricotta Cheese
Ricotta provides the creamy foundation of the filling. Draining it thoroughly is one of the most important steps for achieving a thick bakery-style texture.
Substitution: Mascarpone may replace part of the ricotta for a richer filling.
Marsala Wine
Marsala contributes flavor while helping create delicate shell texture.
Substitution: Dry white wine works well if Marsala is unavailable.
Powdered Sugar
Powdered sugar dissolves smoothly into the filling and helps create a silky consistency.
Mini Chocolate Chips
The small size distributes evenly throughout the filling and provides bursts of texture without overwhelming the ricotta.
Note: Cannoli filling often tastes sweeter after chilling because cold temperatures allow the flavors to blend more evenly.
The Ricotta Filling Guide
While the crispy shell often gets most of the attention, many pastry chefs will tell you that the filling is what truly defines great Cannoli.
A perfect Cannoli filling should be creamy, smooth, lightly sweet, and thick enough to hold its shape when piped. It should enhance the shell rather than overwhelm it.
The quality of the ricotta plays a larger role than many people realize, which is why traditional Italian bakeries pay close attention to both the type of ricotta they use and how it is prepared.
Why Whole Milk Ricotta Works Best
Whole milk ricotta generally produces the richest flavor and smoothest texture.
Its higher fat content creates a creamier filling and helps deliver the luxurious mouthfeel that people expect from bakery-style Cannoli.
Part-skim ricotta can work, but the filling may taste slightly less rich and may require additional draining to achieve the same consistency.
Why Draining Ricotta Is So Important
Fresh ricotta naturally contains a significant amount of whey.
If this excess moisture remains in the cheese, the filling can become loose, watery, and difficult to pipe.
Even worse, excess moisture can transfer into the shell and soften the pastry more quickly after filling.
Draining the ricotta creates a thicker filling with better structure while helping preserve the crisp shell that makes Cannoli so special.
How Long Should Ricotta Be Drained?
For the best texture, drain the ricotta overnight in the refrigerator.
Place the ricotta in a fine-mesh sieve lined with cheesecloth and allow gravity to remove excess moisture naturally.
Even a few hours of draining can make a noticeable difference, but overnight draining typically produces the thickest and most stable filling.
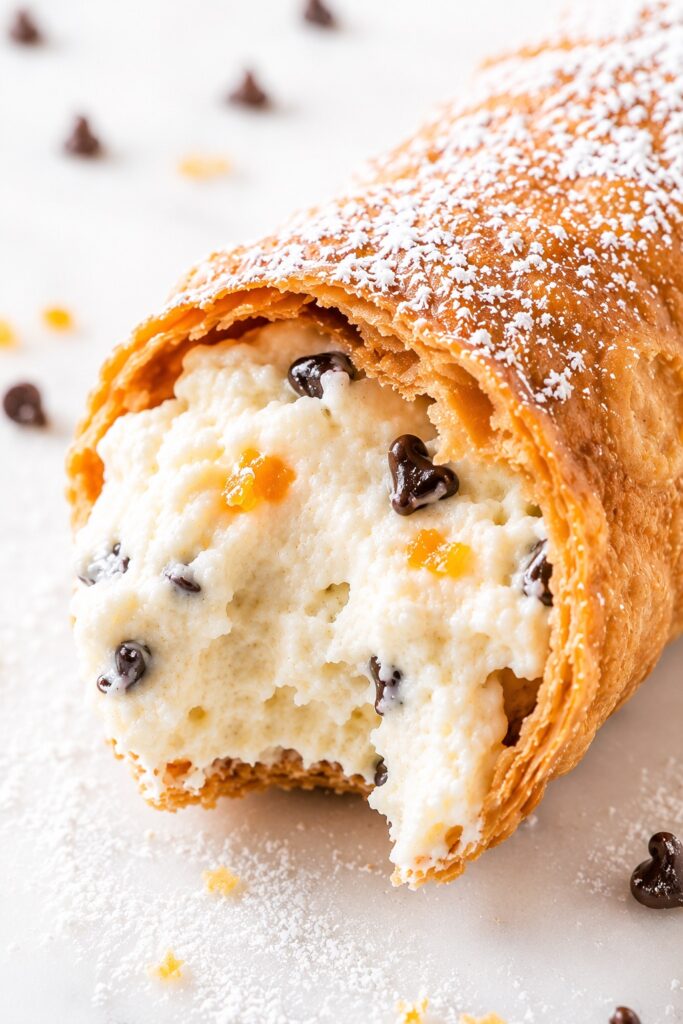
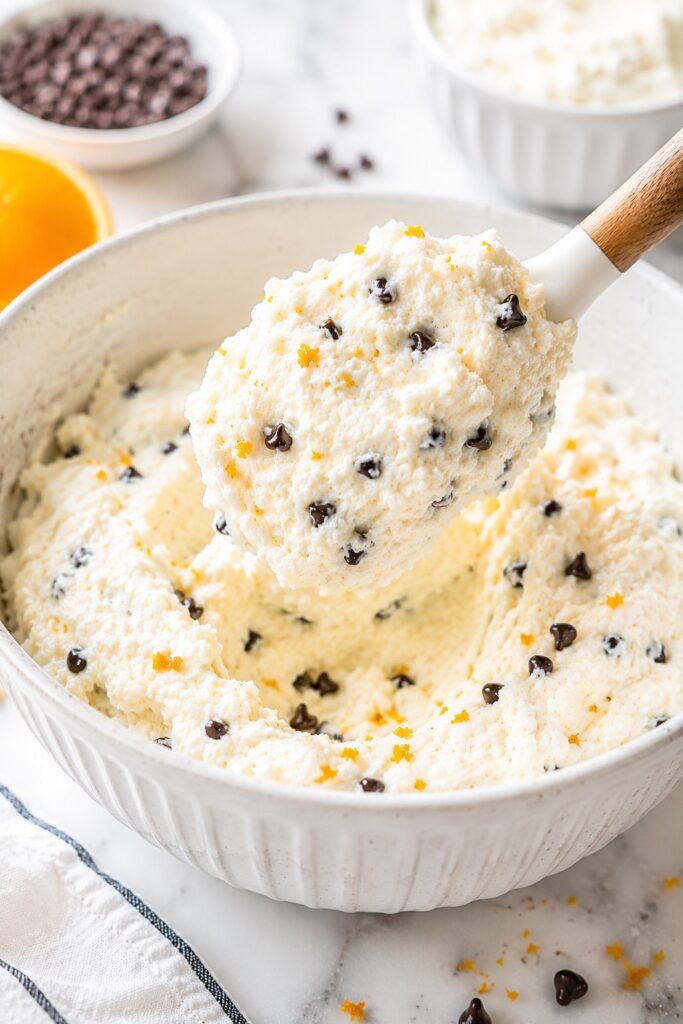
What Should the Filling Look Like?
Properly prepared Cannoli filling should be thick, smooth, and easy to pipe.
When lifted with a spoon, it should hold soft peaks rather than flowing like a sauce.
After chilling, the filling should become even more stable while remaining creamy and spreadable.
If the filling appears runny, additional chilling often helps, but excess ricotta moisture is usually the underlying cause.
Adding Mascarpone for Extra Richness
Some modern Cannoli recipes replace a portion of the ricotta with mascarpone cheese.
This creates a silkier texture and a slightly richer flavor profile.
A blend of approximately half ricotta and half mascarpone produces an especially luxurious filling that many people enjoy for dinner parties and holiday desserts.
Traditional Sicilian Cannoli, however, are typically made with ricotta as the primary ingredient.
The Flavor Improves as It Chills
One interesting characteristic of Cannoli filling is that it often tastes better after several hours in the refrigerator.
The vanilla, cinnamon, and sweetness become more balanced while the texture thickens slightly.
This is one reason many bakers prepare the filling in advance and refrigerate it overnight before assembling the Cannoli.
The result is a filling that tastes smoother, richer, and more cohesive.
What Makes Bakery-Style Cannoli Different?
Not all Cannoli are created equal.
If you’ve ever enjoyed a freshly filled Cannoli from a great Italian bakery, you’ve probably noticed that the experience feels completely different from many grocery store versions.
The difference is not necessarily the ingredients themselves. More often, it comes down to freshness, texture, and timing.
Bakery-style Cannoli focus on preserving the contrast between crisp pastry and creamy filling. Every step is designed to protect that balance.
| Bakery-Style Cannoli | Many Pre-Made Cannoli |
| Filled shortly before serving | Often filled hours or days ahead |
| Crisp, delicate shell | Softer shell texture |
| Fresh ricotta filling | Often stabilized for longer storage |
| Distinct texture contrast | Less separation between shell and filling |
| Fresh garnishes and toppings | Pre-packaged presentation |
Fresh Filling Creates Better Texture
One of the biggest differences is the filling.
Freshly prepared ricotta filling tends to taste lighter, creamier, and more vibrant than fillings designed for extended shelf life.
Because the filling is often prepared close to serving time, the texture remains smooth and airy rather than dense or overly firm.
Timing Matters More Than Most People Realize
Many people assume the shell recipe is the secret to exceptional Cannoli.
While the shell is important, timing often has a greater impact on the final result.
A perfectly fried shell can lose much of its appeal if it sits filled for too long. Even the best filling gradually transfers moisture into the pastry.
This is why many Italian bakeries fill Cannoli to order or shortly before display.
The Contrast Is the Entire Experience
The defining characteristic of great Cannoli is contrast.
You should hear a slight crunch when biting through the shell before reaching the cool, creamy ricotta center.
The pastry should feel delicate rather than hard, while the filling should feel rich without becoming heavy.
When both elements are working together, Cannoli become far more than a simple pastry—they become one of the most memorable desserts in Italian baking.
Fortunately, by making the shells and filling separately and assembling them shortly before serving, it’s entirely possible to recreate that bakery-style experience at home.
Equipment That Makes Cannoli Easier
- Mixing bowls
- Rolling pin or pasta machine
- Round cutter, about 4 inches wide
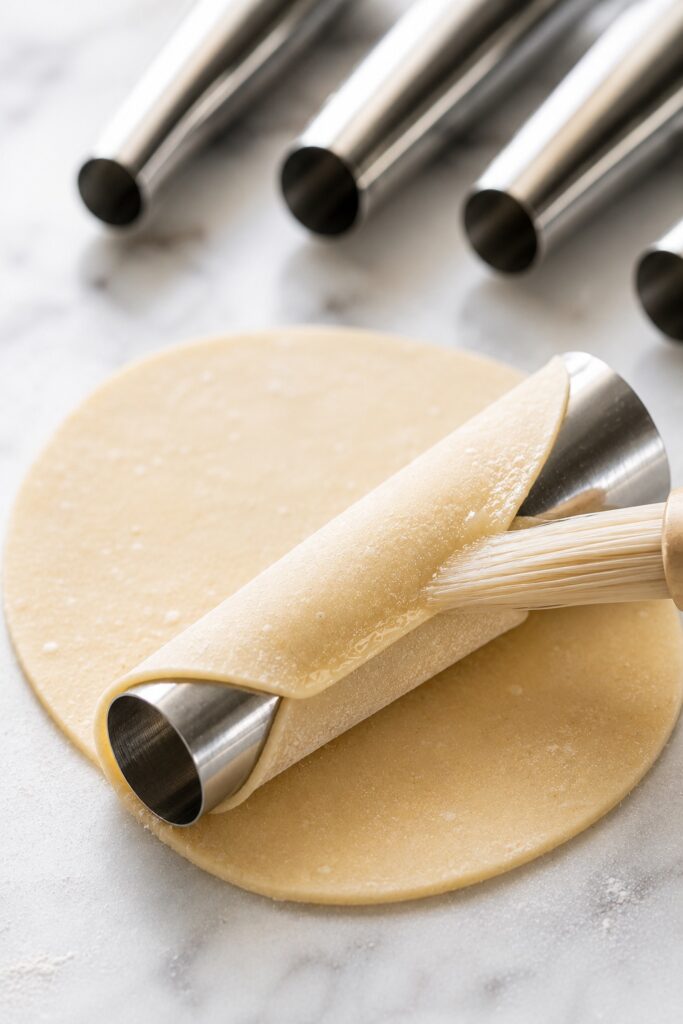
- Cannoli tubes or forms
- Deep heavy pot
- Thermometer
- Cooling rack
- Piping bag
A pasta machine can make rolling the dough significantly easier and helps produce consistently thin shells.
How to Make Cannoli
1. Make the dough
In a large bowl, combine flour, sugar, and salt.
Work in the softened butter until the mixture resembles coarse crumbs.
Add the egg and Marsala wine.
Mix until a dough forms.
The dough should feel smooth and slightly firm rather than sticky.
2. Knead and rest
Knead for about 5 minutes until smooth.
Wrap tightly and allow it to rest for 1 hour.
This resting period relaxes the dough and makes rolling much easier.
3. Prepare the filling
Combine drained ricotta, powdered sugar, vanilla, and cinnamon.
Mix until smooth.
Fold in the mini chocolate chips.
Cover and refrigerate.
The filling should become noticeably thicker as it chills.
4. Roll the dough
Roll the dough very thin, about 1/16 inch thick.
If the dough shrinks back slightly while rolling, allow it to rest for a few minutes before continuing.
Cut into 4-inch circles.
5. Shape the shells
Wrap each dough circle around a cannoli tube.
Seal the edge with a small amount of water.
The overlap should be secure but not excessive.
6. Fry until golden
Heat oil to 350°F (175°C).
Fry the shells for about 2 to 3 minutes.
Watch for golden color and bubbling that gradually slows.
The shells should develop characteristic blistered surfaces.
How to Tell When Cannoli Are Done
- The shells are deep golden, not pale beige.
- Light blistering appears across the surface.
- The shell structure looks crisp and rigid.
- The bubbling in the oil slows near the end of frying.
- There are no pale doughy spots around the seam.
- The shell feels light rather than heavy.
7. Cool completely
Transfer to a cooling rack.
Allow the shells to cool fully before removing the metal tubes.
The shells should feel light and crisp.
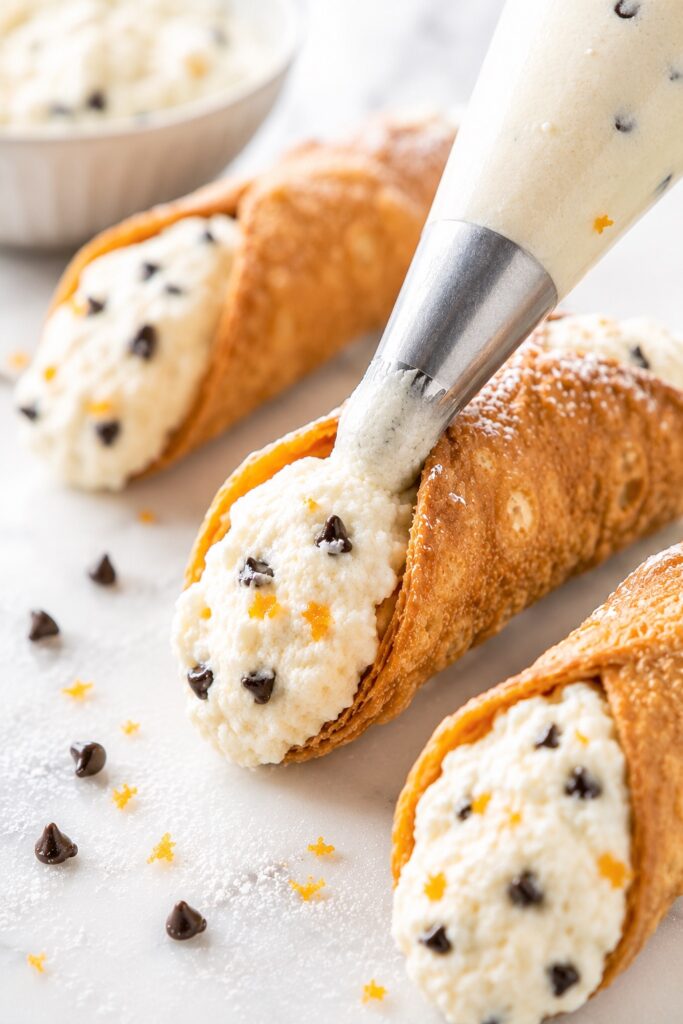
8. Fill the cannoli
Transfer the chilled filling to a piping bag.
Pipe into both ends of each shell until completely filled.
If a shell cracks slightly, don’t worry. It often becomes invisible once filled and garnished.
9. Garnish and serve
Dip the ends into pistachios or chocolate chips.
Dust generously with powdered sugar.
Serve immediately for maximum crispness.
Cannoli Texture Guide
| Stage | What You Should See |
| Dough | Smooth, elastic, and slightly firm |
| Rolled Dough | Very thin, flexible, and easy to wrap |
| Frying | Active bubbling around the shell |
| Finished Shell | Golden, blistered, crisp, and light |
| Filling | Thick, creamy, smooth, and pipeable |
| Finished Cannoli | Crunchy shell with a smooth ricotta center |
Expert Tips for Bakery-Style Cannoli
- Drain the ricotta overnight. This is the biggest difference between thick, creamy filling and a loose filling that softens the shells too quickly.
- Roll the dough thinner than you think. Thick dough fries into a heavy shell instead of a delicate crisp pastry.
- Keep the oil close to 350°F. A thermometer helps prevent greasy shells or shells that brown too fast.
- Fill the shells right before serving. This preserves the crisp shell and creamy center contrast.
- Chill the filling before piping. Cold filling pipes more cleanly and holds its shape better.
- Use a piping bag instead of a spoon. It gives cleaner ends and a more bakery-style finish.
- Fry one test shell first. This lets you check dough thickness, sealing, and oil temperature before frying the full batch.
Common Cannoli Problems and How to Fix Them
| Problem | Cause | Solution |
| Soggy shells | Filled too early | Fill just before serving |
| Runny filling | Ricotta was not drained enough | Drain overnight |
| Tough shells | Dough was too thick | Roll thinner |
| Dark shells | Oil was too hot | Lower the temperature slightly |
| Greasy shells | Oil was too cool | Maintain 350°F |
| Filling leaks | Filling was too soft | Chill longer before piping |
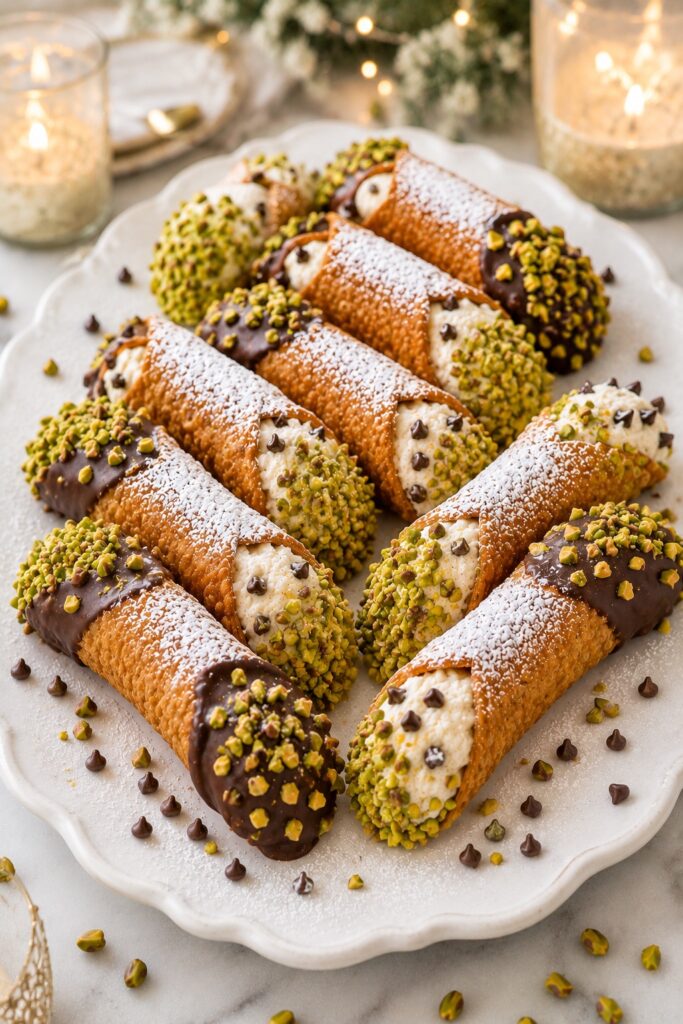
Beautiful Ways to Serve Cannoli
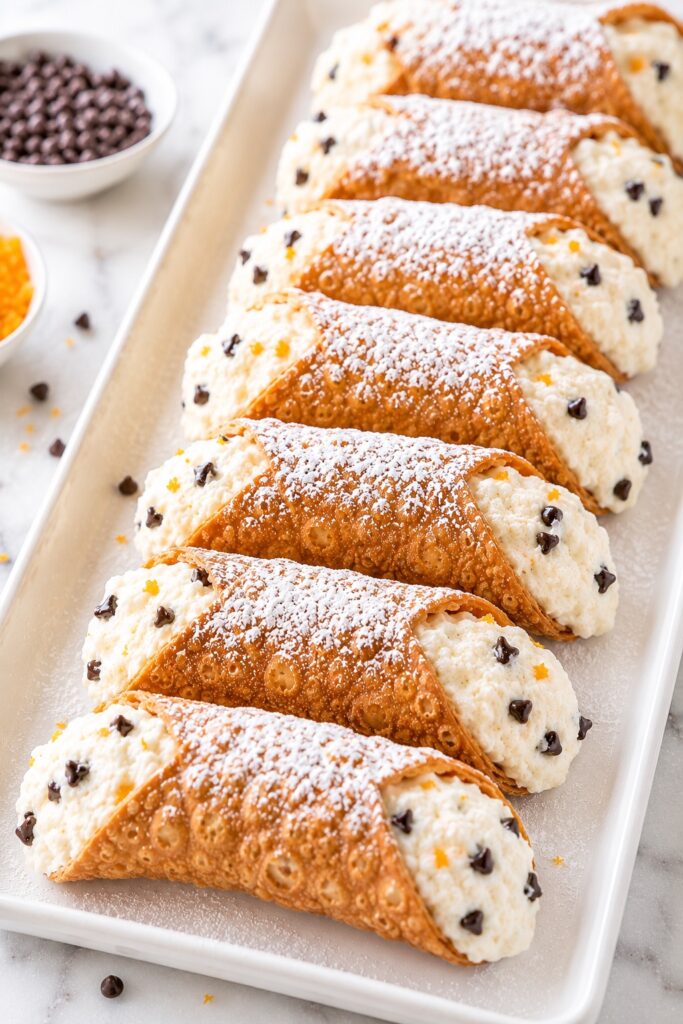
Few desserts create the same visual impact as a platter of freshly filled Cannoli dusted with powdered sugar.
For elegant dinner parties, arrange them on a white serving tray with chopped pistachios scattered around the edges. The contrast between the golden shells and bright green pistachios feels instantly bakery-worthy.
For holidays, serve them alongside espresso, cappuccino, or hot chocolate. The creamy filling pairs beautifully with warm drinks and creates a dessert course that feels both cozy and sophisticated.
For celebrations, alternate pistachio-coated and chocolate-chip-coated ends for a beautiful presentation.
Save this recipe for holiday dessert tables, Italian-themed dinners, family celebrations, and those moments when you want a dessert that looks as impressive as it tastes.
Few homemade desserts disappear faster than freshly filled cannoli.
Storage and Make-Ahead Guide
One of the biggest secrets to exceptional homemade Cannoli is understanding that the shells and filling are best treated as two separate components until the moment you’re ready to serve.
The signature Cannoli experience comes from the contrast between a crisp, delicate shell and a cool, creamy ricotta filling. Proper storage helps preserve both textures and prevents the shells from becoming soft.
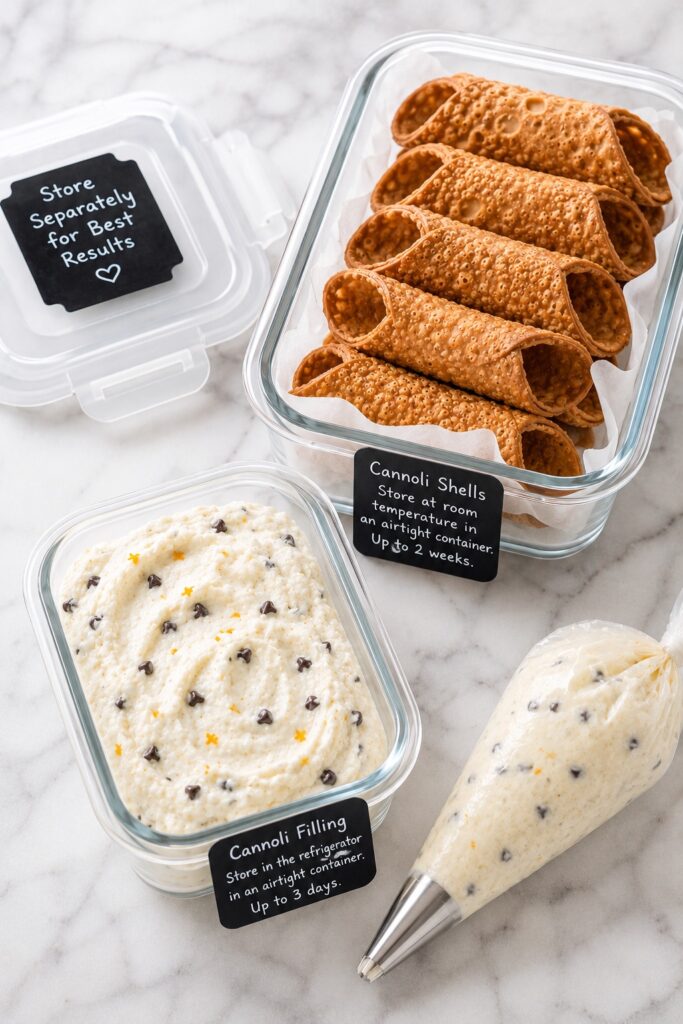
How to Store Unfilled Cannoli Shells
Once completely cooled, store the shells in an airtight container at room temperature.
Properly stored shells typically remain crisp for up to 1 week.
Avoid refrigerating the shells. Refrigerators introduce moisture that can soften the pastry and reduce its signature crunch.
If your kitchen is particularly humid, placing a paper towel inside the storage container can help absorb excess moisture.
How to Store Cannoli Filling
Transfer the ricotta filling to an airtight container and refrigerate for up to 3 days.
The filling often improves after several hours of chilling as the flavors blend together and the texture becomes slightly thicker and smoother.
Before using, give the filling a gentle stir to restore its creamy consistency.
If any liquid has separated during storage, simply stir it back into the filling.
How to Store Filled Cannoli
Freshly filled Cannoli always provide the best texture.
Once filled, the moisture from the ricotta gradually begins softening the shell.
For the crispest results, serve within 1 to 3 hours of filling.
If necessary, filled Cannoli can be refrigerated for several hours, but the shells will gradually lose some of their crunch.
This is completely normal and happens even in many professional bakeries.
Can You Freeze Cannoli Shells?
Yes.
Unfilled Cannoli shells freeze surprisingly well.
Place them in an airtight freezer-safe container and freeze for up to 2 months.
Allow the shells to come to room temperature before filling.
Once thawed, they typically regain their crisp texture beautifully.
Can You Freeze Cannoli Filling?
Freezing is generally not recommended.
Ricotta-based fillings can become grainy or release excess moisture after thawing, which affects both texture and appearance.
For best results, prepare the filling fresh within a few days of serving.
The Best Make-Ahead Strategy
If you’re preparing Cannoli for a holiday, dinner party, or special occasion, make the shells and filling separately one or two days in advance.
Store the shells at room temperature and keep the filling refrigerated.
Transfer the filling to a piping bag shortly before serving, then fill and garnish the shells at the last minute.
This simple approach creates Cannoli that taste remarkably close to those from a professional Italian pastry shop.
Perfect Timing for Parties and Holidays
- 1–2 days ahead: Prepare the shells and filling.
- Several hours ahead: Chill the filling thoroughly.
- 30 minutes before serving: Arrange garnishes and serving platters.
- Just before serving: Fill the shells, garnish, and dust with powdered sugar.
Save this make-ahead method for Christmas dessert tables, Easter celebrations, bridal showers, Italian-themed dinner parties, and family gatherings. It delivers the crisp shell, creamy filling, and bakery-quality texture that make homemade Cannoli so memorable.
My Favorite Cannoli Make-Ahead Trick
The first time I made Cannoli for a holiday gathering, I made what seemed like the smart decision: I filled every shell several hours before guests arrived.
By dessert time, the filling was delicious, but the shells had lost much of the crisp texture that makes Cannoli so special.
That experience taught me one of the most valuable lessons about this classic Italian dessert.
Great Cannoli are really two separate components: crisp shells and creamy filling. The closer those two components meet to serving time, the better the final result tends to be.
Now, whenever I’m preparing Cannoli for holidays, dinner parties, or family celebrations, I make the shells and filling ahead of time but keep them separate until the last moment.
The shells stay beautifully crisp at room temperature, while the filling develops even better flavor after a few hours in the refrigerator.
Just before serving, I pipe the filling into the shells, add the garnishes, and finish everything with a light dusting of powdered sugar.
The difference is remarkable.
You get the delicate crunch of freshly made pastry, the cool creamy texture of the ricotta filling, and the bakery-style contrast that makes homemade Cannoli unforgettable.
If you’re making Cannoli for a special occasion, this simple make-ahead strategy is the single best tip I can recommend.
Easy Cannoli Variations to Try
One of the reasons Cannoli have remained popular for generations is their incredible versatility. While the classic ricotta-filled version is difficult to beat, a few simple adjustments can create entirely new flavor experiences without changing the core recipe.
If you’re making Cannoli for holidays, parties, or dessert tables, offering two or three variations often creates a beautiful bakery-style presentation that guests immediately gravitate toward.
Chocolate Chip Cannoli
This is one of the most popular Cannoli variations and a favorite in many Italian bakeries.
Fold additional mini chocolate chips into the ricotta filling and finish both ends with a generous coating of chocolate chips.
The tiny bursts of chocolate create extra texture while complementing the creamy filling without overpowering it.
This variation is especially popular with children and chocolate lovers.
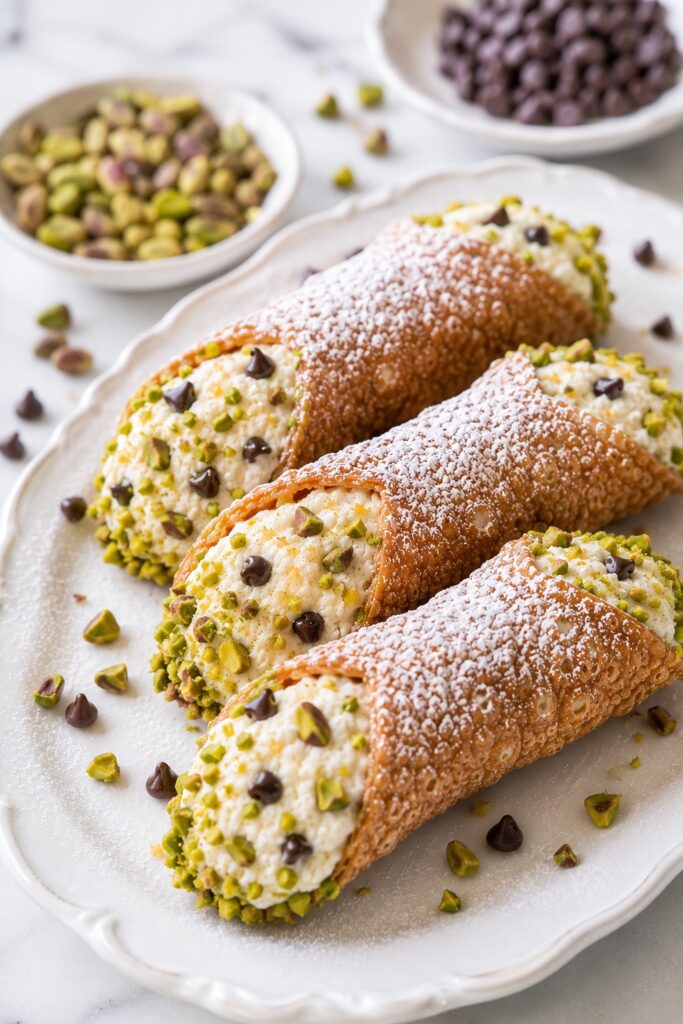
Pistachio Cannoli
For a more traditional Sicilian-inspired presentation, dip the ends of each filled cannoli into finely chopped pistachios.
The pistachios add color, crunch, and a subtle nutty flavor that pairs beautifully with sweet ricotta.
The contrast between the bright green pistachios, snowy powdered sugar, and golden shell also creates a stunning dessert tray presentation.
Orange Ricotta Cannoli
Add 1 to 2 teaspoons of freshly grated orange zest to the filling.
The citrus oils brighten the entire dessert and add a classic Italian flavor profile often found in traditional pastry shops.
This variation feels especially elegant during spring and summer gatherings.
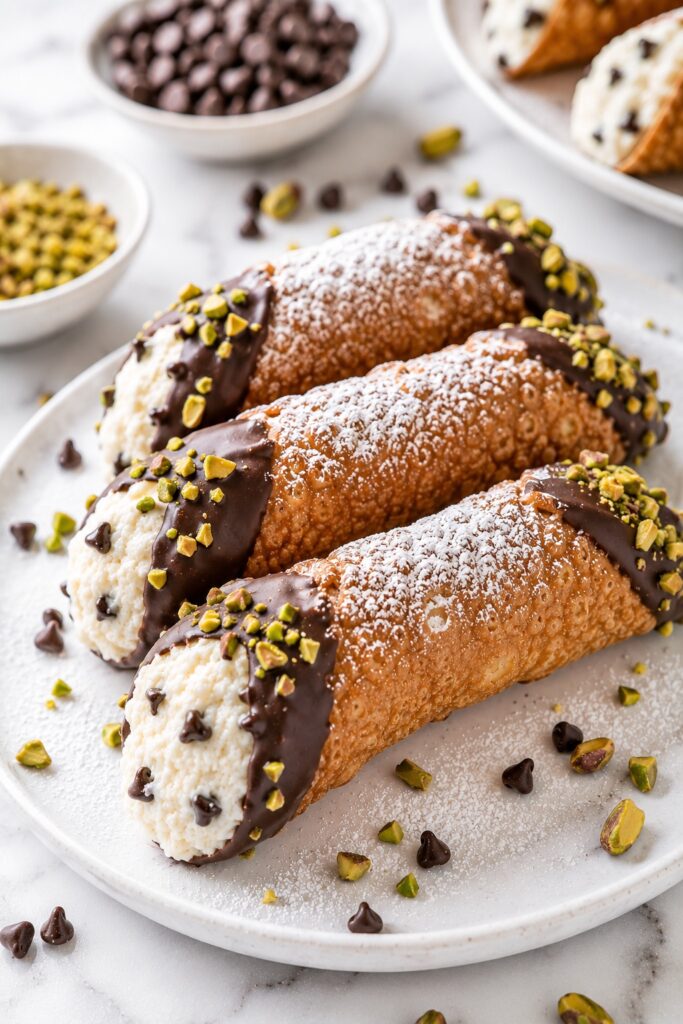
Chocolate-Dipped Cannoli
Dip the cooled shell ends into melted chocolate and allow them to set before filling.
The thin chocolate layer adds another level of texture and helps create a dessert that feels closer to what you might find in an upscale bakery display.
Dark chocolate works particularly well because it balances the sweetness of the ricotta filling.
Mascarpone Cannoli
Replace half of the ricotta with mascarpone cheese.
The result is a richer, silkier filling with a luxurious texture that feels especially suited for dinner parties and special occasions.
The mascarpone softens some of ricotta’s natural tanginess and creates an exceptionally smooth filling.
Mini Party Cannoli
Create smaller shells using reduced-size dough circles and fill them exactly as you would traditional cannoli.
Mini cannoli are ideal for dessert boards, holiday trays, weddings, baby showers, and buffet-style gatherings where guests want to sample multiple desserts.
They also tend to stay crisp slightly longer because each piece contains a higher shell-to-filling ratio.
Cannoli Dessert Board
Instead of serving only one style, create a dessert board with several cannoli variations arranged together.
Include classic cannoli, pistachio cannoli, chocolate chip cannoli, and orange ricotta cannoli alongside small bowls of extra toppings.
The variety creates a bakery-style display that looks impressive while allowing guests to choose their favorite flavor combinations.
Save this idea for holiday dessert tables, Italian-themed dinner parties, bridal showers, and family celebrations. A tray of assorted cannoli often becomes the centerpiece of the entire dessert spread.
Classic Cannoli Styles Compared
| Style | Texture | Flavor |
| Classic Ricotta | Creamy and light | Traditional Sicilian |
| Chocolate Chip | Creamy with small bursts of crunch | Richer and sweeter |
| Pistachio | Creamy with nutty edges | Slightly savory and fragrant |
| Citrus Cannoli | Smooth and bright | Fresh orange flavor |
| Mascarpone Blend | Extra silky | Rich and luxurious |
Frequently Asked Questions About Cannoli
Can I bake cannoli shells instead of frying them?
Yes, but baked shells will not develop the same crisp, blistered texture that traditional frying creates.
Why is my cannoli filling watery?
The ricotta likely contains excess moisture. For the best texture, drain the ricotta overnight before mixing the filling.
Can cannoli be made ahead?
Yes. The shells and filling can be made ahead separately. Fill the shells shortly before serving.
What ricotta works best for cannoli?
Whole milk ricotta gives the filling the richest flavor and creamiest texture.
Do I need cannoli tubes?
Traditional metal cannoli tubes create the best shape and structure, but improvised molds can work in a pinch.
Can I freeze cannoli shells?
Yes. Freeze unfilled shells in an airtight container for up to 2 months. Thaw completely before filling.
How long do filled cannoli stay crisp?
Filled cannoli usually stay crisp for a few hours. After that, the ricotta filling gradually softens the shell.
More Italian Desserts You’ll Love
If you loved the crisp shell and creamy ricotta filling in these Cannoli, these Italian-inspired desserts continue the same cozy bakery-style theme with elegant textures, creamy layers, and beautiful special-occasion appeal.
Classic Italian Bakery Favorites
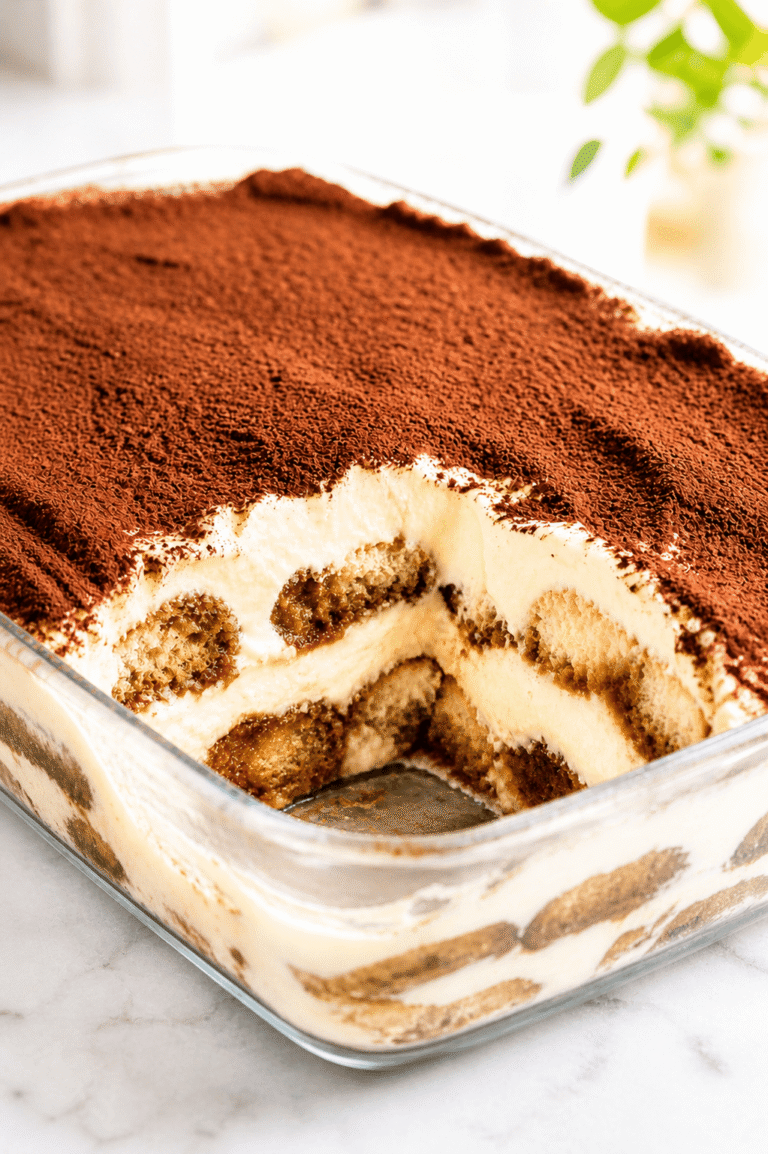
For another true Italian dessert, try this Tiramisu Recipe. It has soft coffee-soaked layers, creamy mascarpone filling, and that elegant chilled texture that feels perfect after dinner.
If you want something fried, soft, and bakery-style, this Bomboloni Recipe is a beautiful next recipe to make. The pillowy dough and sweet filling make it a natural companion to homemade cannoli.
For a delicate chilled dessert, this Panna Cotta is smooth, creamy, and elegant without feeling heavy.
Creamy Desserts for Cannoli Lovers
If the ricotta-style filling is your favorite part, these Cheesecake Cups are a wonderful option. They have the same creamy, spoonable comfort in an easy individual dessert format.
For a richer celebration dessert, this New York Cheesecake Recipe brings a dense, silky texture and classic bakery flavor.
If you want something chocolatey but still elegant, this Chocolate Mousse is smooth, airy, and perfect for small dessert cups.
Italian-Inspired Celebration Desserts
For a soft, festive cookie option, try these Italian Christmas Cookies. They are sweet, tender, colorful, and perfect for holiday cookie trays.
This Italian Cream Cake is not traditionally Italian, but it fits beautifully beside cannoli on a celebration dessert table with its cream cheese frosting, coconut, pecans, and elegant layered look.
For a bright lemon dessert with a delicate finish, this Lemon Posset is creamy, simple, and lovely after a rich Italian meal.
Cannoli Recipe Summary
This Cannoli recipe creates crisp golden pastry shells filled with a rich, creamy ricotta filling and finished with chocolate chips, pistachios, and powdered sugar.
With properly drained ricotta, thinly rolled dough, and careful frying, you can recreate authentic bakery-style Cannoli at home. The contrast between crunchy shells and silky filling is what makes this classic Italian dessert so irresistible.
Final Thoughts
Cannoli are one of those desserts that remind us how powerful texture can be. The crisp shell, the cool creamy filling, and the delicate sweetness create an experience that feels far greater than the simplicity of its ingredients.
What makes this recipe worth returning to again and again is its balance. It feels elegant enough for celebrations, yet comforting enough for an ordinary weekend gathering. Once you’ve experienced the difference between freshly filled homemade Cannoli and store-bought versions, it’s easy to understand why this Italian classic has remained beloved for generations.

Cannoli Recipe
Crispy golden pastry shells filled with sweet, creamy ricotta filling and finished with chocolate chips, pistachios, and powdered sugar. This classic Italian Cannoli recipe delivers authentic bakery-style texture and flavor at home.
Ingredients
For the Cannoli Shells
- 2 cups all-purpose flour
- 2 tablespoons granulated sugar
- 1/2 teaspoon salt
- 2 tablespoons unsalted butter, softened
- 1 large egg
- 1/2 cup Marsala wine or dry white wine
- Vegetable oil, for frying
For the Filling
- 2 cups whole milk ricotta cheese, drained overnight
- 1 cup powdered sugar
- 1 teaspoon vanilla extract
- 1/2 teaspoon ground cinnamon (optional)
- 1/2 cup mini chocolate chips
For Garnish
- Powdered sugar, for dusting
- Chopped pistachios
- Additional mini chocolate chips
Instructions
- In a large bowl, whisk together the flour, sugar, and salt. Cut in the softened butter until the mixture resembles coarse crumbs.
- Add the egg and Marsala wine. Mix until a dough forms, then knead for about 5 minutes until smooth and elastic.
- Wrap the dough tightly and let it rest at room temperature for 1 hour.
- While the dough rests, prepare the filling. In a bowl, combine the drained ricotta, powdered sugar, vanilla extract, and cinnamon if using. Fold in the mini chocolate chips. Cover and refrigerate until needed.
- Roll the dough very thin, about 1/16 inch thick. Cut into 4-inch circles.
- Wrap each dough circle around a cannoli tube and seal the edge with a small amount of water.
- Heat vegetable oil to 350°F (175°C) in a deep heavy pot.
- Fry the shells for 2 to 3 minutes, or until golden brown and blistered. Transfer to a wire rack and cool completely before removing the tubes.
- Transfer the chilled filling to a piping bag. Pipe the filling into both ends of each cooled shell until completely filled.
- Dip the ends into chopped pistachios or additional mini chocolate chips if desired.
- Dust with powdered sugar and serve immediately for the crispiest texture.
Notes
- Drain the ricotta overnight for the thickest and creamiest filling.
- Roll the dough as thinly as possible for light, crisp shells.
- Maintain an oil temperature of 350°F for even frying.
- Do not fill the shells until shortly before serving.
- Unfilled shells can be stored in an airtight container for up to 1 week.
- The filling can be refrigerated for up to 3 days.
- For a richer filling, replace up to half of the ricotta with mascarpone cheese.
Nutrition Information:
Yield: 12 cannoli Serving Size: 1 cannoliAmount Per Serving: Calories: 260Total Fat: 13gSaturated Fat: 5gCholesterol: 35mgSodium: 110mgCarbohydrates: 29gFiber: 1gSugar: 12gProtein: 7g
Nutrition information is provided as an estimate only and may vary based on specific ingredients, brands, and portion sizes used. This information should not be considered medical or nutritional advice.
12 Sweet Favourites — Yours, Free 🍰
Tiramisù, no-bake cheesecake, the perfect chocolate chip cookie & 9 more reader-loved desserts — gathered into one beautiful free recipe book. From my kitchen to yours.
No spam, just sweet things. Unsubscribe anytime.

What a beautiful recipe! I have always wanted to try making cannoli at home. The shells look perfectly crispy. Do you have any tips for getting the oil temperature right? My deep frying never turns out as golden as yours!
Thank you so much for your kind words! 😊 I’m so glad you’re thinking about trying homemade cannoli! They’re such a fun project and so worth it! For the crispiest, golden shells, I recommend keeping the oil at 350–360°F (175–180°C) and using a thermometer if you have one. If the temperature drops too low, the shells can absorb more oil, and if it’s too hot, they’ll brown too quickly before becoming perfectly crisp. Frying just a couple of shells at a time also helps keep the oil temperature steady. I hope this helps, and I’d love to hear how your cannoli turn out! 🇮🇹✨🥰