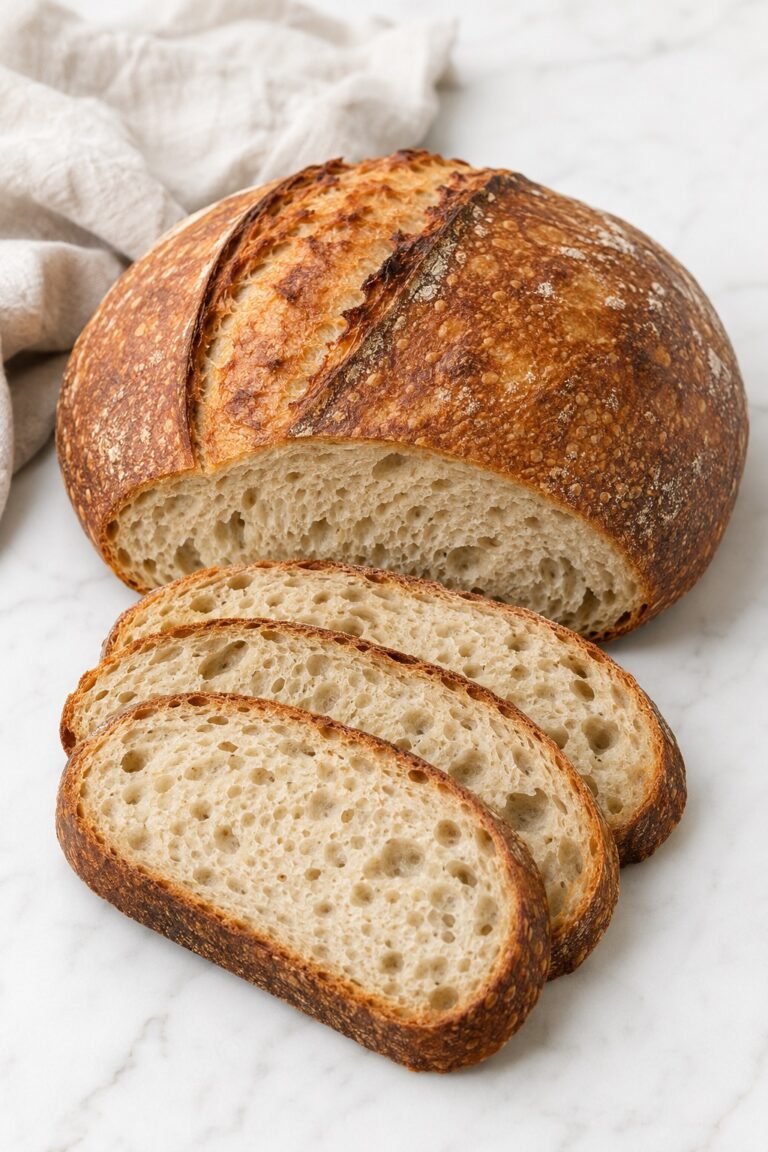
Sourdough Discard Tortillas (Soft & Flexible)
🎁 FREE E-BOOK: 12 Sweet Favorites — reader-loved desserts in one beautiful recipe book.
There is something deeply satisfying about turning a jar of sourdough discard into warm, soft tortillas instead of throwing it away. As each tortilla puffs gently in the skillet, the kitchen fills with the comforting aroma of toasted flour, and within minutes you have a stack of flexible homemade flatbreads that are noticeably different from most store-bought versions.
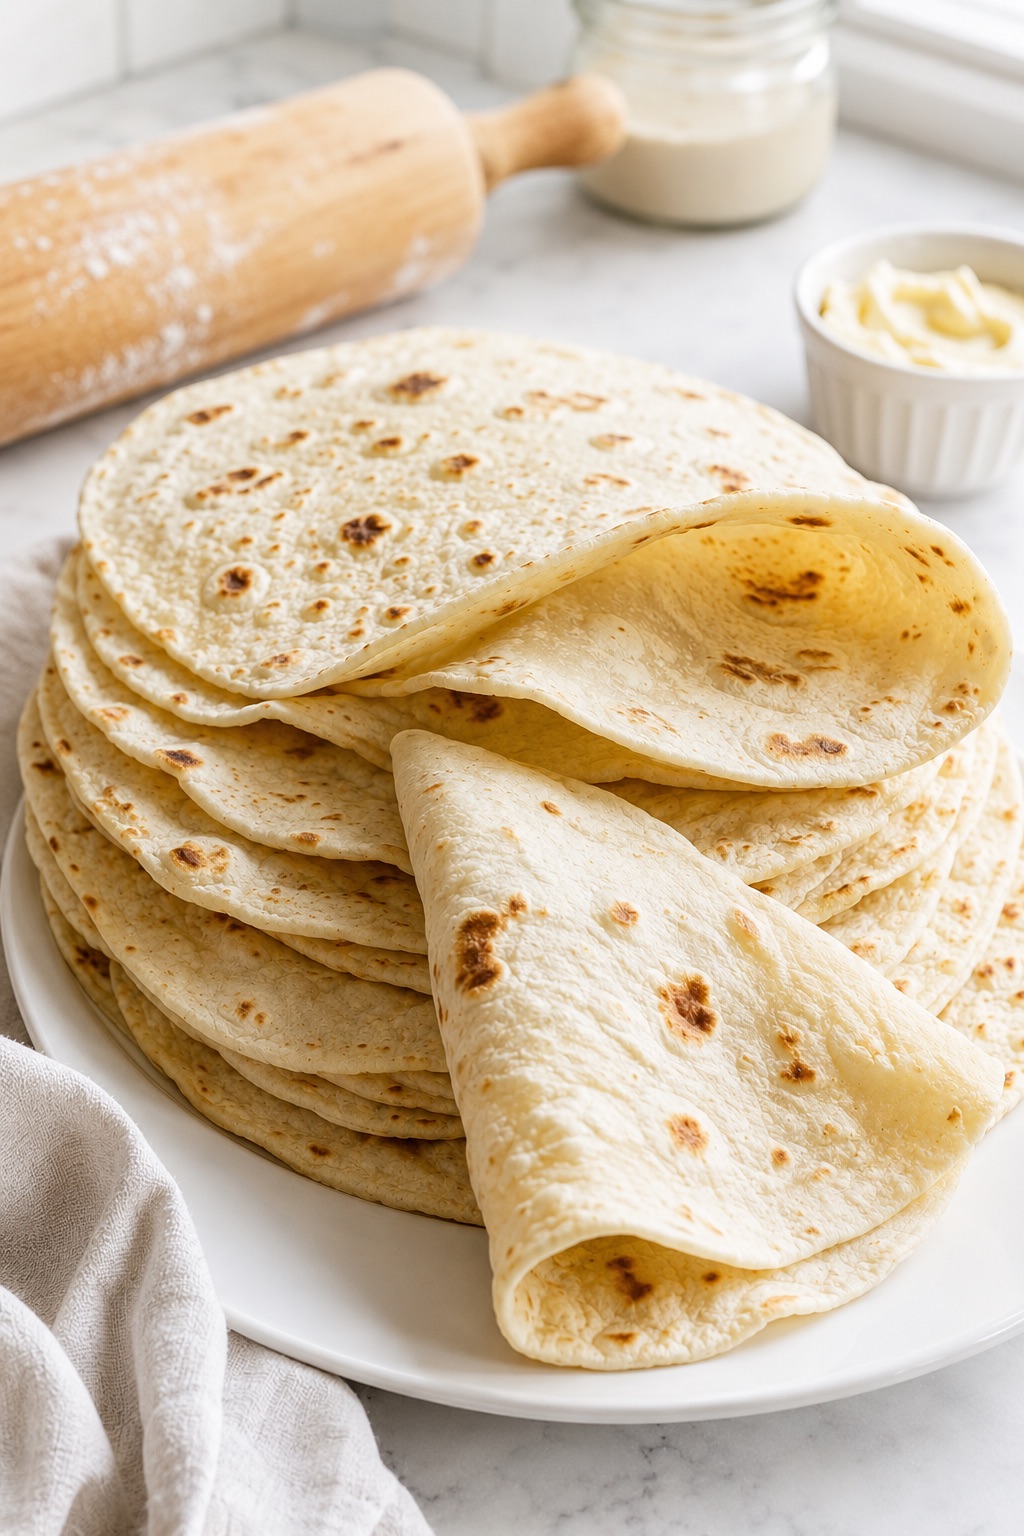
These Sourdough Discard Tortillas are wonderfully soft, easy to fold, and stay tender as they cool. The sourdough discard doesn’t make them taste strongly sour. Instead, it adds subtle complexity, improves the texture, and helps create tortillas that feel almost silky when warm. Whether you’re making tacos, burritos, wraps, quesadillas, or simply serving them with butter, they quickly become one of those recipes you’ll find yourself making again and again.
One of the biggest reasons people save this recipe is that it transforms something many bakers consider waste into one of the most useful staples in the kitchen. Instead of discarding extra starter during feeding, you can turn it into fresh tortillas using simple pantry ingredients and about 30 minutes of active work.
If you keep sourdough starter, this recipe deserves a permanent place in your rotation. If you are still building your first culture, begin with this practical guide to making a sourdough starter from scratch. Once it is established, these tortillas provide a reliable, forgiving way to use the discard, producing rounds that are soft enough for tacos and wraps, sturdy enough for quesadillas, and delicious straight from the skillet.
What Are Sourdough Discard Tortillas?
Sourdough Discard Tortillas are homemade flour tortillas made by incorporating sourdough starter discard into a traditional tortilla dough. Sourdough discard contributes moisture, mild acidity, and fermented flavor while helping create a supple dough that rolls out easily and stays soft after cooking.
Unlike sourdough bread, these tortillas are not designed to rise through fermentation. Instead, the sourdough discard acts as a flavor and texture enhancer, producing tortillas that are softer, more flexible, and often remain tender longer than standard flour tortillas. After resting, the dough is divided, rolled thin, and cooked quickly on a hot dry skillet until light golden spots appear on both sides.
Because they require only basic pantry ingredients, they are one of the easiest and most practical ways to use excess sourdough starter while reducing food waste.
Recipe Identity: What These Tortillas Are—and Are Not
This recipe makes 10 soft, flexible flour tortillas approximately 7 inches (18 cm) across. They have a mild buttery flavor, subtle sourdough depth, and enough structure for tacos, wraps, and quesadillas without feeling thick or bready.
| What to Expect | Expectation Boundary |
|---|---|
| Soft, tender, and flexible | Not crisp, flaky, or stiff like a baked flatbread |
| Thin enough to fold and roll | Not paper-thin or identical to commercially pressed tortillas |
| Mild sourdough complexity | Not strongly sour or fermented-tasting |
| Scattered golden-brown spots | Not deeply charred across the entire surface |
| Small or occasional steam pockets | Full balloon-like puffing is not required for success |
| Hand-rolled, naturally irregular rounds | They do not need perfectly circular edges to cook correctly |
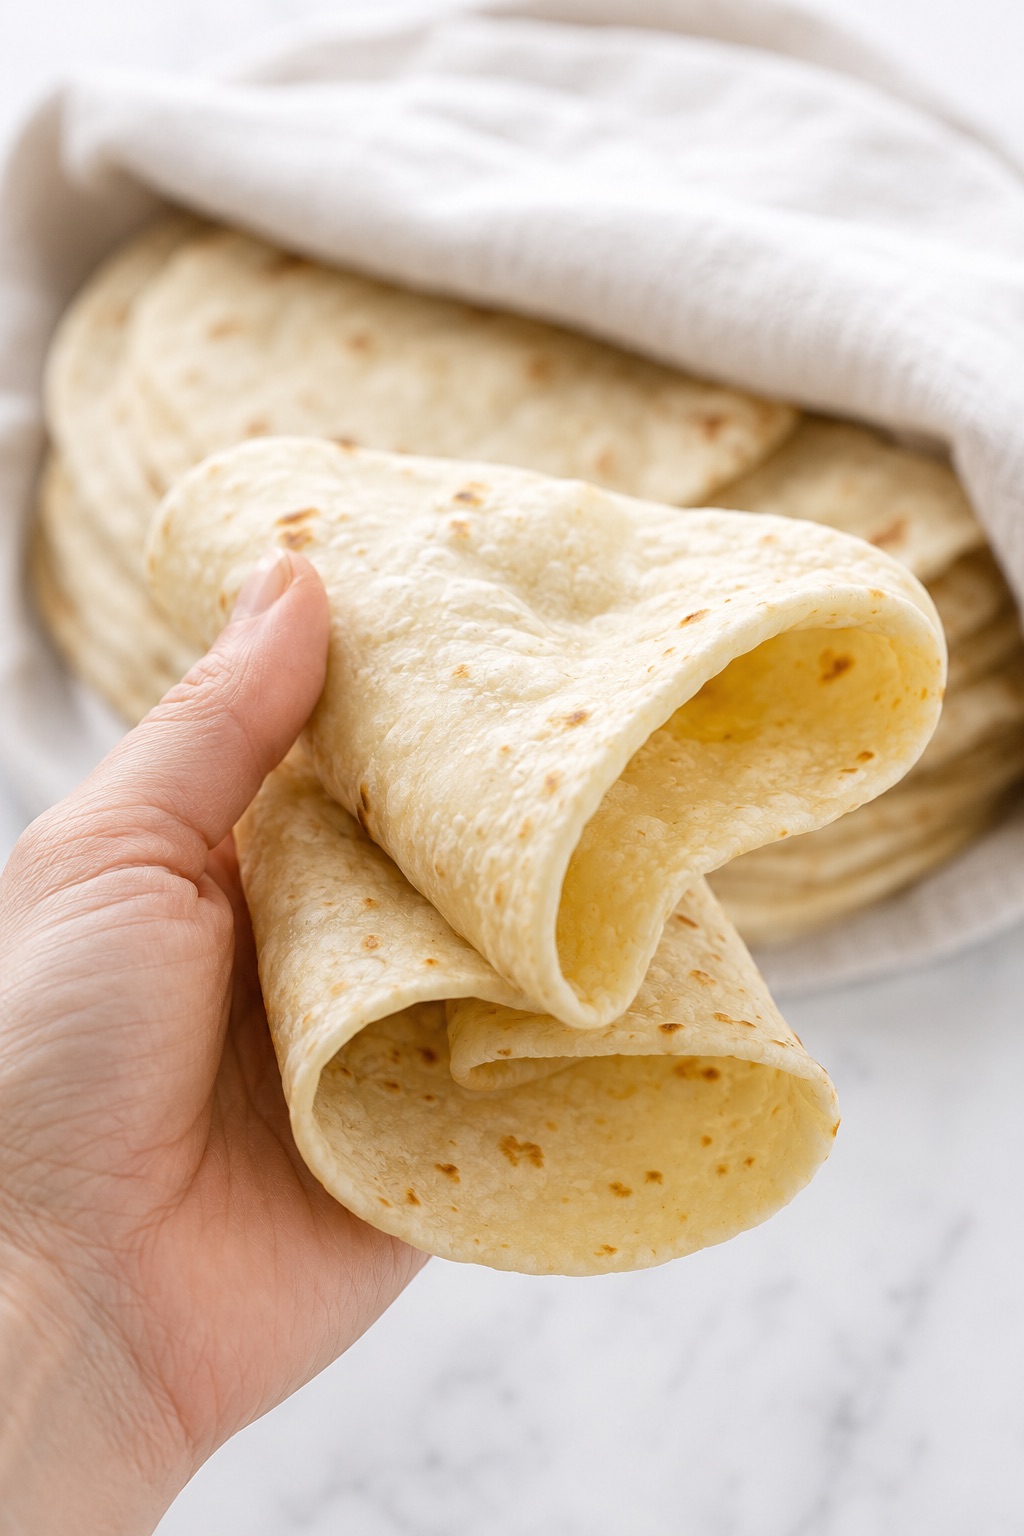
The defining success test: after resting beneath the towel for 5–10 minutes, a warm tortilla should fold deeply around a filling without cracking along the center or edges.
Quick Recipe Overview
Before you begin, here’s a quick snapshot of what to expect. This overview highlights the texture, timing, difficulty, and best uses for these homemade sourdough discard tortillas.
| Feature | Details |
|---|---|
| Texture | Soft, flexible, tender, and pleasantly chewy |
| Flavor | Mild buttery flavor with subtle sourdough depth |
| Difficulty | Easy |
| Prep Time | 20 minutes |
| Rest Time | 50 minutes |
| Cook Time | 15 minutes |
| Total Time | About 1 hour 25 minutes |
| Yield | 10 medium tortillas |
| Method | Mixed dough, rested, rolled, skillet cooked |
| Best For | Tacos, wraps, quesadillas, breakfast tacos, meal prep |
In short: These tortillas combine the convenience of traditional flour tortillas with the subtle flavor and improved texture of sourdough discard. They require very little equipment, cook in minutes, and are an excellent everyday use for leftover starter.
Recipe Timeline and Workback Plan
Allow approximately 1 hour 25 minutes from the first mix to serving. Only about 35 minutes are active; the remaining time allows the dough and divided portions to rest. For the softest texture, plan to finish cooking the tortillas 5–10 minutes before the meal and keep the stack covered until serving.
| Time Before Serving | What to Do |
|---|---|
| 1 hour 25 minutes | Combine the ingredients and knead the dough for 2–3 minutes. |
| About 1 hour 15 minutes | Cover the dough and begin the first 30-minute rest. |
| About 45 minutes | Divide the dough into 10 portions, shape them into balls, cover, and rest for another 20 minutes. |
| About 30 minutes | During the final 4–5 minutes of the second rest, preheat the dry skillet. |
| About 25 minutes | Roll and cook the tortillas one at a time, transferring each one immediately beneath the towel. |
| 5–10 minutes | Let the covered stack rest so the trapped steam can soften the tortillas evenly. |
| Serving time | Serve warm, or cool completely before refrigerating or freezing. |
Working ahead: The tortillas can be cooked earlier the same day and reheated shortly before serving. If making them several days ahead, refrigerate them airtight once completely cool; for longer storage, freeze them with parchment between each tortilla.
Why This Recipe Works
Making excellent tortillas is all about balancing hydration, gluten development, fat, and cooking temperature. Each ingredient contributes to creating a dough that rolls easily, cooks evenly, and remains soft after cooling.
The sourdough discard adds both moisture and natural acidity. Because it contains flour that is already fully hydrated, it blends smoothly into the dough and contributes subtle fermented flavor without requiring a long rise.
Fat is equally important. The softened butter coats part of the flour before the dough is fully hydrated, limiting excessive gluten development and keeping the tortillas tender rather than tough. Lard and neutral oil create slightly different textures but work through the same basic principle.
Resting the dough may seem like a small step, but it dramatically improves the final result. During this time, the flour fully absorbs the liquid while the gluten relaxes naturally. Instead of fighting the rolling pin, the dough becomes smooth, cooperative, and much easier to roll into thin circles.
Finally, cooking in a properly heated dry skillet creates rapid steam inside the dough. Those pockets of steam form the characteristic bubbles while lightly browning the surface, giving homemade tortillas their signature appearance and delicate toasted flavor.
Why You’ll Love This Recipe
There are plenty of reasons these tortillas become a repeat recipe. Beyond using up sourdough discard, they’re easy to make, wonderfully versatile, and fit naturally into everyday cooking.
- A delicious way to use sourdough discard. Instead of wasting extra starter, you transform it into something your family will actually request. For a sweet breakfast option, the same jar of discard can also become a batch of fluffy sourdough discard pancakes.
- Soft enough to fold without cracking. These tortillas stay flexible for tacos, wraps, burritos, and lunchboxes.
- Simple pantry ingredients. Flour, sourdough discard, fat, salt, and water are all you need.
- No special equipment required. A rolling pin and a hot skillet are enough to produce beautiful homemade tortillas.
- Quick enough for weeknights. Most of the total time is passive resting while you prepare other parts of the meal.
- Excellent for meal prep. They store well, reheat beautifully, and freeze surprisingly well.
- Naturally customizable. Once you master the basic dough, it’s easy to make whole wheat, herb, garlic, or even spinach tortillas.
Baking Science: Why Sourdough Discard Improves Tortillas
One of the biggest misconceptions is that sourdough discard is only useful because of its flavor. In reality, it changes how the dough behaves from the moment the ingredients are mixed.
Because the discard already contains fully hydrated flour, it blends smoothly into the dough and contributes to an even, supple consistency. Combined with the resting periods, this makes the dough noticeably easier to roll without constantly shrinking back.
Hydration plays another important role. Since sourdough discard already contains equal parts flour and water (assuming a 100% hydration starter), it contributes moisture in a balanced way. This produces a supple dough that cooks into tortillas that stay soft and flexible instead of becoming dry or stiff.
Heat finishes the transformation. As each tortilla hits the hot skillet, water inside the dough rapidly converts to steam. That steam creates the familiar bubbles across the surface while cooking the interior quickly enough to preserve moisture.
This combination of hydrated dough, relaxed gluten, and rapid steam production is exactly why homemade sourdough discard tortillas feel noticeably softer than many basic flour tortilla recipes.
Ingredients
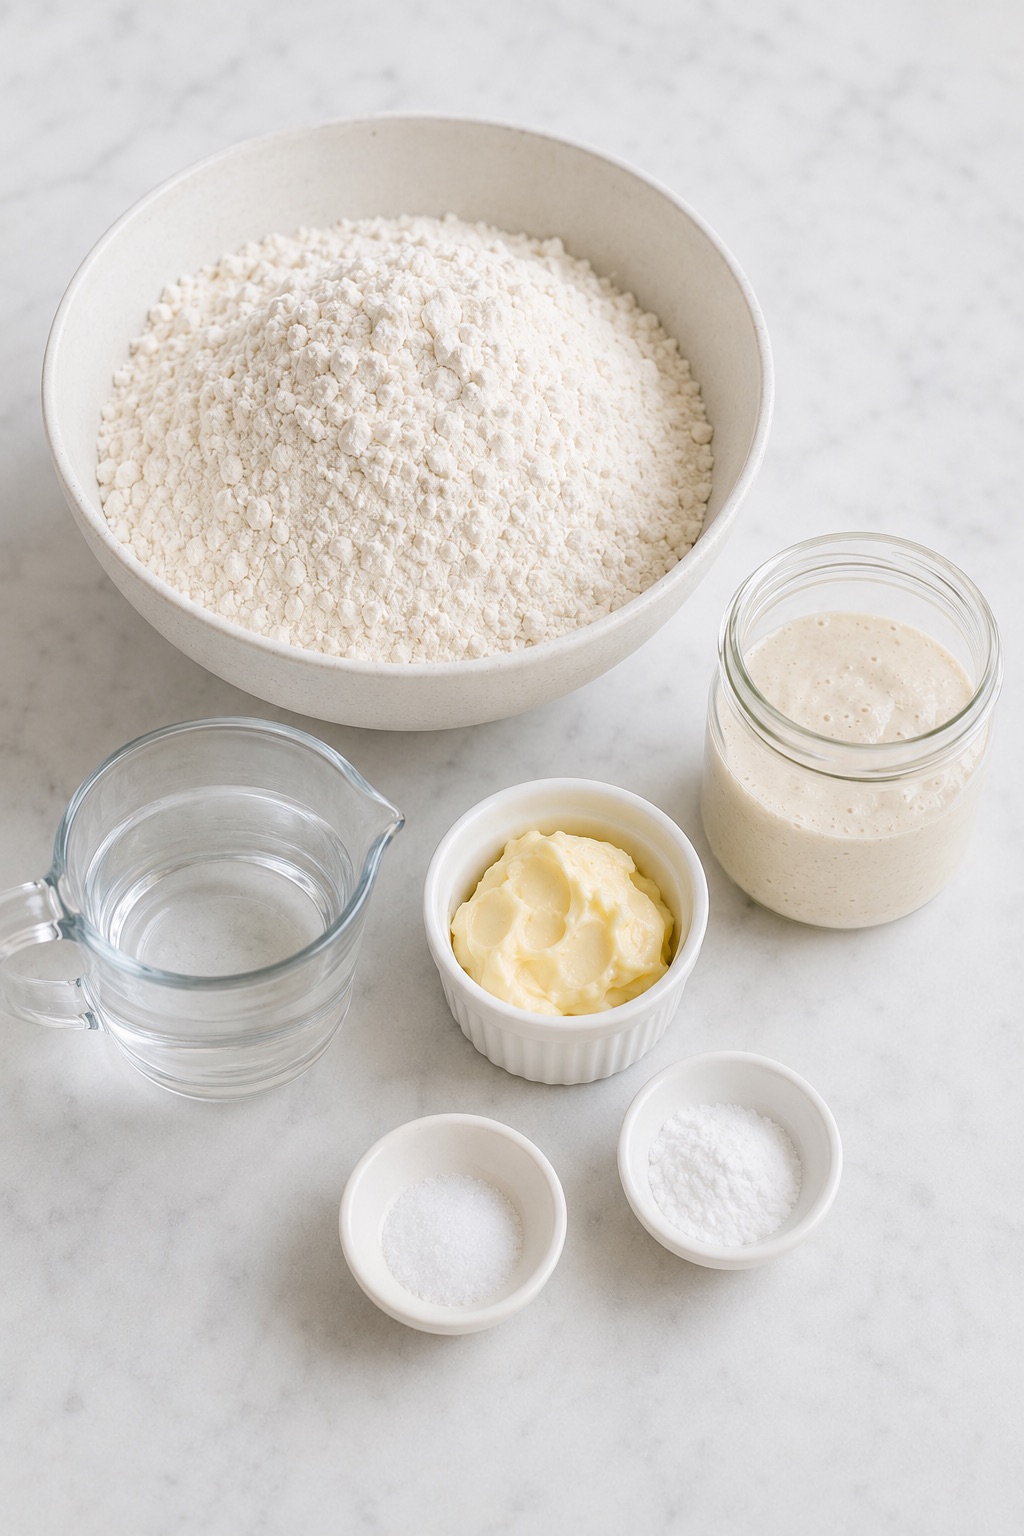
These tortillas rely on just a handful of everyday ingredients, but each one plays an important role in creating a dough that stays soft, rolls easily, and cooks into flexible tortillas with a delicate toasted flavor.
You’ll need:
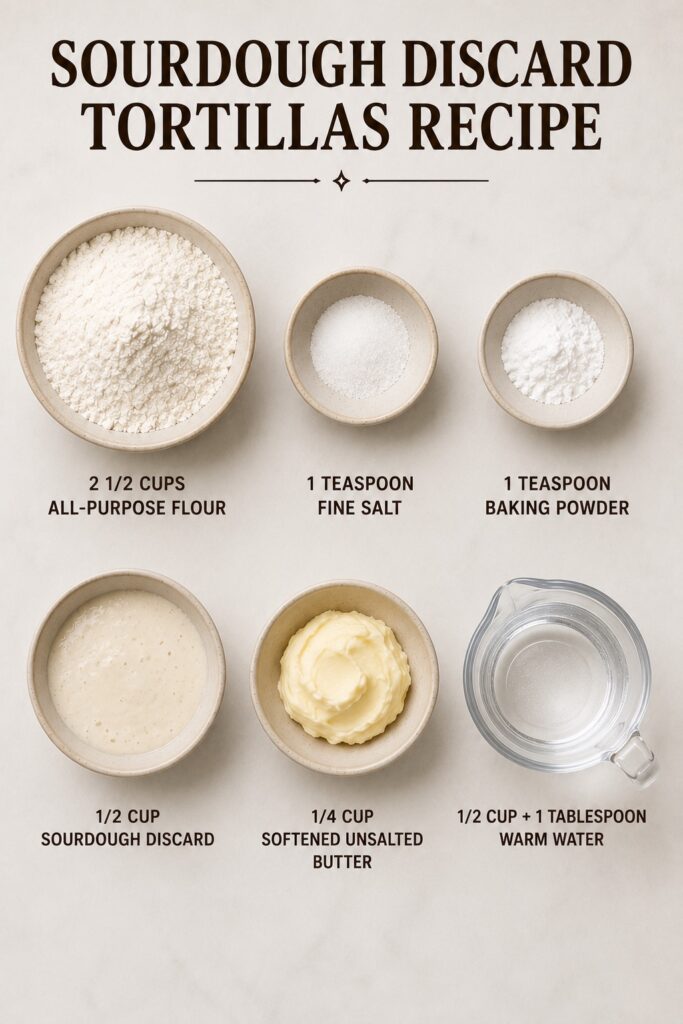
- 2½ cups (300 g) all-purpose flour
- 1 teaspoon (6 g) fine salt
- 1 teaspoon (4 g) baking powder
- ½ cup (120 g) sourdough discard (100% hydration, stirred well)
- ¼ cup (57 g) softened unsalted butter
- ½ cup + 1 tablespoon (135 ml) warm water (105–115°F / 40–46°C)
- Up to 1 additional tablespoon (15 ml) warm water, if needed
Ingredient Intelligence
Understanding what each ingredient contributes makes it much easier to adjust the recipe confidently. While the ingredient list is short, every component affects the dough’s texture, flexibility, or flavor in a slightly different way.
All-Purpose Flour
All-purpose flour provides enough gluten for strength while keeping the tortillas tender. Bread flour creates chewier tortillas, while cake flour lacks enough structure for consistent results.
Sourdough Discard
Use a 100% hydration sourdough discard that has been stirred well before measuring. It can be used straight from the refrigerator or at room temperature. The discard contributes moisture, subtle fermented flavor, and helps create a supple dough that rolls easily.
Practical substitution: Active sourdough starter works equally well if that’s what you have available.
Butter, Lard, or Oil
Unsalted butter is the primary fat in this recipe because it provides rich flavor and a tender texture.
Substitutions:
- 57 g lard for very tender, traditional-style tortillas.
- 50 g neutral oil for exceptionally flexible tortillas.
Each option works well, so choose based on your preference.
Baking Powder
Although these are not leavened like bread, a small amount of baking powder helps create lighter internal layers and slightly puffier tortillas during cooking.
Warm Water
Start with 135 ml warm water. If dry flour remains after one minute of mixing, add additional warm water 1 teaspoon at a time, using no more than 1 tablespoon (15 ml) in total.
Note: Humidity, flour brands, and even the moisture content of your sourdough discard can slightly change how much water the dough needs.
Kitchen Tools You’ll Need
One of the best things about this recipe is that it doesn’t require any specialized equipment. Most home kitchens already have everything needed to make excellent homemade tortillas.
- Large mixing bowl
- Measuring cups or digital kitchen scale
- Rolling pin
- Bench scraper or knife for dividing dough
- Cast iron skillet or heavy stainless-steel skillet
- Clean kitchen towel
- Tortilla warmer or clean towel-lined bowl for storing cooked tortillas
Practical note: A heavy cast iron skillet retains heat exceptionally well, making it easier to achieve even browning from the first tortilla to the last. If using a lighter pan, allow it to recover its heat for a few seconds between tortillas.
Before You Start
Taking a few minutes to prepare before mixing the dough helps everything go more smoothly. These simple checks can prevent the most common beginner mistakes.
✓ Stir the sourdough discard well before measuring so the flour and liquid are evenly combined.
✓ Warm the measured water to 105–115°F (40–46°C) before mixing so the butter softens evenly into the dough.
✓ Have a kitchen scale ready if you want evenly sized tortillas that cook at the same rate.
✓ Lightly flour your work surface, but avoid adding excessive flour while rolling.
✓ Make sure your skillet is fully preheated before cooking the first tortilla.
✓ Prepare a clean kitchen towel before cooking so each finished tortilla stays warm and soft.
What to Expect
If this is your first time making homemade tortillas, a few things may surprise you—in a good way.
The dough should feel soft and slightly tacky, not dry or crumbly. After resting, it becomes noticeably smoother and much easier to roll.
Not every tortilla will puff dramatically. Some develop one large air pocket, others produce several smaller bubbles, and some stay mostly flat. All of these outcomes are completely normal and do not indicate a problem.
The tortillas will look lightly golden rather than deeply browned. A few scattered brown spots are ideal, while extensive dark patches usually mean the skillet is too hot.
Fresh off the skillet, the tortillas may feel slightly firmer around the edges. After stacking under a towel for several minutes, trapped steam naturally softens them into the flexible texture you’re looking for.
The first tortilla is often the least attractive. It helps you fine-tune the skillet temperature, and each tortilla after that usually becomes more consistent.
How to Make Sourdough Discard Tortillas
The process is simple, but the small details matter. Aim for a soft dough, give it enough time to relax, roll each portion thin, and cook the tortillas quickly on a properly heated skillet.
1. Combine the Dry Ingredients
In a large mixing bowl, whisk together the all-purpose flour, salt, and baking powder until evenly distributed.
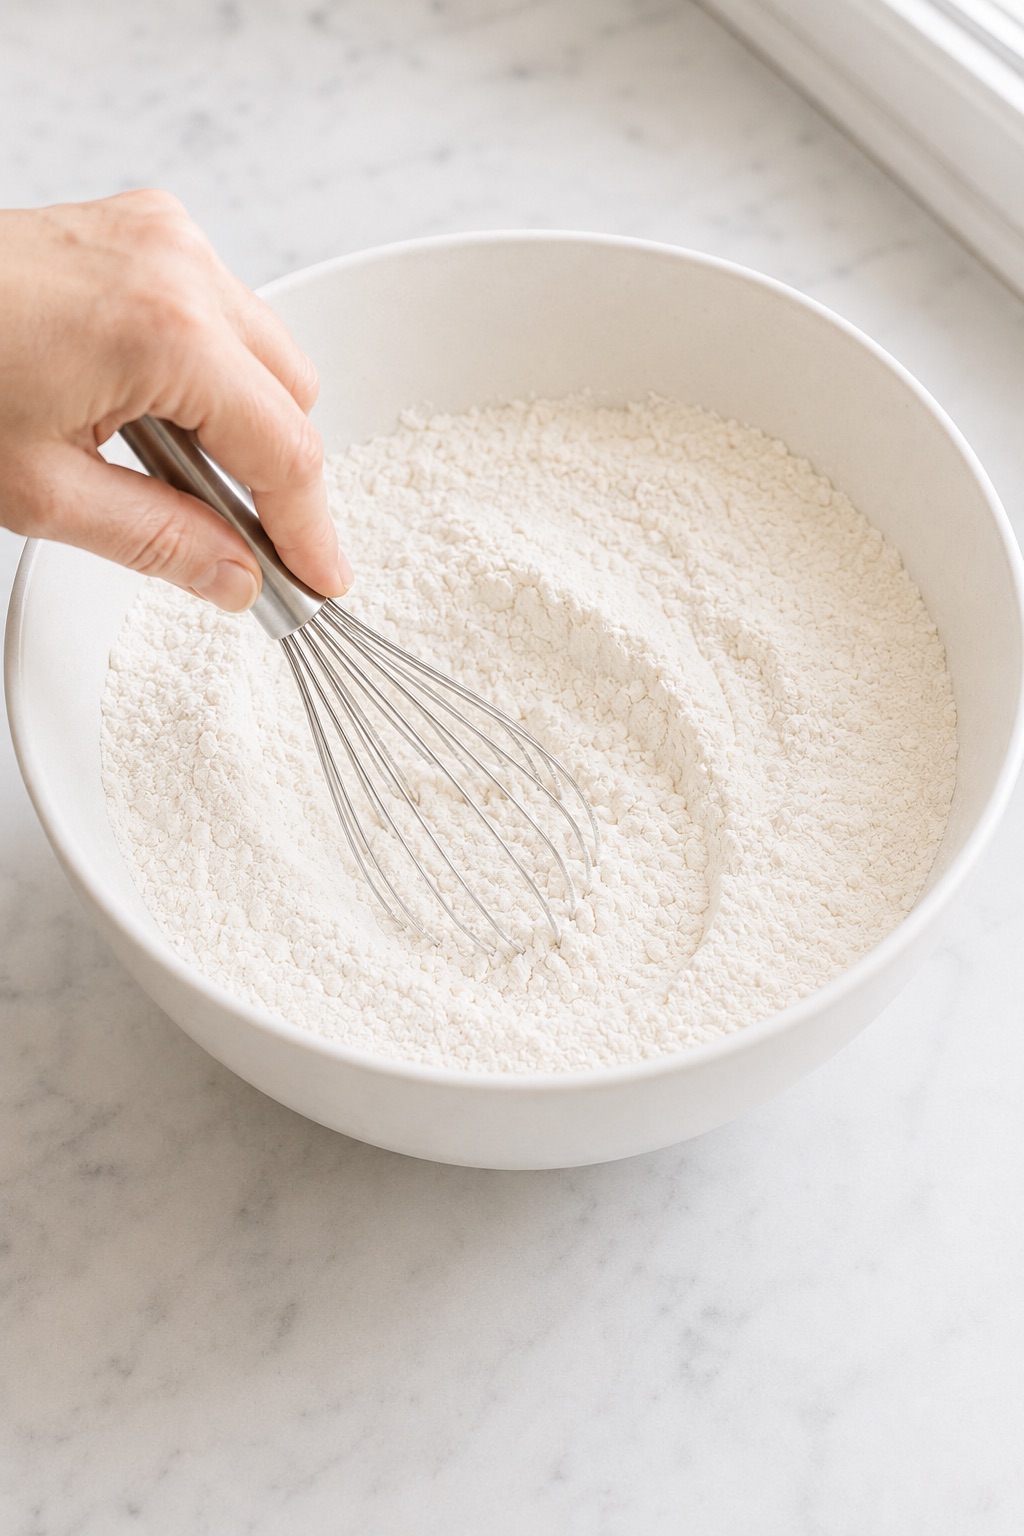
What you should see: The mixture should look uniform, with no visible pockets of baking powder or salt.
Why this matters: Even distribution prevents some tortillas from puffing more than others or developing concentrated salty spots.
2. Work in the Fat
Add the softened butter or lard to the flour mixture. Use your fingertips or a pastry cutter to rub the fat into the flour until the mixture resembles coarse, slightly damp sand. If using neutral oil, stir it directly into the flour until evenly dispersed.
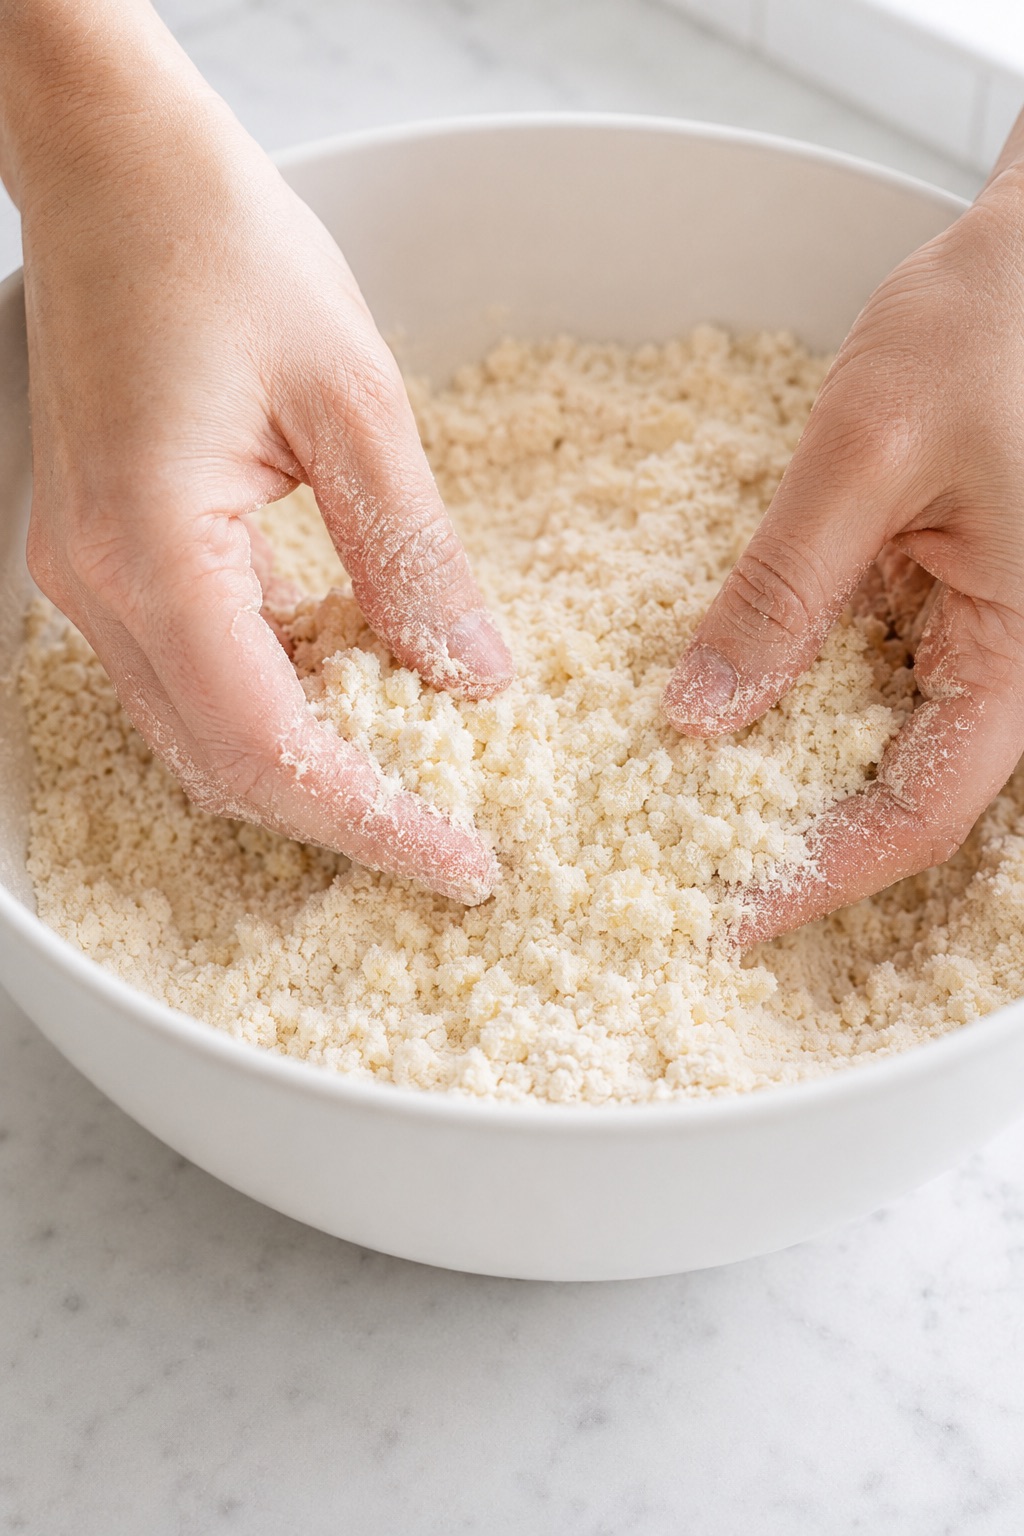
What you should feel: The flour should hold together briefly when squeezed, but it should still break apart easily.
Tip: Do not leave large pieces of butter in the flour. Tortillas benefit from evenly distributed fat rather than distinct butter pockets like pie dough.
3. Add the Sourdough Discard and Warm Water
Add the sourdough discard and 1/2 cup + 1 tablespoon (135 ml) warm water. Stir with a sturdy spoon or your hand until a rough, shaggy dough forms and no large pockets of dry flour remain.
If dry flour remains at the bottom of the bowl after one minute of mixing, add warm water 1 teaspoon at a time, using no more than 1 additional tablespoon (15 ml). Stop as soon as the dough comes together.
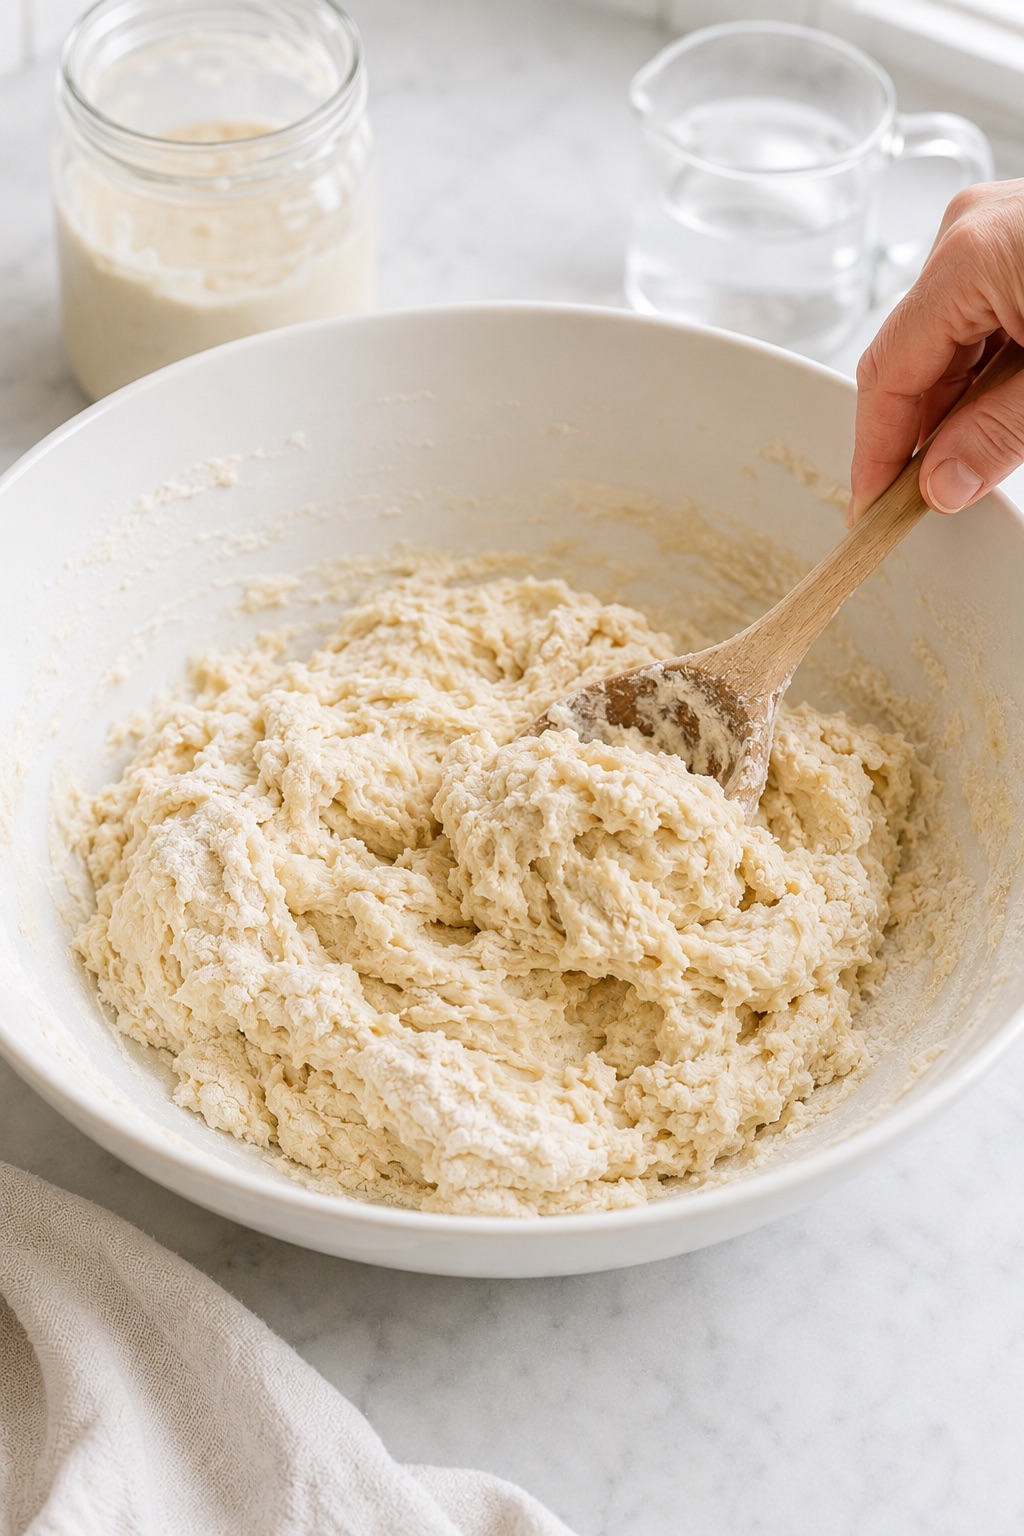
What you should see: The dough may look uneven and slightly rough at first, but it should feel soft and pliable rather than stiff or crumbly.
The exact amount of water can vary slightly because sourdough discard becomes thinner or thicker depending on its flour, hydration, and storage time. A small adjustment here is normal.
4. Knead Until Smooth
Turn the dough onto a clean work surface and knead for 2–3 minutes. Press the dough away from you with the heel of your hand, fold it back over itself, rotate it, and repeat.
The dough is ready when it becomes smoother, more elastic, and only faintly tacky. It should not leave wet residue on your hands or cling heavily to the work surface.
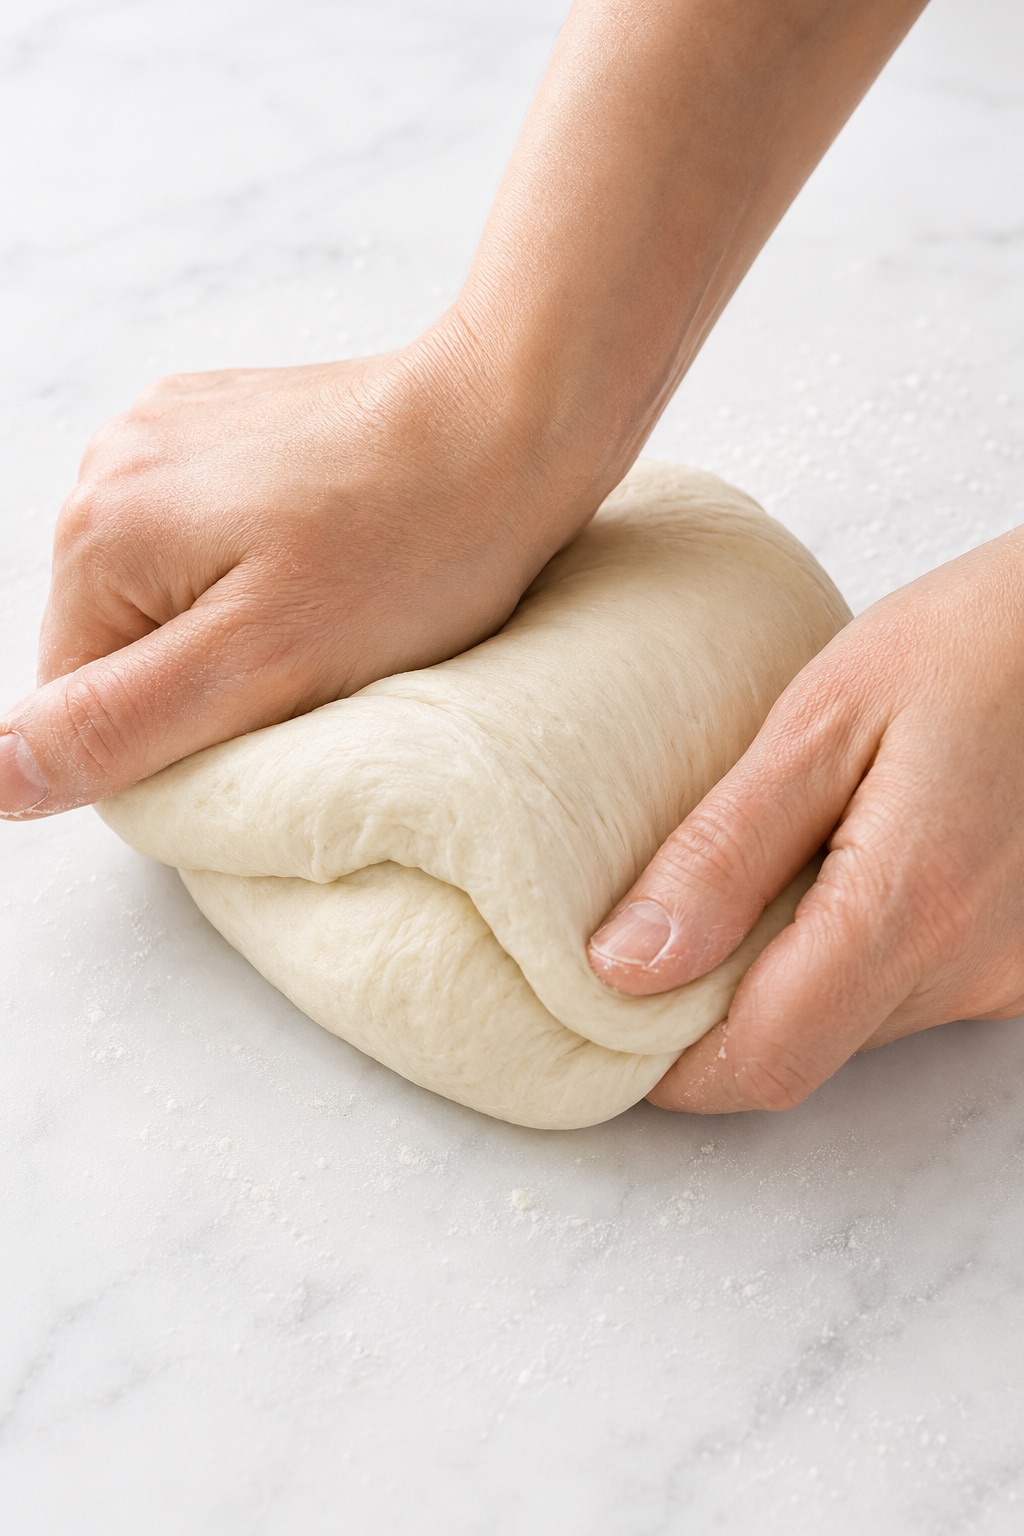
What you should feel: The dough should be softer than bread dough and should spring back slowly when pressed.
Note: The dough may look imperfect during the first minute of kneading. Resist the urge to add more flour immediately; it often becomes smoother as the existing flour finishes absorbing the moisture.
5. Rest the Dough
Shape the dough into a ball, return it to the bowl, and cover it tightly with a clean kitchen towel, reusable cover, or plastic wrap. Let it rest at room temperature for 30 minutes.
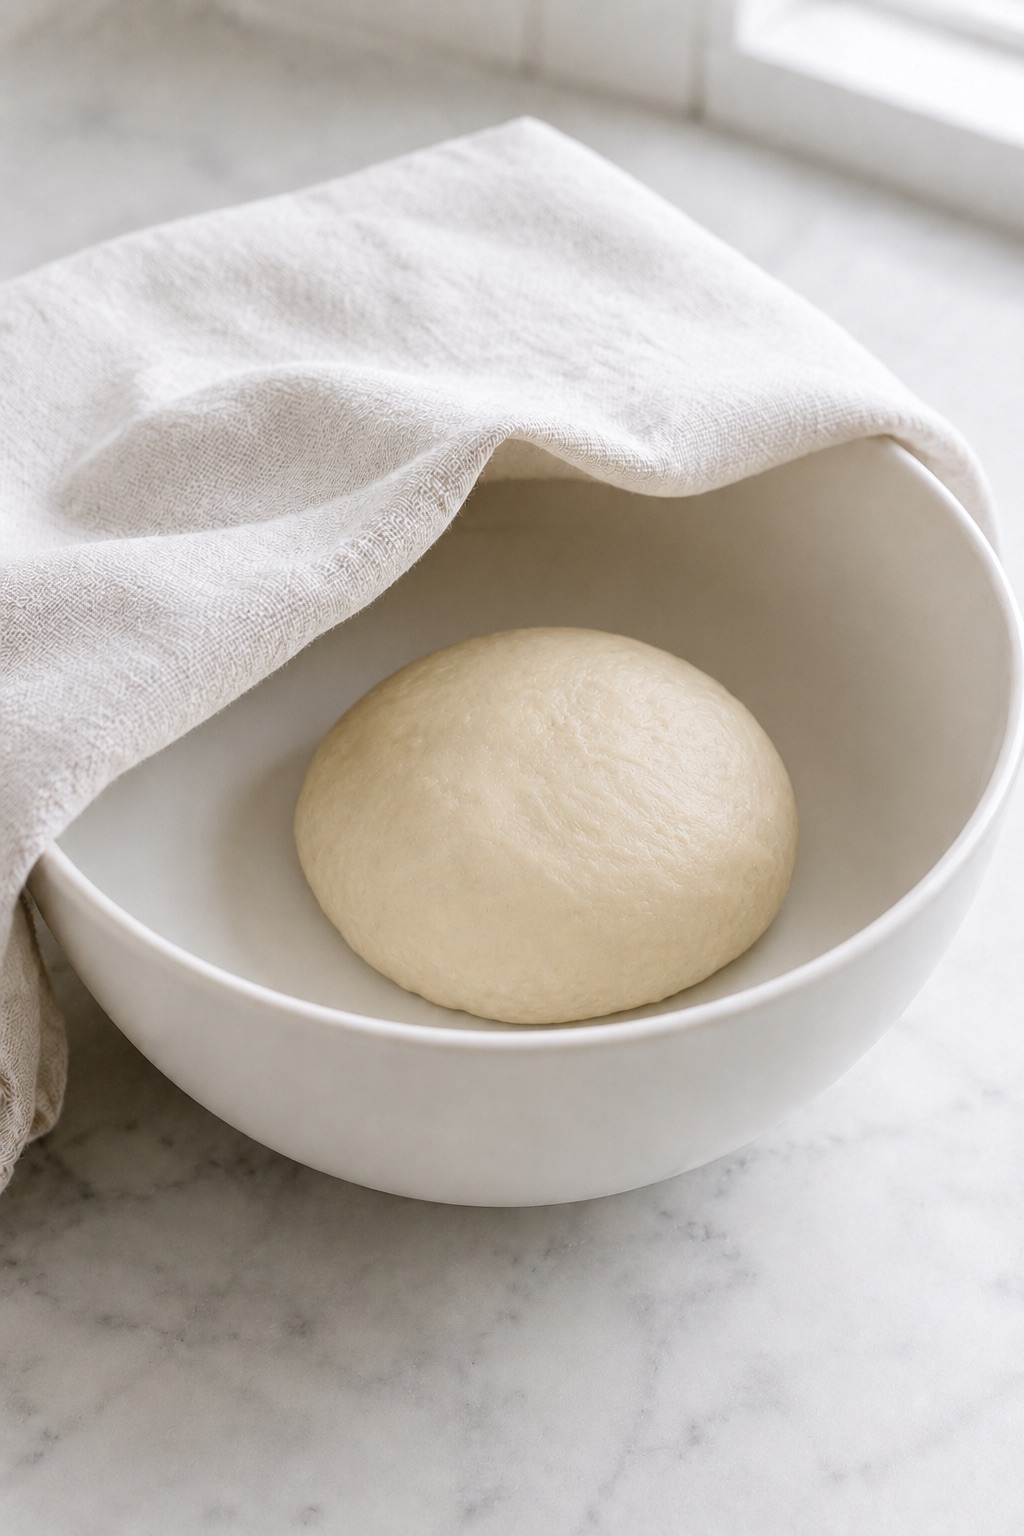
What you should notice: After resting, the dough should feel softer, smoother, and easier to stretch without immediately pulling back.
Why this matters: Resting gives the flour time to hydrate and allows the gluten to relax, making the tortillas much easier to roll thin.
6. Divide the Dough
Place the rested dough on the work surface and divide it into 10 equal portions. For the most consistent tortillas, weigh the entire dough and divide the total weight by 10. Each dough ball should weigh approximately 62–64 g.
Shape each portion into a smooth ball by pulling the edges underneath and rolling it gently beneath your cupped hand.
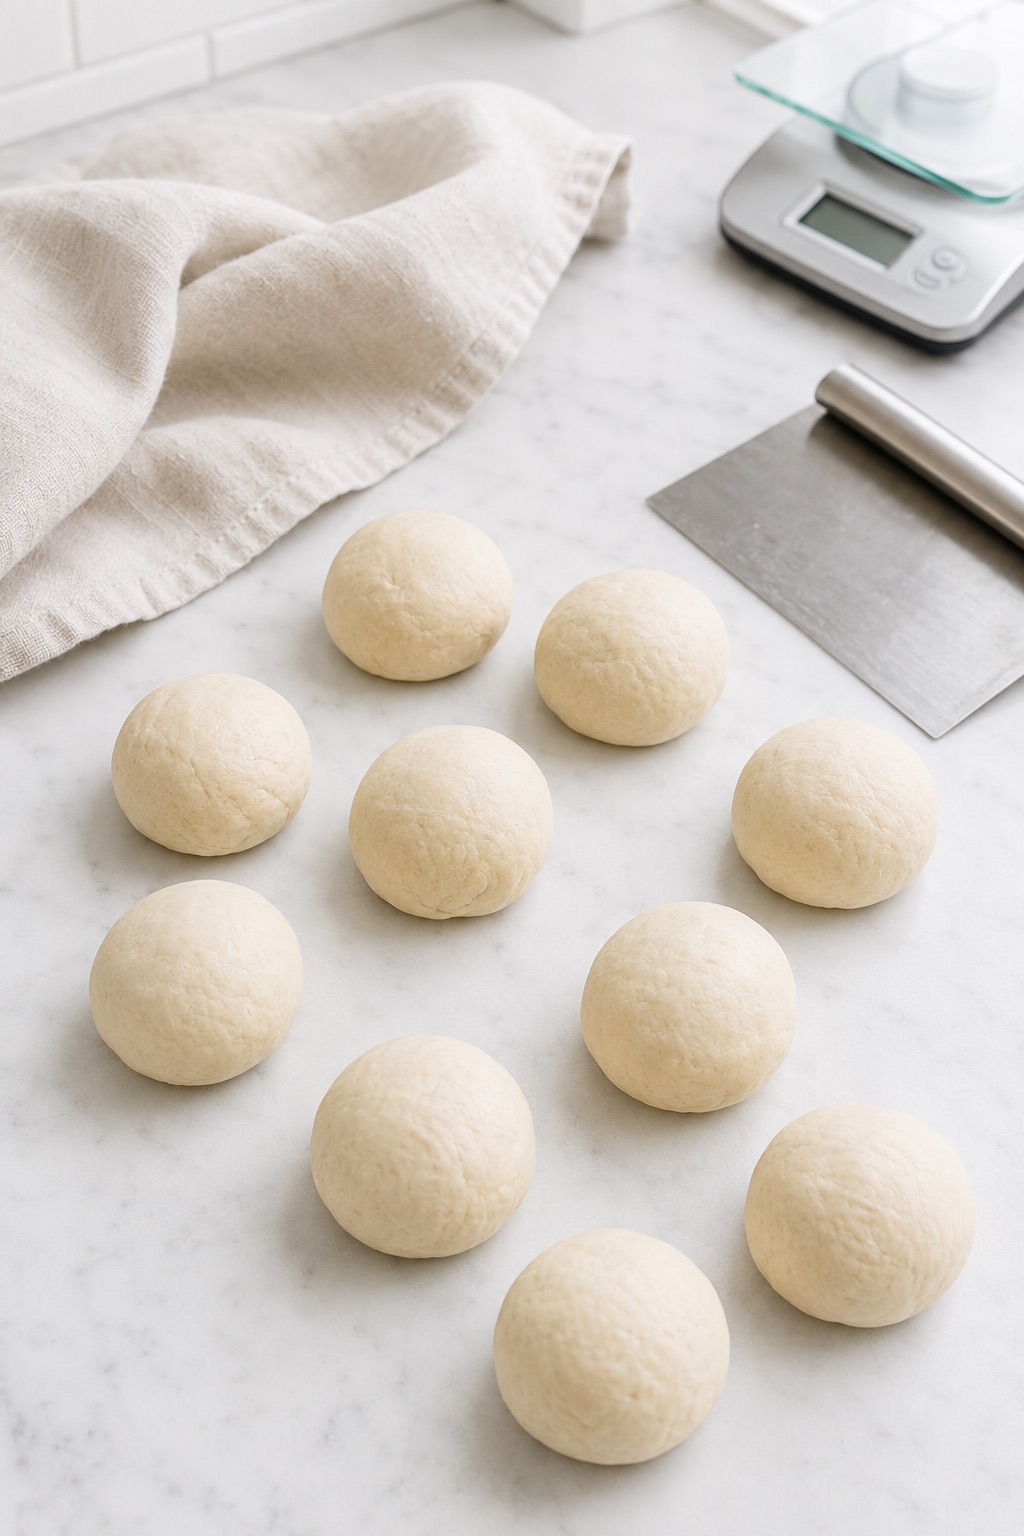
Cover the dough balls with a towel and let them rest for 20 minutes. During the final 4–5 minutes of this rest, preheat the skillet.
What you should see: Each dough ball should have a smooth top and feel relaxed rather than tight.
This second short rest is especially helpful if the dough resists shaping or begins shrinking as soon as you flatten it.
7. Preheat the Skillet
Place a dry cast iron or heavy stainless-steel skillet over medium-high heat. Preheat it for 4–5 minutes before cooking the first tortilla.
Do not add oil or butter to the skillet.
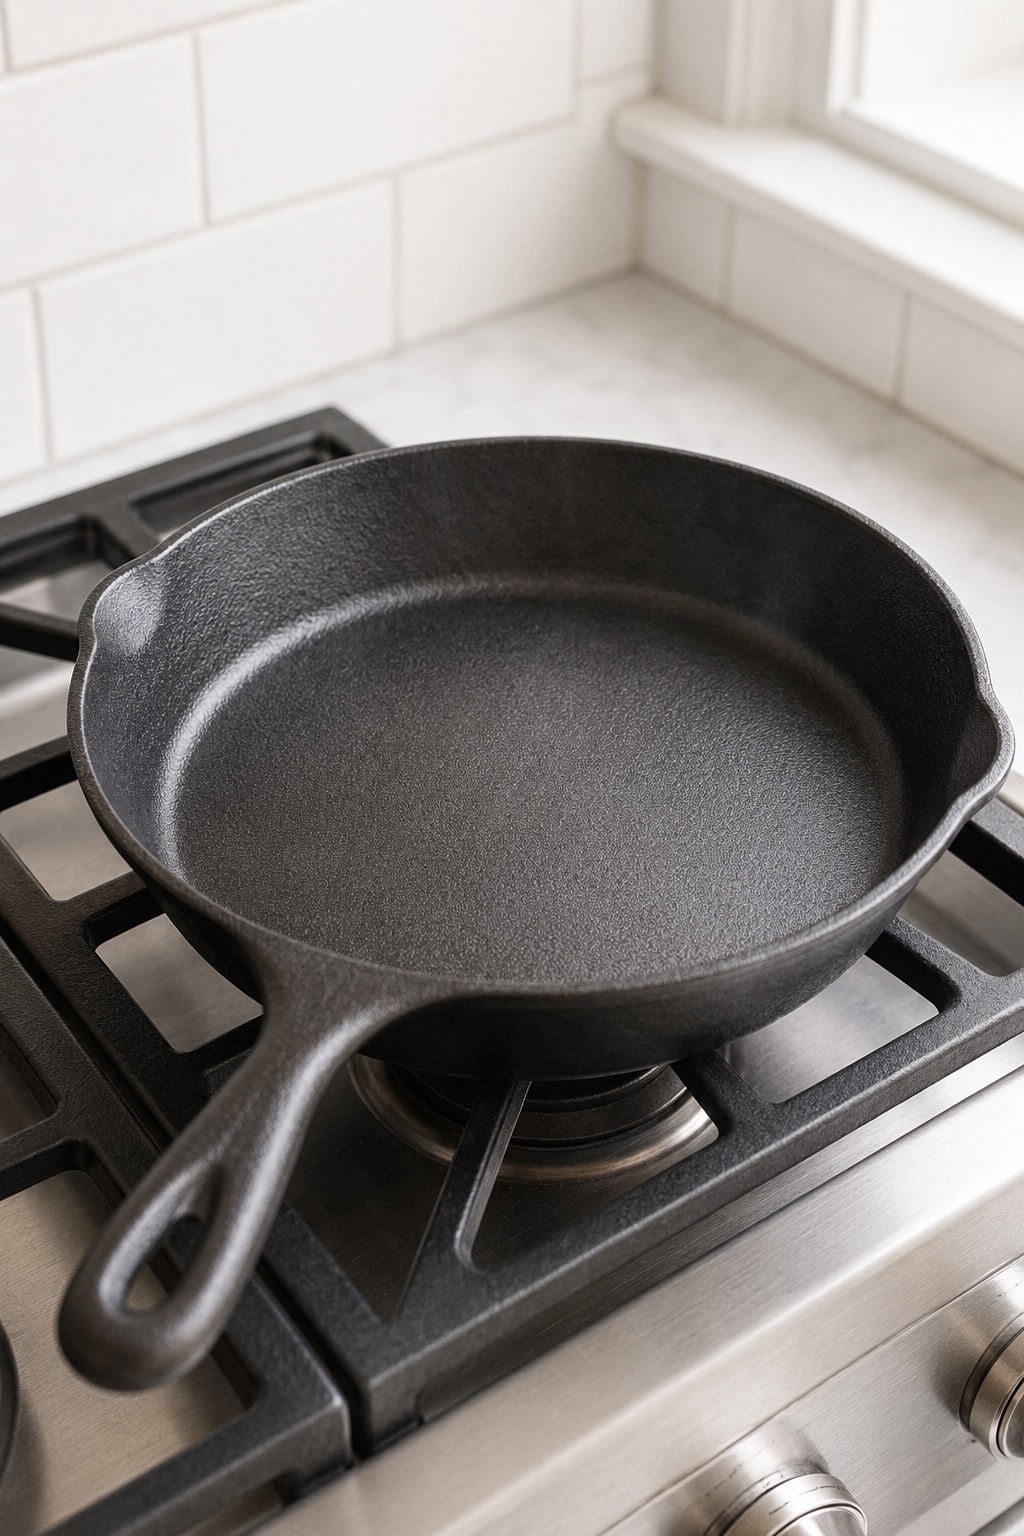
How to judge the heat: The skillet is ready when it feels evenly hot across the center and a tortilla begins bubbling within 20–30 seconds. The first tortilla will help you fine-tune the temperature.
If the pan begins smoking, reduce the heat slightly and allow it to cool for 30–60 seconds before cooking.
8. Roll the First Tortilla
Lightly flour the work surface and rolling pin. Flatten one dough ball into a small disk, then roll it from the center outward, rotating the dough by about one-quarter turn after every few passes.
Roll the dough ball into a circle about 7 inches (18 cm) across. The dough should be thin enough that the outline of your hand is just faintly visible when you lift it toward the light, but not so thin that it tears.
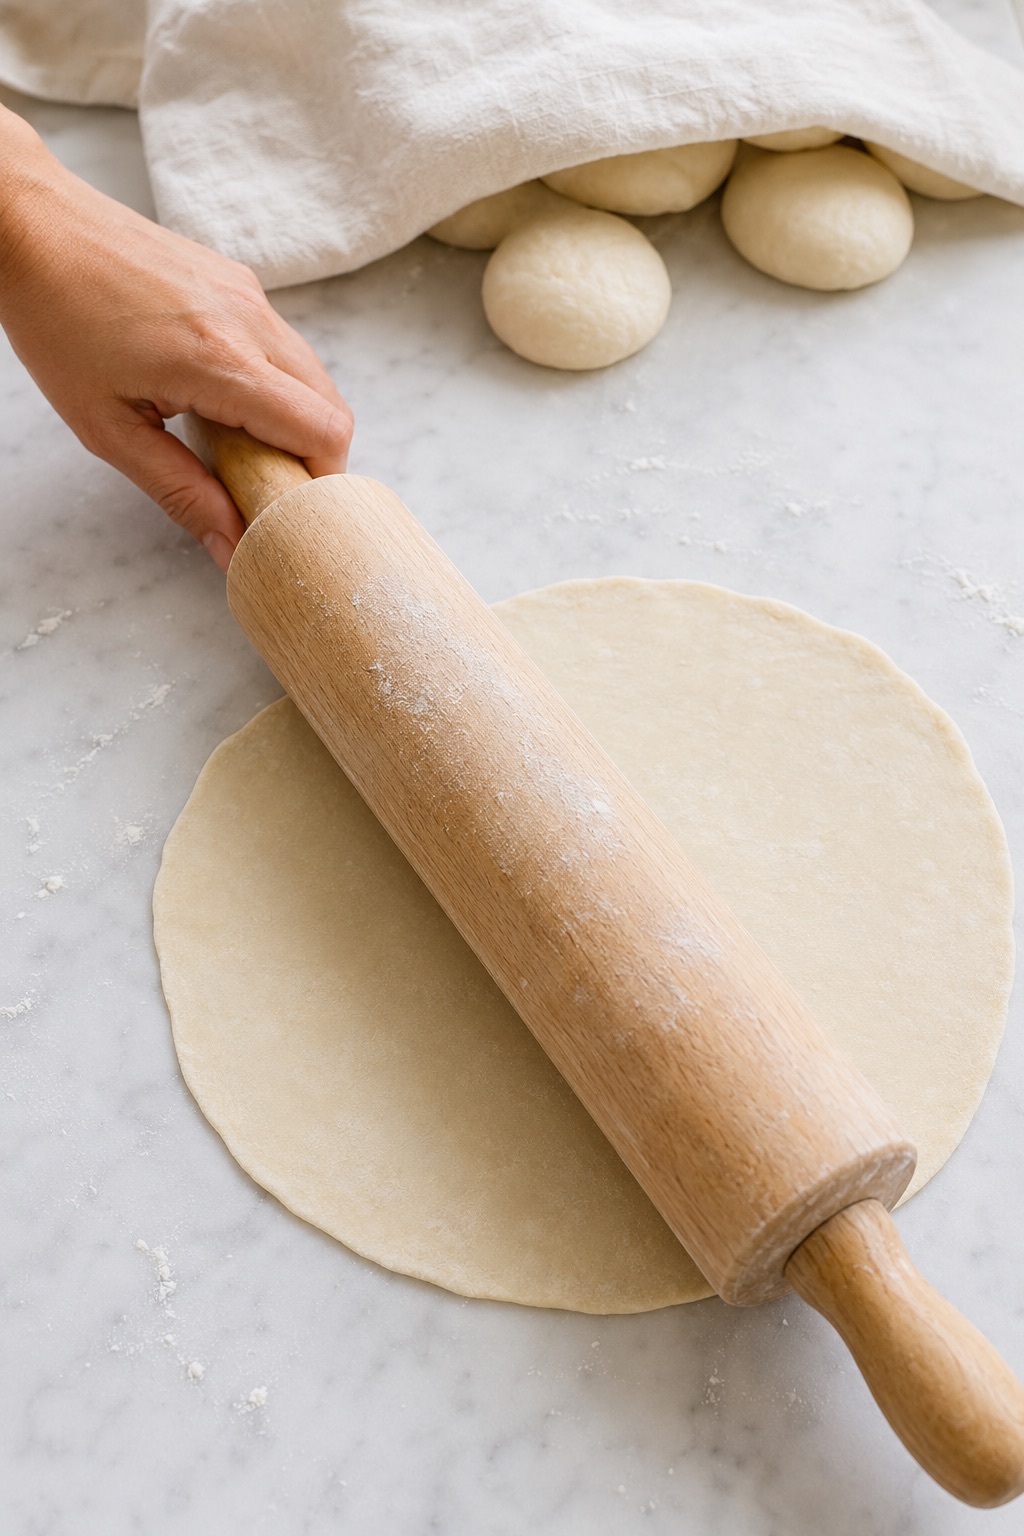
What you should see: The surface may not form a perfect circle, but the thickness should be relatively even from the center to the edges.
Tip: Use only enough flour to prevent sticking. Excess flour can remain on the tortilla and burn in the hot skillet.
If the dough repeatedly shrinks or springs back, cover it and let it rest for another 5–10 minutes before rolling again.
9. Cook the First Side
Carefully lift the rolled tortilla and place it flat in the hot dry skillet. Cook for 20–30 seconds, or until small bubbles appear across the surface and the underside develops scattered golden-brown spots.
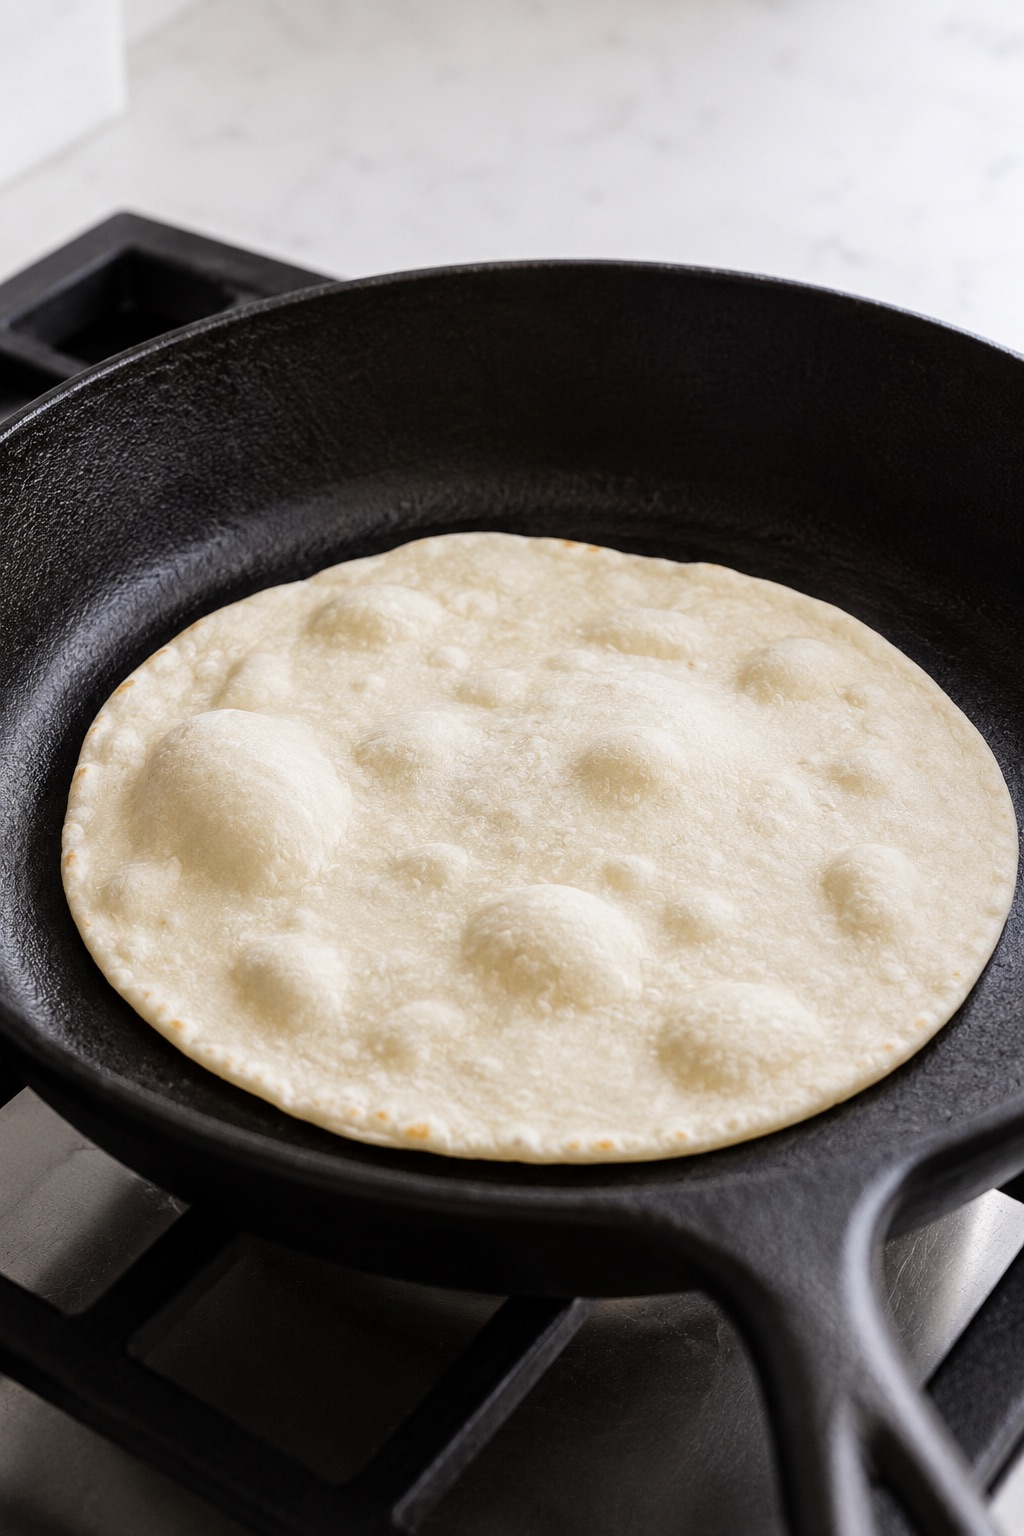
What you should see: The tortilla should change from slightly translucent and doughy to opaque, with bubbles forming in several areas.
If it remains pale and no bubbles have formed after 30 seconds, increase the heat slightly. If dark spots appear before the surface turns opaque, reduce the heat.
10. Flip and Finish Cooking
Flip the tortilla with tongs or a thin spatula and cook the second side for 15–25 seconds. It may puff into one large pocket or develop several smaller bubbles.
Flip it once more and cook for an additional 5–10 seconds only if the first side still looks undercooked.
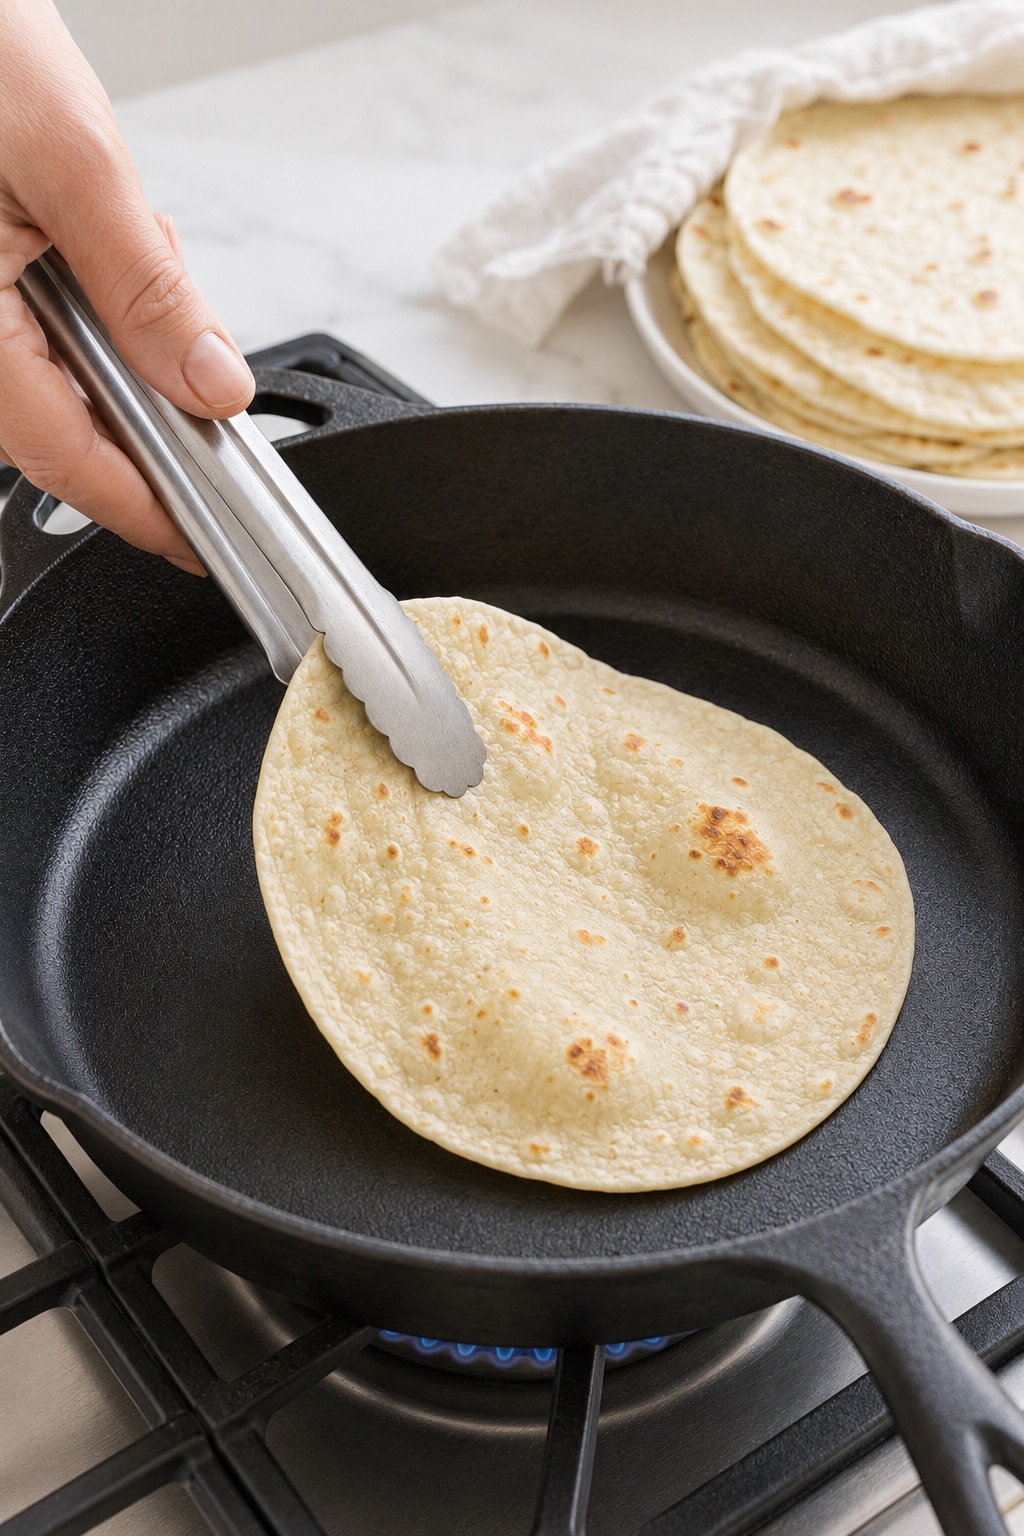
What you should see: Both sides should have scattered toasted spots, while most of the surface remains pale and soft.
Avoid cooking until the entire tortilla is deeply browned. Extended heat drives out moisture and makes the edges stiff.
11. Keep the Tortillas Warm
Transfer the cooked tortilla immediately to a tortilla warmer or a plate lined with a clean kitchen towel. Fold the towel over the top to trap the gentle steam.
Continue rolling and cooking the remaining tortillas one at a time, stacking each finished tortilla beneath the towel.
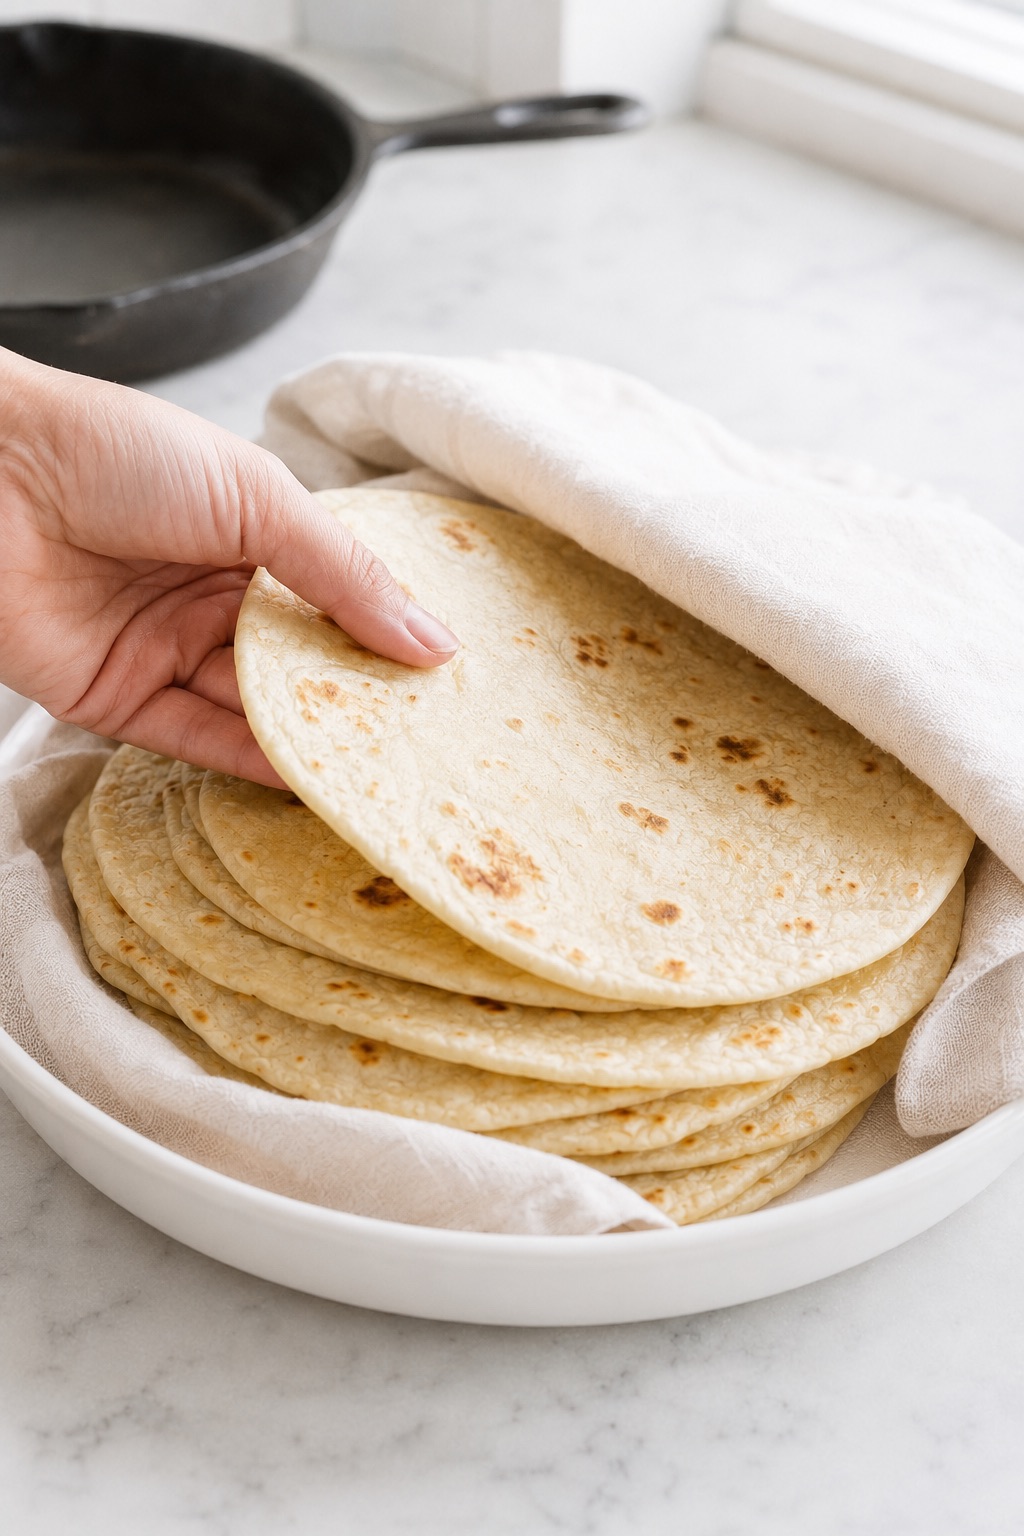
What you should notice: Tortillas that feel slightly firm when they leave the skillet will soften after resting in the covered stack for 5–10 minutes.
Brush excess flour from the skillet between tortillas if it begins to accumulate or smell toasted.
Visual Doneness Cues
Unlike bread, tortillas cook very quickly, so visual cues are much more reliable than exact cooking times. These signs indicate they’re fully cooked while still remaining soft and flexible.
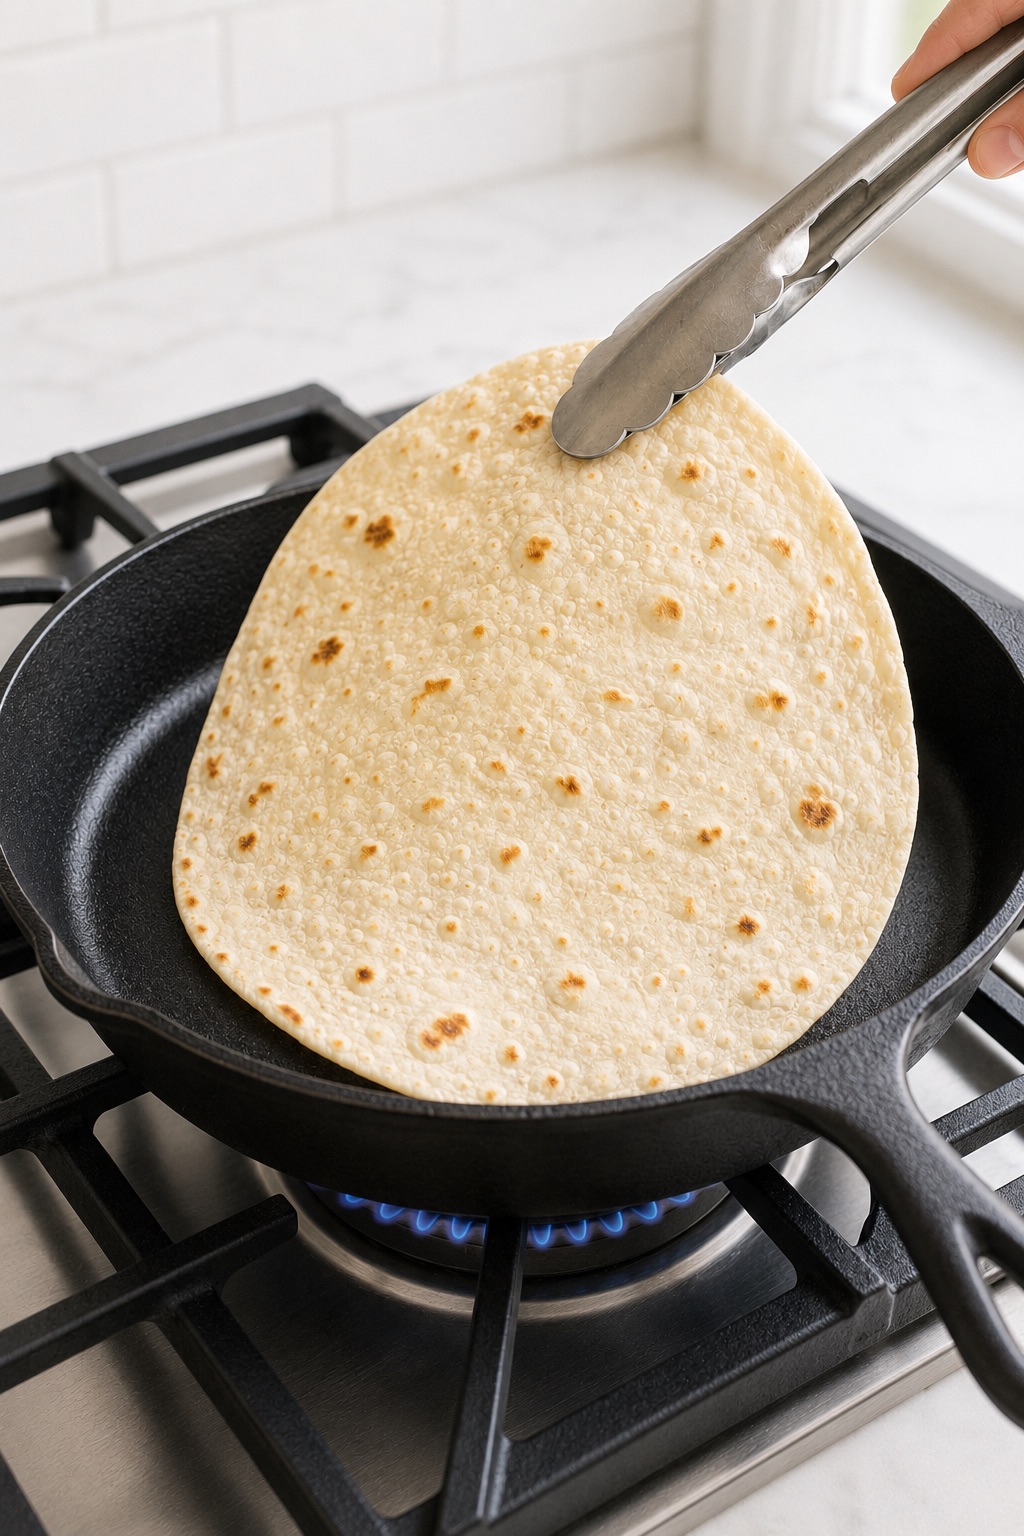
- The surface changes from slightly translucent dough to completely opaque.
- Small or medium air bubbles appear during the first side of cooking.
- The underside develops scattered golden-brown spots rather than uniform browning.
- The edges look cooked and dry but remain flexible rather than crisp.
- The tortilla bends easily when lifted with tongs.
- No raw, gummy, or shiny dough remains in the center.
Do not wait for every tortilla to inflate completely. Full puffing is attractive, but it is not required for a soft, properly cooked tortilla.
Sourdough Discard Tortilla Texture and Behavior Guide
As the dough develops, it changes noticeably in both texture and appearance. These cues make it easier to recognize when each stage is progressing as it should.
| Stage | What It Should Look or Feel Like | What It Means |
|---|---|---|
| Freshly mixed dough | Rough, soft, and slightly tacky with no loose dry flour | The hydration is close to correct, even if the dough is not smooth yet |
| After kneading | Smoother, elastic, and soft without sticking heavily | The gluten has developed enough to provide structure |
| After resting | Relaxed, supple, and easy to press without springing back quickly | The flour is hydrated and the gluten has relaxed |
| Rolled tortilla | Thin and evenly rolled, approximately 7 inches (18 cm) | The tortilla should cook quickly and remain flexible |
| First side cooking | Surface turns opaque and begins forming bubbles | Steam is developing inside the dough |
| Finished tortilla | Scattered toasted spots with a soft, bendable center | The tortilla is cooked without losing too much moisture |
| After stacking | Noticeably softer and more flexible after 5–10 minutes | Trapped steam has redistributed moisture through the stack |
Expert Tips for the Best Sourdough Discard Tortillas
The best tortillas come from learning how the dough behaves rather than following the clock alone. These are the small, repeatable details that consistently make the difference between tortillas that are merely cooked and tortillas that stay soft, thin, flexible, and easy to fold.
Do Not Correct the Dough Too Early
The dough often feels slightly rough and tackier than expected during the first minute of kneading. Resist the urge to add flour immediately; after the full 30-minute rest, it usually becomes noticeably smoother and easier to handle as the flour finishes absorbing the moisture.
Adding flour too early is one of the fastest ways to produce tortillas with dry edges and reduced flexibility.
Judge Hydration by the Edges
When you flatten a rested dough ball, look closely at its edges. Smooth edges indicate that the hydration is well balanced, while deep cracks usually mean the dough is slightly too dry.
If you see only one or two small cracks, continue rolling before making an adjustment. If every portion cracks around the edges, moisten your fingertips with warm water, knead the dough briefly, and let it rest for another 10 minutes.
Let the Dough Tell You When It Needs More Rest
A dough ball that repeatedly shrinks from 7 inches back toward the center is not asking for more pressure from the rolling pin. It is telling you that the gluten is still too tight.
Cover that portion and leave it alone for another 5–10 minutes. A properly relaxed dough should stay close to the size you roll it rather than immediately pulling inward.
Keep the Center as Thin as the Edges
The most common rolling mistake is creating thin edges around a thicker center. That thicker middle cooks more slowly, so the edges can become dry before the center is fully cooked.
Begin each pass in the center, roll outward, and rotate the dough frequently. Before transferring it to the skillet, run your fingertips lightly across the surface; any noticeably thicker area should receive one or two additional gentle passes.
Use the First Tortilla to Calibrate the Skillet
The first tortilla is rarely the prettiest one, but it gives you the most useful information. Small bubbles should appear within 20–30 seconds, and a few golden spots should develop underneath without the surface scorching.
If the tortilla stays pale and slowly dries, the skillet needs more heat. If dark spots appear before the top turns opaque, reduce the heat and allow the pan to cool for 30–60 seconds before continuing.
Stop Adjusting the Burner Once the Heat Is Right
Once the first two tortillas confirm that the skillet temperature is correct, avoid changing the burner after every tortilla. Constant heat adjustments create a cycle of undercooked and overcooked tortillas because the pan temperature lags behind the burner setting.
On a heavy cast iron skillet, brief pauses between tortillas are usually enough to stabilize the heat without touching the control.
Do Not Chase Dark Brown Spots
A tortilla does not need dramatic charring to be fully cooked. Once the surface is opaque, the bubbles have formed, and a few scattered golden-brown spots appear, additional cooking mainly removes moisture.
Removing the tortilla while most of its surface is still pale is what preserves the soft, flexible texture needed for tacos, wraps, and quesadillas.
Judge the Final Texture After Stacking
A freshly cooked tortilla can feel slightly firmer than expected around the edges. Do not assume it is dry until it has rested beneath the towel for 5–10 minutes.
The warm stack creates a gentle steaming environment that redistributes moisture and softens the tortillas. Even a tortilla that initially feels a little stiff often becomes supple once it rests with the others.
Build Speed Only After You Know the Timing
For the first two or three tortillas, focus entirely on cooking rather than trying to roll the next portion at the same time. Once you know how quickly your skillet browns each side, you can begin rolling one tortilla while another cooks.
Trying to multitask before finding that rhythm is one of the most common reasons the first tortillas become overcooked while the remaining dough waits on the counter.
Common Sourdough Discard Tortilla Mistakes
Even simple tortilla recipes can be frustrating if one small step goes wrong. Fortunately, most problems have an easy solution once you know what caused them.
| Problem | Likely Cause | How to Correct It |
|---|---|---|
| The dough is dry and cracking | Not enough water or too much flour added during rolling | Moisten your fingertips with warm water and knead briefly; if the dough is still dry during initial mixing, do not exceed the recipe’s additional 15 ml allowance. |
| The dough is very sticky | Thin discard, excess water, or insufficient resting | Let it rest first, then knead in flour 1 tablespoon at a time only if necessary |
| The tortillas shrink while rolling | The gluten is too tight | Cover the dough balls and rest them for another 5–10 minutes |
| The tortillas stay pale and flat | The skillet is not hot enough | Preheat the pan longer and increase the heat slightly |
| The tortillas burn immediately | The skillet is too hot | Reduce the heat and let the skillet cool for 30–60 seconds |
| The tortillas are hard or brittle | They were rolled too thick, cooked too long, or left uncovered | Roll thinner, shorten the cooking time, and stack immediately beneath a towel |
| Raw flour burns in the skillet | Too much flour was used while rolling | Use minimal flour and wipe the skillet clean between batches |
| The tortillas do not puff | Uneven rolling, low skillet temperature, or small tears in the dough | Roll evenly and verify the skillet is fully heated, but remember that full puffing is not required |
Quick Troubleshooting
If something doesn’t look or feel quite right, don’t worry. Most tortilla problems can be corrected with a small adjustment rather than starting over.
If the Dough Is Too Dry
Wet your fingertips with warm water and knead the dough for 30 seconds. Repeat once or twice only as needed, then cover and rest it for 10 minutes before evaluating the texture again.
If the Dough Is Too Sticky
Allow it to rest for 10 minutes first because freshly mixed flour may still be absorbing moisture. If it remains difficult to handle, knead in 1 tablespoon of flour and reassess before adding more.
If a Tortilla Tears While Rolling
Pinch the tear closed and roll gently over the repaired area. If several portions tear, the dough is probably too dry and needs a small amount of additional water.
If a Tortilla Sticks to the Counter
Slide a bench scraper underneath it, dust the surface very lightly with flour, and continue rolling. Avoid pulling it upward forcefully because thin dough stretches and tears easily.
If the First Tortilla Is Pale and Dry
Increase the heat slightly before cooking the next one. The goal is to cook each side quickly enough to brown while the interior still retains moisture.
If the First Tortilla Burns
Remove the skillet from the burner for 30–60 seconds, reduce the heat, and brush away any burned flour before continuing.
If the Cooked Tortillas Feel Stiff
Stack them while still warm beneath a clean towel and leave them covered for 10 minutes. The trapped steam can soften tortillas that were only slightly overcooked.
If the Tortillas Are Still Too Firm After Resting
Wrap the tortilla in a barely damp paper towel and microwave it briefly according to the wattage guidance in the How to Reheat section. Begin with approximately half the time listed for a stack, check the texture, and serve immediately once warm and flexible.
Sourdough Discard Tortillas vs. Traditional Flour Tortillas
While both styles produce delicious homemade tortillas, using sourdough discard changes the dough in subtle but noticeable ways. Here’s how the two compare side by side.
| Feature | Sourdough Discard Tortillas | Traditional Flour Tortillas |
|---|---|---|
| Flavor | Mildly complex with a subtle fermented depth | Clean, neutral, and primarily influenced by the chosen fat |
| Texture | Soft, flexible, and gently chewy | Soft and tender, depending heavily on hydration and fat |
| Main Liquid | Sourdough discard plus warm water | Usually warm water or milk |
| Fermentation Required | No long fermentation is required | No fermentation is required |
| Dough Behavior | The discard adds hydrated flour and mild fermented flavor, while the resting periods do most of the work of relaxing the dough. | May spring back more if it has not rested sufficiently |
| Food-Waste Benefit | Uses excess starter that might otherwise be discarded | Does not use sourdough starter |
| Best Choice For | Sourdough bakers who want flavorful, practical everyday tortillas | Cooks who want a classic tortilla without maintaining starter |
Both versions can produce excellent tortillas. The sourdough discard version is especially useful when you want to reduce starter waste while adding a little more flavor and tenderness to an everyday kitchen staple.
Beautiful Ways to Serve Sourdough Discard Tortillas
Fresh homemade tortillas have a way of making even the simplest meal feel special. Their soft texture and delicate toasted flavor pair beautifully with everything from classic tacos to hearty breakfast wraps, and they taste their absolute best while still slightly warm.
If you’re making these for family taco night, stack the warm tortillas inside a towel-lined basket and let everyone build their own meal. Serve them with fluffy coconut rice for a more substantial taco or burrito bowl. If you’re meal prepping lunches for the week, allow the tortillas to cool completely before filling them so they stay soft without becoming soggy.
Classic Taco Night
Fill the warm tortillas with seasoned beef, shredded chicken, carnitas, grilled shrimp, or roasted vegetables. Finish with crisp lettuce, diced tomatoes, avocado, fresh cilantro, salsa, and a squeeze of lime for a colorful meal that feels fresh and satisfying.
Breakfast Burritos
Wrap fluffy scrambled eggs with crispy bacon or breakfast sausage, roasted potatoes, cheddar cheese, and fresh salsa. The tortillas stay flexible enough to roll tightly without tearing, making them perfect for hearty breakfast burritos.
For larger burritos, divide the dough into 8 portions instead of 10 before rolling.
Loaded Quesadillas
Layer shredded cheese between two tortillas with cooked chicken, sautéed mushrooms, caramelized onions, or roasted peppers. Cook until the outside turns lightly crisp while the cheese becomes perfectly melted.
Fresh Sandwich Wraps
Spread hummus, cream cheese, or avocado over the tortilla, then add sliced turkey, grilled chicken, leafy greens, and herbs. For a brighter vegetarian filling, pair avocado and greens with this fresh mango salad. Roll the tortilla tightly for an easy lunch that holds together without cracking.
Simple Butter and Sea Salt
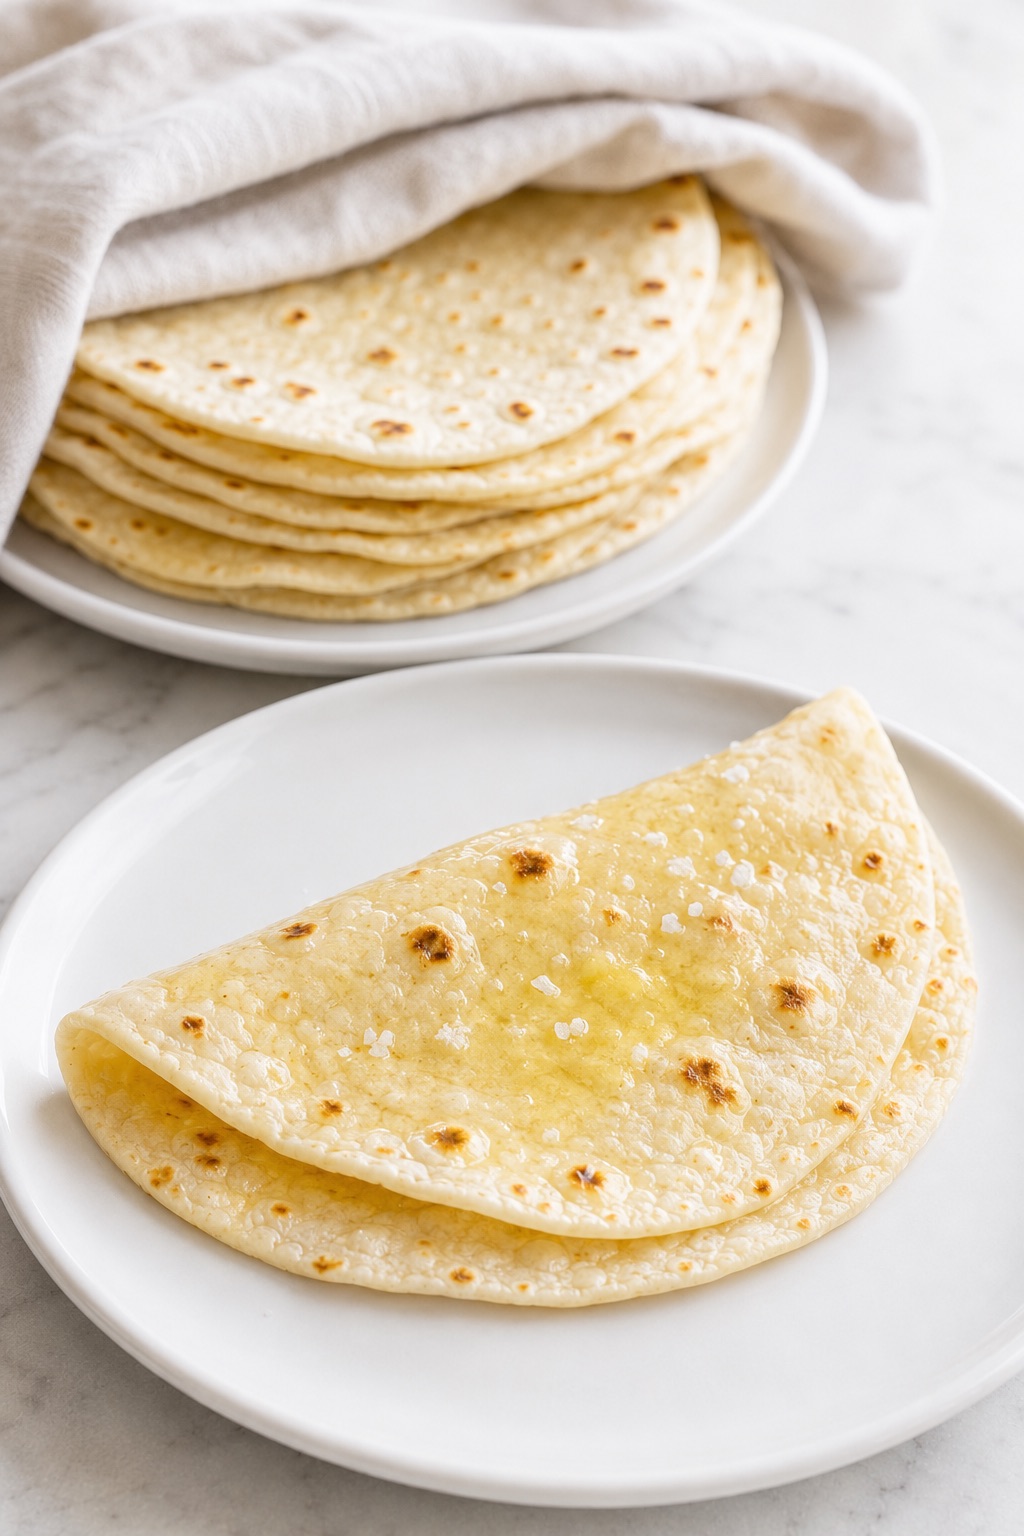
Sometimes the best way to appreciate homemade tortillas is also the simplest. Brush a warm tortilla lightly with butter, sprinkle with flaky sea salt, fold it in half, and enjoy it while it’s still steaming.
Save this recipe for busy weeknights, backyard cookouts, family taco bars, and weekend brunches. Homemade tortillas elevate almost every meal they accompany.
Storage & Make Ahead
One of the biggest advantages of homemade sourdough discard tortillas is how well they store. When handled properly, they remain soft for several days and freeze exceptionally well for future meals.
At Room Temperature
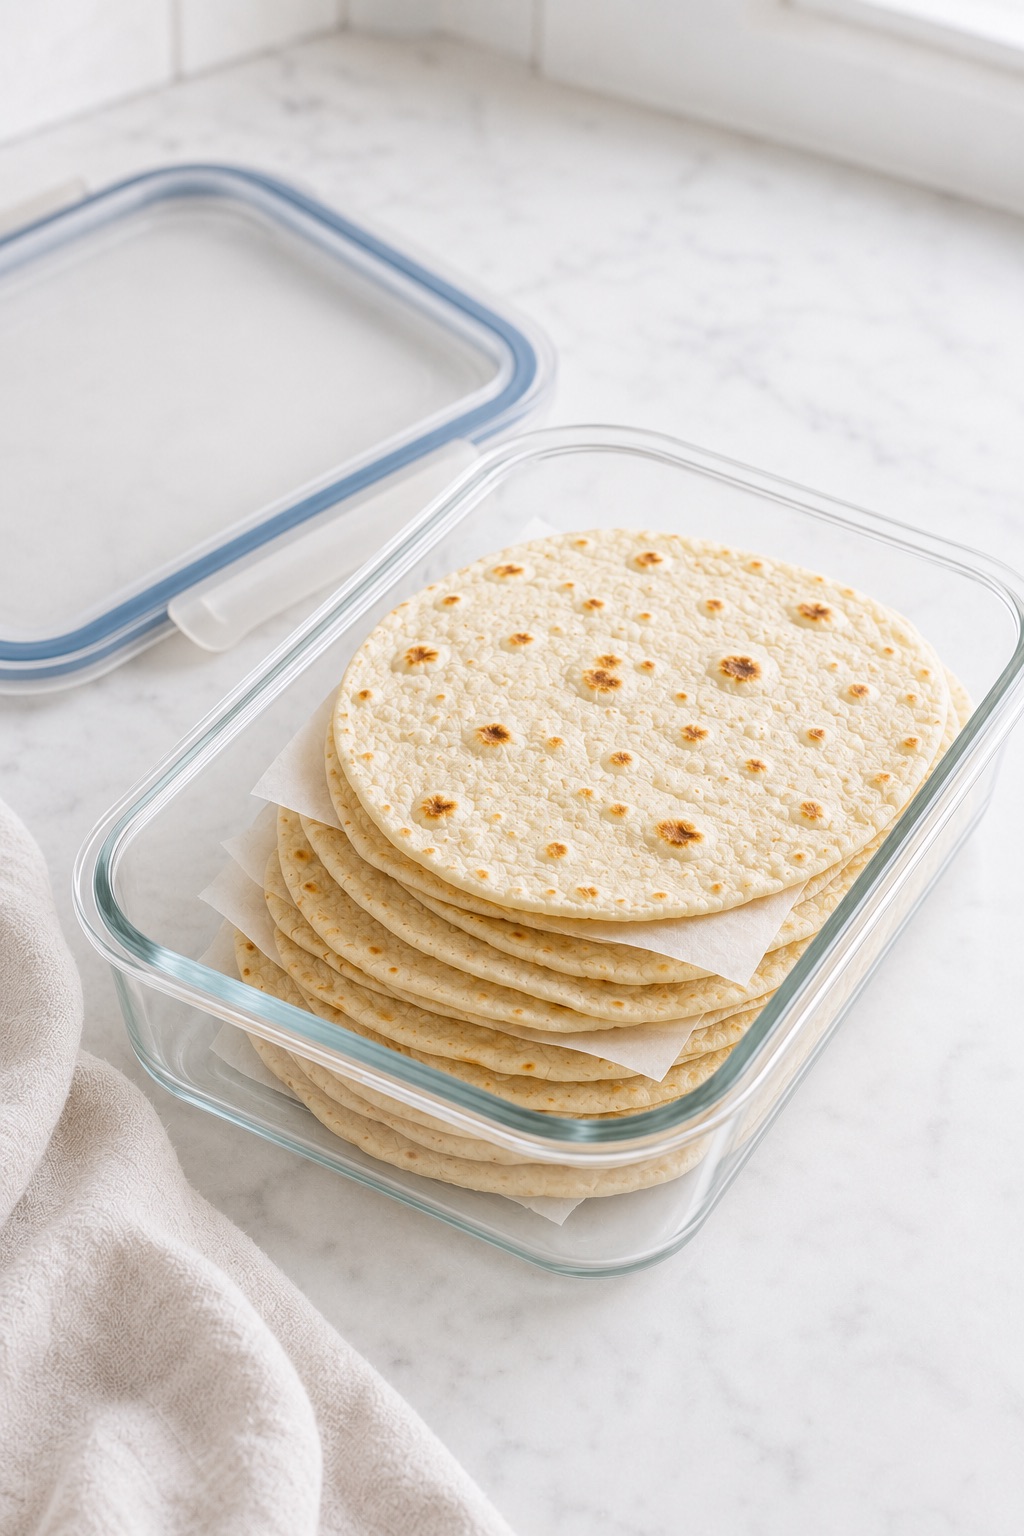
Allow the tortillas to cool completely before storing them.
Place them in an airtight container or resealable bag and keep them at room temperature for up to 2 days.
Leaving even a little trapped steam inside the container can create unwanted condensation, so make sure the tortillas are completely cool before sealing.
Refrigerator
Store the cooled tortillas in an airtight container for up to 5 days.
Separate large stacks with parchment paper if desired to make them easier to remove individually.
Freezer
These tortillas freeze remarkably well.
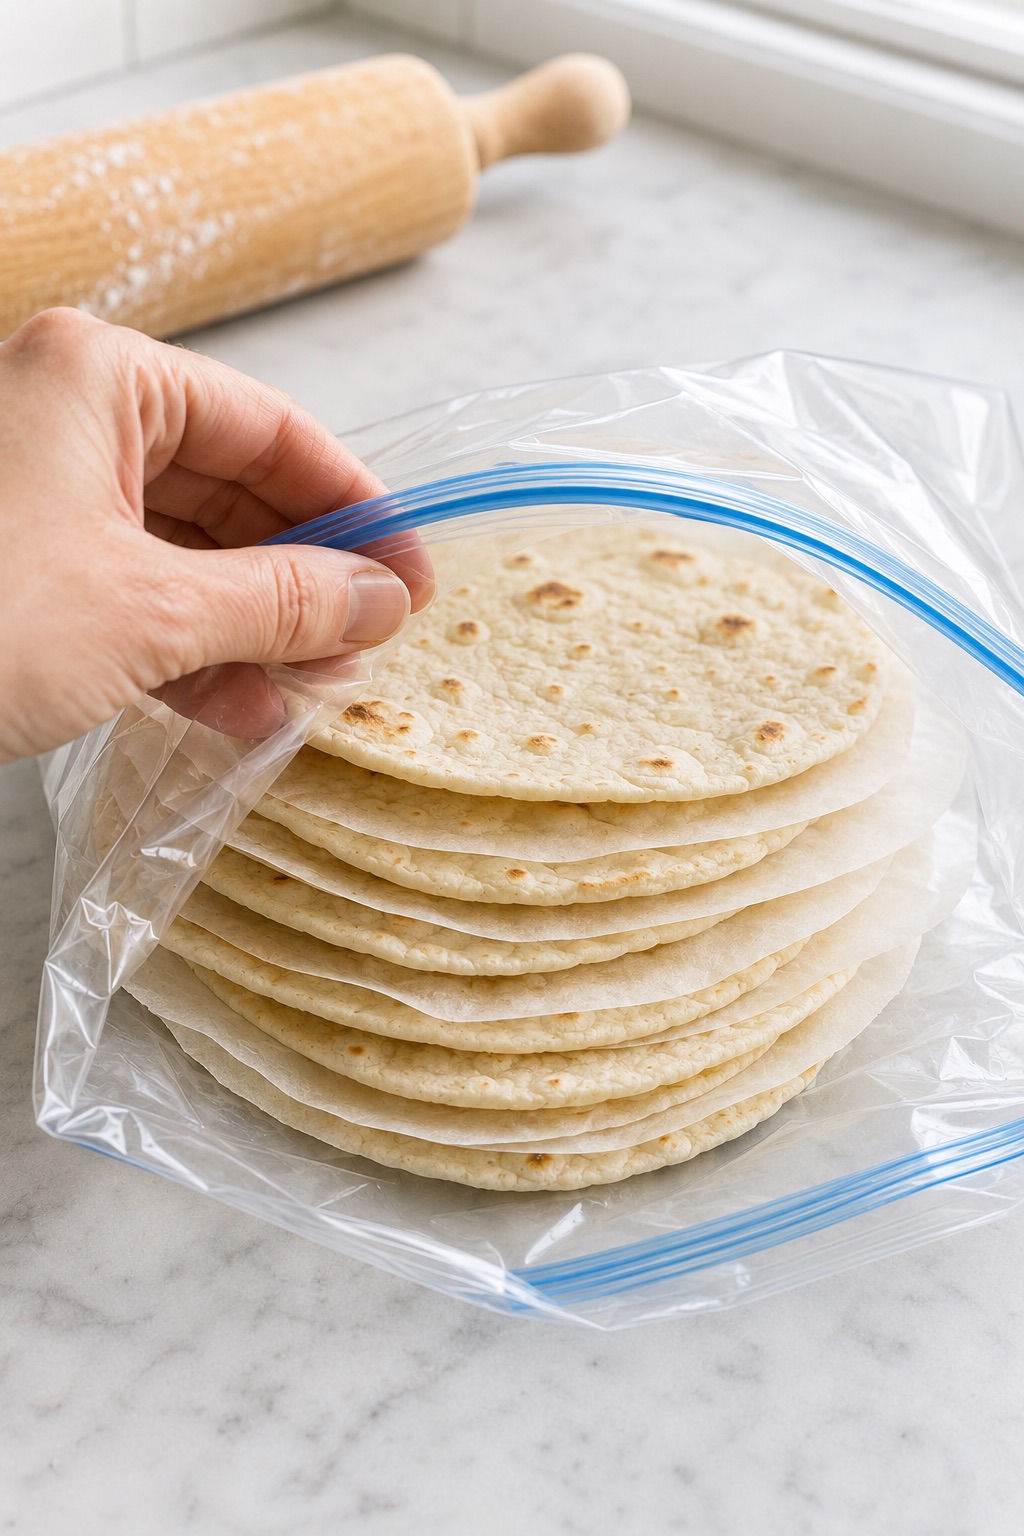
Place parchment paper between each tortilla, stack them, wrap tightly, and freeze inside a freezer-safe bag or airtight container for up to 3 months.
Removing only the number of tortillas you need prevents repeated thawing and freezing of the remaining stack.
How to Reheat
Skillet: Heat each tortilla in a dry skillet over medium heat for 15–20 seconds per side.
Oven: Wrap a stack in foil and warm at 300°F (150°C) for about 10 minutes.
The skillet produces the freshest flavor, while the microwave is ideal when reheating several tortillas quickly.
Microwave: Stack 3–4 tortillas, wrap them in a barely damp paper towel, and microwave until warm and flexible. Begin with the time recommended for your microwave:
- 700 W: 25–30 seconds
- 800 W: 20–25 seconds
- 1000 W: 15–20 seconds
- 1200 W: 12–15 seconds
Check the center of the stack, then continue in 5-second intervals only if needed. Keep the tortillas covered until serving; overheating can make the edges firm as they cool. For one tortilla, begin with approximately half the listed time.
Variations
Once you’re comfortable with the basic dough, it’s easy to adapt the recipe to different flavors and ingredients. These variations keep the same soft texture while giving you plenty of ways to make the recipe your own.
Whole Wheat Sourdough Discard Tortillas
Replace up to half of the all-purpose flour with whole wheat flour. For this variation only, begin with the full 150 ml water allowance. After a 10-minute rest, add up to 1 additional tablespoon if the dough still feels dry.
Garlic Herb Tortillas
Add 1 teaspoon of garlic powder along with 1 tablespoon of finely chopped fresh parsley, cilantro, or chives for extra flavor that pairs beautifully with grilled meats and roasted vegetables.
Cheesy Tortillas
Mix in 1/4 cup finely grated Parmesan and reduce the fine salt to 3/4 teaspoon. Add 1–2 teaspoons extra water only if the dough feels dry.
Spicy Tortillas
Stir 1/2 teaspoon of smoked paprika, chipotle powder, or chili powder into the dry ingredients for tortillas with gentle warmth and smoky depth.
Extra Buttery Tortillas
Brush each finished tortilla lightly with melted butter immediately after cooking before stacking them beneath the towel. The added butter creates an even softer texture and richer flavor.
Frequently Asked Questions
These are the questions readers ask most often after making homemade sourdough discard tortillas for the first time.
Can I use active sourdough starter instead of discard?
Yes. Active starter works just as well because the tortillas are not relying on fermentation for their rise. The flavor may be slightly milder if the starter was recently fed.
Does the discard make the tortillas taste sour?
No. Most people notice only a gentle depth of flavor rather than a pronounced sour taste. Discard that has been refrigerated for several days may taste slightly tangier, but the tortillas remain mild overall.
How old can the sourdough discard be?
Use discard that smells pleasantly tangy, yeasty, or mildly alcoholic. Do not use it if it shows mold, pink or orange discoloration, or a rotten odor.
Why didn’t my tortillas puff?
Complete puffing depends on even rolling, proper skillet temperature, and good steam formation. Many excellent homemade tortillas never fully inflate yet remain soft and delicious.
Can I use cold sourdough discard?
Yes. Cold discard can be used straight from the refrigerator. Stir it well before weighing, then use warm water within the stated temperature range so the dough comes together smoothly.
Can I make these without baking powder?
Yes. The tortillas will still cook successfully, although they may have a slightly denser texture and fewer air pockets.
Which fat makes the softest tortillas?
Lard traditionally produces exceptionally tender tortillas, while butter provides richer flavor and oil offers excellent flexibility. All three produce delicious results.
Can I refrigerate the dough overnight?
Yes. After kneading, cover the dough tightly and refrigerate it for up to 24 hours. Let it sit at room temperature for 20–30 minutes, divide it into portions, and rest the dough balls for 20 minutes before rolling.
Continue Your Homemade Sourdough Journey
If you enjoy baking with sourdough, there are plenty of other ways to put your starter to good use. These recipes continue naturally from homemade tortillas, whether you want another discard recipe, a simple dough to practice, or a fresh side for your next tortilla meal.
More Sourdough Recipes to Try
When your discard jar starts filling again, these recipes give you reliable ways to turn it into something genuinely useful, from quick breakfasts to soft homemade treats.
- Sourdough Discard Pancakes — Light, fluffy pancakes that turn extra starter into an easy family breakfast.
- Sourdough Discard Cinnamon Rolls — Soft, gooey cinnamon rolls with incredible homemade flavor.
- Sourdough Chocolate Chip Cookies — A delicious way to use discard in rich, bakery-style cookies.
- How to Make Sourdough Starter — Perfect if you’re just beginning your sourdough journey.
Homemade Breads and Breakfast Favorites
If rolling and cooking these tortillas makes you want to try another simple dough, these recipes are natural next steps for expanding your homemade breakfast and bread routine.
- Sourdough English Muffins — Soft, chewy homemade English muffins with classic sourdough flavor.
- English Muffin Recipe — A classic yeast version that’s perfect for breakfast sandwiches.
- Buttermilk Biscuits — Flaky homemade biscuits that pair beautifully with almost any meal.
- Homemade Cinnamon Rolls — A bakery-style breakfast everyone loves.
Easy Side Dishes for Homemade Tortillas
Homemade tortillas are even better when paired with fresh, colorful sides that balance rich fillings and turn tacos, wraps, or quesadillas into a complete meal.
- Coconut Rice — A simple side dish that pairs beautifully with tacos, wraps, and burrito bowls.
- Mango Salad — Fresh, colorful, and perfect inside wraps or alongside grilled tortillas.
- Fruit Salad — A refreshing side for brunches or lighter tortilla meals.
- Sweet Potato Salad — A hearty side that works well with tacos, quesadillas, or burritos.
Whether you continue with another sourdough recipe or build a complete meal around these tortillas, each recipe gives you another practical way to make more food from scratch with confidence.
Why This Recipe Belongs in Your Recipe Box
Some recipes solve more than one problem at the same time, and these sourdough discard tortillas are a perfect example.
- Reduces Food Waste. They transform extra sourdough discard into something genuinely useful instead of throwing it away.
- Everyday Versatility. One batch works for breakfast, lunch, dinner, snacks, and meal prep.
- Simple Ingredients. Everything comes from basic pantry staples you probably already keep on hand.
- Beginner Friendly. The dough is forgiving, making it an excellent introduction to homemade flatbreads.
- Freezer Friendly. A single batch can provide homemade tortillas for several future meals.
- Reliable Results. Once you learn the dough texture and skillet temperature, the recipe becomes wonderfully consistent.
- Worth Repeating. It’s one of those dependable kitchen staples you’ll reach for whenever your sourdough jar starts filling with discard.
Final Thoughts
Homemade sourdough discard tortillas are proof that some of the most satisfying recipes begin with ingredients that might otherwise be overlooked. Instead of treating sourdough discard as something to throw away, this recipe turns it into warm, tender tortillas that can anchor countless family meals throughout the year.
The more often you make them, the more intuitive the process becomes. You’ll recognize the perfect dough texture by touch, know exactly when the skillet is ready, and soon you’ll be rolling tortillas almost without thinking. That kind of quiet confidence is one of the greatest rewards of cooking from scratch.
Great homemade food isn’t always about mastering complicated techniques. Often, it’s about understanding a few simple ingredients well enough to transform them into something comforting, practical, and worth sharing. These sourdough discard tortillas are exactly that kind of recipe—one you’ll come back to every time your sourdough jar starts filling up again.

Sourdough Discard Tortillas
Soft, flexible sourdough discard tortillas with a mild buttery flavor and subtle sourdough depth. They roll easily, cook quickly in a dry skillet, and stay tender enough for tacos, wraps, quesadillas, and meal prep.
Ingredients
- 2 1/2 cups (300 g) all-purpose flour
- 1 teaspoon (6 g) fine salt
- 1 teaspoon (4 g) baking powder
- 1/2 cup (120 g) sourdough discard, 100% hydration and stirred well
- 1/4 cup (57 g) unsalted butter, softened
- 1/2 cup plus 1 tablespoon (135 ml) warm water, 105–115°F (40–46°C)
- Up to 1 additional tablespoon (15 ml) warm water, only if needed
Instructions
- In a large mixing bowl, whisk together the all-purpose flour, salt, and baking powder until evenly distributed.
- Add the softened butter. Rub it into the flour with your fingertips or a pastry cutter until the mixture resembles coarse, slightly damp sand.
- Add the sourdough discard and 1/2 cup plus 1 tablespoon (135 ml) warm water. Stir until a rough, shaggy dough forms. If dry flour remains after one minute, add more warm water 1 teaspoon at a time, using no more than 1 additional tablespoon (15 ml).
- Turn the dough onto a clean work surface and knead for 2–3 minutes, until smoother, elastic, and only faintly tacky. It should not cling heavily to your hands or work surface.
- Shape the dough into a ball, return it to the bowl, and cover tightly. Let it rest at room temperature for 30 minutes.
- Divide the dough into 10 equal portions, approximately 62–64 g each. Shape each portion into a smooth ball, cover with a towel, and rest for another 20 minutes.
- Near the end of the second rest, preheat a dry cast-iron or heavy stainless-steel skillet over medium-high heat for 4–5 minutes. Do not add oil or butter.
- Lightly flour the work surface and rolling pin. Roll one dough ball from the center outward into a thin circle approximately 7 inches (18 cm) across. Use only enough flour to prevent sticking.
- Place the tortilla in the hot dry skillet. Cook the first side for 20–30 seconds, until the surface becomes opaque, small bubbles appear, and the underside develops scattered golden-brown spots.
- Flip and cook the second side for 15–25 seconds. Flip once more and cook for another 5–10 seconds only if the first side still appears undercooked.
- Transfer the tortilla immediately to a tortilla warmer or towel-lined plate and cover it. Repeat with the remaining dough, stacking each cooked tortilla beneath the towel. Let the covered stack rest for 5–10 minutes before serving.
Notes
- Use sourdough discard at 100% hydration and stir it well before measuring. Cold discard can be used directly from the refrigerator. Active starter also works.
- Begin with 135 ml water. Add extra water only if dry flour remains, 1 teaspoon at a time, up to 15 ml total.
- The dough should be soft and slightly tacky, not stiff or crumbly. Avoid adding unnecessary flour.
- The butter can be replaced with 57 g lard or 50 g neutral oil.
- Cook the tortillas in a completely dry skillet. They are done when opaque, flexible, and marked with scattered golden spots; full puffing is not required.
- Cool completely before storing. Keep airtight for up to 2 days at room temperature, 5 days refrigerated, or 3 months frozen with parchment between the tortillas.
- To reheat, warm each tortilla in a dry skillet for 15–20 seconds per side. For the microwave, wrap a stack of 3–4 tortillas in a barely damp paper towel and heat for 25–30 seconds at 700 W, 20–25 seconds at 800 W, 15–20 seconds at 1000 W, or 12–15 seconds at 1200 W. For one tortilla, begin with approximately half the listed time. Alternatively, warm a foil-wrapped stack at 300°F (150°C) for approximately 10 minutes.
Nutrition Information:
Yield: 10 Serving Size: 1 tortillaAmount Per Serving: Calories: 172Total Fat: 5gSaturated Fat: 3gUnsaturated Fat: 2gCholesterol: 12mgSodium: 285mgCarbohydrates: 28gFiber: 1gProtein: 4g
Nutrition information is provided as an estimate only and may vary based on specific ingredients, brands, and portion sizes used. This information should not be considered medical or nutritional advice.
12 Sweet Favourites — Yours, Free 🍰
Tiramisù, no-bake cheesecake, the perfect chocolate chip cookie & 9 more reader-loved desserts — gathered into one beautiful free recipe book. From my kitchen to yours.
No spam, just sweet things. Unsubscribe anytime.