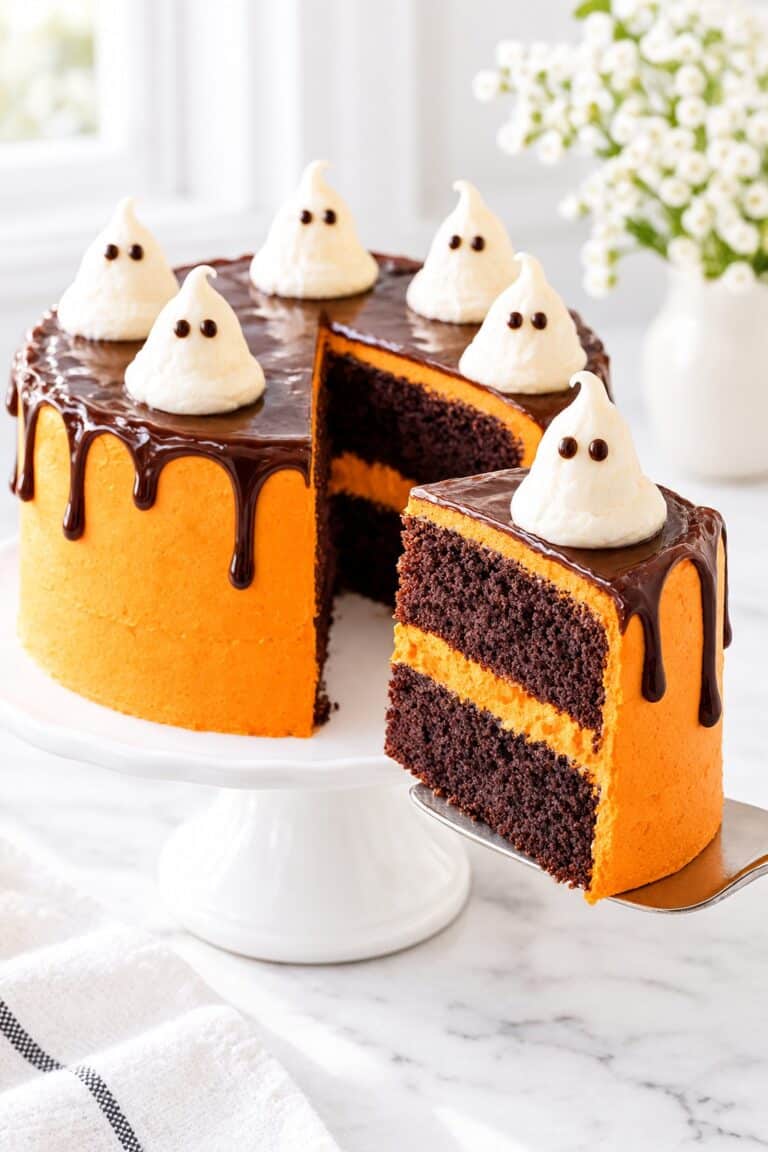
Halloween Cupcakes with Chocolate Cake and Vanilla Buttercream
🎁 FREE E-BOOK: 12 Sweet Favorites — reader-loved desserts in one beautiful recipe book.
Halloween cupcakes with tender chocolate cake, orange vanilla swirls and little white buttercream ghosts bring two recognizable designs to one twelve-cupcake batch. The chocolate stays in the cake; both colors of frosting taste like sweet vanilla, with mini chocolate chips giving each ghost its face.

The familiar chocolate-and-vanilla pairing makes the decorations feel playful without changing the dessert underneath. A white ghost beside an orange swirl is enough to give a shared tray a Halloween mood, whether the occasion is a small party or an afternoon spent decorating together.
Keep this Halloween cupcakes recipe for the two-design decorating plan: one measured buttercream batch becomes orange swirls and little white ghosts. The same cake supports both finishes, and the component-ahead option makes the decorating session easier to arrange around a party.
Halloween Cupcakes at a Glance
Plan on twelve Halloween cupcakes: six orange swirls and six short, pale buttercream ghosts. The time estimate includes cooling, so you can plan the decorating session around cakes that are ready for frosting.
| Field | What to expect |
|---|---|
| Texture | Moist, tender, cohesive chocolate cake with smooth, pipeable buttercream. |
| Flavor | Chocolate and sweet vanilla. Orange is coloring only, with no pumpkin or citrus flavor. |
| Difficulty | Easy baking with basic piping practice. |
| Time | 45 minutes prep + 22 minutes reference baking + 60 minutes cooling = 127 minutes (2 hours 7 minutes); allow about 2 hours 10 minutes. Bake range: 20–24 minutes. |
| Servings | 12 standard cupcakes; one decorated cupcake per portion. |
| Method | Baking followed by buttercream piping. |
| Best For | Halloween parties, dessert trays and decorating sessions. |
| Pan | One standard 12-well metal muffin pan. |
| Decoration | Six orange open-star swirls and six white buttercream ghosts. |
| Make Ahead | Plain cakes and frosting can be prepared one day ahead. Keep cakes airtight in a cool room and frosting refrigerated; see the storage guidance below. |
Why This Halloween Cupcake Recipe Works
These Halloween cupcakes pair a tender, unfilled chocolate cake with buttercream decorations sized to suit it. The measured batter, completely cooled surface and short ghost shape support a neat finish without asking the cake to carry an oversized topper.
- A matched chocolate base. Natural cocoa, baking soda and the measured vinegar belong to the same batter. Keeping those ingredients together preserves the intended chocolate cake instead of treating every cocoa powder as interchangeable.
- Room for the cake to rise. Even, modest portions leave space above the batter. That helps produce low, rounded tops with enough usable surface for the decorations, rather than overflowing edges that are awkward to frost.
- A cool surface for the cream. Completely cooled cakes keep residual baking heat from immediately softening the buttercream. The frosting can then hold its ridges or broad ghost base where you pipe it.
- One frosting divided evenly. Splitting the buttercream into equal bowls gives both designs a measured share. Coloring only one half also keeps the ghosts pale without requiring a different topping with different handling needs.
- Proportionate shapes and faces. Moderate orange spirals and short ghosts fit the standard cupcake size. Three mini chips create a face without a heavy topper, while the broad ghost base supports the small taper above it.

Why You’ll Love These Halloween Cupcakes
Halloween cupcakes are useful when you want recognizable party decorations and a manageable kitchen project. This batch suits bakers who enjoy a little piping practice, but want the preparation, portions and packing to stay straightforward.
- A useful one-pan quantity. Twelve individual portions fit a small gathering or one dessert tray. You can see the whole batch at once while decorating, which makes alternating the orange and white designs easy to plan.
- Two looks from one bowl of frosting. Make the vanilla buttercream once, then divide and color it. You get variety on the tray without organizing two separate frosting recipes or coordinating different setting times.
- Clear jobs for two tips. The open-star tip makes the orange ridges; the large round tip makes the ghost body. Mini chips finish the faces, so the project does not depend on sculpted fondant or elaborate edible toppers.
- A flexible decorating session. Preparing the cakes and frosting the day before lets you reserve the next session for mixing the cream back to a pipeable texture and finishing the designs. That is helpful when the party day already has other cooking.
- Portions ready to share. Halloween cupcakes can go straight onto a platter or into a box with individual supports and enough lid clearance. Guests can choose a swirl or a ghost without cutting a larger cake.
The Baking Science Behind Moist Chocolate Cupcakes
Natural cocoa and vinegar work with baking soda in the chocolate cake, oil contributes to its tenderness after cooling, and the buttercream’s temperature affects how well the ghosts stand. Understanding those relationships helps you choose ingredients and judge frosting consistency.
Natural Cocoa, Vinegar and Baking Soda
Natural cocoa contributes acidity, and vinegar supplies another acidic ingredient. Baking soda reacts with acid to produce gas; during baking, the cake structure needs to set around that expansion. Changing the cocoa changes part of that balance, even though this batter also contains vinegar. Keep the specified cocoa and vinegar together rather than removing the vinegar because the cocoa tastes strong.
Oil and a Tender Cooled Crumb
Neutral oil remains liquid as the cupcakes cool, contributing to a tender eating texture. It does not replace the flour and egg structure that helps the crumb hold together beneath the cream. Too much flour or a prolonged bake can still make an oil-based cake dry, so accurate flour measurement and a timely doneness check matter.
Buttercream Temperature and Piped Shape
American buttercream relies on softened butter, powdered sugar and a small amount of liquid. Butter that is overly warm offers less support, while extra milk makes the cream easier to move but can also loosen the shape. The useful balance is smooth flow under pressure with a ridge that remains standing after the pressure stops. Adding more air cannot correct frosting that is simply too warm.
Ingredients for Chocolate Cupcakes and Vanilla Buttercream
For Halloween cupcakes, measure the cake ingredients separately from the frosting ingredients before mixing. The orange and white Halloween cupcakes share the same cake and vanilla cream; only half the buttercream receives coloring.

Ingredient List
These amounts make twelve standard chocolate cupcakes, one batch of vanilla buttercream and eighteen mini-chip face pieces for six ghosts. Begin the buttercream with the listed two tablespoons of milk; the extra tablespoon is only for adjustment if needed.
Chocolate Cupcakes
- 1 1/8 cups (135 g) all-purpose flour, spooned and leveled if measured by cups
- 1 cup (200 g) granulated sugar
- 1/2 cup (42 g) unsweetened natural cocoa powder, sifted if lumpy
- 1 teaspoon baking soda
- 1/4 teaspoon fine salt
- 1/4 cup (60 ml) neutral oil, such as canola or sunflower oil
- 1 large egg (about 50 g without shell), at room temperature
- 1 1/2 teaspoons (7.5 ml) vanilla extract
- 1 teaspoon (5 ml) distilled white vinegar, approximately 5% acidity
- 3/4 cup (180 ml) water, at room temperature
Vanilla Buttercream
- 3/4 cup (170 g) unsalted butter, softened but still cool
- 3 cups (360 g) powdered sugar, sifted
- 2 tablespoons (30 ml) whole milk, at room temperature, plus up to 1 tablespoon (15 ml) if needed
- 1 teaspoon (5 ml) vanilla extract
- 1/8 teaspoon fine salt
Decoration
- Orange gel food coloring, as needed to tint half the buttercream
- 18 mini semisweet chocolate chips
Ingredient Choices That Protect the Crumb and Frosting
Choose unsweetened natural cocoa for these Halloween cupcakes. King Arthur Baking’s explanation of natural versus Dutch-process cocoa describes how alkalizing cocoa changes its acidity. Dutch-process cocoa also changes color and flavor; the vinegar in this recipe means the issue is more nuanced than saying every Dutch-cocoa cake will fail.
For the chocolate Halloween cupcakes, use a scale for the flour when possible. If measuring by cups, spoon it into the cup and level it without packing. Sift lumpy cocoa and powdered sugar so you do not need prolonged mixing to break up dry pockets.
The butter should yield to pressure while still feeling cool, with no oily surface. Orange gel gives a concentrated color without needing a large amount of watery coloring. Leave the ghost portion untinted; a slight natural butter color is normal. Use mini chips so the faces stay small, with each chip’s flat base facing outward.
The chocolate cake in these Halloween cupcakes is adapted from King Arthur Baking’s chocolate cupcake recipe. These Halloween cupcakes use vanilla buttercream decorations and have no caramel filling. They contain wheat, egg and milk; check chocolate-chip labels for soy and other ingredients relevant to your guests.

Tools for Baking and Decorating Halloween Cupcakes
A standard metal muffin pan gives these Halloween cupcakes their size; the round and open-star tips give the two decorations their different shapes. Have the following tools available before you mix the batter or make the frosting.
- Measuring: kitchen scale or US cups/spoons and liquid measure.
- Baking: standard 12-well metal muffin pan and 12 liners, approximately 2-inch base and 1 1/4-inch height.
- Mixing: two bowls, whisk, sieve and flexible spatula.
- Frosting/decorating: hand mixer or stand mixer with paddle, two piping bags, large open-star tip and large round tip with roughly 1/2-inch (12–13 mm) opening.
- Cooling/checking: wire rack and toothpick or cake tester.
Before You Mix and Pipe
Before making Halloween cupcakes, check the cake pan, butter and cooling space. These conditions affect the batter allocation and whether the frosting will be ready to pipe later.
- The pan has twelve standard metal wells holding roughly 85–100 ml, with liners approximately 2 inches across the base and 1 1/4 inches high.
- The egg and milk are at room temperature, while the softened butter still feels cool and has no oily surface.
- A wire rack has enough clear space for all twelve cupcakes to cool outside the pan.
- Two separate piping bags fit the large open-star tip and a large round tip with roughly a 1/2-inch opening.
- Your schedule leaves time for the center and base of each cupcake to cool completely before decoration.
What to Expect from the Batter, Crumb and Buttercream
Expect a pourable chocolate batter, low rounded cake tops and pale, shape-holding buttercream for these Halloween cupcakes.
- Loose batter: it flows from the bowl; it is not meant to have the thickness of brownie batter.
- Modest cake tops: a low dome gives the decorations a usable surface, so a dramatic muffin-like crown is not the goal.
- A tender cake crumb: small natural pores and a cohesive interior are normal, rather than a dense, wet brownie center.
- Pale ghost frosting: untinted buttercream may be ivory because of the butter and vanilla; it need not be bright white to look right.
The white ghosts are piped vanilla buttercream, rather than marshmallow toppers. Orange changes the color of the other half of the frosting; both designs keep the same vanilla flavor.
How to Make Halloween Cupcakes
Make the chocolate batter, bake and cool the cakes, then prepare the vanilla buttercream and pipe the two designs. Keep decorating after complete cooling so the cake’s remaining heat does not soften the frosting.
1. Prepare the Oven and Mix the Chocolate Batter
For evenly baked Halloween cupcakes, start with a fully preheated conventional oven and a lined pan. Mixing the dry ingredients evenly before adding the liquid helps distribute the cocoa and baking soda without prolonged whisking later.
- Heat the oven to 350°F (175°C) with a rack in the center. Line all twelve wells of the standard metal muffin pan.
- In one bowl, whisk together the flour, granulated sugar, cocoa, baking soda and cake salt until uniformly combined. Sift lumpy cocoa first.
- In a second bowl, whisk the oil, egg, cake vanilla, vinegar and water until the egg is fully dispersed.
- Add the wet mixture to the dry mixture. Whisk gently until no dry pockets remain, scraping the bowl once with the flexible spatula. Stop when combined rather than continuing to beat the batter.


What you should see: An evenly chocolate-colored, pourable batter with no visible flour pockets or streaks of egg.

2. Portion and Bake the Cupcakes
Keep the Halloween cupcakes evenly portioned and leave headroom in each liner. The clock gives a checking window; the center of the cake determines when the pan is ready to come out.
- Divide the approximately 681 g of batter among the liners, about 55–57 g each, filling no more than two-thirds full. If your wells are smaller, put excess batter into another lined well instead of forcing it into the twelve. Bake immediately.
- Bake for 20–24 minutes, beginning the check at 20 minutes. A tester in the center should come out clean or with a few moist crumbs, without liquid batter. The top should spring back lightly and retain its shape.

What you should see: Low, rounded tops that stay raised when lightly touched, with set centers and no liquid batter on the tester.

3. Cool the Cupcakes Completely
Cooling is part of the preparation time for Halloween cupcakes. A top that feels cool can still cover a warm center, so check the base as well before reaching for the buttercream.
- Leave the cakes in the pan for 10 minutes, then transfer them to a wire rack for about 50–65 more minutes, or longer if needed. Wait until the center and base are completely cool.
What you should see: Cupcakes that hold together when moved, with no remaining warmth at the base and no steam collecting around the liners.

4. Make and Divide the Vanilla Buttercream
Aim for cream that moves smoothly through the bag and keeps its shape afterward. Start with the smaller milk amount and judge the frosting before making an adjustment.
- Beat the softened, still-cool butter for 2–3 minutes until smoother and paler. Add the powdered sugar gradually on low speed. Add 30 ml milk, the frosting vanilla and frosting salt; mix on medium for about 2–3 minutes. Finish on low for roughly 1 minute, then stir with a spatula to reduce large air pockets.
- Test a small piped ridge. It should hold without slumping, while the frosting flows under steady pressure. If too stiff, add milk 5 ml at a time, using no more than 45 ml total. If too soft, cool it briefly, stir and reassess before making another adjustment.
- Divide the buttercream equally by weight into two bowls, approximately 283–290 g per bowl depending on milk used. Tint one half orange with small additions of gel coloring and leave the other half untinted. Fill two separate bags, using the open-star tip for orange and the large round tip for white.

What you should see: Smooth frosting, orange in one bowl and pale in the other, with a test ridge that remains distinct. Plan about 40–45 g per cupcake, leaving a little frosting for bag loss.

5. Pipe the Orange Swirls
On the orange Halloween cupcakes, a moderate spiral leaves the chocolate cake and frosting in balance. Keep the motion steady and finish the pressure before lifting so the final point does not stretch into a long tail.
- On six completely cooled cupcakes, pipe one orange spiral with the open-star tip, beginning near the outer edge and moving inward. Stop squeezing before lifting the tip away.
What you should see: Six orange Halloween cupcakes with distinct ridges and a centered finish, without a tall stack of cream.

6. Pipe the White Ghosts and Add Their Faces
On the white Halloween cupcakes, the ghost stands on its own broad base on the cake. Keep the body short and tapered so its small peak stays above the face without leaning over.
- Hold the large round tip upright over each of the remaining six cupcakes. Pipe a broad base, then reduce pressure while building a short taper. Stop squeezing and lift to leave a small peak. Press three mini chips into each ghost for two eyes and one mouth, placing the flat bases outward.

What you should see: Six short pale ghosts, each with a supported base, a small peak and three distinct face pieces. No ghost sits on an orange swirl.

7. Arrange or Pack the Finished Cupcakes
The decorated Halloween cupcakes can be served once the frosting is in place. Packing needs protection from movement and lid contact, especially around the ghost peaks.
- Arrange the cupcakes on a tray, or place them in a tall covered carrier with individual supports. If transport requires firmer frosting, refrigerate until it resists light movement. Allow extra time for that optional transport chill.
What you should see: A twelve-cupcake batch with six orange swirls and six white ghosts, separated enough that the frosting does not touch its neighbors or the lid.

How to Tell When the Cupcakes and Frosting Are Ready
Begin checking the Halloween cupcakes at 20 minutes, and combine the center tester, springback and retained shape before taking the pan out. After piping, frosting readiness is a separate check: it must flow smoothly while keeping the intended ridges and short ghost peaks.
| State | What you see or feel | What it means | Next decision |
|---|---|---|---|
| Ready cake | A center tester is clean or carries a few moist crumbs; the top springs back lightly and holds its shape. | The center has set within the 20–24 minute bake window. | Remove the pan and begin the specified 10-minute pan cooling, followed by the rack. |
| Underbaked cake | Liquid batter on the tester, or a center that remains visibly unset. | The center needs more baking even if the edges look done. | Continue baking and check again; do not rely on cooling to finish a liquid center. |
| Overbaked cake | Once cooled, the crumb is dry and crumbly rather than moist and cohesive. | Baking beyond doneness or excessive flour can produce this texture. | Buttercream cannot restore the lost moisture; use an earlier check and accurate flour measurement next time. |
| Cooled cake | The base and center no longer feel warm; the crumb holds together when handled. | The cake is ready to carry buttercream without transferring residual baking heat to it. | Decorate only at this point; a cool top alone is not enough. |
| Ready buttercream | Smooth flow through the tip, a defined ridge and a short peak that remains upright. | The frosting can form both designs. | Pipe the batch with moderate shapes. |
| Buttercream too soft | A base spreads or a ridge disappears after pressure stops. | The cream cannot yet support the decoration. | Pause and reassess temperature and consistency before continuing. |
As the cakes cool, the crumb becomes easier to handle, but a gummy wet line through a cooled center is not normal tenderness. Keep the remaining cooling time on the rack; leaving the whole cooling stage in the hot pan is a different holding condition.
Tips for Neat Swirls and Upright Ghosts
Use the first small decoration on your Halloween cupcakes to decide whether the frosting or the piping motion needs attention. A spreading base and a stretched tail are different problems, even when both make a ghost look untidy.
The lesson I keep in mind with buttercream decorations is to check the frosting before changing the piping technique. If a ghost starts to slump, I check the frosting’s temperature and consistency first. A small test shape helps me decide whether it is ready before I decorate the whole batch.

- Read where the shape changes. Watch the base first, then the ridge or taper, and finally the peak. If the base spreads after pressure stops, changing the lifting motion cannot supply missing support. If the base holds but a tail stretches during the lift, end the pressure before moving the tip; this distinguishes frosting support from a finishing motion.
- Use frosting weight to diagnose oversized shapes. With equal halves of roughly 283–290 g, a very large first decoration reduces what is left for the other five. Compare its use with the 40–45 g allowance before carrying the same height across the batch. Reducing the shape’s volume preserves enough cream for a complete matching group without loosening it with more milk.
- Notice a change during the session. If an initially sound shape begins to lose definition later, frosting can have warmed while the bag was held. Recheck the cream before assuming your tip or technique has suddenly failed; pausing to restore its consistency can protect the remaining decorations.
For a fuller explanation of buttercream behavior, the buttercream consistency guide offers additional texture guidance alongside the small-shape check used for these Halloween cupcakes.
Common Halloween Cupcake Mistakes and How to Fix Them
With Halloween cupcakes, an overfilled liner, a warm cake and extra liquid in the buttercream produce different failures. Identify the action behind the symptom so the next correction addresses its cause.
| Mistake | What Happens | Why It Happens | How to Prevent or Fix It |
|---|---|---|---|
| Overfilling liners or ending the bake before the center sets | Tops can overflow, or the cake may sink. | Too little headroom or an unset center undermines the intended standard cupcake shape. | Keep the fill no higher than two-thirds and check the center as well as the edges; continue baking if the center is still unset during the bake. |
| Packing flour into the cup or baking too long | The cooled crumb is dry instead of tender. | Excess flour or moisture loss changes the eating texture. | Weigh the flour, or spoon and level it, and begin checking at 20 minutes; frosting cannot restore an already dry cake. |
| Piping onto a cake that is still warm | Frosting can slide or lose definition. | Heat transfers from the cake to the buttercream. | Wait until both base and center are cool; pause decoration and cool the remaining cakes before continuing. |
| Using overly soft cream or a very tall ghost | The ghost spreads or leans. | A weak base or excessive height cannot support the taper. | Restore frosting consistency and use a broad base with a short taper; do not add more liquid to cream that is already loose. |
| Leaving sugar lumps or large air pockets in the frosting | Piping has gaps or a ragged surface. | Lumps interrupt the smooth flow, while air pockets can break the line. | Sift the powdered sugar and finish with low-speed mixing and a spatula stir; add milk only for genuine stiffness, within the stated maximum. |
| Pouring in watery food coloring | The orange frosting becomes too loose. | Additional liquid changes the consistency while the color is being adjusted. | Use concentrated orange gel gradually; if the cream loosens, pause and cool it before reassessing. |
Beautiful Ways to Serve Halloween Cupcakes
Serve Halloween cupcakes with the buttercream softened slightly from refrigerator temperature and the two designs clearly visible. A pale ghost beside an orange swirl makes an attractive contrast on a tray, at a place setting or inside a protected gift box.
An Orange-and-White Halloween Dessert Platter
Alternate the orange ridges and pale ghost faces on a simple white platter, leaving space around each decoration. The dark chocolate cake gives both colors a clear base, while a plain platter keeps the small faces easy to see. Bring the Halloween cupcakes out close to serving rather than leaving them in a warm room for a long display.

A Small Halloween Place Setting
Set one Halloween cupcake on a small dessert plate for each guest, alternating a ghost and an orange swirl around the table. Individual plates keep the frosting clear of neighboring portions and make the little faces visible from the seated guest’s side.
A Gift Box That Protects the Ghosts
Use a cupcake box with individual liner supports and a lid that clears the ghost peaks. Arrange the orange and white Halloween cupcakes in alternating positions so the box opens to both designs. Keep it level and cool during transport; firm frosting still needs clearance from the lid.

Pairings for a Mixed Halloween Dessert Table
Coffee or unsweetened tea provides a less-sweet drink beside the chocolate cake and sweet vanilla cream; cold milk gives a familiar, softer pairing. For another individual treat with a contrasting coating, Halloween cake pops bring a candy-coated finish to the same dessert table. Keep ingredient labels available for both desserts.
Keeping Halloween Cupcakes Fresh and Ready to Decorate
Keep plain cakes, prepared frosting and decorated Halloween cupcakes in their appropriate containers. The storage windows below describe best quality; a cold container also protects the buttercream shapes from warmth and contact.
Storage
Store completely cooled, plain cupcakes airtight in a cool room for up to one day before decorating. Store decorated Halloween cupcakes in a tall airtight container in the refrigerator at 40°F (4°C) or below, for up to three days for best quality. The lid should clear every peak.
Let refrigerated cupcakes stand for about 20–30 minutes before eating. Cold buttercream feels firmer; this normal change should ease as it softens slightly. Dried cake edges and crusted frosting indicate declining quality, while warmth can make the decorations slump. The three-day window refers to eating quality under the refrigerated storage conditions above.

Making the Components Ahead
Prepare the Halloween cupcakes and buttercream one day ahead when you want the decorating session to be separate from baking. Keep the plain cakes airtight in a cool room and refrigerate the cream airtight. Return the frosting to a pipeable consistency, remix gently and check a small shape before decorating; the cakes should remain cool.
Waiting to decorate reduces the handling and lid contact that finished ghosts would otherwise experience overnight. Refrigeration firms the buttercream, so the next session includes restoring its texture as well as piping. Fully decorated Halloween cupcakes can also be held in the refrigerator using the storage guidance above.
Planning Around a Halloween Party
For an example 4:00 p.m. serving time, begin a sequential batch of Halloween cupcakes at about 1:30 p.m. to leave room for the bake and cooling ranges. Full cooling still controls when decoration can begin. Add time before this plan if transport or an optional frosting-firming chill is needed.
| Moment / window | What to prepare | Readiness dependency | Hold / storage |
|---|---|---|---|
| About 1:30–2:10 p.m. | Mix and bake the cakes. | Allow the 15-minute batter preparation and 20–24 minute bake; doneness determines removal. | No batter hold: portion and bake immediately. |
| About 2:05–2:10 to 3:05–3:25 p.m. | Cool the cakes, including the initial 10 minutes in the pan. | The center and base must become completely cool before frosting. | After the pan interval, hold spaced on the wire rack; extend cooling if still warm. |
| Once cool, about 3:05–3:25 to 3:35–3:55 p.m. | Make the buttercream and decorate. | Allow about 15 minutes for cream and 15 for the two designs; check consistency before the full batch. | Keep finished portions clear of one another and of the carrier lid. |
| Around 4:00 p.m. | Serve the finished tray. | For a day-ahead refrigerated batch, bring the cakes out at about 3:30–3:40 p.m. for 20–30 minutes of tempering before the 4:00 p.m. serving time. | Keep out of heat; use protected refrigeration for longer holding. |
The reference total remains 45 minutes prep + 22 minutes baking + 60 minutes cooling = 127 minutes, about 2 hours 10 minutes. This example starts earlier to accommodate the 20–24 minute bake and roughly 60–75 minute overall cooling window. Making the frosting during cooling can shorten elapsed time by about 15 minutes; subtract that overlap only once. For a day-ahead route, use the component storage stop above and plan the final decorating session separately.
Freezing and Thawing Before Decoration
Freeze plain, completely cooled Halloween cupcakes individually wrapped and sealed airtight for up to two months for best quality. Thaw covered in the refrigerator overnight, then decorate. The plain-cake route avoids wrapping the delicate ghost peaks and face pieces, whose original appearance is less predictable after freezing and thawing.
Do not reheat decorated Halloween cupcakes: warmth softens the buttercream and can erase the designs. Tempering from refrigerator temperature is the serving step; it is not reheating.
Decoration Changes and Substitution Limits
Changing the allocation of the two decorations is simpler than changing the cake ingredients. Keep the chocolate base and vanilla buttercream as written when you want the result described for these Halloween cupcakes.
- All orange or all ghosts: use the frosting across twelve moderate decorations. For twelve ghosts, leave all the cream untinted and use 36 mini chips for the faces.
- Cocoa and flour: keep natural cocoa and all-purpose flour. Dutch-process or black cocoa changes the cake’s acidity, appearance and flavor; cake flour changes its structure. There is no one-for-one replacement instruction here.
- Liquid and fat: water and neutral oil are the starting ingredients. Coffee would change the flavor, and melted butter is not a direct equivalent of the oil amount.
- Other frostings: whipped cream and cream cheese frosting handle differently and should not be assumed to support these short piped ghosts in the same way.
- Other sizes: this recipe describes standard cupcakes. Mini wells need different portioning and baking time; do not carry the standard fill weights or bake window into a mini pan.
Questions About Making Halloween Cupcakes
Halloween cupcakes can be made ahead, but a larger batch or a smaller pan changes the planning. Keep the cake size, buttercream consistency and storage conditions in mind when deciding how to prepare your tray.
Can I Make Halloween Cupcakes the Day Before?
Yes. For the clearest Halloween cupcakes decorating session, prepare the plain cakes and frosting one day ahead and finish the designs the next day. You can also refrigerate the decorated batch in a tall airtight container; protect the peaks and allow 20–30 minutes of tempering before eating.
Why Is My Buttercream Too Soft to Hold a Ghost Shape?
If the ghosts on your Halloween cupcakes slump, check cake warmth, very soft butter and excess milk first. A ghost needs cream that holds a ridge after piping, not just cream that moves easily through the tip. Pause, cool the frosting briefly, stir and try a short test shape before changing your piping pressure.
What Piping Tip Do I Need for Ghost Cupcakes?
Use a large round tip with roughly a 1/2-inch (12–13 mm) opening for the short ghosts on these Halloween cupcakes. The orange swirls use a separate large open-star tip. Both designs use the same vanilla buttercream, divided into untinted and orange portions.
Why Did My Chocolate Cupcakes Sink?
For sunken Halloween cupcakes, overfilled liners and an underbaked center are two likely causes, though sinking can have several explanations. Keep each well no more than two-thirds full and check the center tester, springback and retained shape together. Avoid assuming a browned edge means the center has finished baking.
Can I Make 24 Halloween Cupcakes?
Yes, prepare two measured twelve-cupcake batches. With the same decoration split, twenty-four Halloween cupcakes need twelve orange swirls, twelve ghosts and 36 mini chips. Allow for the extra baking and cooling; the one-pan time estimate does not cover two sequential batches.
Can I Freeze the Cupcakes Before Decorating?
Yes. Freeze fully cooled, undecorated Halloween cupcakes wrapped individually and sealed airtight, for up to two months for best quality. Thaw them covered in the refrigerator overnight, then decorate. That is the more practical route when you want intact faces and clean frosting peaks.
Are the Ghosts Marshmallow or Meringue?
The ghosts on these Halloween cupcakes are vanilla American buttercream, with mini chocolate chips for eyes and mouths. They contain no marshmallow, meringue or fondant. The orange frosting is the same buttercream with gel coloring, so both halves of the tray have the same vanilla flavor.
Can I Use Cake Flour?
Use the specified all-purpose flour for these Halloween cupcakes instead of swapping in cake flour cup for cup. A different flour changes the cake’s structure; keeping the listed flour and its measured amount preserves the intended cohesive chocolate crumb.
Can I Make Mini Halloween Cupcakes?
Keep these Halloween cupcakes standard-sized when following the listed portions and baking window. Mini wells need different batter weights, less frosting and a shorter bake. Do not apply the 55–57 g portions or the 20–24 minute bake window to a mini pan.
Keep the Halloween Baking Going
A second cupcake flavor can round out the dessert table, while a layer cake or decorated cookie offers a different Halloween project. For baking beyond the holiday, pumpkin, apple and warm spice give the chocolate-and-vanilla tray an autumn continuation.
More Cupcakes for the Same Dessert Table
Keep individual portions, but give guests another cake flavor alongside the chocolate and vanilla Halloween cupcakes.
- Chocolate Cupcake Recipe: Choose a ganache-filled chocolate alternative when you want a richer center.
- Vanilla Cupcakes with Vanilla Buttercream: Add a vanilla cake option for guests who prefer a lighter flavor beside chocolate.
- Oreo Cupcakes: Bring a cookies-and-cream flavor to a mixed cupcake tray.
- Red Velvet Cupcakes: Choose a different cocoa-style cake and red crumb for more color on the table.
Another Halloween Decorating Project
Change the dessert format while keeping the Halloween decorating theme, from a centerpiece cake to cookies or coated fruit.
- Halloween Cake with Buttercream Ghosts: Move from individual portions to a layer-cake centerpiece with buttercream ghosts.
- Halloween Brownies: Try a denser chocolate base for another Halloween decorating project.
- Peanut Butter Spider Cookies: Add a peanut butter cookie with a recognizable spider character.
- Caramel Apples: Choose a fruit-and-caramel project with a coating rather than piped frosting.
Keep Baking Through Fall
Follow the season with pumpkin, apple or spice once you are ready to move beyond the orange-and-white Halloween tray.
- Pumpkin Cupcakes: Bake with real pumpkin and spice when you want autumn flavor as well as color.
- Apple Cupcakes: Switch to an apple-based cupcake for a fruit-led fall dessert.
- Gingerbread Cupcakes: Try molasses and warm spice as the season moves toward winter.
- Pumpkin Roll Recipe: Make a cream-cheese spiral cake when you want a sliceable autumn project.
Why These Halloween Cupcakes Belong on BlogDolceVita
Keep these Halloween cupcakes as a small seasonal baking project that can grow with your decorating confidence.
- Seasonal Continuity: The recognizable orange-and-white motif gives each year’s Halloween tray a familiar starting point.
- Growing Confidence: Returning to two different piping shapes creates a focused opportunity to notice how your decorating becomes steadier over time.
- Transferable Judgment: Distinguishing a spreading base from a stretched peak can make later buttercream projects less dependent on guesswork.
- Individual Character: Slightly different ghost expressions let repeated batches feel handmade without needing increasingly elaborate decoration.
- Familiar Flavor: Chocolate and vanilla leave a comfortable flavor foundation as your Halloween presentation changes from one occasion to another.
A Little Halloween Character in Every Cupcake
These Halloween cupcakes give a familiar chocolate dessert a seasonal identity through the frosting itself. The orange swirl and pale ghost are part of the sweet vanilla finish, so the decoration belongs to the bite as well as the tray.
When another Halloween gathering comes around, this is a small project to return to if you enjoy giving individual treats their own expressions. A new tray can feel familiar without every little face looking the same.
Three tiny chocolate chips can suggest a whole expression. There is something fitting about that small amount of character on a homemade Halloween cupcake: the face can be a little crooked and still bring the celebration with it.

Halloween Cupcakes
Moist chocolate cupcakes with sweet vanilla buttercream, decorated as six orange swirls and six little white ghosts. One buttercream batch makes both designs.
Ingredients
Chocolate Cupcakes
- 1 1/8 cups (135 g) all-purpose flour, spooned and leveled if measured by cups
- 1 cup (200 g) granulated sugar
- 1/2 cup (42 g) unsweetened natural cocoa powder, sifted if lumpy
- 1 teaspoon baking soda
- 1/4 teaspoon fine salt
- 1/4 cup (60 ml) neutral oil, such as canola or sunflower oil
- 1 large egg (about 50 g without shell), at room temperature
- 1 1/2 teaspoons (7.5 ml) vanilla extract
- 1 teaspoon (5 ml) distilled white vinegar, approximately 5% acidity
- 3/4 cup (180 ml) water, at room temperature
Vanilla Buttercream
- 3/4 cup (170 g) unsalted butter, softened but still cool
- 3 cups (360 g) powdered sugar, sifted
- 2 tablespoons (30 ml) whole milk, at room temperature, plus up to 1 tablespoon (15 ml) if needed
- 1 teaspoon (5 ml) vanilla extract
- 1/8 teaspoon fine salt
Decoration
- Orange gel food coloring, as needed to tint half the buttercream
- 18 mini semisweet chocolate chips
Instructions
- Prepare the oven and pan. Preheat a conventional oven to 350°F (175°C) with a rack in the center. Line a standard 12-well metal muffin pan with 12 liners.
- Mix the dry ingredients. Whisk the flour, granulated sugar, natural cocoa, baking soda and cake salt in a bowl until uniformly combined and free of dry clumps. Sift lumpy cocoa first.
- Whisk the wet ingredients. In a second bowl, whisk the oil, egg, cake vanilla, vinegar and room-temperature water until the egg is fully dispersed.
- Combine the batter. Pour the wet mixture into the dry mixture and whisk gently just until no dry pockets remain. Scrape the bowl once. The batter should be evenly chocolate-colored and pourable; stop mixing when combined.
- Portion the batter. Divide the approximately 681 g batter evenly among the liners, about 55–57 g each, without filling more than two-thirds full. If your wells are smaller, put excess batter into another lined well instead of overfilling. Bake immediately.
- Bake until the centers are set. Bake for 20–24 minutes, beginning the check at 20 minutes. A center tester should come out clean or with a few moist crumbs, with no liquid batter; the top should spring back lightly and retain its shape.
- Cool completely. Leave the cupcakes in the pan for 10 minutes, then transfer to a wire rack for about 50–65 more minutes, or longer if needed. Wait until both center and base are completely cool before piping.
- Make the vanilla buttercream. Beat the softened, still-cool butter for 2–3 minutes until smoother and paler. Add powdered sugar gradually on low speed. Add 2 tablespoons (30 ml) milk, the frosting vanilla and frosting salt; mix on medium for 2–3 minutes. Finish on low for about 1 minute, then stir with a spatula to reduce large air pockets.
- Check the frosting consistency. Pipe a small test ridge: it should hold without slumping while the cream flows under steady pressure. If too stiff, add milk 1 teaspoon (5 ml) at a time, using no more than 3 tablespoons (45 ml) total. If too soft, cool briefly, stir and reassess before continuing.
- Divide and color the frosting. Divide the buttercream equally by weight between two bowls, approximately 283–290 g per bowl depending on milk used. Tint one half orange with small additions of gel coloring and leave the other half untinted. Fill separate bags with a large open-star tip for orange and a large round tip with roughly a 1/2-inch (12–13 mm) opening for white. Allow about 40–45 g frosting per cupcake, leaving a little for bag loss.
- Pipe six orange swirls. Use the open-star tip to pipe one moderate orange spiral on each of six cupcakes, starting near the outer edge and moving inward. Stop squeezing before lifting the tip away; the ridges should remain distinct.
- Pipe six ghosts and add their faces. On the remaining six cupcakes, hold the round tip upright and pipe a broad base, then reduce pressure while building a short taper. Stop squeezing and lift to leave a small peak. Press three mini chocolate chips into each ghost for two eyes and one mouth, with flat bases facing outward: 18 chips total.
- Serve or pack the cupcakes. Serve once the frosting is in place. For transport, use a tall covered carrier with individual supports and clearance above the ghost peaks. Refrigerate until the frosting is firm enough to resist light movement if needed; this optional transport chill is additional time.
Notes
- Flour and cocoa: Weigh the flour, or spoon and level it without packing. Use unsweetened natural cocoa for this batter; different cocoa or flour types do not provide the same cake result automatically.
- Pan and portions: Use a standard 12-well metal pan with liners about 2 inches across the base and 1 1/4 inches high. Keep portions no higher than two-thirds full. Smaller wells may need an extra lined well for excess batter.
- Frosting adjustment: Begin with 30 ml milk and add only 5 ml at a time if the frosting is genuinely too stiff, up to 45 ml total. Cool soft frosting before adding more liquid. Untinted buttercream may be pale ivory.
- Make ahead: Prepare the plain cakes and buttercream 1 day ahead. Keep completely cooled cakes airtight in a cool room and refrigerate the frosting airtight. Return the cream to a pipeable consistency, remix gently and test before decorating.
- Storage: Refrigerate decorated cupcakes in a tall airtight container at 40°F (4°C) or below for up to 3 days for best quality. Allow 20–30 minutes before eating to soften the buttercream slightly. Keep away from heat and do not reheat decorated cupcakes.
- Freeze plain cakes: Freeze completely cooled, undecorated cakes individually wrapped and sealed airtight for up to 2 months for best quality. Thaw covered in the refrigerator overnight and decorate afterward.
- Larger batch: For 24 cupcakes, make two measured 12-cupcake batches. The same decoration split gives 12 orange swirls and 12 ghosts, requiring 36 mini chips. Allow extra baking, cooling and decorating time; the one-pan time estimate does not cover two sequential batches.
- Decoration choices: For 12 ghosts, leave all the frosting untinted and use 36 mini chips; for 12 orange swirls, tint the frosting orange and omit the face chips. Keep the decorations moderate in size. Orange is coloring only, not pumpkin or citrus flavor.
- Format and frosting changes: The portions and bake window are for standard cupcakes. Mini pans need different portioning and baking time. Whipped cream or cream cheese frosting should not be assumed to support these ghosts in the same way.
- Nutrition: Nutrition is an estimate per decorated cupcake, averaged across the mixed batch. It includes the full buttercream recipe and the starting 2 tablespoons of milk; brands and the amount of frosting used can change the values.
- Ingredients to check: Contains wheat, egg and milk. Check the chocolate chips and gel coloring labels for additional ingredients relevant to your guests.
Nutrition Information:
Yield: 12 Serving Size: 1 cupcakeAmount Per Serving: Calories: 384Total Fat: 17.3gSaturated Fat: 8gCholesterol: 46mgSodium: 188mgCarbohydrates: 57.6gFiber: 1.6gSugar: 46.4gProtein: 2.6g
Nutrition information is provided as an estimate only and may vary based on specific ingredients, brands, and portion sizes used. This information should not be considered medical or nutritional advice.
12 Sweet Favourites — Yours, Free 🍰
Tiramisù, no-bake cheesecake, the perfect chocolate chip cookie & 9 more reader-loved desserts — gathered into one beautiful free recipe book. From my kitchen to yours.
No spam, just sweet things. Unsubscribe anytime.