Soft Dinner Rolls with Buttery Golden Tops
🎁 FREE E-BOOK: 12 Sweet Favorites — reader-loved desserts in one beautiful recipe book.
Soft dinner rolls are small, round yeast breads made with milk, egg, and butter, then baked close together so their tender sides pull apart at the table. This batch has golden, butter-brushed tops, a fine, gently springy crumb, and just enough sweetness to sit comfortably beside a savory dinner.

A warm bread basket brings a particular kind of comfort to a meal. There is the soft give of a roll in your hand, the pale crumb underneath its golden top, and the little pause while butter melts into the middle. It is a simple pleasure that fits a quiet supper as naturally as a crowded holiday table.
These homemade dinner rolls make one pan of fifteen, with guidance for the moments that matter most: when the dough has developed enough, when each rise is finished, and when the center is baked through. There is also a fully baked make-ahead route for days when fresh bread belongs on the menu but the oven has other jobs to do.
Dinner Rolls at a Glance
These dinner rolls use a direct, moderately enriched dough shaped into smooth rounds and baked in a single pan. Plan on about half an hour of hands-on work, with most of the elapsed time devoted to hydration, rising, baking, and a short cooling period.
| Detail | What to plan for |
|---|---|
| Method | Mix, knead, let rise, shape, proof, and bake. |
| Yield | 15 dinner rolls; divide the actual dough weight equally, usually about 63–64 g per piece. |
| Pan | One light-colored metal 9 × 13-inch pan, at least 2 inches deep; arrange 3 across the short side and 5 along the long side. |
| Active work | About 30 minutes. |
| Hydration rest | 10 minutes, covered. |
| First rise | About 60–90 minutes, until roughly doubled. |
| Final proof | About 45–75 minutes, until puffy and gently responsive to a light touch. |
| Baking | 22–28 minutes at 350°F (175°C), conventional oven, center rack. |
| Cooling before serving | About 5 minutes in the pan, then 5 minutes on a wire rack. |
| Total time | About 3 hours 15 minutes as a representative schedule; allow roughly 3–4 hours, and longer in a cool room or if shaping needs an extra rest. |
| Difficulty | Approachable for a patient beginner who is willing to knead and follow dough cues. |
| Texture | A fine, soft pull-apart crumb under a thin buttered crust. |
| Make ahead | Bake completely, cool, and freeze; thaw and warm before serving. |
| Contains | Wheat, milk, and egg. |
Why These Dinner Rolls Bake Up Soft and Even
The softness of these dinner rolls comes from a balanced dough, enough development to hold its rise, and a pan arrangement that protects the joined sides. Each choice supports a different part of the finished roll, so adding more butter or more flour is not the answer to every texture problem.
- Enrichment without a heavy, sweet dough. Whole milk, one egg, and a measured amount of butter bring tenderness and flavor, while the flour still provides enough structure to shape fifteen rounded pieces. The modest sugar level keeps the bread useful alongside gravy, soup, or a savory main course.
- A small flour allowance with a clear purpose. The dough starts with 480 g flour and gets time to hydrate before its consistency is judged. Keeping the additional flour conditional protects the softness of the dinner rolls instead of gradually turning a tacky dough into a stiff one.
- Even portions in a deliberately sized pan. Fifteen similar pieces share the same baking window more successfully than a mixture of tiny and oversized rounds. The 3 × 5 arrangement lets their sides grow together, leaving tender pull-apart edges beneath the exposed golden tops.
- Separate decisions for baking and finishing. The rolls bake until the center is set before melted butter is brushed over them. That finishing layer adds butter flavor and softens the feel of the crust; it does not have to disguise an underbaked middle.
Why You’ll Love Having These Rolls on the Table
These dinner rolls suit the kind of meal where a basket of soft bread has a clear job: catching a little sauce, rounding out a bowl of soup, or giving everyone something warm to pull apart. They ask for patience during two rises, but the active work is spread into manageable stretches.
- One pan gives the meal a useful center. Fifteen individual rolls are easy to share without slicing a loaf at the table, and their mild sweetness leaves room for both plain butter and savory food.
- You can work with the equipment you have. A dough hook makes kneading convenient, but the hand-kneaded route is fully described. A scale and a little attention to how the dough feels matter more than owning a large collection of baking tools.
- The waiting periods leave room for other preparation. Once the dough is covered, you can turn to the rest of dinner while staying nearby to check its progress. A warm kitchen may move it along more quickly, so the schedule includes cues as well as time ranges.
- A busy serving day can begin with the bread already baked. Fully cooled rolls can be frozen and refreshed later, giving you a practical alternative to fitting mixing, shaping, and two rises around a crowded oven.
Who These Dinner Rolls Are Perfect For
These dinner rolls fit home kitchens where a soft bread basket is worth planning a little time around. Choose them for the meals and baking routines below, with enough room in the schedule for two rises.
- Patient beginners learning yeast dough. You get separate checkpoints for kneading, the first rise, and the shaped proof, so you can judge progress by the dough as well as the clock. Choose either the mixer or hand-kneading route, and allow several hours from mixing to serving.
- Holiday hosts planning a shared bread basket. One 9 × 13-inch pan makes fifteen individual dinner rolls. Work back from serving time and reserve the oven before the shaped rolls finish proofing, especially when a roast or casserole is also on the menu.
- Families serving soup, a roast, or a saucy main. The fine crumb and mild sweetness suit a small roll beside dinner. The joined sides pull apart softly, while the buttered top adds flavor without needing a rich filling.
- Bakers who want the bread ready ahead. Bake the rolls fully, cool them completely, and freeze them for up to one month for best quality. Thaw them wrapped and warm under foil, giving serving day a shorter bread task.
The recipe contains wheat, milk, and egg. Its light structure suits small dinner portions; use a dedicated burger bun recipe when you need bread to hold a substantial filling.
The Science Behind a Soft, Light Roll
Soft dinner rolls need both tenderness and enough structure to hold the gas made by yeast. Hydration, kneading, fermentation, and baking each contribute something different, which is why a dough can feel soft yet still need more development or more time to rise.
Hydration and Kneading Build a Gas-Holding Dough
Kneading develops the elastic gluten framework that holds gas produced by yeast. Utah State University Extension explains how kneading develops gluten; in this dough, that helps explain why smooth elasticity matters more than a completely clean mixing bowl.
A slight tack is compatible with good development. Flour takes up liquid during the covered rest, and kneading then turns the mixed ingredients into a cohesive dough. Adding flour just to remove every trace of stickiness can make the dinner rolls firmer without solving the original lack of structure.
Fermentation Changes with the Dough and the Room
Yeast produces gas as the dough ferments, but the rate changes with the dough and its surroundings. A cool room can slow a perfectly usable batch, while a warmer spot can bring it to the endpoint sooner than the suggested time.
The first rise is judged mainly by overall expansion and aeration. After shaping, the dough needs to expand again inside each round. Those are separate stages, so a generous first rise does not remove the need to proof the shaped dinner rolls before baking.
Milk, Egg, and Butter Shape the Crumb
Milk, egg, and butter give these rolls a richer flavor and more tender eating texture than a simple flour-and-water bread. Their amounts in these dinner rolls are moderate enough to preserve a dough that can be kneaded, portioned, and rounded by hand.
Removing the egg, changing the milk, or switching to a different flour can affect more than flavor. Those changes alter the balance of liquid, fat, and structure, so keep the stated ingredients for the intended soft dinner rolls rather than treating the enrichment as an optional addition.
Baking and Cooling Finish the Center
The crust colors before it can tell you everything about the center. Inside the roll, heat sets the crumb as starch absorbs water and the dough structure firms; a golden surface can therefore coexist with an unfinished middle, especially in the center of a joined pan.
Use color, set sides, and a center temperature together, then allow the short cooling period before pulling the dinner rolls apart. That pause lets the hot crumb settle enough to separate cleanly instead of compressing into a damp-looking strip.
Ingredients for Soft Dinner Rolls
The dough for these dinner rolls uses seven main ingredients, followed by a separate butter finish. The bowl and pan need a thin coating of oil, and a small extra-flour allowance is available only if the developed dough still needs it.

Ingredient List
Measure the base flour before you begin, and keep the finishing butter separate from the butter that goes into the dough. The amounts below make fifteen dinner rolls; the last flour quantity is a limit for adjustment, not an instruction to add it automatically.
Dough
- 1 1/4 cups pasteurized whole milk (300 ml), warmed to 100–110°F (38–43°C)
- 2 1/4 teaspoons instant yeast (7 g)
- 3 tablespoons granulated sugar (38 g)
- 1 large egg (50 g without shell), at room temperature
- 1/4 cup unsalted butter (56 g), softened but not melted or oily
- 4 cups all-purpose flour (480 g), spooned and leveled if not weighed; US flour around 11–12% protein
- 1 1/2 teaspoons fine table salt (9 g)
For finishing
- 2 tablespoons unsalted butter (28 g), melted
For handling
- Neutral oil or nonstick spray, as needed for a thin coating on the bowl, pan, and covering
Only if needed
- Up to 2 tablespoons additional all-purpose flour (15 g), only if the developed dough still smears like paste; add 1 teaspoon at a time
Choose Flour for Soft, Manageable Dough
For soft dinner rolls with enough strength to shape, use a US all-purpose flour around 11–12% protein and weigh the 480 g base quantity when possible. If measuring by cups, spoon the flour into the cup and level it; scooping directly from a compacted bag can add more than you intend.
I used to add a little more flour whenever a soft dough clung to my fingers. It made shaping easier, but the rolls sometimes turned out firmer than I wanted. Learning to leave the dough slightly tacky, and give it time to become smooth through kneading, helped me stop adding flour too soon.
Give this dough its covered ten-minute rest, then knead until it becomes smooth and elastic before deciding that it needs more flour. Normal tackiness leaves a slight pull against a finger; persistent paste-like smearing means the dough still cannot hold together usefully. If that remains after development and a brief rest, add the extra flour one teaspoon at a time, stopping as soon as the dough is manageable and never exceeding 15 g.
That small distinction protects the texture of the dinner rolls. The aim is a soft dough you can handle, not a dry surface that never clings to anything. Use the bench scraper to gather dough from the work surface rather than answering every sticky moment with another dusting of flour.
Check Yeast, Milk, Butter, and Salt Before Mixing
Instant yeast is the starting point for this dough and does not need a separate foam test. Warm the milk to 100–110°F (38–43°C), use a room-temperature egg, and soften the butter until it yields easily without turning oily or melted.
Fine table salt is specified because different salt crystals occupy different amounts of space in a teaspoon. If using another salt, follow the 9 g weight rather than assuming the same spoonful is equivalent. The active dry yeast option has its own instructions below; it also uses milk and sugar taken from the existing quantities.

The Tools That Make Dinner Rolls Easier
A correctly sized pan and accurate weighing make dinner rolls easier to manage from the first mix to the final portion. Keep the shaping, covering, and cooling tools nearby so the soft dough does not sit exposed while you look for them.
- Measure and check. Digital scale, liquid measuring cup, measuring spoons, and instant-read thermometer; use the scale for flour and equal portions, the thermometer for milk and center crumb.
- Mix and let rise. Large mixing/rising bowl, flexible spatula or dough whisk, and a cover that keeps the surface from drying without sticking.
- Knead and shape. Stand mixer with dough hook, or a clean kneading surface and bench scraper for the hand route; respect the mixer manufacturer’s dough-speed instructions.
- Bake one even pan. Light-colored metal 9 x 13 x at least 2-inch pan on the center rack of a conventional oven; optional parchment sling, lightly greased covering, and foil if tenting is needed.
- Finish and cool. Pastry brush for the finishing butter and wire rack for cooling; transfer the joined rolls carefully after their brief pan rest.
Plan Your Dinner Rolls Around Serving Time
Start these dinner rolls about three hours and fifteen minutes before serving for the representative schedule below, allowing more room if your kitchen is cool. The two rises are the flexible parts: reserve the oven before the shaped rolls reach their endpoint, rather than leaving a fully proofed pan waiting for another dish to finish.
| Elapsed time from starting | Stage | What controls the next stage |
|---|---|---|
| 0–10 minutes | Prepare and mix | Ingredients measured, milk warm, and no dry flour pockets. |
| 10–20 minutes | Covered hydration rest | A ten-minute pause before kneading. |
| 20–32 minutes | Knead | Smooth, elastic, tacky dough; actual mixer or hand time varies. |
| 32–102 minutes | First rise | About doubled; the usual range is 60–90 minutes. |
| 102–110 minutes | Divide and shape | Fifteen equal pieces with closed seams underneath. |
| 110–160 minutes | Final proof; preheat toward the end | Puffy rounds and a ready oven; the usual proof range is 45–75 minutes. |
| 160–185 minutes | Bake | Golden, set rolls with the center checked. |
| 185–195 minutes | Butter and cool briefly | Five minutes in the pan, then about five on a rack before serving warm. |
This example includes about 30 minutes of active work, a 25-minute bake, and 140 minutes of resting, rising, and cooling. The full planning range is 177–243 minutes. A shaping rest adds time, and rolls intended for storage need to cool completely beyond the brief warm-serving interval.
Before You Start the Dinner Roll Dough
Check the milk temperature, butter softness, and available oven space before mixing. Choose a comfortable spot around 75–80°F (24–27°C) for the covered dough to rise, away from drafts and direct heat; a warm-feeling surface is not a substitute for a suitable room temperature.
- Set out the measured base flour and keep the conditional extra flour separate so it cannot slip into the first mix.
- Lightly grease the bowl and pan, and prepare a cover that will protect the dough without sticking to its surface.
- Plan where the pan will proof while the oven preheats, especially if the oven is also needed for dinner.
- Use pasteurized milk, avoid tasting raw flour-and-egg dough, and wash hands, utensils, and work surfaces after handling it.
If the meal cannot wait for two rises, buttermilk biscuits offer a different, flaky bread option without yeast fermentation. For dinner rolls, leave room for the dough to reach its own readiness cues.
What to Expect from This Soft Dough
This dough begins rough and a little sticky, then becomes smoother and more elastic while keeping a slight tack. It feels softer than a firm, floury ball, and a little attachment to the bottom of the mixing bowl can be normal.
The first rise makes the dough noticeably lighter and more aerated. After shaping, the individual rounds become fuller, their spaces narrow, and their sides touch or nearly touch. In the oven, the exposed tops turn golden while the joined sides of the dinner rolls stay pale and tender.
How to Make Soft Dinner Rolls
Make the dinner rolls in eight stages, keeping the same soft dough through mixing, kneading, and both rises. Use each time range to know when to start checking, then let the dough and the center of the baked pan determine when to move on.
1. Prepare the Pan and Ingredients
Lightly grease a 9 × 13-inch light-colored metal pan, at least 2 inches deep, and a large bowl. Add a parchment sling to the pan if desired. Weigh the flour and salt, warm the milk to 100–110°F (38–43°C), and have the softened butter and room-temperature egg ready.
What you should see: A thin coating of grease, accurately measured flour, butter that gives under light pressure, and warm milk within the stated range.
2. Mix the Dough and Let the Flour Hydrate
Stir the milk, instant yeast, and sugar together in the mixing bowl. Add the egg, softened butter, 480 g flour, and salt. Mix with a spatula, dough whisk, or mixer until no dry pockets remain; the dough does not need to look smooth yet.
What you should see: A shaggy, uneven dough with all the flour moistened, rather than a finished ball or a pourable mixture.

Cover and rest for 10 minutes so the flour can take up the liquid before kneading. This pause is part of making the dough manageable; do not add the conditional flour simply because the first mixture feels sticky.

3. Knead Until Smooth, Elastic, and Tacky
Knead with the dough hook on low to medium-low speed, following your mixer’s dough instructions, for about 8–12 minutes. Alternatively, knead by hand on a clean surface for about 12–15 minutes, using a bench scraper to gather the dough as needed.
Look for a cohesive, smooth, elastic dough that remains slightly tacky. If it still smears like paste after adequate kneading and a brief rest, add flour one teaspoon at a time, up to 15 g total. Stop adding flour as soon as you can handle the dough; a perfectly clean bowl is not the goal.
What you should see: The dough holds together and stretches rather than breaking immediately, although a little may cling to the bottom of the bowl.

To check the dinner rolls’ dough, let a small piece relax briefly, then stretch it gently between your fingers. It should form a thin membrane before tearing. If it tears while still thick, continue developing the dough and reassess rather than treating the clock as proof that kneading is finished.

4. Let the Dough Complete Its First Rise
Place the dough in the lightly greased bowl and cover it. Let it rise in mild warmth, ideally around 75–80°F (24–27°C), for about 60–90 minutes. Note its starting volume so the later expansion is easier to judge.

What you should see: The dough is roughly doubled and visibly aerated. A cooler room may need more time; a small increase after an hour does not mean it is ready just because an hour has passed.

5. Divide and Shape Fifteen Even Rolls
Gently deflate the dough, weigh it, and divide the actual weight by fifteen. The pieces will usually be about 63–64 g each. Portion all the dough before rounding so you can distribute small adjustments evenly across the batch.

To shape the dinner rolls, bring the edges of each piece underneath and pinch them together to close the bottom seam. Keep the top surface intact as you gather the underside.

Cup your hand around the portion and round it into a smooth ball. If the dough pulls back strongly or resists shaping, cover it and rest for 5–10 minutes before continuing.

What you should see: Fifteen similar dinner rolls with smooth tops and closed seams underneath, arranged three across the short side and five along the long side of the pan, with space left for expansion.

6. Proof the Shaped Rolls and Preheat the Oven
Cover the shaped dinner rolls loosely with lightly greased wrap and let them proof in the same mild warmth for about 45–75 minutes. Preheat the oven to 350°F (175°C) during the latter part of this rise, with a rack in the center.
What you should see: The dinner rolls look puffy and expanded, with neighboring sides touching or nearly touching. They no longer look like the compact rounds that first went into the pan.

Press one gently with a lightly floured finger to make a shallow indentation. It should return slowly and leave a slight impression. A quick rebound suggests more proofing; dough that feels fragile and collapses at a touch has gone too far. Read this response alongside the overall expansion, not as an isolated test.

7. Bake Until the Center Is Set
Uncover and bake the dinner rolls on the center rack for about 22–28 minutes. If the tops brown before the center is ready, loosely tent the pan with foil and continue checking rather than removing the rolls on color alone.
What you should see: Even golden tops and set sides, with a center roll baked through rather than a pale, compressed middle hidden between darker edges.

Check the crumb of a center roll with an instant-read thermometer without touching the pan. A reading around 190°F (88°C) supports doneness when the color and set cues agree. A hotter corner roll cannot tell you whether the middle of the pan is finished.

8. Brush with Butter and Cool Briefly
Brush the hot dinner rolls with the 2 tablespoons (28 g) melted finishing butter. Let the dinner rolls rest in the pan for about 5 minutes, then carefully transfer the joined slab to a wire rack and cool for another 5 minutes before serving warm.
What you should see: A light butter sheen over the golden tops and a soft center that holds its structure when the rolls are separated. Rolls for packing or freezing must cool completely.

How to Tell When the Rolls Are Baked Through
Check a center roll when judging the whole pan of dinner rolls. The outside edges receive heat differently from the protected middle, so a dark corner or a golden top is only part of the picture.

| What you check | Ready signs | What needs caution |
|---|---|---|
| Tops and sides | Golden tops with sides that look set. | Rapid top browning while the middle remains pale or soft; tent and continue checking. |
| Center crumb temperature | Around 190°F (88°C), with the other signs of doneness. | A reading taken against the pan or only in an outer roll. |
| After the brief cooling period | Fine, soft crumb that separates in tender strands and small cells. | A wet, compressed or gummy band; consider incomplete baking or opening too hot, rather than assuming softness alone means underbaking. |
| Joined edges | Pale, tender sides where the dinner rolls met. | Expecting every side to have the same color as the exposed tops. |

Soft bread should still have a set interior. Give the center its cooling time before judging the crumb closely, and distinguish a moist, tender bite from dough that smears together. The aim is lightness with enough structure to hold butter, not a dry center that crumbles at a touch.
Small Details That Make Better Dinner Rolls
Consistency improves when you notice where small differences enter the batch. These details help you make the fifteen dinner rolls more alike, shape them without fighting the dough, and protect their final rise while dinner is coming together.
- Use the portion weight as a calculation, not a target to force. The estimated dough mass gives a useful guide, but flour adjustments and dough left on the bowl can change what is actually available. Divide your weighed dough by fifteen before rounding; otherwise, forcing fourteen pieces to an assumed weight can leave the last one noticeably smaller. Even a 75 g piece beside a 63 g piece contains about 19% more dough, so visual similarity alone can hide a meaningful size difference.
- Separate springy resistance from a sticky surface. When shaping dinner rolls, a portion that keeps pulling back is not necessarily asking for flour. Recently handled dough can resist stretching because its gluten is under tension; the covered 5–10-minute rest gives it a chance to relax. Resume when the edges come underneath without tearing. This protects a smooth upper surface and a closed seam instead of producing a tight-looking round whose skin has been stretched past what it can hold.
- Treat oven readiness as part of proofing. The shaped dinner rolls keep fermenting while another dish finishes or the oven heats. Start preheating before the rolls look fully ready, and use the final-proof interval to settle the oven plan. If the meal needs a longer delay, the fully baked make-ahead route is a more useful planning choice than deliberately extending a finished proof; the latter changes the dough while you wait.
Dinner Roll Problems and How to Fix Them
Dense, misshapen, or dry dinner rolls can begin with different decisions, even when the finished results look similar. Use the symptom with what happened during mixing and rising to choose a correction, and separate a fix that is still possible from a lesson for the next batch.
| Mistake | What happens | Why it happens | How to prevent or fix it |
|---|---|---|---|
| Adding flour until the dough feels completely dry | Heavy rolls with a firmer crumb. | The dough loses the soft consistency needed for this style of roll. | Give it the rest and kneading first; use only the small conditional allowance. A baked, over-floured crumb cannot be made airy afterward. |
| Ending a rise because the timer rings | Compact rolls or a tight center. | The dough may not have expanded enough in the actual room conditions. | Allow more time when the dough is still compact and the yeast is active; follow expansion and proof response. |
| Trying to solve slow rising with direct heat | Uneven or unreliable fermentation. | A very hot spot can warm one part of the dough much more than another. | Use mild room warmth and check the milk temperature at mixing; avoid putting the bowl against a direct heat source. |
| Leaving shaped rolls until fragile and collapsing | Poor shape and less support during baking. | The proof has progressed beyond the dough’s ability to hold its structure well. | Have the oven ready as the rolls become puffy. Once overproofed dough collapses, it may not regain its original volume. |
| Using uneven portions or forcing a larger batch into the pan | Mixed sizes and inconsistent baking. | Pieces have different amounts of dough or too little room. | Weigh the batch, divide into fifteen, and keep the specified pan and layout. |
| Removing the pan when only the tops look done | A gummy center between golden edges. | The protected middle may lag behind the exposed surfaces. | Check a center roll; tent overly brown tops while the center finishes. |
| Packing warm rolls or reheating them uncovered | Damp surfaces after storage, or a dried crust after warming. | Trapped steam condenses; unprotected reheating loses moisture. | Cool fully before airtight packing, then refresh thawed rolls under foil and stop when warm. |
Beautiful Ways to Serve Warm Dinner Rolls
Serve dinner rolls warm enough for butter to soften into the crumb, after their brief cooling period. A basket, a small butter plate, or a place beside the main dish each brings out a different part of their appeal without needing elaborate decoration.
Bring a Warm Basket to the Table
Line a basket with a clean linen and tuck the dinner rolls together with their golden tops visible. The pale edges where they separated add a softer contrast to the crust, and the loose linen makes them easy to pass around the table.

Keep the presentation breathable rather than sealing hot bread inside a container. Bring out the dinner rolls close to the meal so the warm crumb is part of the experience, rather than leaving the basket standing while the rest of dinner catches up.
Split a Roll for Butter or a Sweet Finish
Split a warm roll gently through the middle and let a small pat of butter soften against the pale crumb. The mild bread leaves room for the fresh dairy flavor of homemade butter, served alongside rather than used to change the dough.

For a sweeter table, the honey-butter finish below gives dinner rolls a light, glossy top. Keep extra serving butter or honey separate from the recipe’s measured finishing butter, especially when planning portions or estimating what each person eats.
Set Them Beside a Savory Dinner
Set a roll beside a bowl of soup, a roast dinner, or vegetables with a little sauce to catch. Its soft center can take up the last spoonful on the plate, while the golden top provides a gentle contrast to a tender main dish.

For a holiday meal, place the bread where it can be passed easily instead of building a tall arrangement that hides the portions. The pleasure of these dinner rolls is their small, inviting scale and the way they pull apart, so let that remain the focus.
Keep Dinner Rolls Soft: Store, Freeze, and Reheat
Dinner rolls are at their softest when served warm on baking day. For later meals, protect them from drying only after they have cooled completely, and choose fully baked freezing when you want to prepare the bread well ahead.
Keep Fully Cooled Rolls for the Next Day
Let the dinner rolls cool completely on a rack before placing them in an airtight container or a well-closed food bag. Keep plain rolls at normal room temperature for up to two days as a quality target; the surface should no longer feel warm when you enclose them.
A container that fogs up is trapping moisture from dinner rolls that are still warm. Let the rolls finish cooling before closing it again. These keeping times assume suitable storage conditions, and bread with visible mold or signs of spoilage should be discarded, not refreshed.
Freeze the Baked Rolls for a Later Meal
For make-ahead dinner rolls, bake the batch completely, cool it fully, then wrap the rolls airtight and freeze for up to one month for best quality. Pack them in the amounts you expect to serve so you can thaw a small group without opening the whole batch repeatedly.

This route moves the mixing and rising to an earlier day while leaving only thawing and gentle warming for the meal. Keep it to baked rolls here; an overnight raw-dough proof, raw-dough freezing, and a partial bake would need different timing and handling instructions.
Thaw and Warm Without Drying the Crumb
Thaw the dinner rolls while wrapped, then enclose them in foil and warm in a 350°F (175°C) oven. Begin checking a small group after about 5 minutes; a larger group may need 10–15 minutes. Stop once the middle is warm rather than waiting for more browning.
Foil protects the thin crust while the center warms. Serve promptly after reheating, and expect a pleasant refreshed roll rather than an exact recreation of bread just out of its first bake. Reheating adds warmth; it cannot reverse every change from storage.
Two Butter Finishes and a Yeast Substitution
The simplest way to change these dinner rolls is at the surface, with one of two butter finishes. The dough, fifteen-piece yield, pan, and bake stay the same; the active dry yeast option is a separate ingredient choice with a specific brand and activation method.
Honey Butter or Dried Garlic-Herb Butter
For either version of the dinner rolls, use the same 2 tablespoons (28 g) melted finishing butter, adding the flavoring before brushing it over the hot rolls. The honey finish is sweeter and slightly tackier; the dried garlic-herb finish gives a savory aroma without adding wet ingredients to the dough.
- Honey butter: Stir 1 tablespoon honey (21 g) into the 28 g melted butter.
- Dried garlic-herb butter: Stir 1 teaspoon dried parsley (about 0.5 g) and 1/4 teaspoon garlic powder (about 0.8 g) into the 28 g melted butter.

Keep the storage guidance the same, and do not use these quantities as an invitation to add fresh garlic or wet herbs to stored rolls. The optional additions and any extra serving accompaniments are separate from the plain dinner rolls.
Using Red Star Active Dry Yeast
To make these dinner rolls with Red Star Active Dry Yeast, use 7 g in place of the 7 g instant yeast. Take 1/2 cup (120 ml) milk and 1 teaspoon sugar from the amounts already listed, warm that milk to 110–115°F (43–46°C), and stir in the yeast and reserved sugar.
Allow 5–10 minutes for visible foaming, then continue with the remaining milk, sugar, and other ingredients. Keep both rises and follow the dough cues, allowing longer if needed. This is a manufacturer-specific option; other brands may give a different conversion or activation temperature, so check their instructions rather than assuming all active dry yeast behaves identically.
Flour, Batch Size, and Format Limits
Keep all-purpose flour, fifteen dinner rolls, and the specified pan for the intended result. Bread flour can change both absorption and chew, while whole-wheat or gluten-free flour changes the dough more substantially; those are not simple ways to reproduce these soft dinner rolls.
Likewise, a larger bun, a loaf, or a doubled amount in the same pan changes the size or depth that must bake through. Choose a recipe written for that format rather than carrying over this pan arrangement and baking window unchanged.
Dinner Roll Questions, Answered
These questions focus on the decisions most likely to interrupt a batch of dinner rolls: dough feel, rising, yeast choice, equipment, and planning ahead. Use the short answers to choose the next step, with the fuller explanations above when you need to diagnose what happened.
Why are my dinner rolls dense instead of soft?
Dense dinner rolls often point to too much flour, incomplete kneading, or a rise that ended before the dough was ready. Start with the 480 g flour, develop a smooth elastic dough, and follow expansion rather than the timer alone. A gummy center also calls for checking the bake and cooling period; density does not identify one single cause.
Why isn’t my dinner roll dough rising?
First check whether the dough is slowly expanding or showing no change at all. A cool room can delay dinner rolls, so keep the covered bowl in mild warmth around 75–80°F (24–27°C) and allow more time. If there is still no activity, review the yeast and mixing-liquid temperature; extra heat is not a reliable rescue.
How sticky should the dinner roll dough be?
The developed dough should feel soft and slightly tacky while holding together as a smooth elastic mass. It should not smear like paste. Give it the ten-minute hydration rest and adequate kneading before adding flour; only if paste-like smearing persists, add the conditional flour one teaspoon at a time, up to 15 g total.
Can I make these dinner rolls ahead of time?
Yes. For these dinner rolls, use the fully baked route: cool completely, wrap airtight, and freeze for up to one month for best quality. Thaw wrapped, then warm under foil at 350°F (175°C), checking a small group after about 5 minutes. An overnight raw-dough proof or partial bake needs a different schedule and is not part of this method.
Can I use active dry yeast instead?
For Red Star Active Dry Yeast, use 7 g and activate it with 120 ml of the listed milk, warmed to 110–115°F (43–46°C), plus 1 teaspoon of the listed sugar. Wait 5–10 minutes for foaming, then add the remaining ingredients. Allow longer rises if needed. Other brands may specify different quantities or temperatures, so check their directions.
Can I make the dough without a stand mixer?
Yes. Mix in a large bowl, take the ten-minute covered rest, then knead by hand for about 12–15 minutes, using a bench scraper to gather the dough. Continue until it is smooth, elastic, and slightly tacky, with a thin stretched membrane. This hand route keeps the dinner rolls within the same method without requiring a bread-machine or food-processor setting.
Keep Baking After the Bread Basket Is Empty
If working with a soft dough has made you want to bake again, there are several useful directions to take next. Stay with a shareable sweet bake, try another bread format, or give yourself a longer project with a sourdough starter.
More Soft, Shareable Bakes
For another bake that is portioned and passed around, sweet rolls keep the pleasure of a soft center while adding a filling or finish. Each uses its own dough and shaping instructions.
- Homemade Cinnamon Rolls: Practice spreading, rolling, and cutting a cinnamon-filled dough into soft spirals.
- Pumpkin Cinnamon Rolls: Bring pumpkin into the dough and finish the pan with cream cheese glaze for a seasonal brunch.
- Sourdough Discard Cinnamon Rolls: Use a separate sweet-roll recipe when there is discard in the kitchen to work with.
- Monkey Bread: Trade individual rounds for small cinnamon-coated pieces that pull away from a shared bake.
Bring Homemade Bread to Breakfast and Dessert
Bread can become a skillet breakfast, a flexible wrap, or the base of a custardy bake. These recipes take the interest in homemade dough and soft crumb toward different textures and uses.
- English Muffins: Make skillet-cooked rounds that split into a surface ready for butter and toasting.
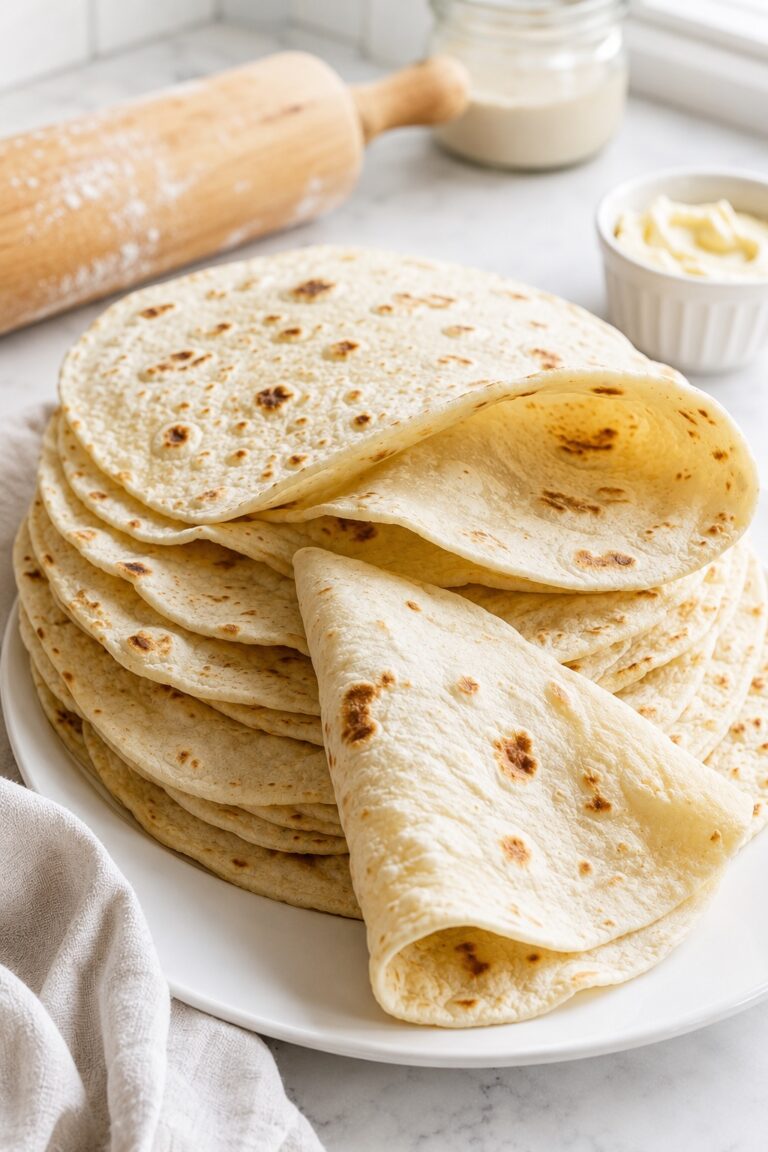
- Sourdough Discard Tortillas: Practice shaping thin, flexible flatbreads for wraps instead of rounded rolls.
- Bread Pudding: Follow the bread pudding recipe’s quantities and bread guidance for a soft, custardy dessert with warm vanilla sauce.
- French Toast Casserole: Plan a shared breakfast built from bread and custard, with the soaking and baking guidance in its own recipe.
Build Your Sourdough Skills
Naturally leavened bread brings a different rhythm to baking, beginning with an active starter rather than a packet of yeast. Start with the foundation if needed, then choose a skillet bread, a loaf, or a boiled-and-baked bagel.
- How to Make Sourdough Starter: Learn the feeding and readiness routine before choosing a bake that depends on an active starter.
- Sourdough English Muffins: Apply that starter to naturally leavened rounds cooked in a skillet.
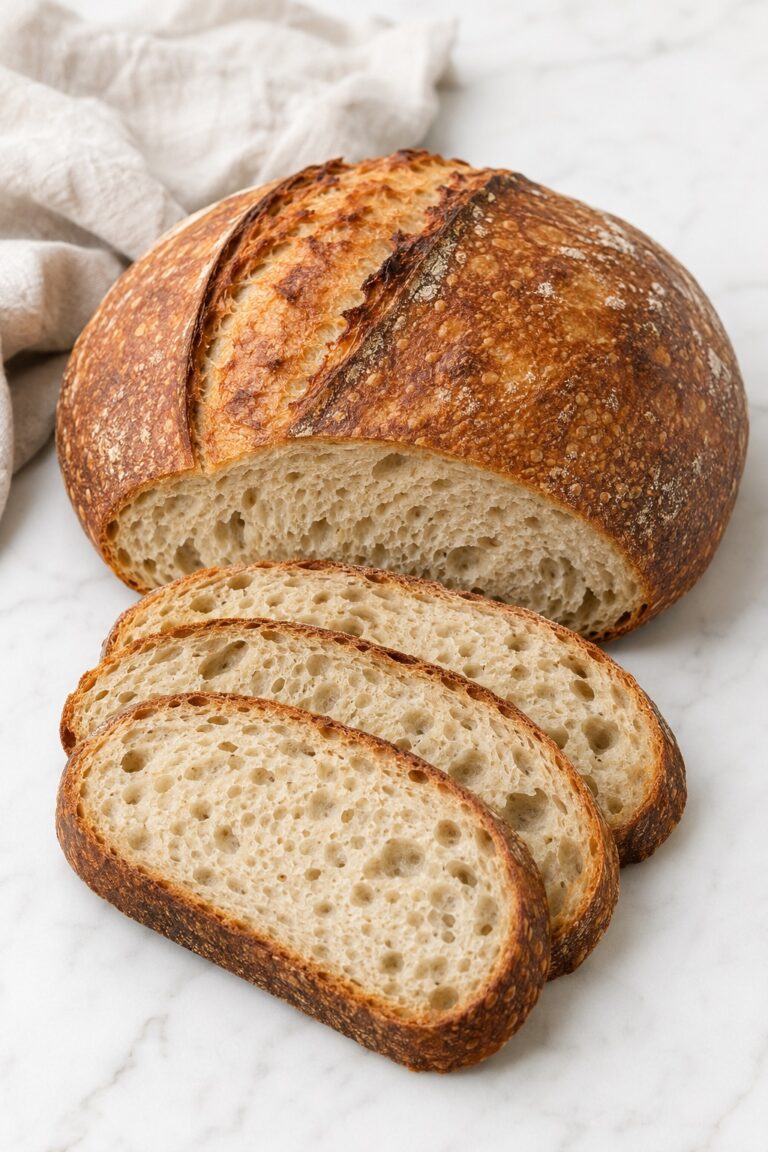
- Sourdough Bread: Move to a full loaf with a crisp crust and its own fermentation and shaping schedule.
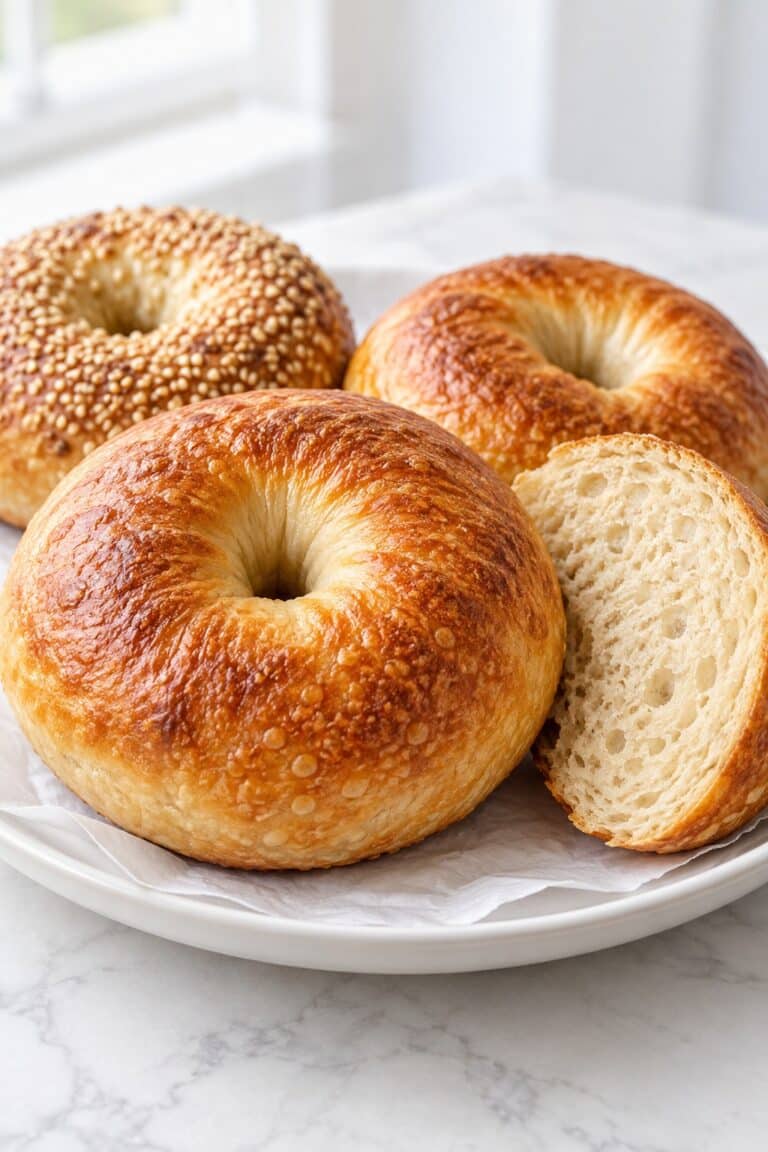
- Sourdough Bagels: Add ring shaping and a brief boil for a chewy bread with a noticeably different bite.
Why These Dinner Rolls Belong in Your Recipe Box
Keep these dinner rolls for the meals when a familiar bread deserves the same care as the dish beside it.
- A Familiar Batch. Returning to the same pan of fifteen dinner rolls gives you a useful point of comparison for how your own flour, kitchen, and hands behave from one bake to the next.
- Judgment That Grows. The differences between tacky dough, developed dough, and fully proofed rounds become easier to recognize with repetition, giving this recipe value beyond a single successful bread basket.
- Two Ways In. Having both a hand and mixer route keeps these dinner rolls useful as your equipment changes, while preserving the same dough characteristics to look for.
- Bread Beside Dinner. The restrained sweetness makes these dinner rolls a familiar companion across savory menus, so the recipe can return often without needing a new flavor identity each time.
- Room for Planning. The fully baked make-ahead option makes the recipe worth keeping for crowded cooking days as well as afternoons when you can enjoy the whole rise-and-bake rhythm.
- A Personal Finish. Plain butter, honey butter, or a dried herb finish lets the same soft bread feel at home at different tables without asking you to learn a new dough.
A Final Note on Homemade Dinner Rolls
A pan of dinner rolls earns its place quietly. The main dish may be what everyone planned the meal around, but bread is often what gets passed from hand to hand first. A soft round with a little warmth left in it can make an ordinary dinner feel more thoughtfully prepared.
This is a bake to return to when you want that small generosity without making the bread the whole event. Over time, the once-unfamiliar feel of the dough becomes easier to recognize, and the work can settle into the pauses between the other things happening in the kitchen.
There is room for a few uneven seams in a homemade bread basket. What matters is the tender crumb underneath them and the pleasure of offering something made with attention. Dinner rolls do not need to look identical to belong together on the table.

Soft Dinner Rolls with Buttery Golden Tops
Soft dinner rolls with tender pull-apart sides and buttery golden tops. This fifteen-roll batch includes both mixer and hand-kneading directions, with dough cues for each rise.
Ingredients
Dough
- 1 1/4 cups pasteurized whole milk (300 ml), warmed to 100–110°F (38–43°C)
- 2 1/4 teaspoons instant yeast (7 g)
- 3 tablespoons granulated sugar (38 g)
- 1 large egg (50 g without shell), at room temperature
- 1/4 cup unsalted butter (56 g), softened but not melted or oily
- 4 cups all-purpose flour (480 g), spooned and leveled if not weighed; US flour around 11–12% protein
- 1 1/2 teaspoons fine table salt (9 g)
For finishing
- 2 tablespoons unsalted butter (28 g), melted
For handling
- Neutral oil or nonstick spray, as needed for a thin coating on the bowl, pan, and covering
Only if needed
- Up to 2 tablespoons additional all-purpose flour (15 g), only if the developed dough still smears like paste; add 1 teaspoon at a time
Instructions
Prepare the Pan and Ingredients. Lightly grease a 9 × 13-inch light-colored metal pan, at least 2 inches deep, and a large bowl. Add a parchment sling to the pan if desired. Weigh the flour and salt, warm the milk to 100–110°F (38–43°C), and have the softened butter and room-temperature egg ready.
What you should see: A thin coating of grease, accurately measured flour, butter that gives under light pressure, and warm milk within the stated range.
Mix the Dough and Let the Flour Hydrate. Stir the milk, instant yeast, and sugar together in the mixing bowl. Add the egg, softened butter, 480 g flour, and salt. Mix with a spatula, dough whisk, or mixer until no dry pockets remain; the dough does not need to look smooth yet.
What you should see: A shaggy, uneven dough with all the flour moistened, rather than a finished ball or a pourable mixture.
Cover and rest for 10 minutes so the flour can take up the liquid before kneading. This pause is part of making the dough manageable; do not add the conditional flour simply because the first mixture feels sticky.
Knead Until Smooth, Elastic, and Tacky. Knead with the dough hook on low to medium-low speed, following your mixer’s dough instructions, for about 8–12 minutes. Alternatively, knead by hand on a clean surface for about 12–15 minutes, using a bench scraper to gather the dough as needed.
Look for a cohesive, smooth, elastic dough that remains slightly tacky. If it still smears like paste after adequate kneading and a brief rest, add flour one teaspoon at a time, up to 15 g total. Stop adding flour as soon as you can handle the dough; a perfectly clean bowl is not the goal.
What you should see: The dough holds together and stretches rather than breaking immediately, although a little may cling to the bottom of the bowl.
To check the dinner rolls’ dough, let a small piece relax briefly, then stretch it gently between your fingers. It should form a thin membrane before tearing. If it tears while still thick, continue developing the dough and reassess rather than treating the clock as proof that kneading is finished.
Let the Dough Complete Its First Rise. Place the dough in the lightly greased bowl and cover it. Let it rise in mild warmth, ideally around 75–80°F (24–27°C), for about 60–90 minutes. Note its starting volume so the later expansion is easier to judge.
What you should see: The dough is roughly doubled and visibly aerated. A cooler room may need more time; a small increase after an hour does not mean it is ready just because an hour has passed.
Divide and Shape Fifteen Even Rolls. Gently deflate the dough, weigh it, and divide the actual weight by fifteen. The pieces will usually be about 63–64 g each. Portion all the dough before rounding so you can distribute small adjustments evenly across the batch.
To shape the dinner rolls, bring the edges of each piece underneath and pinch them together to close the bottom seam. Keep the top surface intact as you gather the underside.
Cup your hand around the portion and round it into a smooth ball. If the dough pulls back strongly or resists shaping, cover it and rest for 5–10 minutes before continuing.
What you should see: Fifteen similar dinner rolls with smooth tops and closed seams underneath, arranged three across the short side and five along the long side of the pan, with space left for expansion.
Proof the Shaped Rolls and Preheat the Oven. Cover the shaped dinner rolls loosely with lightly greased wrap and let them proof in the same mild warmth for about 45–75 minutes. Preheat the oven to 350°F (175°C) during the latter part of this rise, with a rack in the center.
What you should see: The dinner rolls look puffy and expanded, with neighboring sides touching or nearly touching. They no longer look like the compact rounds that first went into the pan.
Press one gently with a lightly floured finger to make a shallow indentation. It should return slowly and leave a slight impression. A quick rebound suggests more proofing; dough that feels fragile and collapses at a touch has gone too far. Read this response alongside the overall expansion, not as an isolated test.
Bake Until the Center Is Set. Uncover and bake the dinner rolls on the center rack for about 22–28 minutes. If the tops brown before the center is ready, loosely tent the pan with foil and continue checking rather than removing the rolls on color alone.
What you should see: Even golden tops and set sides, with a center roll baked through rather than a pale, compressed middle hidden between darker edges.
Check the crumb of a center roll with an instant-read thermometer without touching the pan. A reading around 190°F (88°C) supports doneness when the color and set cues agree. A hotter corner roll cannot tell you whether the middle of the pan is finished.
Brush with Butter and Cool Briefly. Brush the hot dinner rolls with the 2 tablespoons (28 g) melted finishing butter. Let the dinner rolls rest in the pan for about 5 minutes, then carefully transfer the joined slab to a wire rack and cool for another 5 minutes before serving warm.
What you should see: A light butter sheen over the golden tops and a soft center that holds its structure when the rolls are separated. Rolls for packing or freezing must cool completely.
Notes
Equipment
- Digital scale, liquid measuring cup, measuring spoons, and instant-read thermometer; use the scale for flour and equal portions, the thermometer for milk and center crumb.
- Large mixing/rising bowl, flexible spatula or dough whisk, and a cover that keeps the surface from drying without sticking.
- Stand mixer with dough hook, or a clean kneading surface and bench scraper for the hand route; respect the mixer manufacturer's dough-speed instructions.
- Light-colored metal 9 x 13 x at least 2-inch pan on the center rack of a conventional oven; optional parchment sling, lightly greased covering, and foil if tenting is needed.
- Pastry brush for the finishing butter and wire rack for cooling; transfer the joined rolls carefully after their brief pan rest.
Recipe Notes
- Timing is a representative schedule. Allow 60–90 minutes for the first rise and 45–75 minutes for the final proof, following the dough cues. The full planning range is 177–243 minutes; a cool room or extra shaping rest can add time.
- Keep the fifteen-piece yield, light-colored metal 9 × 13-inch pan at least 2 inches deep, and 3 × 5 arrangement. Weigh the actual dough and divide by fifteen; about 63–64 g each is a guide.
- Use the 480 g base flour first. Additional flour is conditional, up to 15 g total, added one teaspoon at a time only if the developed dough remains paste-like. A slight tack is normal for dinner rolls.
- Cool completely before packing dinner rolls airtight. Keep at room temperature up to two days for quality, or freeze the fully baked rolls up to one month. Thaw wrapped; reheat under foil at 350°F (175°C), checking a small group after 5 minutes or a larger group at 10–15 minutes, and stop when warm.
- For honey butter, stir 1 tablespoon honey (21 g) into the same 2 tablespoons melted finishing butter (28 g). For dried garlic-herb butter, add 1 teaspoon dried parsley (about 0.5 g) and 1/4 teaspoon garlic powder (about 0.8 g) to that butter. These additions and extra serving accompaniments are separate from the plain dinner rolls.
- For Red Star Active Dry Yeast, use 7 g. Reserve 120 ml milk and 1 teaspoon sugar from the totals; warm that milk to 110–115°F (43–46°C), add the yeast and reserved sugar, and wait 5–10 minutes for foaming. Continue with the remaining ingredients and allow longer rises if needed. Other brands may specify a different conversion or temperature.
- Use the fully baked make-ahead route for dinner rolls. This method does not include overnight raw-dough proofing, raw-dough freezing, partial baking, alternative flour formulas, or a larger bread format.
- Contains wheat, milk, and egg. Avoid tasting raw dough and clean hands, tools, and work surfaces after handling it.
- Nutrition is estimated per dinner roll, including one-fifteenth of all the plain finishing butter. The estimate excludes oil or spray used for greasing, conditional extra flour, optional honey or dried herb additions, and extra serving accompaniments. Using all 15 g of the extra flour adds about 4 calories per roll.
Nutrition Information:
Yield: 15 Serving Size: 1 rollAmount Per Serving: Calories: 185Total Fat: 5.9gSaturated Fat: 3.4gCholesterol: 27mgSodium: 248mgCarbohydrates: 28.2gFiber: 1.0gSugar: 3.7gProtein: 4.6g
Nutrition information is provided as an estimate only and may vary based on specific ingredients, brands, and portion sizes used. This information should not be considered medical or nutritional advice.
12 Sweet Favorites — Yours, Free 🍰
Tiramisù, no-bake cheesecake, the perfect chocolate chip cookie & 9 more reader-loved desserts — gathered into one beautiful free recipe book. From my kitchen to yours.
No spam, just sweet things. Unsubscribe anytime.