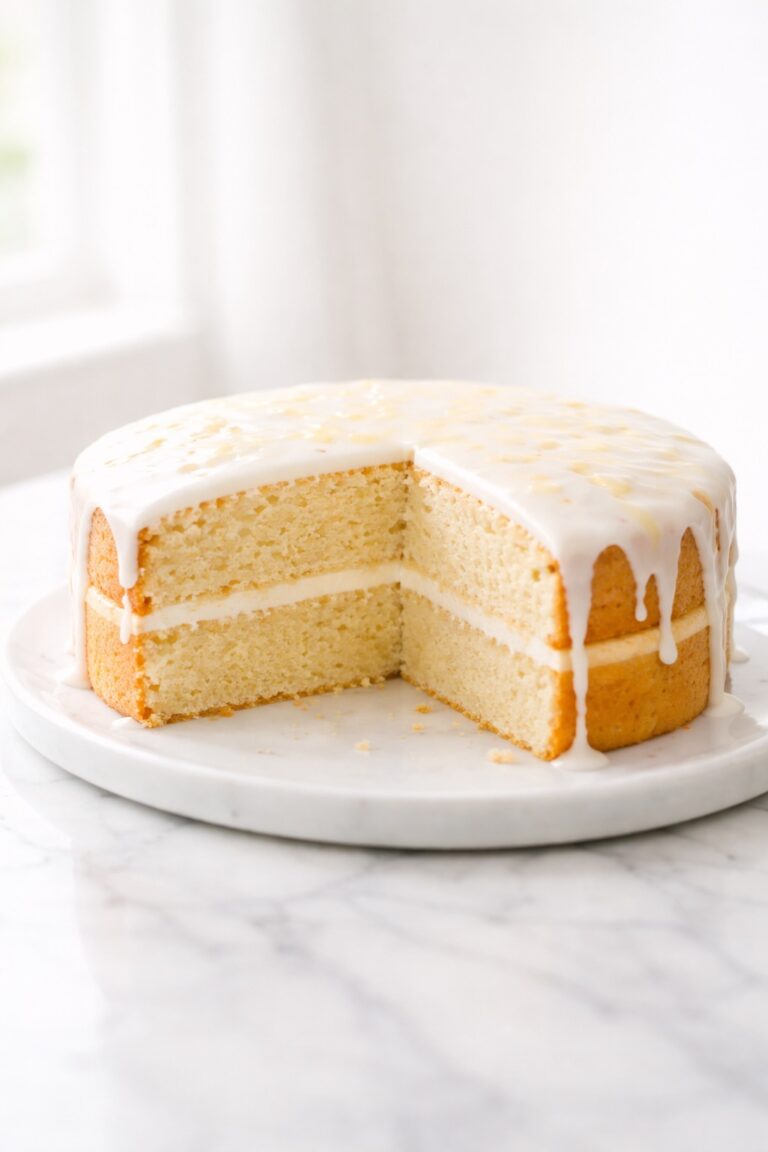
Flourless Chocolate Cake
🎁 FREE E-BOOK: 12 Sweet Favorites — reader-loved desserts in one beautiful recipe book.
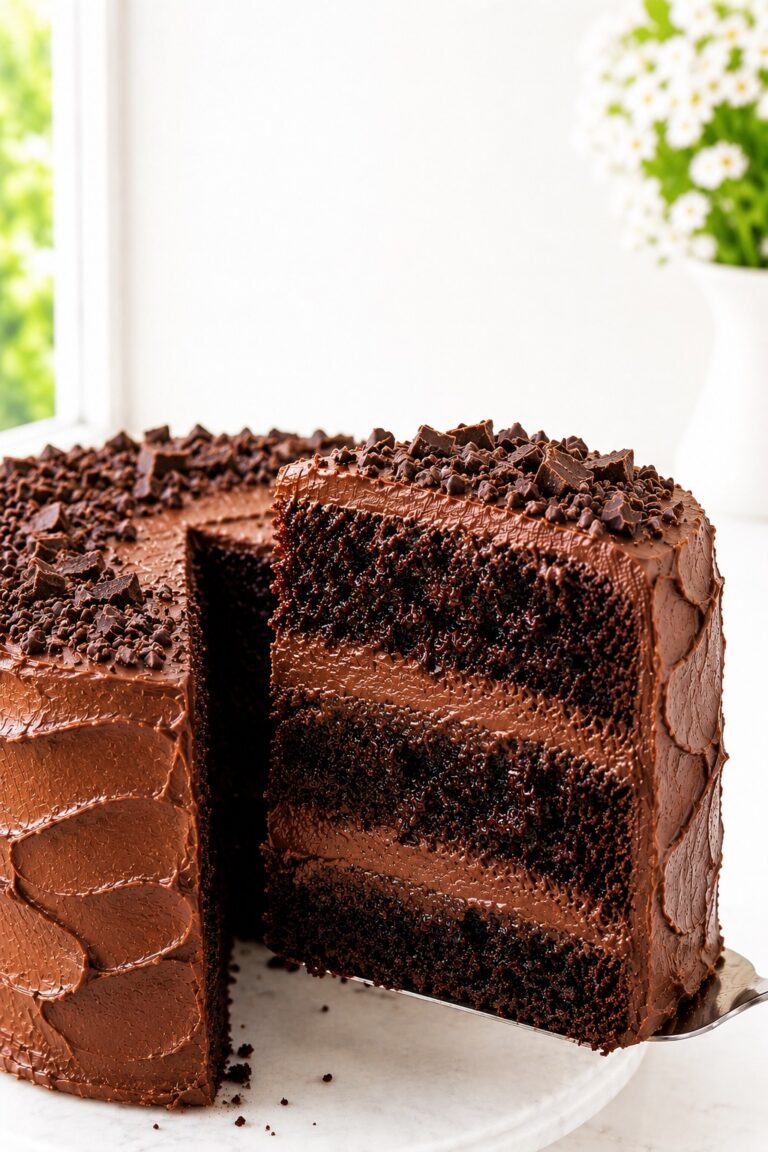
This flourless chocolate cake has a delicate top crust and a dense, smooth center that feels closer to a chocolate truffle than a traditional layer cake. Each small slice is deeply chocolatey, rich without being greasy, and firm enough to hold a clean edge.

The texture comes from a careful balance of 60 to 64% bittersweet baking chocolate, weighed eggs, Dutch-process cocoa, and restrained aeration. Five doneness cues work together so you can remove the cake while the center is still fudgy rather than waiting until it turns dry and cakey.
The recipe is naturally flourless, but anyone avoiding gluten strictly should still verify ingredient labels and prevent flour cross-contact. After baking, the cake cools gradually, chills for at least 4 hours to finish setting, and tempers for 20 minutes before slicing so the chocolate can soften to its intended texture.
Flourless Chocolate Cake at a Glance
This overview shows the pan, timing, yield, and texture decisions that matter most before you begin.
| Prep and batter | 25 minutes |
|---|---|
| Bake time | 28–32 minutes |
| Room-temperature cooling | About 90 minutes |
| Minimum chilling | 4 hours |
| Tempering before serving | 20 minutes |
| Total elapsed time | About 6 hours 45 minutes |
| Yield | One 9-inch cake, 12 rich dessert slices |
| Pan | Light-colored metal 9-inch springform pan |
| Oven | 350°F (177°C), conventional setting |
| Target texture | Thin crust with a dense, smooth, fudgy center |
Why This Flourless Chocolate Cake Recipe Works
Every part of the recipe has a clear job, from the narrow chocolate range to the cooling sequence that completes the set.
- A precise chocolate range balances the center. Bittersweet baking chocolate between 60 and 64% cacao provides enough cocoa solids for structure without making the cake excessively bitter or firm.
- Weighed eggs provide reliable structure. Using 250 g of egg without shells removes the variation that comes from relying only on an approximate egg count.
- Restrained whisking protects the fudgy texture. The eggs are blended and slightly lightened, but never whipped into a full ribbon-stage foam.
- A warm, gradual emulsion keeps the batter cohesive. The chocolate-butter mixture cools to 105–110°F (41–43°C) before it is streamed into the eggs.
- Five doneness cues prevent guesswork. Edge set, surface, center movement, tester crumbs, and internal temperature must agree.
- Cooling and chilling finish the structure. The cake settles gently, firms in the refrigerator, and then softens during a short temper before serving.
Why You’ll Love This Flourless Chocolate Cake
This is a small-slice dessert with an intense chocolate payoff and a make-ahead rhythm that works beautifully for celebrations.
- The ingredient list is short, with no flour, nut meal, cream, or chemical leavener.
- The center is dense and fudgy rather than molten, airy, or brownie-like.
- The cake can be chilled overnight, which removes pressure from the day you plan to serve it.
- Clear visual and temperature cues help protect the center from overbaking.
- A simple dusting of confectioners’ sugar is enough for an elegant finish.
- The rich 9-inch cake divides into 12 neat dessert portions.
The Science of a Dense, Fudgy Flourless Chocolate Cake
Without flour or chemical leavener, the cake depends on chocolate solids, egg proteins, emulsion stability, and gradual cooling to form a sliceable center.
Chocolate and Butter Build the Truffle-Like Center
Chocolate supplies cocoa solids, cocoa butter, sugar, and flavor, while butter adds tenderness and richness. Dutch-process cocoa contributes extra chocolate solids and absorbs some free fat. When the warm chocolate-butter mixture joins the eggs gradually, these components form a smooth emulsion instead of separating into an oily batter.
Eggs Add Structure Without a Full Foam
Egg proteins set around the chocolate mixture as the cake bakes. A shallow layer of small bubbles is enough to encourage a delicate crust and modest lift. Whipping until the eggs hold a ribbon would introduce more air, creating a taller rise, a less dense crumb, and a greater risk of dramatic collapse.
Cooling and Chilling Complete the Set
The center is still soft when the cake leaves the oven. As it cools, carryover heat finishes the egg structure and the fats begin to firm. Refrigeration gives the chocolate enough time to set for clean transfer and slicing, while the final 20-minute temper restores a smoother, softer eating texture.
Before You Make Flourless Chocolate Cake
A few minutes of preparation keep water away from the chocolate, prevent the warm batter from waiting, and make the cooling and chilling stages easier to manage.
- Bring the eggs to 68–72°F (20–22°C) and weigh 250 g without shells.
- Finely chop the chocolate so it melts gently and evenly.
- Cube the butter into roughly 1/2-inch pieces.
- Sift the Dutch-process cocoa before it reaches the batter.
- Fit and grease the parchment round before melting the chocolate.
- Confirm that the center oven rack is clear and the oven is fully preheated.
- Make space for the cooled cake to sit level in the refrigerator for at least 4 hours.
- Keep every bowl and utensil that touches the chocolate completely dry.
A Make-Ahead Timeline for Flourless Chocolate Cake
The cake needs about 6 hours 45 minutes from preparation to serving, but most of that time is hands-off cooling and chilling.
| When | What to do |
|---|---|
| About 6 hours 45 minutes before serving | Prepare the pan, make the batter, and begin baking. |
| About 6 hours 20 minutes before serving | Bake for 28–32 minutes, checking from minute 27. |
| About 5 hours 48 minutes before serving | Cool 15 minutes in the pan, release the ring, then cool about 75 minutes longer. |
| About 4 hours 18 minutes before serving | Cover the fully cooled cake and refrigerate for at least 4 hours. |
| 20 minutes before serving | Temper the cake at cool room temperature. |
| Just before serving | Add an optional finish and slice with a hot, dry knife. |
For the easiest schedule, bake and chill the cake the day before. Keep it undecorated, then temper, finish, and slice it shortly before serving.
Ingredients for Flourless Chocolate Cake
This short recipe leaves little room for ingredient substitutions, so use baking chocolate in the specified cacao range, weigh the eggs, and choose Dutch-process cocoa for the intended result.
Ingredient List
Measure the cake ingredients before melting begins. US customary amounts appear first, with metric measurements in parentheses.
- 8 oz (226 g) 60 to 64% bittersweet baking chocolate, finely chopped
- 10 tbsp (142 g) unsalted butter, cut into 1/2-inch cubes
- About 5 large eggs (250 g without shells), at 68–72°F (20–22°C)
- 3/4 cup plus 2 tbsp (175 g) granulated sugar
- 1/3 cup (30 g) Dutch-process cocoa powder, sifted
- 2 tsp (10 ml) pure vanilla extract
- 1/2 tsp (3 g) fine sea salt
- 1 tsp (2 g) instant espresso powder, optional
- 1 tbsp (8 g) confectioners’ sugar, optional for finishing

Ingredient Notes
Chocolate type, cocoa processing, egg weight, and the timing of the flavor ingredients all influence the finished texture.
Choosing 60 to 64% Bittersweet Chocolate
Choose a baking bar or couverture that lists a cacao percentage between 60 and 64%. Chocolate below this range usually contributes more sugar and may set more softly, while higher-cacao chocolate brings more bitterness and a firmer center. Chocolate chips are not a direct replacement because stabilizers and other ingredients can change how they melt and set.

Why Dutch-Process Cocoa Works Best
Dutch-process cocoa gives this cake a rounder chocolate flavor, dark color, and a measured amount of dry solids. Because there is no baking soda, natural cocoa would not create a leavening failure, but it would make the flavor sharper and the color lighter. It is workable in a different version, not identical to this one.
Add the vanilla, salt, and optional espresso powder to the eggs and sugar in Step 3. The espresso amount is small and optional; its purpose is to deepen the chocolate rather than turn the cake into a mocha dessert.

Kitchen Tools Needed
The pan color, accurate scale, dry melting setup, and reliable thermometer all help control a cake with such a narrow doneness window.
- Pan and release: One light-colored metal 9-inch (23 cm) springform pan at least 2 1/2 inches deep, a parchment round, and heavy-duty foil or a rimmed sheet pan for drip control.
- Measurement: A digital kitchen scale, liquid measuring tools, and measuring spoons.
- Melting: A completely dry heatproof bowl and saucepan for a low double boiler, or a microwave-safe bowl for short bursts at low power.
- Mixing: A medium mixing bowl, balloon whisk, flexible silicone spatula, and fine-mesh sieve.
- Checking and finishing: An instant-read thermometer, wire cooling rack, thin flexible knife or offset spatula, sharp slicing knife, and hot water.
What to Expect from This Flourless Chocolate Cake
This cake changes noticeably as it moves from glossy batter to a softly set bake, a chilled structure, and finally a tempered slice.
| Stage | Normal result |
|---|---|
| Finished batter | Thick, dark, glossy, and free of cocoa pockets or oily separation. |
| During baking | A modest rise with a thin, dry top crust and possible fine cracks. |
| When ready to leave the oven | Set outer edge with a softer center that moves as one unit rather than rippling or sloshing. |
| During cooling | Shallow, even settling and a slight center depression; fine cracks may remain visible. |
| After chilling | Firm enough to transfer and cut cleanly, with no paste-like or wet line at the base. |
| After a 20-minute temper | Dense, smooth, and fudgy rather than cold-hard, liquid, cakey, or crumbly. |
How to Make Flourless Chocolate Cake
Move through the mixing stages without long pauses, then rely on the visible and temperature cues rather than extending the bake for a completely dry tester.
1. Prepare the Pan and Oven
Position a rack in the center of a conventional oven and preheat to 350°F (177°C). Lightly grease the base and sides of a light-colored metal 9-inch springform pan. Line the base with parchment and lightly grease the parchment. Wrap only the exterior joint at the base with one wide sheet of heavy-duty foil, or place the pan on a rimmed sheet pan. Use this only for drip control, not as a water bath.
What you should see: The parchment lies flat, the ring is fully latched, and the foil does not rise above the outside midpoint of the pan.
2. Melt the Chocolate and Butter
Combine the finely chopped chocolate and cubed butter in a completely dry heatproof bowl. Set it over barely simmering water that does not touch the bowl. Stir slowly until about 85% of the chocolate has melted, then remove the bowl from the heat and continue stirring until smooth. Keep water and steam out of the bowl. Let the mixture cool to 105–110°F (41–43°C).

What you should see: The mixture is glossy, fluid, and streak-free, with no unmelted pieces, graininess, scorch marks, or separated oil.
3. Whisk the Eggs and Sugar Without Building a Full Foam
In a separate bowl, whisk the 250 g eggs, granulated sugar, vanilla, salt, and optional espresso powder for 60–90 seconds. Stop when the mixture is uniform and slightly lightened but has not reached ribbon stage or doubled in volume.

What you should see: The sugar is fully moistened, no ropes of egg white remain, and only a shallow layer of small bubbles sits on the surface.
4. Build the Chocolate Emulsion
While whisking the egg mixture continuously, pour in the 105–110°F (41–43°C) chocolate-butter mixture in a thin, steady stream over about 30 seconds. Scrape the bowl and whisk only until the batter is glossy and evenly dark.

What you should see: The batter is smooth and cohesive, with no cooked egg flecks, pale streaks, oily pooling, or broken grainy texture.
5. Fold in the Cocoa
Sift the Dutch-process cocoa over the batter in two additions. Fold with a flexible spatula, scraping the base and sides, until no dry cocoa pockets or pale streaks remain. Stop immediately when the mixture is uniform, normally after about 20–25 broad folds.

What you should see: The batter falls from the spatula in a thick, continuous ribbon that settles back into the surface within several seconds.
6. Fill the Pan
Transfer 815–830 g of batter to the prepared pan. Smooth the top gently without repeatedly tapping the pan, then rotate it once to level the surface.

What you should see: The batter is level, glossy, and approximately 3/4 to 1 inch deep, with no large trapped air pockets.
7. Bake Until All Five Doneness Cues Agree
Bake at 350°F (177°C) for 28–32 minutes and begin checking at 27 minutes. Remove the cake only when the outer 1 1/2 inches are set, the top has a thin dry crust, the center 2–3 inches move as one soft unit, a tester carries moist crumbs but no wet batter, and the center registers 200–202°F (93–94°C).

What you should see: The cake is slightly puffed, the crust may show fine cracks, and the center remains visibly softer than the edge without looking fluid.
8. Release and Cool Gradually
Cool the cake in the pan on a rack for 15 minutes. Run a thin flexible knife around the inside edge and release the springform ring. Leave the cake on the pan base until fully cooled, about 75 minutes longer. Do not lift or slide the warm cake.

What you should see: The cake settles modestly and evenly. A shallow center depression and fine crust cracking are normal, while a wet collapsed crater is not.
9. Chill to Set the Slice
Once completely cool, cover the cake without pressing wrap onto the surface and refrigerate for at least 4 hours or overnight. Slide the chilled cake from the base onto a flat serving plate.

What you should see: The cake is firm enough to move and slice cleanly, while the center remains dense rather than hard, wet, or crumbly.
10. Temper, Finish, and Slice
Let the chilled cake stand at cool room temperature for 20 minutes. Dust lightly with the optional confectioners’ sugar immediately before serving. Dip a sharp knife in hot water, wipe it completely dry, and clean and reheat it between cuts.

What you should see: Each slice holds a sharp edge and reveals a smooth, dense, fudgy interior without a wet line at the base.
How to Tell When Flourless Chocolate Cake Is Done
Time is only the starting point. The cake is ready when the edge, crust, center movement, tester, and internal temperature all point to the same softly set center.
One thing I learned with flourless chocolate cake is that a perfectly clean toothpick can come too late. The cake continues to set as it cools, so I now look for set edges, a thin dry crust, a center that moves as one soft unit, and moist crumbs on the tester. That combination protects the dense, fudgy center instead of letting it turn dry and cakey.
Flourless Cake Doneness Guide
Use this comparison when the visual cues seem close but you are not sure whether to keep baking or remove the cake.
| Check state | Edge and surface | Center movement | Tester | Center temperature | What to do |
|---|---|---|---|---|---|
| Too early | Edge not fully set; surface still glossy or wet | Ripples or sloshes independently | Glossy wet batter | Below 200°F (93°C) | Bake 2 minutes, then repeat every check. |
| Ready | Outer 1 1/2 inches set; thin dry crust; fine cracks allowed | Center 2–3 inches move as one soft unit | Moist crumbs with no wet batter | 200–202°F (93–94°C) | Remove the cake and let it cool gradually. |
| Overbake risk | Hard edge ring; uniformly dry or rigid surface | Little or no softness remains | Completely dry | Above the intended range | Remove immediately; do not wait for a cleaner tester. |

Expected Settling and Fine Cracks
A modest, even drop is normal because the cake contains no flour framework or chemical leavener. A shallow center depression and fine surface cracks can accompany a properly baked fudgy center. A deep wet crater, detached sidewalls, greasy core, or paste-like center after chilling points to underbaking, excess aeration, or a broken emulsion.

Expert Tips for a Smooth, Fudgy Center
These details protect the texture without adding extra steps or ingredients.
Stop Whisking Before Ribbon Stage
Whisk only until the eggs and sugar are uniform, slightly lighter, and covered with a shallow layer of small bubbles. If the mixture falls in a thick ribbon that holds on the surface, too much air has been incorporated for this dense cake.
Keep the Chocolate Emulsion Glossy
Cool the chocolate-butter mixture to 105–110°F (41–43°C), then stream it into room-temperature eggs while whisking continuously. A thin stream prevents sudden heat concentration, while stopping as soon as the batter is evenly dark avoids unnecessary aeration.
Use a Hot, Dry Knife for Clean Slices
Dip the knife in hot water, dry it completely, make one cut, and wipe away the chocolate before reheating the blade. The knife must be dry because stray water can mark the surface and smear the cut face.
Flourless Chocolate Cake Mistakes to Avoid
Most problems trace back to ingredient substitutions, an unstable emulsion, excess aeration, or a doneness decision made from only one cue.
| Symptom | Likely cause | What to do now | Next time |
|---|---|---|---|
| Dry or cakey center | Excess egg aeration, dark pan, too much cocoa, high-cacao chocolate, or baking too long | Remove immediately if the cake is still in the oven; serve finished slices with a restrained accompaniment if desired. | Use the specified pan and ingredients, stop before ribbon stage, and require moist crumbs at 200–202°F. |
| Greasy or separated batter | Chocolate too hot, rapid addition, or an unstable emulsion | Fold gently only if the separation is slight; a severely broken batter may not recover. | Cool chocolate to 105–110°F and stream it slowly into room-temperature eggs. |
| Gummy or wet center | Removal before all five cues agreed or insufficient chilling | If the cake is still warm and clearly underbaked, return it briefly only when it can be handled safely. Do not promise that a fully chilled underbaked cake can be repaired. | Check center movement, crumbs, and temperature together, then chill at least 4 hours. |
| Deep collapse | Underbaking, excessive egg foam, or broken emulsion | Distinguish it from normal shallow settling; a cosmetic topping does not correct a wet center. | Avoid ribbon-stage eggs and confirm all five doneness cues. |
| Stuck or torn edge | Incomplete greasing, missing parchment, or forceful warm release | Loosen the edge carefully with a thin flexible knife. | Fit a greased parchment round and loosen the side after the 15-minute pan rest. |
| Crumbly slices | Overbaking, slicing straight from the refrigerator, or using a cold dirty knife | Temper the cake 20 minutes and switch to a hot, dry knife. | Remove when all five doneness cues agree, then clean and reheat the knife between cuts. |
| Cocoa lumps or pale streaks | Unsifted cocoa or incomplete folding | Fold only until the last visible pocket disappears. | Sift cocoa in two additions and scrape the bowl from the base. |
Supported Changes and Recipe Boundaries
Simple finishing choices are flexible, but changes to chocolate, eggs, cocoa, sugar, dairy, or pan geometry alter the structure and require more than a timing adjustment.
| Change | Recommendation | What it means |
|---|---|---|
| Omit the espresso powder | Works | The cake remains structurally unchanged with slightly less roasted chocolate depth. |
| Omit or add confectioners’ sugar | Works | This is a finish only; dust immediately before serving. |
| Add whipped cream, berries, ganache, or vanilla ice cream | Works as a pairing | Serve it as an accompaniment rather than adding it to the cake itself. |
| Use natural cocoa | Changes the result | The cake will be lighter and sharper in flavor; no direct equivalence is promised. |
| Use chocolate chips | Not a direct swap | Stabilizers and varying cacao content can change melt viscosity and set. |
| Use an 8-inch or 10-inch pan | Not a direct swap | Depth, bake time, and doneness cues would need to be tested again. |
| Replace the eggs | Not tested here | Eggs are the primary protein structure and emulsion system. |
| Use dairy-free butter or reduce the sugar | Not tested here | Fat crystallization, moisture, crust, bitterness, and set would change. |
Beautiful Ways to Serve Flourless Chocolate Cake
A tempered plain slice shows the intended texture, but a restrained finish can add color, creaminess, or temperature contrast without covering the cake’s character.
A Simple Confectioners’ Sugar Finish
Sift a very light layer over the tempered cake immediately before serving. Applying it to a damp, very cold, or stored surface can make the sugar dissolve and disappear.

Whipped Cream and Fresh Contrast
A small spoonful of softly whipped cream and a few tart berries can lighten each rich bite. For the right texture, follow these steps to make whipped cream that is soft and spoonable rather than stiff.
Ganache for an Extra-Rich Finish
For a more intense presentation, add a thin spoonful of chocolate ganache to individual plates. Ganache remains optional and is not included in the cake recipe or nutrition estimate.
Vanilla Ice Cream with a Tempered Slice
Temper the cake before adding a small scoop of vanilla ice cream. The contrast is strongest when the cake is softly fudgy rather than refrigerator-hard.
How to Store, Freeze, and Make Flourless Chocolate Cake Ahead
Cool the cake completely before covering so trapped steam does not soften the crust or create condensation.
Refrigerator Storage
Store the cake airtight in the refrigerator for up to 4 days. Keep it undecorated for the cleanest surface, then temper individual slices for about 20 minutes before serving.
Freezing and Thawing
Freeze the fully cooled, undecorated whole cake or individual slices for up to 2 months. Wrap first in plastic wrap, then place in an airtight container or freezer bag. Thaw overnight in the refrigerator while still wrapped. Unwrap after thawing, then temper before serving.
Make It One Day Ahead
Bake and cool the cake the day before, cover it once completely cool, and refrigerate overnight. Wait until serving day to transfer, temper, dust, and slice it.
Flourless Chocolate Cake Questions, Answered
These concise answers cover the questions most likely to affect ingredient safety, pan choice, make-ahead planning, and serving texture.
Is flourless chocolate cake gluten-free?
This recipe contains no wheat, rye, barley, flour, or nut meal, so it is naturally flourless. For strict gluten avoidance, verify the labels on the chocolate, cocoa, vanilla, espresso powder, confectioners’ sugar, and any pan-release product. Use clean tools and surfaces and avoid flour-containing baking spray. The FDA gluten-free labeling standard explains the U.S. less-than-20-ppm definition, but it does not certify a home kitchen or finished cake.
Why does flourless chocolate cake sink or crack?
A shallow, even settle and fine surface cracks can be normal as the egg structure relaxes and the fats firm. A deep wet crater, detached sides, or greasy core points instead to underbaking, excess aeration, or emulsion failure.
Can I make flourless chocolate cake ahead and freeze it?
Yes. Refrigerate the cooled cake airtight for up to 4 days, or freeze it undecorated and well wrapped for up to 2 months. Thaw it wrapped overnight in the refrigerator and temper before serving.
Should flourless chocolate cake be served cold or at room temperature?
Chill it for at least 4 hours so the center sets cleanly, then let it stand at cool room temperature for 20 minutes before slicing. That sequence gives you stability from the chill and a softer fudgy texture from the temper.
Can I use an 8-inch or 10-inch pan instead?
Not with the same reliable result. An 8-inch pan creates a thicker cake, while a 10-inch pan creates a thinner one. Both change batter depth, heating rate, and timing, so this recipe is written for a light-colored 9-inch springform pan.
Will espresso powder make the cake taste like coffee?
The optional 1 teaspoon (2 g) is intended to deepen the chocolate, not create a mocha flavor. Leave it out if you prefer; the structure and method remain unchanged.
Keep Exploring Chocolate and Flourless Desserts
Choose your next bake by staying with chocolate cake, exploring a different rich chocolate texture, or following a gluten-free and naturally flourless path.
More Chocolate Cakes
These cakes keep chocolate at the center while changing the pan, crumb, filling, or presentation.
- Chocolate Sheet Cake: choose it for a tender 9 × 13 cake with creamy chocolate frosting.
- Matilda Cake: choose it for a tall, dramatic chocolate centerpiece.
- Chocolate Poke Cake Recipe: choose it for a soaked, filling-rich chocolate texture.
- Ding Dong Cake Recipe: choose it for chocolate cake with a creamy center and glossy finish.
Rich Chocolate Desserts
Move beyond cake when you want chocolate that is chewy, silky, warm, or spoonable.
- Chocolate Fudge Recipe: for dense bite-size chocolate richness.
- French Silk Pie: for a smooth chocolate filling in a sliceable pie.
- Chocolate Cobbler Recipe: for a warm chocolate dessert with its own sauce.
- Chocolate Chia Pudding: for a make-ahead spoonable chocolate option.
Gluten-Free and Naturally Flourless Paths
These recipes offer different gluten-free or naturally flourless directions, but each keeps its own ingredient-label and cross-contact requirements.
- Gluten Free Chocolate Chip Cookies: for a classic cookie made with a different gluten-free recipe.
- Gluten Free Angel Food Cake: for a light, airy cake at the opposite end of the texture spectrum.
- Crustless Pumpkin Pie: for a softly set spice dessert without a traditional crust.
- 3 Ingredient Peanut Butter Cookies: for a simple naturally flourless cookie path.
A Classic Dessert with Clear, Measurable Cues
This classic dessert becomes easier to repeat when each key decision can be seen or measured. Chocolate percentage, egg weight, batter temperature, center movement, moist crumbs, and a narrow internal-temperature range remove much of the guesswork.
The cake also reflects the kind of elegance that does not need elaborate decoration. A thin crust, a smooth dark center, and one clean slice carry the presentation, while optional pairings stay secondary to the chocolate itself.
Why This Flourless Chocolate Cake Belongs in Your Recipe Box
Choose this cake when you want deep chocolate flavor, a polished presentation, and most of the work finished before guests arrive.
- Short ingredient list: Seven required cake ingredients create the complete structure and flavor.
- Precise chocolate range: The 60 to 64% cacao range makes shopping more precise.
- Clear doneness cues: Every major stage includes a texture, temperature, or visual cue.
- Make-ahead timing: Overnight chilling fits naturally into the method.
- Neat portions: One 9-inch cake yields 12 small, celebration-ready slices.
- Flexible presentation: Serve it simply or add a restrained accompaniment without changing the cake itself.
Final Thoughts on Flourless Chocolate Cake
A flourless chocolate cake does not need to rise high or bake until every crumb looks dry. Its beauty is in the contrast between the fragile top crust and the dense center beneath it.
Near the end of baking, check for set edges, a thin dry crust, one soft movement in the center, moist crumbs, and the correct internal temperature.
Cool the cake completely, chill it for at least 4 hours, and temper it for 20 minutes before serving. This sequence produces a smooth, fudgy slice that still holds a clean edge.

Flourless Chocolate Cake
This rich flourless chocolate cake has a delicate top crust and a dense, smooth, fudgy center. Weighed eggs, a precise chocolate range, and five doneness cues help it bake evenly and slice cleanly.
Ingredients
- 8 oz (226 g) 60 to 64% bittersweet baking chocolate, finely chopped
- 10 tbsp (142 g) unsalted butter, cut into 1/2-inch cubes
- About 5 large eggs (250 g without shells), at 68 to 72°F (20 to 22°C)
- 3/4 cup plus 2 tbsp (175 g) granulated sugar
- 1/3 cup (30 g) Dutch-process cocoa powder, sifted
- 2 tsp (10 ml) pure vanilla extract
- 1/2 tsp (3 g) fine sea salt
- 1 tsp (2 g) instant espresso powder, optional
- 1 tbsp (8 g) confectioners' sugar, optional for finishing
Instructions
- Prepare the Pan and Oven: Position a rack in the center of a conventional oven and preheat to 350°F (177°C). Lightly grease the base and sides of a light-colored metal 9-inch springform pan. Line the base with parchment and lightly grease the parchment. Wrap only the exterior joint at the base with one wide sheet of heavy-duty foil, or place the pan on a rimmed sheet pan. Use this only for drip control, not as a water bath. The parchment should lie flat, the ring should be fully latched, and the foil should not rise above the outside midpoint of the pan.
- Melt the Chocolate and Butter: Combine the finely chopped chocolate and cubed butter in a completely dry heatproof bowl. Set it over barely simmering water that does not touch the bowl. Stir slowly until about 85% of the chocolate has melted, then remove the bowl from the heat and continue stirring until smooth. Keep water and steam out of the bowl. Let the mixture cool to 105 to 110°F (41 to 43°C). It should be glossy, fluid, and streak-free, with no unmelted pieces, graininess, scorch marks, or separated oil.
- Whisk the Eggs and Sugar Without Building a Full Foam: In a separate bowl, whisk the 250 g eggs, granulated sugar, vanilla, salt, and optional espresso powder for 60 to 90 seconds. Stop when the mixture is uniform and slightly lightened but has not reached ribbon stage or doubled in volume. The sugar should be fully moistened, with no ropes of egg white and only a shallow layer of small bubbles on the surface.
- Build the Chocolate Emulsion: While whisking the egg mixture continuously, pour in the 105 to 110°F (41 to 43°C) chocolate-butter mixture in a thin, steady stream over about 30 seconds. Scrape the bowl and whisk only until the batter is glossy and evenly dark. It should be smooth and cohesive, with no cooked egg flecks, pale streaks, oily pooling, or grainy texture.
- Fold in the Cocoa: Sift the Dutch-process cocoa over the batter in two additions. Fold with a flexible spatula, scraping the base and sides, until no dry cocoa pockets or pale streaks remain. Stop when the mixture is uniform, normally after about 20 to 25 broad folds. The batter should fall from the spatula in a thick, continuous ribbon that settles back into the surface within several seconds.
- Fill the Pan: Transfer 815 to 830 g of batter to the prepared pan. Smooth the top gently without repeatedly tapping the pan, then rotate it once to level the surface. The batter should be level, glossy, and approximately 3/4 to 1 inch deep, with no large trapped air pockets.
- Bake Until All Five Doneness Cues Agree: Bake at 350°F (177°C) for 28 to 32 minutes and begin checking at 27 minutes. Remove the cake only when the outer 1 1/2 inches are set, the top has a thin dry crust, the center 2 to 3 inches move as one soft unit, a tester carries moist crumbs but no wet batter, and the center registers 200 to 202°F (93 to 94°C). The cake should be slightly puffed, with a center that remains visibly softer than the edge without looking fluid.
- Release and Cool Gradually: Cool the cake in the pan on a rack for 15 minutes. Run a thin flexible knife around the inside edge and release the springform ring. Leave the cake on the pan base until fully cooled, about 75 minutes longer. Do not lift or slide the warm cake. A shallow center depression and fine crust cracking are normal, but a wet collapsed crater is not.
- Chill to Set the Slice: Once completely cool, cover the cake without pressing wrap onto the surface and refrigerate for at least 4 hours or overnight. Slide the chilled cake from the base onto a flat serving plate. It should be firm enough to move and slice cleanly, while the center remains dense rather than hard, wet, or crumbly.
- Temper, Finish, and Slice: Let the chilled cake stand at cool room temperature for 20 minutes. Dust lightly with the optional confectioners' sugar immediately before serving. Dip a sharp knife in hot water, wipe it completely dry, and clean and reheat it between cuts. Each slice should hold a clean edge and reveal a smooth, dense, fudgy interior without a wet line at the base.
Notes
- Use a baking bar or couverture labeled 60 to 64% cacao. Chocolate chips and chocolate outside this range can melt and set differently.
- Weigh 250 g of egg without shells. The egg count is approximate because individual eggs vary.
- Use Dutch-process cocoa for the intended dark color and rounder flavor. Natural cocoa will produce a lighter color and sharper flavor.
- Keep every bowl and utensil used for melting completely dry. Water or steam can make the chocolate grainy.
- Use a light-colored metal 9-inch springform pan. A dark pan, glass pan, solid cake pan, different diameter, or water bath will change how the cake bakes.
- Judge doneness with all five cues together: set outer edge, thin dry crust, center moving as one soft unit, moist crumbs without wet batter, and a 200 to 202°F (93 to 94°C) center.
- Refrigerate the cake for at least 4 hours so it sets cleanly. Temper it for 20 minutes before serving so the center is fudgy rather than refrigerator-hard.
- Add confectioners' sugar immediately before serving. It can dissolve on a moist or chilled surface.
- The recipe contains no flour. For strict gluten avoidance, verify the labels on the chocolate, cocoa, vanilla, espresso powder, confectioners' sugar, and pan-release product, and use clean tools and surfaces.
- Store the cooled cake airtight in the refrigerator for up to 4 days. Temper individual slices for about 20 minutes before serving.
- Freeze the fully cooled, undecorated cake or individual slices for up to 2 months. Wrap airtight, thaw overnight in the refrigerator while still wrapped, then unwrap and temper before serving.
- Keep automatic serving scaling disabled. Pan size, batter depth, baking time, doneness cues, cooling, chilling, and tempering do not scale evenly.
Nutrition Information:
Yield: 12 Serving Size: 1 sliceAmount Per Serving: Calories: 288Total Fat: 20gSaturated Fat: 12gCholesterol: 103mgSodium: 134mgCarbohydrates: 25gFiber: 3gSugar: 19gProtein: 4g
Nutrition information is provided as an estimate only and may vary based on specific ingredients, brands, and portion sizes used. This information should not be considered medical or nutritional advice.
12 Sweet Favourites — Yours, Free 🍰
Tiramisù, no-bake cheesecake, the perfect chocolate chip cookie & 9 more reader-loved desserts — gathered into one beautiful free recipe book. From my kitchen to yours.
No spam, just sweet things. Unsubscribe anytime.