Buttercream Frosting Recipe (Smooth & Pipeable)
🎁 FREE E-BOOK: 12 Sweet Favorites — reader-loved desserts in one beautiful recipe book.
This buttercream frosting recipe gives you a smooth, pale-ivory frosting with classic vanilla flavor. Use it straight from the mixer for cupcake swirls, rosettes, and borders, or loosen it with a little extra cream for effortless spreading.

There is no syrup to cook and no eggs to temper—just five familiar ingredients and about 10 minutes of mixing. Its buttery vanilla flavor is at home on vanilla cake, chocolate cupcakes, fruit cakes, and nearly any everyday bake that needs a creamy finish.
The details below take the guesswork out of consistency. You will find a precise butter temperature, visual checks for every mixing stage, side-by-side piping and spreading guides, and simple ways to correct frosting that feels too firm, too soft, or too airy.
The recipe makes about 2 1/2 cups—enough for roughly 12 to 16 medium cupcake swirls or a generous layer on a 9 × 13-inch cake. If you are frosting a layer cake, check the quantity chart before you begin so you can scale the batch comfortably.
Why This Buttercream Frosting Recipe Works
American buttercream comes together quickly, yet its texture can shift with the warmth of the butter or a small pour of cream. Precise measurements and easy-to-read visual signs help you reach the consistency you want without overcorrecting.
- Balanced proportions: 4 cups (454 g) confectioners’ sugar give 1 cup (226 g) butter enough body for everyday decorating.
- Butter you can judge: At 65–68°F (18–20°C), it blends easily while staying cool enough for crisp piping lines.
- Cream added gradually: Two tablespoons go into the frosting first; the last tablespoon is reserved for softening only when needed.
- Fewer trapped bubbles: A slow finish with the paddle, followed by firm strokes with a spatula, leaves the buttercream noticeably smoother.
Why You’ll Love This Recipe
Keep this easy vanilla frosting close whenever you need one batch that can move between cupcakes, sheet cakes, and simply decorated layer cakes.
- Five pantry and refrigerator staples become frosting in about 10 minutes.
- You can make it with a stand mixer or a handheld electric mixer.
- The same batch works for defined piping and soft, swooping finishes.
- Useful cake and cupcake estimates make scaling less of a guessing game.
- Texture checks show when to keep mixing, chill the bowl, or add a teaspoon of cream.

Buttercream Frosting at a Glance
These are the essentials to know before you measure the ingredients or choose a decorating style.
| Frosting style | Classic American buttercream flavored with vanilla |
|---|---|
| Preparation | No-cook; mixed with an electric mixer |
| Time needed | Approximately 10 minutes |
| Amount made | Approximately 2 1/2 cups |
| For piping | Medium consistency suited to stars, borders, rosettes, and cupcake swirls |
| For spreading | Softened with the reserved cream, 1 teaspoon at a time |
| Ideal setting | A cool kitchen, protected from sunlight and other heat sources |
| Finished color | Naturally pale ivory, not bright white |
Ingredients for Buttercream Frosting
With only five ingredients, measurements and temperature make a visible difference. Weigh the sugar if possible, and judge the butter by touch and appearance instead of relying only on how long it has been out of the refrigerator.
Ingredient List
Set out everything before mixing, but keep the optional final tablespoon of cream in its own small measure.
- 1 cup (226 g) unsalted butter, 65–68°F (18–20°C), pliable and matte
- 4 cups (454 g) confectioners’ sugar, weighed and sifted only if visibly lumpy
- 2 teaspoons (10 ml) pure vanilla extract, at room temperature
- 1/8 teaspoon (about 0.75 g) fine sea salt
- 2 tablespoons (30 ml) heavy cream, plus up to 1 tablespoon (15 ml) as needed, at 65–70°F (18–21°C)

Ingredient Notes
Knowing what each ingredient contributes will help you make small, confident adjustments while keeping the buttercream balanced.
- Unsalted butter: This supplies the rich flavor and helps the frosting hold the tiny bubbles created during mixing. The recipe assumes standard U.S. butter with about 80% milkfat. For a closer look at the process, see how butter is made from heavy cream.
- Confectioners’ sugar: Its fine texture sweetens and thickens at the same time. Weigh it for accuracy, and sift only if you find firm lumps.
- Pure vanilla extract: Vanilla gives the frosting its familiar bakery flavor and can add a faint warm tint.
- Fine sea salt: A small amount keeps the sweetness from tasting flat. Stirring it into the cream distributes it evenly.
- Heavy cream: The first 2 tablespoons smooth the frosting; the optional final tablespoon lets you fine-tune it for spreading.

Kitchen Tools Needed
You do not need specialty equipment, but the right basics make measuring, mixing, and smoothing much easier.
- Mixer and bowl: Choose a stand mixer of at least 4.5 quarts with its paddle, or standard beaters and a deep bowl if using a handheld mixer. With a hand mixer, prepare one batch at a time.
- Measuring tools: Use a digital scale, measuring spoons, a liquid measure, and an instant-read thermometer for the most precise results.
- Fine-mesh sieve: Keep one nearby for any hard lumps in the confectioners’ sugar.
- Silicone spatula: Its flexible edge reaches the bottom of the bowl, cleans the paddle, and helps press out air bubbles.
- Decorating and storage pieces: Have an airtight container, an offset spatula, and—if piping—a bag and tip ready before the frosting is finished.
Before You Begin
Before the mixer starts, check three things: the butter should be cool and pliable, the optional cream should remain separate, and the cake or cupcakes should be completely cool.
Check the Butter, Not Only the Clock
At 65–68°F (18–20°C), the butter should yield to gentle pressure without collapsing. Look for a matte surface, cool feel, and clean edges; glossiness or an oily sheen means it has become too warm.
“Room temperature” can describe very different butter from one kitchen to another. I trust what I can see and feel: cool, matte, and pliable is ready; shiny or oily is too warm.

Keep the Cream Reserve Separate
Stir the vanilla and salt into 2 tablespoons (30 ml) of cream. Leave the last tablespoon (15 ml) aside—you will add it by the teaspoon only if the finished frosting needs to spread more easily.
Cool the Cake Completely
A warm cake will soften buttercream on contact, often making it shiny or slippery. Wait until cakes and cupcakes are cool all the way through before filling, frosting, or piping.
Buttercream Recipe Science
The method is simple, but four details determine the result: butter temperature, fine sugar, carefully measured cream, and how much air enters during mixing.
Butter Temperature Shapes the Structure
Cool, flexible butter blends with the sugar while keeping the frosting firm enough to hold fine ridges. Very cold butter stays lumpy; overly warm butter turns glossy and makes piped shapes relax.
Confectioners’ Sugar Builds the Body
Because confectioners’ sugar is so finely milled, it thickens the buttercream as it dissolves into the fat and liquid. A large reduction affects not only sweetness, but also thickness and piping strength.
Liquid Changes Consistency Quickly
Even one teaspoon of cream can soften the mixture quickly. Add the reserve slowly, and if the frosting already feels warm or looks shiny, cool it first rather than trying to thicken it immediately with more sugar.
Low-Speed Mixing Creates a Finer Finish
Fast mixing adds volume, but it can also leave visible holes when the frosting is spread on a cake. Finish with the paddle turning slowly, then work the buttercream against the bowl with a spatula to release the largest bubbles.
What to Expect from This Buttercream Frosting
Expect a creamy American-style frosting with a pronounced butter-and-vanilla flavor and the familiar sweetness that comes from confectioners’ sugar. In a cool kitchen, it holds everyday piping details and can still be softened for broad, easy strokes.
| Characteristic | Finished buttercream |
|---|---|
| Taste | Rich butter and vanilla, with a touch of salt to round out the sweetness |
| Appearance | A soft ivory color rather than a pure white finish |
| When piped | Creamy medium consistency that keeps stars, swirls, and borders distinct |
| When spread | Softer and easier to sweep after cream is added by the teaspoon; still thick enough to form a soft peak |
| Working temperature | Ideally around 68–72°F (20–22°C) once mixed |
| Batch size | Approximately 2 1/2 cups |
| Keep in mind | This is neither a pure-white frosting nor one designed for hot weather, and a single batch will not cover most two-layer cakes |
If your preference is a noticeably less-sweet frosting, a cooked meringue buttercream will be a better fit. Simply cutting a large amount of sugar from this recipe would leave it too soft for the same uses.
How to Make Buttercream Frosting
Work through the six stages in sequence, pausing to look at the frosting after each one. Timing is useful, but the surface, ridges, peaks, and temperature give the clearest indication of when to continue.
1. Prepare the Ingredients and Equipment
Attach the paddle to the mixer. Check that the butter is 65–68°F (18–20°C), weigh the confectioners’ sugar, and pass it through a sieve only if it contains firm lumps. Combine the vanilla and salt with 2 tablespoons (30 ml) of cream; set the remaining tablespoon aside.
What you should see: The butter bends under light pressure yet remains matte and neatly shaped. The sugar is powdery and loose, with no hard pieces.
2. Smooth the Butter
Mix the butter on medium speed for about 2 minutes. Pause once to scrape both the bowl and paddle, then stop when the butter is evenly creamy; there is no need to whip it on high.
What you should see: The butter looks smooth and a shade lighter, with narrow marks from the paddle. It should have no glossy film, oily patches, melting edges, or obvious air pockets.

3. Add the Confectioners’ Sugar Gradually
Reduce the mixer to low and add the confectioners’ sugar in four portions of about 1 cup (113 g) each. Wait until one portion is absorbed before adding another. Scrape the sides, bottom, and paddle after the second portion and once more after the fourth.
What you should see: The mixture is thick and may look dry for the moment, but there is no free sugar collecting along the sides or underneath the butter.

4. Add the Vanilla, Salt, and Cream
Add the cream mixture containing the vanilla and salt. Mix on low for 30 seconds, scrape the bowl and paddle well, then continue on medium for 1 to 2 minutes. Stop when the frosting is creamy, smooth, and lighter in color.
What you should see: The frosting is pale ivory, with clear ridges and a peak between soft and medium. The surface should look creamy—not dusty, wet, shiny, oily, or separated.

5. Choose the Final Consistency
For piping, keep the frosting as it is after the first 2 tablespoons (30 ml) of cream. To make it easier to spread, mix the reserved cream in on low, 1 teaspoon (5 ml) at a time. Check the texture after every teaspoon and do not exceed the final tablespoon (15 ml).
What you should see: For piping, stars and rosettes keep their ridges without drooping. For spreading, the spatula glides without tugging at the cooled cake, while the frosting still stands in a soft peak rather than running.
6. Reduce Large Air Pockets
Let the paddle turn at its lowest speed for 2 to 3 minutes. Remove the bowl, then spend about 1 minute pressing and folding the buttercream against the side with a silicone spatula.
What you should see: The buttercream is still creamy and smooth, with most of the large holes worked out. It can now go directly onto the cake or into a piping bag.

Piping vs. Spreading Consistency
Decide how you will decorate before reaching for the reserved cream. A quick look at the peak and ridges—and one pass with a spatula—will tell you whether the frosting is ready as it is.

| What to check | For piping | For spreading |
|---|---|---|
| Amount of cream | Use the initial 2 tablespoons (30 ml) | Begin with 2 tablespoons, then add up to 1 tablespoon (15 ml) more, 1 teaspoon at a time |
| Peak | Stands clearly, bending just at the point | Leans more gently but does not melt back into the bowl |
| How it behaves | Keeps the grooves in stars, borders, rosettes, and medium swirls | Slides beneath the spatula without lifting crumbs |
| Where to use it | Cupcakes and uncomplicated piped details | Fillings, sheet-cake tops, light cake coverings, and free-form swirls |
| Before adjusting | If the frosting is shiny or sagging, cool it before adding sugar | Add only as much of the reserved cream as the texture calls for |

Buttercream Doneness: How to Tell When It’s Ready
There is no baking or cooking point to watch for here. The batch is finished when it is at a comfortable working temperature and shows the right surface and peak for your decorating plan.
- A comfortable final temperature is about 68–72°F (20–22°C).
- The color is pale ivory, and the surface is creamy with no gloss, grease, powdery patches, or separation.
- The sides and bottom of the bowl are free from dry sugar.
- A lifted paddle leaves the kind of peak you need for piping or spreading.
- Only fine bubbles remain after the slow mixing and spatula finish.

Tips for Smooth Buttercream Frosting
A smooth finish is built through careful measuring, moderate mixing, and a calm final minute with the spatula. These habits make a bigger difference than beating at high speed.
- Put the sugar on a scale. The weight stays accurate even when one cup is more firmly filled than another.
- Choose the paddle for a stand mixer. Unlike a whisk, it blends without pulling as much air into the bowl.
- Stir the salt into the cream first. This disperses a tiny quantity evenly through the whole batch.
- Take the temperature before adding anything. Cool warm frosting before reaching for sugar, and let very cold frosting soften before reaching for cream.
- Cover the bowl whenever you pause. An airtight cover keeps the top from drying while you prepare a cake or piping bag.
- Finish slowly. Use the lowest mixer speed, then smooth the frosting against the bowl with a flexible spatula.

Buttercream Mistakes and How to Fix Them
Temperature is often the reason a batch suddenly feels different, so check it before changing the ingredient balance. Make one small correction at a time and reassess as soon as the frosting looks creamy and behaves the way you need.
| Problem | How it looks or feels | Likely reason | What to do |
|---|---|---|---|
| Too firm | The spatula drags and pulls crumbs from the cake | The frosting may be cold, need a little more liquid, or contain too much volume-measured sugar | Check the temperature first. If it is not cold, add reserved cream by the teaspoon until it glides while still forming a soft peak |
| Too soft, without greasiness | Piped grooves fade and the mixture feels loose | Too much liquid was added, or the kitchen is warm | Refrigerate the bowl for 10 minutes, then mix on low just until the ridges stay in place |
| Glossy, greasy, or drooping | Swirls and borders begin to lose their shape | The butter or finished batch is warmer than it should be | Chill for 10–15 minutes, scrape well, and mix on low until the surface becomes creamy-matte and holds a ridge |
| Hard after refrigeration | The frosting is dense and may appear slightly broken | It has not warmed enough after chilling | Leave it at room temperature for 10–15 minutes, then mix on low until creamy, stopping before it becomes warm and greasy |
| Gritty | Small hard particles are noticeable when tasted | The sugar contained lumps, the salt remained undissolved, or the cream was very cold | Let the bowl rest briefly, then mix on low. In future batches, use regular confectioners’ sugar and never replace it with granulated sugar |
| Dusty or dry-looking | Pockets of sugar cling to the bowl | The sugar has not fully mixed in, or the initial cream has not yet been added | Scrape all the way to the bottom, pour in the vanilla–cream mixture, and mix on low until every dry patch disappears |
| Full of large bubbles | Visible holes interrupt piped and smoothed finishes | A whisk, extended high-speed beating, or a bowl that is too large for the batch pulled in extra air | Run the paddle at the lowest speed for 2–3 minutes, then press the buttercream firmly against the bowl with a spatula |
| Sweeter than desired | The sugar seems to overpower the butter and vanilla | This style is naturally sweet, or the vanilla and salt were left out | Make sure both vanilla and salt were measured. For a substantially less-sweet finish, use another frosting style instead of removing the sugar that helps this one hold |
| More ivory than white | The frosting has a light yellow cast | Butter and pure vanilla are naturally warm in color | Enjoy the natural ivory shade, or choose paler butter and clear vanilla when a lighter result matters; it will still not be snow white |
Since butter is the main fat, this frosting naturally softens in a warm setting. King Arthur Baking explains how butter-based frostings behave in hot weather; for this recipe, keep the finished dessert out of direct sun and away from heat.

How Much Buttercream Do You Need?
A batch yields about 2 1/2 cups. The exact coverage depends on the piping tip, height of each swirl, cake size, filling thickness, outer layer, and any extra borders or decorations.
| Dessert | Buttercream to prepare |
|---|---|
| 12–16 regular cupcakes | Make one batch for medium swirls; the final count varies with the tip and swirl height |
| One 9 × 13-inch cake | Make one batch for a comfortable layer across the top |
| One 8-inch, two-layer cake | Make about 1 1/2 batches for a thin filling, outer coat, and uncomplicated borders |
| One 9-inch, two-layer cake | Make about 1 3/4 batches, adjusting for thicker filling or exterior frosting |
| Filling for one 8-inch cake | Allow roughly 1 cup for a thin layer, with more for a deeper filling |
One batch pairs neatly with these 12 vanilla cupcakes, whether you prefer smaller swirls or a little more height.
For other cake sizes and decorating styles, King Arthur Baking offers a broader guide to estimating frosting quantities for cakes and cupcakes. It also helps explain why most two-layer cakes need more than this single 2 1/2-cup batch.

Substitutions and Variations
A few close substitutions are easy to make here. More substantial swaps can alter flavor, moisture, color, and how well the frosting holds, so they are better handled with a recipe written for those ingredients.
Substitutions That Work
Use the quantities below, and let the same peak, ridge, and spatula checks guide the final consistency.
- Whole milk: Use an equal amount in place of the heavy cream for a slightly lighter taste.
- Half-and-half: Replace the cream measure for measure for a result between milk and cream in richness.
- Salted butter: Begin without the added salt because the sodium level differs from one brand to another.
- Clear vanilla: Substitute the same volume when a paler color matters, keeping in mind that its flavor is different from pure extract.
- Vanilla bean paste: Use the same quantity only if the paste is similar in strength and thickness; the seeds will show and the color may deepen.
Changes That Need Their Own Recipe
The following ingredients behave differently enough that a one-for-one replacement may affect melting, spreading, and piping.
| Proposed swap | Why the result will differ |
|---|---|
| Replacing butter with shortening | The flavor, color, and response to a warm room all change |
| Margarine or spreadable butter from a tub | Fat and water levels vary too much for a direct swap |
| Granulated sugar | It will not dissolve like confectioners’ sugar and can leave a gritty texture |
| Powdered sugar made at home | The grind and amount of starch are difficult to match consistently |
| Plant-based butter or milk | Water, fat, emulsifiers, flavor, and melting point differ by product |
| Removing a large portion of the sugar | The frosting loses sweetness, thickness, surface quality, and piping strength together |
Flavor and Color Options
Tint the frosting with gel color, adding a small amount at a time while the mixer runs on low. Liquid coloring can thin the texture. For a citrus frosting with its own measured balance, make these lemon cupcakes with lemon buttercream rather than pouring lemon juice into the vanilla batch.
Make Ahead, Store, Freeze, and Rewhip
This frosting keeps well when sealed tightly. After chilling or freezing, give it time to soften evenly before mixing again so the butter regains a creamy texture without becoming greasy.
Use the Buttercream the Same Day
Once the texture is set and the large bubbles are gone, cover the bowl snugly and leave it in the coolest part of the kitchen. If the surface turns shiny or the ridges relax, refrigerate it briefly and mix again on low.
Refrigerate for Up to 1 Week
Spoon the frosting into an airtight container before refrigerating. When you are ready to decorate, let it warm slowly to about 65–70°F (18–21°C), when the butter is soft enough to become creamy again.
Freeze for Up to 3 Months
Seal the buttercream well before freezing, then thaw it overnight in the refrigerator. Let it soften gradually before it returns to the mixer. Wilton also explains how to refrigerate and freeze buttercream frosting and bring it back to a workable consistency for decorating.
How to Rewhip Buttercream
Return the frosting to the bowl and mix with the paddle on low until it looks creamy again. Wait until it reaches 65–70°F (18–21°C) before deciding whether it needs cream; while still cold, it can seem dry and firm even when the proportions are right.
Once the cake is assembled, follow the storage needs of its most delicate element. A filling, garnish, or cake layer that requires refrigeration means the entire finished dessert should be kept cold.

Beautiful Ways to Serve Buttercream Frosting
One bowl of vanilla buttercream can create crisp rosettes, generous swoops, a soft filling, or a neat border. Match the consistency to the finish before you start decorating.
Pipe Medium Swirls on Cupcakes
Keep the medium consistency for clean grooves on vanilla, chocolate, strawberry, or red velvet cupcakes. Shorter swirls help one batch cover closer to 16 cupcakes; taller ones use more frosting.
Spread It Across a Sheet Cake
Add reserved cream by the teaspoon until the spatula moves freely, then cover a completely cooled sheet cake. Broad arcs, small waves, and loose swirls show off the softer texture beautifully.
Fill and Frost a Layer Cake
Soften part of the buttercream for filling and coating, leaving the rest at medium consistency for the border. An 8-inch, two-layer cake with a light filling and outer coat needs about 1 1/2 batches, so a single batch will be too little for every surface.
Add Borders, Rosettes, and Simple Decorations
In a cool room, the piping consistency keeps shells, stars, rosettes, and uncomplicated borders distinct. Very tall or highly detailed decorations need a frosting formulated specifically for that kind of support.

Why This Buttercream Frosting Belongs in Your Recipe Box
This is the vanilla frosting to reach for when you want careful measurements, visible signs of readiness, and useful quantities for both cupcakes and cakes.
- Measured proportions: 226 g butter and 454 g sugar produce the sweetness and body expected from classic American buttercream.
- A useful temperature guide: The 65–68°F starting point comes with visual checks—cool butter, a matte surface, and edges that still hold.
- Two decorating consistencies: Pipe with the initial texture or add reserved cream little by little for spreading.
- Practical quantity estimates: The 2 1/2-cup yield is translated into cupcakes, sheet cakes, fillings, and layer cakes.
- A cleaner surface: The paddle, a slow final mix, and firm spatula strokes help remove distracting air pockets.
- Easy corrections: The troubleshooting chart connects what you see in the bowl with a small, specific adjustment.
Frequently Asked Questions
These two questions cover the most common concerns about mixer choice and lowering the sweetness.
Can I Make Buttercream Frosting Without a Stand Mixer?
Yes. Choose standard beaters and a large, deep bowl, work with one batch at a time, and stop frequently to scrape. You can mix buttercream by hand, but incorporating four cups of sugar evenly and achieving a smooth finish takes considerably more effort.
Can I Reduce the Confectioners’ Sugar?
A small adjustment is possible, but a large one is not. Confectioners’ sugar provides much of the thickness that lets this frosting spread and pipe. When you want a dramatically less-sweet result, choose another style instead of removing the ingredient that gives this one its body.
Where to Take Your Frosting Skills Next
With the vanilla buttercream ready, you can pair it with a familiar cake, explore a different creamy topping, or choose a project that gives you more room to practice piping and spreading.
Start with a Cake or Cupcake Ready for Buttercream
Each of these bakes works naturally with vanilla buttercream and offers a different surface for swirls, borders, or a smooth coat.
- White Cake Recipe — A delicate vanilla crumb lets the buttery frosting remain the leading flavor.
- Vanilla Cake — Scale the buttercream with the chart above to fill and cover this classic layer cake.
- Chocolate Cupcake Recipe — Deep cocoa flavor makes a pleasing contrast to sweet vanilla frosting.
- Strawberry Cupcakes — Bright berry flavor gives the rich buttercream a fresh counterpoint.
Compare a Different Creamy Finish
Choose another topping when the dessert calls for tang, deeper chocolate, a lighter texture, or a bright fruit note.
- How to Make Cream Cheese Frosting — Cream cheese brings a gentle tang that balances the sugar.
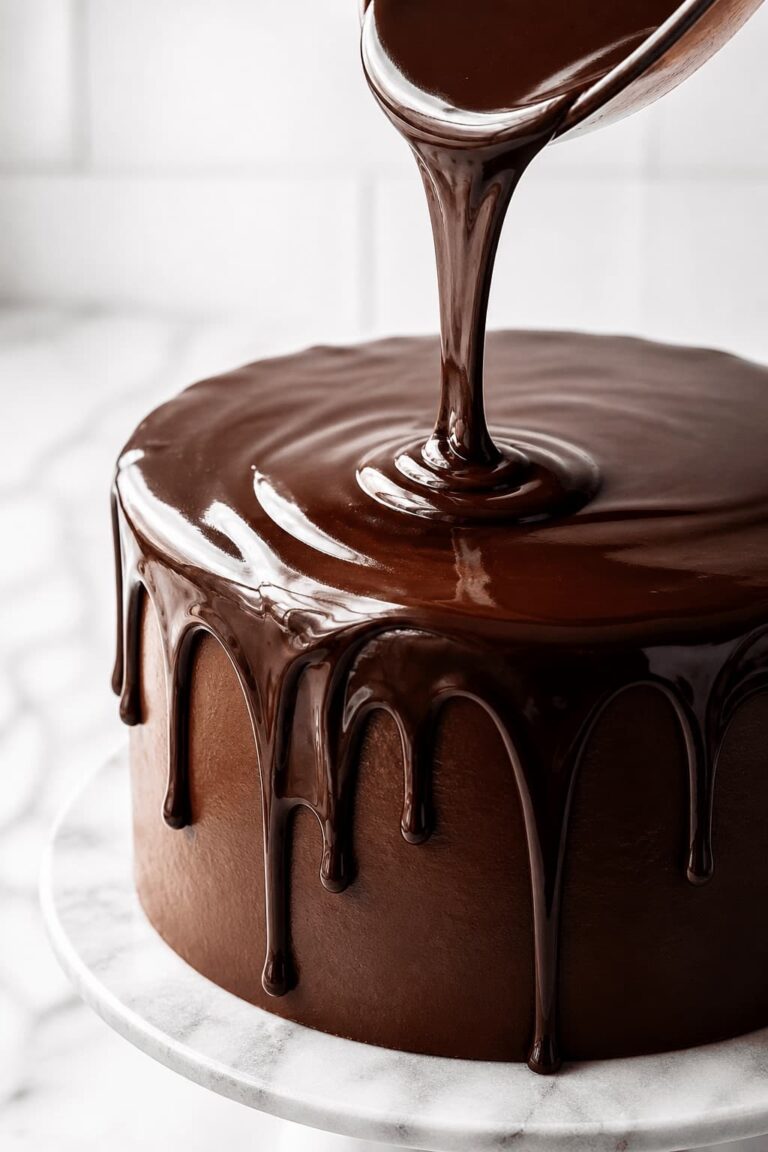
- Chocolate Ganache Recipe — Ganache creates a silky coating or filling with concentrated chocolate flavor.
- How to Make Whipped Cream — Whipped cream is a softer, lighter choice when detailed piping is not required.
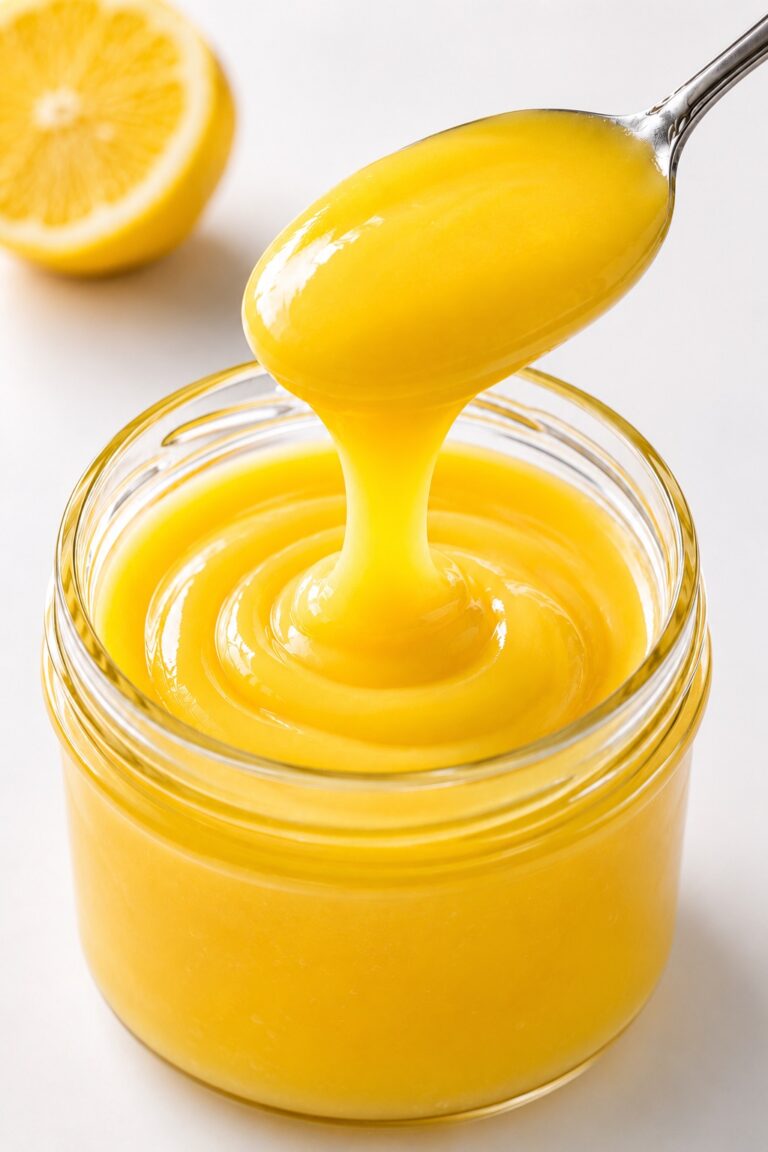
- Lemon Curd Recipe — Use it as a sharp, sunny filling or accent in place of frosting.
Build a More Decorative Baking Project
Use these projects to build confidence with portioning, spreading, and consistent piping pressure.
- How to Make Cake Pops — Add only enough buttercream to hold the crumbs together without weighing them down.
- Strawberry Sheet Cake — Its wide, level top is an inviting place to practice smooth strokes and soft waves.
- Red Velvet Cupcakes — Repeat the same hand pressure on every cupcake for evenly sized swirls.
- Carrot Cake Cupcakes — Warm spices pair well with vanilla buttercream as well as cream cheese frosting.
A Final Note on Buttercream Frosting
Classic buttercream is far easier to handle when the ingredients are measured and the butter begins at the right temperature. Cool, pliable butter and a separately measured spoonful of cream make the texture easier to adjust from the first turn of the mixer.
If the room is warmer, the season changes, or a decorating style asks for a softer texture, use the comparison chart and troubleshooting table as a guide. The peak and surface in the bowl reveal more than an unmeasured scoop of sugar or splash of cream ever could.
Pay attention to what the buttercream shows you, adjust it a little at a time, and it will be ready for anything from a simple sheet cake to a tray of neatly piped cupcakes.

Buttercream Frosting Recipe
This vanilla buttercream is smooth, creamy, and easy to adjust for piping or spreading. It comes together in about 10 minutes with five simple ingredients.
Ingredients
- 1 cup (226 g) unsalted butter, 65–68°F (18–20°C), pliable and matte
- 4 cups (454 g) confectioners’ sugar, weighed and sifted only if visibly lumpy
- 2 teaspoons (10 ml) pure vanilla extract, at room temperature
- 1/8 teaspoon (about 0.75 g) fine sea salt
- 2 tablespoons (30 ml) heavy cream, plus up to 1 tablespoon (15 ml) as needed, at 65–70°F (18–21°C)
Instructions
- Prepare the Ingredients and Equipment: Fit the mixer with the paddle attachment. Confirm the butter is 65–68°F (18–20°C), weigh the confectioners’ sugar, and sift only if hard lumps are visible. Stir the vanilla and salt into 2 tablespoons (30 ml) of the cream, keeping the remaining tablespoon separate. What you should see: The butter is pliable but matte and still holds its shape, while the sugar is loose and free of hard lumps.
- Smooth the Butter: Beat the butter on medium speed for about 2 minutes, stopping once to scrape the bowl and paddle. Stop as soon as it is evenly creamy rather than whipping it at high speed for extra volume. What you should see: The butter is smooth, creamy, and slightly lighter, with fine paddle ridges and no shine, oiliness, melted edges, or large bubbles.
- Add the Confectioners’ Sugar Gradually: Turn the mixer to low and add the confectioners’ sugar in four additions of about 1 cup (113 g) each. Let each addition disappear into the butter before adding the next, scraping the bowl, base, and paddle after the second addition and again after the last. What you should see: The mixture becomes thick and temporarily dry-looking, but no loose sugar remains at the bottom or around the sides of the bowl.
- Add the Vanilla, Salt, and Cream: Pour in the vanilla–salt–cream mixture. Mix on low for 30 seconds, scrape thoroughly, then beat on medium for 1 to 2 minutes, stopping once the buttercream is smooth, creamy, and visibly lighter. What you should see: The frosting is pale ivory and forms defined ridges with a soft-to-medium peak. It should not look powdery, wet, glossy, greasy, or curdled.
- Choose the Final Consistency: For medium piping consistency, use the frosting after adding the first 2 tablespoons (30 ml) of cream. For spreading consistency, mix in the remaining cream on low, 1 teaspoon (5 ml) at a time, checking after each addition and using no more than the final tablespoon (15 ml). What you should see: Piping frosting holds star and rosette ridges without slumping. Spreading frosting moves easily under a spatula without pulling the surface of a cooled cake, yet still holds a soft peak instead of flowing.
- Reduce Large Air Pockets: Run the paddle on the lowest speed for 2 to 3 minutes. Finish by pressing and folding the frosting firmly against the side of the bowl with a silicone spatula for about 1 minute. What you should see: The buttercream remains creamy and smooth, but the largest visible holes and bubbles have disappeared. It is ready to spread or transfer to a piping bag.
Notes
- Butter temperature: Start at 65–68°F (18–20°C). The butter should feel cool and pliable, look matte, and still hold its shape. It should never look glossy or oily.
- Remaining cream: Use the first 2 tablespoons (30 ml) of cream in the recipe. Add the remaining cream only when you need a softer spreading consistency, 1 teaspoon (5 ml) at a time, up to 1 tablespoon (15 ml).
- Coverage: One batch makes about 2 1/2 cups, enough for approximately 12–16 medium cupcake swirls or a moderate top layer on a 9 × 13-inch cake. Plan about 1 1/2 batches for a lightly filled and frosted 8-inch two-layer cake.
- Warm conditions: All-butter frosting softens with heat. Keep it away from direct sun and chill briefly if it becomes shiny or loses its ridges.
- Storage: Refrigerate airtight for up to 1 week or freeze airtight for up to 3 months. Thaw frozen frosting overnight in the refrigerator, return it gradually to 65–70°F (18–21°C), and remix on low.
- Milk and cream options: Whole milk or half-and-half may replace the heavy cream in the same amount. Add the final tablespoon only as needed, 1 teaspoon at a time.
- For a less-sweet frosting: Do not reduce the confectioners’ sugar by a large amount because it also gives the frosting structure. Choose a different style of frosting when you want a much less-sweet result.
- Storage for decorated desserts: Store the finished dessert according to whichever part needs the coldest conditions. If the cake, filling, or garnish requires refrigeration, keep the whole dessert refrigerated.
Nutrition Information:
Yield: 16 Serving Size: 2 1/2 tablespoonsAmount Per Serving: Calories: 220Total Fat: 12gSaturated Fat: 8gTrans Fat: 0.5gUnsaturated Fat: 4gCholesterol: 35mgSodium: 20mgCarbohydrates: 28gFiber: 0gSugar: 28gProtein: 0g
Nutrition information is provided as an estimate only and may vary based on specific ingredients, brands, and portion sizes used. This information should not be considered medical or nutritional advice.
12 Sweet Favourites — Yours, Free 🍰
Tiramisù, no-bake cheesecake, the perfect chocolate chip cookie & 9 more reader-loved desserts — gathered into one beautiful free recipe book. From my kitchen to yours.
No spam, just sweet things. Unsubscribe anytime.