Healthy Chocolate Banana Bread
🎁 FREE E-BOOK: 12 Sweet Favorites — reader-loved desserts in one beautiful recipe book.
Dark cocoa, ripe banana, and small pockets of melted chocolate define this healthy chocolate banana bread. The finished loaf has a rich aroma and a moist, tender crumb that holds together cleanly once cool.

It is the kind of familiar loaf that fits an ordinary breakfast or afternoon pause, but the chocolate makes it feel more satisfying than a plain “healthy” bake. The recipe keeps real brown sugar, a measured amount of oil, and real chocolate, so the lighter result does not depend on artificial sweetness or a dry compromise.
This recipe is worth keeping because it gives you a clear route to the hardest balance in chocolate banana bread: deep cocoa flavor, a genuinely moist center, and enough structure for neat slices. Precise weights, batter cues, an internal-temperature range, and a full cooling time make every stage easier to judge.
Quick Healthy Chocolate Banana Bread Overview
This overview shows the exact loaf style, pan, yield, texture, and time commitment before you decide to begin.
| Element | What to Expect |
|---|---|
| Texture | Moist, tender, cohesive, and cleanly sliceable after cooling |
| Flavor | Deep cocoa, recognizable ripe banana, vanilla, and small chocolate pockets |
| Sweetness | Moderate rather than dessert-cake sweet |
| Difficulty | Easy to moderate |
| Pan | 9 × 5-inch (23 × 13 cm) light-colored metal loaf pan |
| Yield | 1 loaf; 12 substantial slices |
| Timing | About 15 minutes prep, 50–60 minutes baking, and 2 hours cooling |
| Nutrition basis | Approximately 147 calories per 1/12 loaf, depending on ingredient brands |
Why This Healthy Chocolate Banana Bread Works
This loaf works because each moisture source is balanced with enough flour and egg protein, while steady oven heat sets a soft crumb without leaving the center wet or unstable.
- Measured banana: Exactly 300 g supplies flavor and moisture without asking the flour blend to absorb an unpredictable amount of fruit.
- Balanced tenderness: Thick 2% Greek yogurt and 21 g neutral oil keep the crumb supple while avoiding the heavier fat load of a classic double-chocolate loaf.
- Hydrated cocoa: Boiling water turns the cocoa and espresso powder into a smooth paste before flour enters the bowl, helping the chocolate disperse evenly.
- Two-flour blend: All-purpose flour preserves tenderness while white whole wheat flour contributes whole grain and additional absorption.
- Reliable doneness: A 200–205°F (93–96°C) center and a full 2-hour cool distinguish a moist loaf from an underbaked one.
Here, “healthy” means a loaf with less added fat and sugar than a traditional double-chocolate banana bread. It is not sugar-free, fat-free, high-protein, gluten-free, or intended for a medical diet. The FDA’s explanation of added sugars helps clarify why the sugar naturally present in banana and yogurt is accounted for differently from the brown sugar and chocolate added to the batter.
The approximate nutrition estimate uses standard ingredient data from USDA FoodData Central and must be recalculated if the ingredient brands, quantities, or slice count change.
Why You’ll Love This Healthy Chocolate Banana Bread
This recipe suits readers who want a lighter everyday chocolate loaf but still care about a soft crumb, real ingredients, and enough flavor to make each slice satisfying.
- It uses one bowl for the wet mixture and requires no electric mixer.
- Its moderate sweetness lets the banana and cocoa remain distinct.
- Mini chocolate chips create frequent small chocolate pockets without dominating the loaf.
- One loaf makes 12 satisfying slices rather than relying on an unrealistically small serving size.
- The visual, tactile, and temperature cues remove much of the guesswork from a dark quick bread.
- The fully cooled loaf can move naturally between breakfast, a snack, and a lighter dessert.
This recipe produces a moist everyday chocolate banana loaf, not a fudgy brownie bread or a frosted dessert cake. For a banana-forward loaf without cocoa, choose this healthy banana bread instead.

How the Ingredients Create a Moist Chocolate Banana Crumb
This loaf stays moist without becoming paste-like because the fruit, cocoa, dairy, fat, flour, and egg proteins each play a different role in the crumb.
I used to rely on three familiar shortcuts with banana bread: count the bananas instead of weighing the fruit, whisk the cocoa directly into the dry ingredients, and judge the crumb while the loaf was still warm. The more reliable pattern is the opposite—use exactly 300 g of banana, bloom the cocoa with boiling water, and let the loaf cool for the full 2 hours before deciding whether the center is moist or gummy.
Banana supplies bound moisture and natural sweetness. Mashed ripe banana carries water, sugars, and soluble fibers into the batter, but the 300 g limit matters: more fruit would add liquid faster than the flour and egg structure could reliably hold.
Hot water disperses cocoa before flour can compete for it. Blooming the Dutch-process cocoa and espresso powder in exactly 2 tablespoons (30 ml) boiling water breaks up dry pockets and distributes the chocolate flavor evenly without turning the full batter loose.
Greek yogurt supports both tenderness and lift. Its thick texture adds less free liquid than regular yogurt, while its acidity supports the baking soda; baking powder supplies a second, independently balanced source of leavening.
Liquid oil keeps the cooled crumb flexible while flour and egg make it sliceable. Oil remains fluid at room temperature, but tenderness alone is not enough: the two-flour blend and egg proteins must set fully in the oven and continue stabilizing during the 2-hour cool.
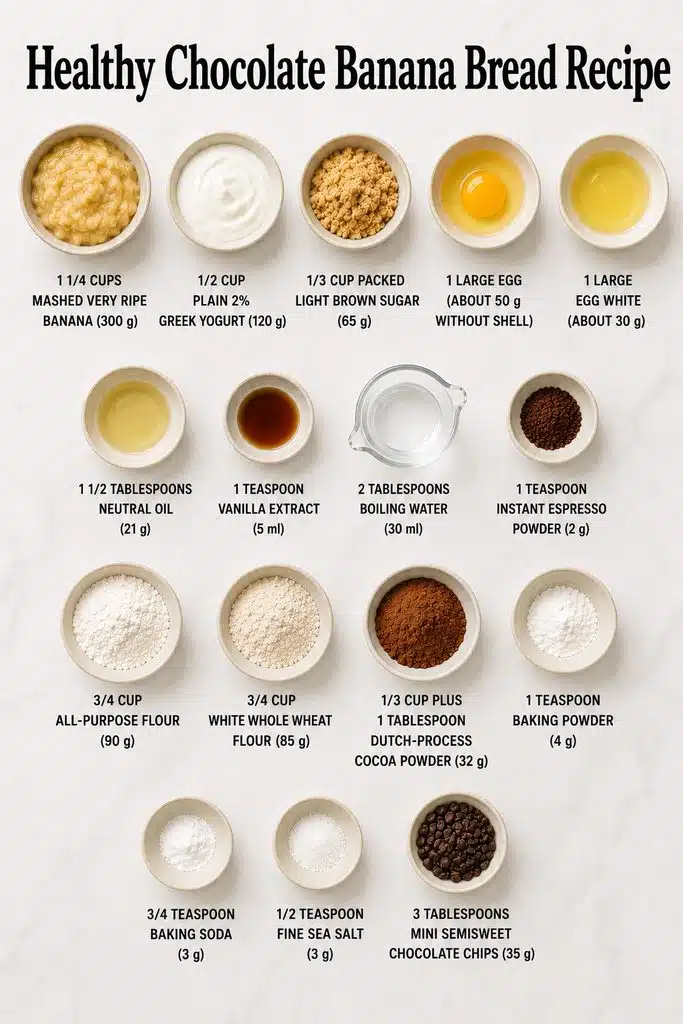
Ingredients for Healthy Chocolate Banana Bread
The recipe uses familiar baking ingredients in precise amounts. Start with the complete list, then review the ingredient notes that make the biggest difference to moisture, flavor, and structure.
Ingredient List
Use the ingredients in this order and keep every stated type, weight, temperature, and divided use for a consistent loaf.
- 1 1/4 cups mashed very ripe banana (300 g)
- 1/2 cup plain 2% Greek yogurt (120 g), at room temperature
- 1/3 cup packed light brown sugar (65 g)
- 1 large egg (about 50 g without shell), at room temperature
- 1 large egg white (about 30 g), at room temperature
- 1 1/2 tablespoons neutral oil (21 g)
- 1 teaspoon vanilla extract (5 ml)
- 2 tablespoons boiling water (30 ml)
- 1 teaspoon instant espresso powder (2 g)
- 3/4 cup all-purpose flour (90 g)
- 3/4 cup white whole wheat flour (85 g)
- 1/3 cup plus 1 tablespoon Dutch-process cocoa powder (32 g)
- 1 teaspoon baking powder (4 g)
- 3/4 teaspoon baking soda (3 g)
- 1/2 teaspoon fine sea salt (3 g)
- 3 tablespoons mini semisweet chocolate chips (35 g), divided

Ingredient Notes for a Moist Crumb
Banana, Greek yogurt, brown sugar, and oil all affect softness, but they are not interchangeable sources of moisture.
- Very ripe banana: Weigh 300 g after peeling; extensive brown spotting and soft, fragrant flesh give the loaf its banana flavor and predictable hydration.
- Plain 2% Greek yogurt: Use a thick strained yogurt, because regular yogurt adds more free liquid and changes the batter consistency.
- Light brown sugar: The measured amount balances cocoa bitterness and supports a flexible crumb; liquid sweeteners are not direct replacements.
- Neutral oil: The small quantity helps the cooled crumb remain tender without making the loaf feel oily.
The Ingredients That Build Chocolate Flavor
Dutch-process cocoa creates the main chocolate character, while espresso powder and miniature chips deepen it in different ways.
- Dutch-process cocoa: Its darker color and smoother flavor suit this loaf; black cocoa and natural cocoa are not direct substitutes.
- Espresso powder: Two grams reinforces the cocoa without turning the loaf into coffee bread.
- Mini semisweet chips: The measured 35 g amount creates small, evenly distributed pockets of melted chocolate.
The Ingredients That Set the Crumb
The flour blend, egg, egg white, and leaveners supply the structure that holds the fruit-rich batter as it rises and cools.
All-purpose flour keeps the crumb tender, white whole wheat flour adds whole grain and absorption, the whole egg contributes richness and emulsification, and the extra white adds protein without a second yolk. Baking powder, baking soda, and salt must be dispersed evenly before the dry mixture reaches the wet bowl.
Kitchen Tools Needed
The equipment is simple, but the pan material, scale, thermometer, and cooling rack all help produce a moist loaf that slices cleanly.
- 9 × 5-inch light-colored metal loaf pan: This exact size and material provide the heat transfer used for the 50–60 minute bake; a parchment sling supports clean removal.
- Digital scale and measuring set: Use the scale for the banana, flour, cocoa, oil, yogurt, and chocolate, then use measuring spoons and a heatproof liquid measure for the smaller quantities and boiling water.
- Two mixing bowls: Use one large bowl for the cocoa paste and wet mixture, plus one medium bowl to distribute the flours, leaveners, and salt evenly.
- Whisk and flexible spatula: The whisk smooths the cocoa paste and wet mixture; the spatula reaches the bottom of the bowl and folds the thick batter with minimal overworking.
- Instant-read thermometer and wire rack: The thermometer verifies the dark center at 200–205°F (93–96°C), and the rack lets steam escape while the loaf completes its required cooling period.
What to Expect From This Chocolate Banana Bread
Several normal features of this loaf can look surprising before or during baking, so use these expectations to avoid mistaking the intended behavior for failure.
- The finished batter is thick enough to fall in a heavy ribbon, not pour like a thin cake batter.
- The baked top develops a natural center crack and a modest dome rather than a tall cake-like crown.
- The dark crumb retains a slight moist sheen even when fully baked, but it should not contain translucent paste-like streaks.
- The loaf is fragile and appears wetter while warm; its cohesive slicing texture develops during the full 2-hour cool.
How to Make Healthy Chocolate Banana Bread
The method is divided into eight clear steps, with a visual cue after each one so you can judge the batter and loaf without relying on time alone.
1. Preheat and Prepare the Pan
Preheat the oven to 350°F (175°C) with conventional heat and a rack in the lower-middle position, allowing at least 25 minutes for full preheating. Line a 9 × 5-inch (23 × 13 cm) light-colored metal loaf pan with a parchment sling, then grease the two exposed ends very lightly.

What you should see: The parchment lies flat against the long sides and extends above them far enough to lift the loaf, without bulky corner folds that would distort its shape.
2. Bloom the Cocoa
Place the Dutch-process cocoa and espresso powder in the large bowl, add the boiling water, and whisk until no dry pockets remain. Whisk in the brown sugar and neutral oil for about 30 seconds.

What you should see: A thick, dark, glossy paste with no pale cocoa specks; a slight graininess from the brown sugar is normal.
3. Build the Wet Mixture
Add the mashed banana, Greek yogurt, whole egg, egg white, and vanilla to the cocoa mixture, then whisk only until evenly combined. Do not blend or aggressively aerate the mixture.

What you should see: A thick, cohesive chocolate mixture with tiny natural banana flecks, not a foamy, separated, or watery mixture.
4. Combine the Dry Ingredients
In the medium bowl, whisk the all-purpose flour, white whole wheat flour, baking powder, baking soda, and fine sea salt for at least 20 seconds, breaking apart any visible leavener clumps.

What you should see: A uniform pale flour mixture without concentrated white clumps of baking powder or baking soda.
5. Finish the Batter
Add the dry ingredients to the wet mixture and fold gently until only a few narrow flour streaks remain. Add 25 g of the mini chocolate chips, then finish folding just until the final streaks disappear, scraping the bottom and sides once for hidden flour.

What you should see: A thick, glossy batter that falls from the spatula in a heavy ribbon and holds a visible ridge for about 2–3 seconds.
6. Fill the Pan
Transfer the batter immediately to the prepared pan, spread it into the corners without repeatedly stirring or pressing, and smooth the top with one or two broad strokes. Scatter the remaining 10 g mini chocolate chips over the surface.

What you should see: The pan is filled evenly, the batter remains visibly thick, and the chips form a light, even scatter rather than a heavy layer.
7. Bake to Doneness
Bake for 50–60 minutes, beginning the first check at 50 minutes. Insert an instant-read thermometer into the center without touching a melted chip, and remove the loaf at 200–205°F (93–96°C), ideally about 203°F (95°C). If the surface is fully set before the center is ready, tent it loosely with foil.

What you should see: A softly domed loaf with a natural center crack that looks matte and baked; a tester may carry a few moist crumbs but no liquid batter.
8. Cool Completely
Cool the loaf in its pan for 15 minutes, lift it out with the parchment sling, and transfer it to a wire rack. Allow a full 2 hours of cooling before slicing, and do not wrap the loaf while any warmth remains.

What you should see: The loaf holds its shape after removal, its base loses the steamy feel of a warm bake, and the completely cooled crumb cuts without smearing.
Chocolate Banana Bread Doneness Guide
Use temperature, the center crack, and the tester together, because cocoa hides the browning cues that are easier to read in a plain banana loaf. The 200–205°F (93–96°C) center range is the most reliable check, but the surface and tester should also show that the loaf is fully baked.
| Indicator | Correct Result |
|---|---|
| Internal temperature | 200–205°F (93–96°C), ideally about 203°F (95°C) |
| Center crack | Set and matte, with no glossy liquid batter |
| Tester | A few moist crumbs, no wet streaks |
| Surface | Softly domed and resilient under a very light touch |
| Edges | Set and beginning to release slightly from the pan |
Correct Moist Crumb vs. Gummy Crumb
Evaluate the crumb only after the full cooling period, when the difference between an intentionally moist slice and an underbaked center becomes clear.

| Correct Moist Crumb | Gummy or Underdone Crumb |
|---|---|
| Fine, irregular air pockets | Dense translucent streaks |
| Soft fibers separate cleanly | Interior smears beneath the knife |
| Slice bends slightly but holds | Slice compresses into a wet mass |
| Moist sheen without raw batter | Glossy, paste-like center |
| Even structure from base to crown | Compressed gummy line near the base |
Expert Tips for Better Texture and Slices
These details make it easier to spread the batter evenly, check the center accurately, and cut clean slices.
- Weigh the banana after mashing. Peel size and fruit length do not predict the amount of usable banana, so use exactly 300 g.
- Press stubborn cocoa specks against the bowl. Smearing them with the whisk against the side removes dry pockets more efficiently than prolonged whisking after the eggs are added.
- Deposit the batter in three mounds. Spreading from several points fills the pan with fewer strokes and reduces the chance of compacting one end.
- Keep the probe path visible. Leave a small chip-free area near the center so the thermometer can read crumb rather than melted chocolate.
- Use a thin serrated knife. Gentle sawing preserves the soft crumb better than downward pressure from a heavy chef’s knife.
Chocolate Banana Bread Mistakes That Cause a Gummy Crumb
Most failures trace to excess liquid, uneven leavening, overdeveloped gluten, or an early slice; this table separates the symptom, cause, and realistic prevention.
| Mistake | What Happens | Why It Happens | How to Prevent or Fix It |
|---|---|---|---|
| Using unweighed banana | The center may sink or remain gummy | Excess fruit adds more water than the flour can support | Use exactly 300 g mashed banana after peeling |
| Using regular yogurt | The batter becomes loose and the crumb may set unevenly | Unstrained yogurt contributes more free liquid | Use thick plain 2% Greek yogurt |
| Leaving leavener clumps | The loaf develops bitter spots or an uneven rise | Baking soda or powder remains concentrated | Whisk the dry mixture for at least 20 seconds and break visible clumps |
| Overmixing after flour | The crumb becomes rubbery rather than tender | Repeated stirring develops excess gluten | Fold only until the final flour streak disappears; a baked loaf cannot be repaired |
| Adding extra chips | The crumb becomes heavier and the nutrition estimate changes | Additional chocolate adds weight, sugar, and fat | Keep the total at 35 g, divided 25 g inside and 10 g on top |
| Judging only by color | The center may be removed while still wet | The dark cocoa crumb conceals subtle browning | Use internal temperature, the center crack, and a tester together |
| Slicing while warm | The knife smears the crumb and creates a false gummy appearance | Steam and starches have not finished settling | Cool for the full 2 hours; the warm crumb cannot be restored once compressed |
Beautiful Ways to Serve Chocolate Banana Bread
Serve this loaf in ways that keep its tender crumb visible and its moderate sweetness in balance, whether the slice is part of breakfast, a snack, or a simple dessert plate.
Soft-Crumb Breakfast Slice
Serve one room-temperature slice on a small plate with plain Greek yogurt alongside it, so the cool tang contrasts with the cocoa while the loaf keeps its clean, soft texture.
Warm Chocolate-Pocket Snack
Warm a single slice only until the miniature chips soften, then serve it plain so the melted chocolate accents remain distinct from the banana crumb.

Berry-Bright Dessert Plate
Add a small handful of fresh raspberries or strawberries beside the slice; their acidity and color brighten the dark loaf without covering its surface or changing its texture.

Simple Brunch Board
Cut fully cooled slices to an even thickness and arrange them with fresh fruit and unsweetened coffee or tea, leaving space between slices so the moist edges do not stick together.
How to Store, Freeze, and Reheat Chocolate Banana Bread
Cool the loaf completely before storing it, then choose the method below according to how soon you plan to serve it and how closely you want to preserve the fresh crumb.
Room-Temperature Storage
For the best texture, keep the completely cooled loaf or individual slices in an airtight container at room temperature for up to 3 days, with parchment between stacked slices to prevent sticking.
Refrigerator Storage
Refrigerate the loaf tightly covered for up to 5 days when a longer holding window matters more than the softest texture; cold storage firms both the crumb and the chocolate.
Freezing and Thawing
Wrap completely cooled individual slices tightly, place them in an airtight freezer container for up to 3 months, and thaw each slice at room temperature while still wrapped so condensation forms on the wrapping rather than the crumb.

Reheating One Slice
For one room-temperature slice, microwave for 15–18 seconds at 700 W, 12–15 seconds at 800 W, 8–10 seconds at 1000 W, or 6–8 seconds at 1200 W, adding only a few seconds if needed because overheating can make a lower-fat quick bread rubbery.
Discard any slice with visible mold, an off odor, or unexpected surface moisture that persists after unwrapping; storage extends usability but does not preserve fresh-baked quality indefinitely.
Substitutions and Variations
The options below work without changing the basic texture of the loaf. Larger changes to the sweetener, flour, egg, cocoa, or pan require different measurements and baking times.
- Without espresso powder: Omit the 2 g espresso powder but keep the full 2 tablespoons (30 ml) boiling water.
- All-purpose flour only: Replace the 85 g white whole wheat flour with 85 g additional all-purpose flour; expect a slightly lighter crumb and the loss of the whole-grain contribution.
- Without chocolate chips: Omit all 35 g without another adjustment; the loaf will be less sweet and approximately 14–15 calories lighter per slice.
- Darker chocolate: Use the same 35 g weight of mini dark chocolate chips and preserve the 25 g/10 g division.
If you want a richer classic loaf with more obvious chocolate pockets, try this chocolate chip banana bread rather than increasing the chips in this lower-calorie recipe.
Healthy Chocolate Banana Bread FAQs
These common questions cover frozen bananas, cocoa choices, gluten-free flour, and baking the batter as muffins.
Can I use frozen bananas?
Frozen bananas are not a direct substitute here. Thawing changes the fruit’s physical state and releases liquid, which can upset the 300 g fruit target and the loaf’s hydration.
Can I use natural cocoa powder?
Use Dutch-process cocoa in this recipe, because natural cocoa has a different acidity and a brighter flavor that can change the balance of the baking powder and baking soda.
Can I make this chocolate banana bread gluten-free?
A direct gluten-free flour swap is not recommended here, because gluten-free blends absorb water and set differently. Choose a gluten-free recipe designed for that type of flour instead.
Can I bake the batter as muffins?
The temperature, timing, yield, and doneness cues above apply to a 9 × 5-inch loaf. For muffins, use a dedicated muffin recipe rather than guessing at a shorter bake.
Continue Your Banana Baking Journey
If you have more ripe bananas or want another chocolate bake, these recipes are natural choices for what to make next.
More Banana Bread Comfort
Choose one of these loaves or loaf-inspired bakes when you want to stay close to the familiar banana bread experience.
- Banana Bread offers the traditional buttery flavor and classic bakery-style crumb.
- Healthy Banana Bread keeps the lighter everyday direction but lets ripe banana lead without cocoa.
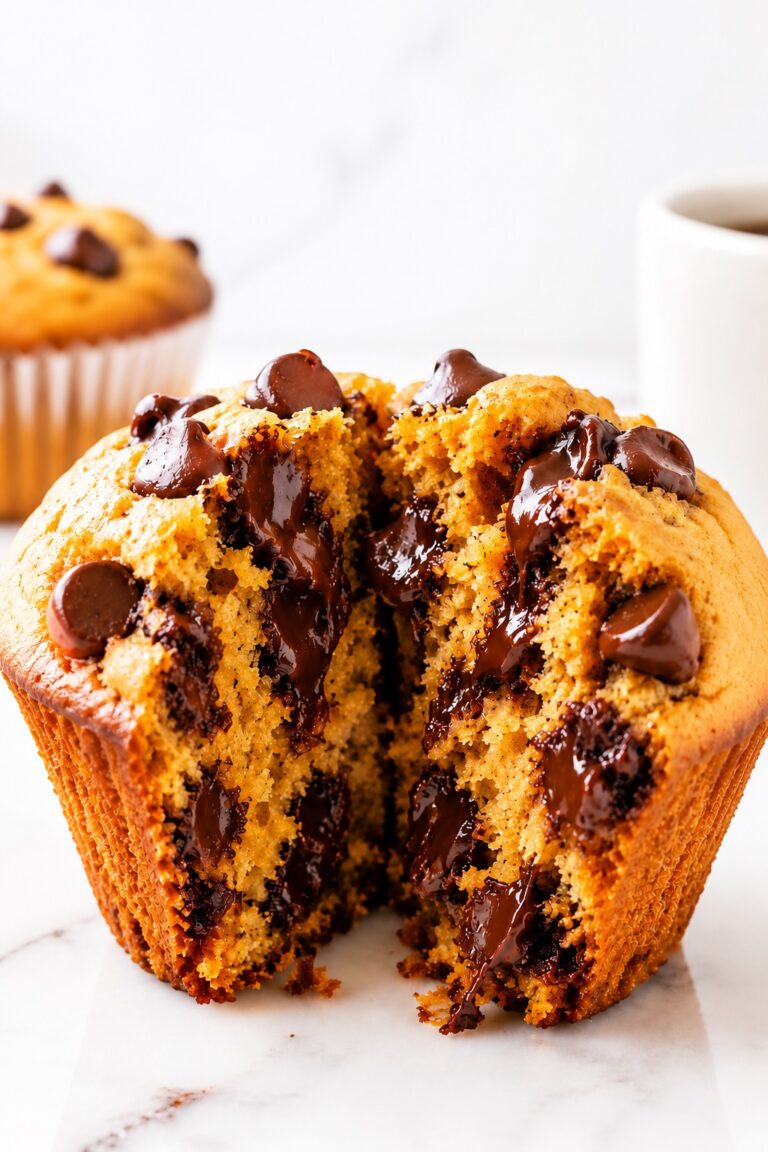
- Chocolate Chip Banana Bread is the richer choice when you want a classic crumb with more melted chocolate.
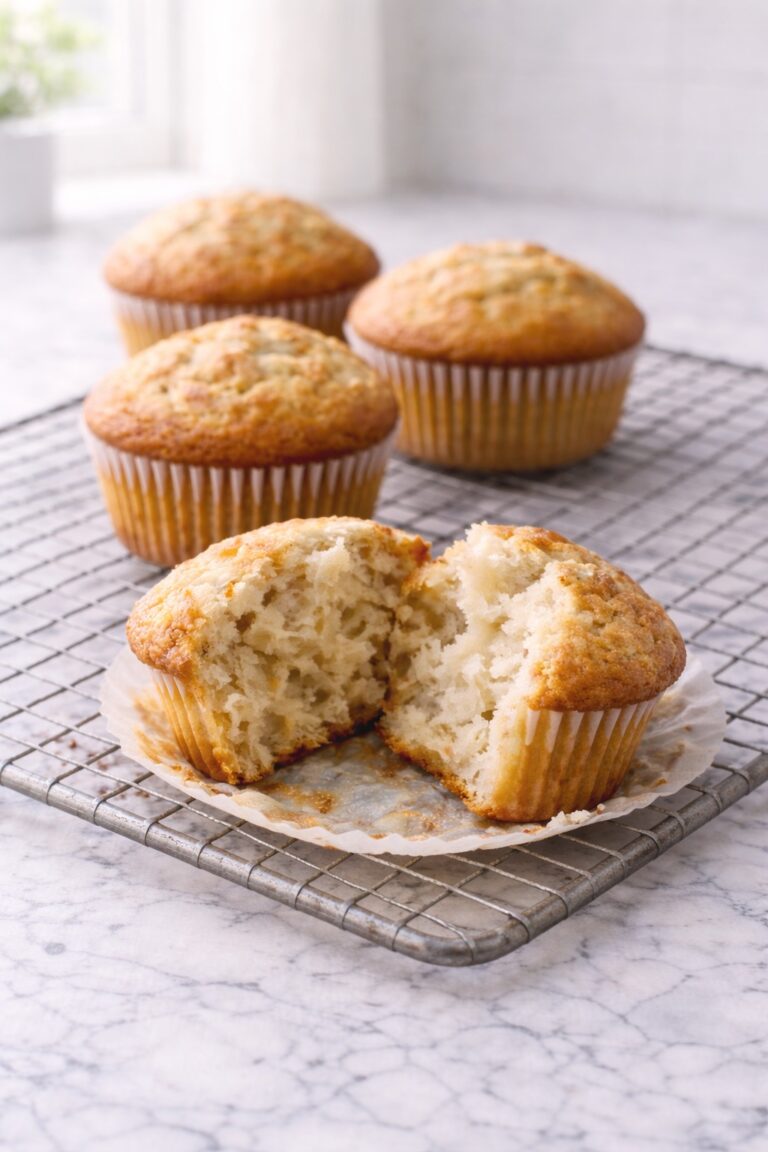
- Banana Bread Muffins carry the familiar loaf flavor into a convenient individual format.
Lighter Banana Breakfasts
These recipes keep ripe banana in a breakfast-friendly role while changing the texture, shape, or serving rhythm.
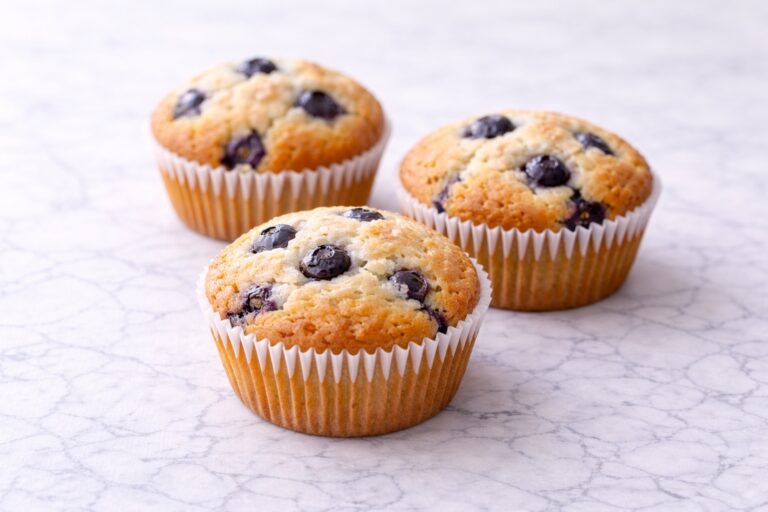
- Banana Chocolate Chip Muffins deliver soft portable portions with distinct semisweet chocolate pockets.
- Healthy Banana Muffins are the lighter individual option for breakfast and meal prep.
- Banana Oatmeal Muffins use oats for a heartier texture and a more substantial morning bite.
- Banana Pancakes turn ripe fruit into a quick, soft breakfast cooked on the stovetop.
A Different Sweet Direction
Move beyond quick bread with a cake, cookie, brownie, or no-bake dessert that keeps either banana or chocolate at the center.
- Banana Cake shifts ripe banana into a softer celebration-style dessert.
- Banana Cookies offer a small-format bake when you do not need another loaf or muffin batch.
- Black Bean Brownies continue the lighter chocolate theme with a deliberately fudgier texture.
- Cottage Cheese Chocolate Mousse provides a creamy chocolate option without turning on the oven.
Why This Recipe Belongs in Your Recipe Box
This is an easy loaf to return to because it brings together everyday ingredients, deep chocolate flavor, and a reliably moist crumb.
- Deep chocolate flavor: Dutch-process cocoa, espresso powder, and mini chocolate chips make the loaf taste rich without overwhelming the banana.
- Moist but sliceable: Greek yogurt and oil keep the crumb tender, while the flour blend and full cooling time help each slice hold together.
- Simple preparation: The batter needs no electric mixer and comes together with two bowls, a whisk, and a spatula.
- Easy to keep: The loaf works for breakfast, snacks, or dessert and freezes well in individual slices.
A Final Note on Healthy Chocolate Banana Bread
This healthy chocolate banana bread is a satisfying choice when you want the comfort of banana bread with a deeper cocoa flavor. It is lighter than a traditional double-chocolate loaf, but it still uses real brown sugar, oil, Greek yogurt, and chocolate chips for a soft, flavorful crumb.
The most important details are simple: weigh the mashed banana, bloom the cocoa, stop folding as soon as the flour disappears, and let the loaf cool completely before slicing.
Once cooled, the loaf should have a tender, evenly set center with small pockets of melted chocolate. Enjoy it plain, with Greek yogurt and berries, or gently warmed for a softer chocolate bite.
Love this? There are twenty more like it.
128 pages, five chapters, 15 kitchen guides and 16 printable planning pages — in US Letter and A4.

Healthy Chocolate Banana Bread
A moist, deeply chocolatey banana bread made with ripe banana, Greek yogurt, Dutch-process cocoa, and small pockets of semisweet chocolate. Weigh the banana, bloom the cocoa, bake to the internal-temperature target, and cool the loaf fully for a tender crumb that slices cleanly.
Ingredients
- 1 1/4 cups mashed very ripe banana (300 g)
- 1/2 cup plain 2% Greek yogurt (120 g), at room temperature
- 1/3 cup packed light brown sugar (65 g)
- 1 large egg (about 50 g without shell), at room temperature
- 1 large egg white (about 30 g), at room temperature
- 1 1/2 tablespoons neutral oil (21 g)
- 1 teaspoon vanilla extract (5 ml)
- 2 tablespoons boiling water (30 ml)
- 1 teaspoon instant espresso powder (2 g)
- 3/4 cup all-purpose flour (90 g)
- 3/4 cup white whole wheat flour (85 g)
- 1/3 cup plus 1 tablespoon Dutch-process cocoa powder (32 g)
- 1 teaspoon baking powder (4 g)
- 3/4 teaspoon baking soda (3 g)
- 1/2 teaspoon fine sea salt (3 g)
- 3 tablespoons mini semisweet chocolate chips (35 g), divided: 25 g for the batter and 10 g for the top
Instructions
- Preheat the oven and prepare the pan: Set a conventional oven rack in the lower-middle position and preheat to 350°F (175°C) for a full 25 minutes. Line a 9 × 5-inch (23 × 13 cm) light-colored metal loaf pan with a parchment sling and lightly grease the exposed short ends. What you should see: The parchment lies flat against the bottom and long sides, with lifting extensions and no bulky corner folds.
- Bloom the cocoa: In a large bowl, whisk the Dutch-process cocoa and espresso powder with the boiling water until no dry cocoa remains. Add the brown sugar and neutral oil, then whisk for 30 seconds. What you should see: A thick, dark, glossy paste; a slight sugar grain is normal, but there should be no dry cocoa pockets.
- Build the wet mixture: Add the mashed banana, Greek yogurt, whole egg, egg white, and vanilla to the cocoa mixture. Whisk only until combined; do not blend or aggressively aerate it. What you should see: A thick, cohesive chocolate mixture with tiny banana flecks and no foam, watery layer, or visible separation.
- Combine the dry ingredients: In a medium bowl, whisk the all-purpose flour, white whole wheat flour, baking powder, baking soda, and salt for about 20 seconds, breaking up any clumps. What you should see: A uniform pale flour mixture with no concentrated white pockets of leavener.
- Finish the batter: Add the dry mixture to the wet mixture and fold gently until only a few flour streaks remain. Add 25 g of the mini chocolate chips and fold just until the final streaks disappear, scraping the bottom and sides once. What you should see: A thick, glossy batter that falls in a heavy ribbon; a ridge should remain visible for 2–3 seconds before settling.
- Fill the pan: Transfer the batter to the prepared pan immediately. Spread it into the corners with as few strokes as possible, then scatter the remaining 10 g mini chocolate chips over the top. What you should see: An evenly filled pan with thick batter and a restrained, even scatter of chocolate chips.
- Bake: Bake for 50–60 minutes, beginning the first doneness check at 50 minutes. Insert an instant-read thermometer into the center while avoiding a chocolate chip; the target is 200–205°F (93–96°C), ideally about 203°F (95°C). If the top is darkening too quickly, tent it loosely with foil near the end. What you should see: A soft dome with a natural matte crack; a tester should bring up moist crumbs but no liquid batter.
- Cool completely: Cool the loaf in the pan for 15 minutes, then lift it out by the parchment and place it on a wire rack. Let it cool for a full 2 hours before slicing, and do not wrap it while warm. What you should see: The loaf holds its shape, the base is no longer steamy, and a slice cuts cleanly without smearing.
Notes
- Weigh the banana after mashing: Use 300 g rather than relying on a banana count. Fruit size and moisture vary enough to change the crumb.
- Use the specified pan: The stated time and temperature apply to a 9 × 5-inch light-colored metal loaf pan. Other materials and dimensions can change the baking time and texture.
- Keep the cocoa-bloom water: If you omit the espresso powder, retain the full 30 ml boiling water so the hydration does not change.
- Flour option: The 85 g white whole wheat flour may be replaced with 85 g additional all-purpose flour. The loaf will be slightly softer and less wheaty.
- Chocolate options: You may omit the chocolate chips or replace the full 35 g with the same weight of dark mini chocolate chips. Keep the 25 g/10 g inside-and-top division when using chips.
- Use fresh banana: Frozen-and-thawed banana can release extra liquid and make the loaf wetter. Use fresh, very ripe banana for the best result.
- Doneness has three signals: Use the internal-temperature range, the moist-crumb tester cue, and the set surface together. Avoid probing through a melted chocolate chip.
- Cooling is part of the method: The crumb finishes setting as the loaf cools. Cutting early can make a fully baked loaf appear gummy.
- Room temperature: Once completely cool, keep the loaf or individual slices in an airtight container for up to 3 days. Place parchment between stacked slices to prevent sticking.
- Refrigerator: Refrigerate airtight for up to 5 days. Bring a slice toward room temperature before serving for a softer crumb, or warm it briefly as described below.
- Freezer: Wrap completely cooled individual slices tightly, place them in an airtight freezer container, and freeze for up to 3 months. Thaw each slice at room temperature while still wrapped so condensation forms on the wrapping rather than the crumb.
- Microwave reheating: For one room-temperature slice, microwave for 15–18 seconds at 700 W, 12–15 seconds at 800 W, 8–10 seconds at 1000 W, or 6–8 seconds at 1200 W. Add only a few seconds if needed because overheating can make this lower-fat quick bread rubbery.
- Food-safety check: Discard any slice with visible mold, an off odor, or unexpected surface moisture that persists after unwrapping.
Nutrition Information:
Yield: 12 Serving Size: 1Amount Per Serving: Calories: 147Total Fat: 4gSaturated Fat: 1gCholesterol: 16mgSodium: 220mgCarbohydrates: 26gFiber: 3gSugar: 10gProtein: 5g
Nutrition information is provided as an estimate only and may vary based on specific ingredients, brands, and portion sizes used. This information should not be considered medical or nutritional advice.
12 Sweet Favorites — Yours, Free 🍰
Tiramisù, no-bake cheesecake, the perfect chocolate chip cookie & 9 more reader-loved desserts — gathered into one beautiful free recipe book. From my kitchen to yours.
No spam, just sweet things. Unsubscribe anytime.