Red Velvet Cake Recipe (Soft, Moist & Bakery-Style)
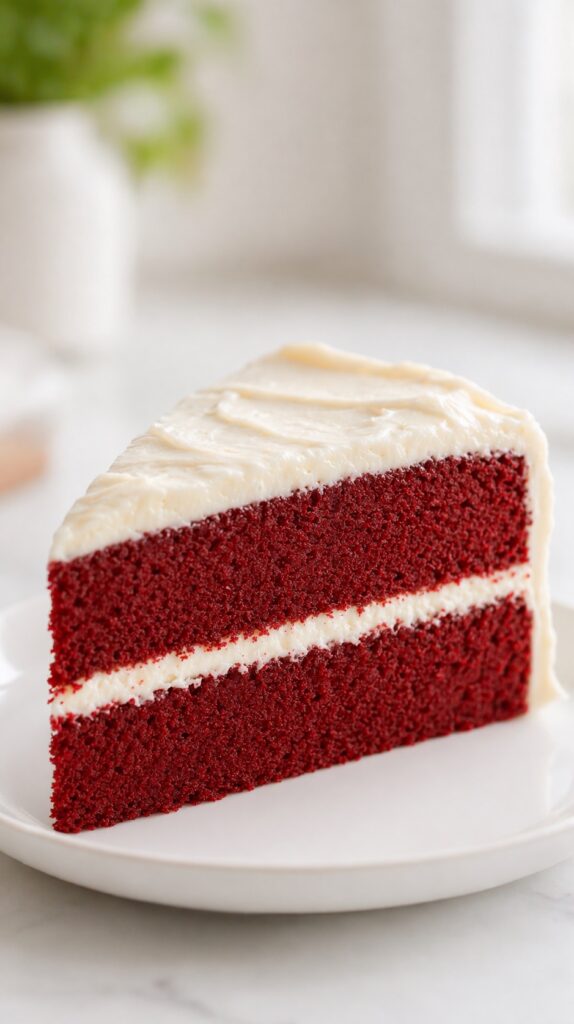
There’s something instantly captivating about a Red Velvet Cake. That deep crimson color, the soft, tender crumb, and the creamy swirl of frosting layered between each slice — it feels both nostalgic and indulgent at the same time. It’s the kind of cake that looks impressive, but once you taste it, you realize it’s the texture that truly makes it unforgettable.

This Red Velvet Cake recipe is built to give you that exact result every time: a fine, tender crumb, a subtle cocoa flavor, and just enough tang to keep each bite balanced instead of overly sweet. It’s the kind of cake that slices cleanly, holds its shape, and still feels incredibly soft and light.
It’s also one of those recipes people come back to again and again. Whether you’re making a birthday cake, a holiday dessert, or simply want something bakery-style at home, this cake delivers a reliable, consistent result without complicated techniques — much like a classic Vanilla Cake or a festive Funfetti Cake.
What makes Red Velvet Cake special isn’t just the color — it’s the balance. The combination of buttermilk, cocoa, and a touch of acidity creates a texture that feels smoother and softer than most classic cakes.
And once you make it once, it quickly becomes one of those recipes you rely on — simple enough to repeat, but impressive enough to serve for any occasion.
It’s the kind of cake that feels simple once you understand it — but that first perfectly soft, velvety slice is what makes people fall in love with it.
What Is Red Velvet Cake?
Red Velvet Cake is a classic American layer cake known for its soft, fine crumb, subtle cocoa flavor, and distinctive red color. It is usually made with buttermilk, a small amount of cocoa powder, and an acidic ingredient like vinegar, which reacts with baking soda to create a light, tender texture.
Unlike chocolate cake, Red Velvet Cake uses only a small amount of cocoa powder. The goal is not a strong chocolate flavor, but a balanced, slightly richer base that supports the cake’s signature texture and mild tang.
It is most commonly paired with cream cheese frosting, which complements the cake’s soft crumb and enhances its slightly tangy flavor profile.
Because the flavor is more subtle than chocolate cake, Red Velvet depends heavily on texture, balance, and structure — which is what gives it that smooth, velvety finish people love.
In simple terms, Red Velvet Cake is defined by its soft texture, mild cocoa base, and the balance of acidity and sweetness that creates its signature velvety crumb.
Key Facts About Red Velvet Cake
- Best for: Layer cakes, celebrations, and bakery-style desserts
- Texture: Soft, fine crumb with a smooth, velvety finish
- Flavor: Light cocoa with a subtle tang from buttermilk
- Main ingredients: Flour, sugar, oil, eggs, buttermilk, cocoa powder, vinegar
- Leavening: Baking soda activated by acidic ingredients
- Signature feature: Balanced texture rather than strong chocolate flavor
- Frosting: Traditionally paired with cream cheese frosting
These quick facts give you a clear overview of what makes Red Velvet Cake unique, but the details below help you understand how those elements come together in a real baking scenario.
Red Velvet Cake at a Glance (Texture, Flavor & Baking Details)
| Category | Details |
|---|---|
| Texture | Soft, moist, fine crumb, velvety |
| Flavor | Light cocoa, slightly tangy, balanced sweetness |
| Difficulty | Medium |
| Time | 1 hour 45 minutes |
| Servings | 12 slices |
| Method | Baked layer cake |
| Best For | Celebrations, holidays, elegant desserts |
In short: Red Velvet Cake is a soft, moist layer cake with a fine crumb, light cocoa flavor, and a balanced tang, finished with smooth cream cheese frosting.
Why You’ll Love This Red Velvet Cake
- Light, delicate crumb every time – This cake is built for texture, giving you that signature smooth, tender bite without feeling dense or heavy.
- Perfectly balanced flavor – A light cocoa base with a gentle tang keeps the cake rich but never overly sweet or overly chocolatey.
- Reliable enough for celebrations – Once you make it once, it becomes one of those cakes you can trust for birthdays, holidays, and special occasions.
- Stays soft even after chilling – Thanks to the oil and buttermilk, the crumb stays moist and pleasant even the next day.
- Pairs beautifully with cream cheese frosting – The slight tang and soft crumb create one of the most classic cake-and-frosting combinations.
- Looks impressive without complicated decoration – The contrast between the deep red layers and white frosting already gives it that iconic bakery-style look.
Why This Red Velvet Cake Works (Texture, Moisture & Structure)
This recipe is all about balance — and that’s what makes Red Velvet Cake so unique.
- Moisture: Buttermilk keeps the crumb soft and slightly creamy without making it dense
- Structure: A balanced ratio of flour and eggs creates a stable but delicate cake that slices cleanly
- Fat: Oil (instead of only butter) ensures the cake stays moist even after chilling
- Heat: A moderate oven temperature allows the cake to rise evenly without drying out the edges
One key insight: the small amount of cocoa powder isn’t meant to dominate — it adds depth and enhances the overall flavor rather than making it taste like chocolate cake.
Another subtle detail: the vinegar might seem unusual, but it enhances tenderness and activates baking soda, giving that signature soft texture.
One real baking observation: if the batter looks slightly more fluid than a classic cake batter, that’s exactly what you want. That softer structure is what creates the signature velvety crumb instead of a dense slice.
Another small detail: because of the acidity in the batter, the crumb stays softer even after chilling, which is why Red Velvet Cake often tastes even better the next day.
One small but important detail: Red Velvet Cake relies more on balance than intensity. If one element becomes too strong — too much cocoa, too much flour, or too little acidity — the cake quickly loses that signature soft, velvety texture. When everything is balanced correctly, the result feels noticeably smoother than most standard cakes.
Balanced Moisture Without a Heavy Texture
The combination of oil and buttermilk keeps the cake soft and moist, while still allowing the crumb to feel light rather than dense.
Soft Structure That Still Slices Cleanly
The ratio of flour and eggs creates enough stability for clean slices without losing that signature tender texture.
Why a Small Amount of Cocoa Makes a Big Difference
Instead of dominating the flavor, cocoa adds depth and enhances the overall richness of the cake.
Together, these elements create a cake that feels noticeably softer and more refined than most standard butter-based cakes.
The Baking Science Behind Red Velvet Cake
Two simple reactions define this cake:
- Acid + Baking Soda Reaction: The buttermilk and vinegar react with baking soda, creating carbon dioxide bubbles that make the cake light and tender
- Emulsification: Oil blends smoothly with the wet ingredients, creating a uniform batter that bakes into a fine, smooth crumb
This is why the texture feels so smooth compared to standard cakes — it’s not just the ingredients, it’s how they interact.
Another subtle detail: the red color actually becomes more vibrant in the presence of acid (from buttermilk and vinegar), which is why this combination is essential not just for texture, but also for the final appearance.
Because this cake relies on both chemical leavening and emulsification, even small changes in ingredient ratios or mixing can noticeably affect the final texture — which is why consistency matters more here than in heavier cakes.
That’s what gives Red Velvet Cake its noticeably softer and more refined texture compared to classic butter-based cakes.
How Acid Creates a Softer Crumb
Buttermilk and vinegar react with baking soda, creating lift while also tenderizing the crumb.
Why Oil Creates a More Velvety Texture
Oil blends more evenly than butter, creating a smoother batter and a finer crumb.
That’s why Red Velvet Cake isn’t just about ingredients — it’s about how those ingredients interact to create a uniquely soft and balanced result.
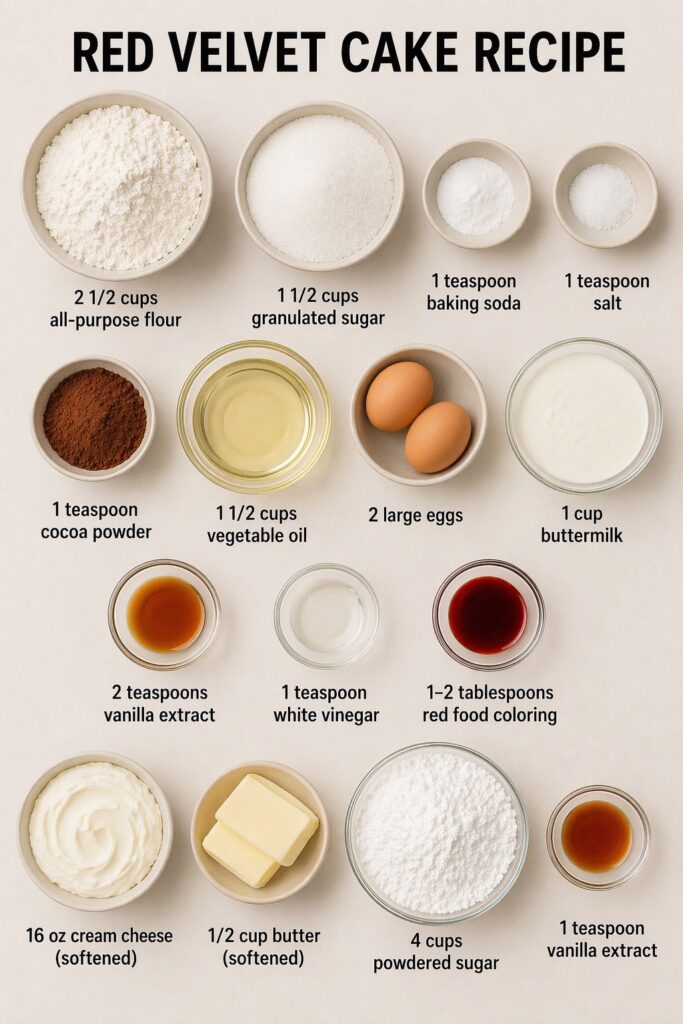
Ingredients for the Perfect Red Velvet Cake

For the cake:
- 2 1/2 cups all-purpose flour
- 1 1/2 cups granulated sugar
- 1 teaspoon baking soda
- 1 teaspoon salt
- 1 teaspoon cocoa powder
- 1 1/2 cups vegetable oil
- 2 large eggs
- 1 cup buttermilk
- 2 teaspoons vanilla extract
- 1 teaspoon white vinegar
- 1–2 tablespoons red food coloring
For the cream cheese frosting:
- 16 oz cream cheese (softened)
- 1/2 cup butter (softened)
- 4 cups powdered sugar
- 1 teaspoon vanilla extract
Ingredient Insights (What Makes Red Velvet Cake Work)
Buttermilk
Adds acidity and softness. It creates a tender crumb and a slight tang that balances sweetness.
Substitution: Milk + 1 tablespoon lemon juice (let sit 5 minutes)
If you don’t have any on hand, here’s How to Make Buttermilk for an easy substitute that still supports the texture of the cake.
Cocoa Powder
Used in a small amount — it deepens flavor without making the cake chocolate-heavy
Oil
Keeps the cake moist longer than butter-based cakes — especially important after refrigeration
Vinegar
Enhances softness and activates leavening — you won’t taste it, but you’ll notice the texture
Food Coloring
Primarily visual, but it also slightly affects perception — a deeper red color often makes the cake feel richer and more indulgent, even when the flavor stays the same.
Because Red Velvet Cake depends on subtle balance, each ingredient does more than one job. The cocoa adds depth, the buttermilk softens the crumb, the vinegar sharpens the structure, and the food coloring completes the visual identity people expect from the cake.
Insight: The combination of buttermilk + vinegar is what gives Red Velvet its signature softness — removing one changes the entire texture.
Another practical note: natural cocoa powder works best here — Dutch-processed cocoa can reduce the acidity needed for the classic texture and color.
Why Buttermilk Is Essential in Red Velvet Cake
Buttermilk does more than add moisture. Its acidity helps tenderize the crumb, balances the sweetness, and supports the classic Red Velvet flavor profile that feels slightly tangy rather than flat.
Why Natural Cocoa Works Better Here
Natural cocoa powder is usually the better choice for classic Red Velvet Cake because it works more naturally with the acidic ingredients in the batter. That balance helps preserve both the soft texture and the traditional flavor.
Once you’ve made Red Velvet Cake a few times, you’ll notice that small adjustments — like slightly reducing flour or mixing more gently — can have a noticeable impact on how soft and velvety the final crumb feels.
Kitchen Tools You’ll Need
- 2 round cake pans (8 or 9 inch)
- Mixing bowls
- Hand or stand mixer
- Rubber spatula
- Whisk
- Wire cooling rack
- Parchment paper
A practical note: lining the bottoms of the pans with parchment is one of the easiest ways to make this recipe feel stress-free. Red Velvet Cake is soft and tender, and even when pans are greased well, parchment gives you a much safer release.
If you want especially even layers, a kitchen scale is also helpful for dividing the batter more precisely between pans.
How to Make Red Velvet Cake Step by Step
1. Preheat and prepare pans
Preheat oven to 175°C (350°F). Grease and line cake pans.
Visual cue: Parchment should sit flat with no folds.
2. Mix dry ingredients
In a bowl, whisk flour, sugar, baking soda, salt, and cocoa powder.
Tip: Break any cocoa lumps — they can create dark spots in the cake.
3. Combine wet ingredients
In another bowl, mix oil, eggs, buttermilk, vanilla, vinegar, and food coloring.
Visual cue: The mixture should be smooth and evenly red.

4. Combine wet and dry
Gradually mix wet ingredients into dry until just combined.

If the batter looks a little softer than a typical butter cake batter, that is completely normal — Red Velvet should feel smoother and slightly more fluid.
Do not overmix.
It’s normal if the batter looks slightly thinner than typical cake batter.
If the batter looks slightly uneven in color at first, keep mixing gently — it usually comes together into a smooth, uniform red as the ingredients fully combine.
What the Batter Should Look Like Before Baking
The batter should be smooth, slightly fluid, and evenly colored, without lumps or streaks.

How to Avoid Overmixing the Batter
Mix just until combined. Overmixing develops gluten and creates a tighter crumb.
5. Divide and bake
Pour evenly into pans and bake 25–30 minutes.

Visual cue: Edges pull slightly away from the pan, center is set but soft.

If your oven runs hot, you might notice the edges setting faster than the center. In that case, rotate the pans halfway through baking to keep the texture even.
From experience, the first time you bake this cake, you might wonder if it’s fully done because the center stays soft even when baked correctly. As long as it springs back lightly and the edges are set, that soft center is exactly what gives Red Velvet Cake its signature texture.
6. Cool completely
Let cakes cool fully before frosting.
Important: Warm cake will melt the frosting.
If the cake feels slightly warm in the center, give it more time — rushing this step is one of the most common reasons frosting melts or slides.

7. Make frosting
Beat cream cheese and butter until smooth, then add powdered sugar and vanilla.
Texture cue: Silky, spreadable, not runny.
8. Assemble
Layer cake with frosting between layers and on top.
Tip: Chill briefly for cleaner slices.
How to Make Cream Cheese Frosting (Smooth & Stable)
Beat the softened cream cheese and butter until smooth and creamy. Add powdered sugar gradually, mixing until fully combined. Finish with vanilla extract and mix until the frosting is soft, smooth, and spreadable.
The ideal texture should hold soft peaks but still spread easily without tearing the cake layers. If it feels too soft, chill briefly before using.
Because cream cheese frosting is softer than buttercream, chilling the cake briefly after frosting helps it set cleanly and improves slice stability.

How to Get Smooth, Lump-Free Frosting
Make sure both butter and cream cheese are fully softened before mixing.
Adjusting Frosting Consistency
If the frosting feels too soft, chill it briefly. If too thick, add a small amount of cream.
How to Assemble a Red Velvet Layer Cake (Clean & Stable Layers)
Place the first cake layer on a serving plate or cake stand. Spread an even layer of cream cheese frosting across the top.
Add the second layer and press gently to level. Apply a thin crumb coat over the entire cake and chill for 15–20 minutes.

Finish with a final layer of frosting, spreading smoothly or creating soft swirls for a more natural look.
Chilling between layers makes a noticeable difference — it helps the cake hold its shape and gives cleaner, more stable slices.
If your layers have a slight dome, you can level them before assembling for a more even, bakery-style finish.
How to Keep Layers Even and Stable
Press gently and chill between steps to prevent shifting.
Why a Crumb Coat Makes a Difference
A thin first layer of frosting locks in crumbs and creates a cleaner final finish.

Simple Red Velvet Cake Decoration Ideas (Clean & Elegant)
Red Velvet Cake already has a strong visual contrast, so decoration works best when it stays simple and highlights the layers.
- Classic finish: Smooth frosting with clean edges
- Crumb coating: Use cake crumbs around the edges for a traditional look
- Berry topping: Fresh strawberries or raspberries add contrast
- Minimal style: Keep the top simple with soft swirls

This is one of those cakes that doesn’t need complicated decoration — the natural contrast between the red layers and white frosting already creates a striking, bakery-style look.
Why Simple Decoration Works Best
The natural contrast between red layers and white frosting already creates a strong visual impact.
How to Tell When Red Velvet Cake Is Perfectly Baked
- Edges slightly pulling away from the pan
- Top looks matte, not glossy
- Center springs back lightly when touched
- No wet batter when a toothpick is inserted
- Even rise without sinking in the middle
- Light, even dome on top (no cracks or collapse in the center)
The Most Reliable Doneness Signal
The center should spring back lightly while still feeling soft.
Red Velvet Cake Texture & Behavior Guide
| Stage | What to Expect |
|---|---|
| Batter | Smooth, slightly fluid, evenly colored |
| Baked Crumb | Fine, soft, slightly moist |
| Proper Doneness | Set center, tender but stable |
| Overbaked | Dry edges, crumbly texture |
A properly baked Red Velvet Cake should feel soft when pressed lightly, but not fragile. The crumb should hold together cleanly when sliced, without crumbling or sticking to the knife — a clear sign the moisture and structure are balanced.
How to Recognize a Perfect Red Velvet Crumb
The crumb should feel soft, slightly moist, and hold together cleanly when sliced.

Expert Tips for the Best Red Velvet Cake Texture
- Use room temperature ingredients. This helps the batter mix more smoothly and creates a finer, more even crumb.
- Do not overmix once the flour goes in. Red Velvet Cake should feel soft and velvety, not tight or heavy. Overmixing is one of the fastest ways to lose that texture.
- Measure flour carefully. Even a little too much flour can make the cake feel drier and less tender than it should.
- Use gel food coloring if you want a deeper red without thinning the batter. Liquid coloring works, but gel gives stronger color with less impact on consistency.
- Chill the cake briefly before slicing. This makes the frosting cleaner, the layers more stable, and the slices more bakery-style.
- Weigh the batter if you want perfectly even layers. This small step makes a noticeable difference in both appearance and bake consistency.
- Pay attention to batter texture. In a well-balanced Red Velvet Cake, the batter should feel smooth, slightly fluid, and evenly colored before it goes into the oven.
If your layers come out slightly uneven or with a light dome, don’t worry — that’s completely normal. A quick trim or a simple frosting layer easily evens everything out, and it won’t affect the final texture at all.
The #1 Factor That Affects Texture
Proper mixing and ingredient temperature make the biggest difference.
Common Red Velvet Cake Mistakes (And How to Fix Them)
- Overmixing the batter – This creates a tighter, denser crumb instead of that soft velvety texture. Mix just until the ingredients are combined.
- Using too much flour – Extra flour makes the cake drier and heavier. Spoon and level for the most consistent result.
- Skipping the vinegar – The cake will still bake, but it will lose some of the tenderness and balance that make Red Velvet distinct.
- Overbaking – Even a few extra minutes can dry the edges and make the crumb less smooth. Check the center early and watch for visual doneness cues.
- Frosting warm cake layers – Warm layers melt frosting and make the cake unstable. Let the cake cool completely before assembling.
- Using too much food coloring – This can create a slightly artificial or bitter finish instead of the clean, well-rounded flavor you want.
If your cake ever feels slightly dense instead of soft, it’s often not a single mistake but a combination of small ones — slightly too much flour, a bit of overmixing, or baking just a few minutes too long.
Why Small Mistakes Show Quickly in Red Velvet Cake
Because the cocoa flavor is subtle and the texture is such a big part of the experience, even small mistakes show up more clearly in Red Velvet Cake than they do in richer or heavier cakes.
Red Velvet Cake vs Other Classic Cakes
| Cake | Main Flavor | Texture | What Makes It Different |
|---|---|---|---|
| Red Velvet Cake | Light cocoa with a slight tang | Soft, fine, velvety crumb | Balanced flavor with acidity and a smoother, more refined texture |
| Chocolate Cake | Rich, deep cocoa or chocolate flavor | Denser and more intense | Focused on strong chocolate flavor rather than subtle balance |
| Vanilla Cake | Sweet, buttery, neutral | Light and delicate | Simpler flavor profile without cocoa or acidity contrast |
How to Serve Red Velvet Cake (Simple & Elegant Ideas)
Slice into thick, clean layers and serve slightly chilled for the best texture — the frosting firms up beautifully while the cake stays soft and tender.

Pair it with coffee or tea for a cozy moment, or serve it as a centerpiece dessert for celebrations.
Save this for a birthday cake that feels elegant but comforting.
Save this when you want a bakery-style cake made right in your own kitchen.
The deep red layers with bright white frosting create that iconic contrast that looks stunning in photos — this is the kind of cake people instantly save when they see it.
For a more elegant dessert table, serve it on a simple cake stand with clean slices and let the contrast between the red crumb and white frosting do most of the visual work.
This is the kind of cake that instantly stands out on a dessert table — that deep red slice against the creamy white frosting is hard to ignore.
It’s also one of those recipes people tend to save the moment they see it, not just for how it looks, but for how reliably soft and elegant it turns out every time.
Best Texture for Serving
Serve slightly chilled or at cool room temperature for the best balance of softness and structure.
How to Store and Make Red Velvet Cake Ahead
- Store in the fridge for up to 4 days – Keep the cake covered so the crumb stays soft and the frosting does not dry out.
- Bring to room temperature before serving – This gives you the best balance of soft crumb and creamy frosting.
- Make layers 1 day ahead – Wrap them tightly once cooled and assemble later.
- Freeze unfrosted layers for up to 2 months – Wrap tightly in plastic and thaw before frosting.

How to Keep the Cake Soft After Refrigeration
Let slices sit briefly at room temperature before serving. The crumb softens noticeably, and the frosting tastes smoother and less firm.
Easy Red Velvet Cake Variations to Try
- Red Velvet Cupcakes – Use the same batter in cupcake liners and bake for 18–20 minutes for a smaller, more versatile version.
- Layered Sheet Cake – Bake the batter in a rectangular pan for easier serving and a more casual presentation.
- Less Color Version – Reduce the food coloring if you want a more natural look while keeping the same flavor and texture.
- Deeper Cocoa Version – Increase the cocoa slightly if you want a more chocolate-forward flavor, while still keeping the Red Velvet profile.
How to Adjust Flavor Without Losing Texture
Small changes work best here. Red Velvet Cake depends on balance, so modest adjustments to cocoa, color, or format are usually more successful than major ingredient swaps.
Red Velvet Cake FAQs (Common Questions Answered)
Why is my cake not red enough?
Use gel food coloring for a more vibrant result.
Why is my red velvet cake not soft?
This usually comes from overmixing the batter, using too much flour, or baking too long. Red Velvet Cake depends heavily on balance, so even small changes can affect the final texture.
Can I skip the vinegar?
Not recommended — it affects texture significantly.
Why is my cake dry?
Usually overbaking or too much flour.
Can I use butter instead of oil?
Yes, but the cake will be slightly less moist.
Can I freeze Red Velvet Cake?
Yes, wrap layers tightly and freeze up to 2 months.
Why does it taste slightly tangy?
That’s from the buttermilk — it’s part of the signature flavor.
Can I Make Red Velvet Cake Ahead of Time?
Yes, and it often tastes even better the next day. The flavors settle, and the texture becomes even softer and more balanced after resting.
Can I make Red Velvet Cake without food coloring?
Yes. The cake will still taste like Red Velvet, but the color will be much more muted and less dramatic.
Why does Red Velvet Cake taste different from chocolate cake?
Because it uses far less cocoa and relies more on the balance of buttermilk, acidity, and texture than on deep chocolate flavor.
More Bakery-Style Cake Recipes You’ll Love
If you love the soft, elegant texture of this Red Velvet Cake, there are several other cake recipes on the blog that build on that same idea: balanced structure, dependable layers, and a homemade finish that still feels celebration-ready. Some stay close to the same layer-cake style, while others lean richer, lighter, or more flavor-forward depending on what you want to bake next.
Quick picks: For a similar classic layer-cake feel, try Vanilla Cake. For something fruitier and lighter, go with Strawberry Cake. For a richer chocolate direction, Matilda Chocolate Cake is the most indulgent next step.
Classic Layer Cakes with a Similar Feel
- Vanilla Cake – soft, balanced layers with a clean, timeless flavor.
- Strawberry Cake – light, fruity, and tender with a similar homemade finish.
- Lemon Cake – bright, soft, and fresh with a delicate crumb.
- Coconut Cake – slightly more delicate, with a soft and airy layer-cake texture.
Richer Cakes for a More Indulgent Direction
- Matilda Chocolate Cake – ultra-rich and deeply chocolatey with a denser, more indulgent finish.
- German Chocolate Cake – layered, rich, and slightly more complex in flavor.
- Carrot Cake – soft and moist with a more textured crumb and classic cream cheese pairing.
Red Velvet Variations & Similar Bakes
- Red Velvet Cupcakes – the same flavor in a smaller, easy-to-serve format.
- Red Velvet Cookies – soft and chewy with a similar flavor profile.
- Red Velvet Brownies – denser and more indulgent, but built on the same base idea.
Once you understand how moisture, acidity, and structure work together in a cake like this, it becomes much easier to explore different cake styles while still keeping that same soft, bakery-style result.
Red Velvet Cake Recipe Recap
This Red Velvet Cake recipe creates soft, moist, velvety layers with a fine crumb, balanced cocoa flavor, and a subtle tang, finished with smooth cream cheese frosting for a classic bakery-style result.

A Red Velvet Cake You’ll Keep Coming Back To
Red Velvet Cake isn’t just about its signature color — it’s about how it feels from the very first bite. Soft, smooth, lightly rich, and perfectly balanced, it’s one of those cakes that quietly becomes a favorite without trying too hard.
What makes it truly special is that balance. The gentle cocoa depth, the slight tang from buttermilk, and the velvety texture all come together in a way that feels lighter, softer, and more refined than most classic cakes.
It’s also one of the most reliable cakes you can make. Once you understand how the texture comes together — how moisture, structure, and acidity work in sync — it becomes a recipe you can trust for birthdays, holidays, and any moment that calls for something both simple and impressive.
This is the kind of cake people don’t just make once. It’s the one they come back to — because it works, because it feels right, and because every slice delivers that same soft, bakery-style finish.
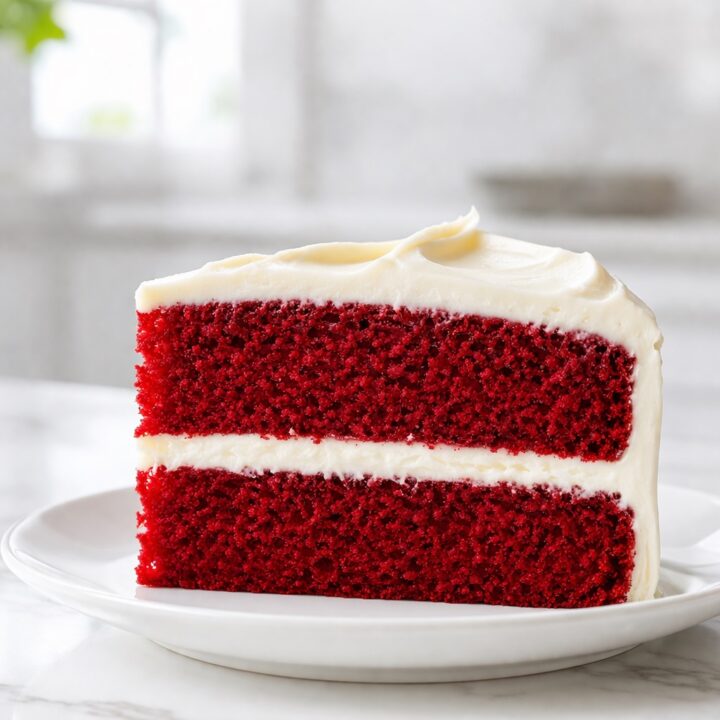
Red Velvet Cake with Cream Cheese Frosting
A soft, moist red velvet cake with a velvety crumb and smooth cream cheese frosting. This easy homemade red velvet cake recipe creates perfectly balanced layers with a rich texture and classic flavor, ideal for celebrations or everyday baking.
Ingredients
For the Cake:
- 2 1/2 cups all-purpose flour
- 1 1/2 cups granulated sugar
- 1 teaspoon baking soda
- 1 teaspoon salt
- 1 teaspoon cocoa powder
- 1 1/2 cups vegetable oil
- 2 large eggs
- 1 cup buttermilk
- 2 teaspoons vanilla extract
- 1 teaspoon white vinegar
- 1–2 tablespoons red food coloring
For the Cream Cheese Frosting:
- 16 oz cream cheese, softened
- 1/2 cup butter, softened
- 4 cups powdered sugar
- 1 teaspoon vanilla extract
Instructions
- Preheat the oven to 175°C (350°F). Grease and line two 8-inch or 9-inch round cake pans with parchment paper to ensure easy release.
- In a large bowl, whisk together the flour, sugar, baking soda, salt, and cocoa powder until evenly combined and free of lumps.
- In a separate bowl, mix the oil, eggs, buttermilk, vanilla extract, vinegar, and red food coloring until smooth and fully blended. The mixture should be evenly colored.
- Gradually combine the wet ingredients with the dry ingredients, mixing just until incorporated. Do not overmix — the batter should be smooth and slightly fluid.
- Divide the batter evenly between the prepared pans and smooth the tops.
- Bake for 25–30 minutes, or until the edges pull slightly away from the pan and the center springs back lightly when touched.
- Allow the cakes to cool completely in the pans for a few minutes, then transfer to a wire rack to cool fully before frosting.
- To make the frosting, beat the cream cheese and butter until smooth and creamy. Add powdered sugar gradually, then mix in the vanilla extract until the frosting is soft and spreadable.
- Assemble the cake by layering frosting between the cake layers and covering the top and sides evenly. Chill briefly before slicing for cleaner layers.
Notes
- For the best texture, use room temperature ingredients — this helps create a smoother batter and a finer crumb.
- Do not overmix once the flour is added, as this can make the cake dense instead of soft and velvety.
- The batter should be slightly thinner than a typical cake batter — this is normal and helps create the signature texture.
- Allow the cake to cool completely before frosting to prevent melting and sliding layers.
- For clean, bakery-style slices, chill the cake for 20–30 minutes before serving.
Nutrition Information:
Yield: 12 slices Serving Size: 1 sliceAmount Per Serving: Calories: 805Total Fat: 49gCarbohydrates: 88gSugar: 66gProtein: 7g
Nutrition information is estimated and may vary based on ingredients and portion sizes.


