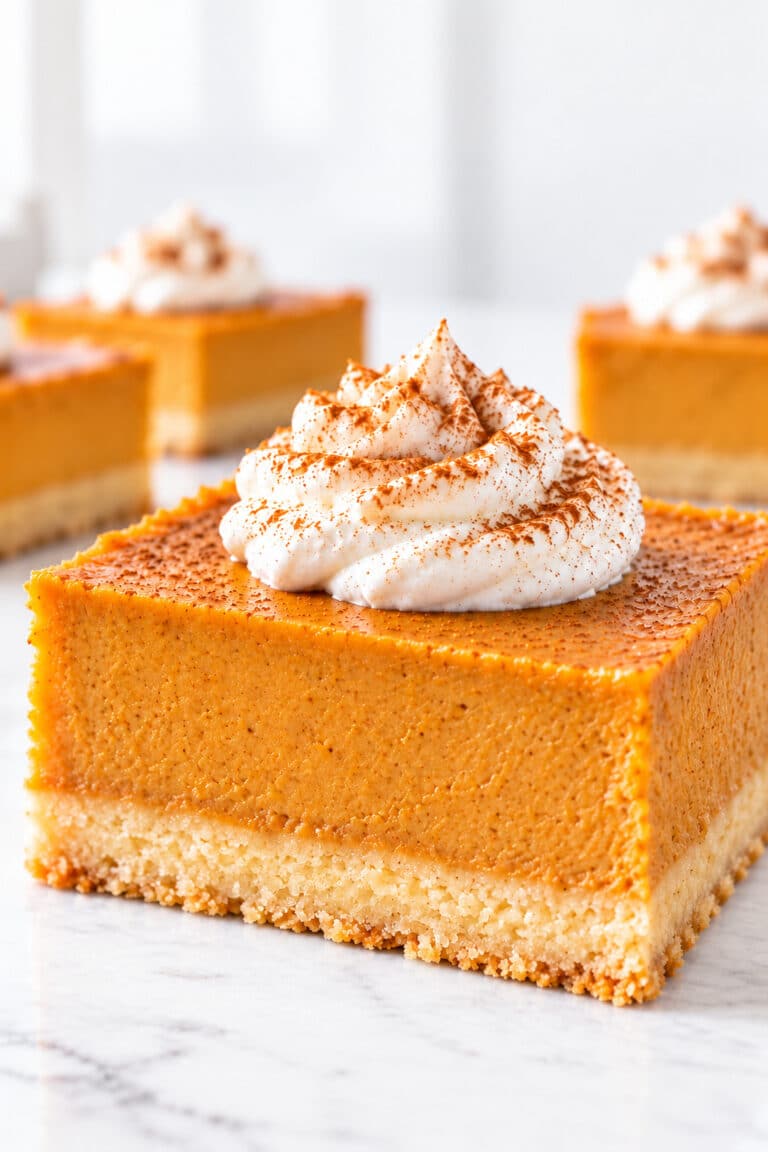
Apple Pie Bars with Buttery Shortbread and Crumble
Apple pie bars tuck tender cinnamon apples between a buttery shortbread base and a coarse, golden crumble topping. The apples cook first, so their juices become a glossy coating before the three layers meet in the oven. Each square brings soft fruit, a close-textured base, and little brown-sugar crumbs that scatter with the first bite.

There is something especially inviting about an apple dessert that can be cut into small squares and set in the middle of the table. The cinnamon and warm butter flavors feel familiar, while the separate fruit layer gives each portion the character of a slice of pie.
These apple pie bars are a useful bake to return to when you want dessert prepared ahead of serving. There is no pastry to roll, but there is time to allow for cooling. Watch the apple juices as they reduce, give the base its first bake, and leave the finished pan long enough to cut into tidy portions.
Apple Pie Bars at a Glance
Give these apple pie bars about 4½–5 hours from start to slicing. You’ll spend about 40–50 minutes making the doughs, slicing the apples, and stirring the filling. The rest is mostly oven, cooling rack, and refrigerator time. If you’re bringing a platter somewhere, bake the day before and cut the bars when they’re cold.
| Detail | What to plan for |
|---|---|
| Method | Baked shortbread bars with a separately cooked apple filling and oat-free crumble. |
| Yield | 24 small bars, cut into a 4 × 6 grid. |
| Pan | 9 × 13 × at least 2 inches, light-colored metal, lined with a parchment sling. |
| Oven | 350°F (177°C), conventional oven, center rack. |
| Difficulty | Three straightforward layers. Watch the juices in the skillet and give the bars time to cool. |
| Hands-on work | About 40–50 minutes in all, including slicing and stirring the apples. |
| Prep time | About 30 minutes of prep. Some of the hands-on work happens while the base bakes. |
| Bake time | 18–22 minutes for the base, then 35–45 minutes after assembly; about 60 minutes total oven time. |
| Stovetop time | About 13–20 minutes, normally overlapping the base bake. |
| Cooling and chilling | About 2 hours on a rack until no warmth remains, then at least 1 hour in the refrigerator. |
| Total time | About 4½–5 hours; allow longer if the center needs more time to cool. |
| Texture and flavor | Tender shortbread, soft sweet-tart apple pieces, cinnamon, and coarse buttery crumble. |
| Serving temperature | Cool for neat portions; warmed bars are softer and best eaten with a fork. |
| Make-ahead option | Bake the day before, refrigerate uncut, and slice near serving. |
| Storage | Refrigerate up to 4 days; freeze up to 2 months for best quality. |
| Ingredient notes | Contains wheat and milk. No eggs, nuts, oats, caramel, or cheesecake layer in this recipe. |
If you’d like cinnamon apples and buttery crumbs in a round pie, try apple crumble pie. These apple pie bars use a pressed shortbread base, so you can skip rolling pastry and cut 24 little squares to lift straight from a platter.
Why This Apple Pie Bars Recipe Works
The three layers of apple pie bars have different jobs, and preparing them separately helps each keep its character. The base gets a head start in the oven, the fruit loses excess juice in the skillet, and the topping stays loose enough to bake into distinct crumbs.
- A base that is ready for the filling. Prebaking sets the pressed shortbread before the apples go on top, giving the fruit a more substantial foundation than an unbaked layer of dough.
- Fruit with less free liquid. Cooking the apples uncovered lets you judge their tenderness and juice level before assembly. The filling coats the pieces instead of pouring a pool of syrup over the base.
- Two different butter textures. Melted butter makes the base easy to press evenly; cold butter helps the separately mixed topping form coarse clusters.
- A sweet-tart apple balance. Granny Smith brings tartness alongside the sweeter Honeycrisp. Both remain visible in the filling, giving the apple pie bars a fruit-centered middle rather than a smooth paste.
Why You’ll Love This Apple Dessert in Bar Form
Apple pie bars offer familiar pie flavors in portions that are easy to arrange on a tray. They take advance planning, but the preparation skips pastry rolling, a stand mixer, and the careful transfer of a full pie crust.
- No rolling or trimming. The shortbread goes directly into the pan, so there is no sheet of pastry to lift or fit around an edge.
- One bake for a dessert tray. A 4 × 6 cutting grid gives 24 small portions, useful when guests want a little of more than one dessert.
- Less to do at serving time. Bake and chill the slab the day before, then leave the cutting until you are ready to arrange it.
- Portions for later. Wrapped individual bars can be frozen, so you can thaw only what you need. Expect the crumble to soften somewhat after storage.
Who These Apple Pie Bars Are Perfect For
These apple pie bars suit a kitchen where the oven can do its work early and the pan can chill while you get on with the day. They’re especially good when you want a generous layer of cinnamon apples in a dessert you can carry to the table on a platter.
- If you’re bringing dessert to share. Cut 24 small squares, so there’s room on everyone’s plate for a taste even when there’s pie or cake on the table.
- If you like to bake the day before. Leave the pan uncut in the refrigerator. Before serving, all that’s left is to lift, slice, and arrange the bars.
- If you love the apple part of apple pie. Granny Smith and Honeycrisp stay in tender pieces, so you can see the fruit in every cut square.
- If you’d rather press a crust than roll pastry. The shortbread goes straight into the pan by hand. You’ll need to stay by the skillet as the apples soften, then the oven and refrigerator take over.
The Science Behind Cleanly Sliced Apple Bars
For apple pie bars that hold their shape, reduce the juice first, thicken what remains, and give the layers time to set before slicing.
Reducing Apple Juice Before Thickening
A wide, uncovered skillet helps water evaporate while the apples soften. Wait until the juice leaves a thin coating on the slices. If liquid still pools when you push the apples aside, keep cooking uncovered before adding the cornstarch.
Turning Cornstarch into a Glossy Binder
Stir the cornstarch into cold water to disperse it, then stir the mixture again just before adding it. For these apple pie bars, bring the juices back to a bubble and stir for 1–2 minutes, until the sauce looks glossy and clings to the slices without pooling.
Giving the Shortbread a Head Start
Check the shortbread before you add the apples. The edges should be pale gold and the center should look set. If the middle still looks wet or greasy, give it more time in the oven.
Letting the Layers Set Before Cutting
Cool and chill the apple pie bars before lifting or slicing. The cold base is firmer and the filling is less likely to slide out as you cut. Chilling won’t fix apples that are still hard or a filling with excess juice. If the chilled slab is still loose, serve it from the pan with a fork.
Ingredients for the Shortbread, Apple Filling and Crumble
The crumble, shortbread, and filling for apple pie bars use separate portions of butter, sugar, flour, and spice. Keep the groups separate as you measure, and weigh the apples after peeling and coring so the fruit layer has the intended amount.
Ingredient List
Make the topping first so it can chill while you prepare the base and apples. US measures are listed first, with gram weights alongside; a scale is particularly useful for flour and the prepared fruit.
Crumble topping
- 1½ cups (180 g) all-purpose flour, spooned and leveled
- ½ cup (106 g) packed light brown sugar
- ½ teaspoon ground cinnamon
- ¼ teaspoon (1.5 g) fine table salt
- ½ cup (113 g) unsalted butter, refrigerator-cold and cut into ½-inch cubes
Shortbread base
- 1 cup (226 g) unsalted butter, melted and cooled until warm, not hot
- ½ cup (100 g) granulated sugar
- 2 teaspoons (10 ml) vanilla extract
- ½ teaspoon (3 g) fine table salt
- 2½ cups (300 g) all-purpose flour, spooned and leveled
Apple filling
- 2 tablespoons (28 g) unsalted butter
- 2½ pounds (1,130 g) peeled, cored apples, about 10 loosely filled cups; approximately half Granny Smith and half Honeycrisp by prepared weight, sliced ¼ inch thick with long slices cut into 1-inch pieces
- ½ cup (100 g) granulated sugar
- 1 tablespoon (15 ml) lemon juice
- 2 teaspoons ground cinnamon
- ⅛ teaspoon ground nutmeg
- ¼ teaspoon (1.5 g) fine table salt
- 2 tablespoons (14 g) cornstarch
- 2 tablespoons (30 ml) cold water

Choosing and Weighing the Apples
The 2½ pounds of apples is the weight after peeling and coring. Buy about 3–3½ pounds of whole fruit to allow for trimming. The cup measurement is approximate because the shape and packing of the slices affect how much fits.
Use roughly equal prepared weights of Granny Smith and Honeycrisp for these apple pie bars. Pink Lady can replace the Honeycrisp portion, though firmer pieces may need longer in the skillet. All-Granny-Smith filling will be more tart; keep the listed sugar amount rather than adjusting it without considering the full filling.
Slice the apples about ¼ inch thick, then shorten long slices into roughly 1-inch pieces. Similar thickness helps them soften together and keeps a single long slice from pulling out of a small bar. Softer varieties such as McIntosh can break down more readily.

Butter, Flour and Filling Substitutions
Butter temperature changes how the two flour mixtures behave. Melt the shortbread butter and let it cool until just warm, but use cold butter cubes straight from the fridge for the crumble. Swapping those states changes how easily the base presses and how well the topping forms clusters.
For flour, spoon and level the cups or use the weights. Packed cups can leave the shortbread and crumble drier than intended. The salt amounts assume fine table salt; coarse salts measure differently by volume.
Canned filling is not a direct replacement in these apple pie bars because its fruit, syrup, sugar, and starch proportions differ. For another baking project that needs a separate filling, use homemade apple pie filling; keep the quantities listed here for this pan. For a gluten-free flour blend or a different filling thickener, see the Apple Pie Bars Variations below. Vegan butter, oats in place of flour, and low-calorie sweeteners can also change the way the layers bind and bake.
Essential Tools for Baking and Slicing Apple Pie Bars
A light-colored metal pan helps you follow the stated baking cues, while a broad skillet gives the apple juices room to reduce. Have the lifting and slicing tools ready before the apple pie bars finish cooling so you can support the slab without bending it.
- Baking setup: a 9 × 13 × at least 2-inch light-colored metal pan, parchment for a sling, and a conventional oven with a center rack.
- Measuring and mixing: a digital scale, dry and liquid measures, two mixing bowls, a fork for mixing and docking, an optional pastry cutter, and a flexible spatula.
- Fruit preparation and cooking: a peeler, knife, cutting board, 12-inch skillet with reasonably deep sides, and a small cup for the cornstarch slurry.
- Cooling and chilling: a cooling rack and a refrigerator shelf with space for the full pan.
- Portioning and protection: a sharp slicing knife, board, thin serving spatula, and foil for a loose tent only if the topping browns before the fruit is ready.
Keep this batch of apple pie bars in the specified 9 × 13-inch pan. An 8- or 9-inch square pan gives the full batch much deeper layers, and a half batch does not automatically create the same depth in either size. Glass, ceramic, dark nonstick pans, and convection ovens also need different baking judgment.
Plan Your Apple Bars Around Serving Time
Baking for tomorrow? Bake the apple pie bars today and cool the pan on a rack. Refrigerate it uncut, cover it once chilled, and slice just before you set out the platter. That leaves the oven free for the rest of the meal.
Baking for today? Start about 4½–5 hours before serving, with a little extra time if the kitchen is warm. The apples can cook while the base is in the oven. Give the shortbread time to set and the juices time to turn glossy, even if one is ready before the other.
| When | What to do | What to look for |
|---|---|---|
| First 25 minutes or so | Set up the oven and pan, make the topping and base, and prepare the apples. | Keep the topping refrigerated and leave room for the cooled pan in the refrigerator. |
| While the base prebakes | Cook, reduce, and thicken the apple filling. | The shortbread looks set and the juices cling to the apple slices. |
| After assembly | Bake the filled pan, then move it to a cooling rack. | Allow about 2 hours to cool, longer if the center remains warm. |
| After full cooling | Refrigerate at least 1 hour before lifting and cutting. | Wait longer if the center is still soft, then support the slab as you lift. |
Before You Start the Apple Bar Layers
A little preparation keeps the three components of apple pie bars moving comfortably. Before you mix, check the fruit amount, the two butter temperatures, and where the full pan will sit during cooling and chilling.
- Use the light metal pan and a parchment sling that extends beyond two opposite sides.
- Measure the apples after peeling and coring.
- Keep topping butter cold; melt the base butter and let it cool until warm.
- Set out the 12-inch skillet and a cup for the slurry.
- Clear refrigerator space and allow the complete cooling and chilling window.
What to Expect from the Dough, Filling and Crumble
The components of apple pie bars look quite different before assembly. A pressable dough, irregular crumbs, and visible apple pieces are all part of the intended result; none should resemble a smooth cake batter.
- The shortbread mixture is soft and pressable, with enough body to stay where it is spread.
- The crumble has small crumbs mixed with larger rough clusters, rather than one smooth sheet.
- The filling contains recognizable apple pieces surrounded by a glossy coating.
- The finished slab is more delicate while warm than after cooling and chilling.
How to Make Apple Pie Bars with Crumble Topping
Start with the crumble, then work on the shortbread and apples while the oven is occupied. The key moments are reducing the fruit juice before thickening, checking both fruit and topping at the end of baking, and waiting for the apple pie bars to cool before lifting.
1. Prepare the Oven and Pan
Heat the oven to 350°F (177°C) with a rack in the center. Line a 9 × 13 × at least 2-inch light-colored metal pan with parchment, leaving overhang on two opposite sides. Fold the paper flat into the corners; grease beneath it is not essential.
Check that the pan will fit on a refrigerator shelf once it has cooled. Set a cooling rack somewhere the hot pan can stand undisturbed.
What you should see: A flat parchment base, accessible lifting overhangs, and an oven that has reached temperature before the shortbread goes in.
2. Make and Chill the Crumble
Combine the topping flour, brown sugar, cinnamon, and salt. Work in the cold cubed butter with a pastry cutter or your fingers until the mixture forms rough clusters when squeezed. Aim for a mixture of smaller crumbs and clusters about the size of peas to hazelnuts.
There should be no substantial pockets of dry flour. Stop before the mixture becomes a smooth paste, then refrigerate it while you prepare the remaining components of the apple pie bars.
What you should see: Crumbs that hold together when pressed, with loose edges and varied sizes rather than greasy clumps.

3. Press and Prebake the Shortbread
Stir together the warm melted base butter, granulated sugar, vanilla, and salt. Fold in the flour just until uniformly combined, without kneading. Distribute the mixture over the lined pan and press it into an even layer all the way to the corners.
For an even base beneath the apple pie bars, keep the surface level instead of building a tall rim. Dock lightly with a fork and bake for 18–22 minutes. Leave the oven on afterward.

What you should see: The center is set and no longer wet or greasy, with pale-gold edges. A still-wet center needs more time before filling.

4. Cook and Reduce the Apples
While the base bakes, melt the filling butter in the 12-inch skillet over medium heat. Add all the prepared apples, sugar, lemon juice, cinnamon, nutmeg, and salt. Cook uncovered, gently stirring and turning the pieces, for about 12–18 minutes.
The apple pie bars need tender fruit without a watery pool of juice. If the pieces remain firm, lower the heat and continue gently. If the fruit is soft enough but the liquid is still watery, continue cooking uncovered before adding the slurry.

What you should see: Slices bend and accept a fork with slight resistance. The released juices have reduced to a shallow glossy coating around recognizable apple pieces.

5. Thicken the Apple Filling
Stir the cornstarch and cold water together until smooth, immediately before adding them to the skillet. Fold the entire slurry into the hot apples. Bring the liquid back to visible bubbling and stir for about 1–2 minutes, until it thickens.
Remove from the heat once the coating is glossy, without chalky streaks or loose liquid collecting when you push the fruit aside. Avoid repeatedly boiling it after thickening. Let the filling stand off the heat for about 5 minutes while you check the base.

What you should see: Fruit that is easy to spread but does not run like syrup, with the thickened juices clinging to the pieces.

6. Assemble the Three Layers
Spread all the cooked filling, including its thickened juices, evenly over the warm prebaked shortbread. Do not add raw apples or extra uncooked juice. Scatter all the chilled crumble across the filling without pressing it down.
Leave small gaps between the clusters so some apple remains visible. This helps you observe bubbling near the center as the apple pie bars bake.

What you should see: An even apple layer beneath loose crumbs, with small openings rather than a solid pressed topping.

7. Bake Until the Fruit and Crumble Are Ready
Bake at 350°F (177°C) for about 35–45 minutes. Check that the crumble is golden across the center as well as the edges, that fruit bubbles through several gaps near the center, and that a thin knife slips into an apple piece with little resistance.
If the topping browns before the fruit is ready, tent loosely with foil and continue to those cues. Keep the tent loose so it does not trap steam against the crumble. A clean-toothpick test is not useful for this fruit-filled bake.
What you should see: Golden crumbs, tender apples, and visible bubbling toward the middle, with no powdery raw topping.
8. Cool Completely and Chill
Set the pan uncovered on a cooling rack until it no longer feels warm, about 2 hours in an ordinary room. Give it longer if the center still holds warmth. Then refrigerate the cooled pan for at least 1 hour before lifting and slicing.
The apple pie bars may need a longer chill if the filling remains loose. Cover once chilled to limit condensation on the topping rather than trapping steam while the pan is warm.
What you should see: A pan with no remaining warmth before refrigeration, followed by a chilled slab that feels stable enough to support during lifting.

9. Lift and Cut into 24 Bars
Use the parchment to lift the chilled slab onto a cutting board, supporting the base as it moves. Cut into a 4 × 6 grid for 24 small bars, wiping the sharp knife between cuts. Slide a thin spatula beneath each portion.
If the slab seems too fragile to lift safely, cut it in the pan. Serve the apple pie bars cool, or let individual portions lose a little refrigerator chill before serving. Warmed portions are softer and better supported on a plate.
What you should see: Distinct layers in supported pieces, with a few loose crumble crumbs rather than filling squeezed out by a warm, dragging cut.

Apple Pie Bars Doneness Guide
Check the middle of the pan, not only the browned edges, before taking apple pie bars out of the oven. The topping and fruit must be ready together; color alone cannot tell you whether the apples have softened.
- Center color: the crumble is golden through the middle, with no powdery flour patches.
- Fruit bubbling: filling bubbles through several topping gaps, including near the center.
- Apple tenderness: a thin knife meets little resistance in a piece of fruit.
- Uneven progress: a loose foil tent protects fast-browning crumbs while the fruit finishes.
These are the baking checks for apple pie bars. The slab still needs its full cooling and chilling time before the shortbread and filling are ready for neat cutting.

Expert Tips for Neater Apple Bar Slices
For neater apple pie bars, pay attention to support as well as temperature. Even a well-cooled slab can crack if it bends during lifting, and a knife carrying sticky filling can drag the next cut out of line.
I once cut into an apple dessert while it was still warm, only to watch the filling slip out of the first piece. I learned to treat cooling as part of the recipe. When I want neat portions, I give the filling time to settle before reaching for the knife.
- Weigh the fruit after trimming. Whole apples include peel and cores that will not enter the pan. Measuring only the prepared pieces keeps the filling amount consistent when apple sizes vary.
- Press the corners as evenly as the middle. A thick central mound with thin corners creates weak edges. Distribute the dough across the pan before pressing, rather than pushing one large mound outward.
- Support the slab during the lift. Keep it close to the board and support underneath. The parchment is a lifting aid, not a rigid tray; a bent slab can break before you make the first cut.
- Reset the blade between cuts. Wipe away clinging fruit and crumbs so the knife enters the next line cleanly. Use a thin spatula beneath each bar instead of pinching it by the topping.

Apple Pie Bar Mistakes and How to Fix Them
When apple pie bars are difficult to portion, first distinguish excess moisture from a slab that simply needs to finish cooling. Some problems can be improved at serving, while others are best prevented before the layers are assembled.
| Problem | Likely cause | Prevent it | What to do now |
|---|---|---|---|
| Filling slides out | Too much free juice or insufficient thickening. | Reduce before adding slurry; check for a glossy coating without a pool. | Cool and chill fully. If still loose, serve from the pan with a fork; chilling cannot fix underbaking. |
| Soft or greasy base | Measurement error, inadequate prebake, or moisture migration. | Weigh flour and butter and check the set surface before adding fruit. | Use a spatula for support. A fully assembled, chilled bar does not have a reliable crust-only repair. |
| Hard apple pieces | Uneven thick slices or too little skillet cooking. | Cut evenly and test the fruit before assembly. | Do not use browned topping as proof of tenderness. While still baking, tent loosely if the fruit needs longer. |
| Floury crumble | Butter was not worked through dry pockets. | Squeeze and inspect clusters before chilling. | Continue baking only if fruit and edge color can tolerate it; do not treat raw flour patches as a finished texture. |
| Slab breaks during lifting | Remaining warmth, insufficient chilling, or poor support. | Cool, chill, and support underneath. | Leave it in the pan and cut there if lifting risks further breakage. |
| Crumble softens overnight | Moisture moves from the fruit, or warm covering traps condensation. | Cool uncovered, then cover once chilled. | Expect some softening. Gentle rewarming can help the surface, but also softens the filling. |
Beautiful Ways to Serve Apple Pie Bars
Set out cool apple pie bars when you want tidy squares people can pick up. For dessert at the table, warm a few pieces just before serving so the cinnamon apples soften and the crumble smells of butter again.
A Simple Tray of Small Squares
Arrange the apple pie bars in one layer with the cut sides facing out. The golden crumbs and stripe of cinnamon apples do the decorating. Leave a little room between squares so guests can lift one without brushing the topping off its neighbor.

A Warm Plated Bar with Vanilla Ice Cream
Put a gently rewarmed bar on a dessert plate and tuck a small scoop of vanilla ice cream beside it. The first bit of melted vanilla is lovely against the tart apples. Serve with a fork, since the layers soften as they warm.
A Neat Slice Beside Coffee or Tea
Take a chilled square out while you brew coffee or steep black tea. Give it a few minutes to lose the refrigerator chill, then serve it plain. A sip of unsweetened coffee or tea makes the cinnamon and brown sugar in the crumble stand out.
Making Ahead, Storing and Freezing Apple Pie Bars
Store apple pie bars in the refrigerator once they have cooled, using a rigid airtight container to protect the layers. The crumble gradually softens against the fruit, so expect a different texture after storage rather than a permanently crisp topping.
Bake Ahead and Refrigerate
For next-day serving, bake the apple pie bars, cool them completely in the pan, and refrigerate the slab uncut. Cover once chilled and slice near serving. Keeping the slab whole reduces handling and the amount of exposed filling.
Use refrigerated apple pie bars within 4 days; aim for the first 1–2 days when texture matters most. For transport, keep them chilled in a rigid covered container so the pieces do not bend or slide into each other.

Freeze and Thaw Individual Bars
Freeze fully cooled portions in one layer, then wrap them individually and pack them airtight. Use within 2 months for best quality. Thaw the wrapped apple pie bars in the refrigerator overnight, then uncover for serving.
University of Maine Cooperative Extension recommends thawing fruit pies in the refrigerator. Allow for some softening of both shortbread and crumble after freezing and thawing.
Rewarm a Portion Gently
Place an individual thawed bar on parchment on a baking sheet and warm at 300°F (149°C) for about 10–15 minutes, checking until the center is pleasantly warm. This can improve the surface texture, but it will not fully return stored crumble to its fresh-baked state.
Rewarmed apple pie bars have a softer filling and base. Serve them on a plate with a fork rather than trying to carry a warm portion by hand.
Apple Pie Bars Variations
Choose the flour or filling swap you need. Each version gives you a full batch of apple pie bars, with its own ingredients and baking steps.
Gluten-Free Apple Pie Bars
Makes 24 small bars. Use a 9 × 13-inch light-colored metal pan at least 2 inches deep. This variation uses King Arthur Gluten-Free Measure for Measure Flour in both the shortbread and the crumble.
Ingredients
Crumble topping
- 1½ cups (180 g) King Arthur Gluten-Free Measure for Measure Flour
- ½ cup (106 g) packed light brown sugar
- ½ teaspoon ground cinnamon
- ¼ teaspoon fine table salt
- ½ cup (113 g) unsalted butter, cold from the refrigerator and cut into ½-inch cubes
Shortbread base
- 1 cup (226 g) unsalted butter, melted and cooled until just warm
- ½ cup (100 g) granulated sugar
- 2 teaspoons vanilla extract
- ½ teaspoon fine table salt
- 2½ cups (300 g) King Arthur Gluten-Free Measure for Measure Flour
Apple filling
- 2 tablespoons (28 g) unsalted butter
- 2½ pounds (1,130 g) peeled and cored apples, weighed after trimming, about half Granny Smith and half Honeycrisp
- ½ cup (100 g) granulated sugar
- 1 tablespoon lemon juice
- 2 teaspoons ground cinnamon
- ⅛ teaspoon ground nutmeg
- ¼ teaspoon fine table salt
- 2 tablespoons (14 g) cornstarch labeled gluten-free
- 2 tablespoons cold water
Method
- Prepare the pan. Heat a conventional oven to 350°F (177°C) with a rack in the center. Line the pan with parchment, leaving enough overhang on two opposite sides to lift the bars later.
- Make the crumble. Mix the flour blend, brown sugar, cinnamon, and salt. Work in the cold butter with your fingertips or a pastry cutter until a handful holds together when squeezed and breaks into rough clusters. Refrigerate while you prepare the base and filling.
- Prebake the shortbread. Stir the warm melted butter with the granulated sugar, vanilla, and salt. Fold in the flour blend just until evenly mixed. Press the dough into an even layer, including the corners, and prick it lightly with a fork. Start checking at 18 minutes. The center should look set rather than wet or greasy, with pale-gold edges. The base for the original apple pie bars takes 18–22 minutes at this stage.
- Cook the apples. Slice the apples ¼ inch thick and cut long slices into roughly 1-inch pieces. While the base bakes, melt the filling butter in a deep 12-inch skillet over medium heat. Add the apples, sugar, lemon juice, cinnamon, nutmeg, and salt. Cook uncovered, turning gently, for about 12–18 minutes, until the apples bend with slight resistance and their juices lightly coat the slices. If liquid still pools in the skillet, cook a little longer before thickening.
- Thicken the filling. Stir the cornstarch and cold water until smooth, then fold the mixture into the hot apples. Bring the juices back to a bubble and stir for 1–2 minutes, until glossy and thick enough to cling to the fruit. Remove from the heat and let stand for about 5 minutes.
- Assemble and bake. Spread the apples and thickened juices over the warm shortbread. Scatter the chilled crumble loosely over the fruit, leaving a few gaps. Bake at 350°F (177°C). Begin checking at 35 minutes. The center should be golden, the filling should bubble through several gaps near the middle, and a thin knife should slide into an apple slice with little resistance. Use 35–45 minutes as a guide from the original apple pie bars. If the top browns first, tent it loosely with foil.
- Cool, chill, and slice. Cool the uncovered pan on a rack for about 2 hours, or until it no longer feels warm. Refrigerate for at least 1 hour, longer if the slab feels too soft to lift. Support the base as you lift it by the parchment. If it seems fragile, slice it in the pan. Cut the apple pie bars into a 4 × 6 grid, wiping the knife between cuts.
Apple Pie Bars Without Cornstarch
Makes 24 small bars. Use a 9 × 13-inch light-colored metal pan at least 2 inches deep. To make these apple pie bars without cornstarch, use 1½ tablespoons of fine tapioca starch, also sold as tapioca flour. Check how firmly the filling sets after chilling before counting on it for tidy squares.
Ingredients
Crumble topping
- 1½ cups (180 g) all-purpose flour, spooned and leveled
- ½ cup (106 g) packed light brown sugar
- ½ teaspoon ground cinnamon
- ¼ teaspoon fine table salt
- ½ cup (113 g) unsalted butter, cold from the refrigerator and cut into ½-inch cubes
Shortbread base
- 1 cup (226 g) unsalted butter, melted and cooled until just warm
- ½ cup (100 g) granulated sugar
- 2 teaspoons vanilla extract
- ½ teaspoon fine table salt
- 2½ cups (300 g) all-purpose flour, spooned and leveled
Apple filling
- 2 tablespoons (28 g) unsalted butter
- 2½ pounds (1,130 g) peeled and cored apples, weighed after trimming, about half Granny Smith and half Honeycrisp
- ½ cup (100 g) granulated sugar
- 1 tablespoon lemon juice
- 2 teaspoons ground cinnamon
- ⅛ teaspoon ground nutmeg
- ¼ teaspoon fine table salt
- 1½ tablespoons fine tapioca starch
- 2 tablespoons cold water
Method
- Prepare the pan. Heat a conventional oven to 350°F (177°C) with a rack in the center. Line the pan with parchment, leaving overhang on two opposite sides for lifting.
- Make the crumble. Mix the flour, brown sugar, cinnamon, and salt. Work in the cold butter until the mixture holds together when squeezed and forms clusters of different sizes. Refrigerate while you make the base and filling.
- Prebake the shortbread. Stir the warm melted butter with the granulated sugar, vanilla, and salt. Fold in the flour just until combined. Press the dough evenly into the lined pan, prick it lightly with a fork, and bake for 18–22 minutes, until the center looks set and the edges are pale gold.
- Cook the apples. Slice the apples ¼ inch thick and cut long slices into roughly 1-inch pieces. While the base bakes, melt the filling butter in a deep 12-inch skillet over medium heat. Add the apples, sugar, lemon juice, cinnamon, nutmeg, and salt. Cook uncovered for about 12–18 minutes, turning gently, until the slices bend with slight resistance. Let excess juice evaporate until only a light coating remains on the fruit.
- Thicken with tapioca. Stir the tapioca starch into the cold water just before adding it. Fold the mixture into the hot apples and stir gently as the juices return to a bubble. Take the skillet off the heat when the sauce turns glossy and clings to the slices without pooling. Let the filling stand for about 5 minutes.
- Assemble and bake. Spread the filling over the warm shortbread and scatter the chilled crumble over it. Leave small gaps so you can see when the fruit bubbles. Bake at 350°F (177°C), checking at 35 minutes and continuing as needed. Look for golden crumbs in the center, bubbling fruit, and apple slices that yield to a thin knife. If the topping browns before the apples are tender, tent it loosely with foil.
- Cool, chill, and slice. Cool the uncovered pan on a rack for about 2 hours, or until it no longer feels warm. Chill for at least 1 hour before checking the filling. If the slab is firm, lift it by the parchment with support underneath. Cut the apple pie bars into a 4 × 6 grid. If the filling still shifts when you cut, leave the bars in the pan and serve them with a fork.
Apple Pie Bar Questions Before You Bake
The apple filling is softest while it’s warm. If you’re making apple pie bars ahead, give the pan enough time to cool and chill before you decide when to slice or freeze it.
How to thicken apple pie bar filling?
Cook the apples until their juices reduce to a thin coating. Stir the cornstarch and cold water together, then add the mixture to the hot apples. Bring it back to a bubble and stir for 1–2 minutes, until the sauce looks glossy and clings to the slices without pooling in the pan.
Why do apple pie bars fall apart?
The layers can slide apart if the filling is too wet or the bars are cut while still warm. Reduce the juices before adding the cornstarch mixture. After baking, cool the pan completely and refrigerate it for at least 1 hour before lifting or slicing.
How long do apple pie bars last?
Refrigerate apple pie bars in an airtight container for up to 4 days. The crumble has its best texture in the first 1–2 days. For longer storage, freeze individually wrapped bars for up to 2 months for best quality.
Can you freeze apple pie bars?
Yes. Freeze completely cooled, individually wrapped bars in an airtight container for up to 2 months for best quality. Thaw them in the refrigerator overnight while still wrapped. The layers will hold, though the crumble and base may soften.
Do apple pie bars need to chill before cutting?
Yes, if you want squares you can pick up. Cool the pan until it no longer feels warm, then chill it for at least 1 hour before lifting or cutting. If you want a warm piece sooner, serve it from the pan with a fork.
Why does the crumble soften overnight?
Moisture from the apples gradually softens the crumbs. Covering a warm pan can trap steam, too. Let the apple pie bars cool uncovered, then cover them once chilled. A slightly softer crumble the next day is normal.
Can I use a smaller pan for these bars?
Use a 9 × 13-inch metal pan for the full batch of apple pie bars. A smaller pan makes the layers deeper, so the edges may finish before the middle. A half batch still needs a pan that gives the layers room to bake evenly.
Can I use canned apple pie filling?
Canned filling isn’t a straight swap. Its apples come in a syrup with its own sugar and thickener. Cooking fresh apples in the skillet lets you stop when the slices are tender and the juices just coat them, so you can spread the filling without soaking the shortbread.
More Bakes for Apple Lovers and Dessert Trays
If the cinnamon apples are what you come back for in these apple pie bars, keep the fruit and change the way you serve it. Go for a slice of pastry pie, warm apples you can eat with a spoon, or a soft bake with fruit tucked into the crumb.
Explore Other Apple Pie Textures
Start here when you want apples to be the first thing you taste. Pick a crisp pastry dessert for the table or a warm fruit bake for individual bowls.
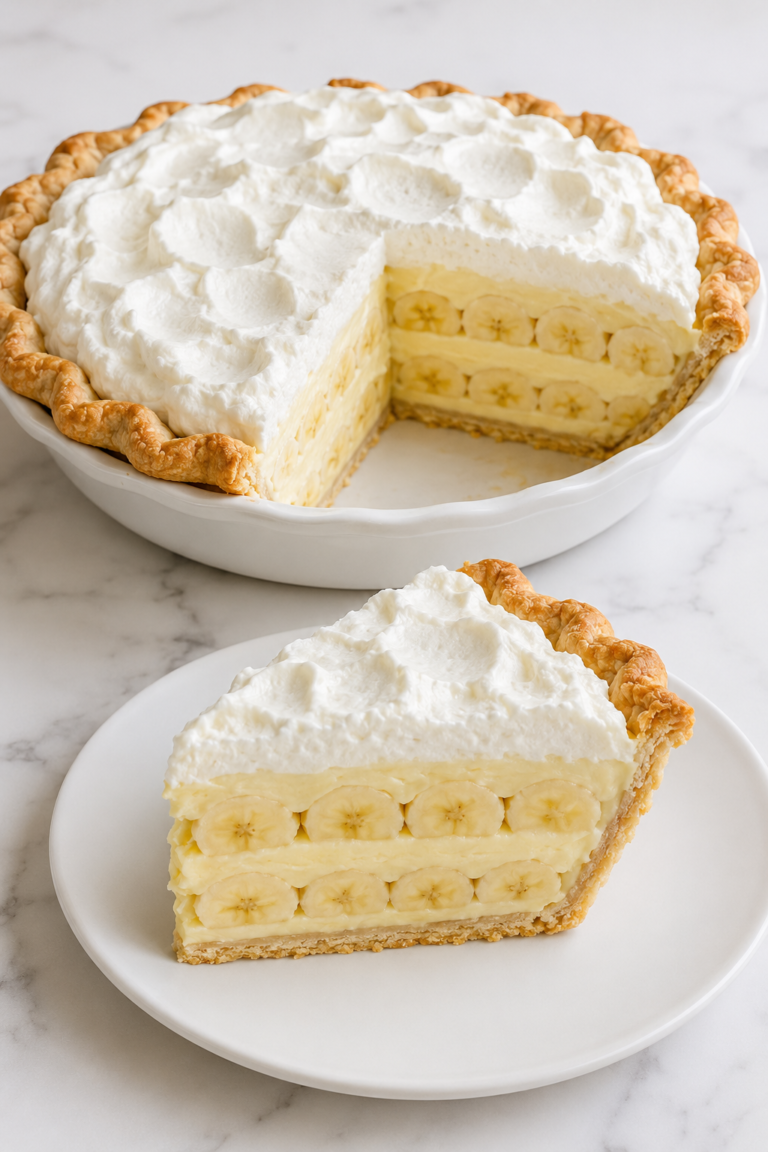
- Bring Apple Pie to the table whole when you want to slice through a flaky pastry crust.
- Pick Apple Pie Cookies for flaky pastry and apple filling in small bites that fit on a cookie tray.
- Serve Apple Crisp warm from the baking dish for tender apples and oat crumbs you can eat with a spoon.
- Try this apple cobbler recipe for spoonfuls of warm cinnamon apples beneath a soft, golden topping.
Add Another Flavor to a Dessert-Bar Tray
If the apple pie bars are already on your platter, add one bake that brings a different note. Lemon gives the plate a bright finish, pecans bring toastiness, and pumpkin custard offers a creamy square beside the crumbly one.
- Add Pecan Pie Bars for a nutty, chewy bite beside the soft apple layer.
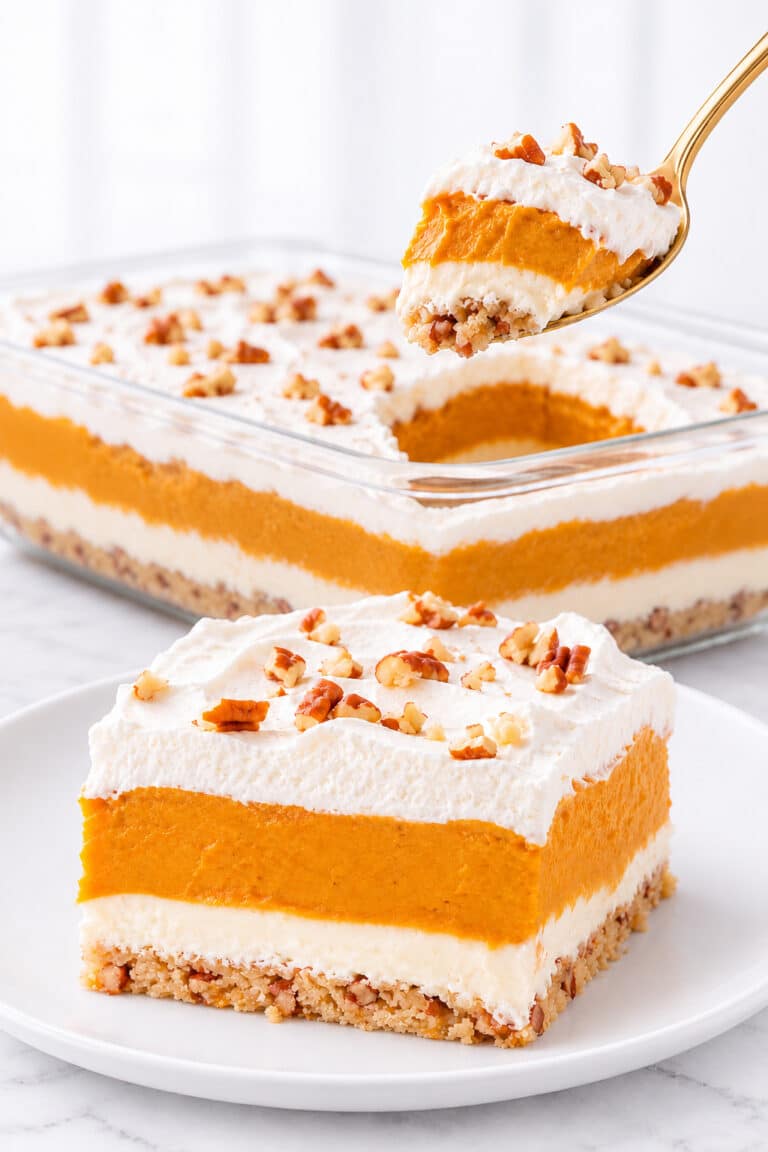
- Set out Pumpkin Pie Bars for a cool custard square alongside the buttery crumble.
- Pair with Lemon Bars when a sharp citrus bite would brighten a platter of cinnamon and brown sugar.
- Set Cranberry Crumble Bars beside the apple squares for a tart cranberry-orange bite between buttery crumbs.
Bake Apples into a Softer Crumb
Choose these when you want apples in the crumb itself. A cake slice goes nicely with coffee, a muffin is easy to pack for the morning, and a frosted cupcake feels right on a party table.
- Slice Apple Cake when you want a soft cinnamon-sugar cake for the coffee table.
- Cut Apple Brownies into squares for a handheld apple dessert with a moist, cake-like center.
- Make Apple Muffins for an apple bake that fits in a breakfast bag without any slicing.
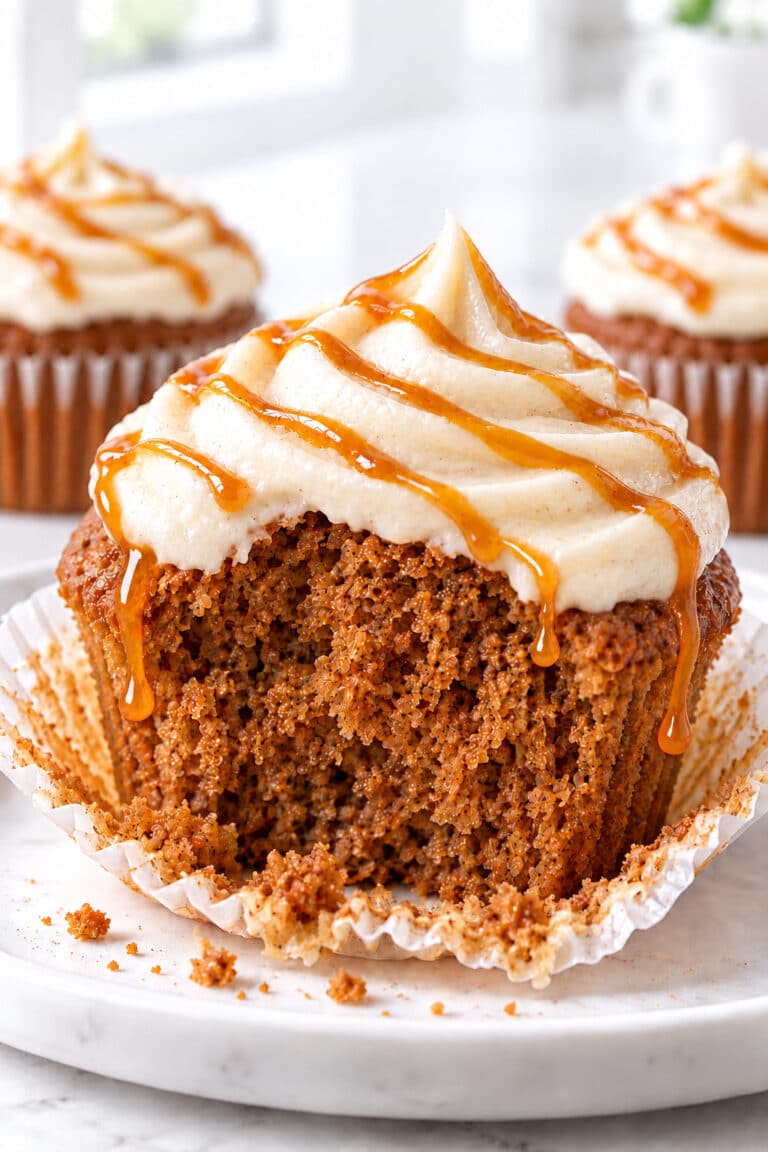
- Bring Apple Cupcakes to a celebration when you want individual apple cakes with frosting.
Why This Apple Pie Bars Recipe Belongs in Your Recipe Box
Keep these apple pie bars in your recipe box for the days when you want the pleasure of apple pie and a dessert that can be ready before guests arrive. The pan can chill overnight, and the next day you can cut just the number of squares you need.
- For a table with several desserts. Twenty-four small squares let everyone take a taste and leave room for a slice of something else.
- For a dessert you’re taking across town. Slice the bars cold, set them in a snug container in one layer, and bring the platter separately.
- For a batch with some to keep. Freeze the extra squares individually. Thaw one overnight when you want cinnamon apples and shortbread with tomorrow’s coffee.
A Final Note on Apple-Filled Squares
Set the platter down with the cut sides showing. There’s a thin stripe of glossy cinnamon apple above the shortbread and a few brown-sugar crumbs that fall away with the first bite. That little bite of all three layers is what makes these apple pie bars worth the wait.

Apple Pie Bars
Buttery shortbread, tender cinnamon apples, and a golden oat-free crumble form three distinct layers in these apple pie bars. Cool completely and chill before cutting into neat squares.
Ingredients
Crumble topping
- 1½ cups (180 g) all-purpose flour, spooned and leveled
- ½ cup (106 g) packed light brown sugar
- ½ teaspoon ground cinnamon
- ¼ teaspoon (1.5 g) fine table salt
- ½ cup (113 g) unsalted butter, refrigerator-cold and cut into ½-inch cubes
Shortbread base
- 1 cup (226 g) unsalted butter, melted and cooled until warm, not hot
- ½ cup (100 g) granulated sugar
- 2 teaspoons (10 ml) vanilla extract
- ½ teaspoon (3 g) fine table salt
- 2½ cups (300 g) all-purpose flour, spooned and leveled
Apple filling
- 2 tablespoons (28 g) unsalted butter
- 2½ pounds (1,130 g) peeled, cored apples, about 10 loosely filled cups; approximately half Granny Smith and half Honeycrisp by prepared weight, sliced ¼ inch thick with long slices cut into 1-inch pieces
- ½ cup (100 g) granulated sugar
- 1 tablespoon (15 ml) lemon juice
- 2 teaspoons ground cinnamon
- ⅛ teaspoon ground nutmeg
- ¼ teaspoon (1.5 g) fine table salt
- 2 tablespoons (14 g) cornstarch
- 2 tablespoons (30 ml) cold water
Instructions
Prepare the oven and pan. Heat a conventional oven to 350°F (177°C), with a rack in the center. Line a 9 × 13 × at least 2-inch light-colored metal pan with parchment, leaving lifting overhangs on two opposite sides and folding the paper flat into the corners. Set out a cooling rack and make space for the pan in the refrigerator. Let the oven reach temperature before baking the base.
Make and chill the crumble. Combine the topping flour, brown sugar, cinnamon, and salt. Work in the ½ cup (113 g) cold cubed butter with a pastry cutter or your fingers. Stop when the mixture holds together when squeezed, with rough pea- to hazelnut-sized clusters and smaller crumbs, no substantial dry flour pockets, and no smooth greasy paste. Refrigerate while preparing the base and filling.
Press and prebake the shortbread. Stir together the 1 cup (226 g) warm melted base butter, base sugar, vanilla, and base salt. Fold in the base flour just until evenly combined, without kneading. Press evenly into the lined pan, including the corners, without building a raised rim. Dock lightly with a fork. Bake for 18–22 minutes, until the center is set and no longer wet or greasy and the edges are pale gold. Give a wet center more time. Leave the oven on.
Cook and reduce the apples. While the base bakes, melt the filling butter in a 12-inch skillet with reasonably deep sides over medium heat. Add all 1,130 g prepared apples, the filling sugar, lemon juice, cinnamon, nutmeg, and salt. Cook uncovered for about 12–18 minutes, gently stirring and turning. The slices should bend and accept a fork with slight resistance, with juices reduced to a shallow glossy coating. If the apples remain firm, lower the heat and continue gently. If the fruit is tender but liquid remains watery, continue cooking uncovered before thickening.
Thicken the filling. Stir the 2 tablespoons (14 g) cornstarch and 2 tablespoons (30 ml) cold water until smooth immediately before use. Fold the entire slurry into the hot apples. Return to visible bubbling and stir for about 1–2 minutes, until glossy and thickened, with no chalky streaks or loose liquid pooling when the fruit is pushed aside. Remove from the heat without repeatedly boiling. Let stand off the heat for about 5 minutes while checking the base.
Assemble the layers. Spread all the cooked apples and thickened juices evenly over the warm prebaked shortbread. Do not add raw apples or extra uncooked juice. Scatter all the chilled crumble loosely over the filling without pressing. Leave small gaps between clusters so some apple remains visible and bubbling can be checked near the center.
Bake until tender and golden. Bake at 350°F (177°C) for about 35–45 minutes. The crumble should be golden in the center as well as at the edges, fruit should bubble through several gaps near the center, and a thin knife should slip into an apple piece with little resistance. There should be no powdery raw topping. If the topping browns first, tent loosely with foil and continue until the fruit is ready. A clean-toothpick test does not indicate doneness for this filling.
Cool completely and chill. Cool the pan uncovered on a rack for about 2 hours, until it no longer feels warm; allow longer if the center retains warmth. Refrigerate the cooled pan for at least 1 hour before lifting or slicing, longer if the filling remains loose. Cover once chilled, rather than trapping steam against the topping. The chilled slab should feel stable enough to support during lifting.
Lift and cut. Lift the chilled slab by the parchment onto a board, supporting its base. Cut into a 4 × 6 grid for 24 small bars, wiping a sharp knife between cuts and sliding a thin spatula under each portion. If too fragile to lift, cut in the pan. Serve cool or let individual portions lose a little refrigerator chill. Warm portions are softer and need a plate and fork.
Notes
Equipment
- Baking setup: a 9 × 13 × at least 2-inch light-colored metal pan, parchment for a sling, and a conventional oven with a center rack.
- Measuring and mixing: a digital scale, dry and liquid measures, two mixing bowls, a fork for mixing and docking, an optional pastry cutter, and a flexible spatula.
- Fruit preparation and cooking: a peeler, knife, cutting board, 12-inch skillet with reasonably deep sides, and a small cup for the cornstarch slurry.
- Cooling and chilling: a cooling rack and a refrigerator shelf with space for the full pan.
- Portioning and protection: a sharp slicing knife, board, thin serving spatula, and foil for a loose tent only if the topping browns before the fruit is ready.
Recipe Notes
- Apples: weigh after peeling and coring. Use approximately half Granny Smith and half Honeycrisp by prepared weight. Buy about 3–3½ pounds whole apples to allow for trimming; the required prepared weight is 2½ pounds (1,130 g). Slice ¼ inch thick and cut long slices into 1-inch pieces.
- Timing: prep 30 minutes, cook 60 minutes, additional cooling and chilling 3 hours, total about 4 hours 30 minutes. The two oven stages take about 53–67 minutes together. Skillet cooking and thickening take about 13–20 minutes and overlap the prebake. Hands-on work is about 40–50 minutes across the recipe and is already included. Allow about 4½–5 hours overall, or longer when cooling and chilling need more time.
- Keep the 9 × 13-inch light-colored metal pan and conventional oven setting. A smaller pan, different material, convection setting, or changed batch size needs separate adjustments; do not keep the same times and assume the result will be equivalent.
- Pink Lady can replace the Honeycrisp portion by prepared weight and may need longer to soften. Using all Granny Smith makes the filling more tart. Canned filling, oats, gluten-free flour, vegan butter, or alternative sweeteners are not direct replacements in these quantities.
- Make ahead: cool and chill the uncut slab, cover once chilled, and slice near serving the next day. Refrigerate in a rigid airtight container and use within 4 days. Aim for the first 1–2 days for texture; the crumble gradually softens. Transport chilled with firm support.
- Freeze fully cooled portions in one layer, then wrap individually and pack airtight. Use within 2 months for best quality. Thaw wrapped in the refrigerator overnight and expect some softening.
- To rewarm a thawed portion, place on parchment on a baking sheet at 300°F (149°C) for about 10–15 minutes, until pleasantly warm. Rewarming softens the filling and base; serve on a plate with a fork.
- If filling stays loose after cooling and chilling, serve from the pan with a fork. Chilling cannot correct underbaked apples or excess juice. Contains wheat and milk.
Nutrition Information:
Yield: 24 Serving Size: 1 barAmount Per Serving: Calories: 258Total Fat: 12.7gSaturated Fat: 7.8gCholesterol: 33mgSodium: 100mgCarbohydrates: 34.8gFiber: 1.3gSugar: 17.5gProtein: 2.3g
Nutrition information is provided as an estimate only and may vary based on specific ingredients, brands, and portion sizes used. This information should not be considered medical or nutritional advice.