Homemade Apple Pie Filling
🎁 FREE E-BOOK: 12 Sweet Favorites — reader-loved desserts in one beautiful recipe book.
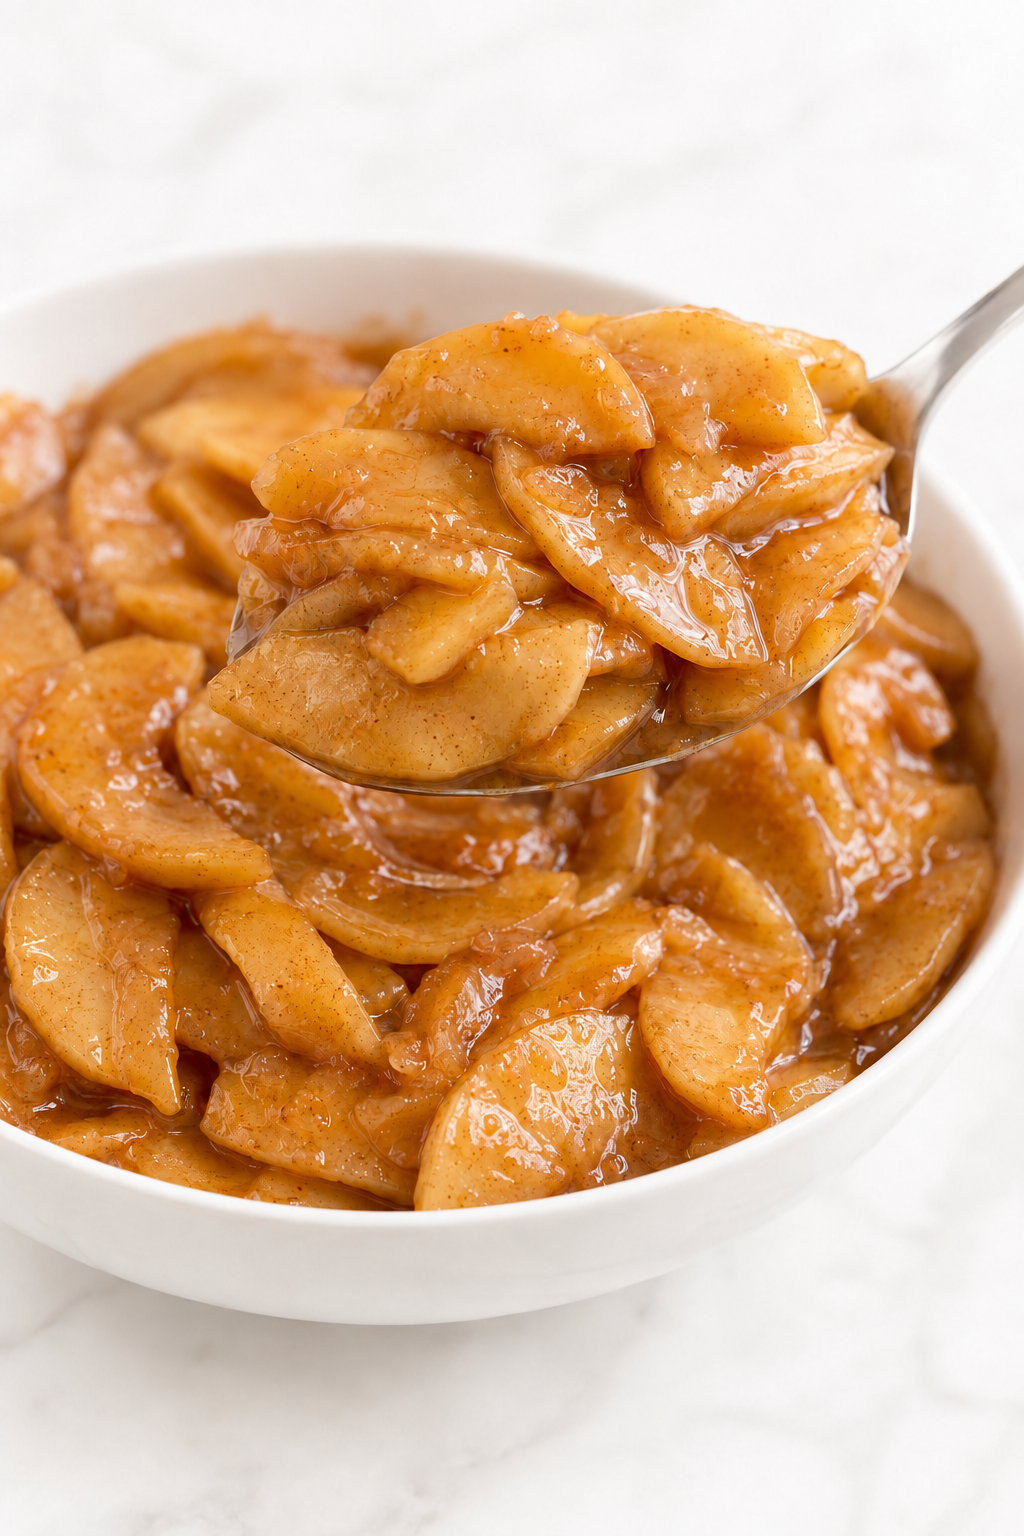
This Homemade Apple Pie Filling is built for the moment when a pie needs tender, distinct apple slices and a glossy cinnamon sauce—not a watery pool beneath the crust. The apples are partially cooked on the stovetop, their released juice is measured before thickening, and the finished filling cools into a cohesive, spoonable texture that can withstand a second bake.
Apple pie carries a familiar kind of comfort, but the filling should make the larger baking project feel calmer rather than uncertain. Preparing the apples in advance leaves the crust, assembly, and serving schedule easier to manage while preserving the warm cinnamon-apple character the dessert promises.
This is a recipe worth saving because one batch makes the full amount needed for a generous 9-inch Apple Pie Recipe, yet remains useful for turnovers, pancakes, waffles, and ice cream. It can be prepared up to four days ahead or frozen for longer planning, turning one carefully controlled batch into a dependable starting point for both holiday baking and smaller everyday desserts.
Quick Recipe Overview
This overview establishes the batch size, timing, and defining result before you begin peeling the apples.
| Recipe detail | What to know |
|---|---|
| Yield | Approximately 5 1/2–6 cups; enough for one generous 9-inch pie |
| Apple blend | 50% Granny Smith and 50% Pink Lady by prepared weight |
| Method | Macerate, partially precook, measure the released juice, thicken the sauce separately, then recombine |
| Texture | Tender apple slices with a slight residual bite in a glossy, spoonable sauce |
| Time | 30 minutes prep, 20 minutes macerating, about 20 minutes cooking, and about 60 minutes cooling |
| Make ahead | Up to 4 days refrigerated or 3 months frozen for best quality |
| Important boundary | Refrigerator/freezer recipe only; not a shelf-stable canning formula |
Why You’ll Love This Apple Pie Filling
This filling solves the practical problems that make homemade apple desserts unpredictable while keeping the flavor recognizably fresh and homemade.
- One exact pie quantity: no guessing whether a vague batch or “one can” is enough for a 9-inch crust.
- Controlled rather than watery: the apple liquid is brought to a measured volume before the cornstarch is added.
- Tender apples that remain identifiable: the slices are stopped before they become fully soft, leaving structure for a second bake.
- Moderately sweet: brown and granulated sugar support the apples instead of creating a heavy canned-syrup profile.
- Useful beyond pie: the filling is fully cooked and can be used directly in pastries or as a warm topping.
- Designed for advance preparation: it can be chilled for several days or frozen with the expected texture change clearly explained.
What to Expect
The filling changes as it moves from the pan to the refrigerator and then, if used in pie, through a second bake. Judging every stage by the same thickness is one of the easiest ways to overcook it.
- While hot: the sauce is glossy and cohesive but still looser than the final cold filling.
- After chilling: the sauce mounds on a spoon, then settles slowly; it should not pour or cut like a solid gel.
- After a second bake: the apple slices become fully tender while remaining visible, and the sauce stays controlled after the finished pie cools.
- Flavor: apple comes first, followed by cinnamon, light caramel notes from brown sugar, and quiet support from lemon, nutmeg, vanilla, butter, and salt.
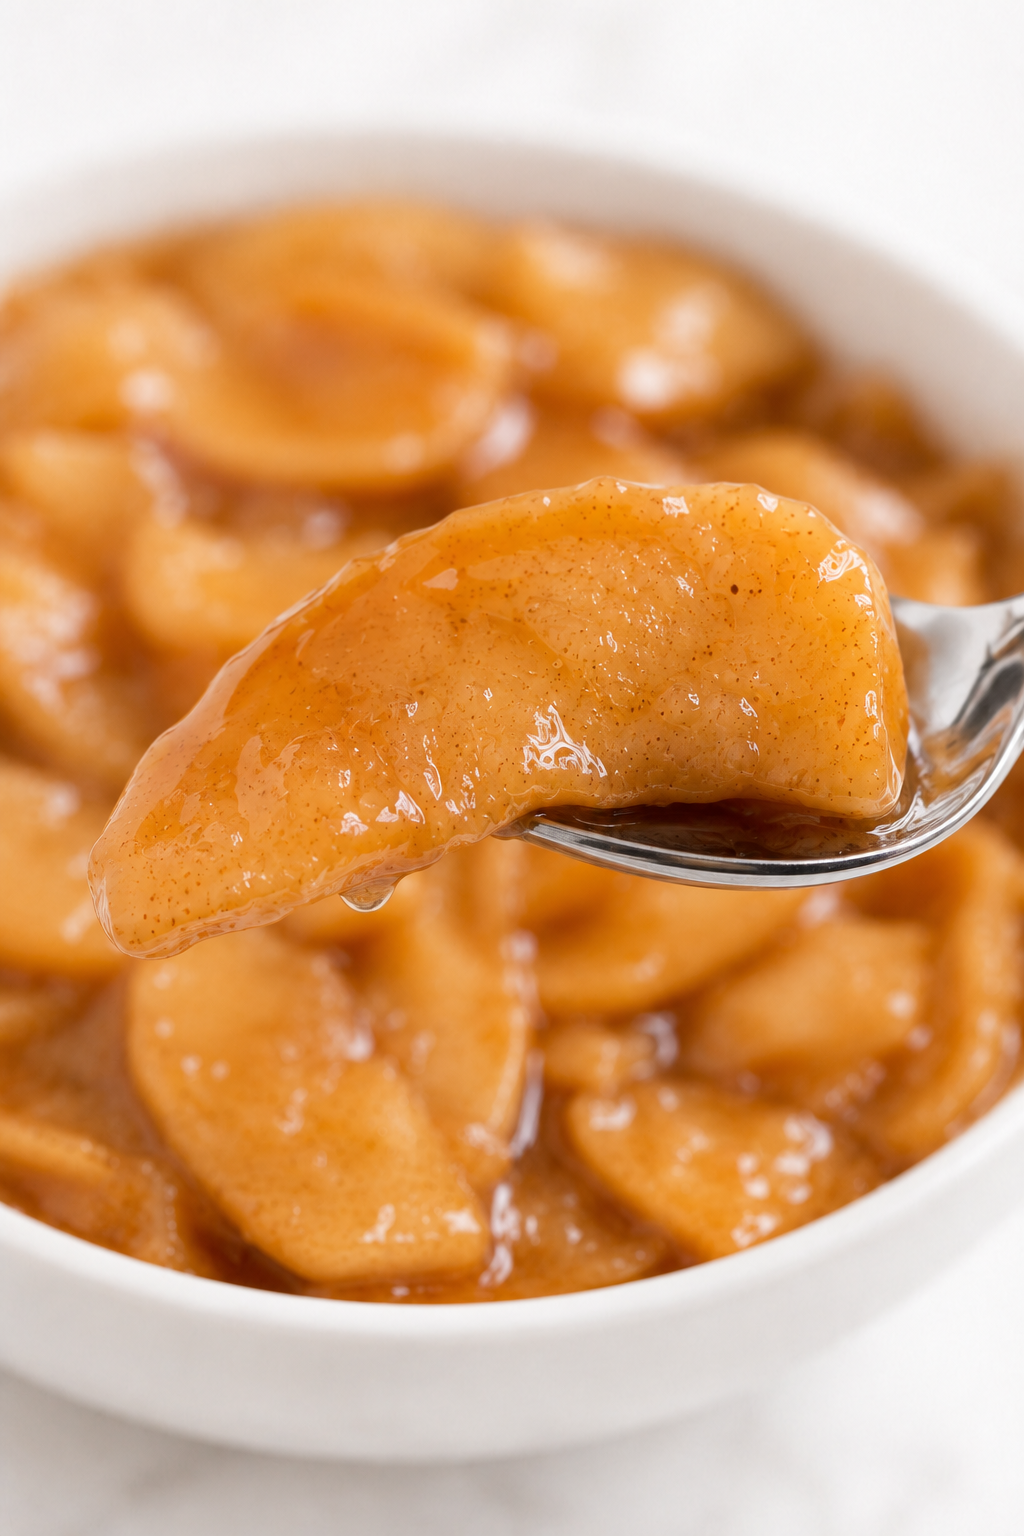
- Appearance: expect pale-gold apple slices coated in a warm amber-brown sauce with natural variation, not factory-uniform dice.
Recipe Identity & Expectation Boundary
This is a fully cooked stovetop filling calibrated for one complete 9-inch pie and intentionally designed to tolerate another baking cycle.
| This recipe is | This recipe is not |
|---|---|
| A make-ahead refrigerator and freezer filling | A shelf-stable or water-bath-canning formula |
| A full 5 1/2–6-cup pie quantity | A small commercial-can replacement |
| Made with distinct 1/4-inch apple slices | Applesauce, compote, or canned-style dice |
| Moderately sweet and cinnamon-led | Caramel apple filling or a heavily spiced syrup |
| Thick enough to mound while remaining spoonable | A stiff, sliceable, rubbery gel |
Safety boundary: do not water-bath can or pressure can this cornstarch-thickened recipe. Shelf-stable apple pie filling requires a separately tested preservation formula using Cook-Type Clear Jel and its exact processing instructions.
Why This Apple Pie Filling Recipe Works
The reliability comes from controlling the naturally variable apple juice separately from the fruit rather than trying to correct the entire batch with more starch.
- A tart and aromatic apple blend balances structure and flavor. Granny Smith contributes acidity and firm texture, while Pink Lady adds aroma and natural sweetness without collapsing quickly.
- The 20-minute sugar rest reveals the batch’s moisture before cooking. Apples vary by variety, ripeness, season, and storage; drawing out juice early makes that variability visible.
- Removing the apples protects their texture. The sauce can reduce and the cornstarch can cook fully without forcing the slices through unnecessary heat and stirring.
- Exactly 3/4 cup of apple liquid gives the cornstarch a stable target. A juicy batch is reduced; a dry batch is topped up only enough to reach the same volume.
- Moderate cornstarch creates cling, not paste. Apples contain natural pectin and need less added thickener than many juicy berries.
- Shallow cooling limits carryover softening. Spreading the filling out helps it cool more evenly and prevents the center from staying hot long enough to break down the apples.
Before You Begin
Three decisions determine whether this filling reaches the intended texture: use the prepared apple weight, keep the slices uniform, and leave enough time for complete cooling before the filling touches pastry.
- Shop by whole weight, cook by prepared weight. Start with about 4 pounds of apples, but stop peeling and coring only when you have 1,350 g ready to slice.
- Use a wide, heavy pan. A 6-quart Dutch oven or 12-inch high-sided sauté pan prevents crowding and reduces the amount of stirring required.
- Slice 1/4 inch thick. Paper-thin apples soften too quickly; substantially thicker pieces may remain hard at the center.
- Prepare a shallow cooling dish. The filling should be no deeper than about 1 1/2 inches while cooling.
- Do not assemble pie with warm filling. Residual heat softens the butter in pastry and works against a flaky bottom crust.
Recipe Timeline / Workback Plan
The filling itself takes 2 hours 10 minutes from the first peel to a fully cooled batch. Use the workback plan below to place that time correctly within a pie or event schedule.
| When you need it | When to begin | Required final state |
|---|---|---|
| Same-day pie | At least 2 hours 10 minutes before assembly | Completely cold before it touches the crust |
| Next-day pie | Prepare up to 24 hours ahead | Refrigerated airtight; fold gently once before filling the crust |
| Holiday or event pie | Prepare 1–4 days ahead | Keep cold and assemble only when the crust and oven plan are ready |
| Freezer plan | Prepare up to 3 months ahead | Freeze fully cooled; thaw overnight in the refrigerator |
| Warm topping | Begin about 50 minutes before serving | Cooking complete; full chilling is unnecessary when no pastry is involved |
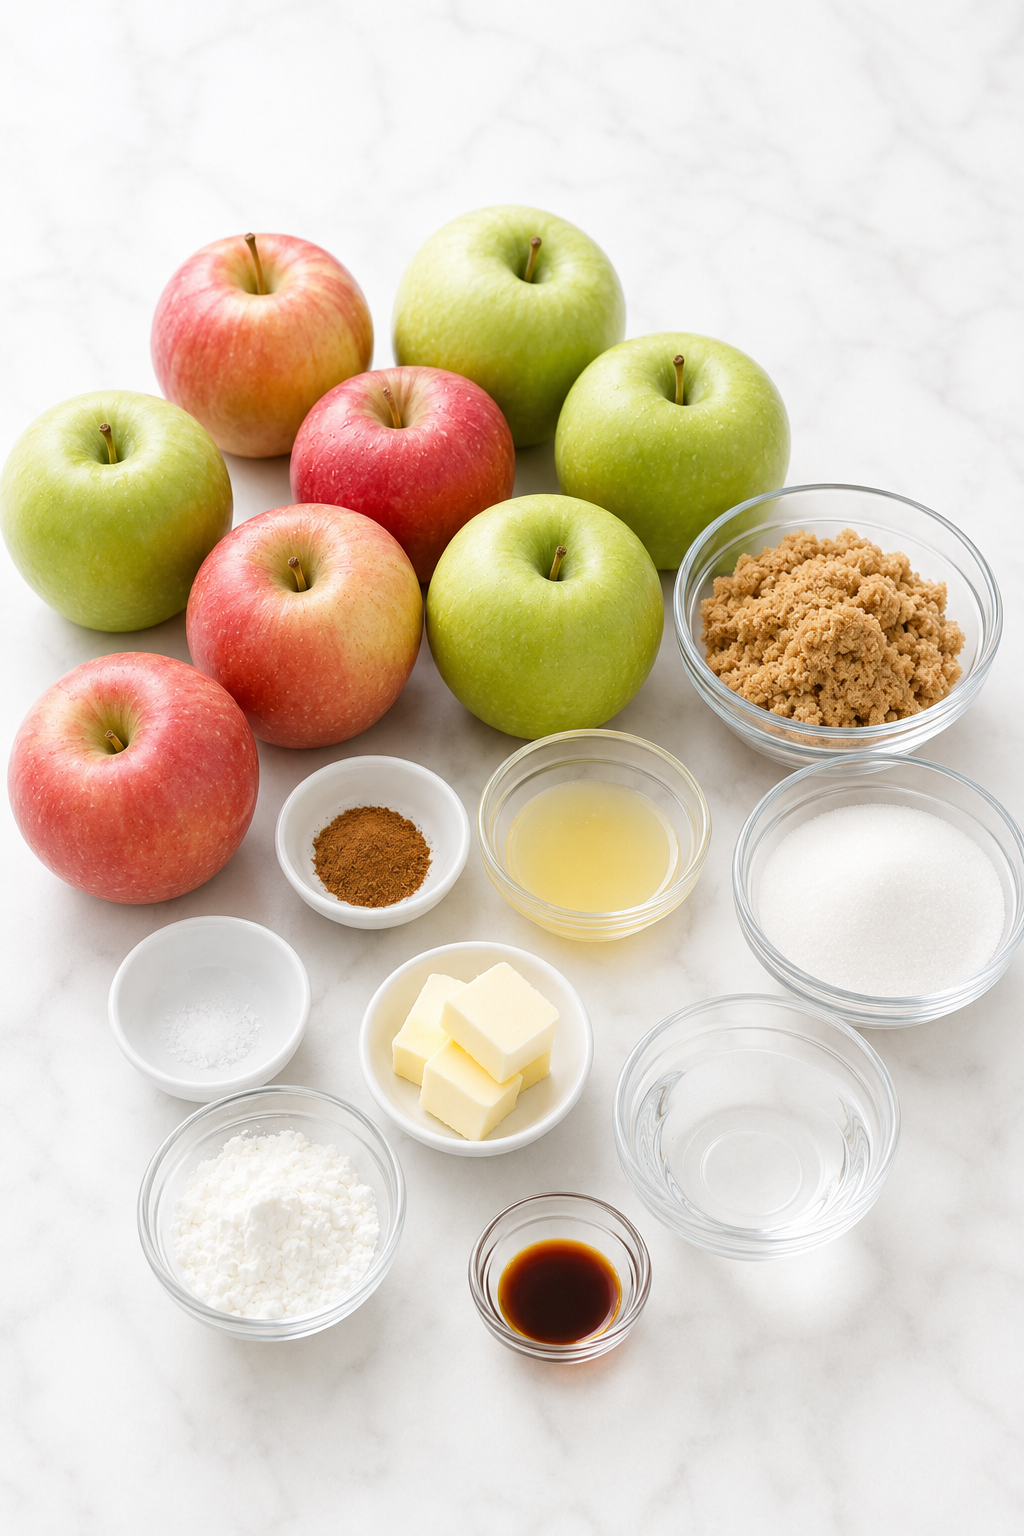
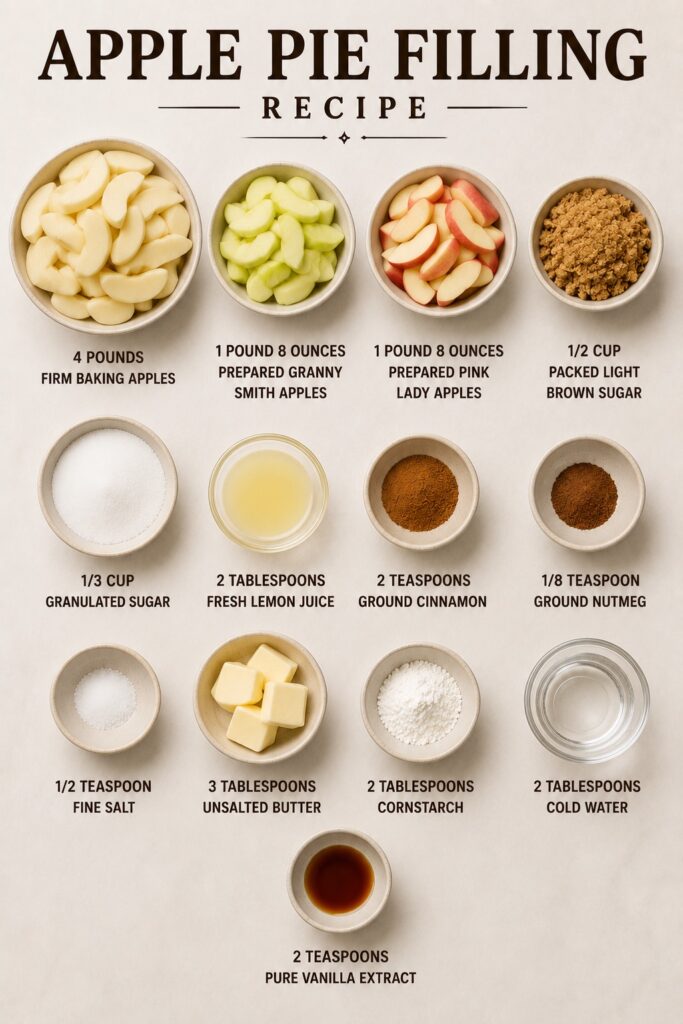
Ingredients for Homemade Apple Pie Filling
The prepared apple weight is the authoritative measurement; whole weight and apple count are shopping guidance because size and trimming loss vary.
- 4 pounds (1.8 kg) firm baking apples, about 9 medium, to yield 3 pounds (1,350 g) after peeling and coring
- 1 pound 8 ounces (675 g) prepared Granny Smith apples
- 1 pound 8 ounces (675 g) prepared Pink Lady apples
- 1/2 cup packed (106 g) light brown sugar
- 1/3 cup (67 g) granulated sugar
- 2 tablespoons (30 g) fresh lemon juice
- 2 teaspoons (5 g) ground cinnamon
- 1/8 teaspoon ground nutmeg
- 1/2 teaspoon (3 g) fine salt
- 3 tablespoons (43 g) unsalted butter
- 2 tablespoons (16 g) cornstarch
- 2 tablespoons (30 g) cold water
- 2 teaspoons (10 ml) pure vanilla extract
Ingredient Intelligence
Each ingredient supports a specific part of the filling’s flavor or structure, and the useful substitutions are narrower than a generic fruit filling might suggest.
Granny Smith and Pink Lady apples
Use equal prepared weights rather than an approximate apple count. Granny Smith supplies the sharper acidity and structural backbone; Pink Lady brings a rounder apple aroma and sweetness while remaining firm. Honeycrisp may replace Pink Lady by weight, but it can release a different amount of juice, making the 3/4-cup liquid-control step essential. Avoid soft apples such as McIntosh as the full batch because they can break down before the sauce is finished.
Light brown and granulated sugar
Light brown sugar adds gentle caramel depth, while granulated sugar keeps the apple flavor clean and helps draw juice from the slices. Dark brown sugar creates a stronger molasses flavor and is not an equal swap for the intended profile. If your brown sugar supply is short, this guide to How to Make Brown Sugar explains the basic pantry method.
Cornstarch
Cornstarch produces the glossy, semi-translucent sauce expected in a stovetop apple filling. Weigh the 16 g when possible, mix it with cold water, and cook it for 60–90 seconds after bubbling resumes. Flour will make the sauce more opaque and requires a different amount; Instant ClearJel and Cook-Type Clear Jel behave differently from each other and from cornstarch, so neither is a direct one-for-one replacement here.
Lemon, cinnamon, nutmeg, vanilla, and salt
Lemon sharpens the fruit and slows browning during preparation without creating a citrus-led filling. Cinnamon is the main spice, nutmeg stays in the background, and vanilla is added after the pan leaves the heat to preserve its aroma. Fine salt keeps the sweetness defined rather than noticeably salty.
Kitchen Tools Needed
The pan width and cooling depth matter more than specialized tools; both determine how evenly the apples cook and how quickly carryover heat stops.
- Digital kitchen scale
- Apple peeler and corer
- Sharp chef’s knife or mandoline with a hand guard
- Large nonreactive mixing bowl
- 6-quart wide Dutch oven or 12-inch high-sided heavy-bottomed sauté pan with a lid
- Flexible heat-safe spatula or broad wooden spoon
- Slotted spoon
- Heat-safe liquid measuring cup
- Small bowl and whisk for the cornstarch slurry
- 9 x 13-inch shallow dish or rimmed quarter-sheet pan for cooling
- Airtight refrigerator or freezer container
How to Make Apple Pie Filling
The apples and sauce are cooked in controlled stages. Gentle folding and clear stop points preserve the slices while the measured-liquid step standardizes the sauce.
1. Prepare uniform apple slices
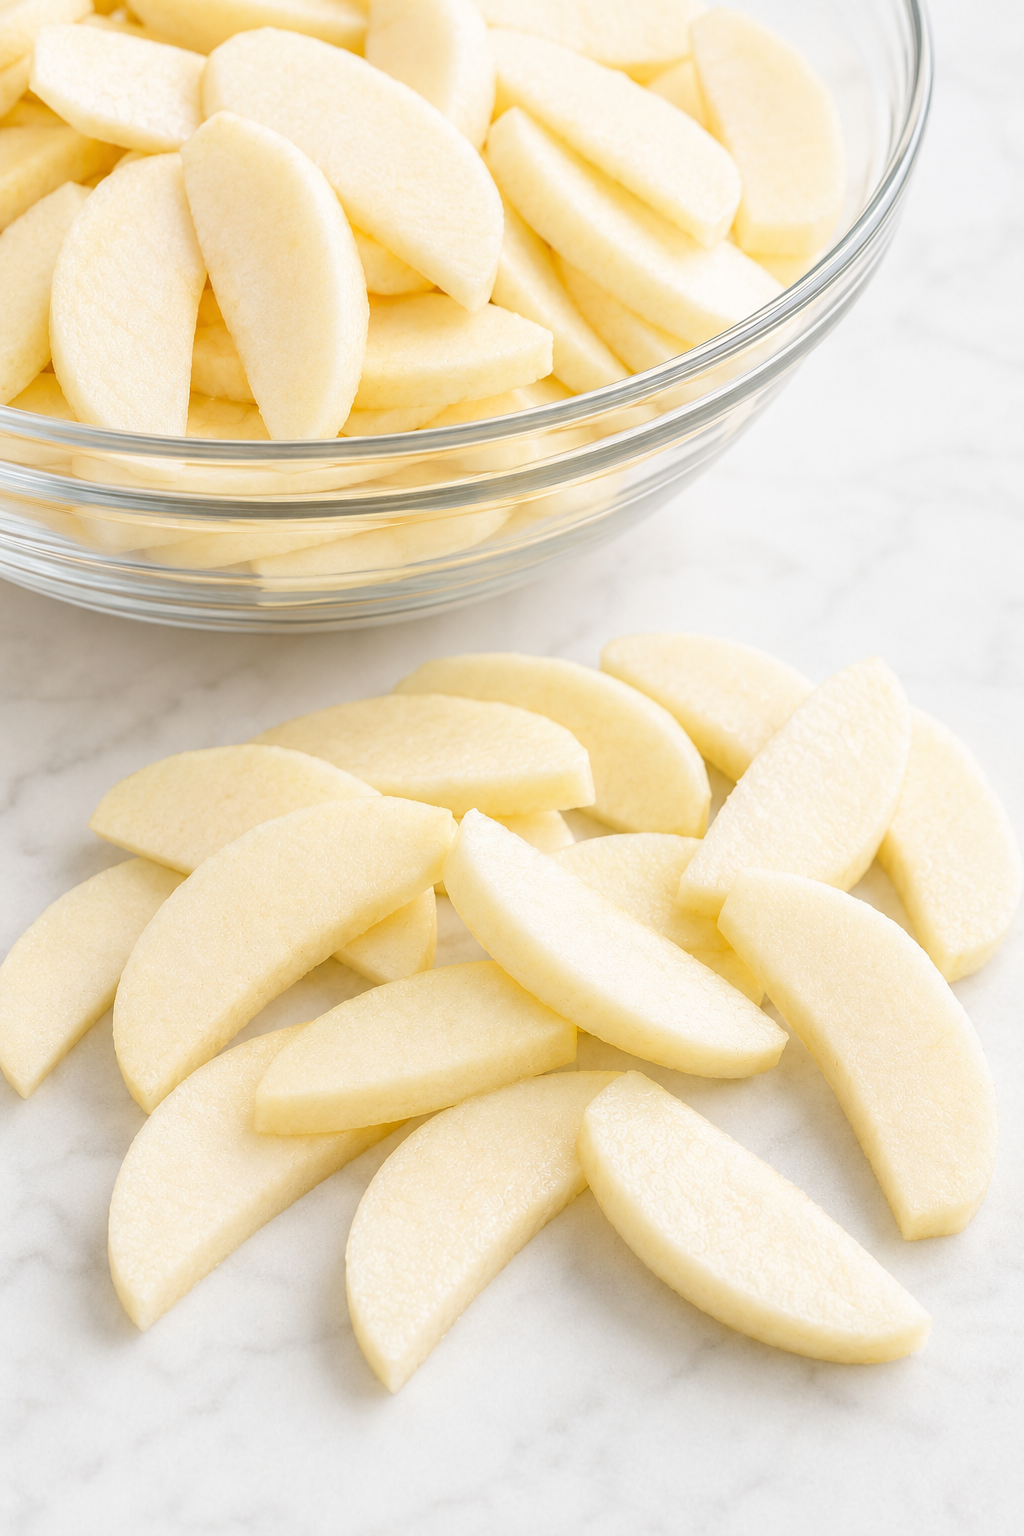
Peel and core the apples. Weigh 675 g prepared Granny Smith apples and 675 g prepared Pink Lady apples, then slice them uniformly 1/4 inch (6 mm) thick. Place all 1,350 g of prepared apples in the large mixing bowl.
What you should see: firm, intact slices of similar thickness with no core fragments. Natural differences in width are fine; paper-thin pieces are not.
2. Draw out the first apple juices
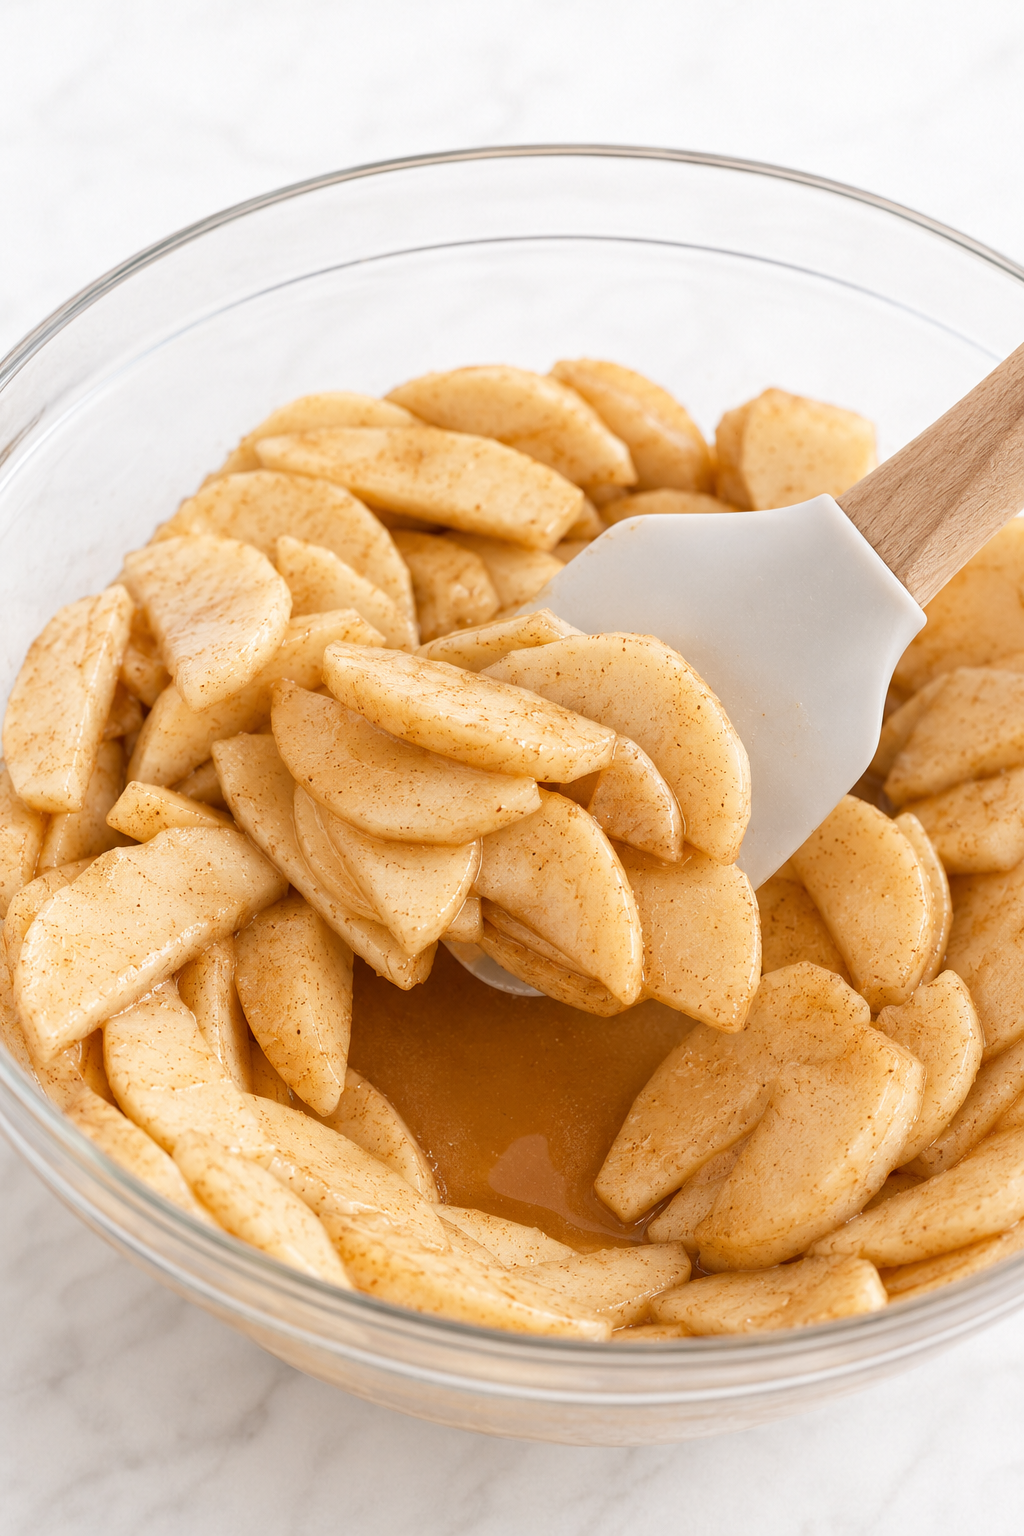
Combine the light brown sugar, granulated sugar, cinnamon, nutmeg, and fine salt. Sprinkle the mixture over the apples, add the lemon juice, and fold gently until every slice is lightly coated. Let the apples stand at room temperature for 20 minutes, folding once after 10 minutes.
What you should see: the sugar looks damp and a shallow layer of amber apple juice collects in the bowl. The slices remain firm and intact.
3. Partially cook the apples
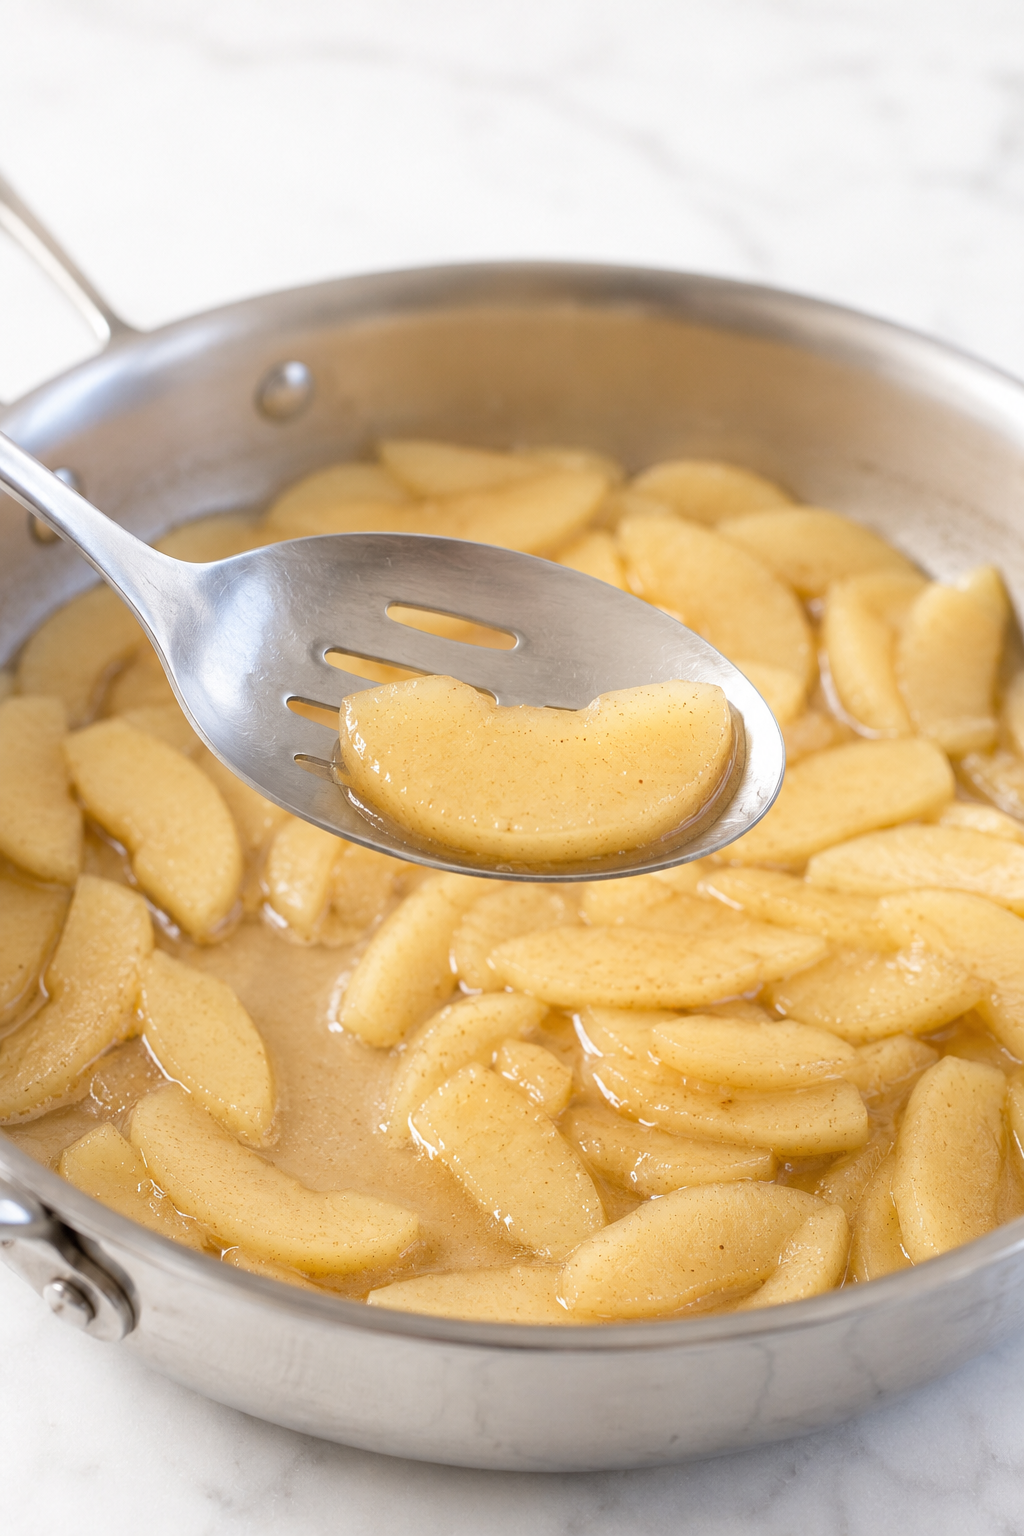
Melt the butter in the wide Dutch oven over medium heat. Add the apples and every drop of accumulated juice. Cover and cook for 5 minutes. Uncover, then cook for another 4–7 minutes, folding from the bottom every 60–90 seconds instead of stirring continuously.
Stop when a paring knife enters the outer part of a slice easily but still meets a small amount of resistance near the center.
What you should see: pale-gold apples that have reduced in volume but still have defined edges. A lifted slice bends slightly without collapsing.
4. Separate the apples and control the liquid
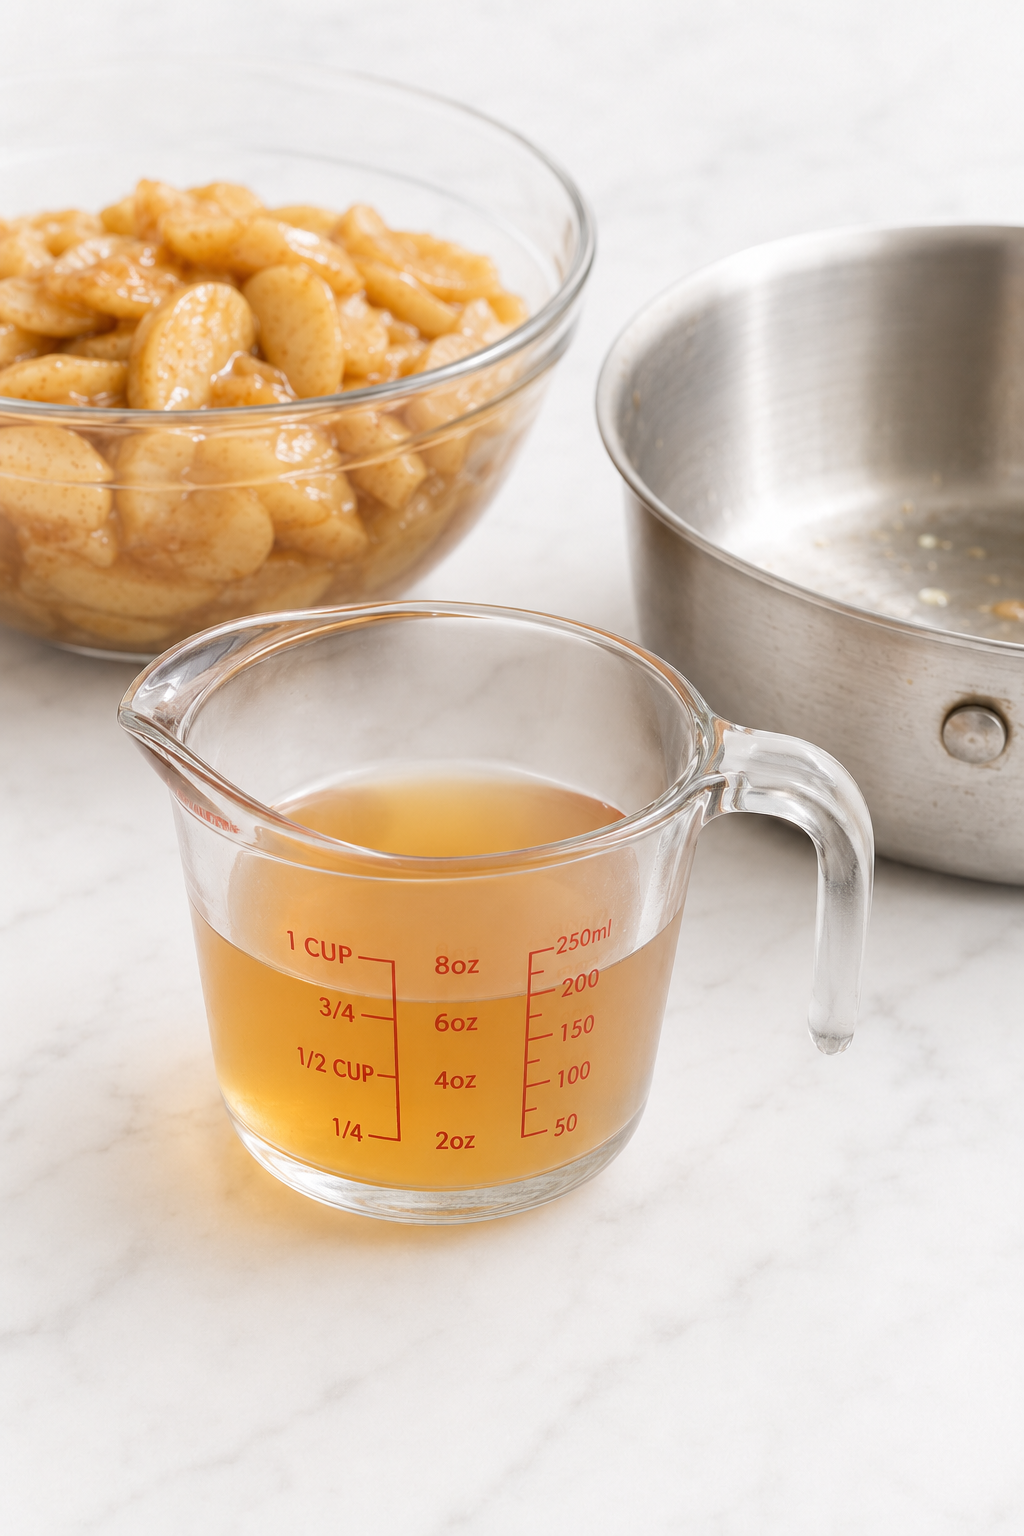
Transfer the apples back to the bowl with a slotted spoon, leaving the liquid in the pan. Pour that liquid into a heat-safe measuring cup. The target is exactly 3/4 cup (180 ml).
- If you have more than 3/4 cup, return all of it to the pan and simmer until reduced to 3/4 cup.
- If you have less than 3/4 cup, add only enough water or unsweetened apple juice to reach 3/4 cup.
What you should see: intact apple slices resting separately from a measured amber liquid. This is the control point that absorbs natural differences in apple juiciness.
5. Thicken the apple sauce
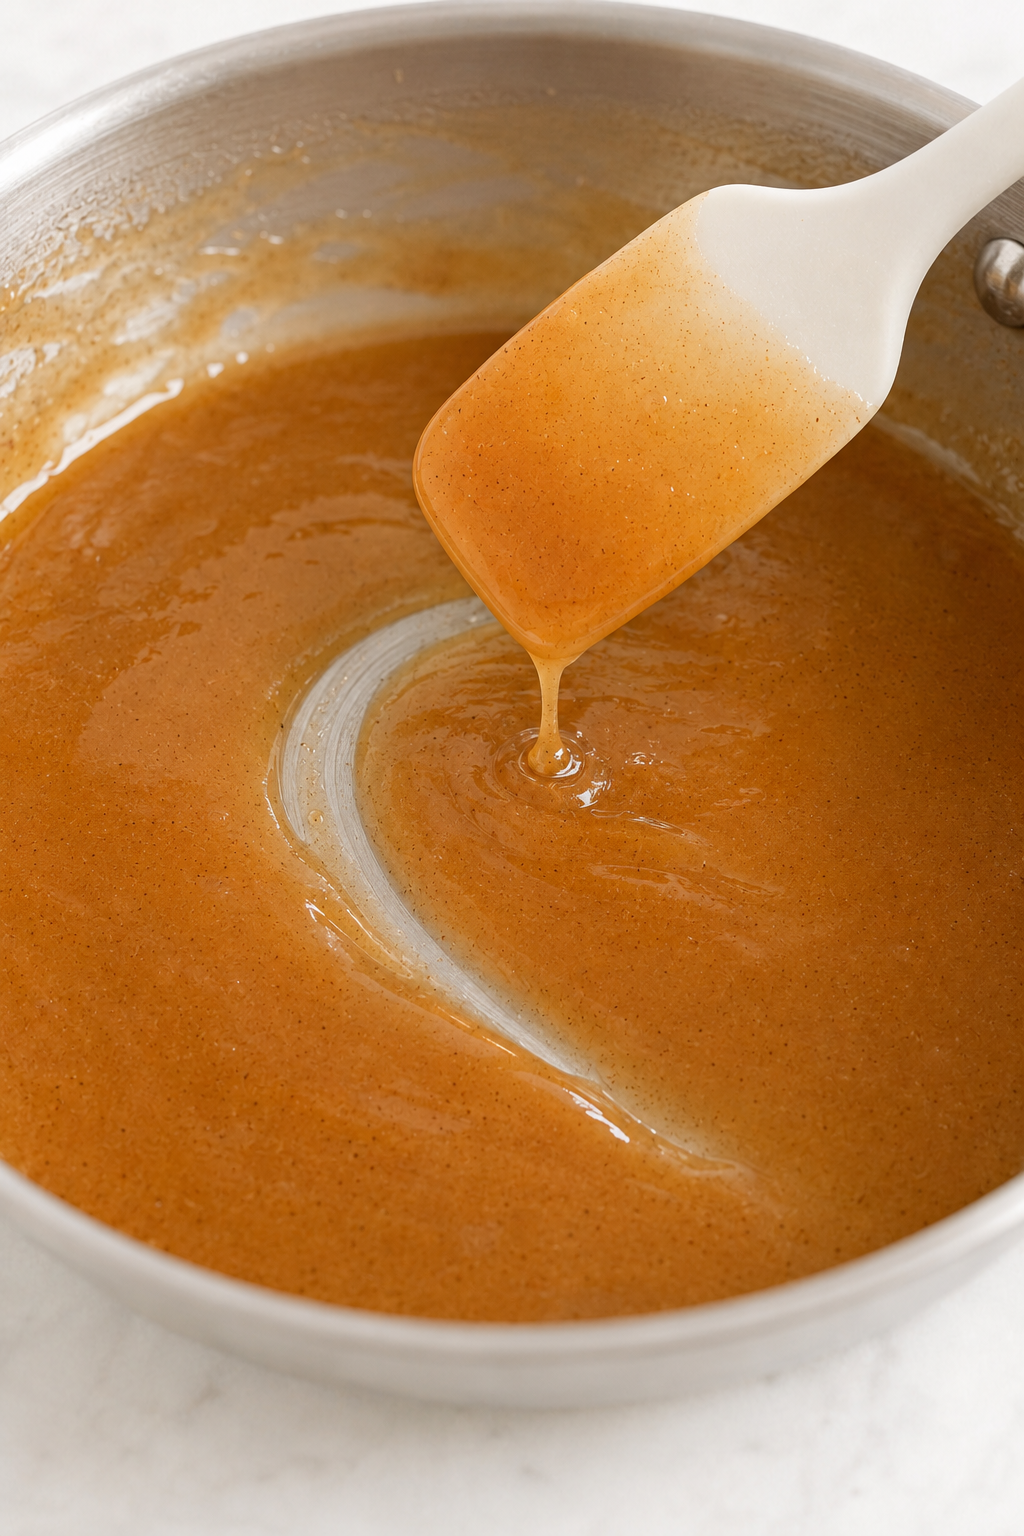
Whisk the cornstarch and 2 tablespoons cold water until completely smooth. Bring the 3/4 cup apple liquid to a steady simmer over medium heat. Whisk the slurry again, then pour it slowly into the simmering liquid while whisking continuously. Cook for 60–90 seconds after bubbling resumes.
What you should see: the sauce changes from cloudy to glossy and semi-translucent. A spatula drawn across the pan leaves a path that stays open briefly, then closes slowly. No white streaks or lumps remain.
6. Recombine and finish with vanilla
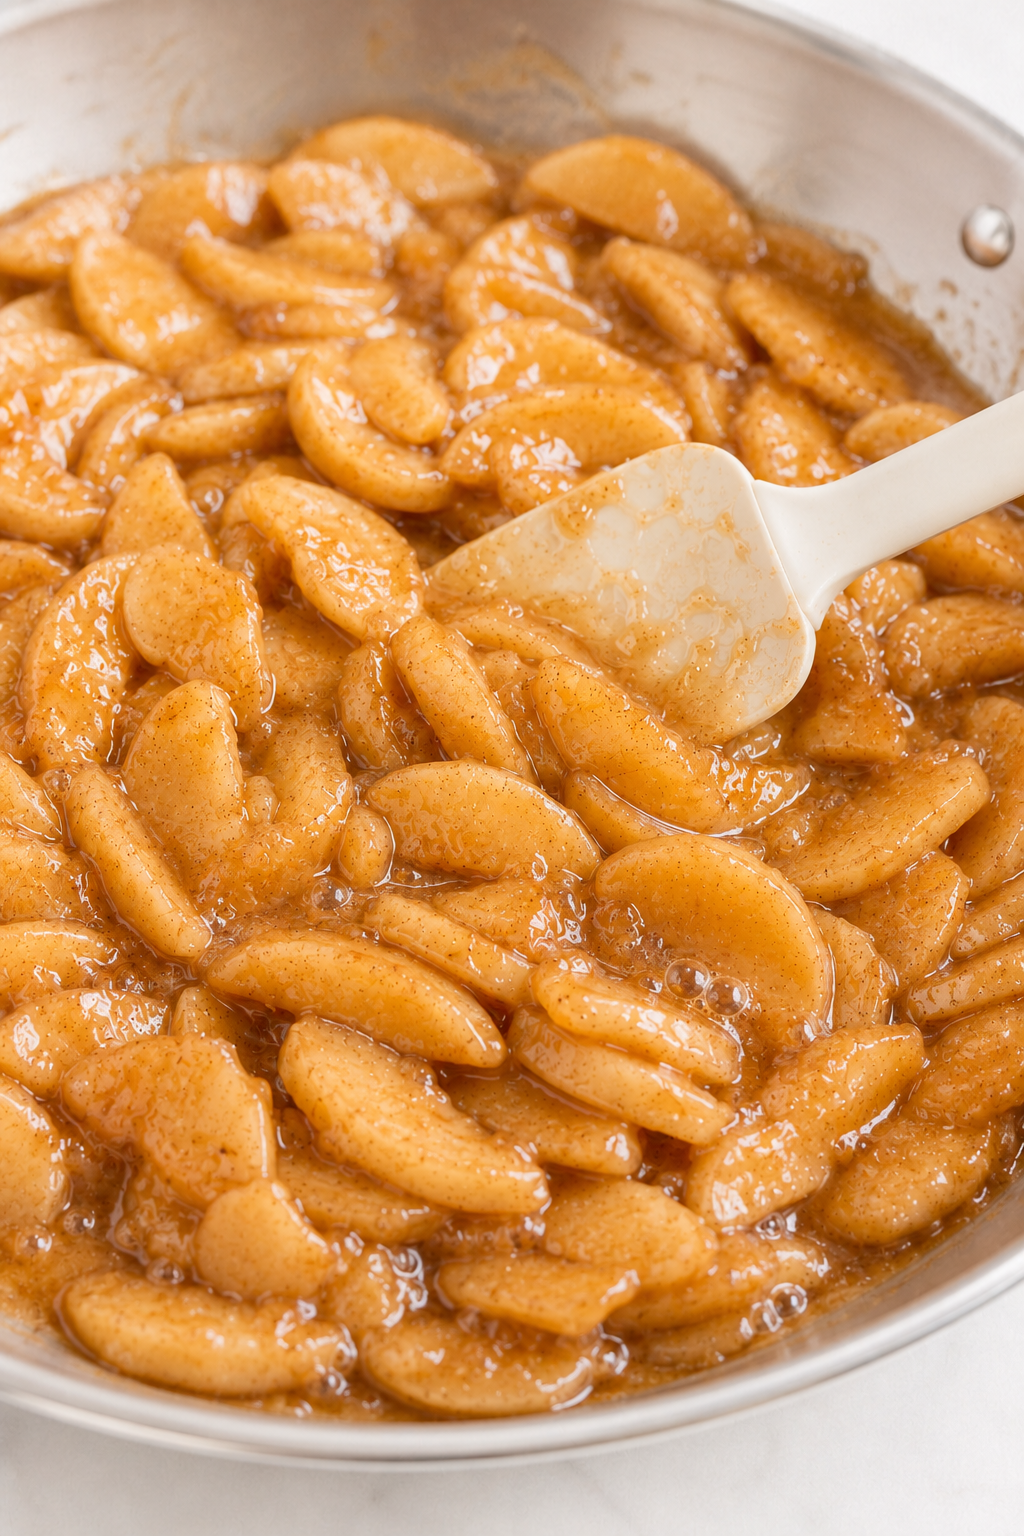
Return the apples and any juice collected in their bowl to the pan. Fold gently for 30–60 seconds, only until every slice is coated and the filling returns to a gentle bubble. Remove the pan from the heat and fold in the vanilla.
What you should see: a cohesive cinnamon-brown sauce clinging to distinct apple slices. The hot filling is looser than it will be after cooling, but no watery pool remains around the edges.
7. Cool the filling completely
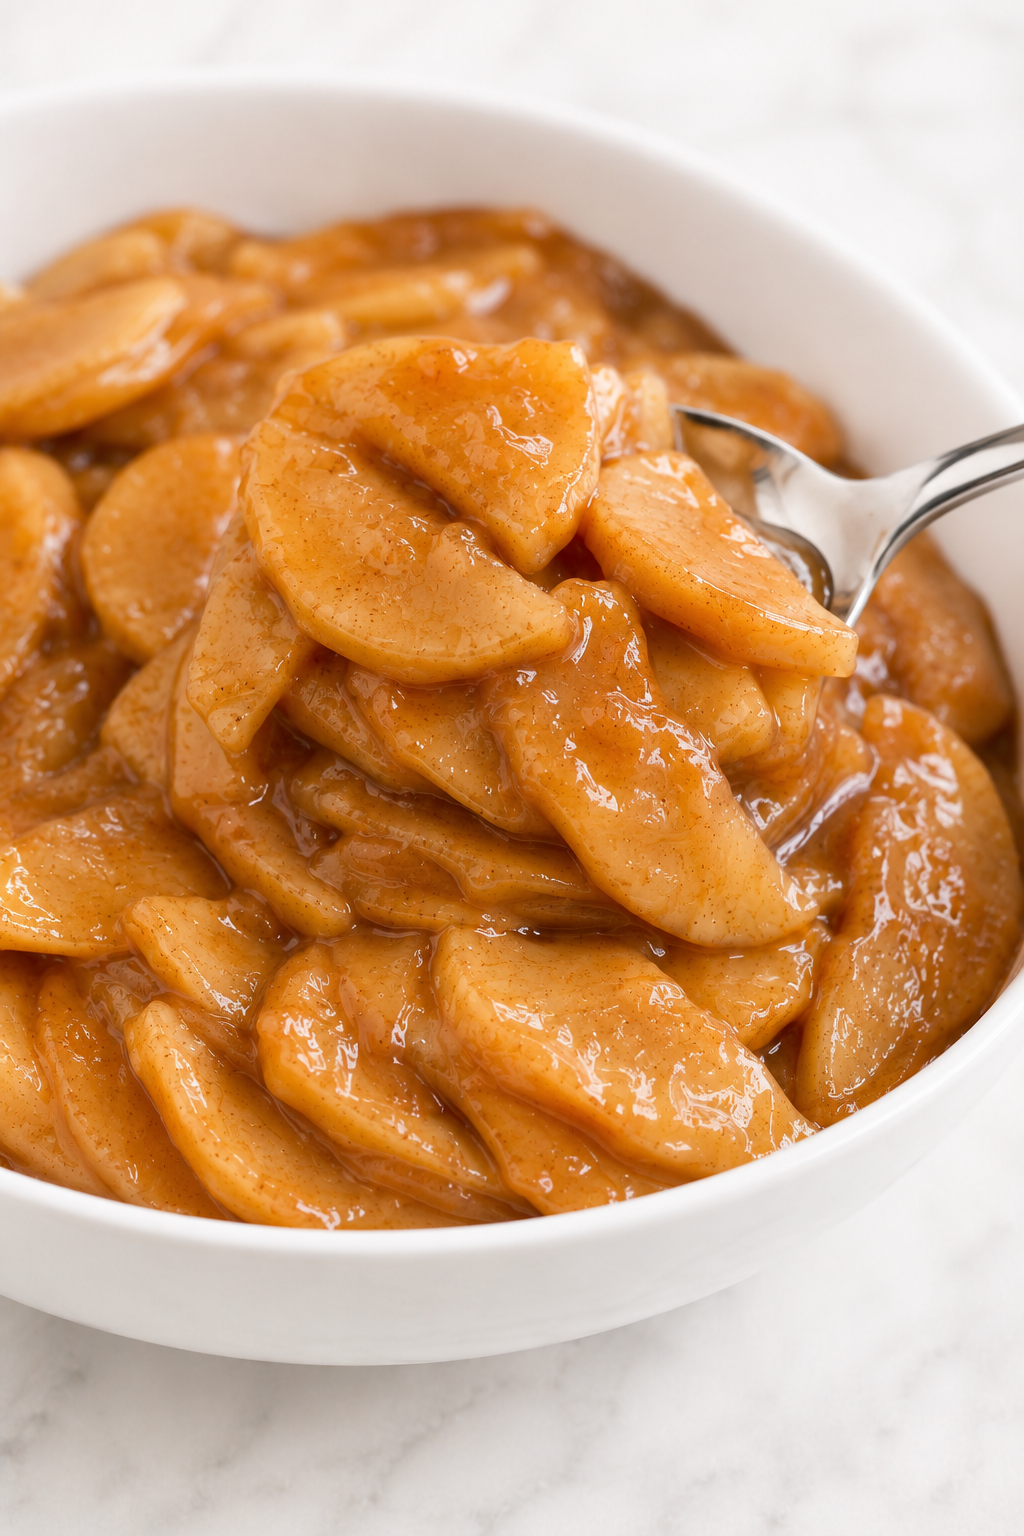
Immediately spread the filling in the shallow dish or rimmed pan in a layer no deeper than about 1 1/2 inches. Cool for 20–30 minutes at room temperature, then refrigerate for 30–40 minutes, or until cold through the center. Refrigerate within 2 hours of cooking.
What you should see: the cold sauce mounds on a spoon and settles slowly instead of running. The apple slices remain separate and identifiable, with no residual warmth in the center of the batch.
Doneness Guide
The filling is finished only when the apples, sauce, and cold set all meet their own stop conditions. Time supports these cues but does not replace them.
| Stage | Correct | Underdone | Overdone |
|---|---|---|---|
| Apples before thickening | Flexible edges, slight center resistance, bends without breaking | Rigid through the center; strong knife resistance | Splits during gentle folding; edges dissolve |
| Hot sauce | Glossy, semi-translucent, coats the spatula, brief track across the pan | White starch streaks, raw starch flavor, immediate liquid flow | Rubbery sheets, elastic clumps, apples cannot settle naturally |
| Cold filling | Mounds, then settles slowly; no liquid halo | Free liquid pools around the apples | Sliceable gel rather than a spoonable filling |
| After a second bake | Filling bubbles through center vents; apples stay visible and tender | No center bubbling; hard apples or loose sauce | Apples lose identity and approach applesauce |
Texture Guide
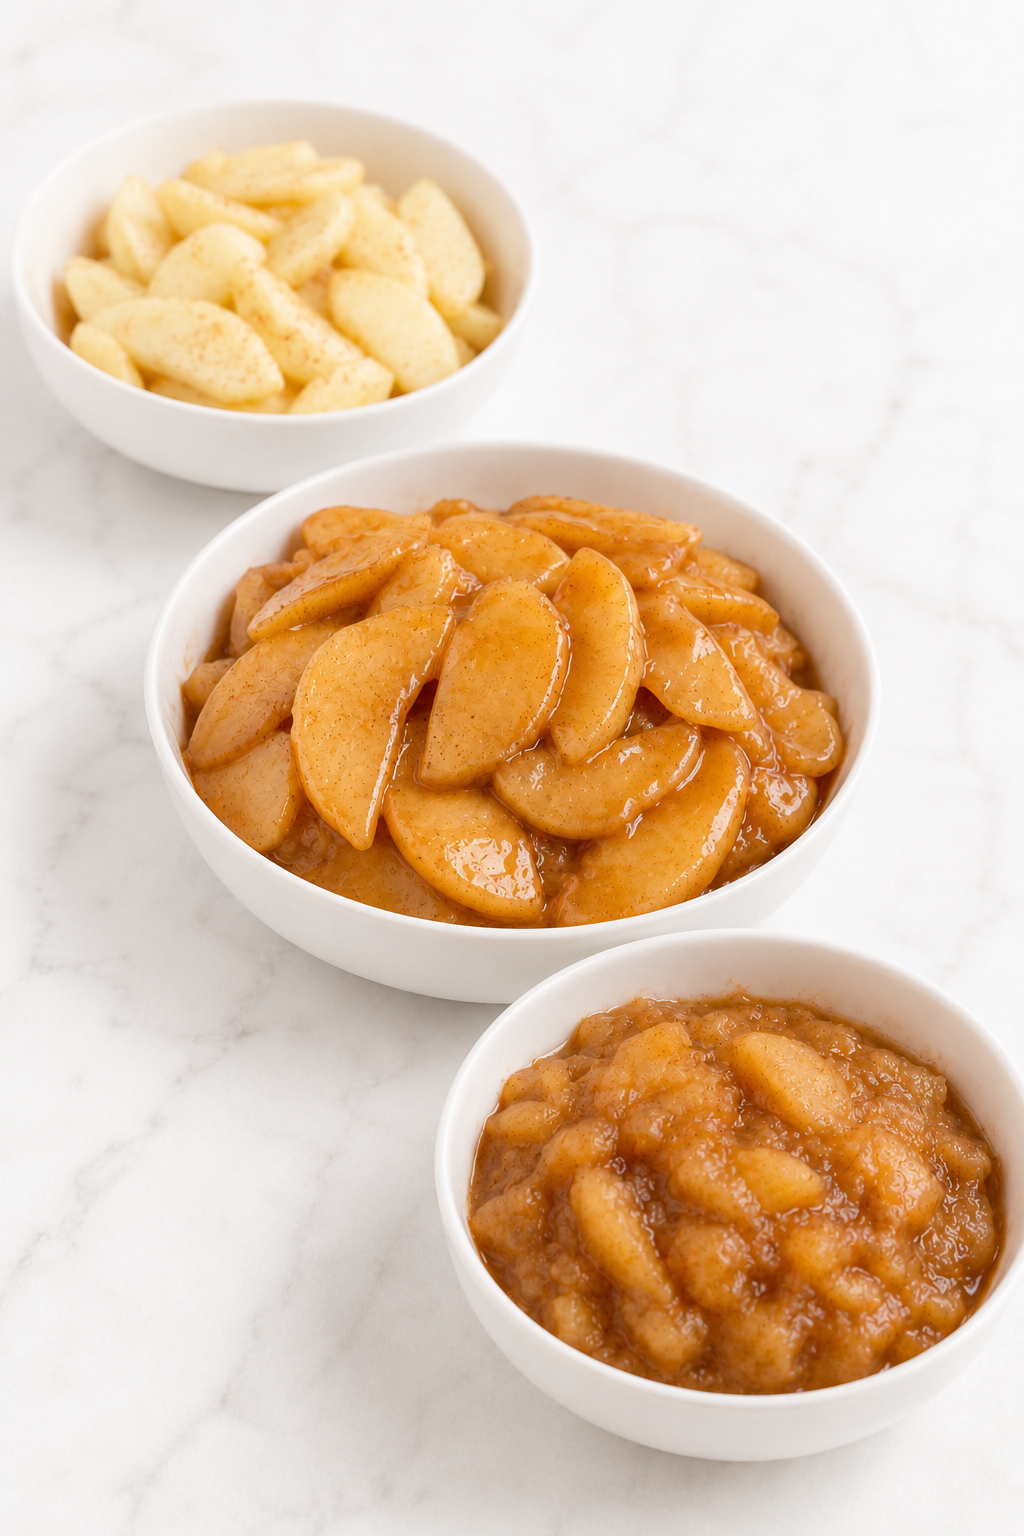
Texture should remain natural at every stage: distinct fruit surrounded by enough sauce to bind the filling without hiding or immobilizing the apples.
- Apple slices: tender at the edges with a slight bite at the center after stovetop cooking; fully tender but still visible after pie baking.
- Hot sauce: fluid enough to fold around the fruit, yet thick enough to leave no watery pool.
- Cold sauce: cohesive and spoonable, with a slow settle rather than a sharp cut edge.
- After freezing: expect slightly softer fruit and possible modest loosening; the thawed filling should not be described as identical to fresh.
Expert Tips for the Best Apple Pie Filling
These decisions help experienced bakers adjust to real apple variability without changing the frozen formula or sacrificing the intended result.
- Use prepared weight to control both yield and sweetness. Trimming loss can vary by several ounces across nine apples. Stopping at exactly 1,350 g keeps the sugar and starch ratios attached to the fruit actually entering the pan.
- Measure the liquid at eye level while hot. Foam and a tilted measuring cup can make 180 ml look larger than it is. An accurate liquid target prevents both a runny sauce and an over-concentrated gel.
- Let the knife test overrule the clock. Stored apples and freshly harvested apples soften at different rates. The slight resistance at the center is the reserve structure needed for a second bake.
- Choose water or apple juice deliberately when topping up. Water keeps the approved flavor balance neutral; unsweetened apple juice adds a little more fruit intensity. Use only the small amount required to reach 3/4 cup.
- Cool for the next use, not just until the surface feels cold. Before pastry assembly, check the center of the filling. Even mild residual warmth can soften butter in the bottom crust.
Common Mistakes
Most failures trace back to one of four variables: apple structure, liquid volume, complete starch cooking, or the temperature at which the filling is judged.
| Mistake | What Happens | Why It Happens | How to Prevent or Fix It |
|---|---|---|---|
| Skipping the 3/4-cup liquid control | The cold filling is watery or varies from batch to batch | Apple moisture changes by variety, ripeness, and storage | Reduce excess liquid or top up a dry batch before adding the fixed starch amount |
| Adding more cornstarch without measuring the liquid | The sauce becomes gluey or rubbery | Starch is compensating blindly for an unknown liquid volume | Weigh 16 g cornstarch and thicken exactly 180 ml liquid; while hot, a slightly tight sauce may be loosened with 1 tablespoon water at a time |
| Fully softening the apples before thickening | The slices break and become applesauce during the second bake | There is no structural reserve for more heat | Stop at slight center resistance; mushy apples cannot be restored and are better repurposed as topping |
| Adding slurry that settled or was mixed with warm water | White lumps remain in the sauce | The starch was not evenly dispersed | Use cold water, re-whisk immediately before pouring, and add slowly while whisking the simmering liquid |
| Removing the sauce before it bubbles again | The filling tastes starchy or remains loose | The cornstarch did not fully gelatinize | Cook 60–90 seconds after bubbling resumes and look for a glossy, semi-translucent finish |
| Putting warm filling into pastry | The bottom crust softens before baking | Warm filling melts the cold butter structure in the dough | Chill the filling completely through the center before pie assembly |
Beautiful Ways to Serve Apple Pie Filling
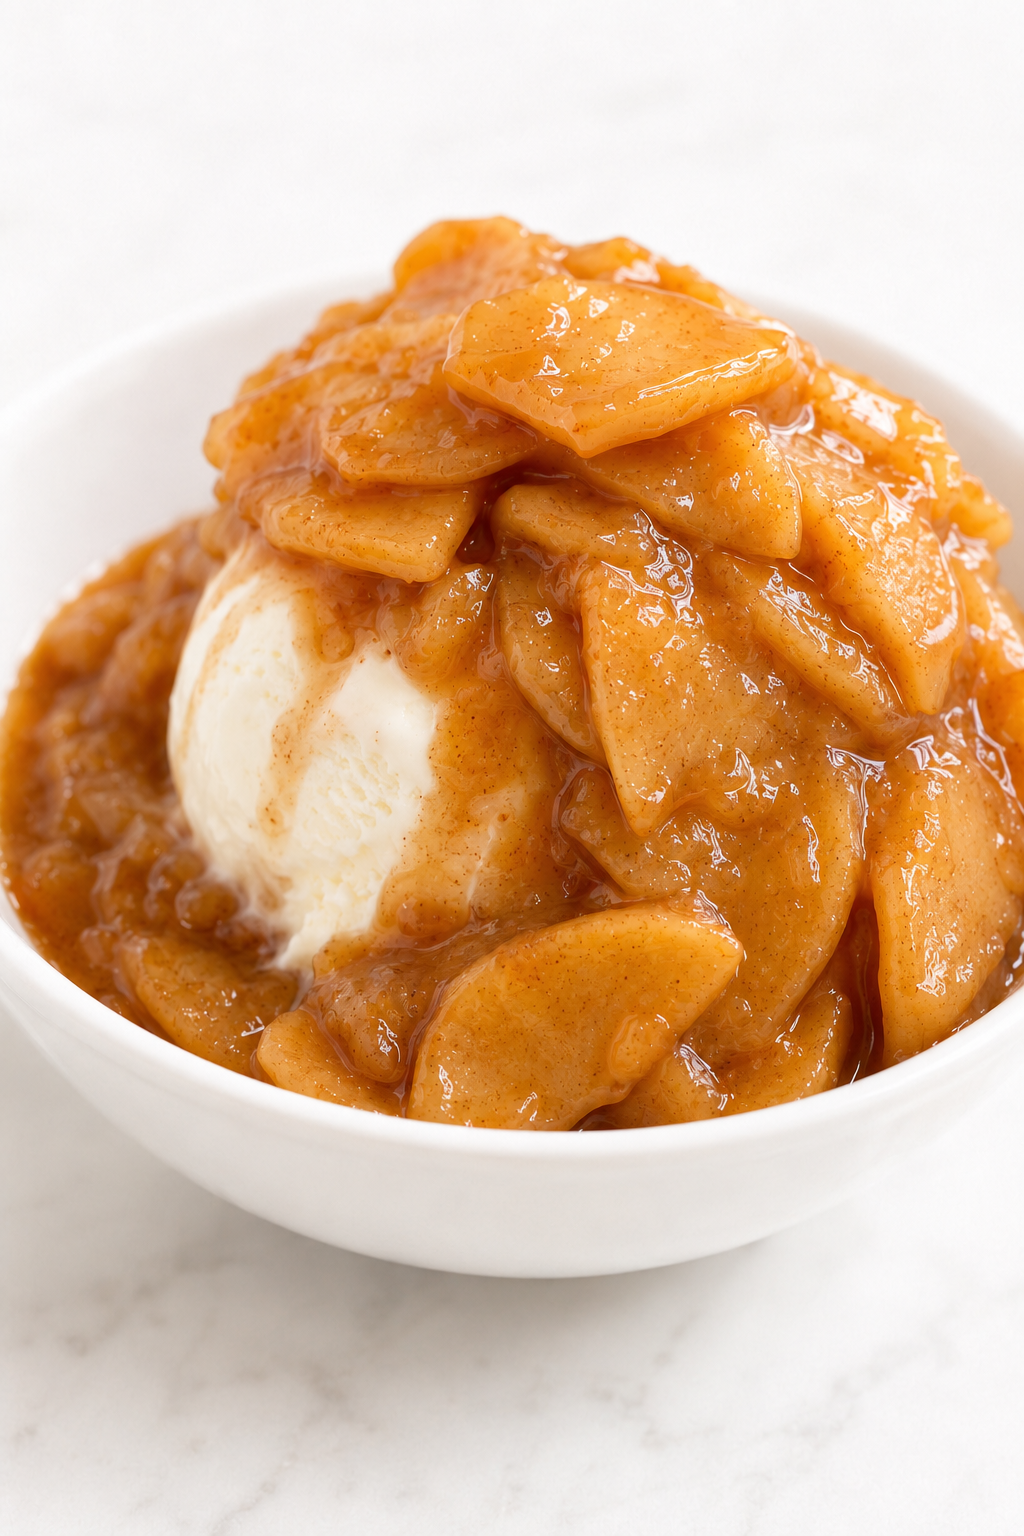
The full cold batch belongs in a 9-inch pie, while smaller portions can be warmed gently for plated desserts and breakfast bakes.
- Classic or lattice pie: use the entire cooled batch and bake until the filling bubbles steadily through the center vents.
- Dutch apple pie: use the full batch under a crisp streusel top.
- Turnovers and hand pies: chop the cooled slices into roughly 1/2-inch pieces and use 2–3 tablespoons per pastry, leaving a clean sealing border.
- Warm dessert topping: spoon over Vanilla Ice Cream, cheesecake, pound cake, or rice pudding.
- Breakfast serving: warm smaller portions for Apple Pancakes, French toast, oatmeal, or a crisp Waffle Recipe.
Pairings that preserve the apple flavor
Use restrained accompaniments: lightly sweetened whipped cream, vanilla ice cream, toasted pecans, or a small drizzle of salted caramel. Strong chocolate sauces or heavily spiced toppings can obscure the fresh apple profile the formula is designed to protect.
Storage & Make Ahead
Cool the filling promptly in a shallow layer, then match the storage method to when and how it will be used.
Room temperature
Room temperature is a controlled cooling or serving state, not a storage method. Refrigerate the cooked filling within 2 hours.
Refrigerator
Transfer the completely cooled filling to an airtight container and refrigerate for up to 4 days. The best texture is during the first 3 days; by day 4, the apples may soften slightly and the sauce may become more firmly set.
Freezer
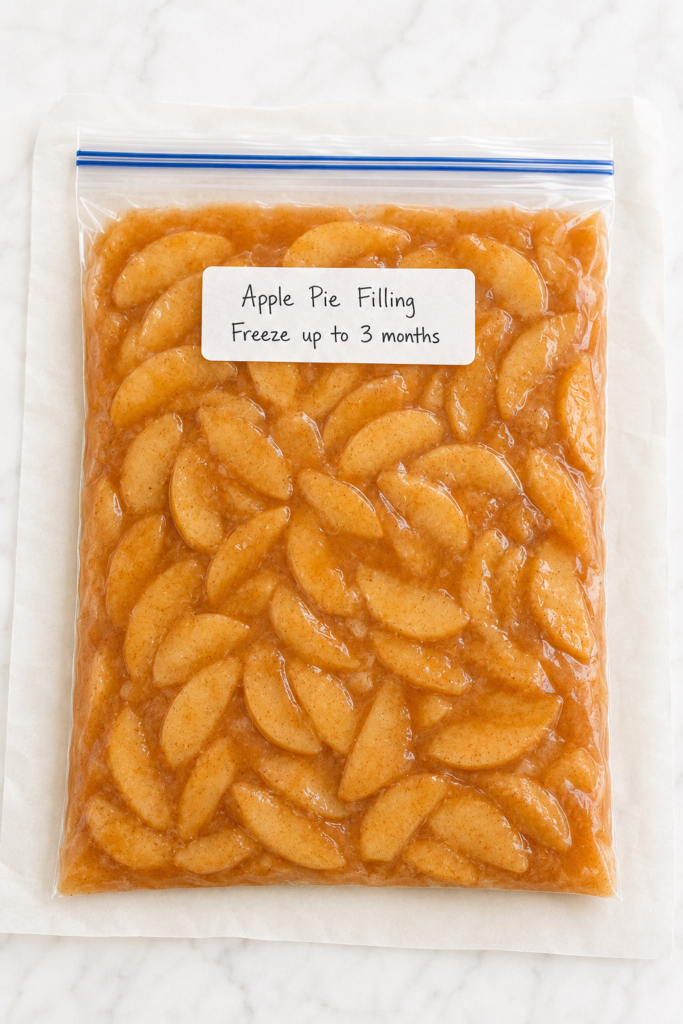
Freeze the cold filling in a freezer-safe airtight container or heavy freezer bag, removing excess air. Freeze for up to 3 months for best quality. Thaw overnight in the refrigerator and fold gently before use. A modestly looser sauce and softer apple texture are normal freeze–thaw changes.
Microwave reheating for topping use
Place 1 cup of refrigerated filling in a microwave-safe bowl, cover loosely, and stir halfway through. Heat until evenly steaming; do not warm filling before putting it into pie pastry.
| Microwave power | Initial time for 1 cup |
|---|---|
| 700 W | 1 minute 45 seconds–2 minutes 15 seconds |
| 800 W | 1 minute 30 seconds–2 minutes |
| 1000 W | 1 minute 10 seconds–1 minute 30 seconds |
| 1200 W | 55 seconds–1 minute 15 seconds |
Continue in 10–15-second intervals if needed. Add 1 teaspoon water before reheating only when the chilled sauce is unusually firm. For stovetop reheating, warm over low heat for 4–6 minutes, folding gently and adding no more than 1 teaspoon water per cup unless the sauce clearly needs it.
Variations and Other Ways to Use It
These supported format changes preserve the approved filling formula; they change portioning or the final dessert rather than pretending every thickener or apple behaves identically.
- Honeycrisp–Granny Smith filling: replace Pink Lady with the same prepared weight of firm Honeycrisp. Follow the liquid-control step exactly because juice release may differ.
- Dutch apple pie: use the complete cold batch in one 9-inch bottom crust and finish with the streusel and baking method from your Dutch pie formula.
- Apple pie cookies: cool the filling, chop the slices into small pieces, and use only the amount the pastry can contain. For a complete format, use this Apple Pie Cookies recipe rather than guessing the dough and bake time.
- Turnovers or hand pies: chop the cold slices to about 1/2 inch and use 2–3 tablespoons per 5-inch pastry round or square. Keep the sealing edge clean and bake according to the pastry recipe.
- Fully tender topping: when the batch will not be baked again, cook the apples 2–4 minutes longer before removing them, stopping as soon as the centers are tender but the slices remain intact.
Flour, tapioca, Instant ClearJel, and Cook-Type Clear Jel are not listed as direct substitutions because they require their own quantities and processing logic. Cook-Type Clear Jel belongs to a tested canning recipe, not an adaptation of this stovetop formula.
Authoritative Sources and Safety Guidance
The recipe’s juice-control method, thickener boundary, freezer disclosure, and non-canning warning were checked against established baking and food-preservation guidance.
- King Arthur Baking: How to Prevent Runny Apple Pie explains how precooking and reducing released apple juice help control a watery filling.
- King Arthur Baking: Pie Thickener Guide distinguishes common pie thickeners and notes that apples need comparatively little thickener because of their pectin.
- Penn State Extension: Freezing Pies and Pie Fillings provides evidence-based guidance for frozen fruit fillings and thickener behavior.
- National Center for Home Food Preservation: Apple Pie Filling provides the separate tested home-canning process using Cook-Type Clear Jel.
Why This Recipe Belongs in Your Recipe Box
The value of this recipe is not limited to one pie; it provides a repeatable apple-filling system that can move from holiday baking to smaller everyday desserts.
- Exact Pie Quantity. One batch makes the clearly defined amount needed for a generous 9-inch pie.
- Controlled Apple Moisture. The method measures seasonal juice variation instead of hiding it beneath excess starch.
- Clear Texture Stages. Separate hot, cold, and second-bake cues show what the filling should look like at every use point.
- Calmer Make-Ahead Baking. The filling can be prepared several days before pie assembly.
- Flexible Dessert Use. The same batch works as both a pastry filling and a ready-to-eat warm topping.
- Honest Freezer Guidance. The storage notes explain the expected texture change rather than promising a perfect thaw.
- Safe Preservation Boundary. Refrigerator cooking stays clearly separated from tested shelf-stable canning methods.
Keep Baking with Apples and Cozy Spices
Once the filling is cooling, the next recipe can stay close to classic apple pie, move toward a crisp or cobbler, or carry the same cozy flavor into a different kind of bake.
Turn the Filling into a Pie
These recipes are the closest continuation when a complete crust-and-filling dessert is the goal.
- Apple Pie Recipe gives the filling its classic double-crust destination.
- Dutch Apple Pie trades the top crust for a buttery crumb layer that releases steam easily.
- Apple Crumble Pie keeps the pie format while emphasizing a generous crisp topping.
- Apple Pie Cookies turn the same apple-and-pastry craving into individual portions.
Explore More Warm Apple Desserts
Choose this path when the apples matter more than the pie crust and a spoonable or crumb-topped dessert sounds right.
- Apple Crisp Recipe pairs tender fruit with a deeply textured oat topping.
- Apple Cobbler Recipe adds a soft baked topping for a more substantial scoopable dessert.
- Baked Apples Recipe keeps the fruit whole for a simple, elegant presentation.
- Apple Cake Recipe folds the same cozy fruit profile into a tender sliceable cake.
Bring Apple-Cinnamon Flavor to Another Bake
These projects move beyond pie while keeping the familiar apple, cinnamon, and bakery-style character.
- Apple Fritter delivers crisp fried edges around a soft apple-centered pastry.
- Apple Muffins make the flavor practical for breakfast or an afternoon snack.
- Apple Cupcakes turn cozy apple spice into an individual celebration dessert.
- Homemade Cinnamon Rolls continue the cinnamon-led bakery theme without repeating the fruit filling.
Frequently Asked Questions
These questions retain value after the full method because they concern compatibility with other recipes, noncanonical fruit states, and batch scaling.
Can I use this filling in any apple pie recipe?
Use it in a pie formula that accepts a fully cooked, completely cooled filling. If another pie recipe begins with raw apples plus its own sugar, starch, butter, and spices, do not add those filling ingredients again. The crust temperature and approximate bake time may still be useful, but the pie must bake until the filling bubbles through the center vents and the crust is deeply golden.
Can I make it with frozen apple slices?
Frozen apples are not recommended for the canonical result. Freezing damages the fruit’s cell structure, so thawed slices tend to release more liquid and soften faster. The 3/4-cup liquid control can manage juice volume, but it cannot restore the firmer texture of fresh Granny Smith and Pink Lady apples.
Can I double the recipe?
Prepare two separate batches or use two wide pans. Doubling 2,700 g of prepared apples in one standard Dutch oven crowds the fruit, changes the steam and reduction rate, and requires more stirring that can break the slices. Each batch should retain its own 180 ml liquid target and 16 g cornstarch.
Final Thoughts
This Homemade Apple Pie Filling exists to give a classic fruit filling the control it needs without losing the tender slices, warm spice, and glossy sauce that make it feel generous and homemade.
Return to it when a pie deserves a calmer schedule, when a small pastry needs a ready filling, or when a warm spoonful of cinnamon apples is enough to turn pancakes, waffles, or ice cream into dessert.
Dependable baking often begins before the crust is rolled: when one component is understood and prepared well, the rest of the project has room to become simpler.

Homemade Apple Pie Filling
A make-ahead stovetop Apple Pie Filling with tender sliced apples and a glossy cinnamon-brown sauce. The controlled-juice method makes one generous 9-inch pie quantity while protecting the apples from becoming watery or mushy.
Ingredients
Apples
- 4 pounds (1.8 kg) firm baking apples, about 9 medium, to yield 3 pounds (1,350 g) after peeling and coring
- 1 pound 8 ounces (675 g) prepared Granny Smith apples
- 1 pound 8 ounces (675 g) prepared Pink Lady apples
Sugar, spice, and flavor
- 1/2 cup packed (106 g) light brown sugar
- 1/3 cup (67 g) granulated sugar
- 2 tablespoons (30 g) fresh lemon juice
- 2 teaspoons (5 g) ground cinnamon
- 1/8 teaspoon ground nutmeg
- 1/2 teaspoon (3 g) fine salt
Cooking and thickening
- 3 tablespoons (43 g) unsalted butter
- 2 tablespoons (16 g) cornstarch
- 2 tablespoons (30 g) cold water
- 2 teaspoons (10 ml) pure vanilla extract
Instructions
- Prepare the apples. Peel and core the apples. Weigh 675 g prepared Granny Smith apples and 675 g prepared Pink Lady apples, then slice them uniformly 1/4 inch (6 mm) thick. Place all 1,350 g prepared apples in a large bowl.
- Draw out the juice. Mix the brown sugar, granulated sugar, cinnamon, nutmeg, and salt. Add the mixture and lemon juice to the apples and fold gently to coat. Rest for 20 minutes, folding once after 10 minutes, until amber juice begins collecting in the bowl.
- Partially cook the apples. Melt the butter in a 6-quart wide Dutch oven over medium heat. Add the apples and all accumulated juice. Cover and cook for 5 minutes. Uncover and cook for 4–7 minutes more, folding every 60–90 seconds, until the edges are flexible and a knife meets slight resistance near the center.
- Control the apple liquid. Transfer the apples to the bowl with a slotted spoon. Measure the pan liquid. If it exceeds 3/4 cup (180 ml), simmer it down to 3/4 cup. If it is below 3/4 cup, add only enough water or unsweetened apple juice to reach 3/4 cup.
- Thicken the sauce. Whisk the cornstarch with 2 tablespoons cold water. Bring the measured apple liquid to a steady simmer. Re-whisk the slurry and pour it in slowly while whisking. Cook for 60–90 seconds after bubbling resumes, until glossy and semi-translucent.
- Finish the filling. Return the apples and any collected juice to the pan. Fold for 30–60 seconds, just until coated and gently bubbling. Remove from the heat and fold in the vanilla.
- Cool completely. Spread the filling in a 9 x 13-inch shallow dish or rimmed quarter-sheet pan no deeper than 1 1/2 inches. Cool for 20–30 minutes at room temperature, then refrigerate for 30–40 minutes, or until completely cold. Refrigerate within 2 hours.
- Use or store. Use the complete cold batch for one 9-inch pie. Refrigerate airtight for up to 4 days or freeze for up to 3 months for best quality. Thaw frozen filling overnight in the refrigerator.
Notes
- Do not put warm filling into a butter-based pie crust.
- The hot sauce should remain looser than the completely cooled filling.
- For topping use, warm 1 cup according to the 700/800/1000/1200 W chart in the article.
- Freeze–thaw can soften the apples and loosen a cornstarch sauce slightly.
- This recipe is not safe or validated for shelf-stable canning. Use a separately tested Cook-Type Clear Jel canning formula.
- Honeycrisp may replace Pink Lady by prepared weight; preserve the 180 ml liquid-control step.
- For hand pies, chop the cold slices to about 1/2 inch and use 2–3 tablespoons per 5-inch pastry.
Nutrition Information:
Yield: 8 Serving Size: 3/4 cupAmount Per Serving: Calories: 216Total Fat: 5gSaturated Fat: 3gCholesterol: 12mgSodium: 152mgCarbohydrates: 46gFiber: 3gSugar: 39gProtein: 1g
Nutrition information is provided as an estimate only and may vary based on specific ingredients, brands, and portion sizes used. This information should not be considered medical or nutritional advice.
12 Sweet Favourites — Yours, Free 🍰
Tiramisù, no-bake cheesecake, the perfect chocolate chip cookie & 9 more reader-loved desserts — gathered into one beautiful free recipe book. From my kitchen to yours.
No spam, just sweet things. Unsubscribe anytime.