Black Forest Thumbprint Cookies
Black Forest Thumbprint Cookies are tender cocoa shortbread cookies with little hollows filled with sour cherry preserves and finished with fine white chocolate drizzle. The cookies bake first, then cool before the fruit is spooned in, giving each one a dark, buttery crumb, a tart cherry center, and a delicate touch of sweetness on top.

Chocolate and cherries make a familiar pairing, but a small cookie gives each flavor its own place. The ruby center catches the light, the cocoa keeps the sweetness grounded, and the pale chocolate lines make a simple plate feel ready for company.
For a holiday tray, you can bake the cocoa bases a day ahead. The next day, all that’s left is to spoon in the cherries and pipe a few white lines across each cookie.
Black Forest Thumbprint Cookies at a Glance
This batch makes 24 small, tender shortbread-style cookies with distinct cherry centers. Expect a delicate, crumbly bite and a slightly firmer edge, with the fruit sitting in the hollow rather than baked through a cake-like middle.
| At a glance | What to plan for |
|---|---|
| Yield | 24 cookies; 1 cookie per serving |
| Active preparation | About 40 minutes |
| Baking | 16–20 minutes per tray; allow 40 minutes for two trays |
| Additional time | About 80 minutes for chilling, cooling, and setting |
| Total | About 2 hours 40 minutes, starting with cool-soft butter |
| Oven | 325°F / 165°C, conventional oven; middle rack |
| Pans | Two light-colored 13 × 18-inch / 33 × 46 cm baking sheets |
| Method | Shape, chill, bake, cool completely, fill, and drizzle |
| Make-ahead choice | Prepare the plain bases or shaped dough separately from the filling |
For the plain butter-forward version of this cookie family, try our classic shortbread cookies.

Why These Chocolate-Cherry Thumbprints Work
The cocoa base, cherry center, and white chocolate each have a different job. Keeping their proportions distinct lets the fruit brighten the cookie without covering up its buttery crumb.
- A well that holds its filling. Leaving about ¼ inch (6 mm) of dough beneath the hollow gives the cherry preserves a sturdy base, even when the rim breaks into delicate crumbs.
- A clear tart-sweet contrast. Sour cherry preserves bring a brighter flavor against the cocoa, while the white chocolate adds sweetness in fine lines.
- A finish that leaves the fruit visible. Filling the cooled bases and using a light drizzle keeps the cherry center recognizable, rather than hiding it under a thick coating.
Why You’ll Love These Cherry-Filled Cookies
You can bake the shortbread while you have the oven on and save the cherry filling for a quieter moment. Once the bases are cool, the decorating takes little more than a spoon and a piping bag.
- No rolling pin required. A rounded measuring spoon makes the small hollows, and your fingertips can smooth the edges.
- A batch for sharing. Two trays give you 24 little cookies, enough to set out a plateful and replenish it later.
- Easy to decorate. A few loose passes with a piping bag leave the red fruit peeking through the white chocolate.
Who These Black Forest Cookies Are Perfect For
These suit a baker who likes to shape cookies by hand and has time to let the trays chill. They’re especially handy for a gathering close to home, where the filled cookies can stay cool until dessert.
- For someone who likes the tart cherry bite of a Black Forest dessert in a small portion.
- For a holiday cookie exchange where you can deliver the finished cookies chilled.
- For a host who wants to do the oven work the day before guests arrive.
If your cookies need to travel a long way without refrigeration, choose a plain shortbread for that trip.
How Butter, Cocoa, and Cherry Preserves Shape the Texture
The texture depends on a fat-rich dough setting into a delicate cookie, then meeting a small amount of moist fruit. Three changes explain why restrained mixing, chilling, and separate assembly matter.
Butter helps keep the crumb short. Fat coats some of the flour particles and limits the development of a tough gluten network. This eggless dough has no added water or milk, so it can look like damp crumbs before it holds together; pressing those clumps is more useful than adding milk or water.
Firmness changes with temperature. Chilled butter helps the shaped dough hold its form as baking begins, while the hot cookie remains fragile after leaving the oven. Cooling allows the fat-rich structure to firm up, which is why a warm cookie should not be judged by the same firmness as a cold one.
Preserves gradually soften the surrounding crumb. Moisture moves from the cherry filling into the drier cookie beneath it. Thick preserves limit free liquid, but they do not prevent that change entirely; assembling near serving time gives the clearest contrast between fruit and shortbread.
Ingredients for the Black Forest Thumbprint Cookies
The cocoa and cherry preserves carry most of the flavor here. Choose unsweetened Dutch-process cocoa and a thick preserve that holds its shape on a spoon.

Ingredient List
Weigh the flour and cocoa before sifting. The dough uses the first six ingredients, with the preserves and white chocolate reserved for finishing.
For the cocoa dough:
- 1½ cups (180 g) all-purpose flour, spooned and leveled if using cups; weigh before sifting
- ⅓ cup (28 g) unsweetened Dutch-process cocoa, weighed before sifting; not black cocoa
- ¼ teaspoon (1.5 g) fine table salt
- ¾ cup / 12 tablespoons (170 g) unsalted stick butter, soft but cool, about 65–68°F / 18–20°C
- ½ cup (100 g) granulated sugar
- 1 teaspoon (5 ml) vanilla extract
For the cherry centers:
- ¼ cup (85 g) thick, full-sugar sour cherry preserves, without loose syrup; chop large fruit pieces to about 3–5 mm before measuring
For the white drizzle:
- 2 ounces (57 g) real white chocolate baking bar, finely chopped
Choosing Cocoa, Cherry Preserves, and White Chocolate
A quick look at the cocoa label, the fruit in the jar, and the ingredients on the chocolate bar will tell you how each will work in the cookies.
Dutch-process cocoa. Dutch-process cocoa is treated with alkali, which reduces its acidity and gives it a darker color and a milder flavor. Use ordinary unsweetened Dutch-process cocoa here, rather than black cocoa or a sweetened drinking mix.
Sour cherry preserves. Look for a thick preserve with no pool of loose syrup. Cut large fruit pieces smaller before measuring so a half-teaspoon portion can settle inside the well. Fresh cherries, thin compote, pie filling, and reduced-sugar preserves do not behave like the filling used here.

White chocolate. Choose a baking bar with cocoa butter for fine, even lines. Chips and candy coatings can flow differently. Two ounces gives you enough to fill a small piping bag comfortably. Stop when a few thin lines cross each cookie, even if there’s chocolate left in the bag.
This recipe contains wheat and milk. Check the chocolate and preserve labels for any additional allergens; the absence of egg or nuts in the ingredient list does not make every brand suitable for every allergy.
Tools for Shaping and Baking Cherry Thumbprints
Two light-colored half-sheet pans let you keep the second tray cold while the first bakes. A scale and a rounded half-teaspoon measure are particularly useful for keeping the cookie portions and their small hollows consistent.
- Measuring and sifting: a digital scale, measuring cups and spoons, a sieve, and a bowl for the dry ingredients.
- Mixing: a stand mixer fitted with a paddle or a hand mixer, a mixing bowl, and a flexible spatula for gathering the dough.
- Shaping and baking: a rounded ½-teaspoon measuring spoon, two light-colored metal 13 × 18-inch / 33 × 46 cm baking sheets, baking parchment, a conventional oven with a middle rack, and refrigerator space for the trays.
- Cooling and preparing the fruit: a wire cooling rack, a spatula for lifting the cookies, and a knife and board for chopping large pieces in the preserves.
- Melting and drizzling: a small, completely dry microwave-safe bowl, a microwave with a 50% power setting, a spoon or small spatula, and a piping cone or bag.
Before You Mix the Cocoa Dough
Start with butter that yields to gentle pressure but still looks matte and holds its shape. Very cold butter makes the dough harder to bring together; greasy, partly melted butter makes clean shaping more difficult.
- Weigh the flour and cocoa before sifting, and have the salt measured with them.
- Line both pans and clear enough refrigerator space for the shaped cookies.
- Check the preserves before you begin: thick fruit is useful here, loose syrup is not.
- Set aside a completely dry bowl and utensil for the white chocolate.
If the butter is straight from the refrigerator, cut it into cubes and let it reach the soft-but-cool stage before starting the mixing time. That lead time varies with the room and is separate from the schedule below.
Plan the Two Trays and Cooling Time
Allow about 2 hours 40 minutes from mixing to a set drizzle, with the butter already ready to use. The two trays bake separately, and the first tray cools while the second is in the oven.
| Elapsed time | What to do |
|---|---|
| 0–25 minutes | Mix, divide, and shape the dough. |
| 25–55 minutes | Chill the shaped cookies for 30 minutes; preheat during this interval. |
| 55–75 minutes | Bake the first tray, checking from 16 minutes. |
| 75–95 minutes | Bake the second tray while the first cools. |
| 95–125 minutes | Finish cooling the last tray: 10 minutes on the pan, then about 20 on a rack. |
| 125–140 minutes | Fill the cool cookies, melt the white chocolate, and drizzle. |
| 140–160 minutes | Let the drizzle set before serving or packing into a container. |
The schedule allows 20 minutes for each oven load. Leave a little flexibility for moving trays, a warm room, or cookies that need longer to cool; a practical window is about 2½–3 hours.
What to Expect from the Cocoa Dough and Baked Cookies
The mixed dough may begin as damp clumps before it becomes a smooth, cohesive mass. A few fine fissures around a shaped well are normal, and the freshly baked cookies will feel much more delicate than the cooled ones.
The baked cookies should be roughly 1½–1¾ inches / 38–45 mm across, allowing for natural variation. The cocoa makes browning difficult to read, so the baked surface stays dark rather than giving an obvious golden cue. Once cool, the base has a tender break with a slightly firmer edge. The cherry filling remains visible and can gradually soften the crumb directly beneath it during storage.
How to Make Black Forest Thumbprint Cookies
Make the hollows before chilling, bake the cookies without filling, and let the bases cool completely before adding the preserves. That order keeps shaping manageable and protects the delicate warm cookies during assembly.
1. Sift the Dry Ingredients
Sift the measured flour, Dutch-process cocoa, and fine salt into a bowl. Break up any cocoa lumps in the sieve so they do not remain as dry pockets in the dough.
What you should see: a loose, evenly colored cocoa-flour mixture with no stubborn dark lumps.

2. Bring the Cocoa Dough Together
Using a hand mixer or a stand mixer fitted with the paddle, beat the softened butter and sugar on medium-low speed for 1–2 minutes, just until smooth and creamy. Mix in the vanilla, then add the dry ingredients on low speed just until damp clumps form and a squeezed handful holds together.

Stop the mixer and gather the dough with a spatula, then press it together by hand. If it remains crumbly because the butter is still too cold, let it stand for 5–10 minutes and press again. If it feels greasy and too soft to shape, chill it for 5–10 minutes before continuing. Do not add milk or water to force it together.

What you should see: a handful of dough holds together when squeezed, without dry powder falling away or an oily surface.

3. Shape the Cookies and Cherry Wells
Divide all the dough into 24 equal portions, approximately 20 g each. Roll each portion smooth, then flatten it gently into a thick cookie about 1½ inches / 38 mm across; use all the dough rather than leaving a small remainder to make every portion exactly 20 g.

Press the rounded back of a ½-teaspoon measure gradually into the center, widening the hollow to about 1 inch / 25 mm across and ⅓ inch / 8 mm deep. Leave at least ¼ inch / 6 mm of dough beneath it. Support the edge with your fingertips and press small cracks closed while the dough is pliable.

Arrange 12 cookies on each lined pan in three rows of four, with about 3 inches / 7.5 cm between their centers. If a hollow breaks through the bottom before baking, roll that portion again and reshape it with a thicker base.
What you should see: a broad, rounded well with a substantial floor, surrounded by a smooth rim that can hold a small spoonful of preserves.

4. Chill the Shaped Dough
Refrigerate the shaped cookies for 30 minutes, until firm. During the chill, preheat a conventional oven to 325°F / 165°C with a rack in the middle. Leave the second pan in the refrigerator while the first bakes.
What you should see: the portions feel firm and keep their shape when the tray is moved; extend the chill if they are still very soft.

5. Bake One Tray at a Time
Bake the first tray for 16–20 minutes, checking from 16 minutes. Look for matte, set rims and a hollow that has lost its visibly raw, greasy appearance. If raw dough is still visible, continue in short 1–2-minute intervals and check again.

If a well has puffed up, gently reinforce it with the rounded spoon as soon as the pan comes out of the oven. Use light pressure and keep the floor intact; do not touch the hot cookie with a finger. Bake the second tray in the same way.
What you should see: the edge is set but the hot cookie is still delicate and slightly yielding. Waiting for a hard center or obvious dark browning can dry it out.

6. Cool the Cocoa Bases Completely
Leave each batch on its pan for 10 minutes, then carefully lift the cookies onto a wire rack. Allow about 20 minutes more, or until completely cool. Let the first tray cool while the second bakes, but wait for the last tray to cool before assembling the batch.
What you should see: the bases lift intact and no longer feel warm. Their structure is firmer than it was straight from the oven.

7. Add the Sour Cherry Centers
Fill only the completely cooled bases. Stir the thick preserves gently and make sure any large fruit pieces have been chopped small; keep the filling at its original thickness without heating or diluting it.
A generous cherry center is tempting, but the hollow only needs about half a teaspoon of preserves. Keep the fruit just within the rim, with a small, rounded mound. That little restraint leaves room for the tender cocoa cookie in every bite, while the fine white chocolate drizzle adds the finishing sweetness.

If you’re weighing the filling, allow about 3.5 g per cookie. Lift off any fruit that spills over the rim. Pressing it down can crack the cooled base.

What you should see: a small, stable cherry mound that stays within the rim, with no loose syrup running across the cocoa surface.
8. Drizzle with White Chocolate and Let Set
Put the 2 ounces (57 g) of chopped white chocolate in the small dry bowl. Microwave at 50% power in 15-second bursts, stirring after each one. Stop heating when only tiny pieces remain, then stir until smooth with the residual warmth.

If the chocolate feels hot, let it stand briefly until it flows in a fine ribbon. Transfer it to a piping cone or bag and drizzle thin lines over the filled cookies, leaving the cherry centers visible. Do not add water or milk to the chocolate.
Let the finish set for about 20 minutes in a cool room, or longer if it still smears. In a warm room, a brief 5–10-minute rest in the refrigerator can help it firm up.
What you should see: separate, fine white lines that hold their shape and no longer smear when the cookies are handled gently.

How to Tell When Chocolate Thumbprints Are Baked
Use three clues together: the 16–20-minute baking window, a set matte rim, and no visibly raw dough in the hollow. The cocoa color alone cannot tell you when the cookies are ready.
| Stage | Normal cue | What needs attention |
|---|---|---|
| Still in the oven | Rim looks set; the hollow no longer looks greasy and raw. | Visible raw paste needs another short baking interval before checking again. |
| Just baked | The cookie is fragile and a little yielding while hot. | Do not keep baking merely to make the hot center hard. |
| Completely cool | The base lifts whole and breaks into a tender, evenly baked crumb. | A hard, very dry center or scorched edge points to overbaking. |
A fine crack along the rim is usually a cosmetic difference if the floor is intact and the filling stays contained. A hole through the bottom is different: that cookie cannot hold the preserves neatly.

Small Details for Neat Cherry Centers and Fine White Drizzle
The finishing is easier if the cherry pieces nestle into the wells and the chocolate flows freely from the bag. A few small adjustments help with both.
- Chop before measuring. A large cherry piece can bridge the hollow and hide an empty space underneath; smaller pieces settle more evenly within the same measured amount.
- Drizzle in one motion. Start just beyond one edge of the cookie and carry the bag past the other. A steady sweep leaves a finer line than stopping to squeeze over the cherry.
- Let stirring finish the melt. Tiny remaining pieces can disappear in the warm chocolate without another microwave burst, reducing the chance of overheating a small quantity.
- Check that the drizzle has set. Touch the end of a line lightly. If it smears, give the chocolate more time before moving the cookies to their container. Pack them in a single layer.

Fixing Crumbly Dough, Split Wells, and Runny Cherry Filling
First decide whether the problem is in the dough, the hollow, or the finish. A cold, crumbly dough needs a different response from a warm, greasy one, and a baked cookie cannot be reshaped like raw dough.
| Problem | Likely cause | Prevention | What to do now |
|---|---|---|---|
| Dough will not hold together | Butter too cold, excess dry ingredients, or mixing stopped before damp clumps form. | Weigh flour and cocoa; use cool-soft butter and check a squeezed handful. | If cold, wait 5–10 minutes and press again. If still powdery, check the measurements and bring the mixture to damp clumps that hold when squeezed; do not add liquid. |
| Cookies spread too far | Warm greasy butter, too much aeration, insufficient chilling, or a warm pan. | Keep mixing moderate; chill until firm and use cool pans. | Leave the next tray in the refrigerator until the portions feel firm. If you’re reusing a baking sheet, let it cool completely before loading it. |
| Well splits or breaks through | Abrupt pressure, cold dough during shaping, or a floor too thin. | Shape before chilling and leave at least 6 mm beneath the well. | Reroll raw dough with a broken floor. Only a puffy, intact well can be gently reinforced immediately after baking; a baked-through floor cannot be repaired. |
| Preserves run over the rim | Loose syrup, large pieces, or too much filling. | Choose thick preserves, chop large pieces, and respect the rim. | Lift away excess. Do not dilute the filling or press down on a fragile base. |
| White chocolate turns grainy | Too much heat or moisture in the bowl or utensils. | Use dry equipment, reduced microwave power, and frequent stirring. | Do not add water or milk for this drizzle. Use fresh chocolate if it has seized or scorched. |
| Drizzle becomes a thick, overly sweet coating | Piping opening too large, or all the melted chocolate is forced onto the batch. | Use a small opening and leave the cherry centers visible. | Stop once fine lines cross each cookie and set surplus chocolate aside; avoid adding more to cover uneven lines. |
Beautiful Ways to Serve Black Forest Thumbprint Cookies
Set the cookies out in a single layer so the cherry centers show and the white drizzle stays intact. If they’re chilled, give the portion you plan to serve about 15–20 minutes for the buttery crumb to soften.
- On a dessert plate. Set a whole thumbprint beside a broken half on a small white plate. The broken edge shows the dark cocoa crumb beneath the bright fruit.
- A varied cookie platter. Place the thumbprints in their own short row rather than underneath larger cookies that could mark the drizzle.
- For an open house. Put out a small plate for the first guests and bring out a fresh one later, leaving the rest of the batch chilled.
For a cookie plate with a softer, chewy contrast, pair these with white chocolate chip cookies.


How to Store and Make These Cherry Thumbprints Ahead
Store the filled cookies differently from the plain bases or raw shaped dough. Keeping the fruit separate until closer to serving helps preserve the contrast between the cherry center and the tender cookie.
Filled Cookies: Refrigerate and Serve Soon
Keep filled cookies in an airtight container in a single layer in the refrigerator at 40°F / 4°C or colder, for up to 3 days. For the best texture, serve on the day of assembly. Follow a shorter limit on your preserves if one applies.
Take out the portion you plan to serve about 15–20 minutes ahead so the butter in the shortbread can soften. Leave the rest in the refrigerator.
Plain Bases: Store Before Filling
Once completely cool, plain unfilled bases can be kept airtight in a cool, dry place for up to 3 days, or frozen for up to 2 months at 0°F / −18°C or colder. Protect them from crushing in their container.
Thaw frozen bases at room temperature in the closed container, usually 45–60 minutes or until they no longer feel cold, then fill and drizzle. Keeping the container closed during thawing helps protect the surface from moisture in the room.

Shaped Dough: Chill or Freeze Ahead
Cover the shaped, unfilled dough and refrigerate it for up to 24 hours. For longer preparation ahead, freeze the portions in a single layer until firm, then pack them airtight for up to 2 months.
Thaw the shaped dough in the refrigerator overnight before baking, then use the same temperature and visual cues. For the neatest fruit center and drizzle, freeze dough or plain bases rather than the fully assembled cookies; no reheating is needed for serving.
Using Sweet Cherry Preserves Instead of Sour Cherry
Thick, full-sugar sweet cherry preserves can replace the sour cherry preserves in the same amount. The center will taste sweeter and less tart, so the cocoa will have a gentler fruit contrast.
Chop any large pieces before measuring. The same half-teaspoon portion will fit each well and keep the sweeter filling in balance with the white chocolate.
Black Forest Thumbprint Cookie Questions
The timing of the cherry filling is what sets these apart from many other thumbprints. Here’s when to spoon it in, along with answers about shaping and storing the cookies.
Why do my chocolate thumbprints crack?
Cold or dry dough can split when you press the center. Shape the wells gently while the dough is pliable, then pinch any fine cracks closed before chilling.
Why did my thumbprint cookies spread?
Greasy butter, soft dough, or a warm baking sheet can make the cookies spread. Chill the remaining shaped cookies until firm and bake them on a cool, parchment-lined sheet.
Should I add the cherry preserves before or after baking?
Add them after baking, once the cocoa bases are completely cool. The warm cookies are fragile and can crack under the spoon.
What cherry jam works best for these cookies?
Use thick, full-sugar sour cherry preserves with small fruit pieces and no loose syrup. Thick sweet cherry preserves work too, though the filling will taste sweeter.
How long do Black Forest thumbprint cookies last?
Once filled, the cookies keep for up to 3 days in an airtight container in the refrigerator. Serve them the day you fill them for the clearest contrast between the tender shortbread and the moist cherry center.
Can I freeze Black Forest thumbprint cookies?
The best stage to freeze is before the cherry filling and white drizzle are added. Freeze plain baked bases or shaped raw dough for up to 2 months; thaw the bases in their closed container, or thaw raw dough overnight in the refrigerator before baking.
Your Next Bake After Black Forest Thumbprint Cookies
If you came for the jam center, there are two more ways to pair it with shortbread. For a holiday tray or a larger dessert to slice, start with whichever part you want more of: buttery crumb, tart fruit, or chocolate.
Explore More Chocolate and Jam Cookies
Choose a buttery dough to let the jam stand out, or follow the cocoa into a cookie with a different finish.
- Thumbprint Cookies pair raspberry jam with vanilla shortbread when you want a lighter base.
- Linzer Cookies sandwich the jam between two cutouts so you get a little fruit with both layers.
- Chocolate Crinkle Cookies open up in the oven, leaving dark cracks in a coat of powdered sugar.
- Hot Chocolate Cookies are the ones to choose for a soft, gooey chocolate bite.
Build a Cookie Plate with Contrasting Textures
On a mixed plate, give the cherry thumbprints a neighbor with a different bite. A delicate pressed cookie or a chewy oat cookie makes the difference easy to taste.
- Spritz Cookies add delicate pressed shapes that tuck neatly between the round thumbprints.
- Italian Christmas Cookies bring a soft, gently cakey bite and a little vanilla glaze.
- White Chocolate Cranberry Cookies echo the tart fruit and white chocolate in a cookie you can pick up without touching a jam center.
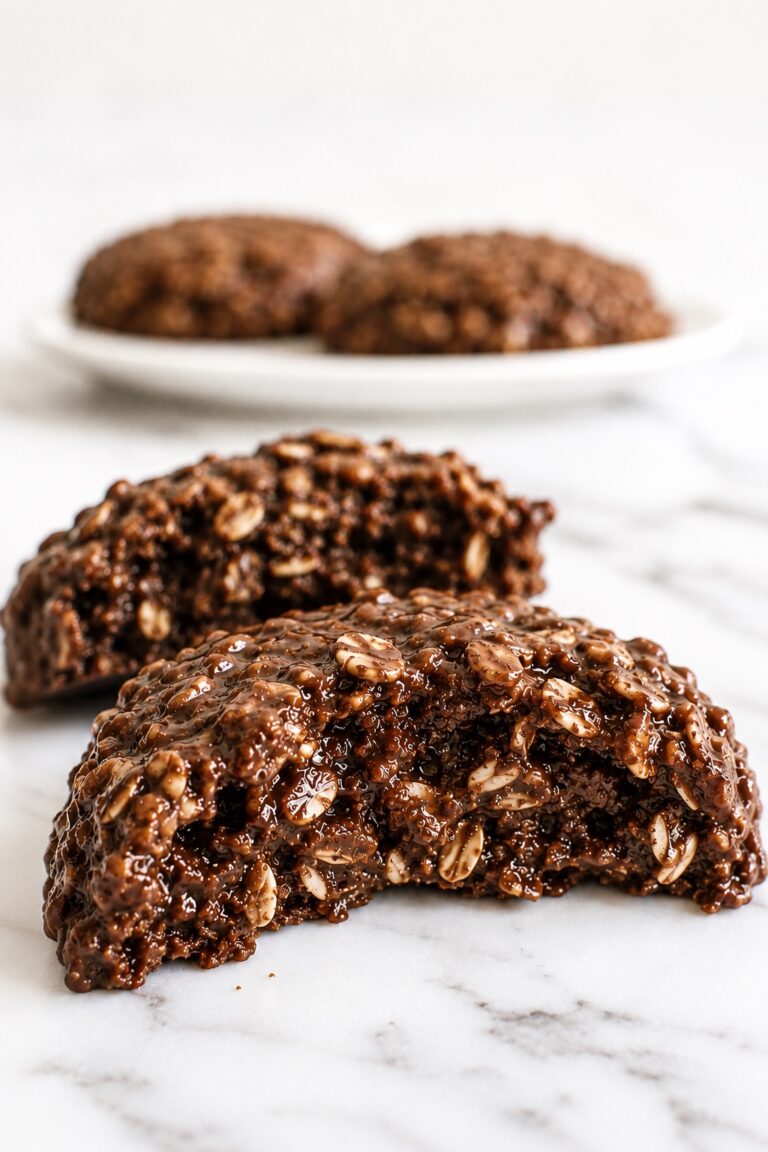
- Oats Cocoa Cookies keep the chocolate flavor and bring the chew of oats to the plate.
Bake a Larger Cherry or Chocolate Dessert
For a dessert to cut at the table, choose cherries in pastry or over cheesecake. If it’s the cocoa you love, the two chocolate cakes give you very different slices.
- Cherry Pie puts the fruit first, with a thick filling tucked into pastry.
- Cherry Cheesecake pairs the fruit with a cool, creamy slice.
- Flourless Chocolate Cake has a delicate crust over a dense center for guests who like their chocolate rich.
- German Chocolate Cake brings coconut and pecans between tender chocolate layers for a celebration cake.
Why These Cherry Thumbprints Belong in Your Recipe Box
This is a good recipe to pull out when a holiday tray already has plenty of sugar cookies and could use a little tart fruit. A batch is easy to divide between today’s plate and another occasion.
- A tart spot on a sweet tray. Sour cherry preserves give each cookie a bright bite alongside frosted or glazed favorites.
- A small batch to finish at a time. Keep some plain bases aside and dress just the cookies you plan to serve that day.
- A reason to open that cherry jar. A quarter cup of thick preserves fills two dozen cookies, handy when there’s a little fruit left in the jar.
- A holiday bake for a quiet afternoon. Tuck plain bases in the freezer and you have the start of a dessert even on a day when the oven is full.
- A finish that shows the fruit. A few pale stripes give the cookies a dressed-up look while leaving plenty of ruby cherry in view.
A Quiet Finish for Chocolate and Cherry
A spoonful of sour cherry is just enough to brighten a whole cocoa thumbprint. The butter comes through at the edge, then the fruit and the sweeter white chocolate meet in the middle.
For a holiday afternoon, the nicest part is being able to finish a few at a time. With the bases already baked, there’s room to linger over the last little stripe of chocolate before the plate goes out.
Break one across the center and a few cocoa crumbs will fall onto the plate. The cherry stays nestled in the hollow, with a thin stripe of white chocolate on either side of the break.

Black Forest Thumbprint Cookies
Tender cocoa shortbread cookies hold thick sour cherry preserves beneath fine ribbons of white chocolate. Bake the bases first, cool them completely, then fill and drizzle for a bright cherry center and a delicate, buttery bite.
Ingredients
- 1½ cups (180 g) all-purpose flour, spooned and leveled if using cups; weigh before sifting
- ⅓ cup (28 g) unsweetened Dutch-process cocoa, weighed before sifting; not black cocoa
- ¼ teaspoon (1.5 g) fine table salt
- ¾ cup / 12 tablespoons (170 g) unsalted stick butter, soft but cool, about 65–68°F / 18–20°C
- ½ cup (100 g) granulated sugar
- 1 teaspoon (5 ml) vanilla extract
- ¼ cup (85 g) thick, full-sugar sour cherry preserves, without loose syrup; chop large fruit pieces to about 3–5 mm before measuring
- 2 ounces (57 g) real white chocolate baking bar, finely chopped
Instructions
- Sift the dry ingredients. Sift the measured flour, Dutch-process cocoa, and fine salt into a bowl, breaking up any cocoa lumps. The mixture should be loose and evenly colored.
- Bring the cocoa dough together. Beat the cool-soft butter and sugar on medium-low for one to two minutes, until smooth and creamy but not very fluffy. Mix in the vanilla. Add the dry ingredients on low just until damp clumps form and a squeezed handful holds together. Stop mixing and press the dough together with a spatula and your hand. If cold butter leaves it crumbly, wait five to ten minutes and press again; if greasy and too soft, chill for five to ten minutes. Do not add milk or water.
- Shape the cookies and wells. Line two light-colored metal 13 × 18-inch / 33 × 46 cm baking sheets with parchment. Divide all the dough into 24 equal portions, approximately 20 g each. Roll smooth and gently flatten into thick cookies about 1½ inches / 38 mm across. Gradually press the rounded back of a ½-teaspoon measure into each center, widening the well to about 1 inch / 25 mm across and ⅓ inch / 8 mm deep. Leave at least ¼ inch / 6 mm of dough underneath. Support the rim and press small cracks closed. Reroll any portion with a broken floor. Arrange 12 cookies per pan in three rows of four, about 3 inches / 7.5 cm between centers.
- Chill the shaped dough. Refrigerate the shaped cookies for 30 minutes, until firm, extending the chill if they are still very soft. Meanwhile, preheat a conventional oven to 325°F / 165°C with a rack in the middle. Keep the second pan refrigerated while the first bakes.
- Bake one tray at a time. Bake each tray for 16–20 minutes, checking from 16 minutes. The rims should be set and matte, with no visibly raw, greasy dough in the wells. If needed, continue in 1–2-minute intervals. Hot cookies will still be delicate and slightly yielding; do not wait for hard centers or obvious dark browning. If an intact well puffs up, gently reinforce it with the rounded spoon immediately after baking, keeping the floor intact. Never use a finger on a hot cookie. Bake the second tray in the same way.
- Cool the bases completely. Leave each batch on its pan for 10 minutes, then carefully move it to a wire rack for about 20 minutes more, until completely cool. Let the first tray cool while the second bakes. Wait until the last tray is completely cool before filling; the cookies should lift intact and no longer feel warm.
- Add the sour cherry centers. Stir the thick preserves gently without heating or diluting them. Large fruit pieces should already be chopped to about 3–5 mm. Spoon about ½ teaspoon (3.5 g) into each completely cooled well, making a small, stable mound within the rim. Keep excess preserves aside. Remove any overflow rather than pressing down or deepening a cold cookie.
- Drizzle with white chocolate and let set. Put the 2 ounces (57 g) of chopped white chocolate in a small, completely dry microwave-safe bowl. Microwave at 50% power in 15-second bursts, stirring after each, until only tiny pieces remain. Stir smooth using the residual warmth. If hot, let it stand briefly until it flows in a fine ribbon. Use a piping cone or bag to drizzle thin lines over the filled cookies, leaving the cherry centers visible; keep excess chocolate aside. Do not add milk or water. Let set for about 20 minutes in a cool room, or longer until the lines no longer smear. In a warm room, refrigerate briefly for 5–10 minutes to help the finish firm up.
Notes
- Butter and timing: Start with soft but cool, matte butter, about 65–68°F / 18–20°C. Allow extra time to soften refrigerated butter before the 40 minutes of active preparation. The 40-minute bake time covers two trays baked one after the other. Additional time includes 30 minutes chilling, 30 minutes cooling the last tray, and 20 minutes setting the drizzle; actual time varies with firmness and room temperature.
- Preserves and chocolate: Use thick, full-sugar sour cherry preserves without loose syrup. Thick sweet cherry preserves may replace them in the same amount. Fresh cherries, pie filling, reduced-sugar preserves, and runny sauces are not direct swaps. Choose real white chocolate with cocoa butter, rather than chips or coating, for the fine drizzle.
- Filled cookies: Refrigerate airtight in a single layer at 40°F / 4°C or colder for up to 3 days, or follow a shorter limit on the preserves. For the best texture, serve on the day of assembly. Temper only the portions you plan to serve for 15–20 minutes; keep the rest chilled.
- Plain bases: Once completely cool, keep airtight in a cool, dry place for up to 3 days, or freeze for up to 2 months at 0°F / −18°C or colder. Thaw at room temperature in the closed container, usually 45–60 minutes or until no longer cold, before filling and drizzling.
- Shaped dough: Cover and refrigerate for up to 24 hours, or freeze in a single layer until firm and pack airtight for up to 2 months. Thaw frozen dough in the refrigerator overnight, then bake at the stated temperature using the same doneness cues. Freeze dough or plain bases for the neatest finish; no reheating is needed for serving.
- Batch size: The directions are for 24 cookies, with 12 per pan. If preparing more, keep the same portion size, spacing, pan size, oven temperature, and one-tray-at-a-time method. Additional trays take additional oven time; do not multiply the baking time for a single tray.
- Allergens: Contains wheat and milk. White chocolate may also contain soy; check ingredient labels.
Equipment
- Measuring and sifting: a digital scale, measuring cups and spoons, a sieve, and a bowl for the dry ingredients.
- Mixing: a stand mixer fitted with a paddle or a hand mixer, a mixing bowl, and a flexible spatula for gathering the dough.
- Shaping and baking: a rounded ½-teaspoon measuring spoon, two light-colored metal 13 × 18-inch / 33 × 46 cm baking sheets, baking parchment, a conventional oven with a middle rack, and refrigerator space for the trays.
- Cooling and preparing the fruit: a wire cooling rack, a spatula for lifting the cookies, and a knife and board for chopping large pieces in the preserves.
- Melting and drizzling: a small, completely dry microwave-safe bowl, a microwave with a 50% power setting, a spoon or small spatula, and a piping cone or bag.
Nutrition Information:
Yield: 24 Serving Size: 1 cookieAmount Per Serving: Calories: 120Total Fat: 6.7gSaturated Fat: 4.2gCholesterol: 16mgSodium: 29mgCarbohydrates: 14.4gFiber: 0.6gSugar: 7.3gProtein: 1.2g
Nutrition information is provided as an estimate only and may vary based on specific ingredients, brands, and portion sizes used. This information should not be considered medical or nutritional advice.