Peanut Butter Pie
🎁 FREE E-BOOK: 12 Sweet Favorites — reader-loved desserts in one beautiful recipe book.
This Peanut Butter Pie balances a crisp chocolate-cookie crust with a tall, silky peanut butter filling that sets cleanly in the refrigerator. The filling is made from scratch with real whipped cream, so it feels light and mousse-like rather than dense like frosting. A restrained border of whipped cream, roasted peanuts, and dark chocolate keeps the finished pie elegant while leaving peanut butter unmistakably in charge.

The crust is the only component that goes into the oven. The filling needs at least 8 hours to chill, which makes this an especially useful make-ahead dessert for holidays, celebrations, and any dinner when the dessert needs to be finished before guests arrive.
Quick Recipe Overview
This overview gives you the essential structure and timing before you begin.
| Flavor | Roasted peanut first, with light cocoa, vanilla, and dark-chocolate contrast |
|---|---|
| Texture | Crisp crumb crust, silky aerated filling, soft whipped topping |
| Difficulty | Approachable intermediate |
| Pan | 9-inch deep-dish pie plate, approximately 6-cup capacity |
| Yield | 10 generous or 12 moderate slices |
| Active time | 35 minutes |
| Total time | 9 hours 30 minutes, including cooling and chilling |
| Best make-ahead window | Assemble 8–24 hours before serving |
Why This Recipe Works
Each component is designed to protect the pie’s peanut-forward flavor, clean slices, and creamy texture without relying on gelatin, frozen whipped topping, or a freezer set.
- The baked chocolate-cookie crust stays compact. A short bake sets the fine crumbs and butter into a shell that lifts with the filling instead of crumbling into loose sand.
- Peanut butter remains the dominant flavor. The filling uses more peanut butter than cream cheese by weight, while cream cheese supplies enough body and dairy contrast for a stable slice.
- Real whipped cream creates controlled aeration. Whipping the cream separately and folding it into a completely smooth base produces a mousse-like cut face without the sweetness or density of a frosting-style filling.
- The refrigerator does the structural work. An 8-hour chill allows the dairy and peanut fats to firm while the folded cream holds the filling’s lighter structure. Freezing is not required.
- The finish is deliberately restrained. Whipped cream, a small amount of salted-roasted peanuts, and fine dark-chocolate shavings add contrast without covering the peanut butter or turning the pie into a chocolate-heavy dessert.
Before You Begin
The two details that most affect this pie are temperature and capacity. Give the crust time to cool completely, bring the dense filling ingredients only to the specified cool room-temperature range, and use a deep-dish plate that can hold the full filling without forcing it above the crust.
- Use a 9-inch deep-dish pie plate that holds approximately 6 cups and is about 1 3/4–2 inches deep. If you are unsure, measure its capacity with water before you start.
- Soften the block cream cheese to 65–70°F (18–21°C). It should yield to pressure but should not look glossy or partially melted.
- Keep the no-stir peanut butter near 68–72°F (20–22°C) so it blends smoothly without warming the filling base.
- Keep both portions of heavy cream refrigerator-cold until you whip them.
- Plan for at least 45 minutes of crust cooling and 8 hours of chilling. Overnight is ideal.
- Clear a level refrigerator shelf before filling the crust; moving an unset pie unnecessarily can disturb the smooth surface.
Production Timeline
This pie fits naturally into a two-day schedule, with all structural work completed before the day you serve it.
| When | What to do |
|---|---|
| Up to 1 day ahead | Bake and cool the crust. Cover it only after it is completely cool. |
| 8–24 hours before serving | Make the filling, assemble the pie, cover it without touching the surface, and refrigerate. |
| Up to 8 hours before serving | Pipe the whipped-cream finish, add the garnish, cover, and refrigerate. |
| At serving time | Slice the pie directly from the refrigerator, then let individual slices stand for 5–10 minutes. |
Ingredients
The ingredients are divided into the baked crust, the peanut butter mousse, and a light finish. Use the full quantities in each group so the filling, pan capacity, and garnish remain balanced.
For the Chocolate-Cookie Crust
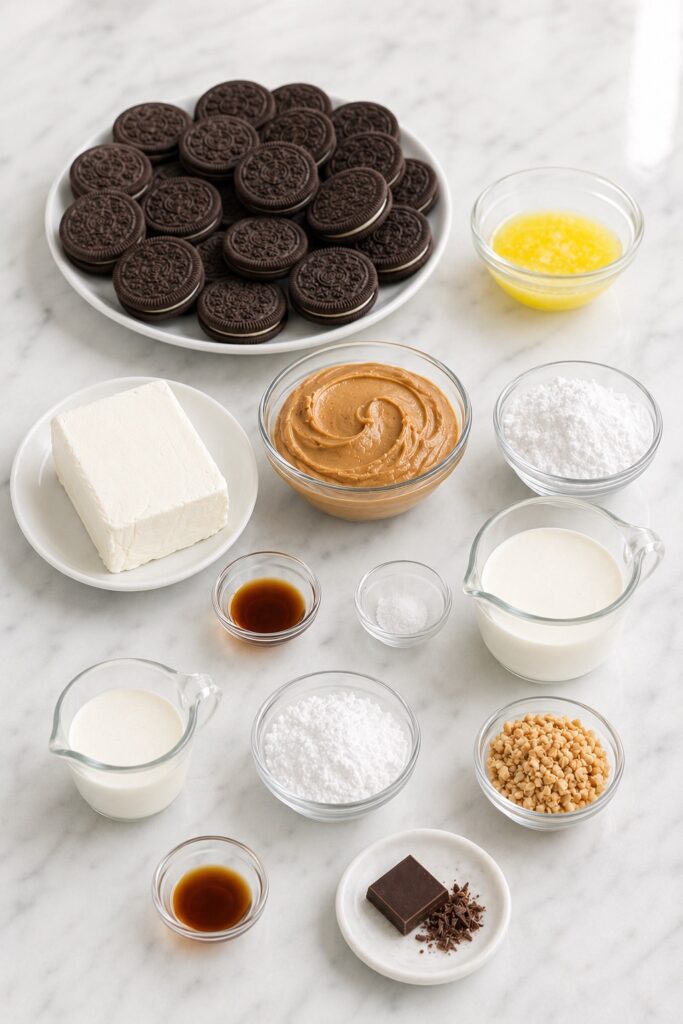
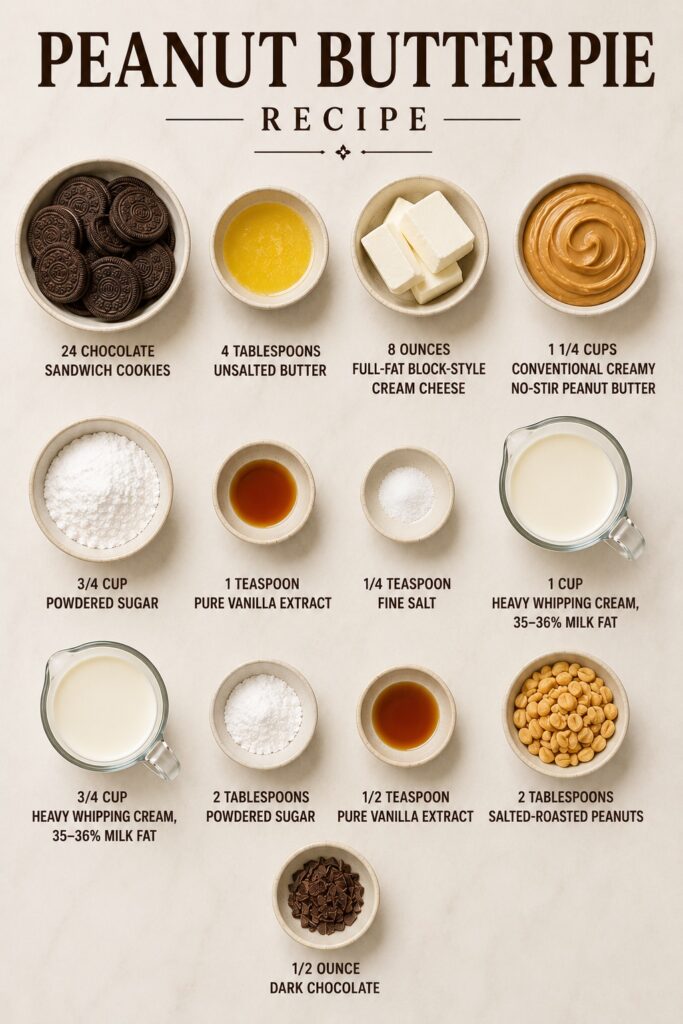
- 270 g regular chocolate sandwich cookies, approximately 24 cookies, cream filling included
- 4 tablespoons (57 g) unsalted butter, melted and cooled for about 5 minutes
For the Peanut Butter Mousse
- 8 ounces (226 g) full-fat block-style cream cheese, softened to 65–70°F (18–21°C)
- 1 1/4 cups (320 g) conventional creamy no-stir peanut butter, 68–72°F (20–22°C)
- 3/4 cup (90 g) powdered sugar, sifted only if visibly lumpy
- 1 teaspoon (5 ml) pure vanilla extract
- 1/4 teaspoon (approximately 1.5 g) fine salt
- 1 cup (240 ml) heavy whipping cream, 35–36% milk fat, refrigerator-cold
For the Whipped Finish
- 3/4 cup (180 ml) heavy whipping cream, 35–36% milk fat, refrigerator-cold
- 2 tablespoons (15 g) powdered sugar
- 1/2 teaspoon (2.5 ml) pure vanilla extract
- 2 tablespoons (18 g) salted-roasted peanuts, finely chopped
- 1/2 ounce (14 g) dark chocolate, 60–70% cacao, finely shaved
Allergen note: This recipe contains peanuts and milk. Regular chocolate sandwich cookies commonly contain wheat and soy, but ingredients and cross-contact statements vary by brand, so check every package used.
Ingredient Intelligence
Ingredient style matters here because the filling sets through its dairy and peanut-fat structure rather than gelatin or freezing.
Choose Conventional Creamy No-Stir Peanut Butter
Use a smooth, homogenized peanut butter that does not separate into a visible oil layer. Its consistent fat and solids balance gives the filling a uniform emulsion and predictable refrigerated firmness. Separating natural peanut butter can make the mousse oily, grainy, or too soft; crunchy peanut butter interrupts the smooth structure and is not supported in the base recipe.
Use Full-Fat Block Cream Cheese
Block cream cheese contributes body, protein, and a light tang without making the pie taste like cheesecake. Tub-style, whipped, reduced-fat, and fat-free products contain different amounts of moisture, fat, or stabilizers and are not equivalent in this formula.
Keep the Heavy Cream Cold
Heavy whipping cream with 35–36% milk fat builds the foam that lightens the dense peanut butter base. It must be cold enough to reach smooth medium-stiff peaks before the fat begins to clump. Milk, half-and-half, and light cream cannot replace it.
Include the Cookie Cream Filling
Process the chocolate sandwich cookies whole. The cream filling contributes sweetness and fat to the crust’s binding system, so scraping it out would change the validated butter-to-cookie balance.
Equipment
A few pieces of equipment directly affect crust uniformity, filling aeration, and the finished slice.
- 9-inch deep-dish pie plate, approximately 6-cup capacity and 1 3/4–2 inches deep
- Rimmed sheet pan
- Food processor
- Electric hand mixer or stand mixer
- Two mixing bowls, including one clean cold bowl for whipping cream
- Flexible spatula
- Flat-bottomed measuring cup
- Wire cooling rack
- Small offset spatula
- Piping bag fitted with a large open-star tip
- Thin sharp knife and thin pie server
How to Make Peanut Butter Pie
Build the pie in this order so the crust is completely cool before the temperature-sensitive mousse reaches it.
1. Make and Shape the Chocolate-Cookie Crust
Set a rack in the center of the oven and heat it to 350°F (177°C). Place the ungreased deep-dish pie plate on a rimmed sheet pan. Process all 270 g of whole chocolate sandwich cookies until the crumbs are fine and even, with no visible white filling pockets or cookie pieces. Add the 57 g melted butter and pulse just until the mixture is evenly dark and clumps when squeezed.
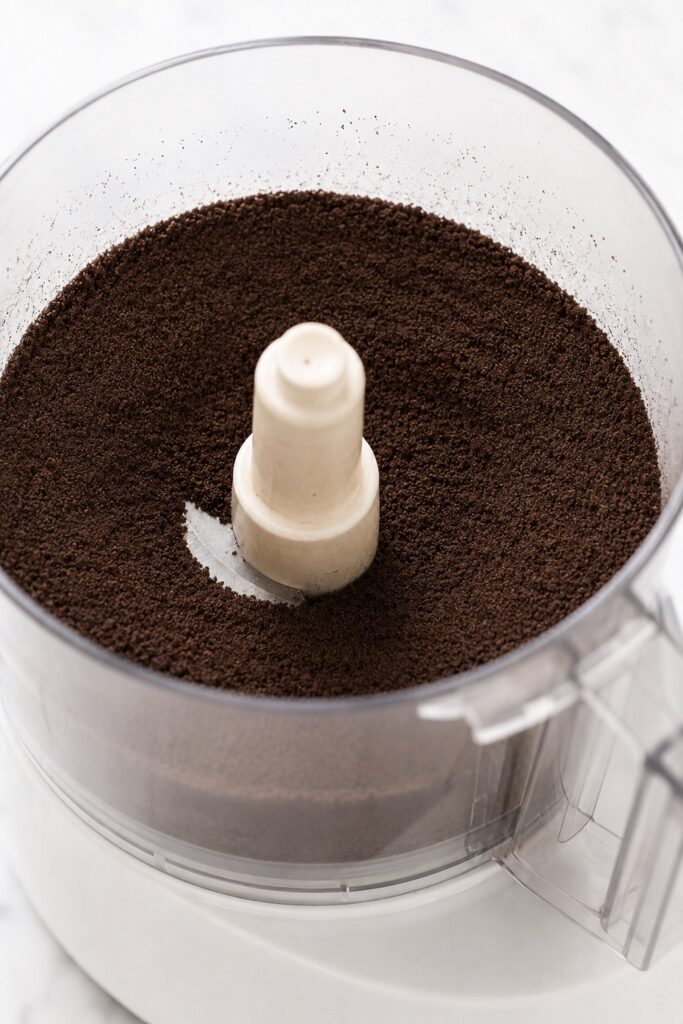
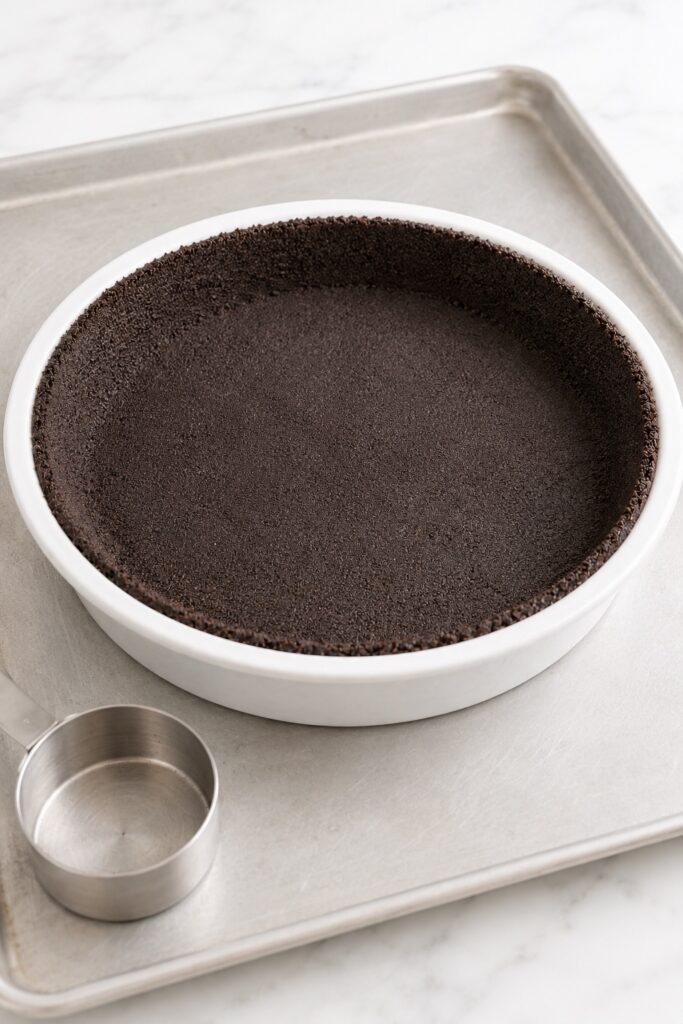
Transfer all the crumbs to the plate. Build the sides first, then spread the remainder over the bottom. Press with medium, even pressure using a flat-bottomed measuring cup. Keep the upper edge even and free of loose crumbs.
What you should see: a continuous dark crust with an even matte surface, clean coverage to the rim, and no greasy pools or glossy overcompressed patches.
Tip: Building the sides before the bottom prevents the corner from becoming disproportionately thick and hard to cut.
2. Bake and Cool the Crust Completely
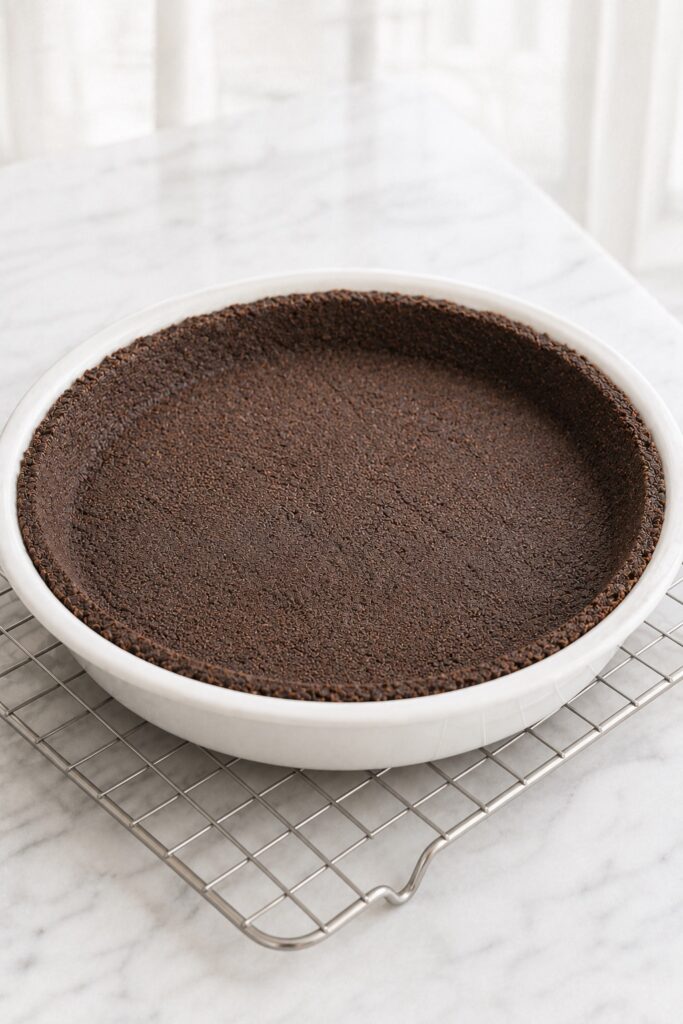
Bake the crust for 9–11 minutes. Cool it in the pie plate on a wire rack for at least 45 minutes. Do not add the filling until the plate is completely at room temperature, including the center of the underside.
What you should see: the crust looks set rather than wet, smells distinctly chocolatey, and has an upper edge that feels fixed when lightly touched. Its dark color will not show conventional browning.
3. Make the Smooth Peanut Butter Base
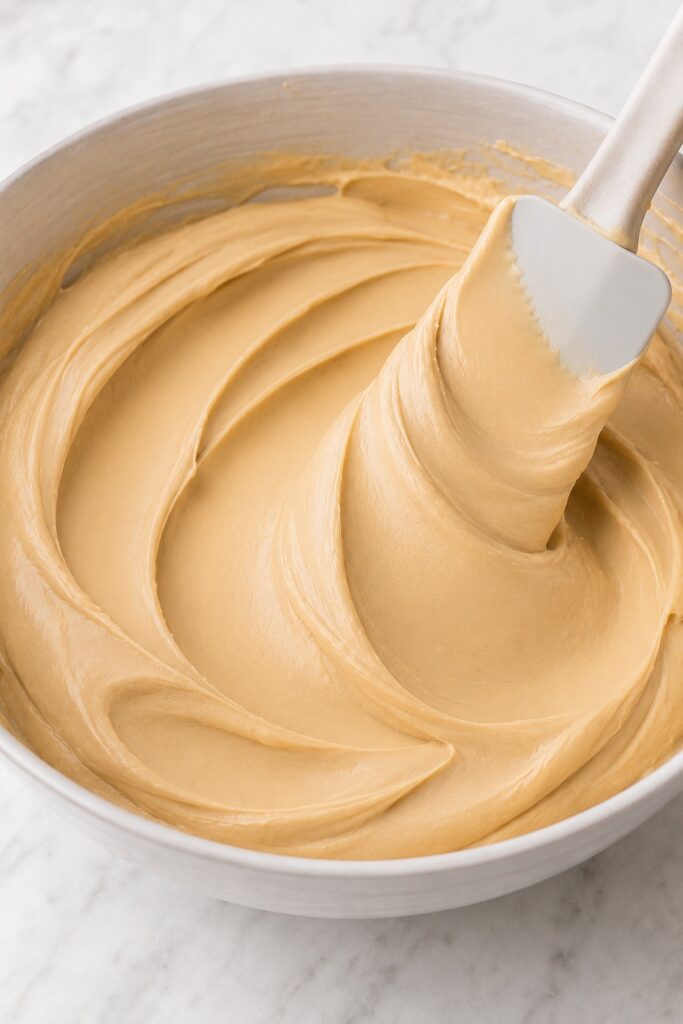
Beat the softened block cream cheese on medium speed for 60–90 seconds, scraping the bowl once, until completely smooth. Add the no-stir peanut butter, 90 g powdered sugar, 1 teaspoon vanilla, and 1/4 teaspoon fine salt. Mix on low until the sugar is incorporated, then beat on medium for 45–60 seconds. Scrape the bowl and beater thoroughly.
What you should see: a uniform, satin-smooth, pale-tan base with no white cream-cheese flecks, dry sugar, oily streaks, or graininess. It should be dense and spreadable, not fluffy like frosting.
4. Whip and Fold the Filling
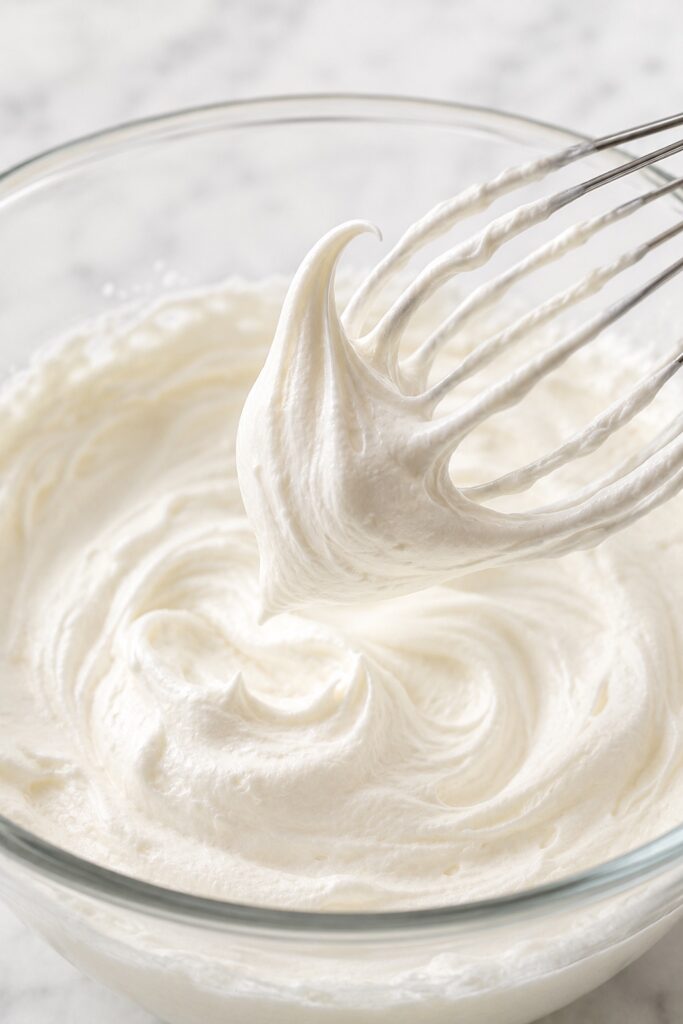
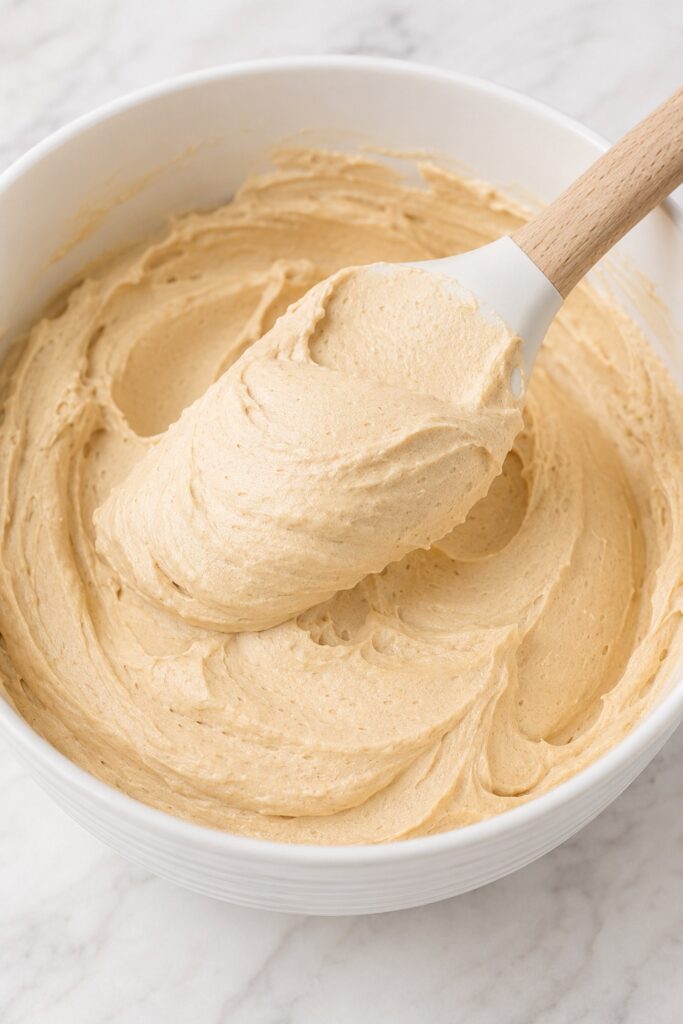
In a clean cold bowl, whip 1 cup cold heavy cream on medium-high speed to medium-stiff peaks. Fold about one-third of the whipped cream into the peanut butter base more firmly to loosen it. Add the remaining cream in two additions, folding with broad strokes from the bottom until no white streaks remain. Stop as soon as the filling is uniform; do not return it to the electric mixer.
What you should see: a lighter pale-tan mousse that holds a soft mound from the spatula. Small natural air pockets are correct; liquid weeping, greasy shine, white streaks, or grainy clumps are not.
Tip: The first third of cream can be folded more decisively. Once the base is loosened, use slower, broader strokes so the remaining foam keeps its volume.
5. Fill and Chill Until Fully Set
Transfer all the filling to the fully cooled crust in several mounds so large voids are not trapped underneath. Smooth it into an even surface with a very slight crown in the center. Cover the plate without touching the mousse and refrigerate at 40°F (4°C) or below for at least 8 hours; overnight is preferred.
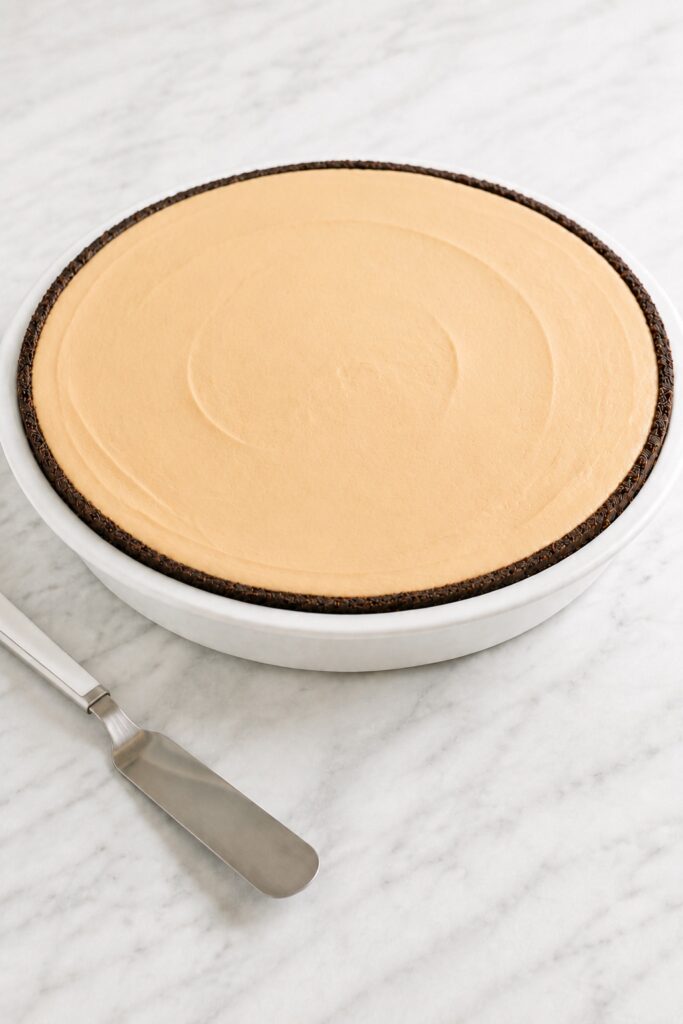
What you should see: after chilling, the filling remains stationary when the plate is moved. A clean fingertip touched near the center leaves only a shallow impression instead of sinking into soft mousse.
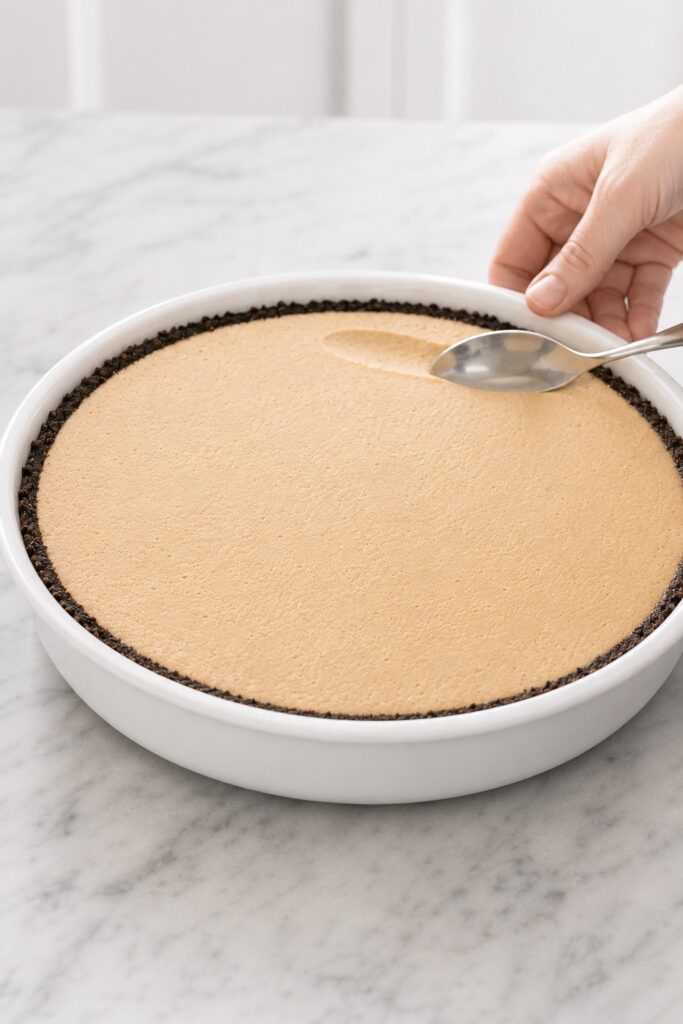
6. Finish, Slice, and Serve
Shortly before serving, whip the remaining 3/4 cup heavy cream with 15 g powdered sugar and 1/2 teaspoon vanilla to medium-stiff peaks. Pipe 10–12 controlled swirls around the perimeter, leaving most of the peanut butter surface visible. Add the chopped salted-roasted peanuts and fine dark-chocolate shavings sparingly over the whipped ring.
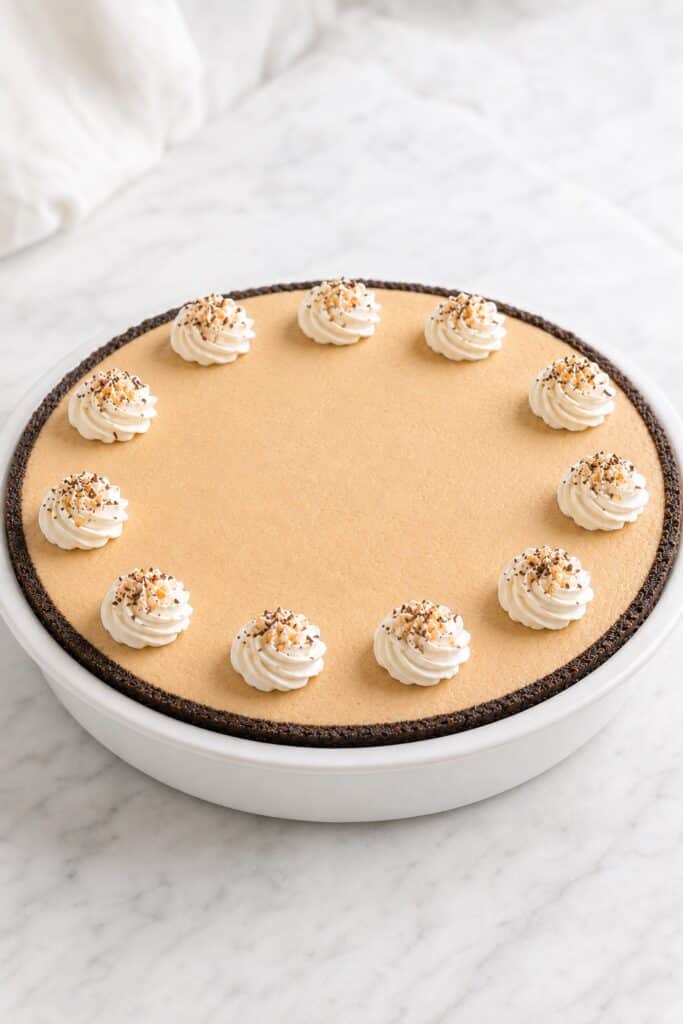
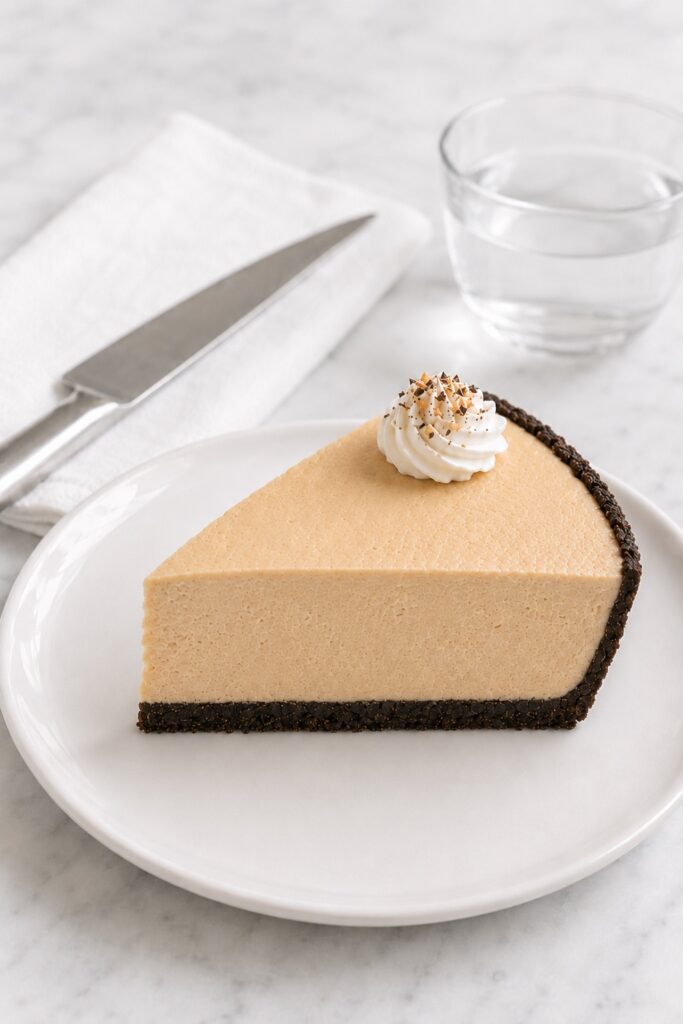
Slice the pie directly from the refrigerator with a thin sharp knife warmed under hot water and wiped completely dry. Clean, rewarm, and dry the knife between cuts. Lift each slice with a thin pie server, then let the plated slice stand for 5–10 minutes before eating.
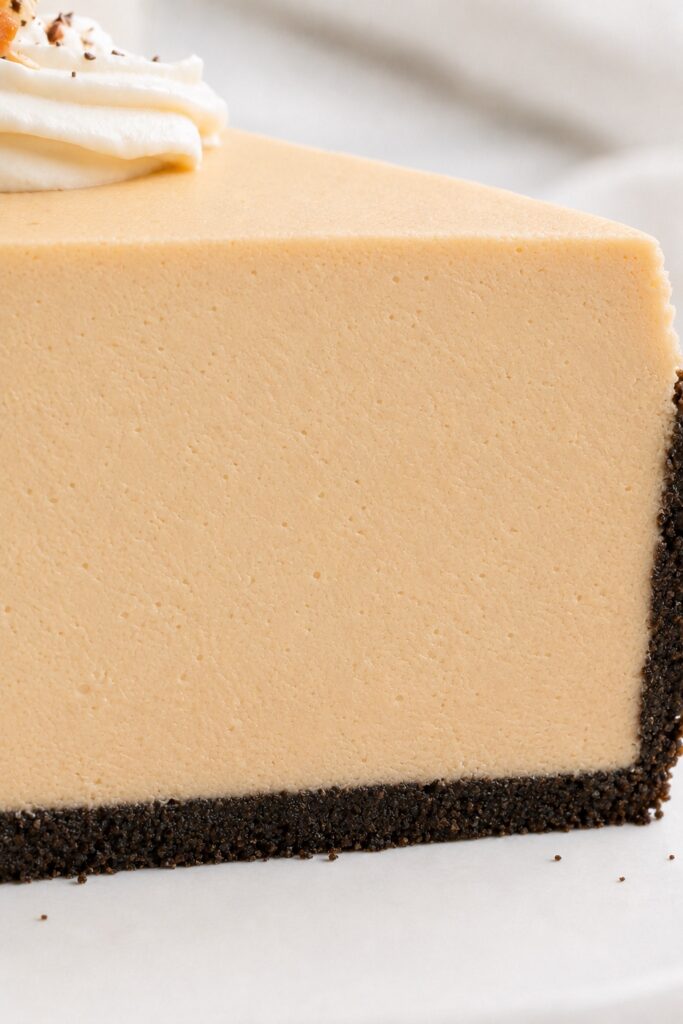
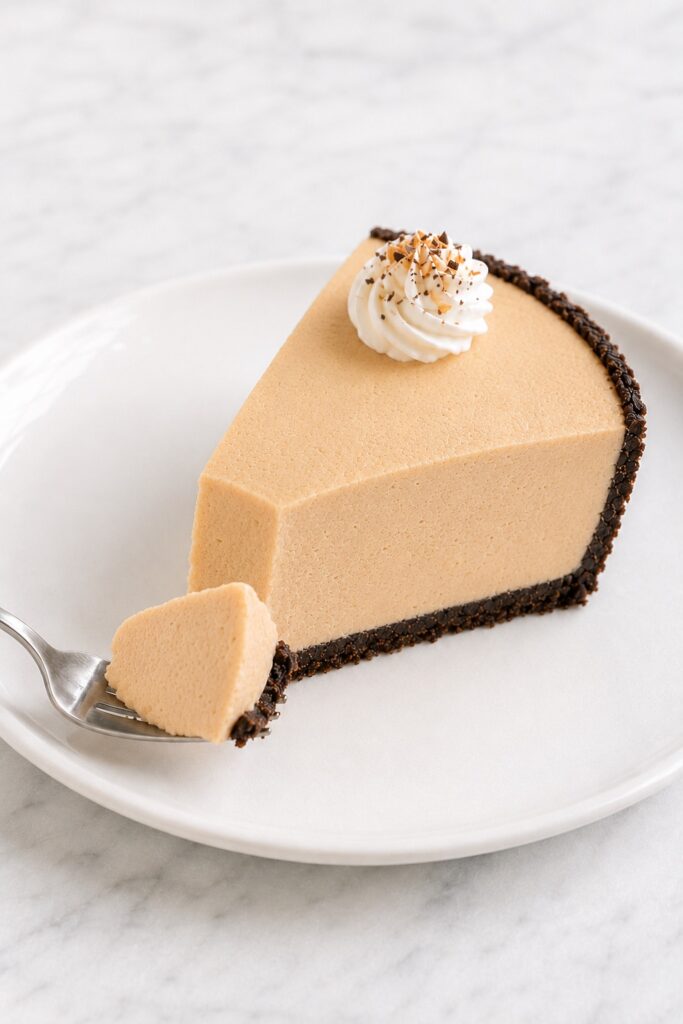
What you should see: each slice stands upright with a compact dark crust, one continuous pale-tan mousse layer, a creamy cut face with tiny natural air pockets, and a restrained ivory topping.
Doneness Guide
This pie has two separate completion points: the baked crust must be set before cooling, and the assembled filling must be fully chilled before slicing.
| Stage | Primary signal | Underdone | Overdone or too warm |
|---|---|---|---|
| Chocolate-cookie crust | After 9–11 minutes, the surface looks matte and set, the edge feels fixed, and the crust smells chocolatey. | The surface still looks wet or loose crumbs shift at the upper edge. | The crust smells scorched or feels excessively hard after cooling. |
| Peanut butter filling | After at least 8 hours at 40°F (4°C) or below, the filling stays stationary when the plate moves and accepts only a shallow fingertip impression. | The center ripples, slumps, or accepts a deep impression. | A frozen pie looks unnaturally rigid and will not have the intended creamy refrigerator-set texture. |
The crust continues to firm as it cools. The filling has no useful room-temperature carryover; it softens as it warms, so an unset pie should remain refrigerated rather than being left on the counter.
Texture Guide
These physical states help distinguish a properly aerated filling from one that is too dense, too soft, or beginning to separate.
| Stage | Correct texture |
|---|---|
| Pressed crumbs | Evenly damp and compact enough to hold an impression, but still matte rather than greasy or polished. |
| Dense peanut butter base | Satin-smooth, spreadable, and uniform, with no cream-cheese flecks or oil sheen. |
| Whipped filling cream | Smooth medium-stiff peaks that stand with only a slight bend at the tip; no grainy flecks. |
| Folded mousse | Light enough to hold small air pockets and a soft spatula mound, yet substantial enough not to flow. |
| Fully chilled slice | Upright and cleanly defined, with a creamy cut face rather than a rubbery, frozen, or frosting-dense interior. |
| Ready to eat | After 5–10 minutes on the plate, the filling softens slightly while retaining its shape and the crust keeps a clear crisp contrast. |
Expert Tips
These small decisions protect the pie’s aeration and improve the final eating texture without changing the formula.
- Measure the plate before you make the filling. Two pans labeled 9 inches can differ significantly in depth. A 6-cup water test prevents an undersized plate from forcing filling above the crust or leaving an unexplained surplus.
- Let the final folds finish the mixing. Stop when one or two faint cream traces remain, then scrape the bowl and complete two broad folds. This avoids the extra strokes that can flatten the mousse while still producing an even cut face.
- Use different temperatures for cutting and eating. Cut the pie refrigerator-cold for sharp boundaries, then temper only the plated slices for 5–10 minutes. The filling tastes creamier and more peanut-forward without sacrificing the structure of the remaining pie.
- Keep garnish around the perimeter. Concentrating the peanuts and chocolate on the whipped ring gives intermittent crunch and bitterness while most forkfuls remain focused on the smooth peanut butter filling.
Common Mistakes
When this pie misses its target, the visible symptom usually points to a specific ingredient, temperature, or mixing problem.
| Symptom | Likely cause | Prevention | Recovery |
|---|---|---|---|
| White cream-cheese lumps | Cream cheese was too cold or peanut butter was added before it was smooth. | Bring block cream cheese to 65–70°F and beat it alone first. | Before folding, continue mixing or press the base through a fine sieve. There is no complete recovery after folding without losing aeration. |
| Oily or grainy filling | Separating natural peanut butter, an overheated base, or prolonged beating. | Use conventional no-stir peanut butter and respect the temperature and mixing limits. | If the base is only warm, chill it for 10–15 minutes before folding. Remake a visibly broken mixture. |
| Dense, frosting-like texture | Too much sugar, insufficiently whipped cream, or beating after the cream was added. | Use 90 g powdered sugar and fold the separately whipped cream by hand. | There is no reliable structural recovery after assembly. |
| Soft or slumped slice | Underwhipped cream, deflated folding, a short chill, or a refrigerator above 40°F. | Reach medium-stiff peaks and chill for the full 8 hours at 40°F or below. | Continue refrigerating if the formula was followed. Do not use freezing to disguise a failed emulsion. |
| Grainy white flecks | The cream was overwhipped before folding. | Stop at smooth medium-stiff peaks. | Before combining, fold 1–2 teaspoons cold unwhipped cream into cream that is only slightly overwhipped. Remake buttered or separated cream. |
| Crust crumbles | Coarse crumbs, too little pressure, missing cookie weight, or too short a bake. | Use all 270 g of cookies, process finely, press evenly, and bake 9–11 minutes. | Serve carefully from the plate; there is no structural repair after filling. |
| Crust is very hard | Too much butter or aggressive packing. | Use 57 g butter and medium pressure rather than polishing the crumbs flat. | Let individual slices stand for 5–10 minutes; do not warm the whole pie. |
Serving Peanut Butter Pie
Serve the pie cold enough to hold a precise slice, but give each plated portion a few minutes to reveal its creamiest texture and fullest roasted-peanut flavor.
Cut Clean Slices
Use a thin sharp knife rather than a serrated blade. Warm it under hot water, dry it completely, make one decisive cut, then clean and repeat. A dry blade matters because water streaks can mark the mousse and soften crumbs along the cut.
Choose the Right Portion
The deep-dish pie yields 10 generous slices or 12 moderate slices. Because peanut butter, cream cheese, and chocolate-cookie crust are naturally rich, a 12-slice cut is usually the better choice after a full meal.
Keep Pairings Simple
Serve it as written or with unsweetened coffee, cold milk, or a small spoonful of softly whipped cream. Avoid a heavy ganache layer or a generous chocolate-syrup pour; both can bury the roasted-peanut profile and make the finished dessert feel unnecessarily sweet.
Storage and Make Ahead
This is a refrigerated dairy dessert. Keep quality timing separate from the maximum food-safety window, and return the remaining pie to the refrigerator promptly after slicing.
Refrigerate the Assembled Pie
Cover and refrigerate at 40°F (4°C) or below. The crust is crispest during the first 48 hours; for the best overall texture, serve within 3 days. The conservative maximum refrigerated storage time is 4 days.
Do not leave the pie at room temperature for more than 2 cumulative hours, or more than 1 hour when the temperature is above 90°F (32°C). Quality softens before that limit, so refrigerate it again as soon as serving is finished.
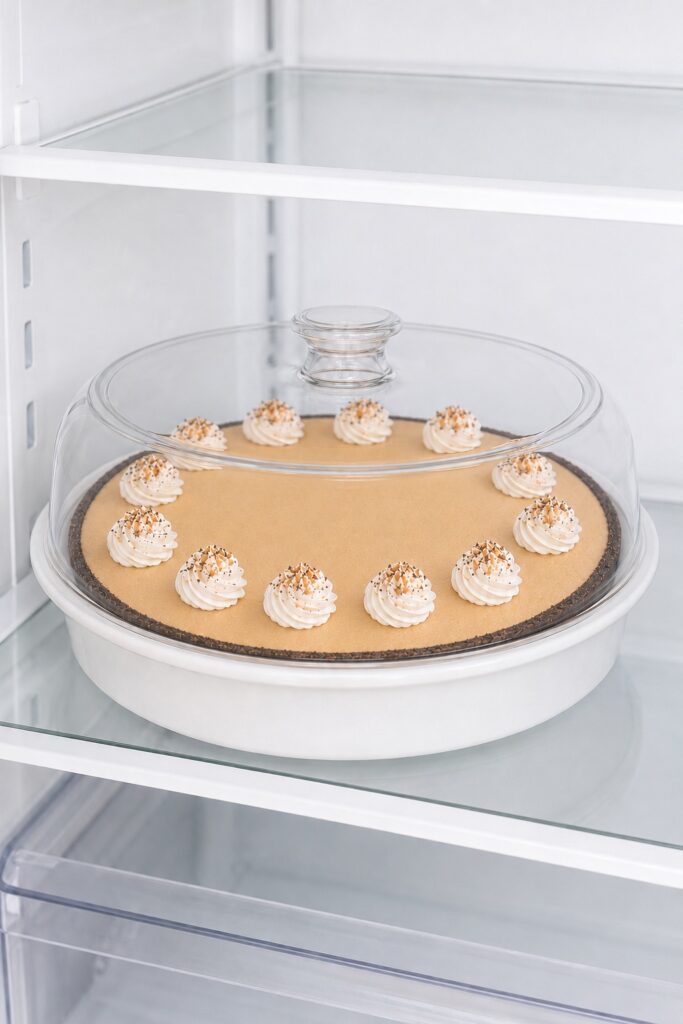
Make It Ahead
Bake and cool the crust up to 1 day ahead, then cover it at cool room temperature. Assemble the untopped pie 8–24 hours before serving. The whipped finish can be added shortly before serving or up to 8 hours ahead, covered and refrigerated.
Freeze for Storage
Freeze the fully chilled pie without whipped topping or garnish. Once firm, wrap the pie plate tightly in two layers and freeze for up to 1 month for best quality. Thaw it covered overnight in the refrigerator, then add fresh whipped cream, peanuts, and chocolate. The thawed filling may be slightly denser and the crust slightly less crisp. Freezing is a storage option, not part of the setting method.
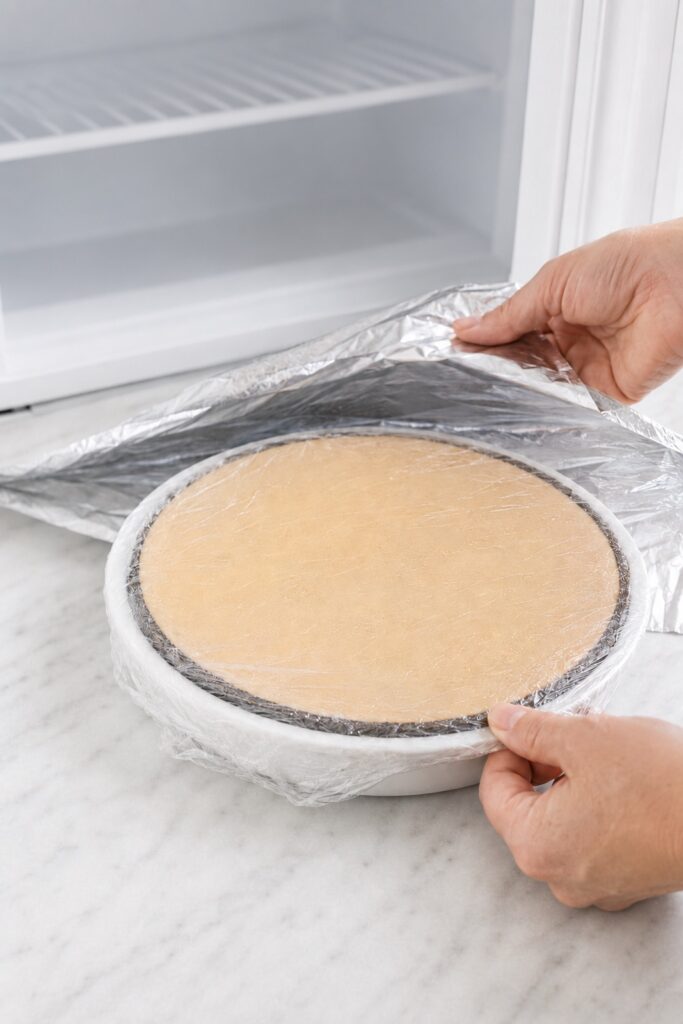
Peanut Butter Pie Variations
The graham-cracker version below is the only alternate crust validated with this filling. Other nut butters, dairy substitutes, shallow premade crusts, and automatic recipe-card scaling require separate formula development rather than a direct swap.
Graham Cracker Crust
For a lighter, more peanut-forward variation, replace the chocolate-cookie crust with 1 3/4 cups (210 g) fine graham cracker crumbs, 2 tablespoons (25 g) granulated sugar, 1/4 teaspoon fine salt, and 7 tablespoons (99 g) melted unsalted butter. Press the mixture into the same deep-dish plate, bake at 350°F (177°C) for 9–11 minutes, and cool completely before filling. The finished pie will have less bitter cocoa contrast and a slightly sweeter crust profile.
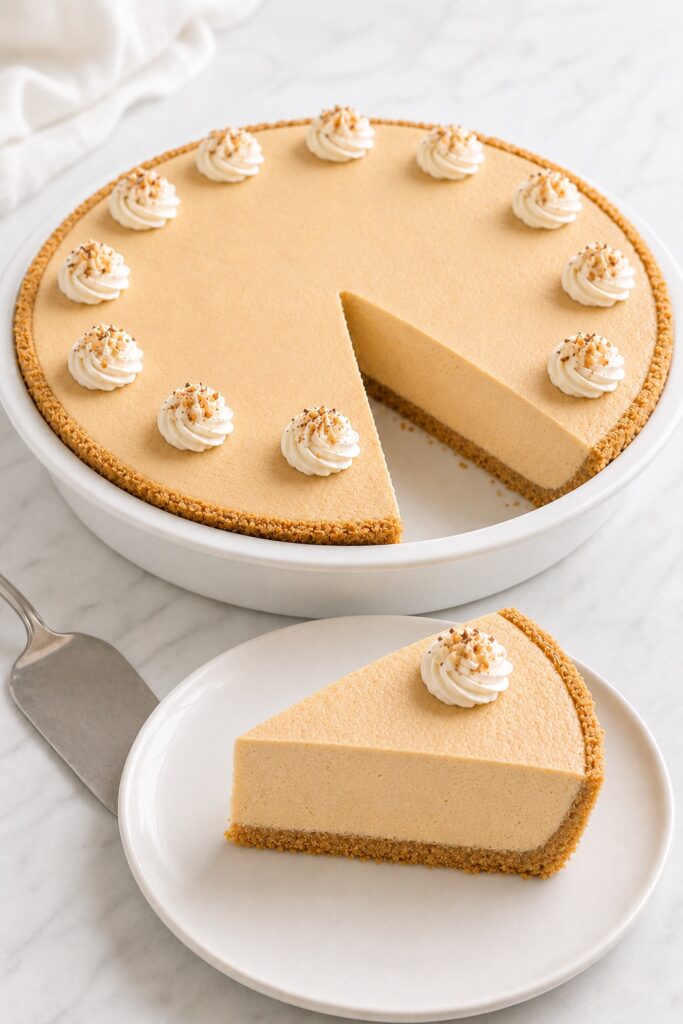
Keep the Peanut Butter Baking Journey Going
If this pie satisfies the peanut butter craving, the next bake can stay close to that flavor, lean into its chocolate pairing, or move toward another chilled showpiece dessert.
Stay With Pure Peanut Butter Flavor
These recipes keep peanut butter at the center while changing the texture and format.
- Peanut Butter Bars turn the same creamy, nutty craving into easy-to-cut handheld squares.
- Peanut Butter Fudge Recipe is the closest next choice when you want a denser, candy-style peanut butter bite.
- Peanut Butter Cookies replace chilled mousse with soft, familiar bakery-style cookies.
- 3 Ingredient Peanut Butter Cookies offer the simplest route when speed matters more than a showpiece finish.
Lean Into Chocolate and Peanut Butter
Choose this path when the dark cookie crust makes you want a stronger chocolate counterpoint.
- Buckeye Brownie Recipe layers a bold peanut butter center over rich brownies for a more chocolate-forward dessert.
- Peanut Butter Chip Chocolate Cookies Recipe carries the pairing into chewy cookies with chocolate in every bite.
- Chocolate Peanut Butter Texas Sheet Cake scales the combination into a crowd-sized celebration cake.
- Peanut Butter Blossom Cookies give you a classic cookie version with a distinct chocolate finish.
Make Another Chilled Showpiece
These desserts preserve the clean-slice, make-ahead appeal while exploring a different filling or finish.
- Oreo Pie Recipe stays closest to the dark-cookie crust and chilled creamy format.
- S’mores Pie Recipe adds glossy chocolate and toasted marshmallow to a dramatic make-ahead pie.
- Chocolate Cream Pie shifts the center of gravity from peanut butter to a smooth chocolate filling.
- French Silk Pie is the natural next project when you want an especially refined chocolate slice.

Peanut Butter Pie
A creamy, peanut-butter-led pie with a crisp baked chocolate-cookie crust, a from-scratch mousse filling that sets in the refrigerator, and a restrained whipped-cream, roasted-peanut, and dark-chocolate finish.
Ingredients
Chocolate-Cookie Crust
- 270 g regular chocolate sandwich cookies, approximately 24 cookies, cream filling included
- 4 tablespoons (57 g) unsalted butter, melted and cooled for about 5 minutes
Peanut Butter Mousse Filling
- 8 ounces (226 g) full-fat block-style cream cheese, softened to 65–70°F (18–21°C)
- 1 1/4 cups (320 g) conventional creamy no-stir peanut butter, 68–72°F (20–22°C)
- 3/4 cup (90 g) powdered sugar, sifted only if visibly lumpy
- 1 teaspoon (5 ml) pure vanilla extract
- 1/4 teaspoon (approximately 1.5 g) fine salt
- 1 cup (240 ml) heavy whipping cream, 35–36% milk fat, refrigerator-cold
Whipped Finish
- 3/4 cup (180 ml) heavy whipping cream, 35–36% milk fat, refrigerator-cold
- 2 tablespoons (15 g) powdered sugar
- 1/2 teaspoon (2.5 ml) pure vanilla extract
- 2 tablespoons (18 g) salted-roasted peanuts, finely chopped
- 1/2 ounce (14 g) dark chocolate, 60–70% cacao, finely shaved
Instructions
- Set a rack in the center of the oven and heat to 350°F (177°C). Place an ungreased 9-inch deep-dish pie plate on a rimmed sheet pan.
- Process the whole chocolate sandwich cookies to fine, even crumbs. Add the melted butter and pulse just until the mixture clumps when squeezed. Build the crust sides first, then press the remainder evenly over the bottom with medium pressure.
- Bake for 9–11 minutes, until the crust smells chocolatey, looks matte and set, and the upper edge feels fixed. Cool completely in the plate on a wire rack for at least 45 minutes.
- Beat the softened block cream cheese on medium speed for 60–90 seconds, scraping once, until completely smooth. Add the peanut butter, 90 g powdered sugar, 1 teaspoon vanilla, and salt. Mix on low until incorporated, then on medium for 45–60 seconds. Scrape thoroughly; the base must be satin-smooth with no white flecks or oil streaks.
- In a clean cold bowl, whip 1 cup cold heavy cream to smooth medium-stiff peaks.
- Fold about one-third of the whipped cream more firmly into the peanut butter base to loosen it. Fold in the remainder in two additions with broad strokes. Stop as soon as no white streaks remain; do not use the electric mixer after the cream is added.
- Transfer all the filling to the fully cooled crust, smooth it with a slight central crown, and cover without touching the surface. Refrigerate at 40°F (4°C) or below for at least 8 hours, preferably overnight, until the filling remains stationary when the plate is moved.
- Before serving, whip the remaining 3/4 cup cream with 15 g powdered sugar and 1/2 teaspoon vanilla to medium-stiff peaks. Pipe 10–12 swirls around the perimeter and add the chopped peanuts and chocolate shavings sparingly over the whipped ring.
- Slice directly from the refrigerator with a thin sharp knife warmed under hot water and wiped dry. Clean and rewarm it between cuts. Let individual slices stand 5–10 minutes before eating; keep the remaining pie refrigerated.
Notes
- Use conventional creamy no-stir peanut butter. Separating natural peanut butter, crunchy peanut butter, and other nut or seed butters are not supported as equivalent swaps.
- Use full-fat block cream cheese, not tub-style, whipped, reduced-fat, or fat-free cream cheese.
- The plate must hold approximately 6 cups. A shallow premade crust is not large enough for the canonical filling.
- Refrigerate covered at 40°F (4°C) or below. Best texture: within 3 days. Conservative maximum: 4 days.
- Do not leave the pie at room temperature for more than 2 cumulative hours, or 1 hour above 90°F (32°C).
- Freeze only after chilling and without the topping. Wrap tightly, freeze for up to 1 month for best quality, and thaw covered overnight in the refrigerator before finishing.
- For two pies, prepare two separate 1x filling batches. Disable or do not promote an automatic multiplier for this recipe.
- Contains peanuts and milk. Regular chocolate sandwich cookies commonly contain wheat and soy; verify the selected package labels.
Nutrition Information:
Yield: 12 Serving Size: 1 sliceAmount Per Serving: Calories: 530Total Fat: 42gSaturated Fat: 19gCarbohydrates: 34gSugar: 23gProtein: 9g
Nutrition information is provided as an estimate only and may vary based on specific ingredients, brands, and portion sizes used. This information should not be considered medical or nutritional advice.
12 Sweet Favorites — Yours, Free 🍰
Tiramisù, no-bake cheesecake, the perfect chocolate chip cookie & 9 more reader-loved desserts — gathered into one beautiful free recipe book. From my kitchen to yours.
No spam, just sweet things. Unsubscribe anytime.